Build Views
1,987
Build Approvals
18
Fistbumps
118
Followers
10
Posts
69
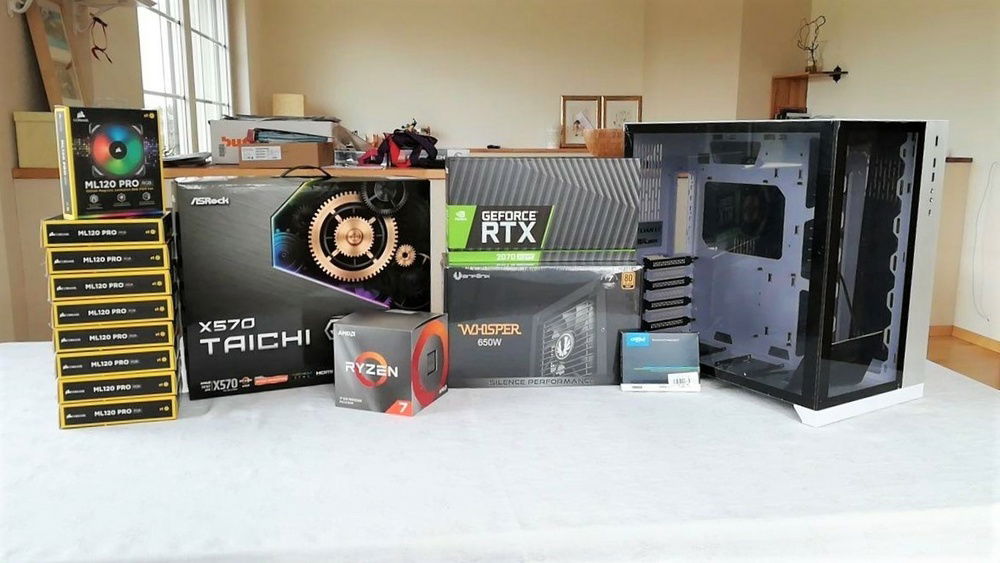
30th March 2020: Got most of the parts together.
The RAM & GPU mount haven't reached yet thanks to COVID-19. The SO was kind enough to lend me one of her RAM modules so I could start building.
There's a ton of fans in the build, but not all of them will be going in immediately.
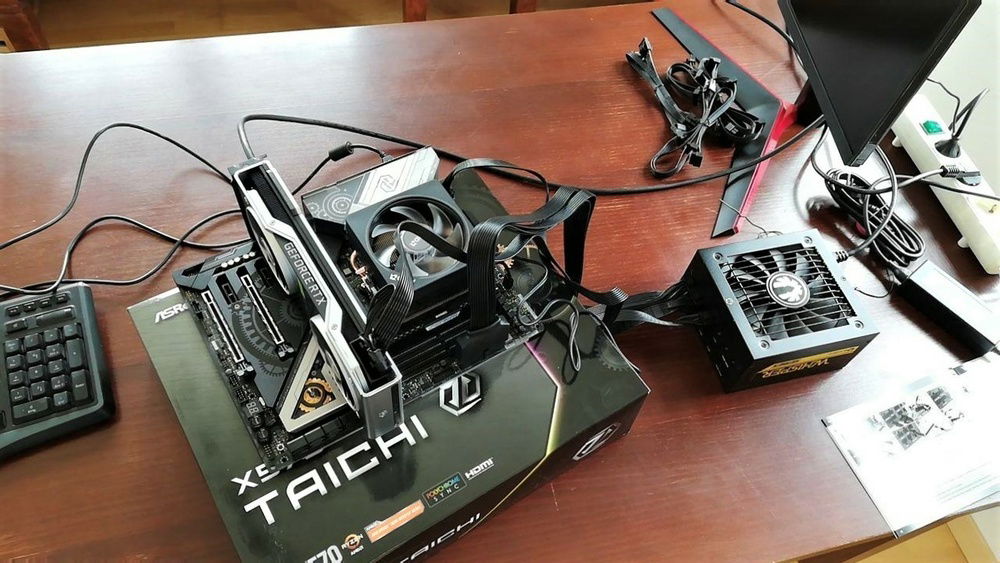
Took Linus's advice and built everything outside first. As expected, it didn't POST.
Thankfully, the X570 TaiChi has debug LEDs - turned out that the GPU wasn't plugged in all the way.
Rookie mistake, but pretty easy to fix. Could have been worse...
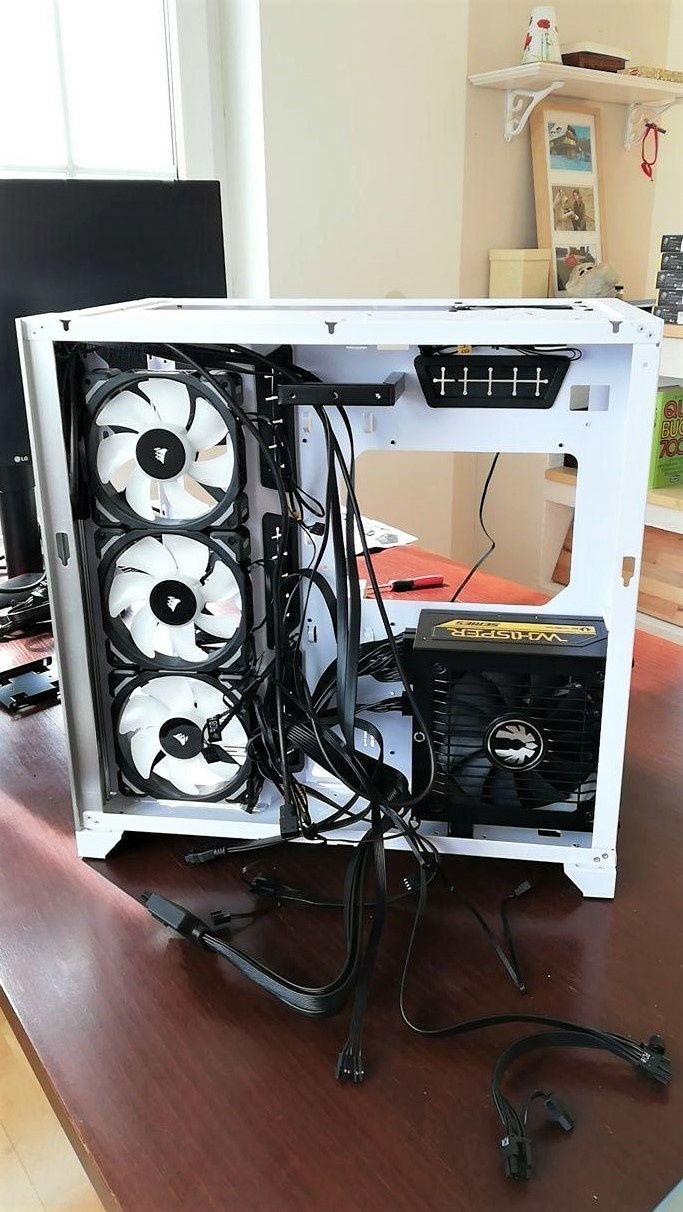
With the system posting, I installed the PSU and 4 case fans. The remiaining 5 will have to wait for Phase 2 of the project. The PC-O11 Dynamic is a really nice case to work in!.
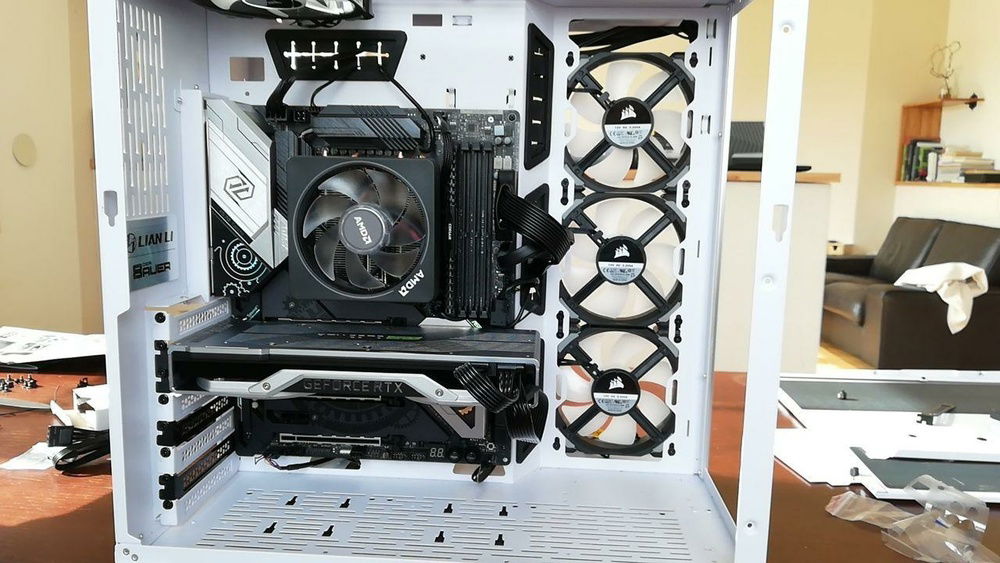
After getting the PSU and fans out of the way, the main bits could be installed and all the headers could be plugged in.
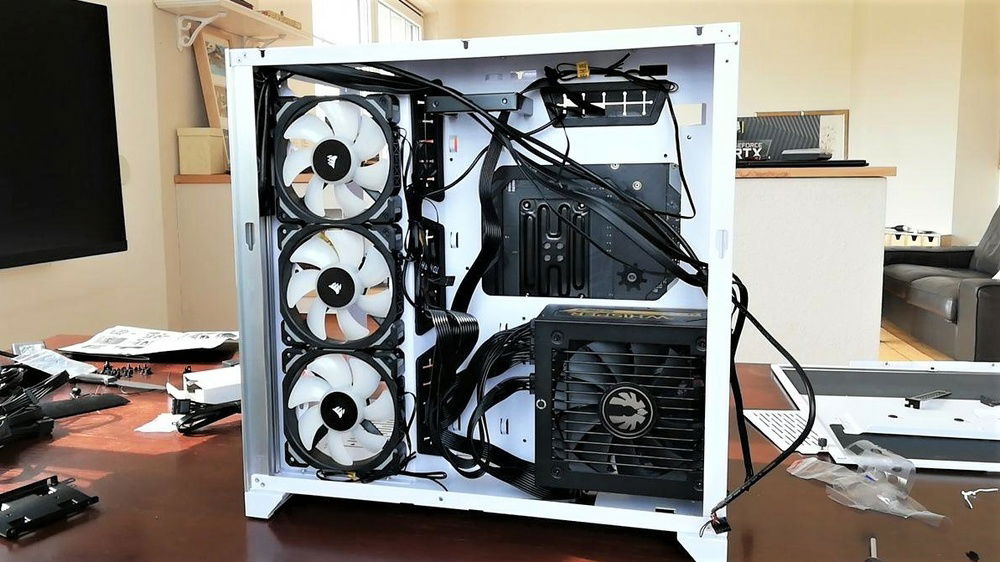
Gotta organize all those cables. Phase 2 will likely introduce more...
Can't wait for Phase 3 to get the cables very nicely sorted out!
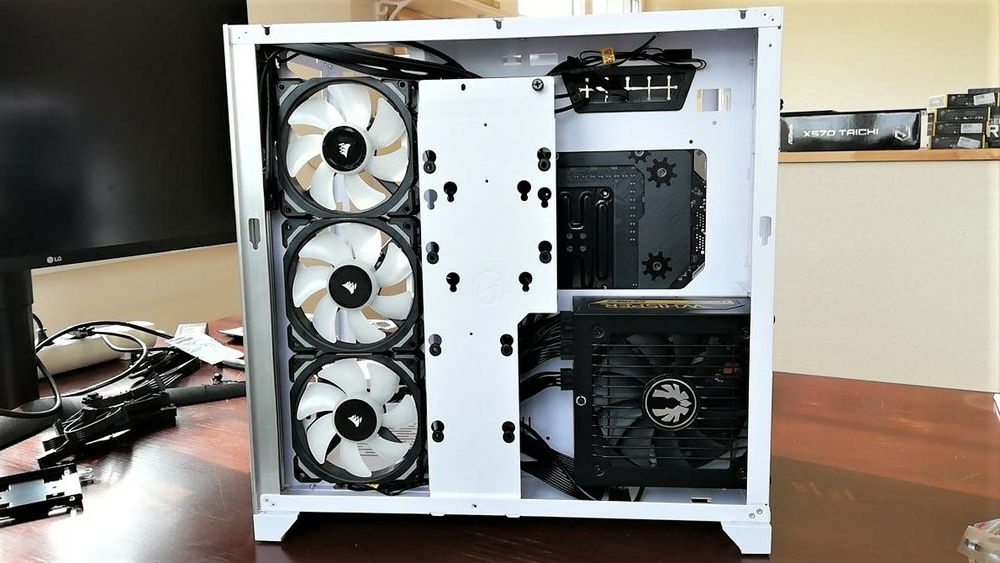
I love how the cable management shroud makes everything look a lot cleaner
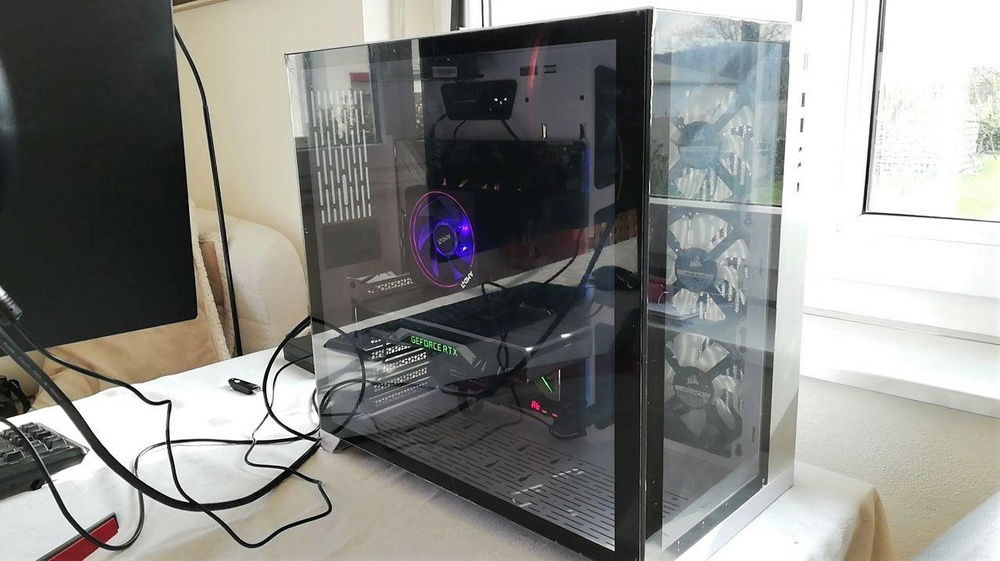
And there we go! The first part of Phase 1 is done!
I'll install the RAM and the vertical GPU mount once they are here and post an update. Hopefully they'll be along shortly.
Now it's time to plan Phases out 2 & 3 while I wait for the parts to arrive!
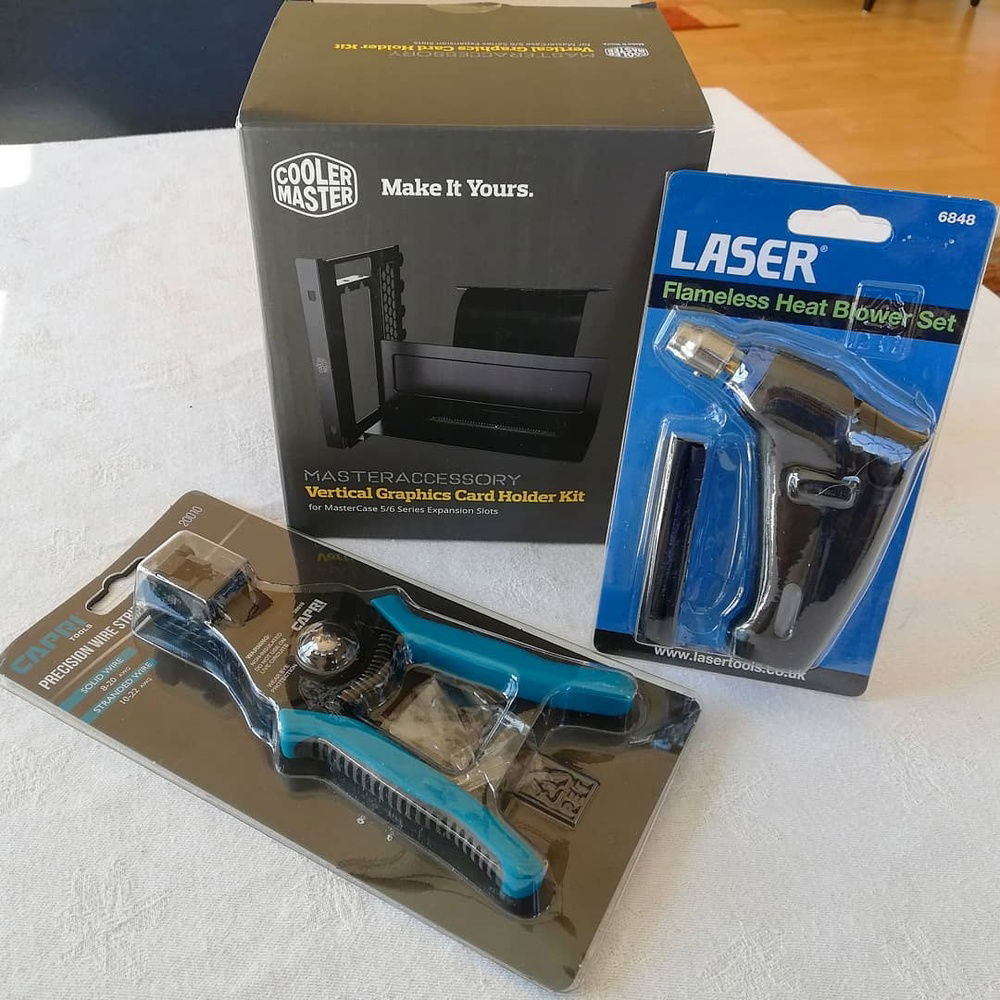
6th April 2020: The Vertical GPU kit and some of the tools I'll need for Phase 3 arrived on the same day.
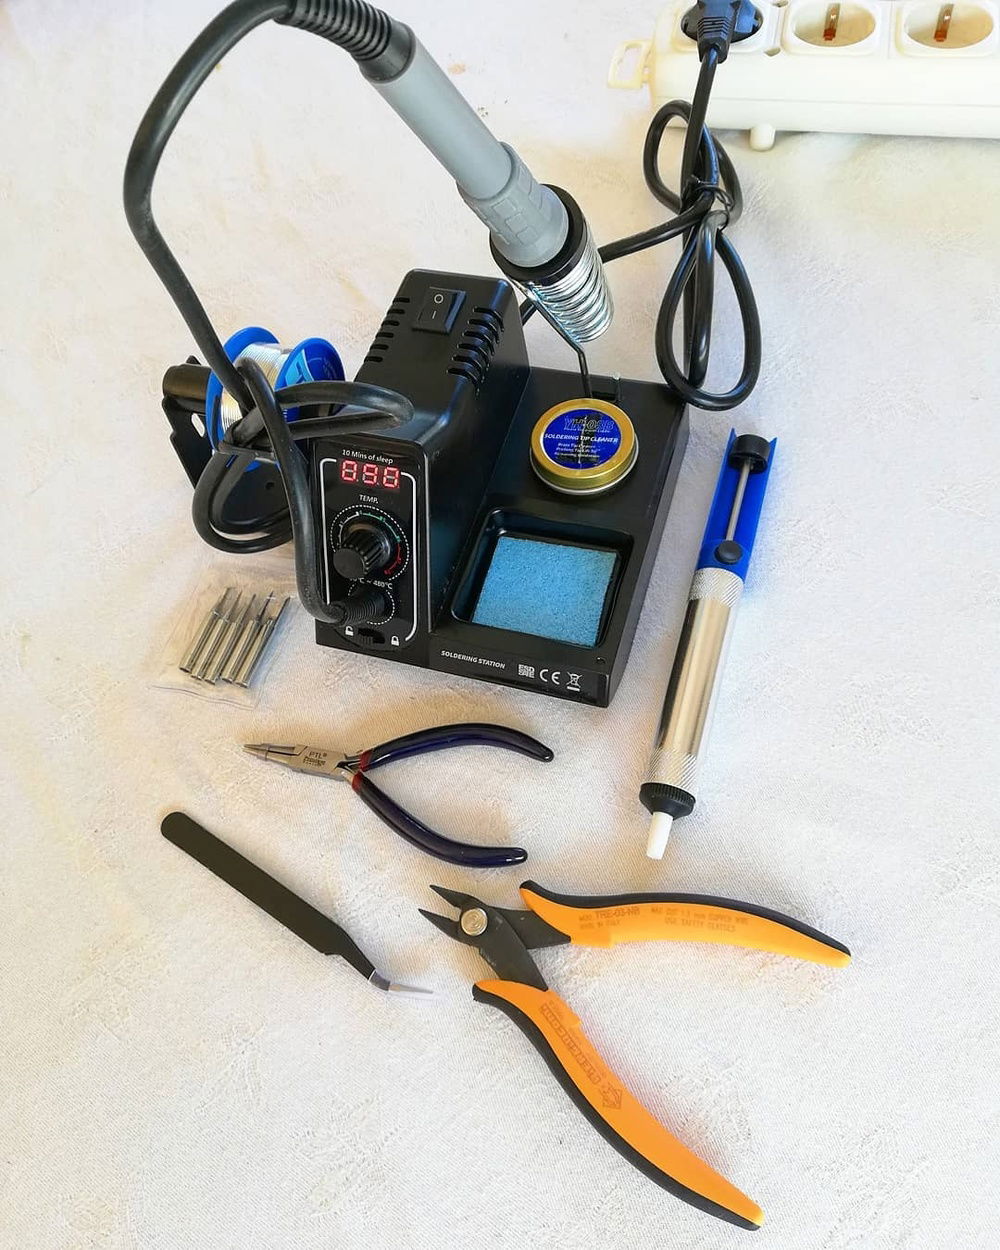
8th April 2020: Just two days later, the remaining tools for Phase 3 and four cans of "GummiDip" got here.
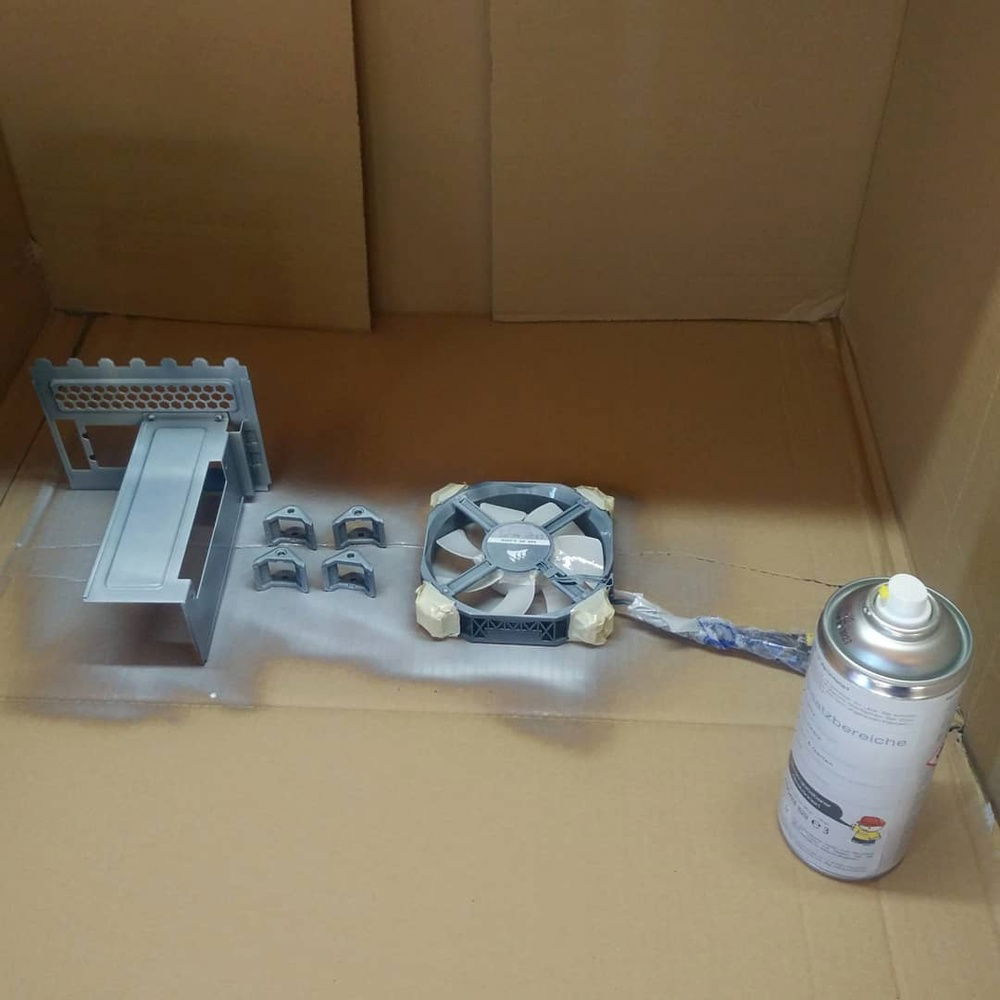
9th April 2020: Once the "GummiDip" was here, I searched the house for some masking tape and spent the evening masking off the rubber corners of one of the ML120 fans. I also masked the gap between the fan frame and the rotor so that paint wouldn't get in there and ruin the electronics.
Then I used the box that I received the MoBo and fans in as a little spraying shroud and got to work.
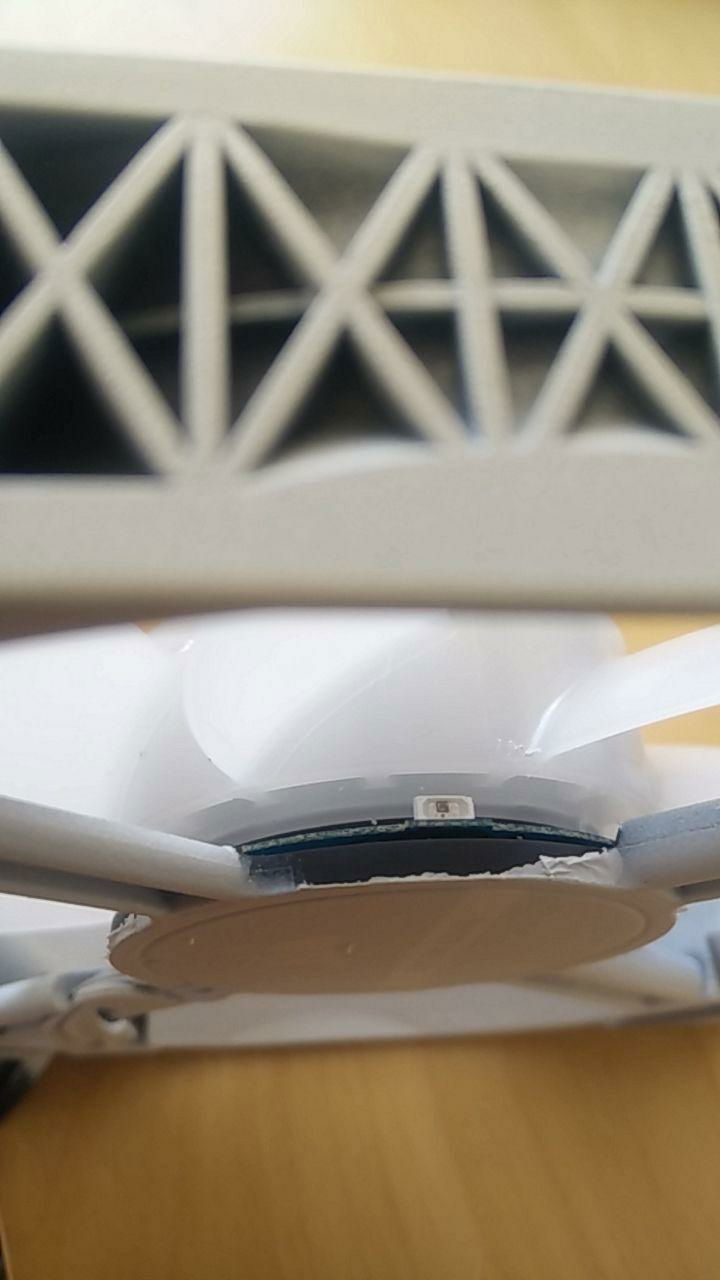
10th April 2020: This is the gap I was talking about. The ML120 PRO RGB fans cannot be safely disassembled to the best of my knowledge. Hence, I decided to use "GummiDip", an Austrian local Plastidip equivalent, to spray the entire fan and then peel the paint off the blades.
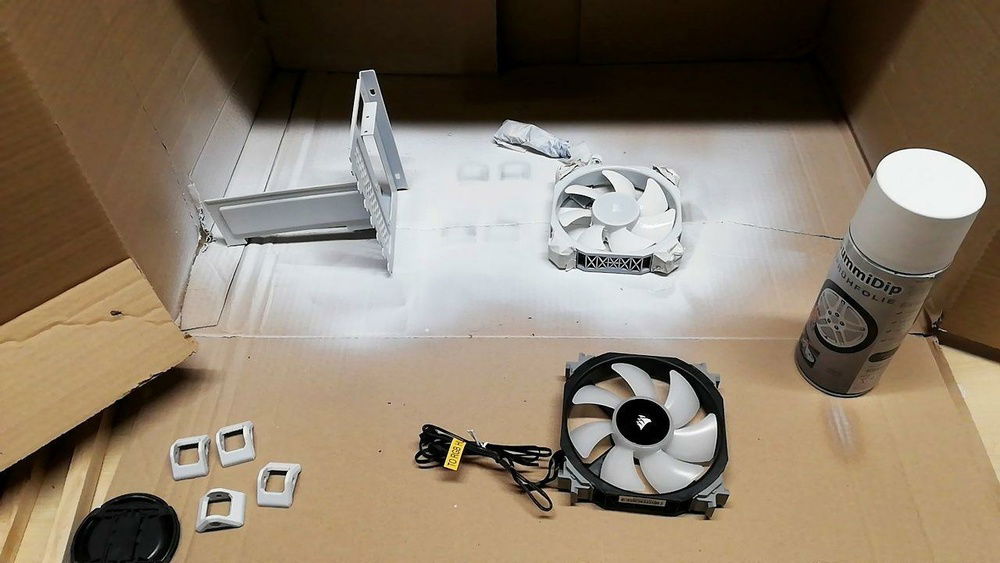
Over the course of the evening, I worked my way through an entire can. Almost 8-10 coats later, it looked like I had hit the point of diminishing returns, so I stopped and let everything dry overnight.
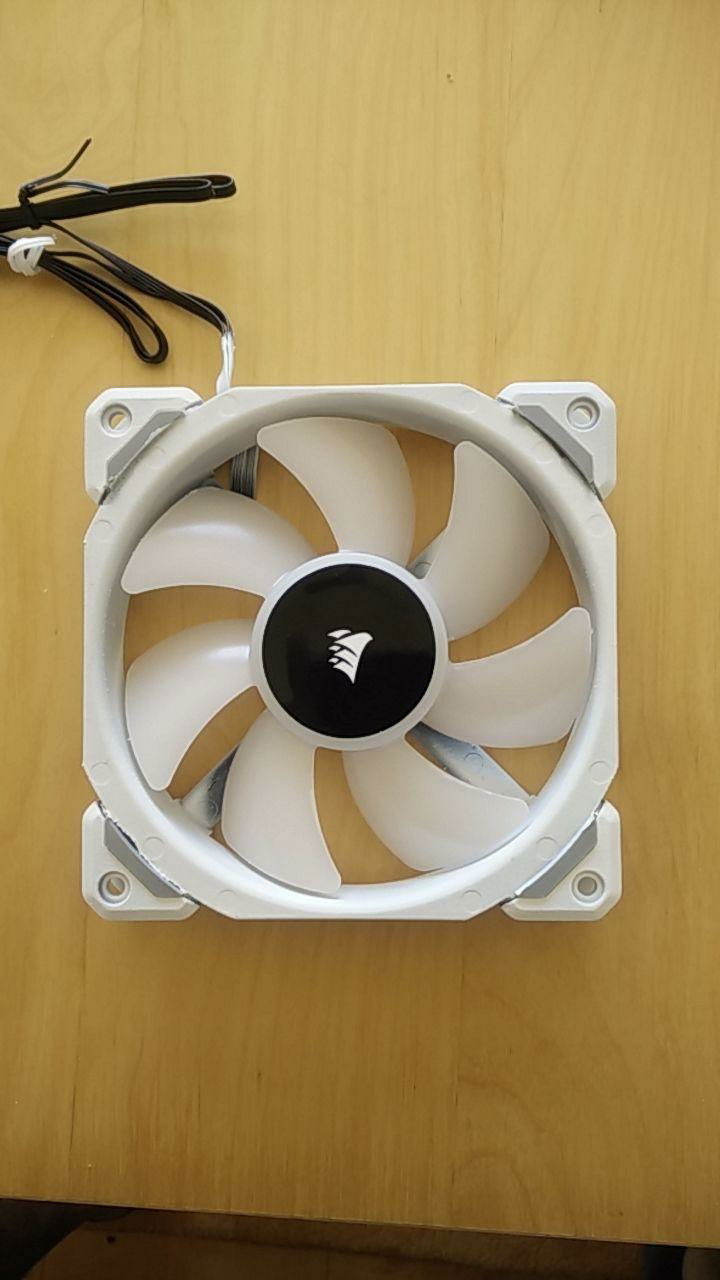
I managed to get the frame to be mostly white, but I'm not very happy with the paint job.
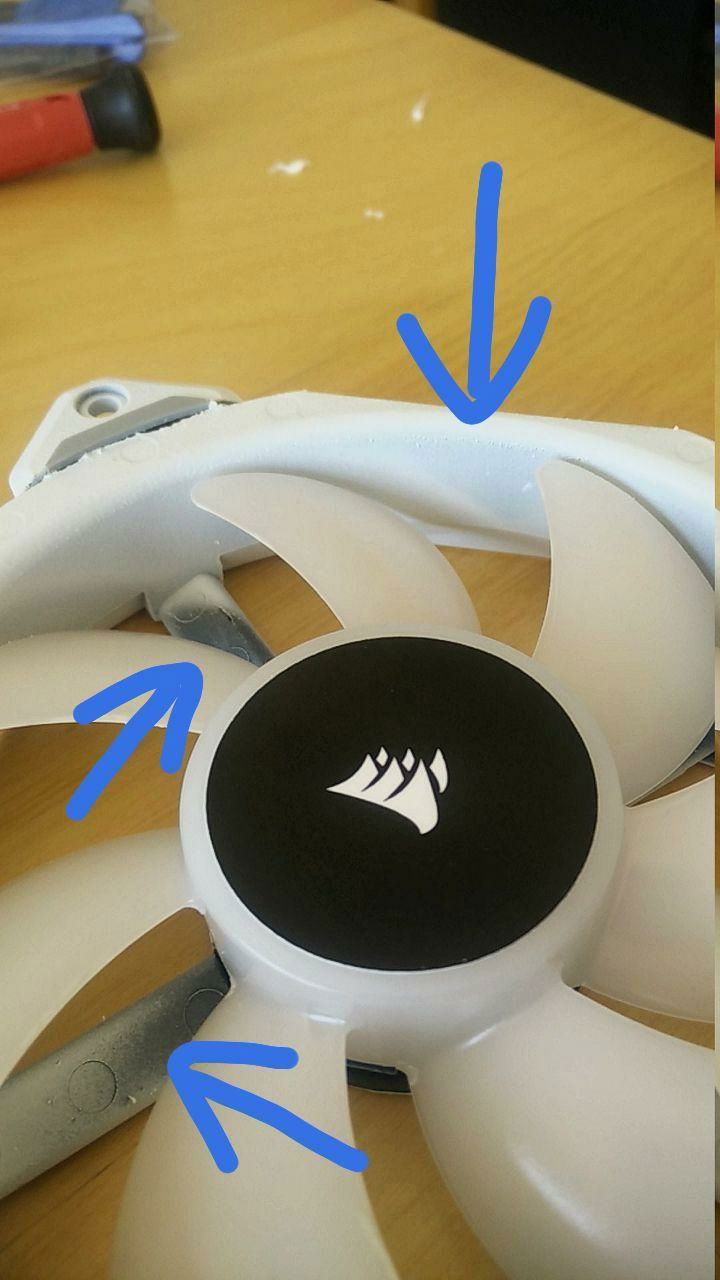
A side-effect of having to mask the gap between the rotor and the frame is that the fan cannot turn when you're spraying it. This results in very uneven cover. I will likely have to find a different way to paint the fans.
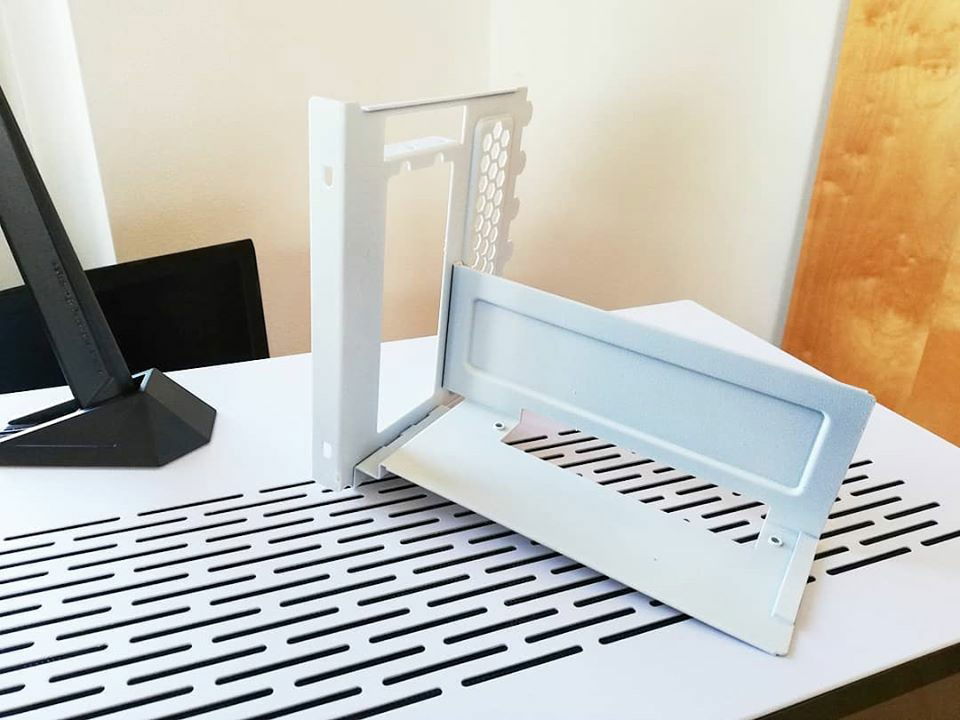
The GPU mount turned out just fine though. There's a bit of a colour mismatch with the case, but there was no way of checking the colour before I started painting. I guess I'll just have to live with it.
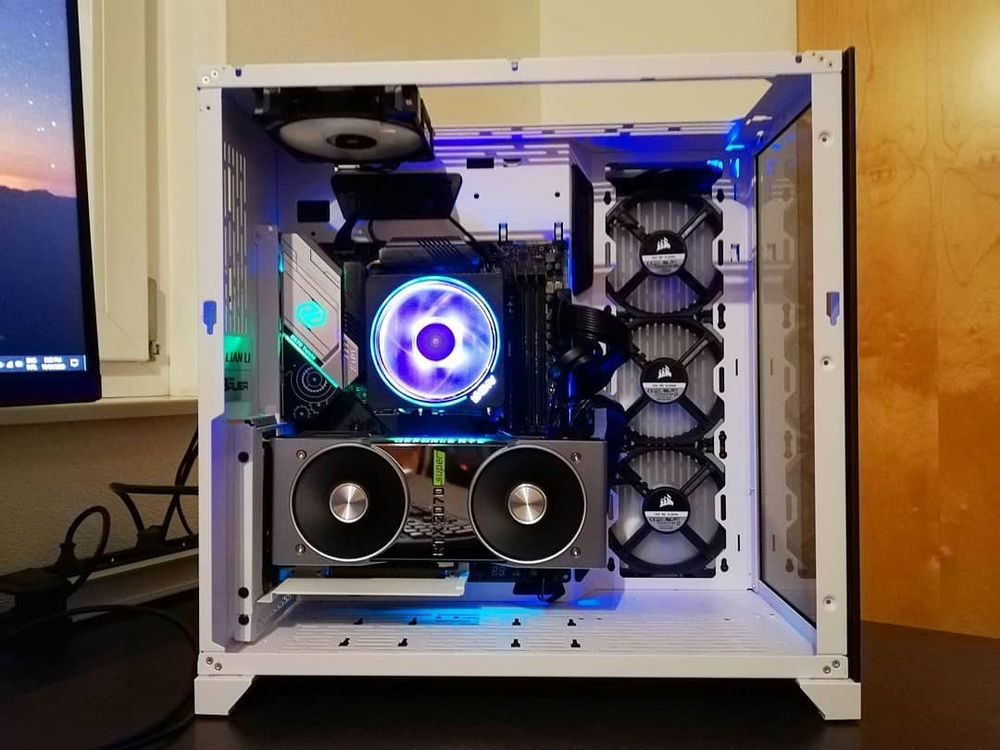
And there we go, the GPU is now vertical! Once the RAM is here, Phase 1 will be finally complete!
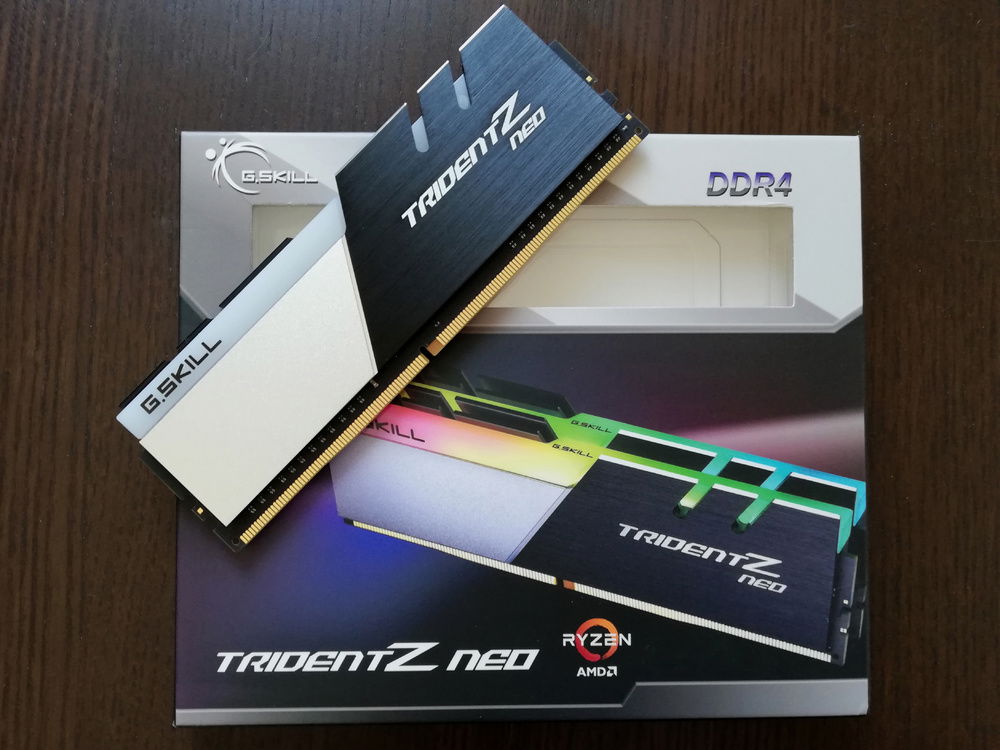
17th April 2020: The G.Skill Trident Z Neo 3600 MHz CL 16 Kit I was waiting for for almost a month finally reached today!
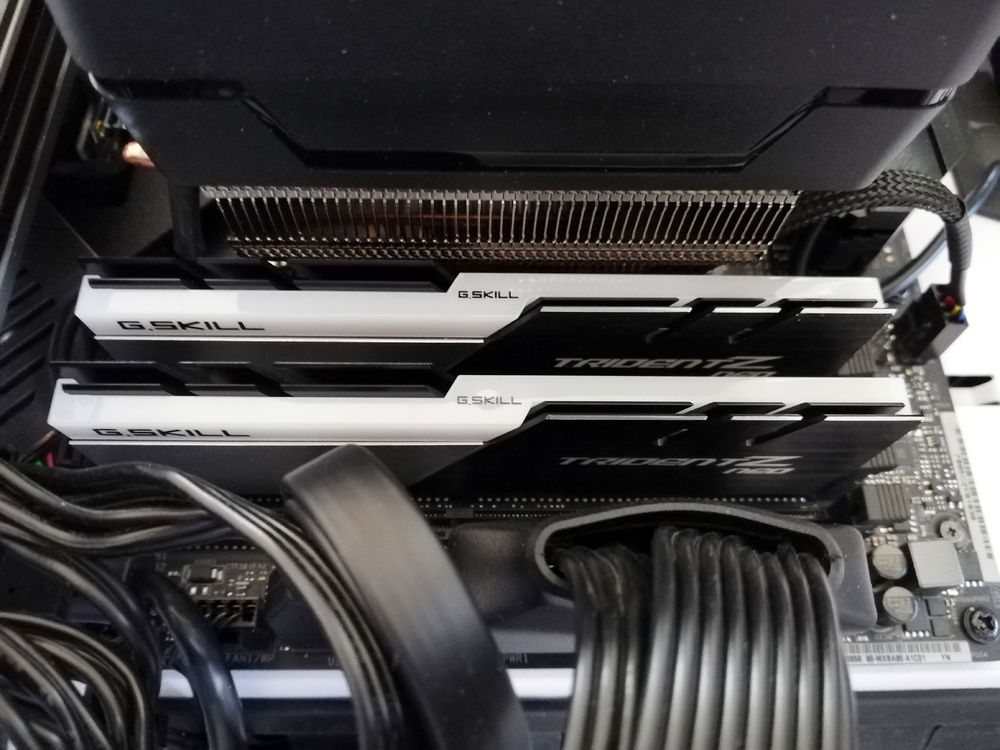
Installing the RAM modules without removing the CPU cooler or any of the cables was very fiddly work. Why did I not remove the cables? Well, they're a pain to unplug and replug and leave me with fairly sore fingertips :P
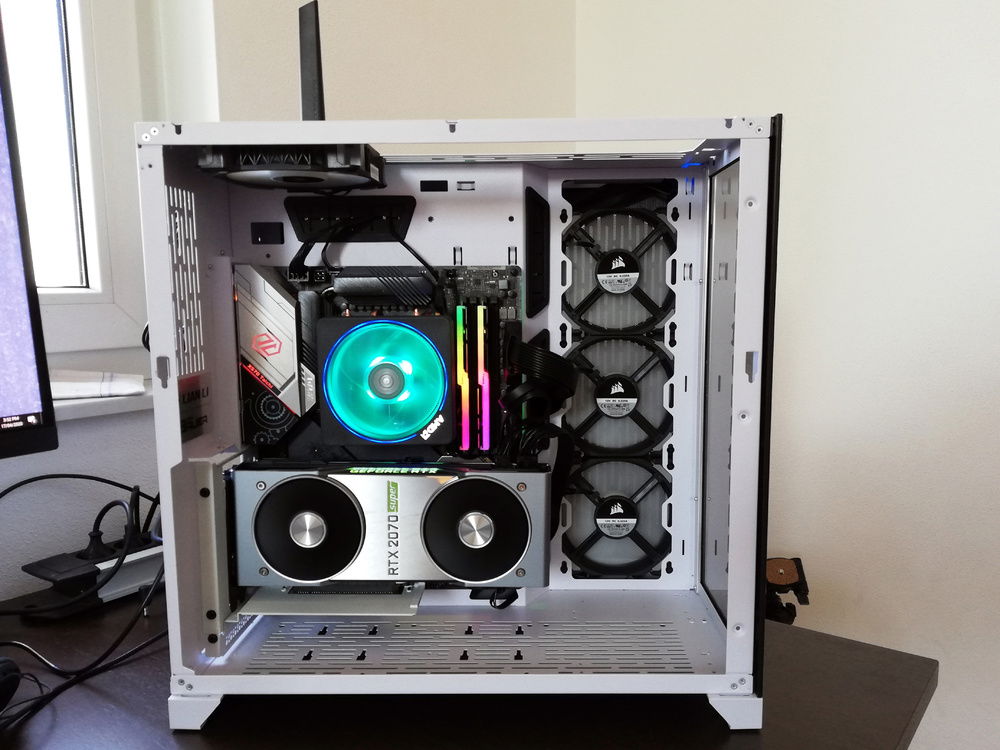
All done! It booted just fine and the RAM seems to be okay!
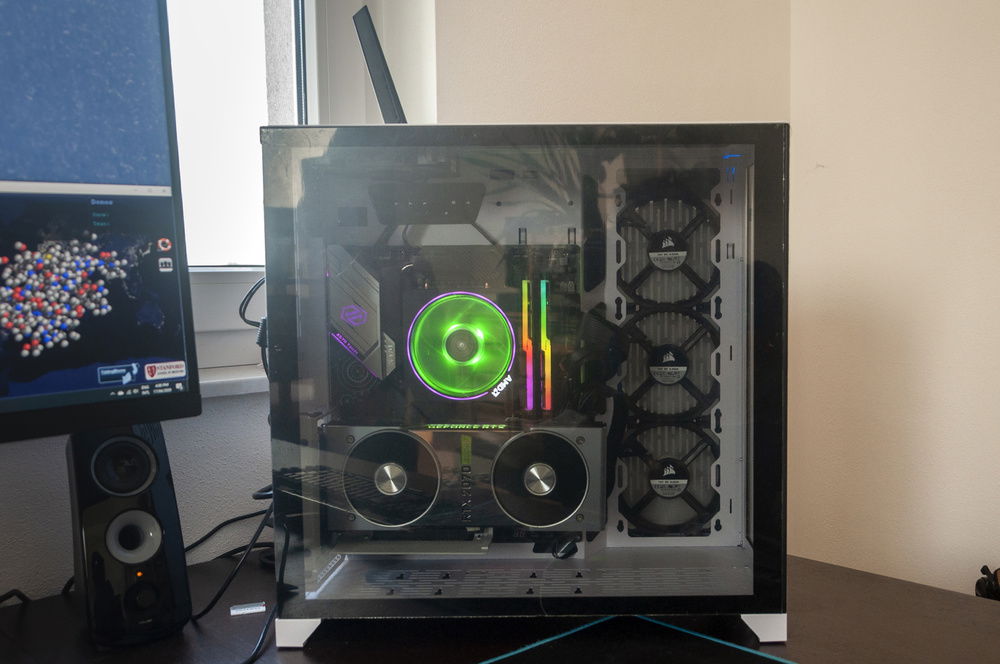
Put the glass panels back on. Time for some F@H!
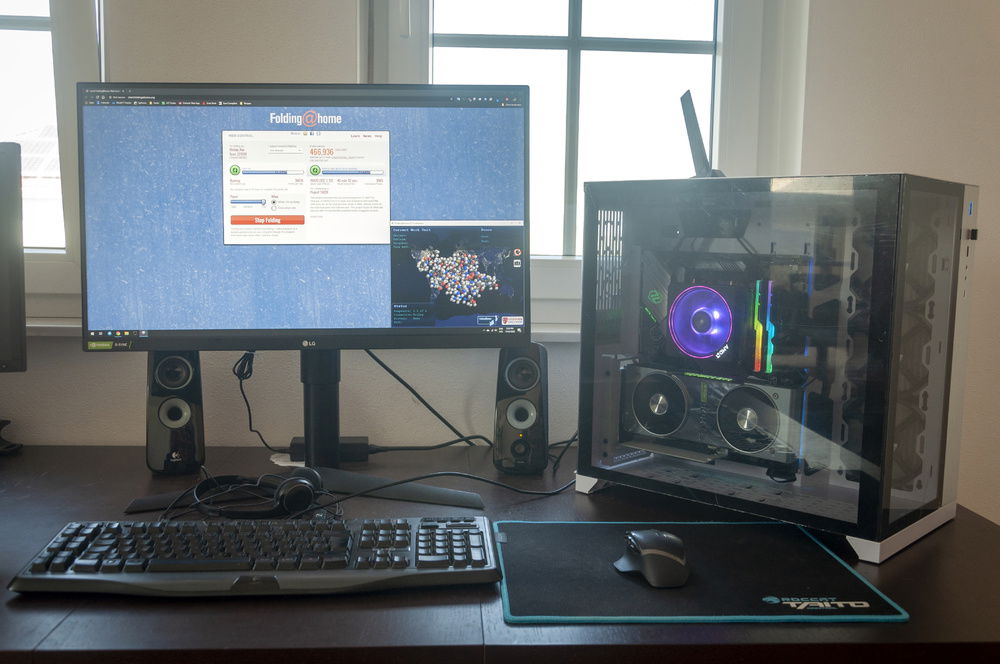
And with that, Phase 1 is finally complete!
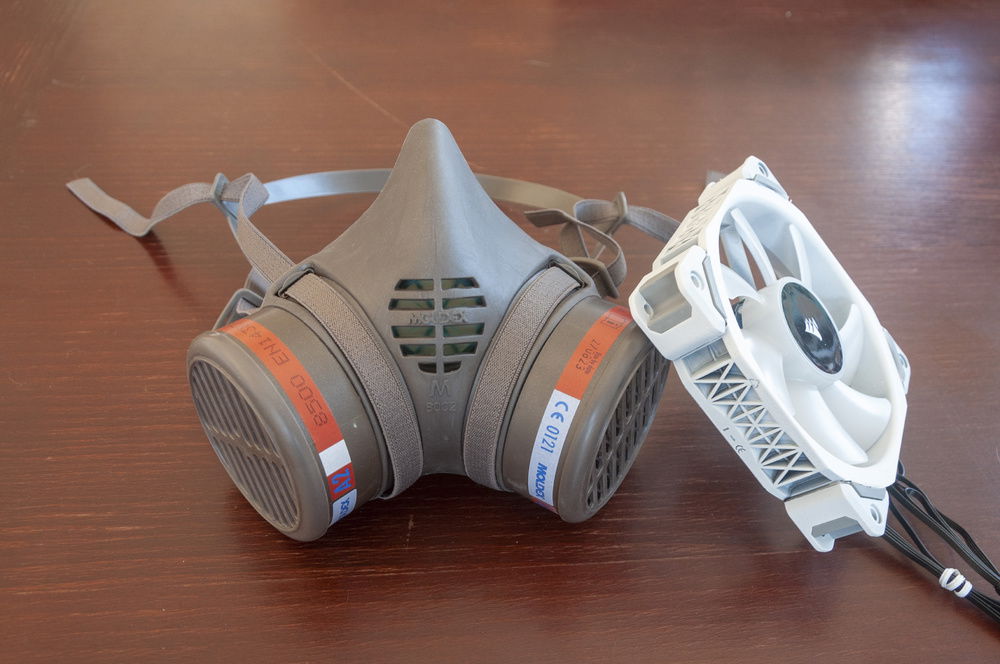
26th April 2020: Hardware stores are now open in AUT and the SO's mom asked me if I could get some stuff. I was lucky enough to find the last respirator they had in stock! And conveniently, it was in the spray painting section!
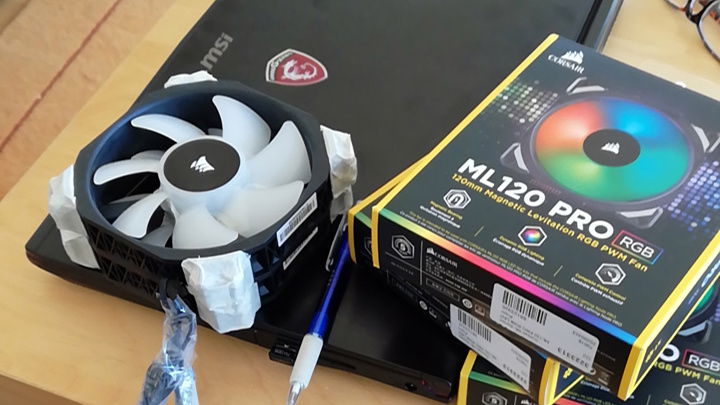
So I decided to get the remaining fans out and paint them.
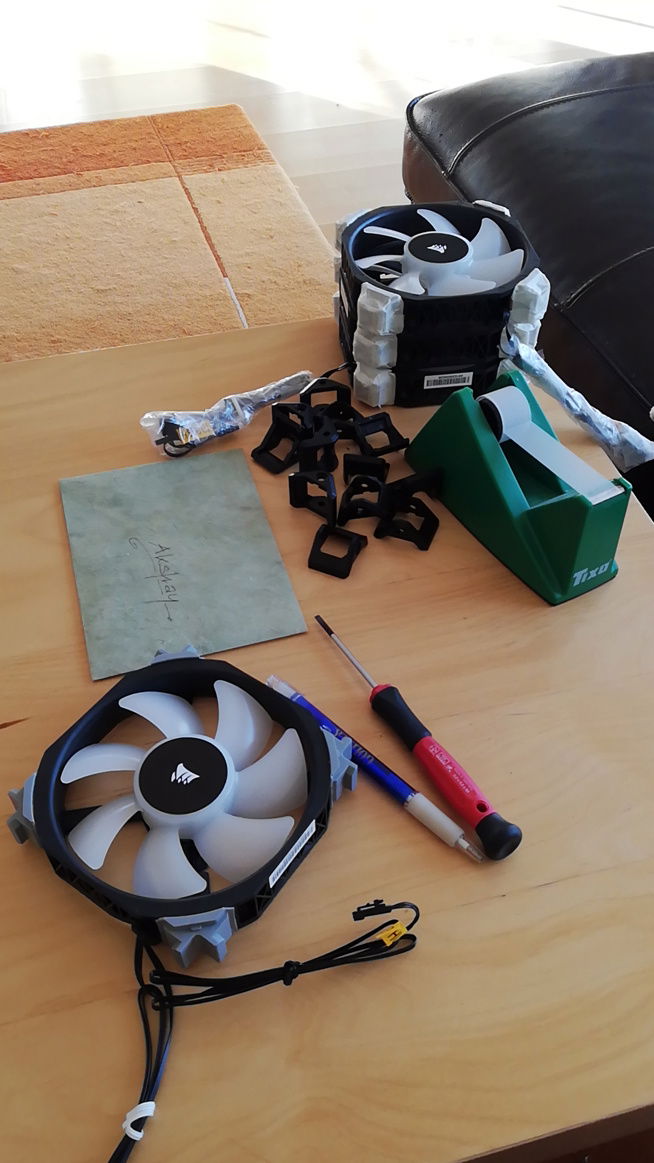
After a few hours of pretty detailed masking work, they were ready for the paint shop.
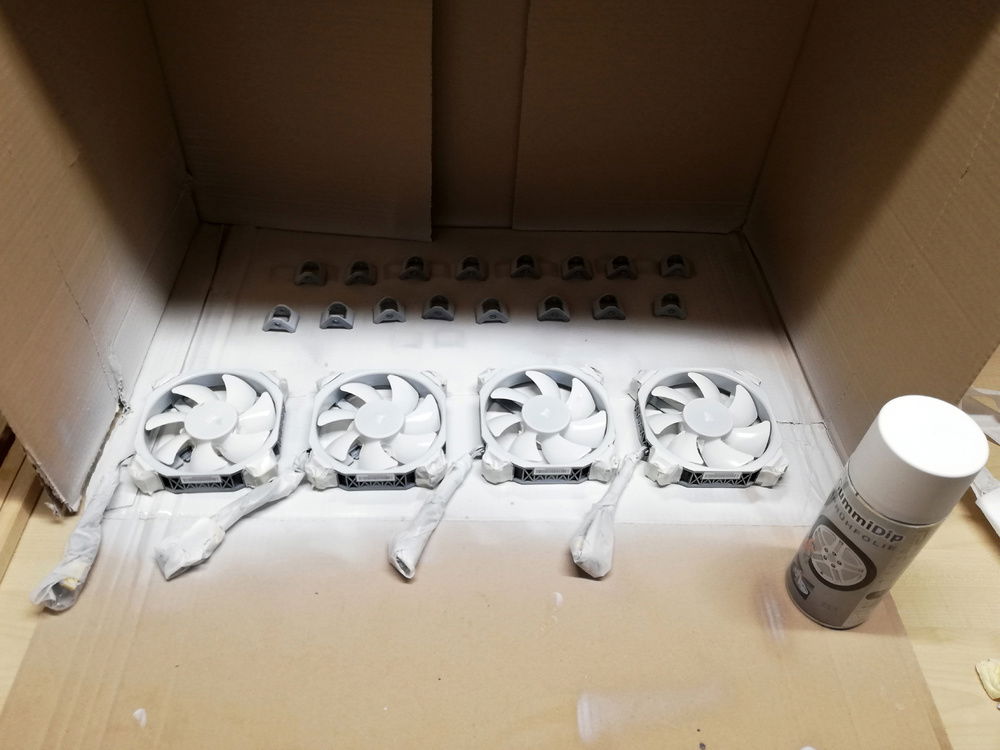
27th April 2020: Even though I'm not super satisfied with this painting method and brand, for the sake of consistency, I decided to not change anything. I ran out of paint with these four fans and had to order more. I guess I'll do the fans that are in the case at the moment once the new cans of paint arrive. Pretty cool way to spend my birthday NGL.
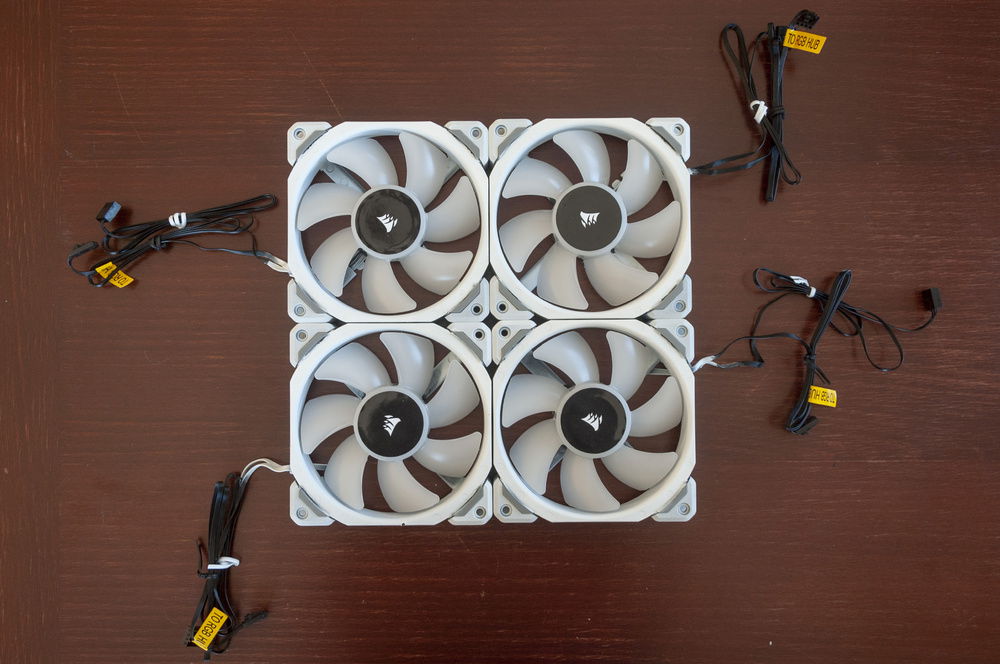
28th April 2020: Unmasking the fans, peeling the film off the rotors and reinstalling the corners took literal hours. I had to stop after three fans because my fingers were sore. I finished the last one the morning after. The paint job, while not yet perfect, is definitely a notch above my first attempt.
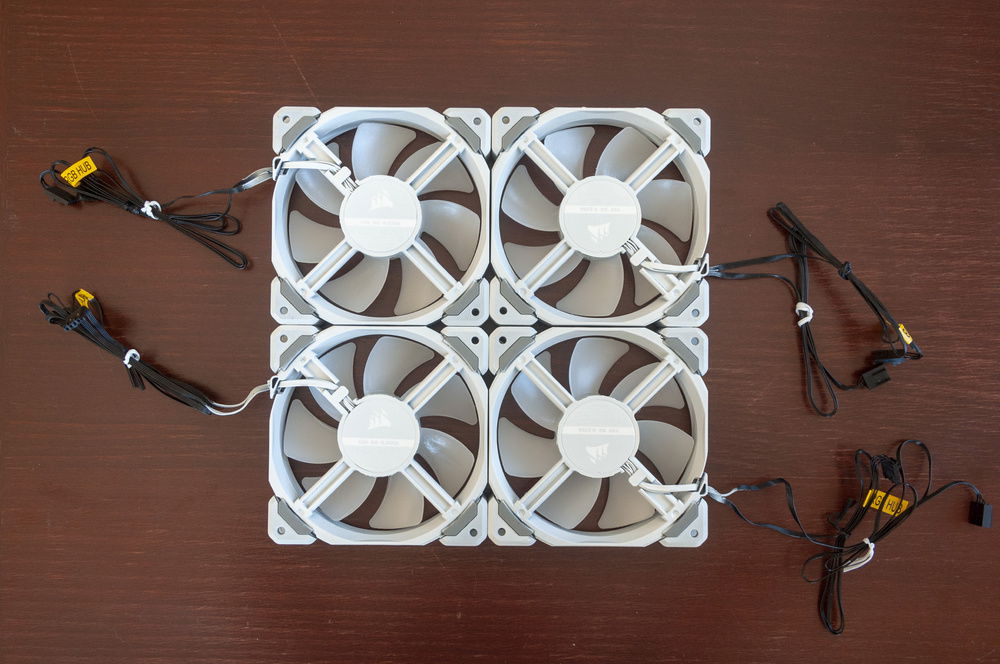
It doesn't cover the sticker text very nicely though. Oh well, guess I'll just cover it up with white vinyl ¯\_(ツ)_/¯
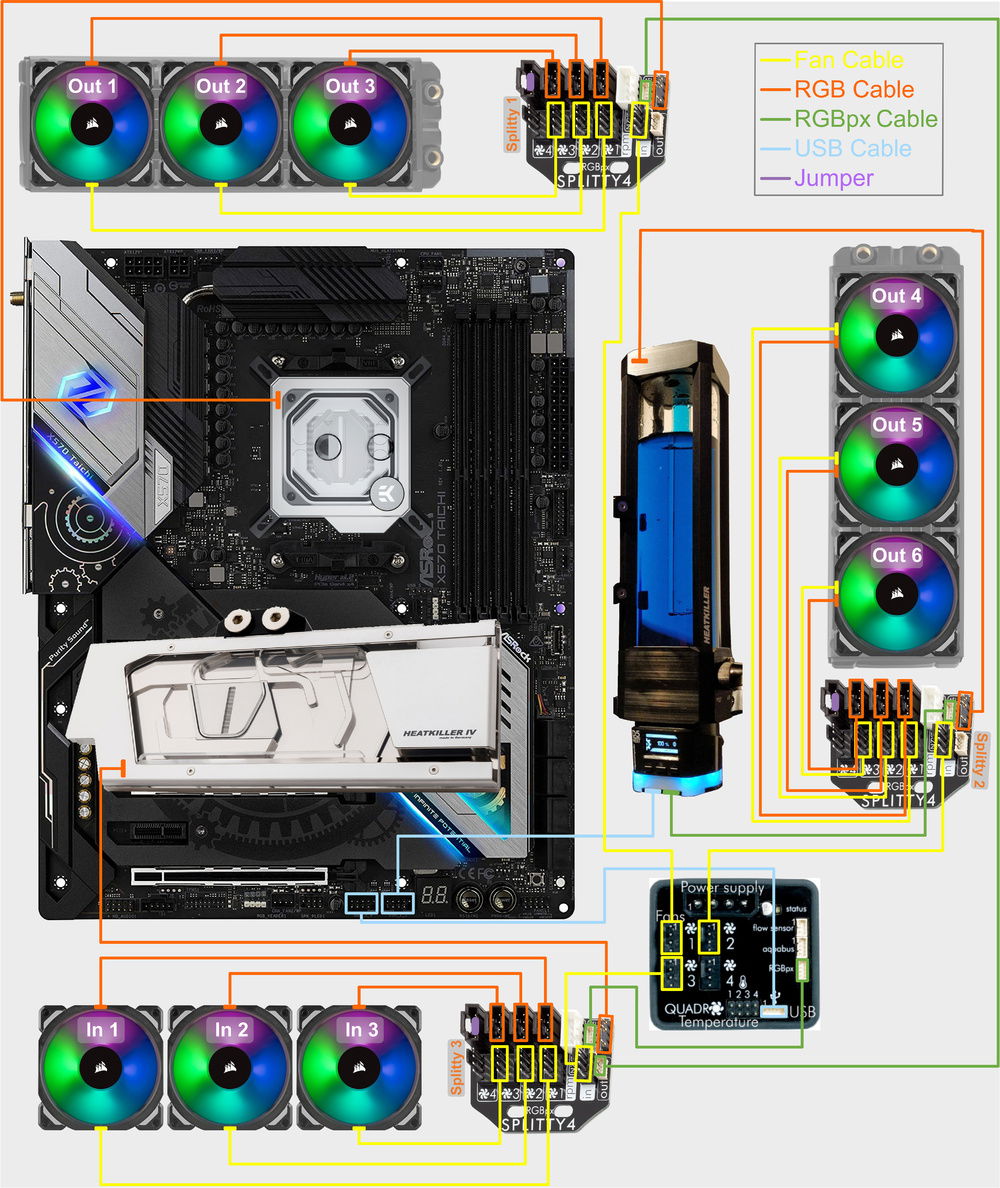
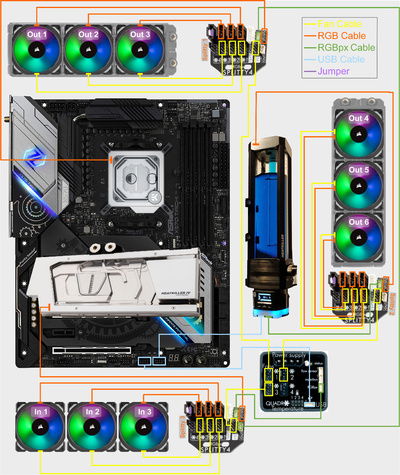
With a ton of advice from Reddit, the Watercooling Discord and from Aquacomputer's Support, I put together and refined the connection plan for all the fans and RGB components.
In case you need something like this for your build. I can send you an editable version of this schematic - feel free to drop me a line.
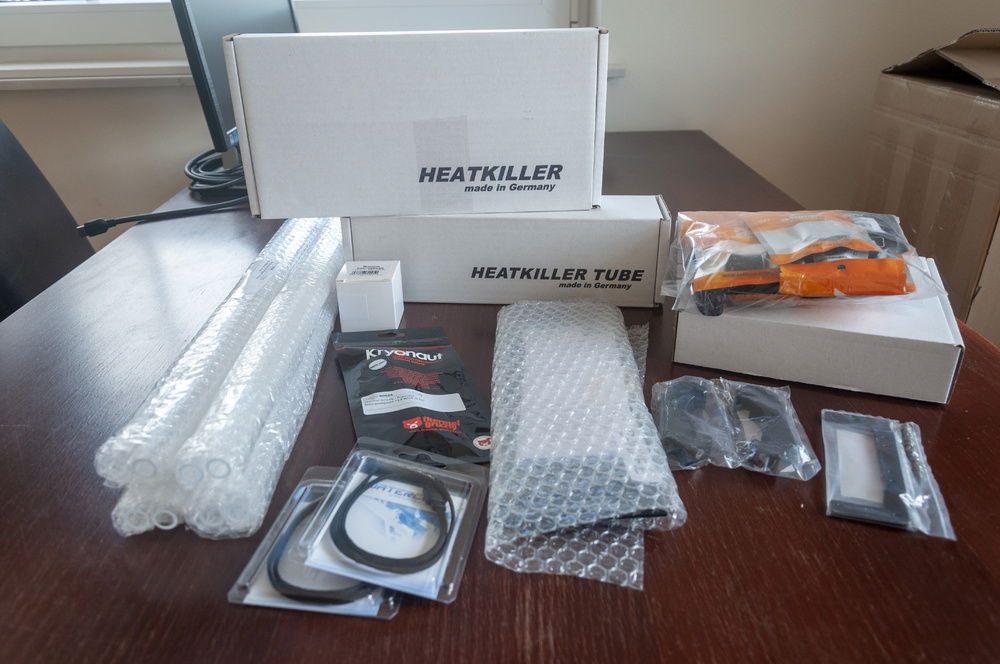
4th May 2020: My watercool shipment arrived today. It was very well packaged. When I placed the order, 4 m of tubing seemed like overkill. Now that I look at the tubes, I'm not quite as certain...
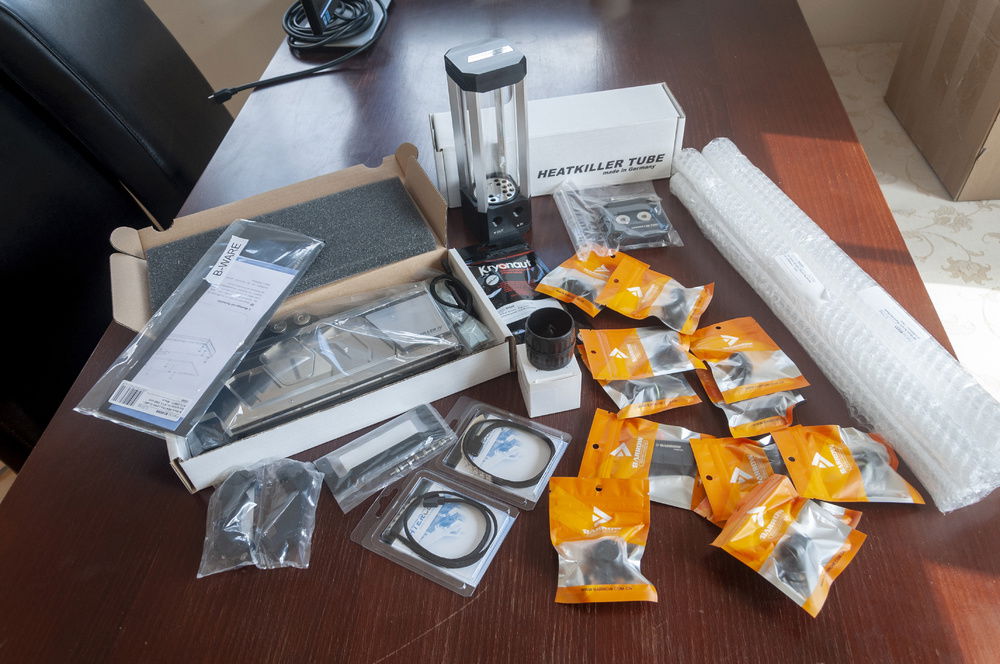
I can see why the Heatkiller stuff is so pricey. Everything they have is chonky AF! This is good quality stuff right here.
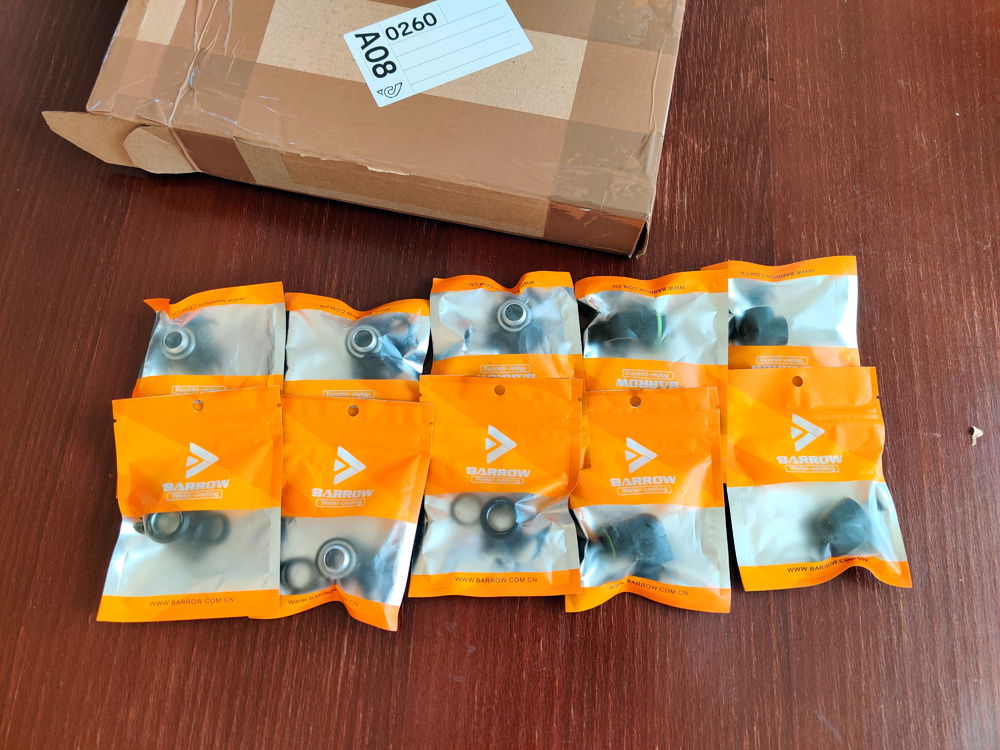
8th May 2020: Someone on our local seconds website was selling a bunch of new, leftover barrow fittings from her build. I snagged this set for €55 and it arrived today.
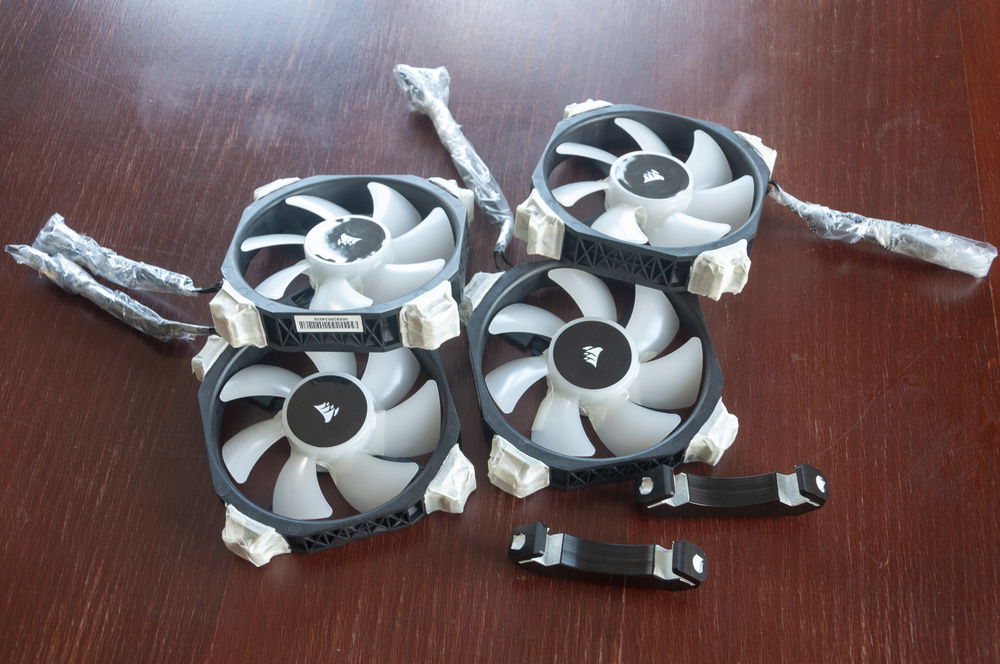
10th May 2020: Spent about 4-5 hours over the past two days masking the four remaining fans and the Reservoir mounting hardware. Too spent to paint today so I'll start tomorrow. Hopefully everything will turn out nicely!
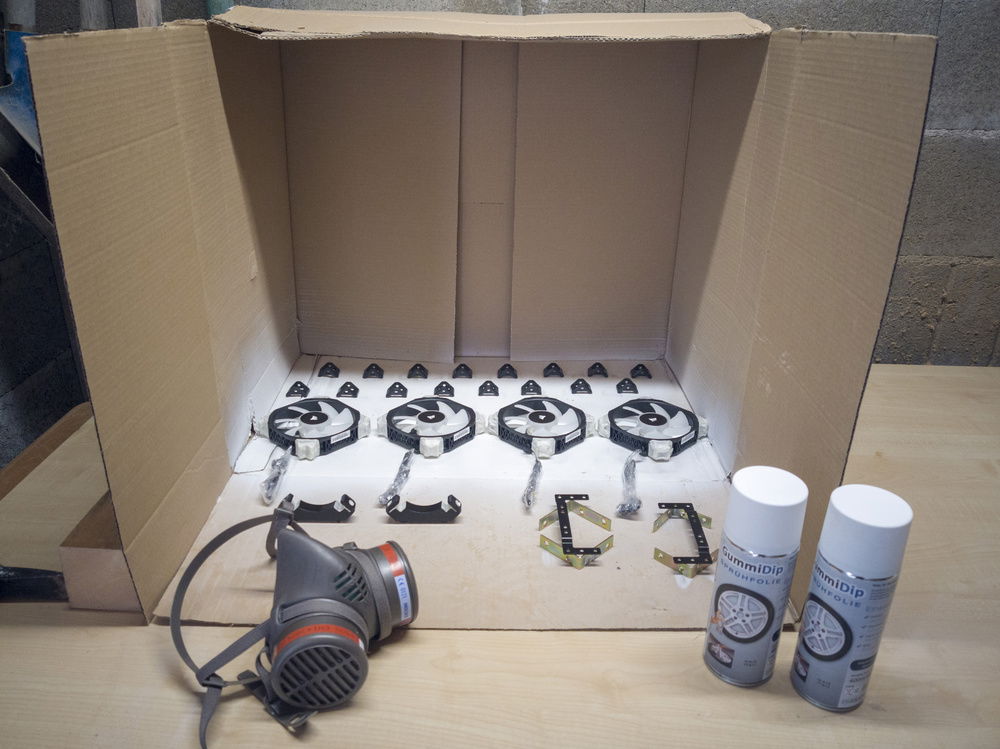
11th May 2020: Going to spend the better part of today painting the last couple of parts that need painting. Depending on how the plastic reservoir mounts turn out, I might consider painting the other black parts of the Res as well.
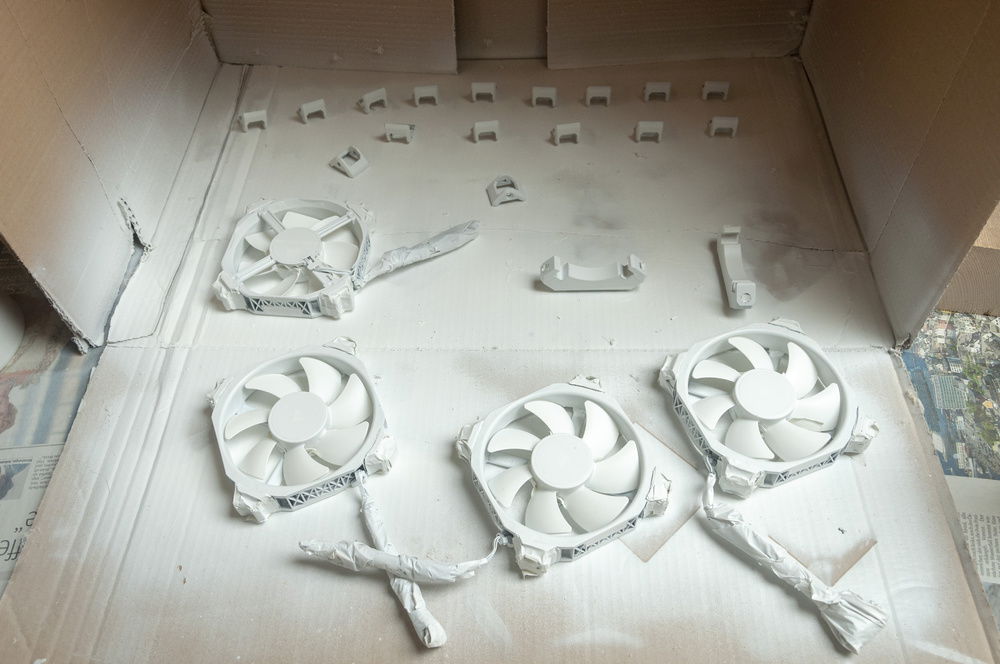
13th May 2020: Fans and res mounting hardware are as painted as they can be. I let them dry and de-stink overnight. Time to start taking the masking tape off.
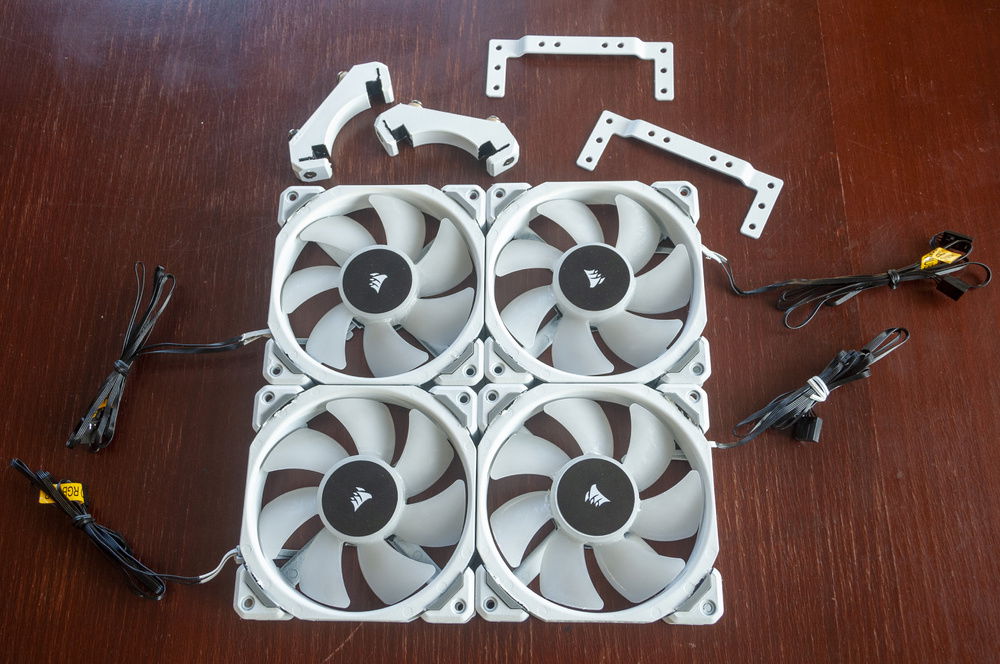
18th May 2020: I finally stopped procrastinating and peeled the paint and masking off of the last fan today. I had already finished the three fans and the res mounting hardware last week, but my fingers were sore from all the peeling so I put the last fan off for a bit.
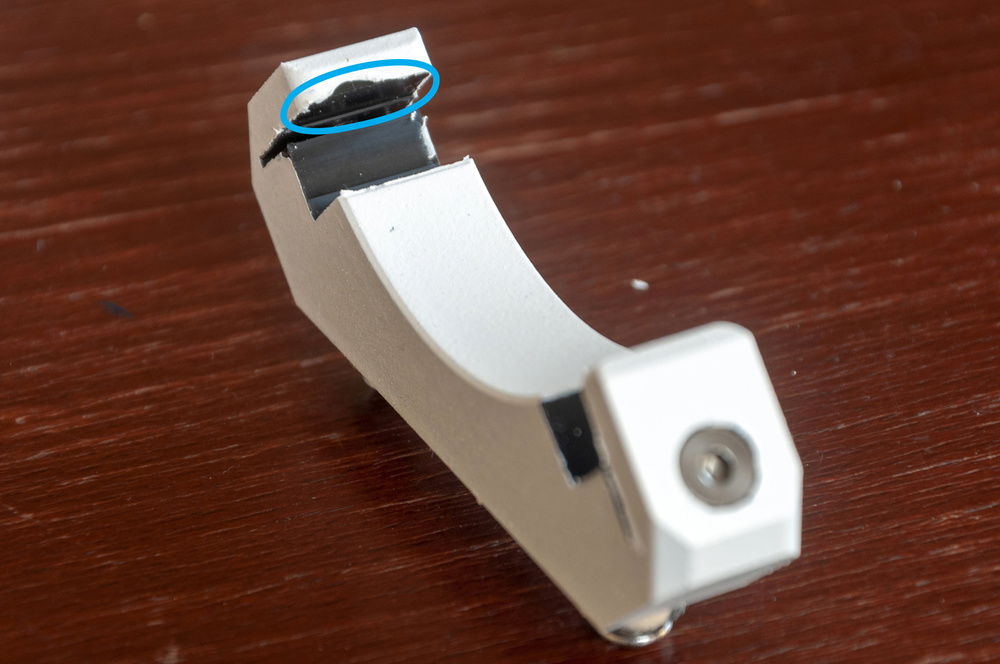
PSA: Make sure you use a VERY sharp blade for unmasking small areas. Ideally, practice on something you don't mind getting ruined. Plasti-Dip is elastic AF and can be really hard to cut accurately. You'll end up with a lot of jagged edges if you aren't careful.
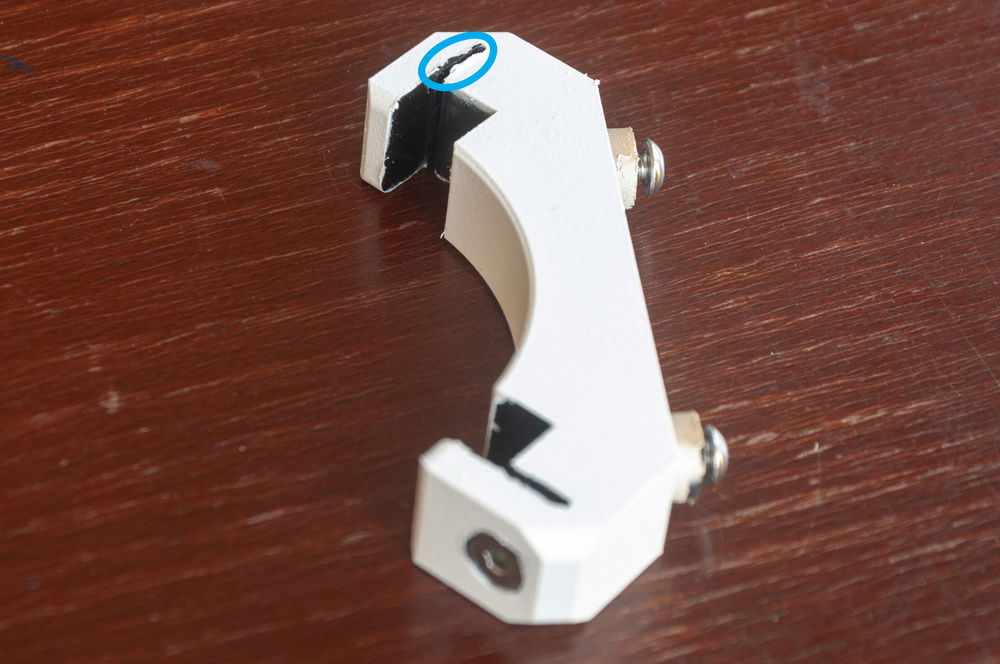
Another example of the kind of jagged edges you can end up with if you aren't careful.
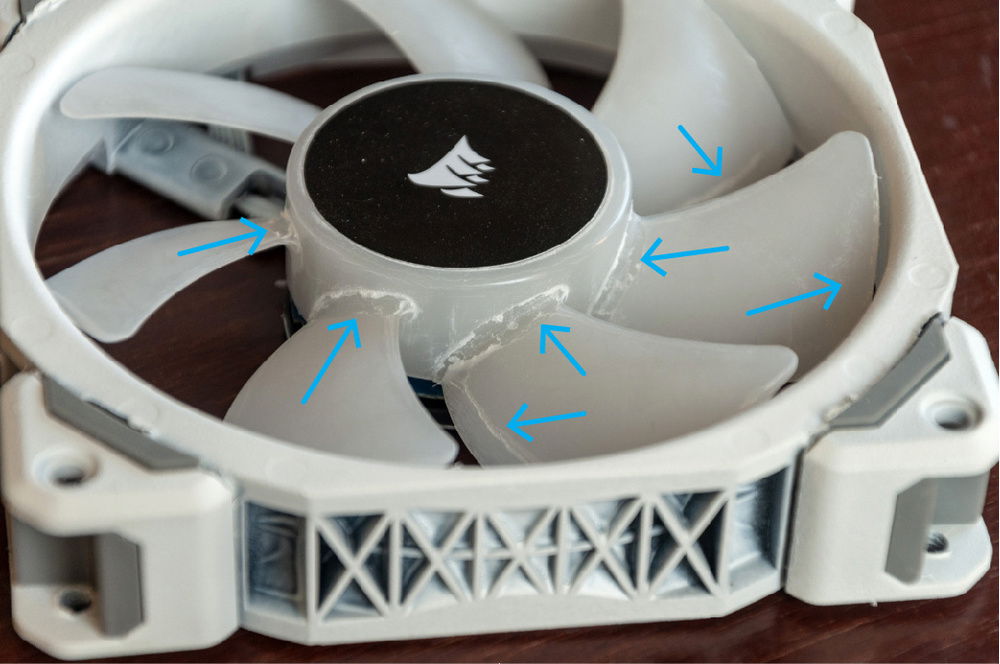
PSA: Make sure to check what solvent your spray paint has and whether the plastics you are spraying can deal with the solvent. I bought 8 fans from one store and 1 fan on discount from a different store. This fan was likely from a different batch and Corsair probably changed something about their plastic composition between these batches. The spray's solvent has eaten into the rotor quite a bit.
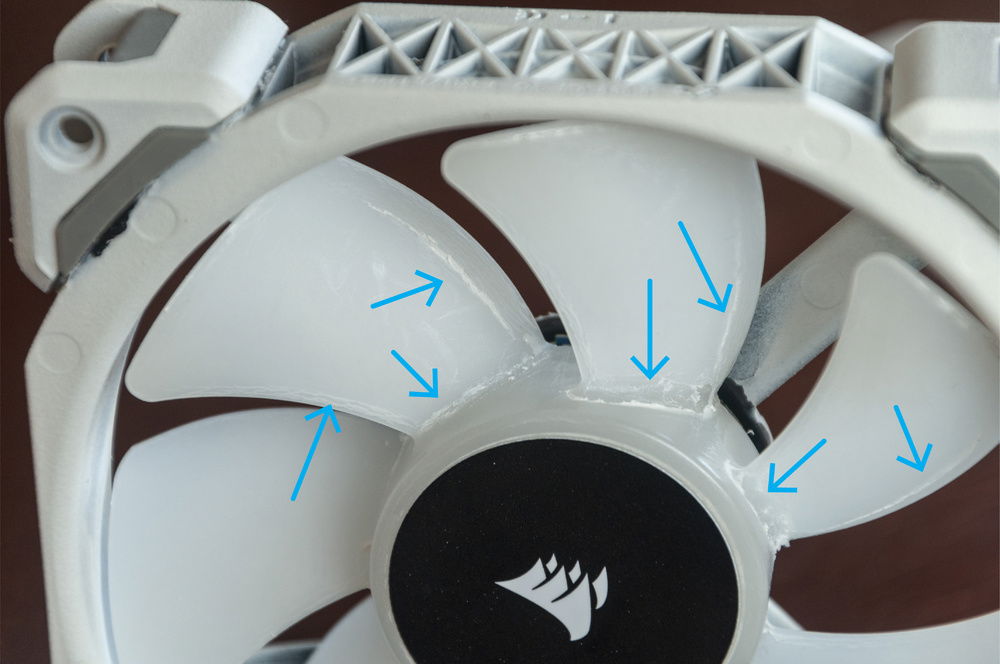
The damage is not bad enough to trash the fan, but had I sprayed any more, it could have been worse. The rotor has a very matte finish now (it started off VERY glossy) and the edges have stress marks. I'm not sure how much this is going to reduce the life of the fan by.
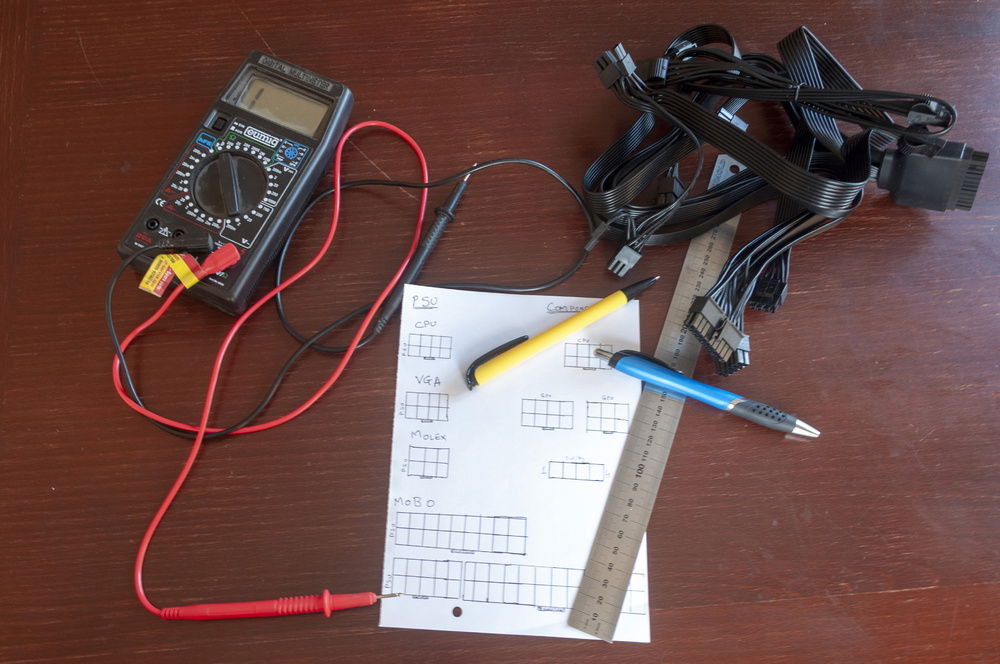
With the painting out of the way, it's time to get to reverse-engineering my PSU cables. I couldn't find a pinout for the Whisper M 650W anywhere, but I'm glad @GTS81 told me how to figure the cables out. I'll write to BitFenix and once I have some sort of confirmation, put together a chart other folks can use :)
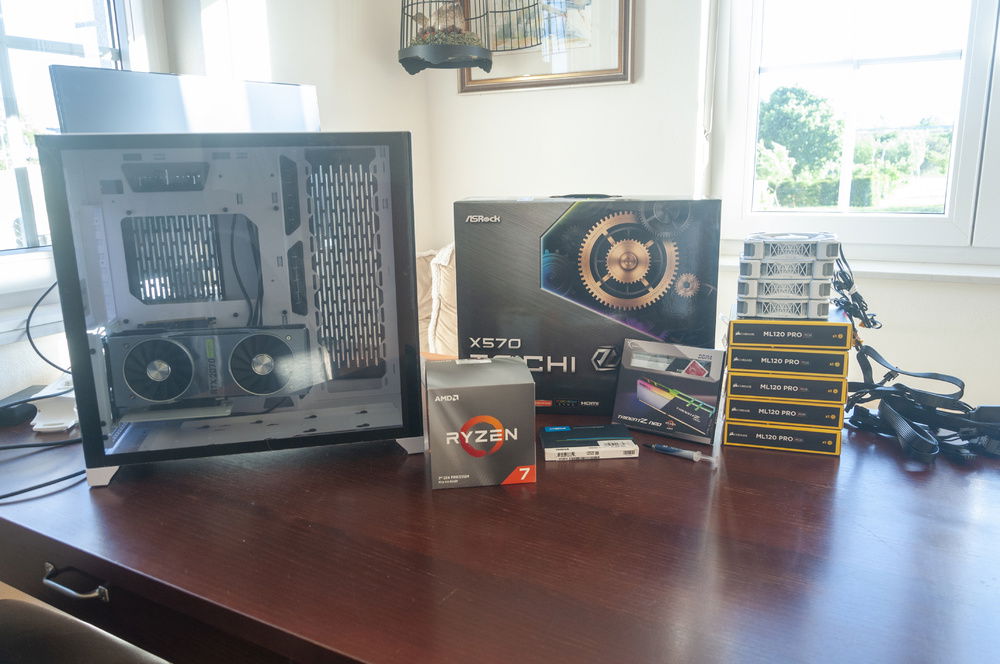
21st May 2020: The replacement motherboard arrived today so I got the rest of the parts out of the basement. Decided to install all 9 fans since the Splitty4s should arrive in a couple of weeks. I had to hurridely put everything together since we were supposed to group for a trial in ESO in under 2 hours.
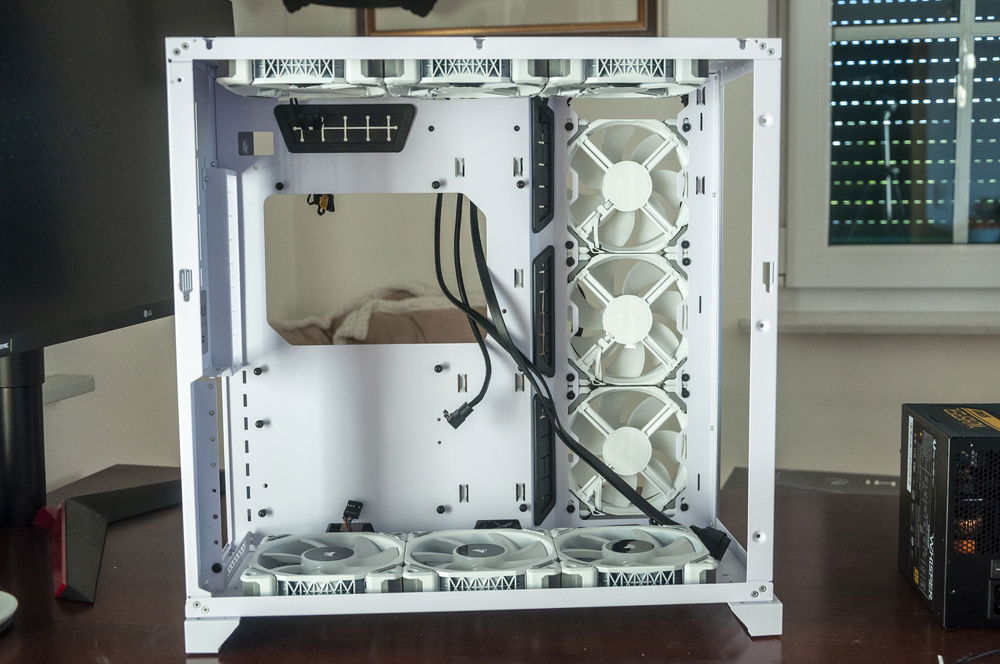
22nd May 2020: Decided to take the entire PC apart and cable manage everything.
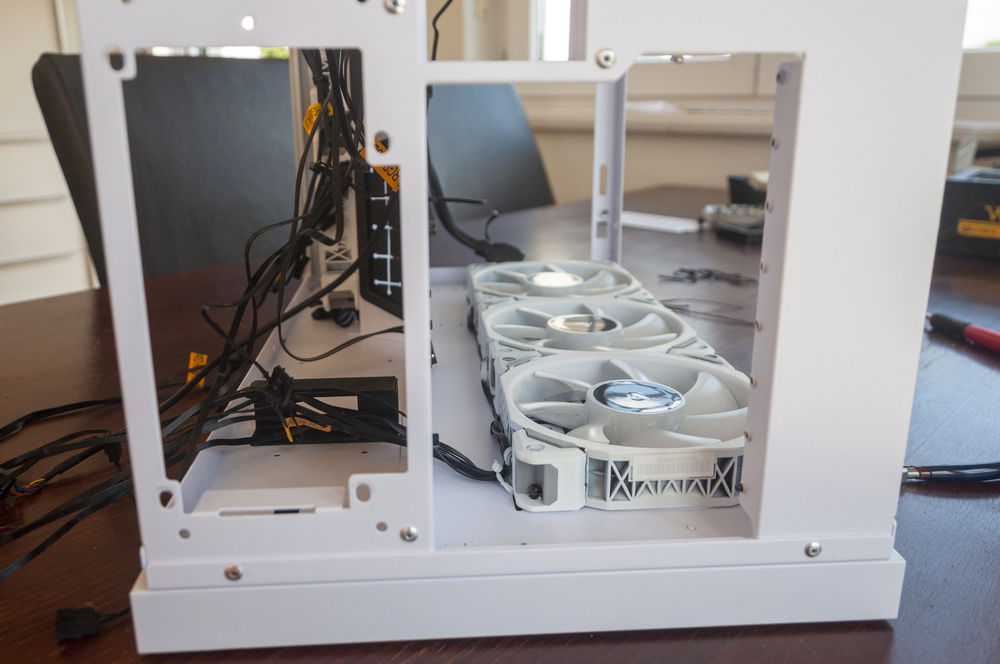
The bottom fans needed to be done first. This could be a bit of a permanent setup since they won't be removed even after the system is watercooled. I used the fans themselves to lightly clamp the cables down and used cable twisties to secure the cables to the case.
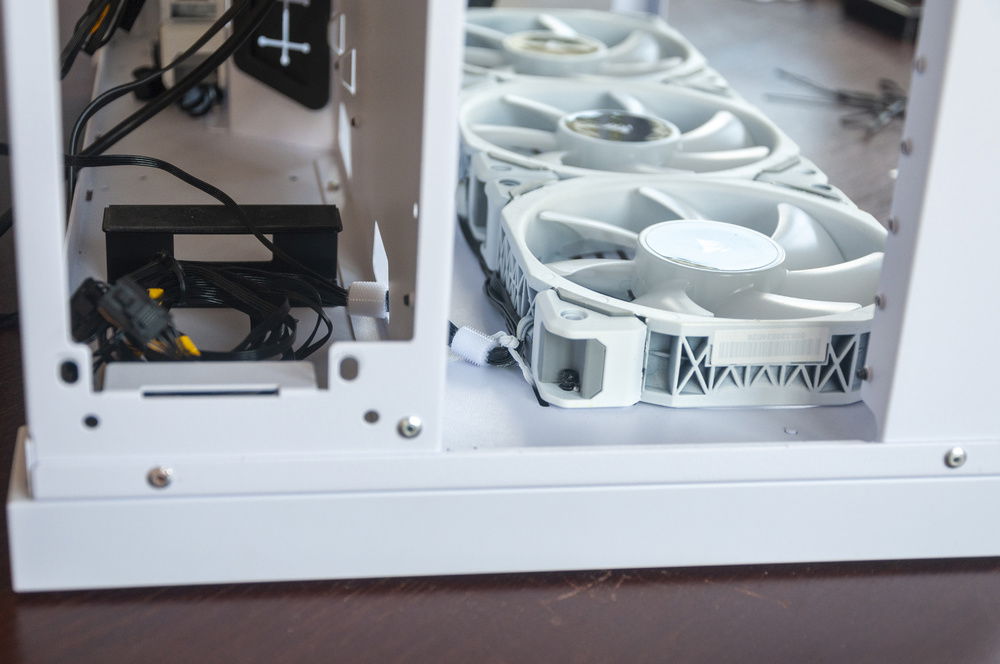
I then used velcro cable ties to bundle everything up neatly. Only one of those fans will be running for now so the rest of the cables can sit under the PSU till I have my splitters.
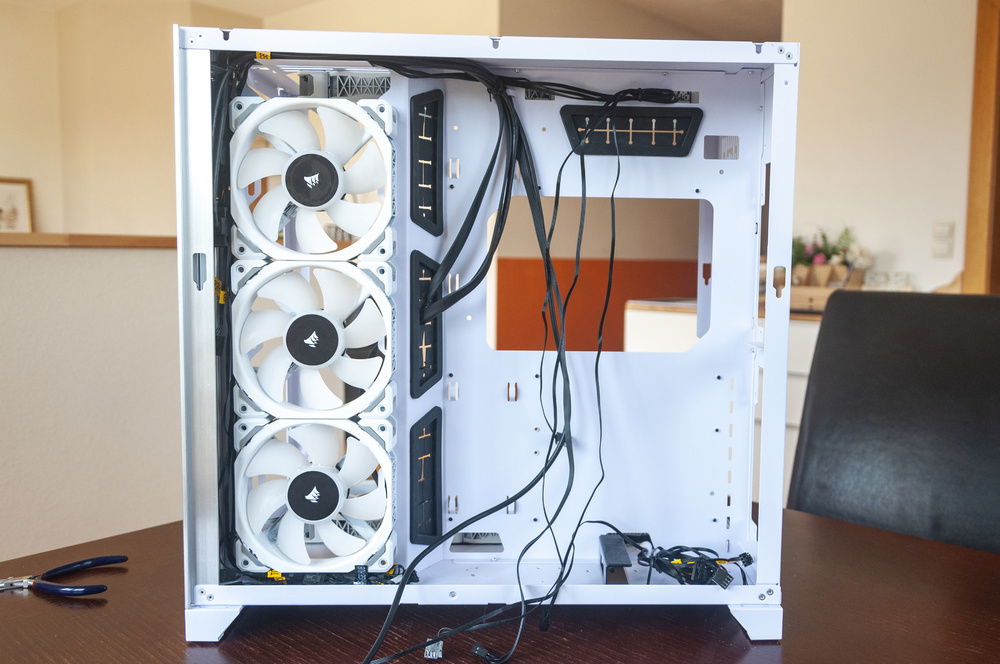
I rotated the side fans so that all of their cables could be routed along the channel at the front of the case. None of those fans will be plugged in till the splitters arrive, so those cables can be stuffed away too.
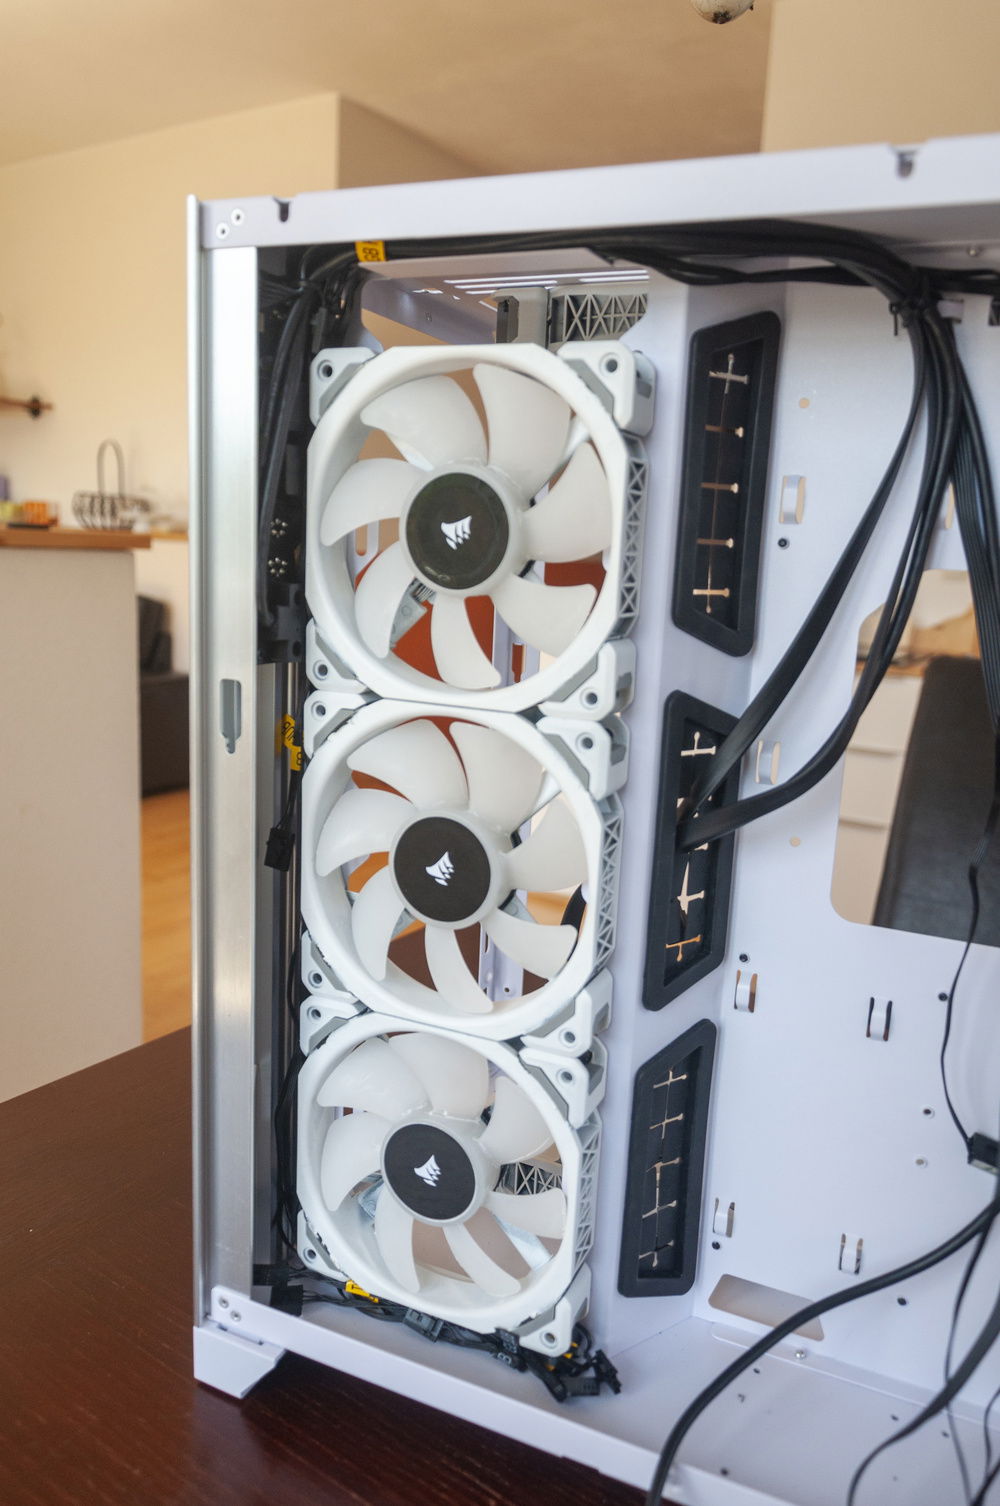
The front panel cables were next. I used a cable-twisty to group and secure them to the case.
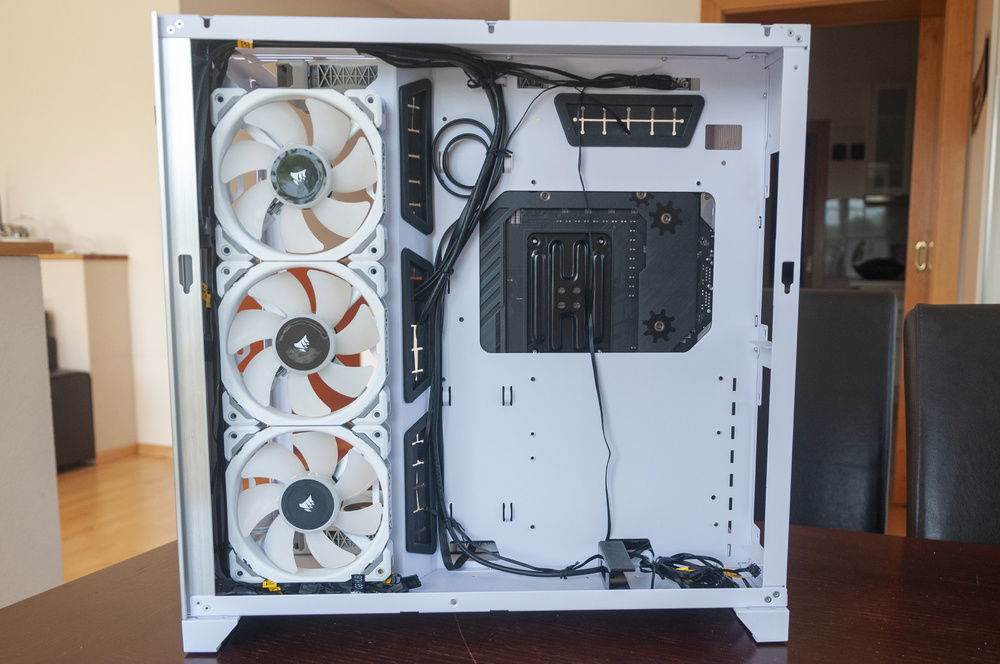
With all the cables cleaned up and secured, I could finally put the MoBo in.
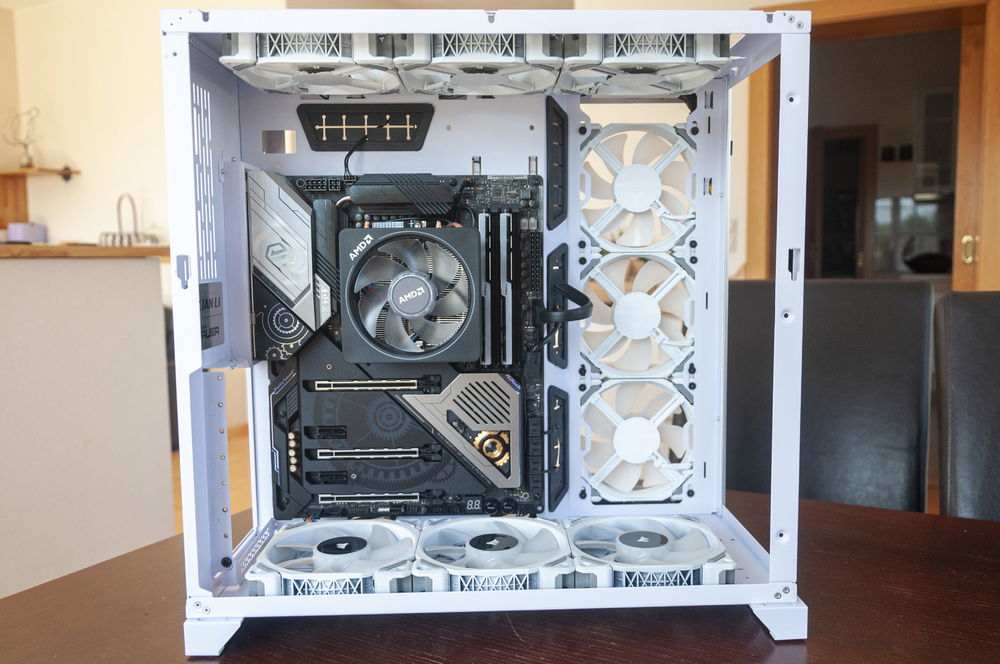
I plugged the front panel cables and the fan cables in first. I could route some of the fan cables between the SATA ports to make things extra-clean!
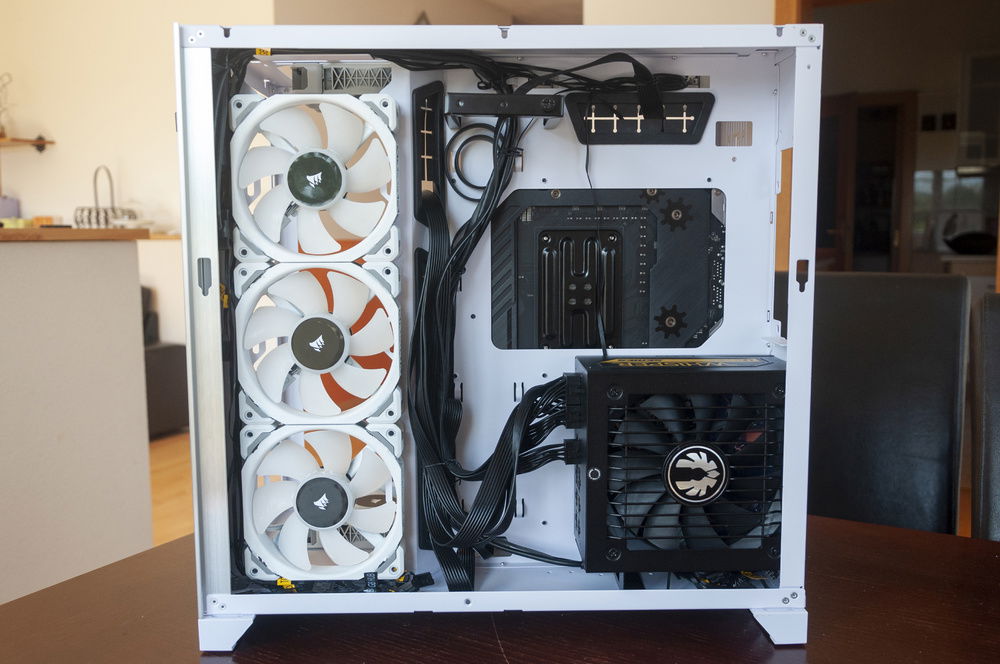
Finally, the PSU and those horrendously stiff BitFenix cables could go in. Routing, binding and managing those cables was a pretty big pain.
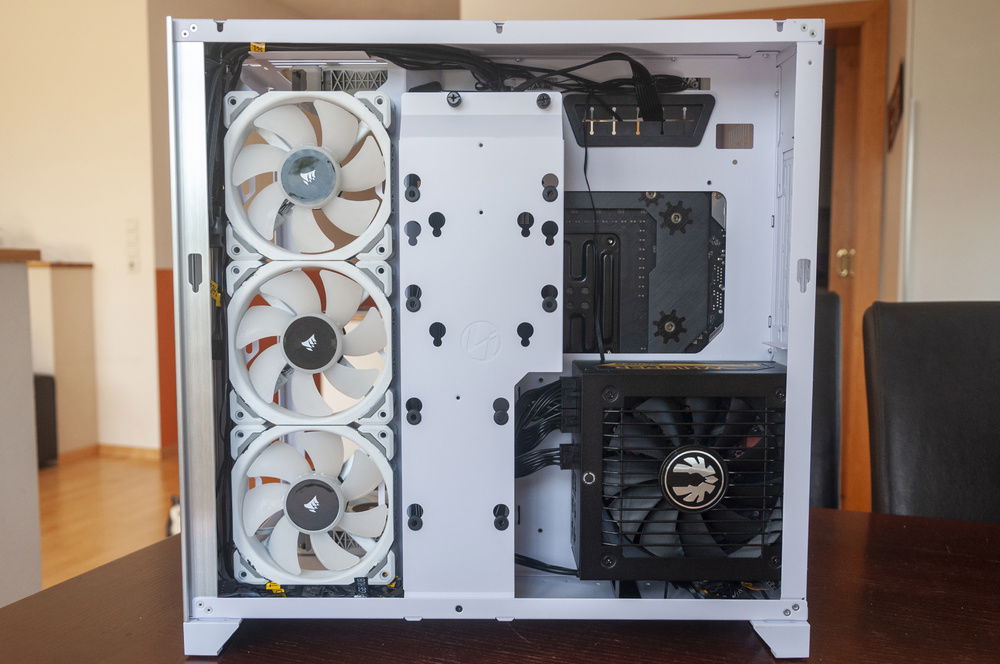
I love the cable management shroud and how clean it makes everything look!
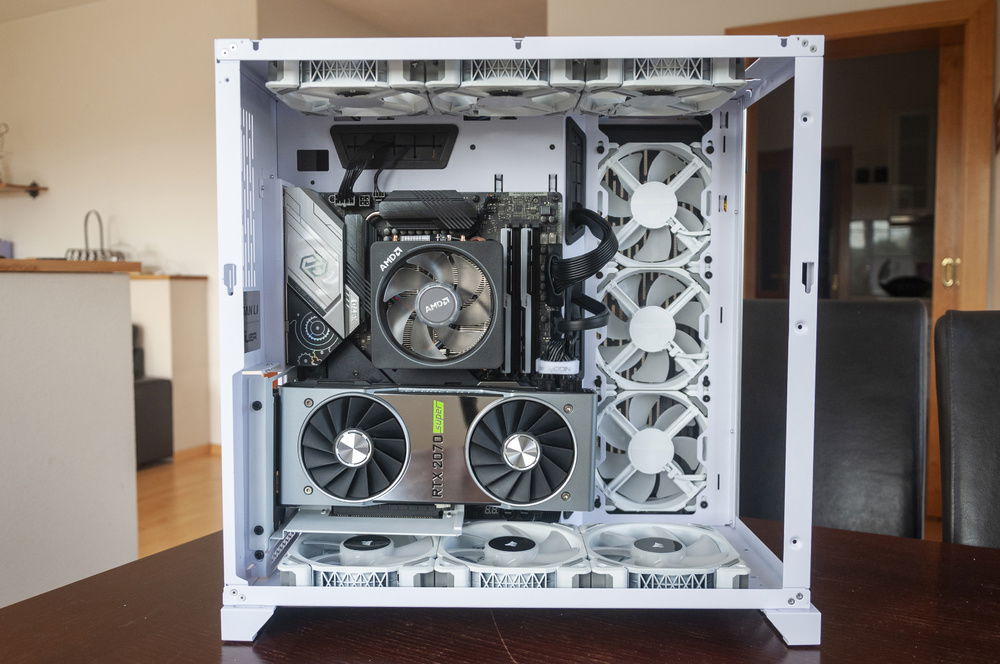
Finally, I used some velcro cable-tie to bind the GPU power cables together. I think it makes the cables look a little less hideous.
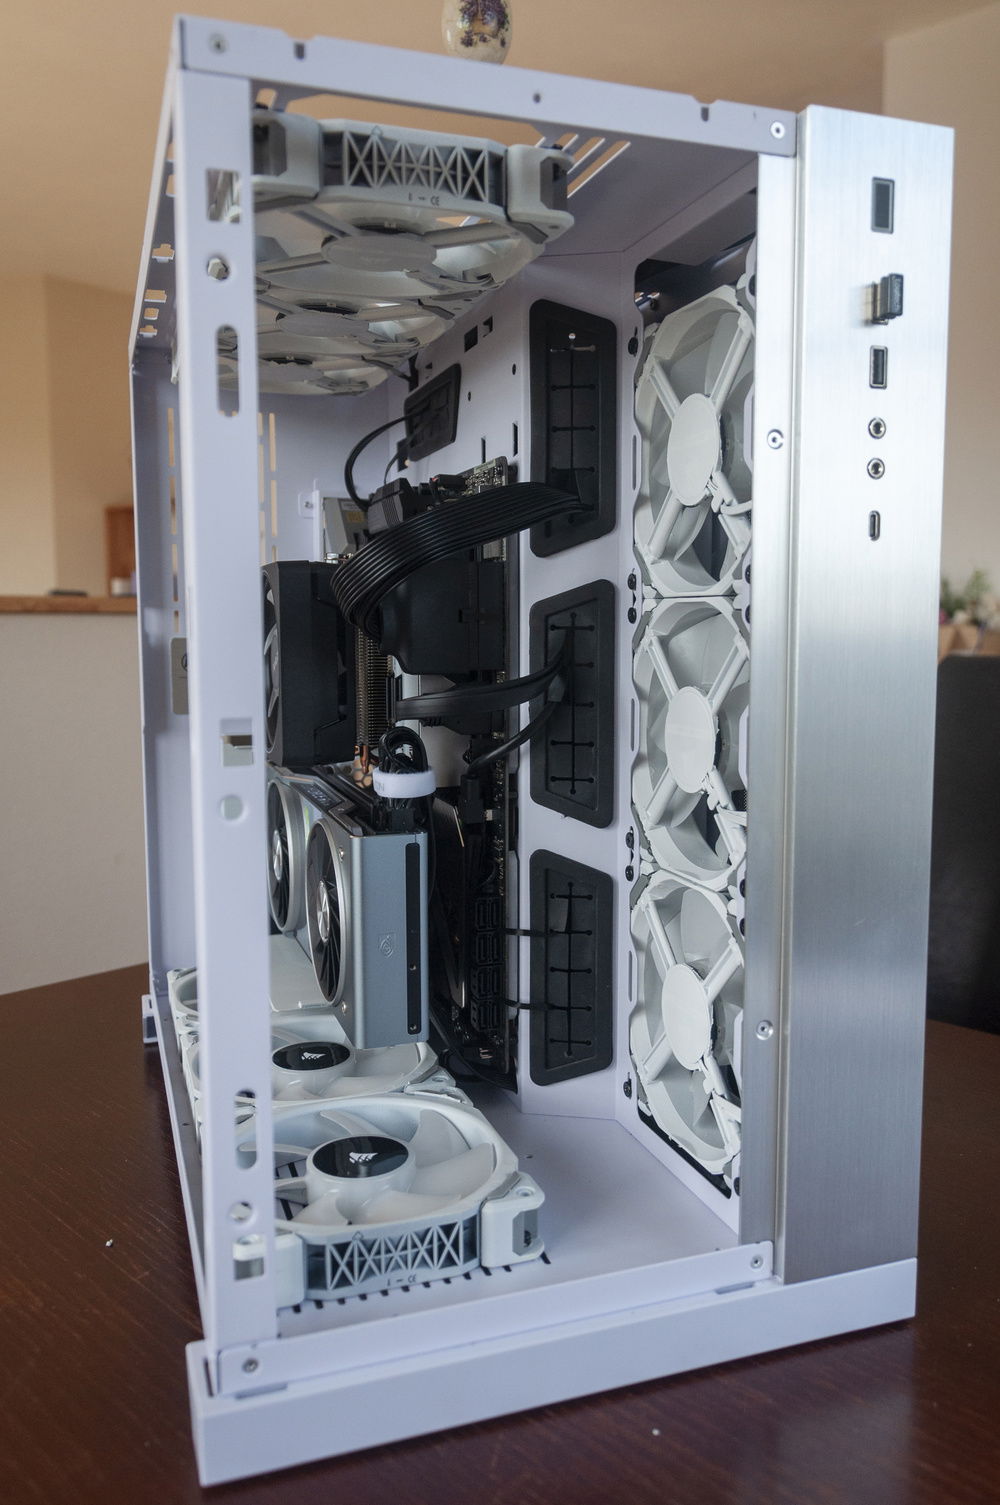
Side view of the bound GPU cables.
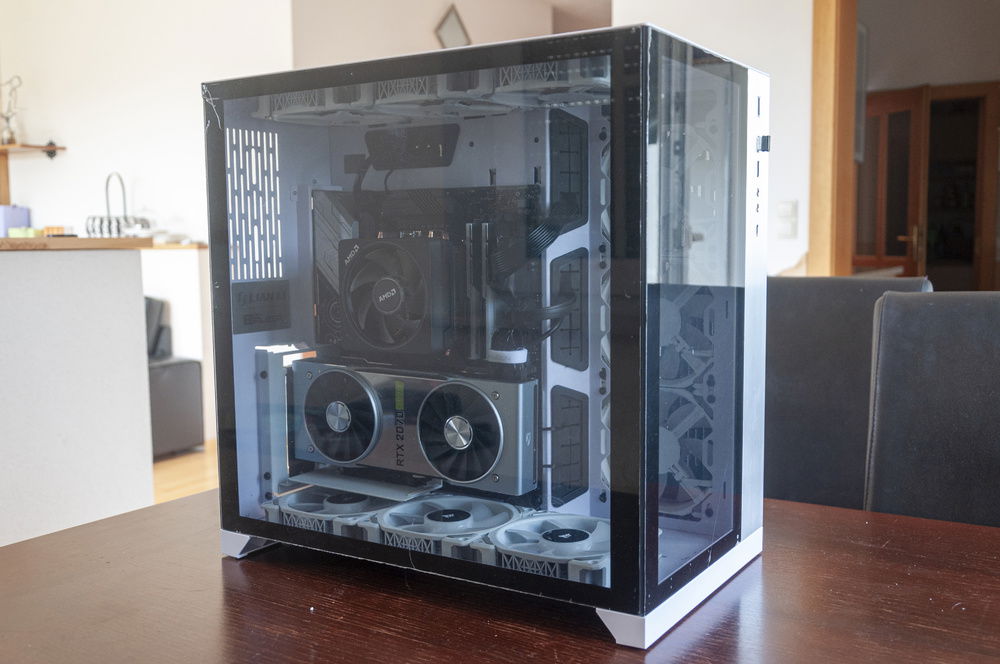
After close to 4 hours of work, it was time to put the side panels on again!
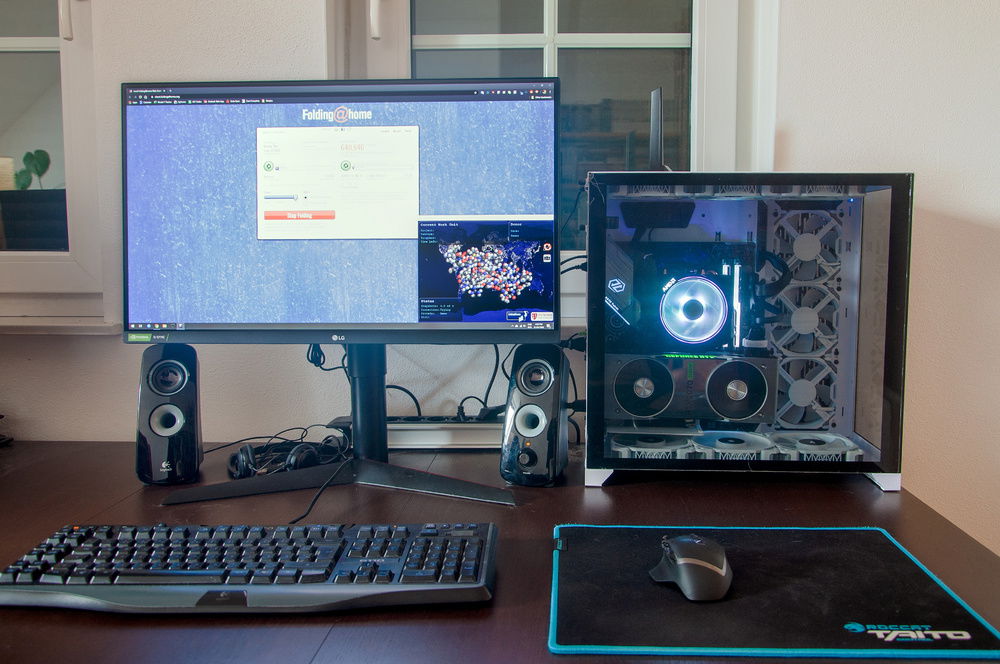
Here's what the setup looks like now.
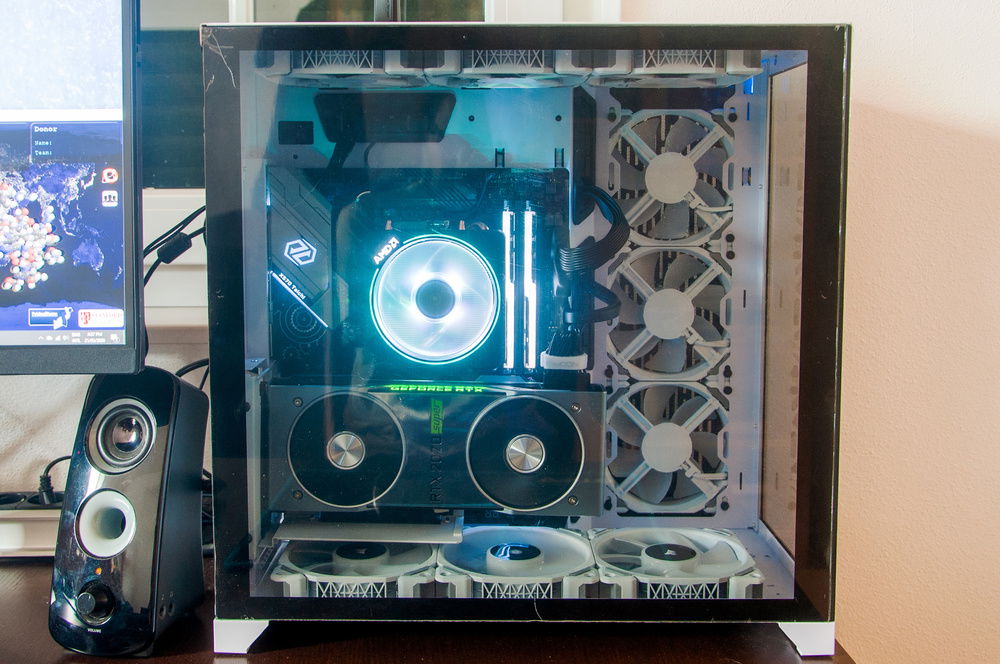
Close-up of the system. r/ShittyHDR would be proud.
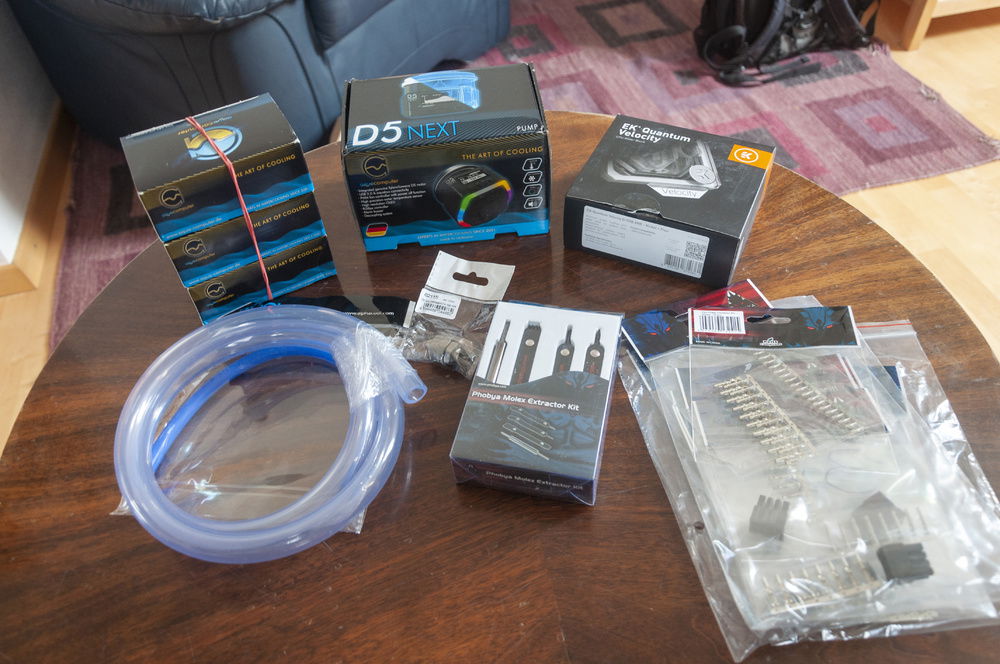
29th May 2020: The Aquatuning order finally arrived! That takes care of almost all of the water cooling parts and about half of the sleeving parts.
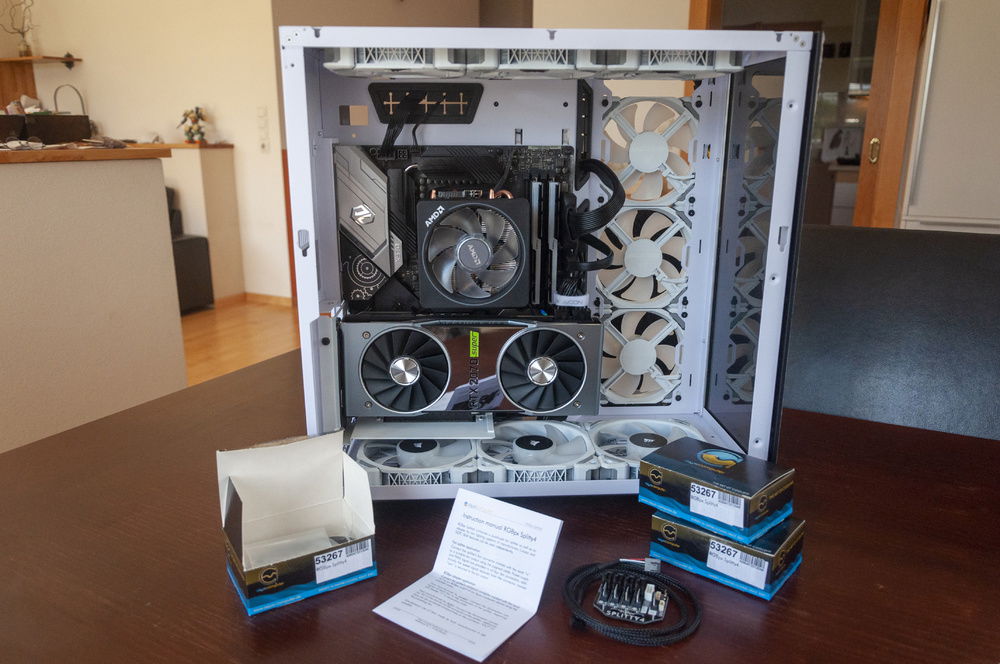
30th May 2020: Since the Splitty4s were here, I figured I could improve some airflow :D
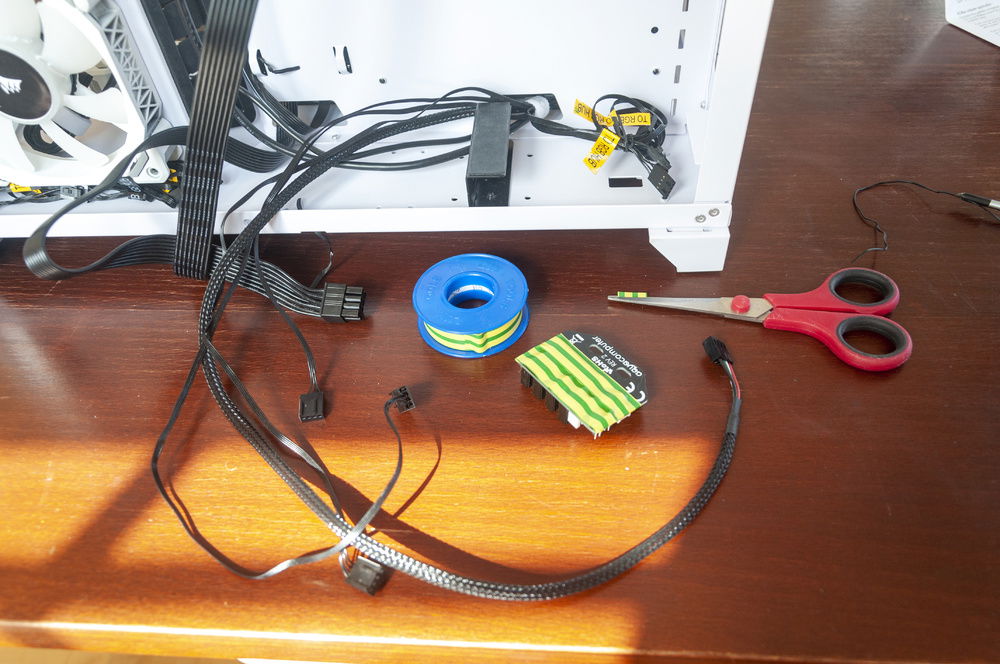
The contacts on the back of the Splitty should not touch any electrical components. Just to be safe, I put some electrical tape on them.
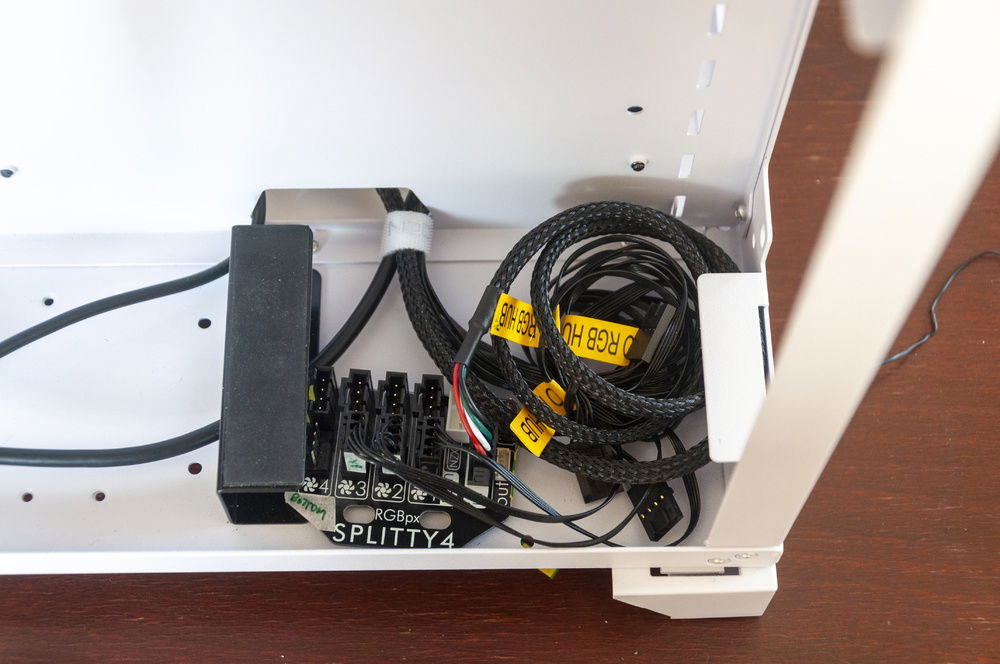
The first Splitty4 will control the bottom exhust fans. I can't connect the RGB yet since that requires the Quadro and it'll arrive later.
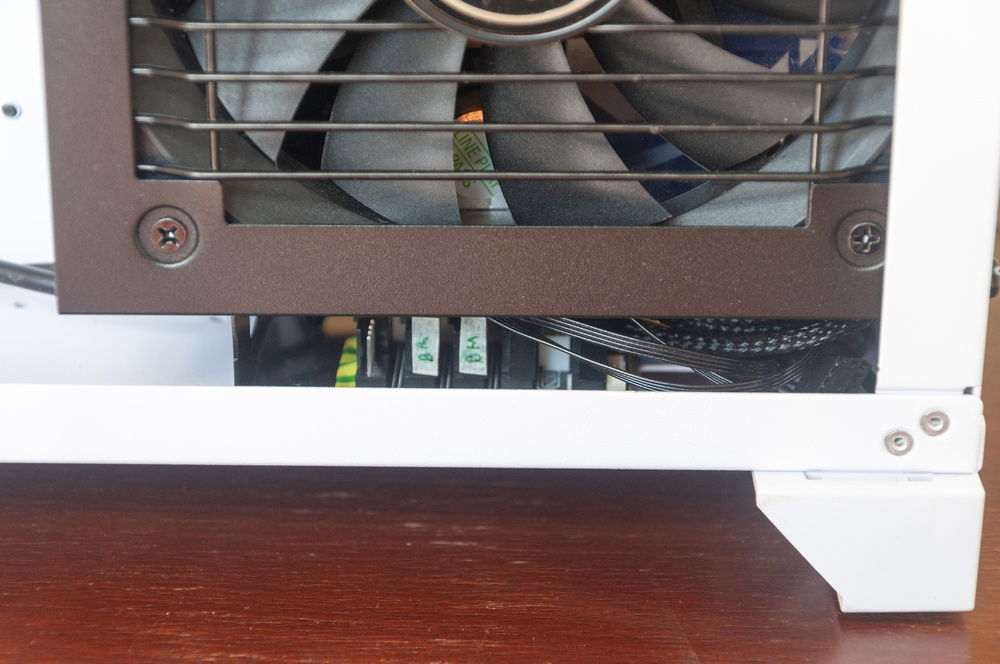
It fits really nicely under the PSU.
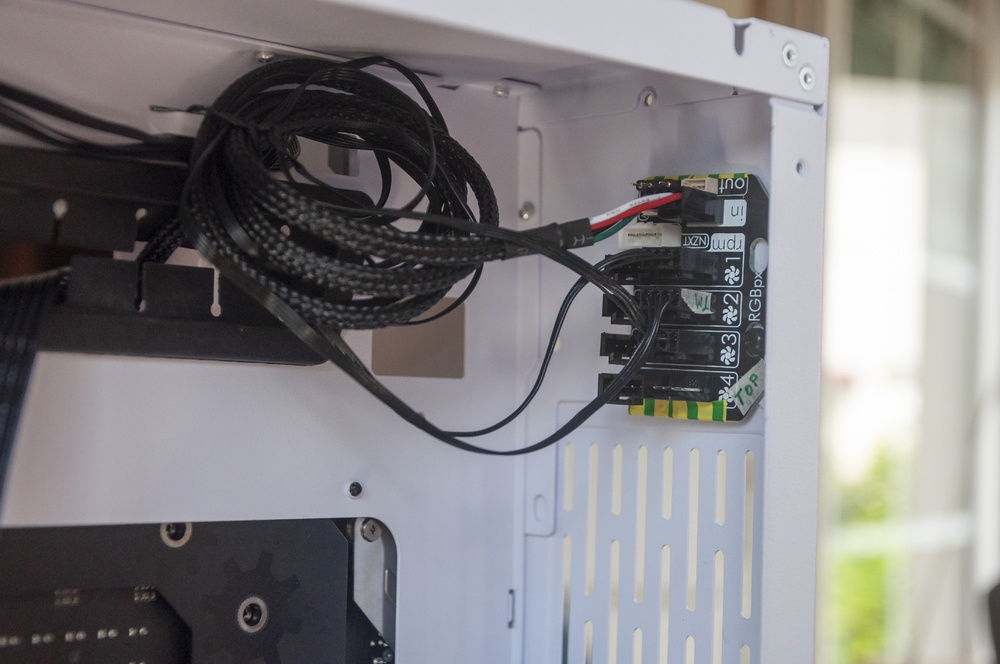
I screwed the second Splitty4 to one of the holes at the back of the case.
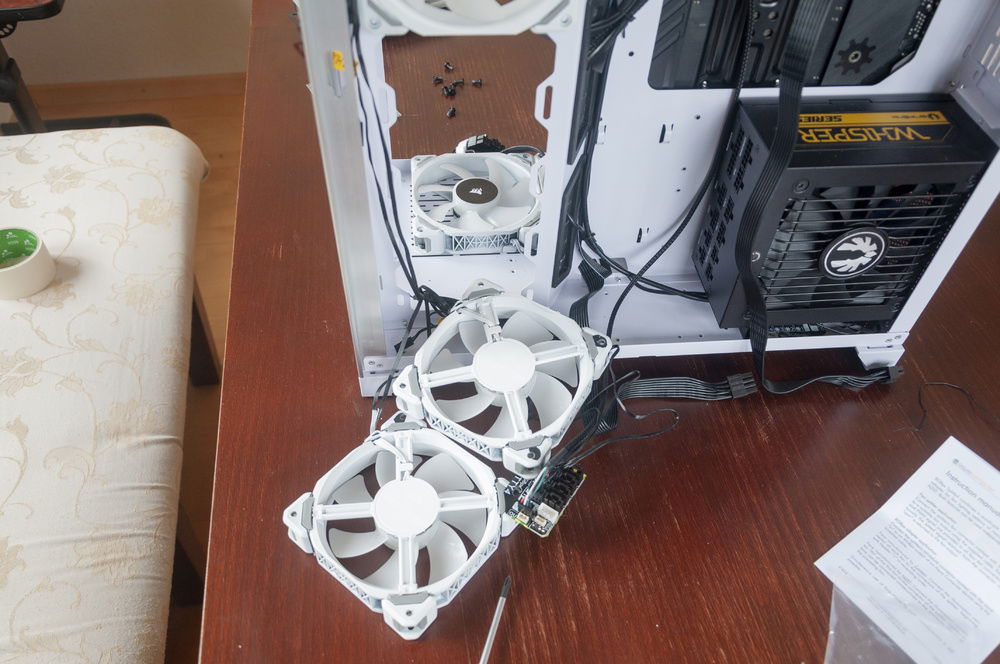
I decided to put the third Splitty4 on the fans. However, screwing it on to the fans with all the plugs attached and the fans on the case was impossible so I had to take the fans off.
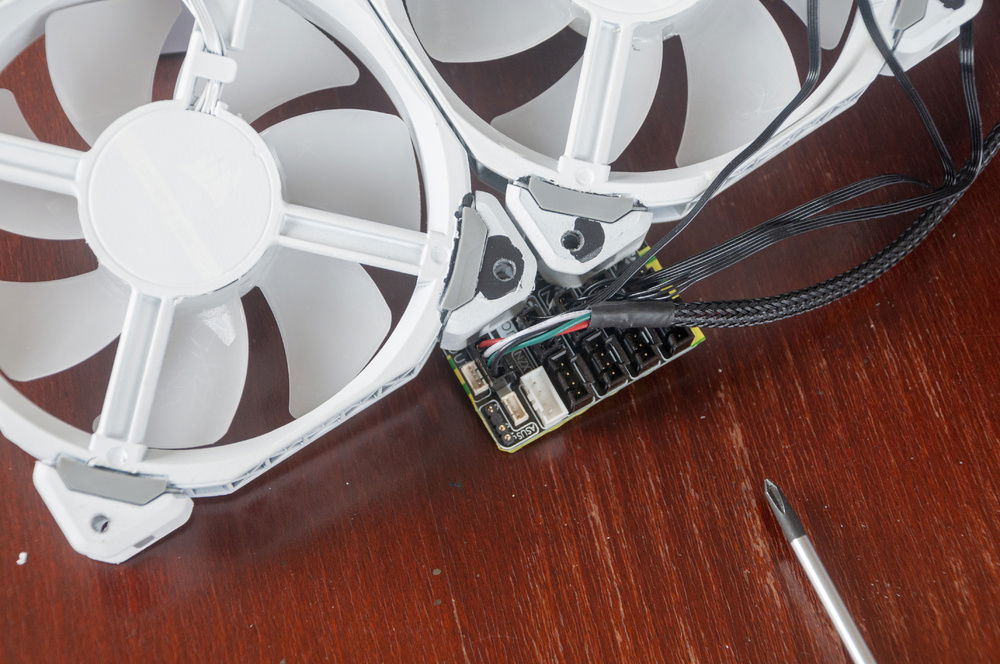
It was fiddly work, but it fits reall nicely.
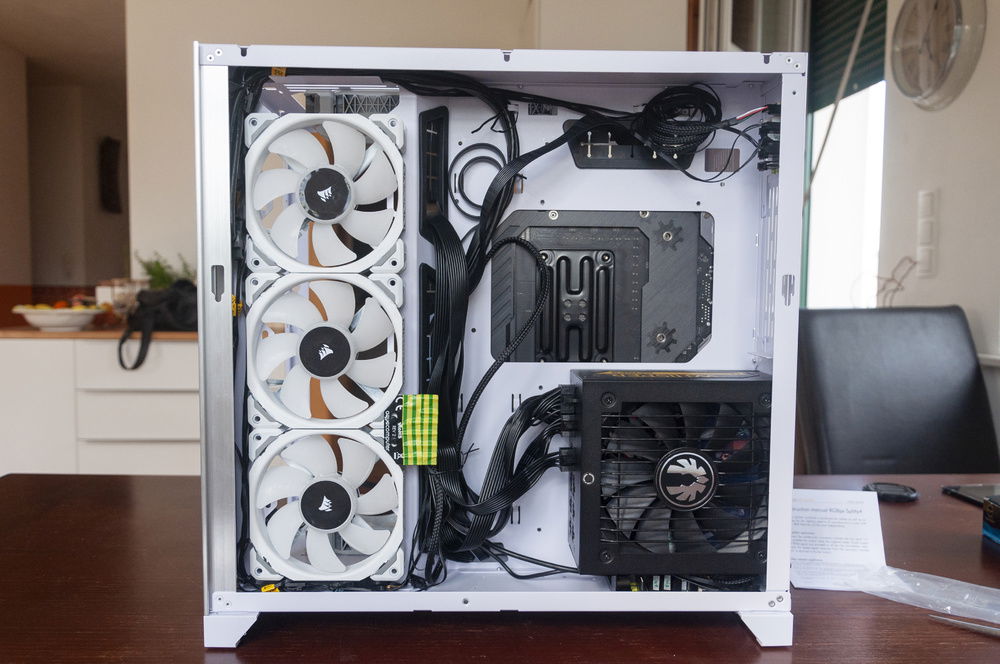
Managed all the cables. There's a lot of excess cabling right now but that'll change once I build my own cables.
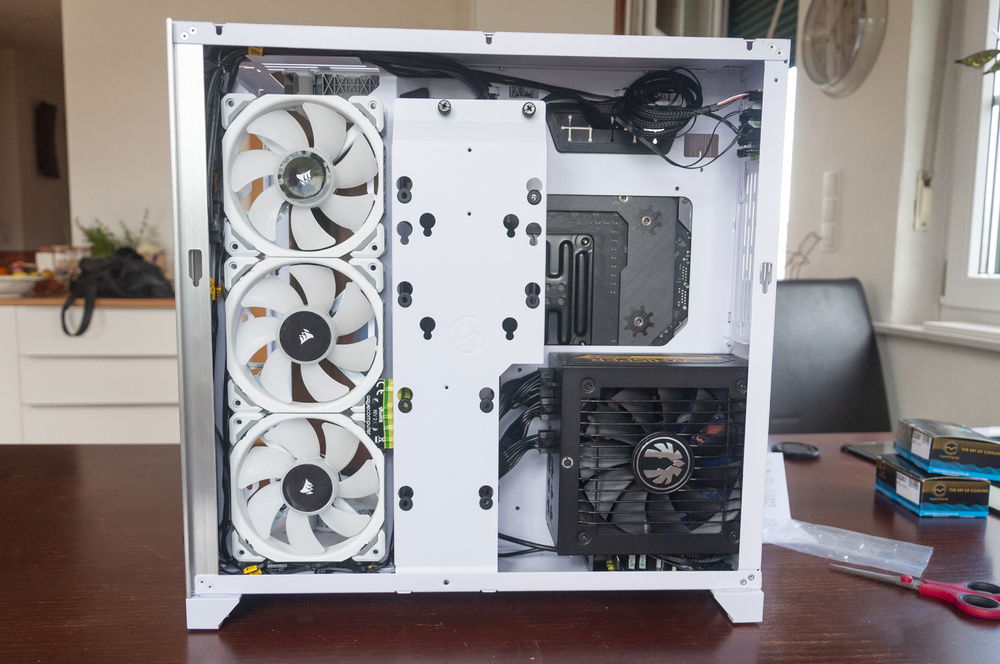
Shroud on - done!
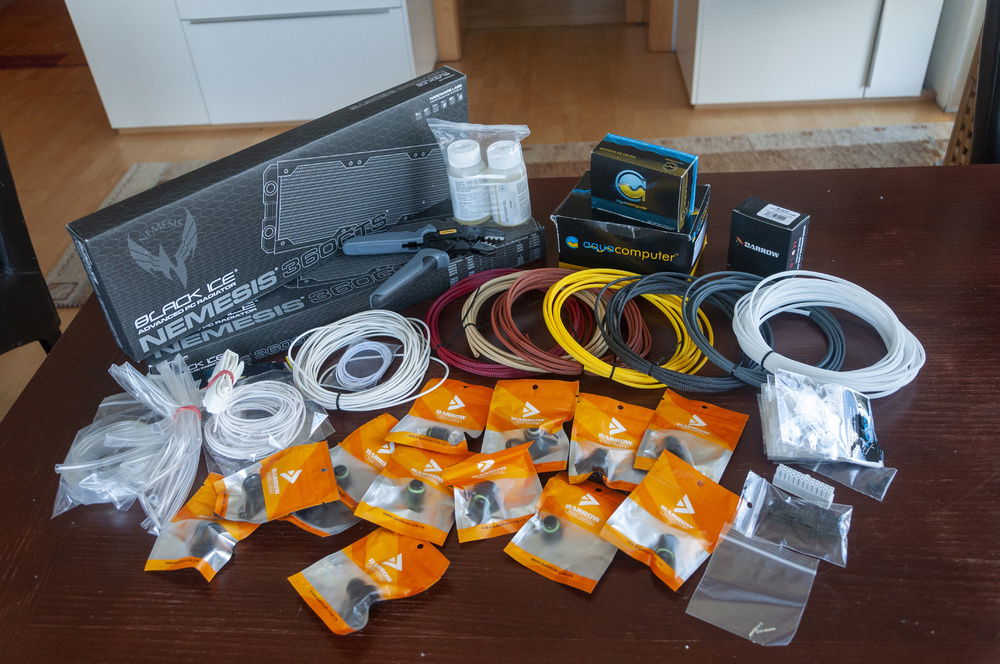
30th June 2020: The last few components finally reached! Radiators, fittings, EK CryoFuel Clear, a whole load of MDPCX stuff, wires and the Quadro!
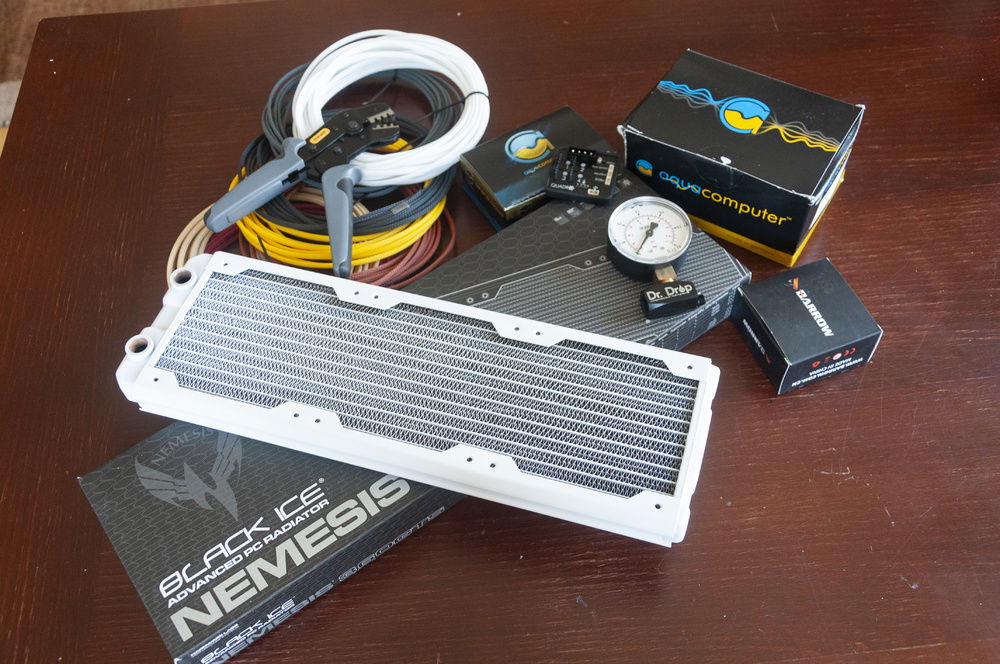
These white rads look awesome! So glad I went with these! Totally worth the wait!
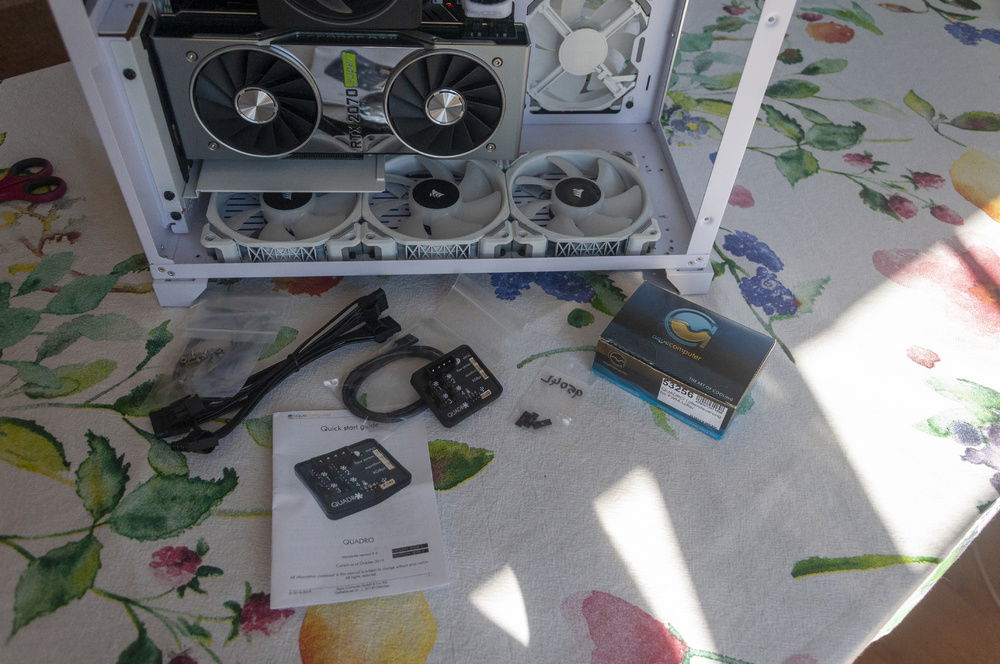
The first order of business was installing the Quadro so that I could finally have some reasonable control over the fans.
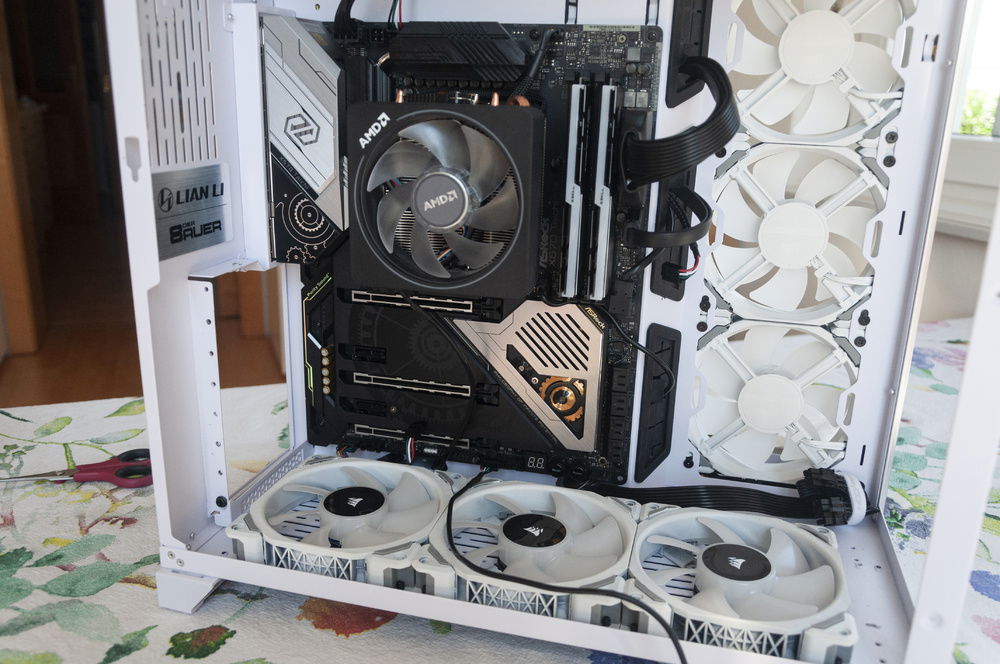
Getting to the USB 2 ports wasn't going to be possible without unmounting the GPU though.
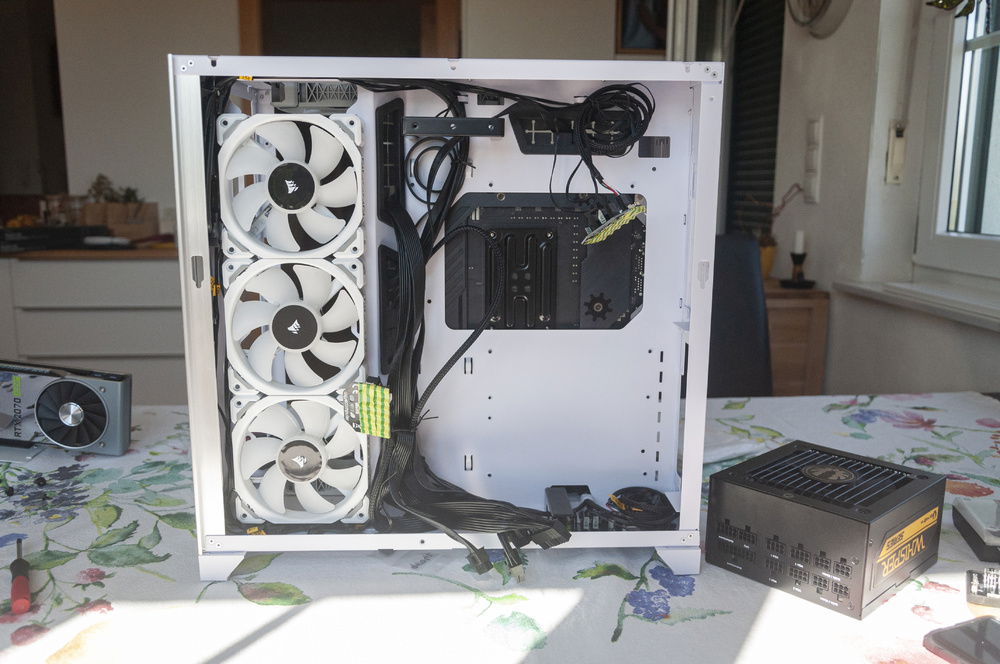
Then, I had to take the PSU out and undo all the cable management. I then removed all the Splittys.
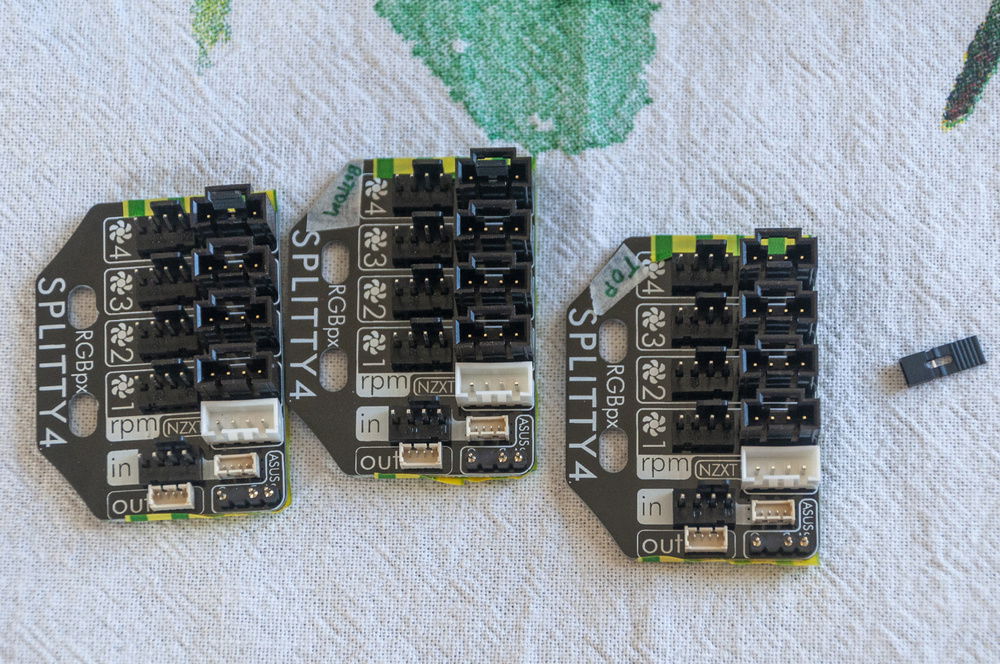
I had to bridge the pins on the fourth Corsair RGB connectors on the Splittys so I could get everything to work properly. I'm glad I spoke to Aquacomputer before I ordered - I wouldn't have known this otherwise.
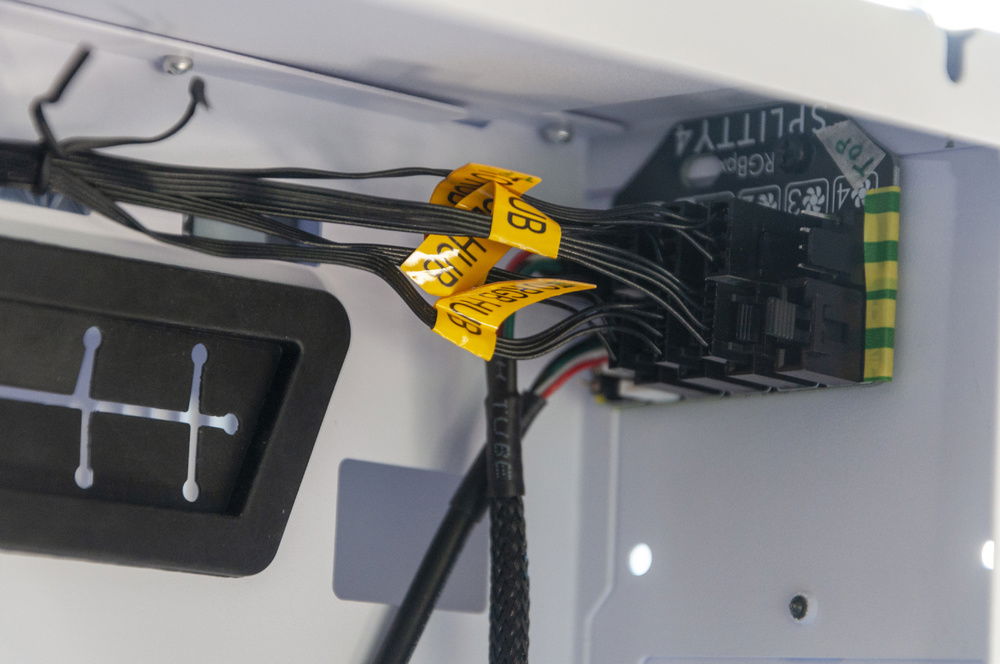
Once the Splitty's were populated, I started mounting them back to their original positions. This will likely change once I have the Water Cooling stuff in because some of those components need to plug into the Splittys too.
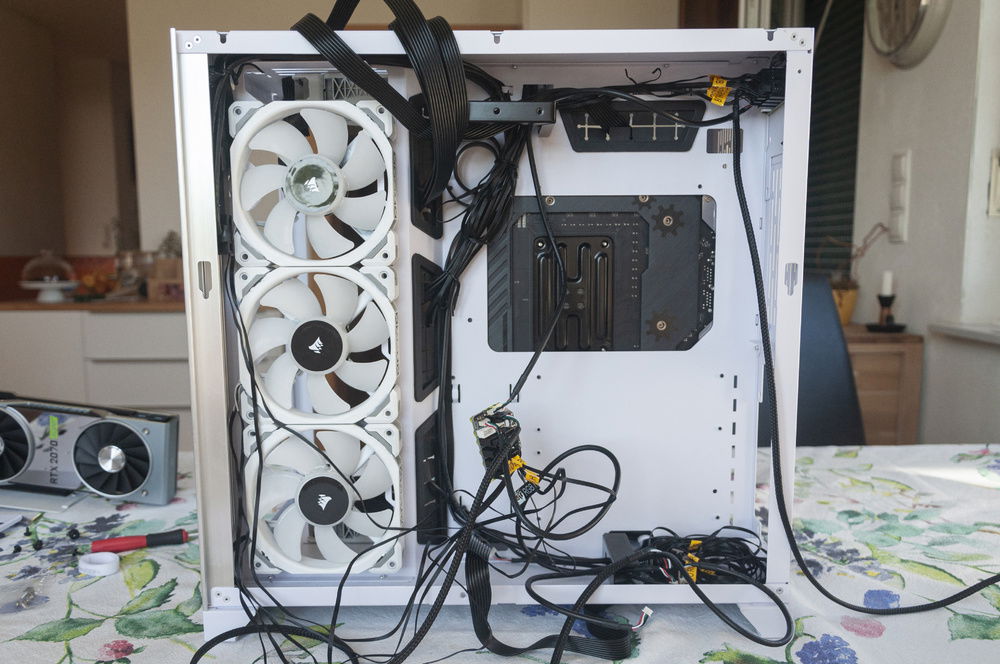
So many cables...
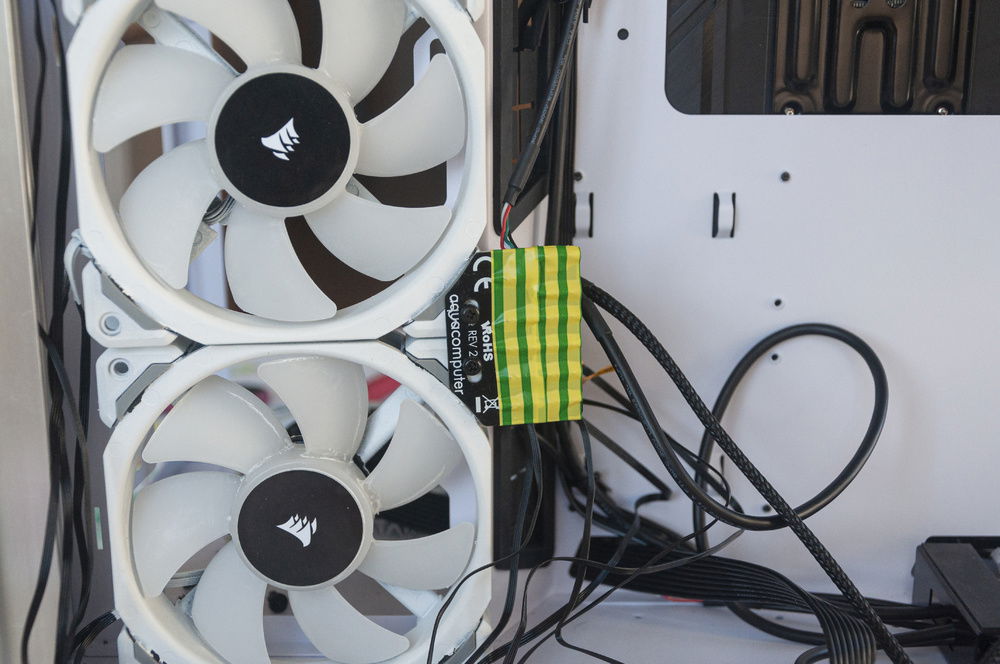
This Splitty was particularly painful to install. Managing to hold the tiny little nut in place with so many plugs was really hard.
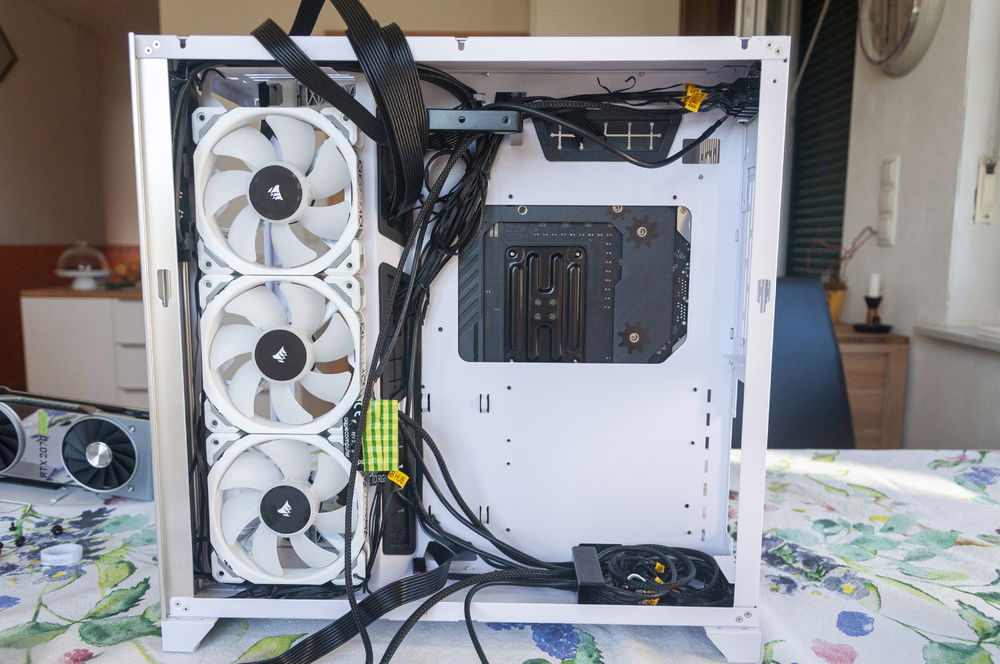
It took the better part of half an hour to get it properly fit.
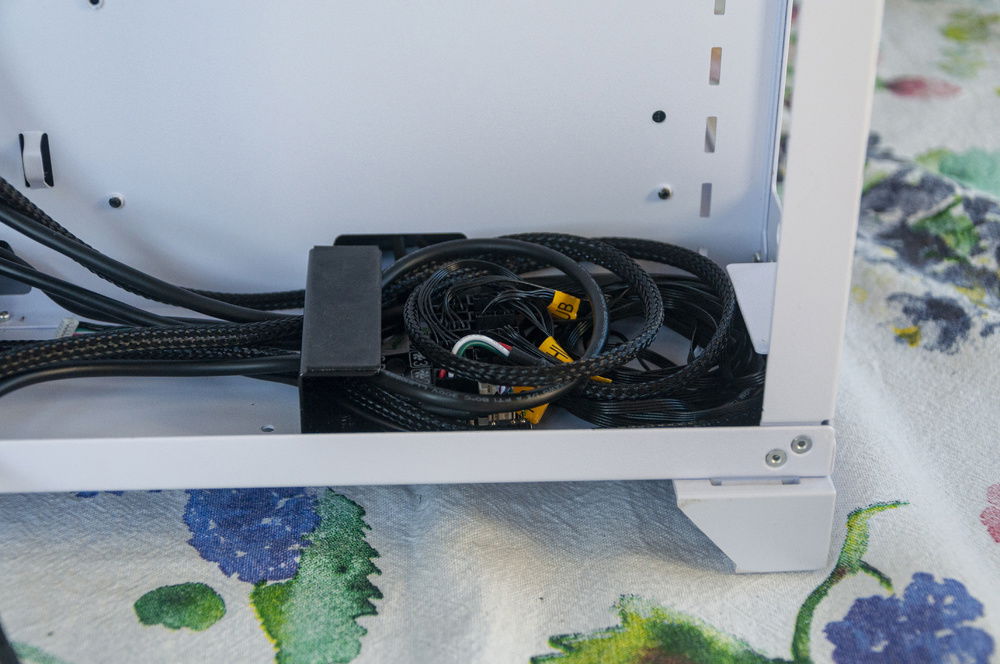
The bottom Splitty and all its cables still fit nicely in this little gap.
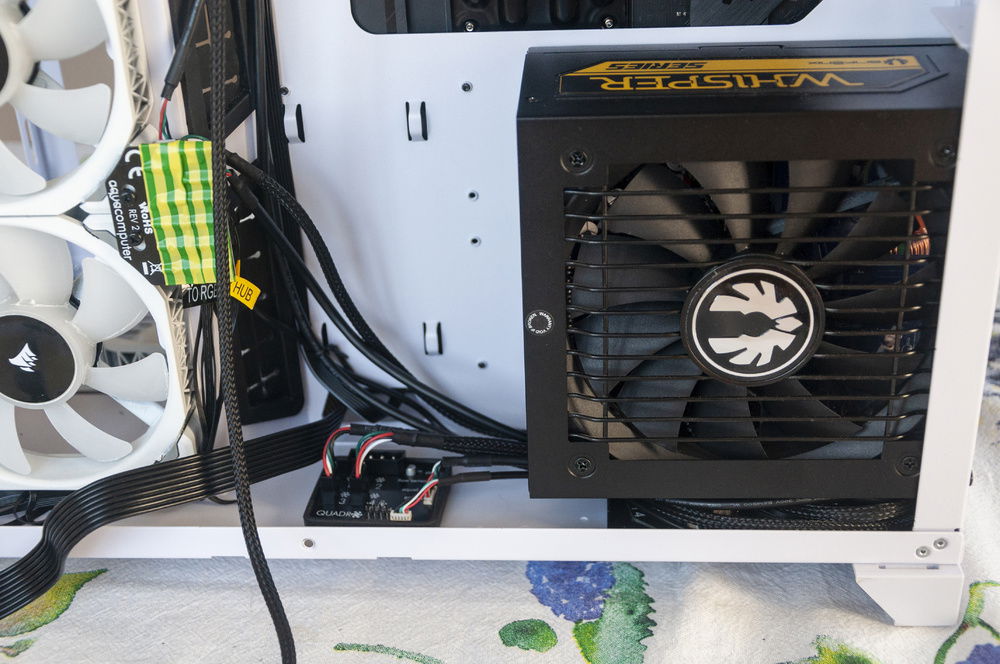
And are properly hidden under the PSU. Hopefully it won't get obnoxiously hot under there.
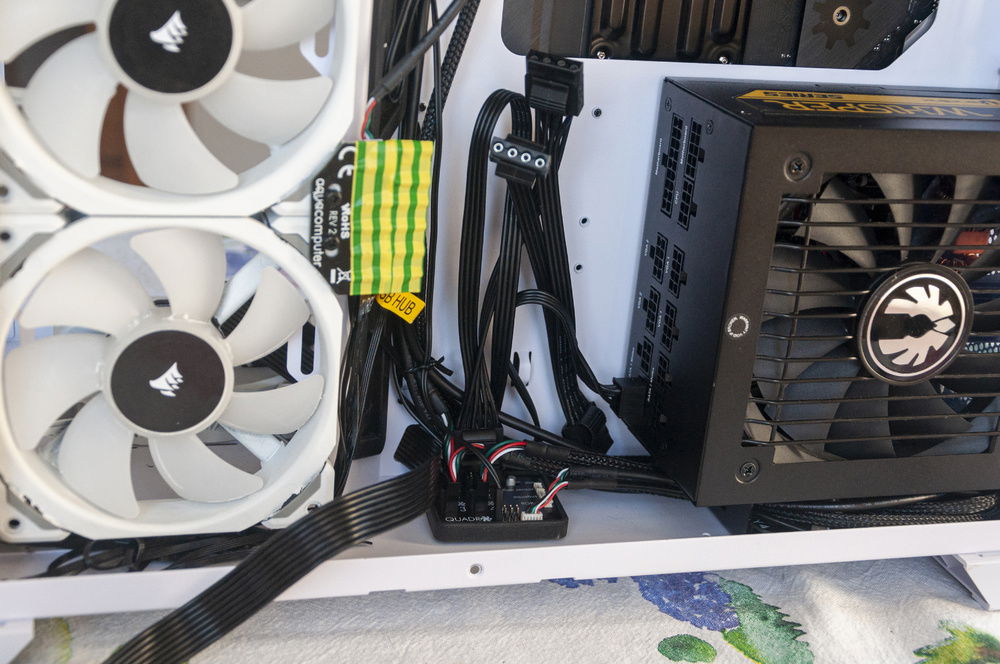
Finally plugged that Quadro in. I can't wait to make the custom cables. That Molex power cable is a disaster, honestly.
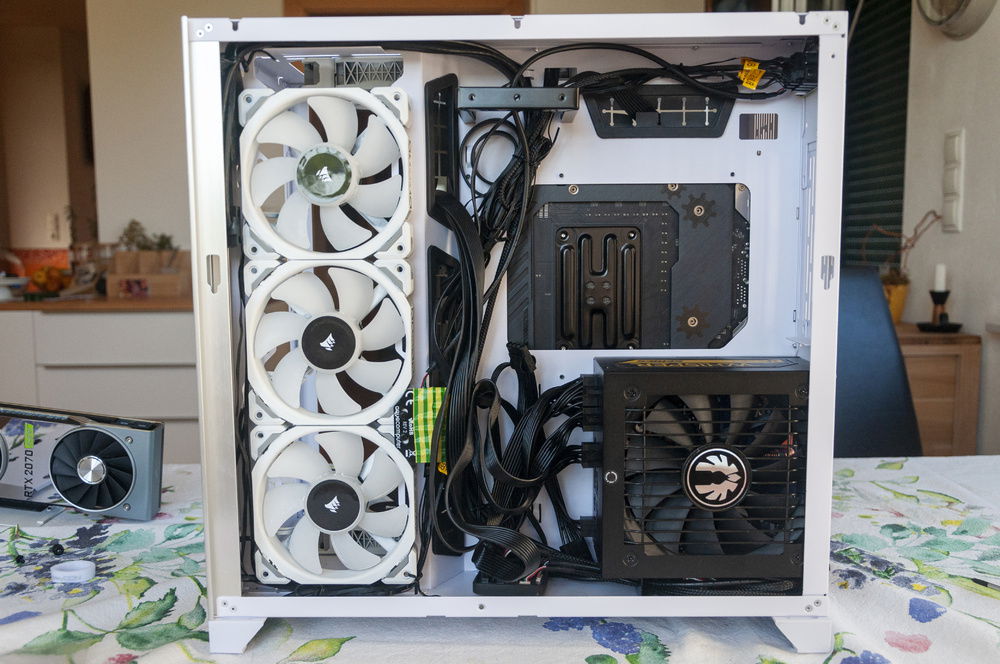
Tied as many of the cables down as I could. Did I mention I can't wait to make my own cables?
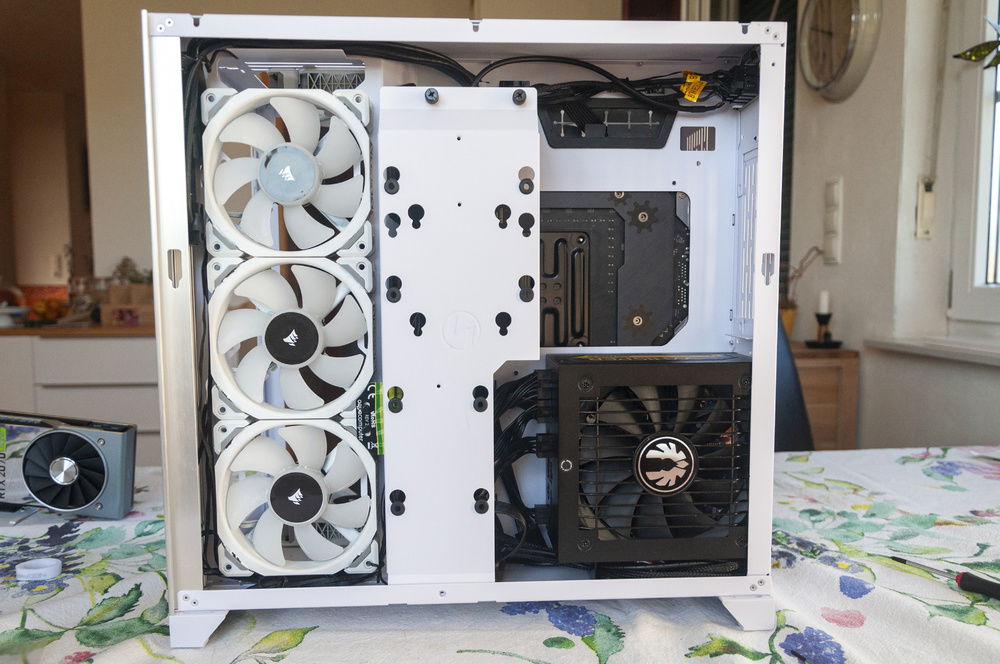
For now, at least the shroud hides everything away nicely.
![All lit up!
[Status as of 30th June 2020]](https://p1.builds.gg/builds_pictures/25000/25229/142721/142721_1000.jpg)
All lit up!
[Status as of 30th June 2020]
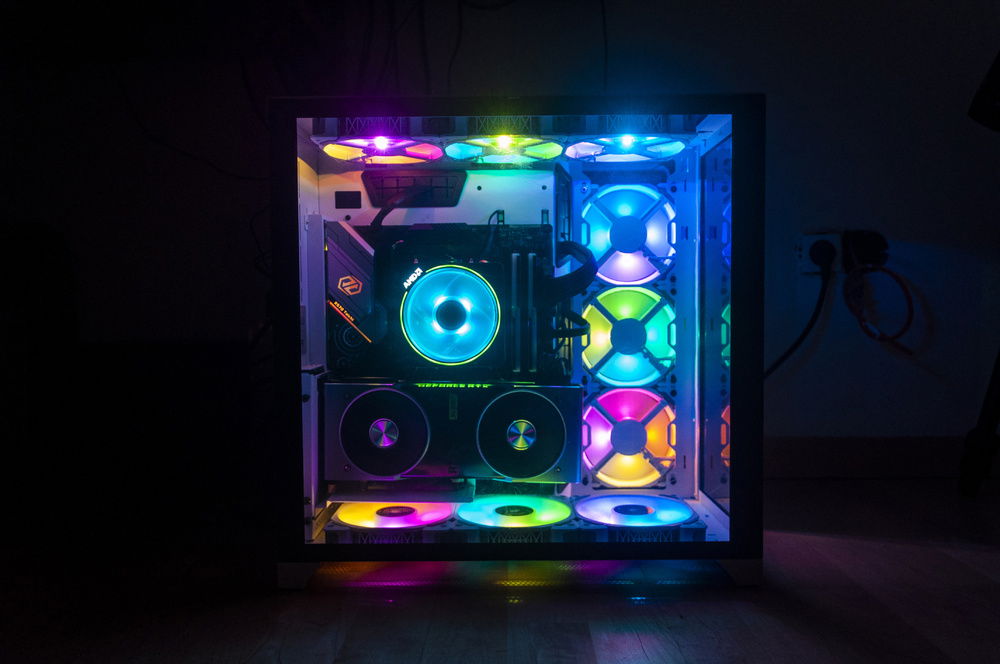
Obligatory rainbow vomit.
(The G.Skill software crapped out so the RAM went dark)
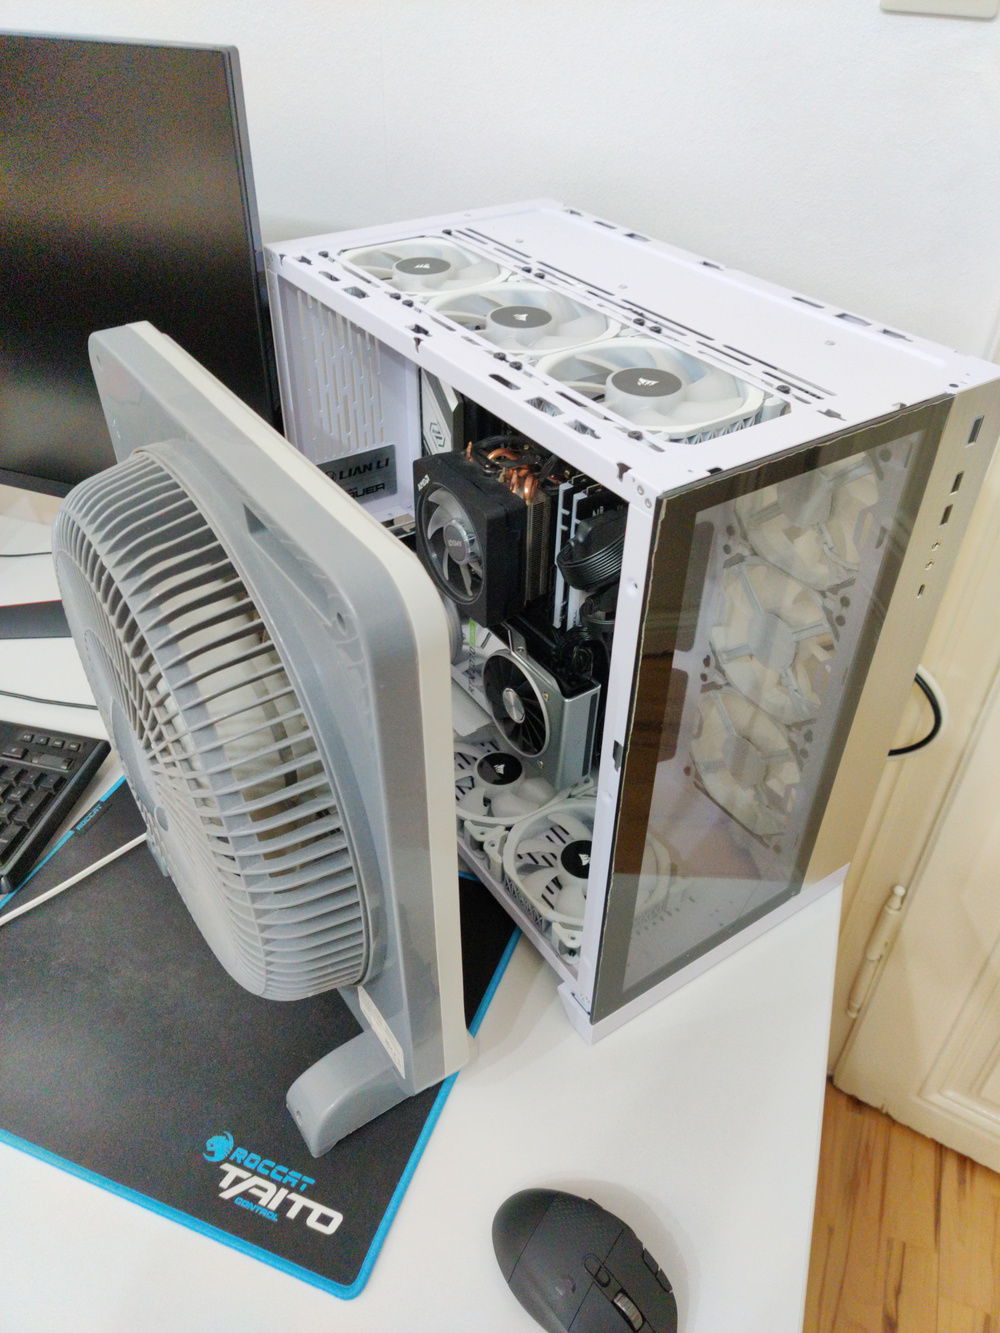
24th October 2020: Before building the loop, I thought I'd run a bunch of benchmarks and get a baseline so I know whether or not I've improved performance. And I forgot to record the scores. So I decided to up the Air Cooling to cool the PC down and re-run the bunchmarks :P
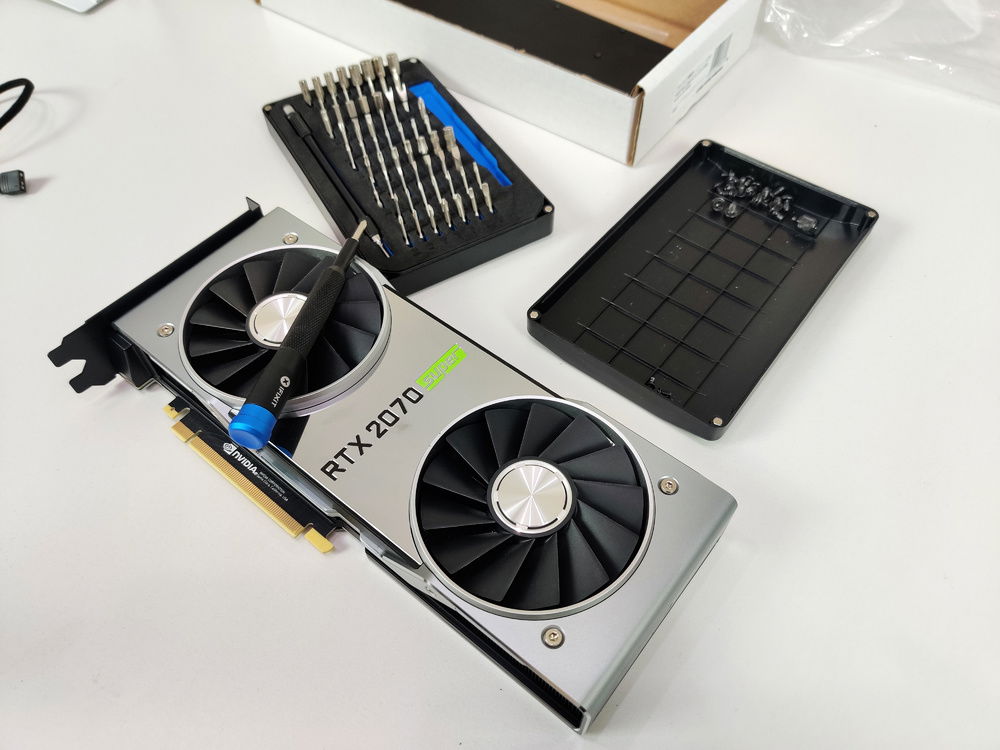
25th October 2020: Time to void my GPU's warranty!
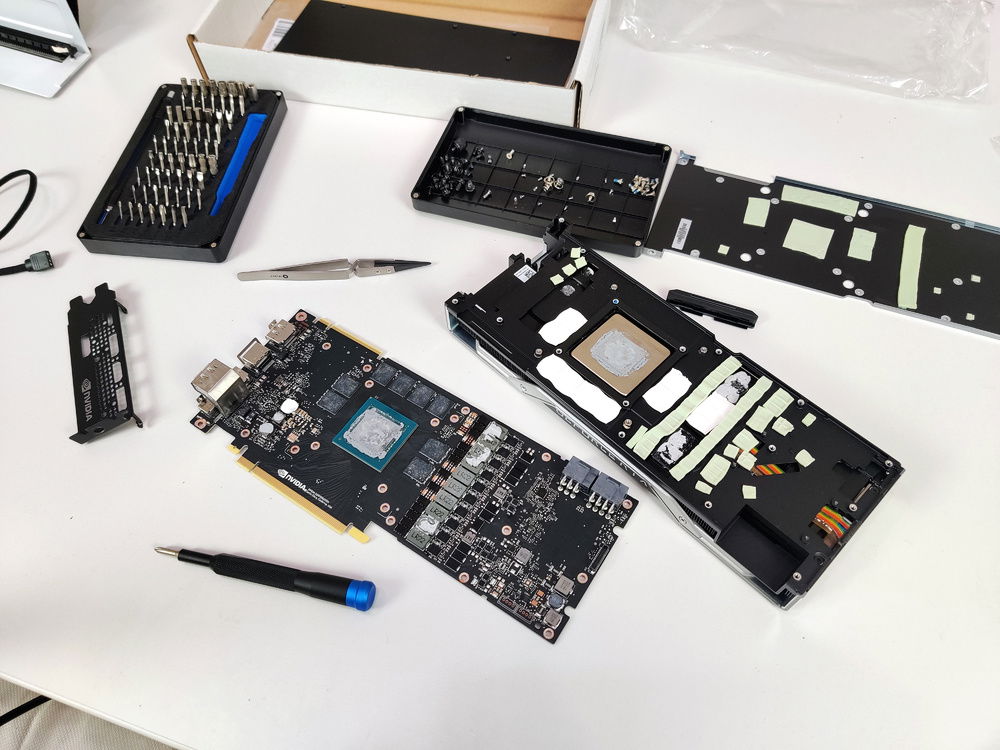
Steve's video helped a lot with taking the whole thing apart.
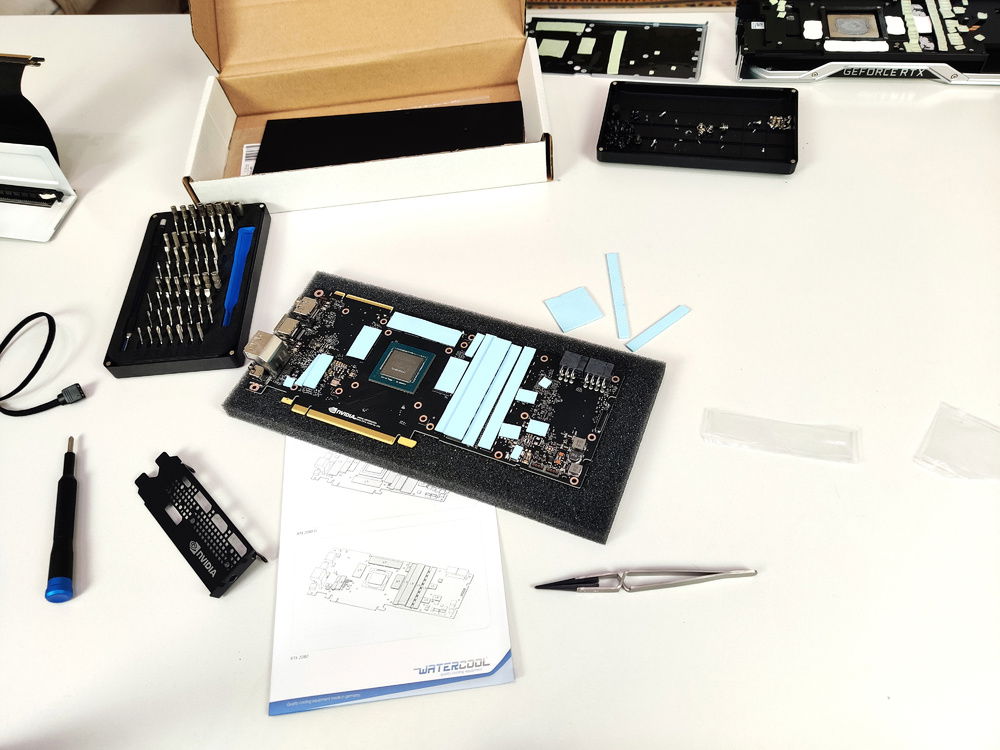
The most annoying part about the whole process was putting the thermal pads on and peeling the plastic off. For anyone attempting this - take the flat plastic off (it's a lot thicker) and put that side of the thermal pad on the GPU. The textured plastic is a lot thinner and easier to peel off. Otherwise, you will need to hold the pads down with something and peel the thicker plastic off. This can result in the thermal pads getting damaged and/or stretched and deformed.
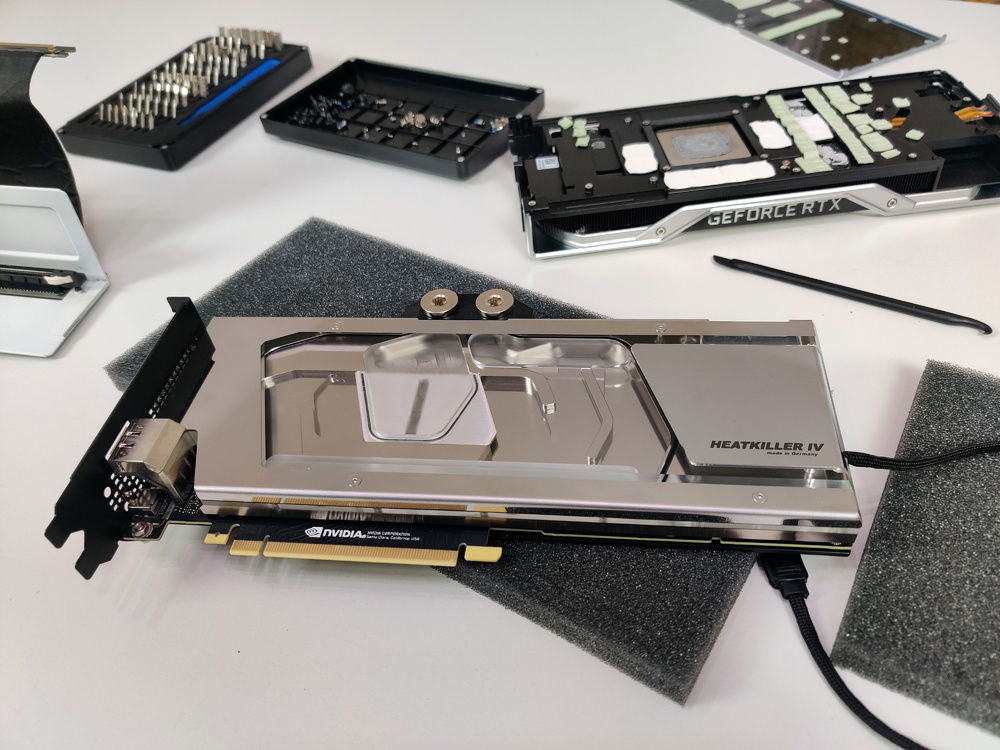
The heatkiller GPU block looks amazing TBH.
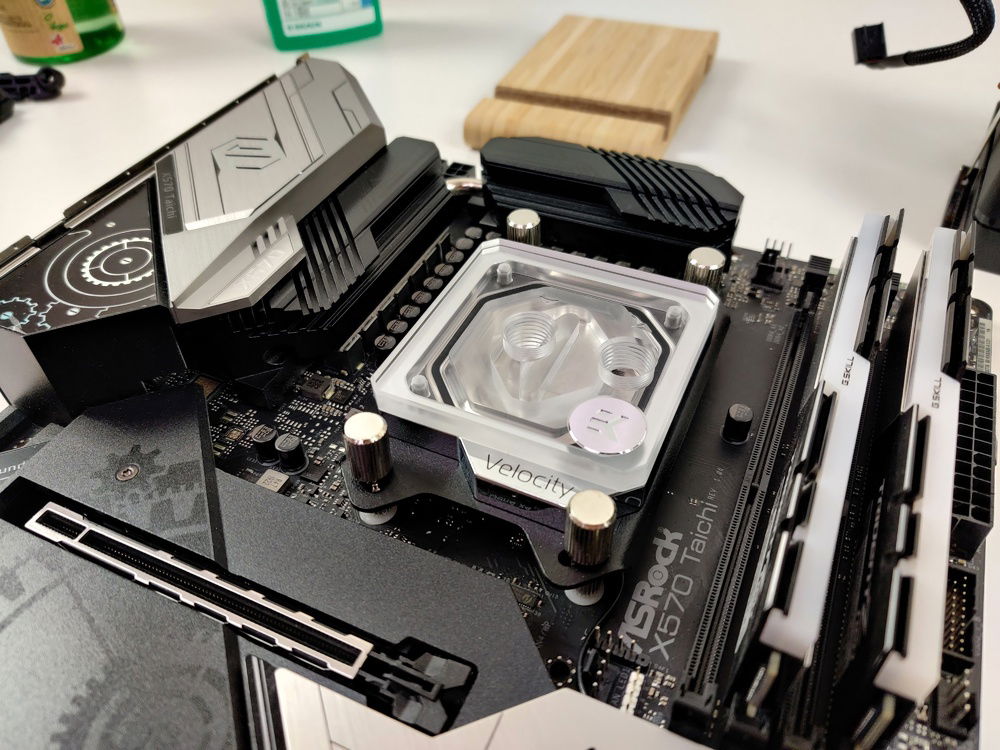
The CPU block was really, REALLY easy to install.
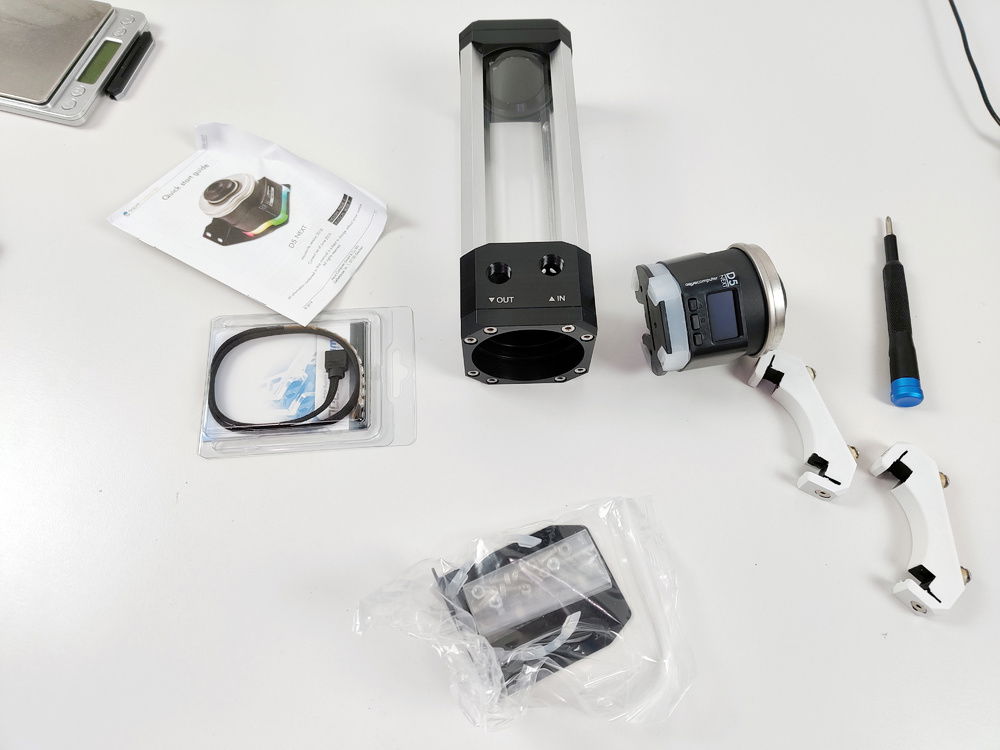
Installing the pump in the res was quite easy too.
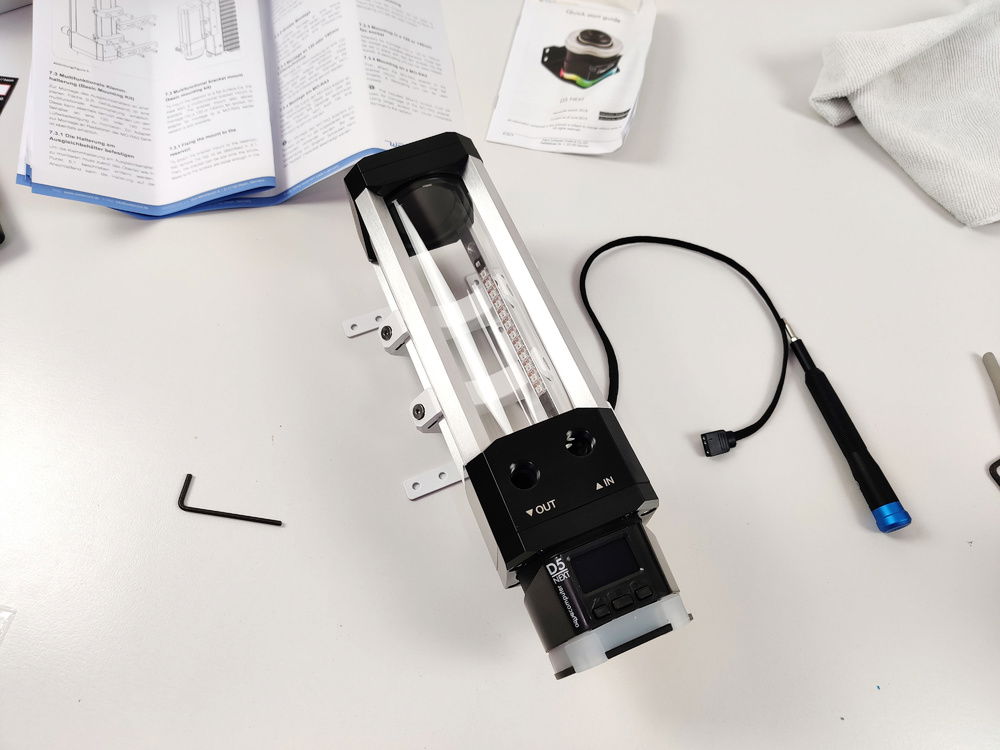
I did have to uninstall and reinstall it a couuple of times becuase I forgot to put the LED strip in...
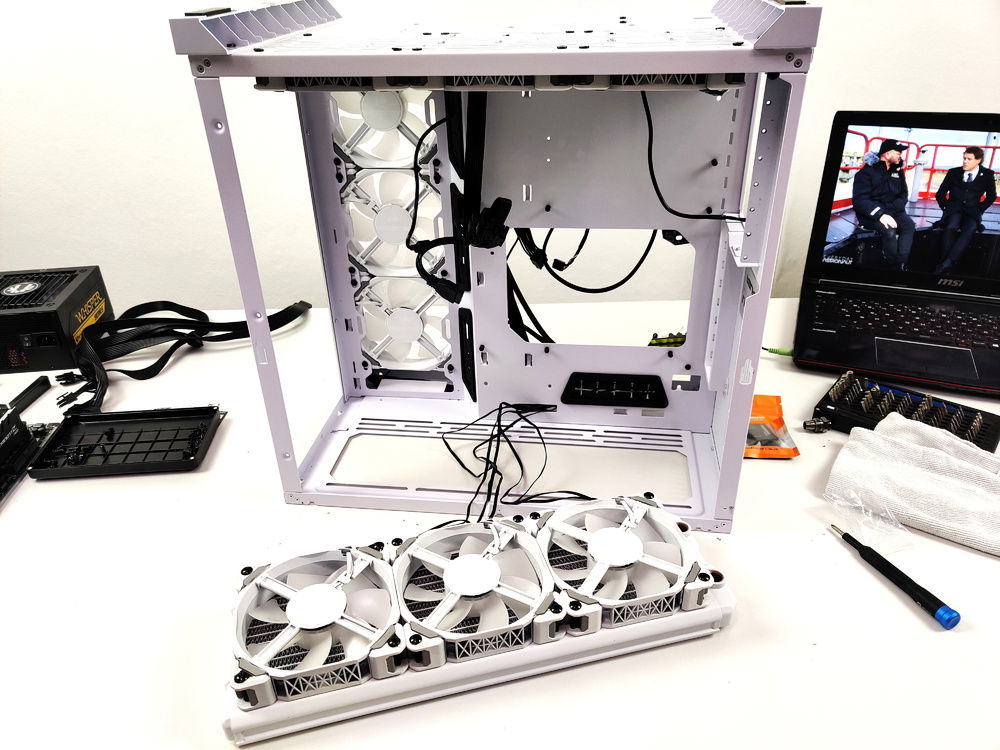
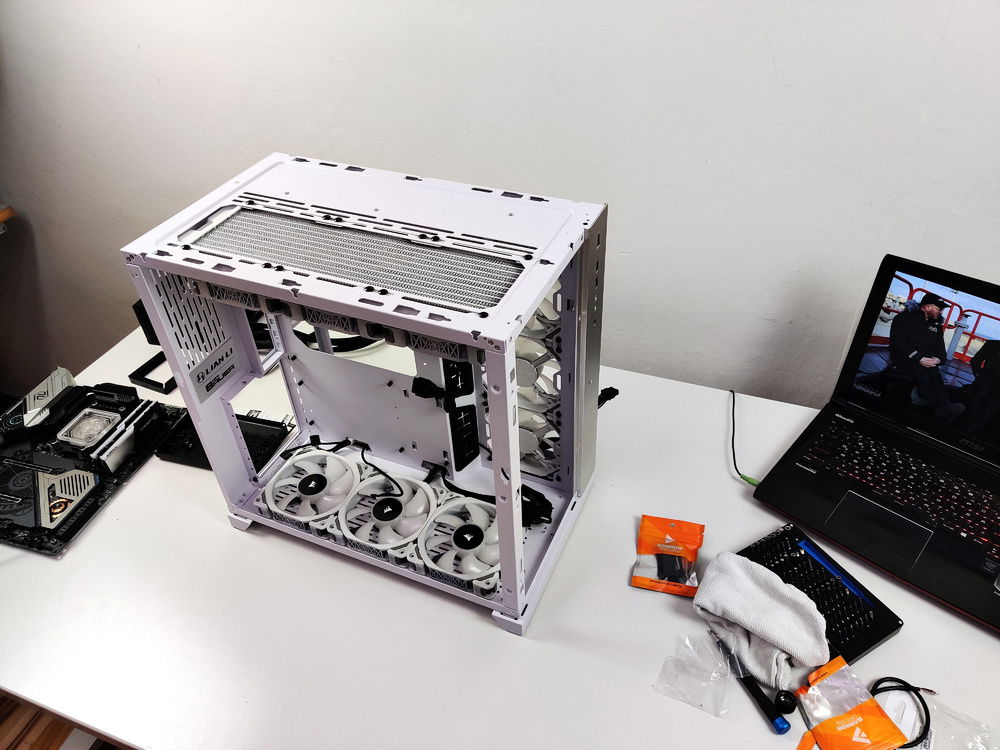
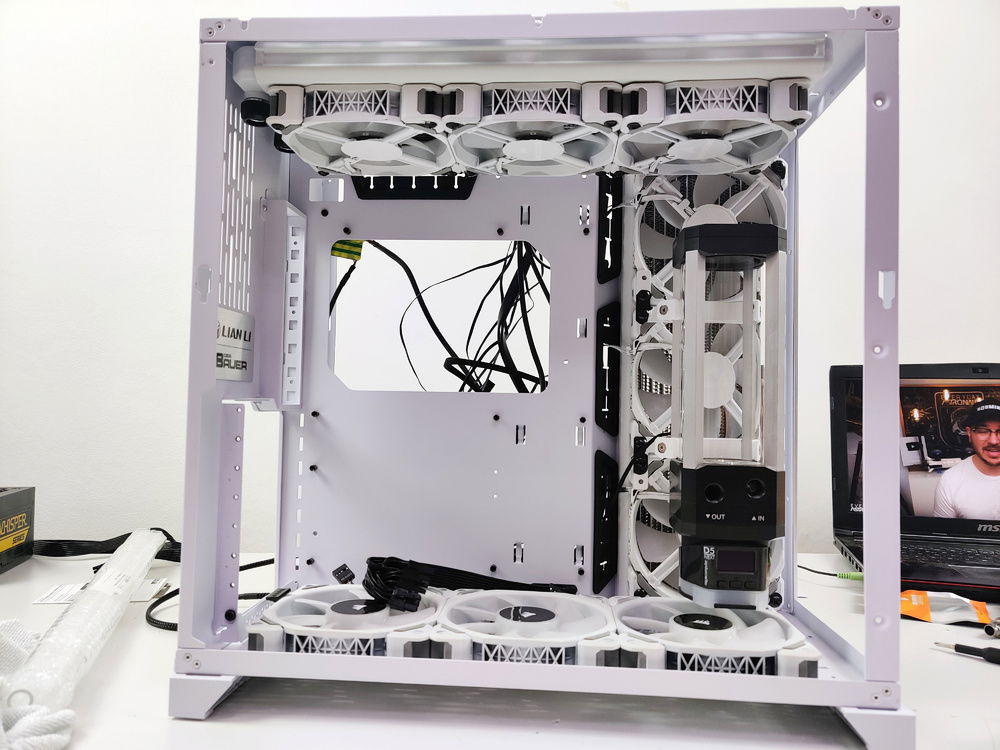
Mounted the reserviour and pump too.
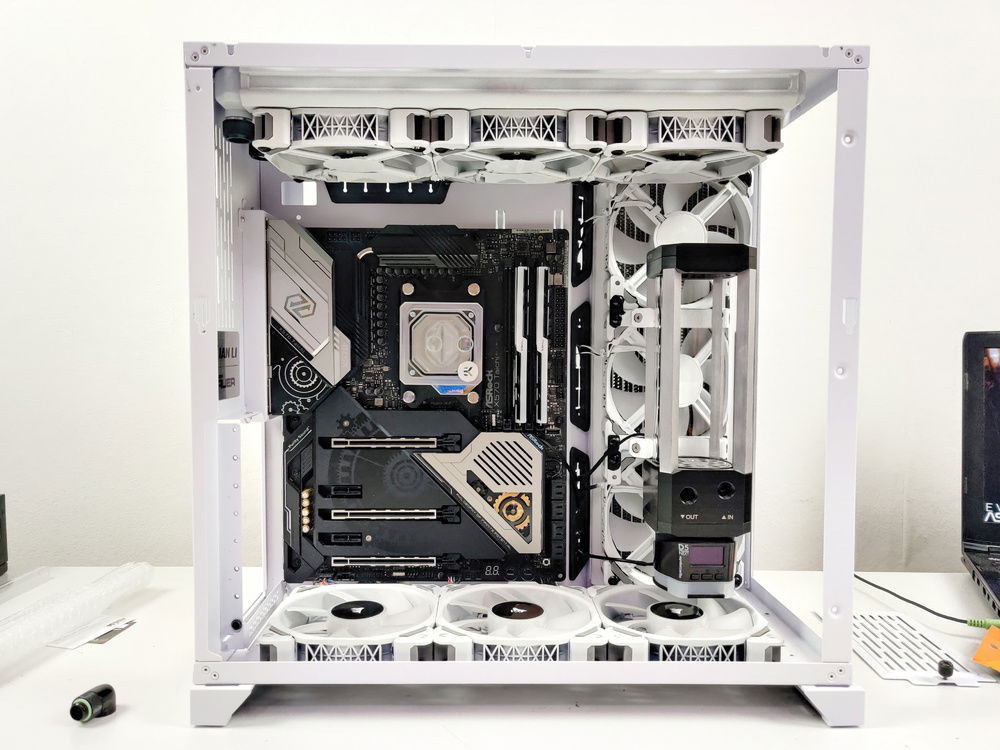
And then checked if the MoBo fit properly
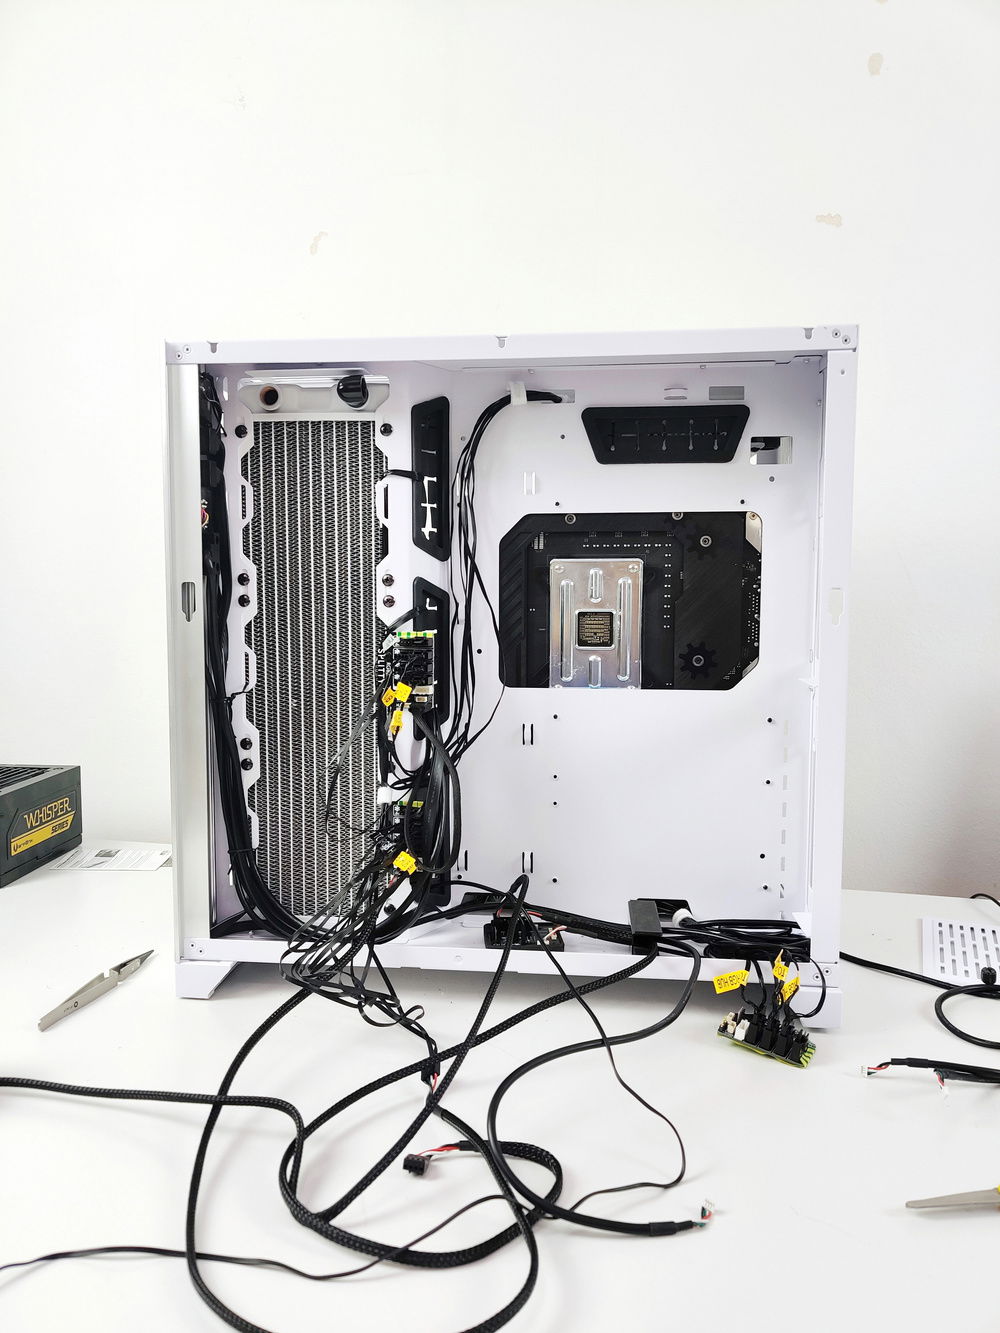
I thought the cables at the back were a pain at this stage. Boy did it get worse...
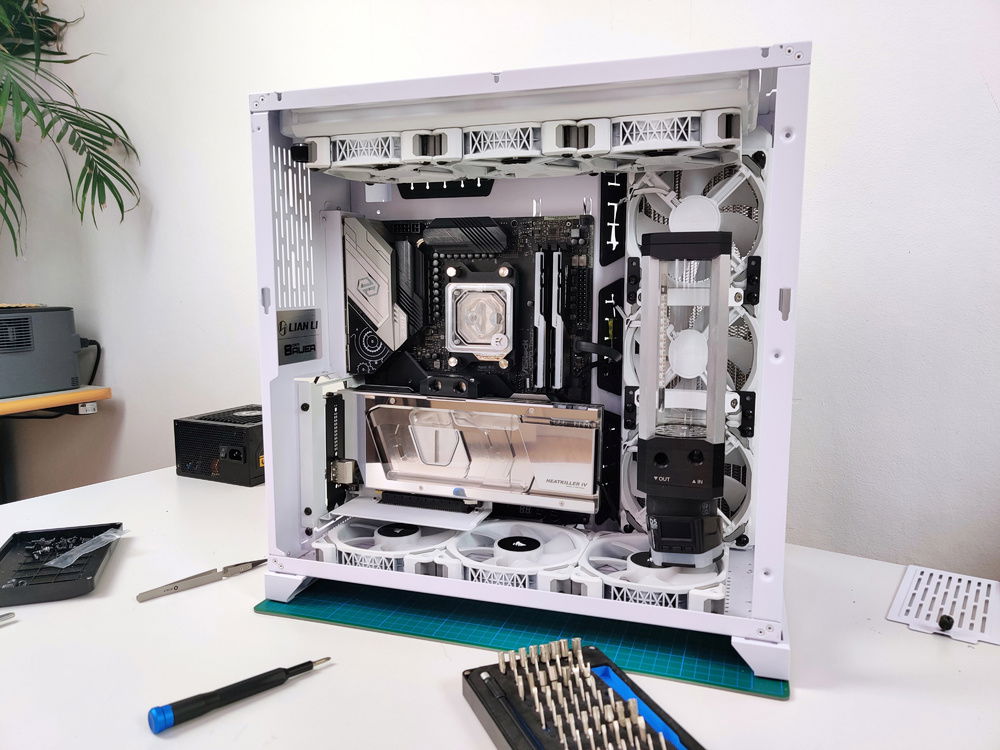
Installed the GPU and things finally started coming together. For the moment.
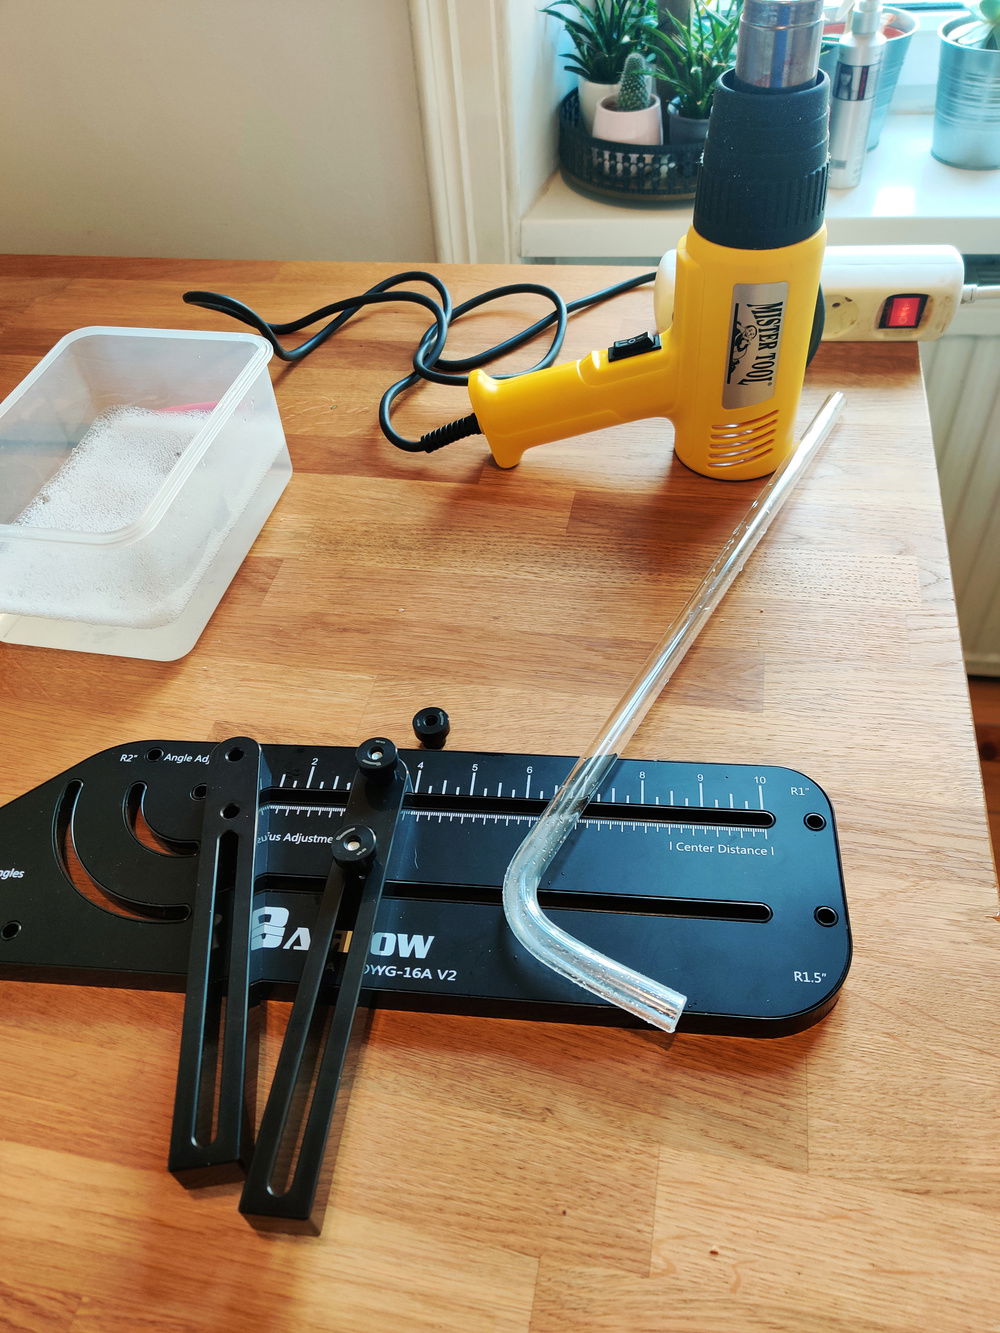
26th October 2020: I decided to try using the Barrow tube bending tool to do my runs.
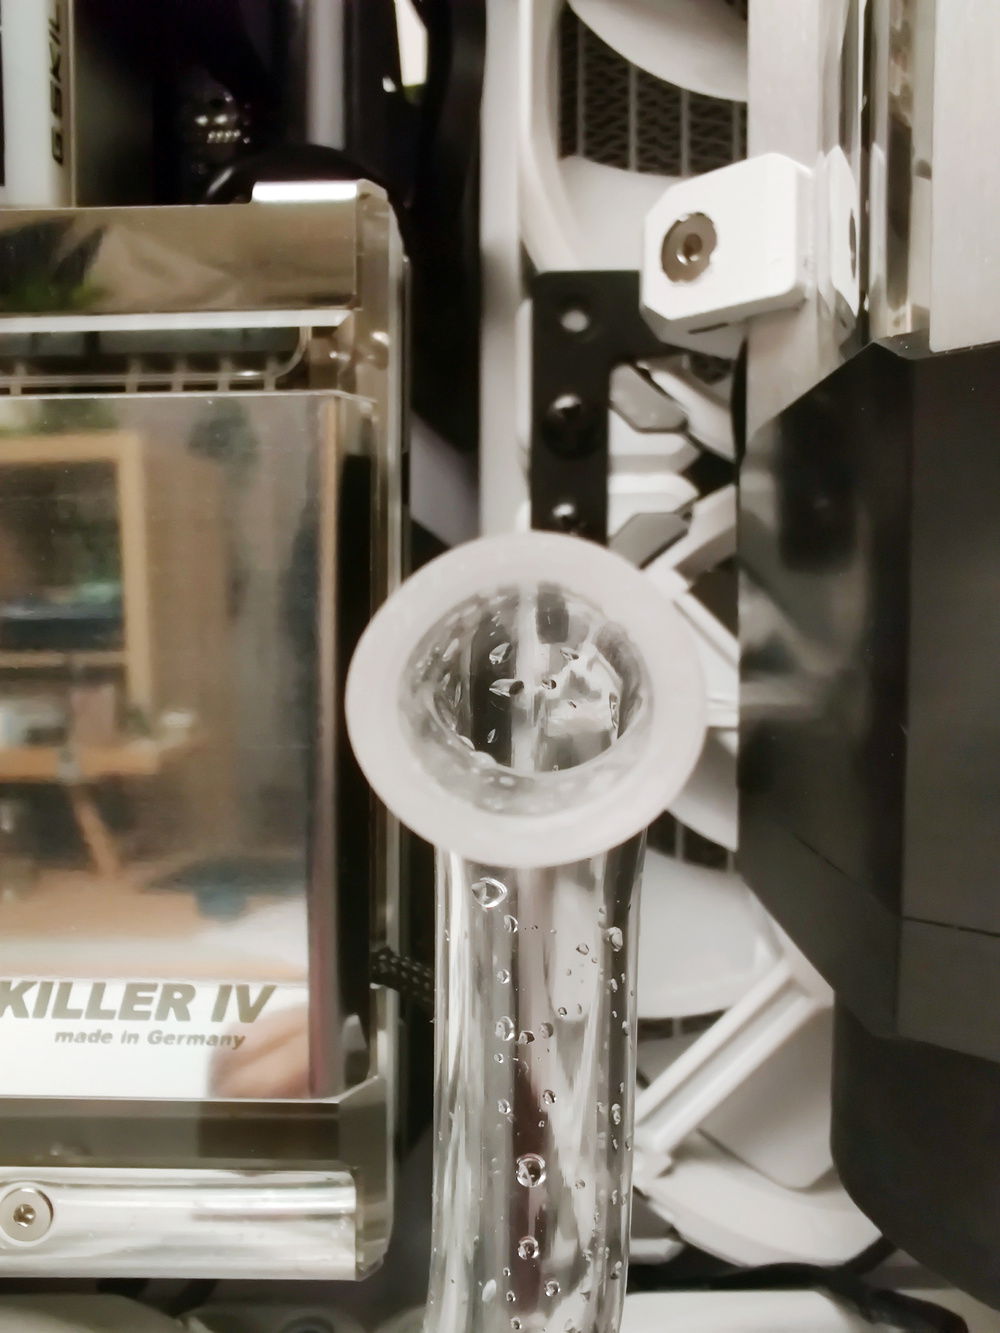
So much so, that it was impossible to get the fitting to go over it.
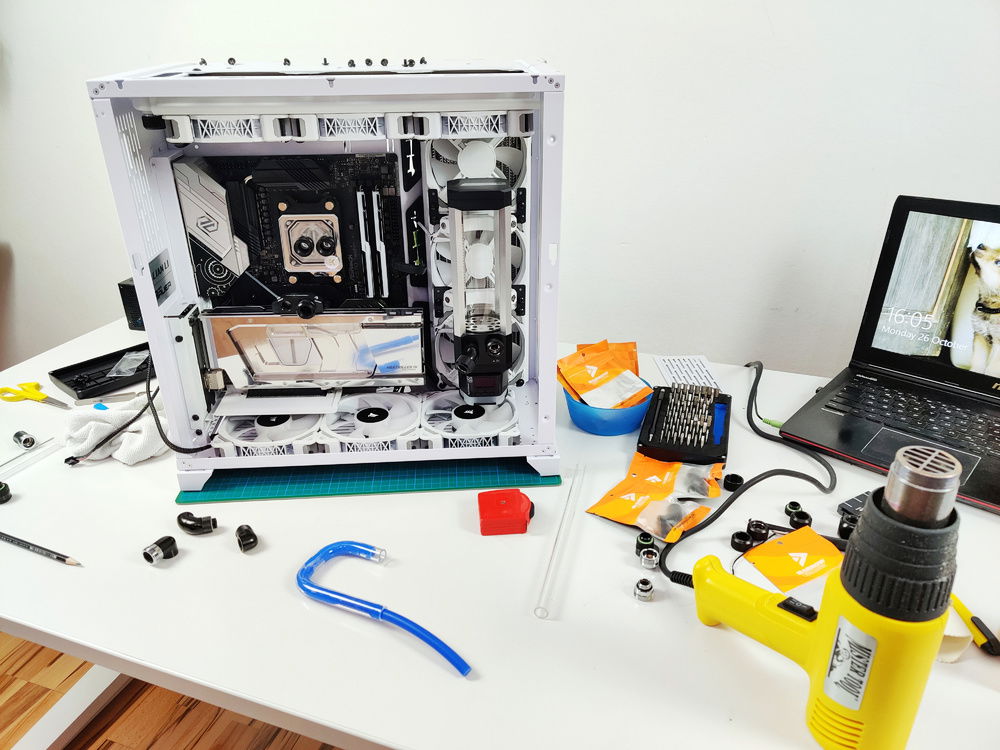
About 15 minutes in, it turned out that doing them freehand would be a TON easier.
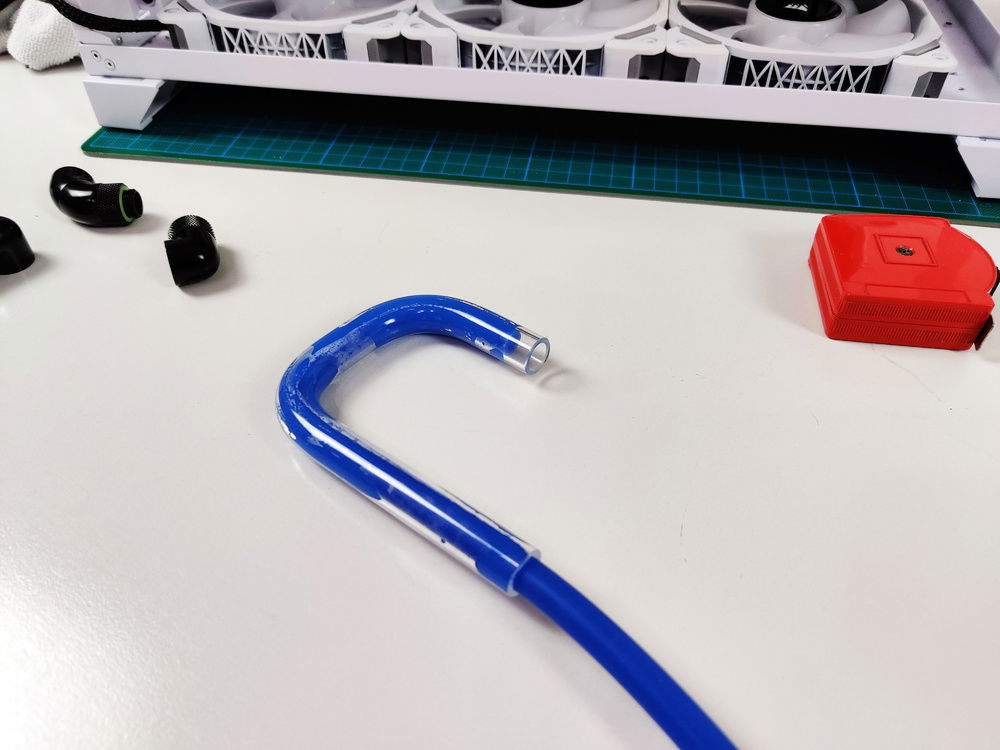
Getting the two consecutive 90° bends correct was not as easy as I had expected it to be.
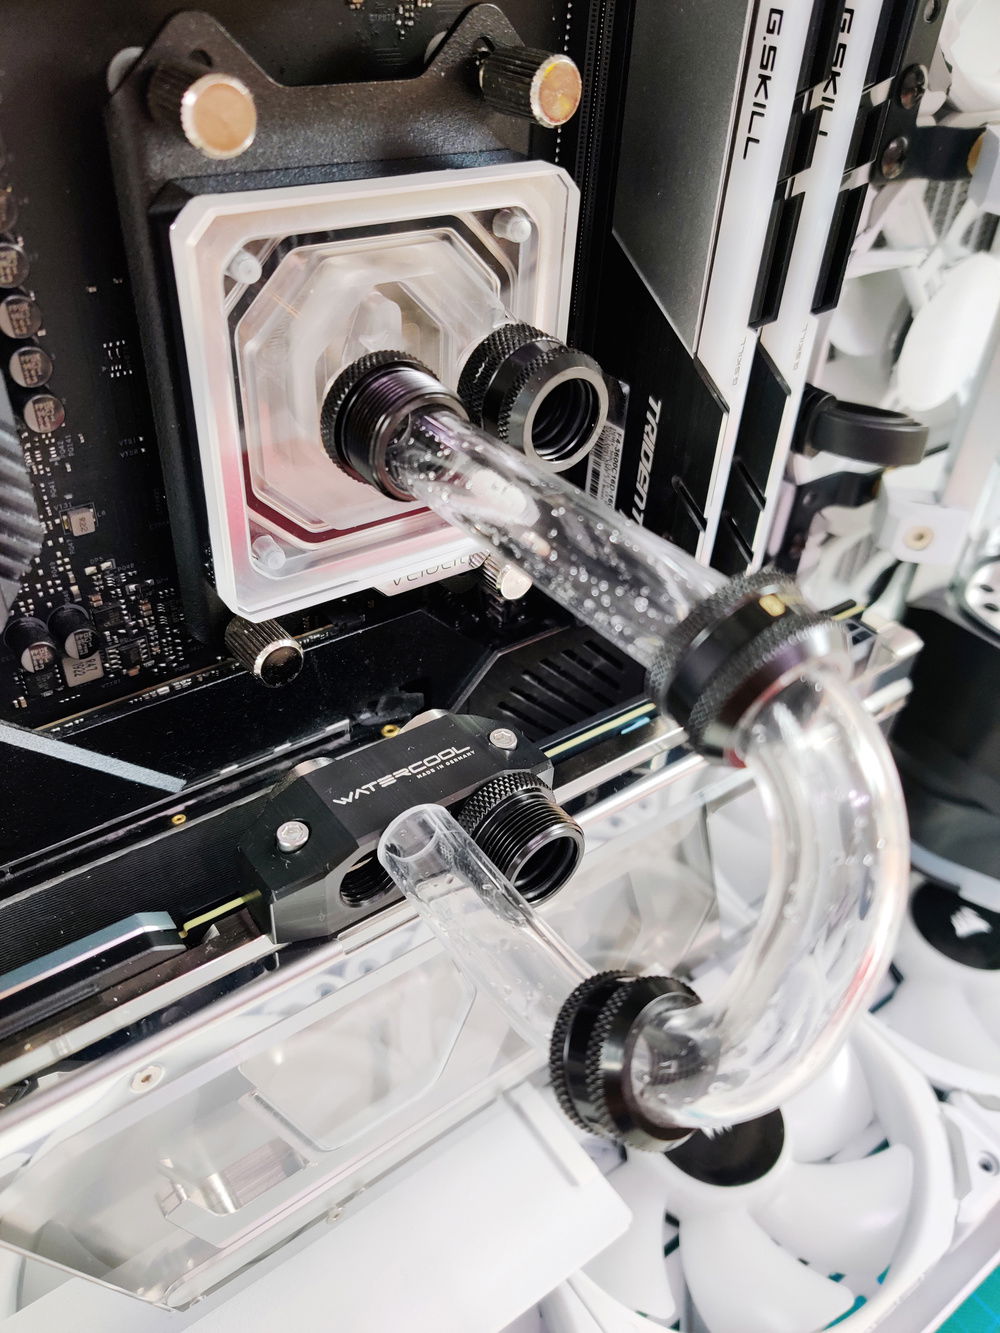
Despite trying to be as accurate as I could, the bends were still off. Took me loads of unbending and rebending to get this just right
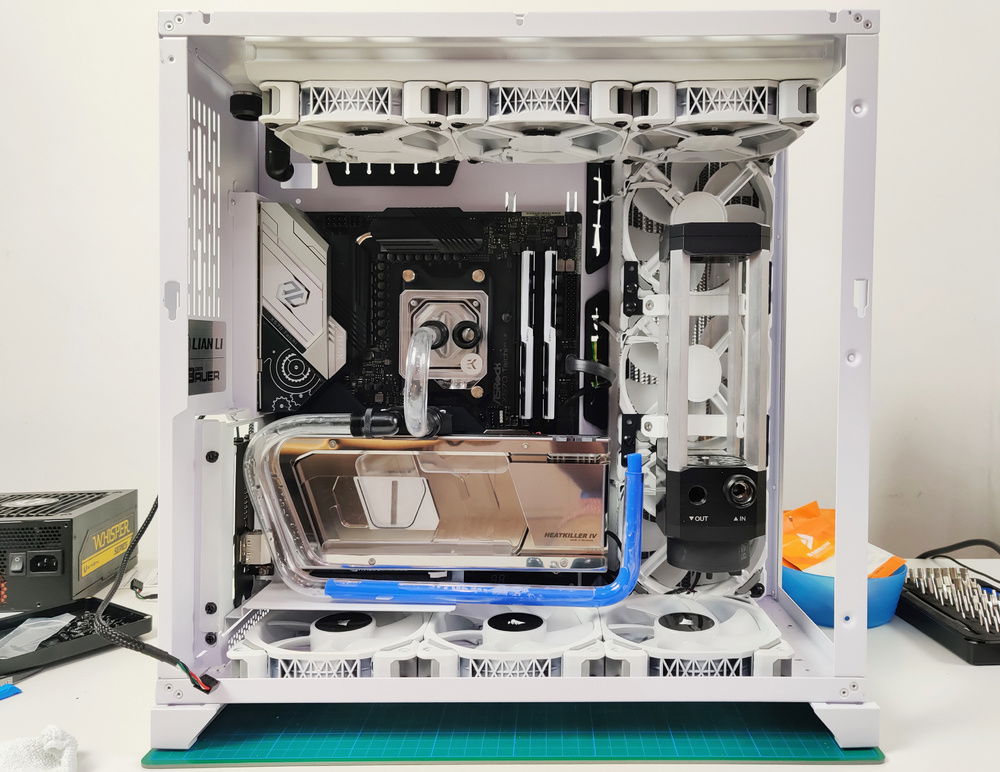
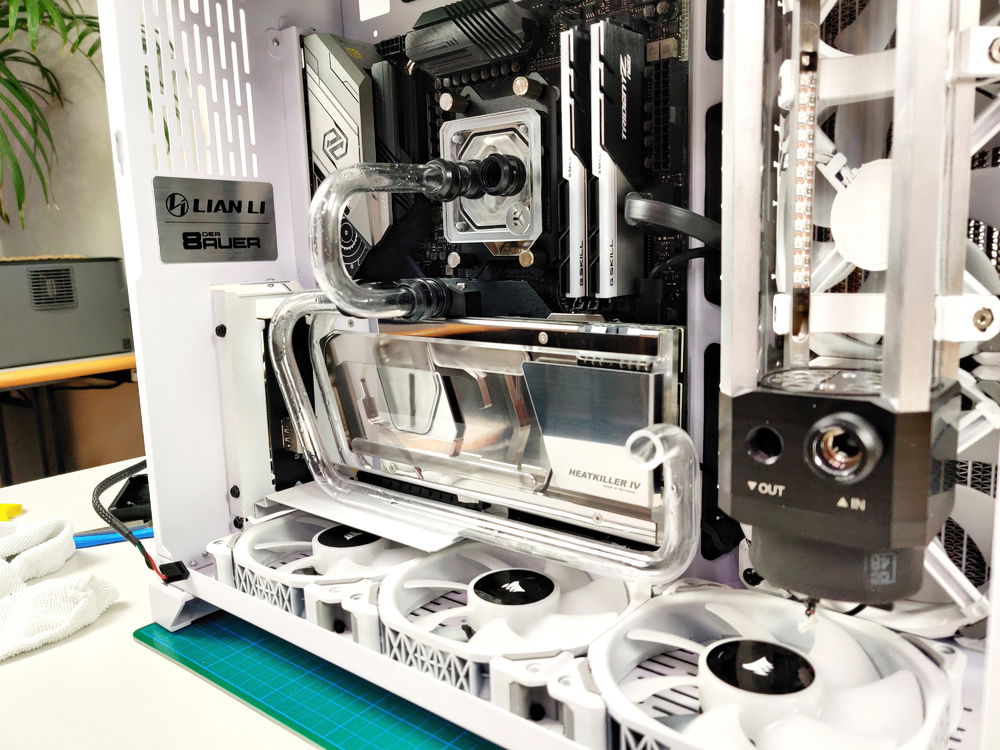
The next challenge was the GPU run. Again, loads of unbending and rebending to get that one just right.
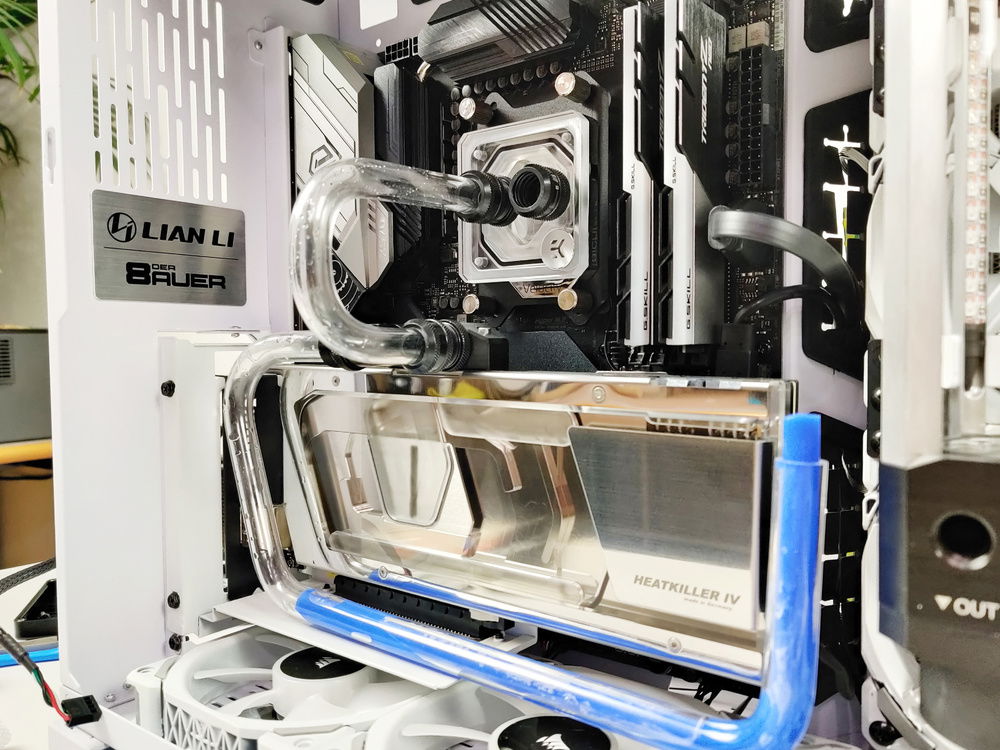
All the time and effort I put into it definitely paid off though. That run looks sick.
I wanted to do a couple of complex bends to avoid using too many fittings, but I ran out of tube.
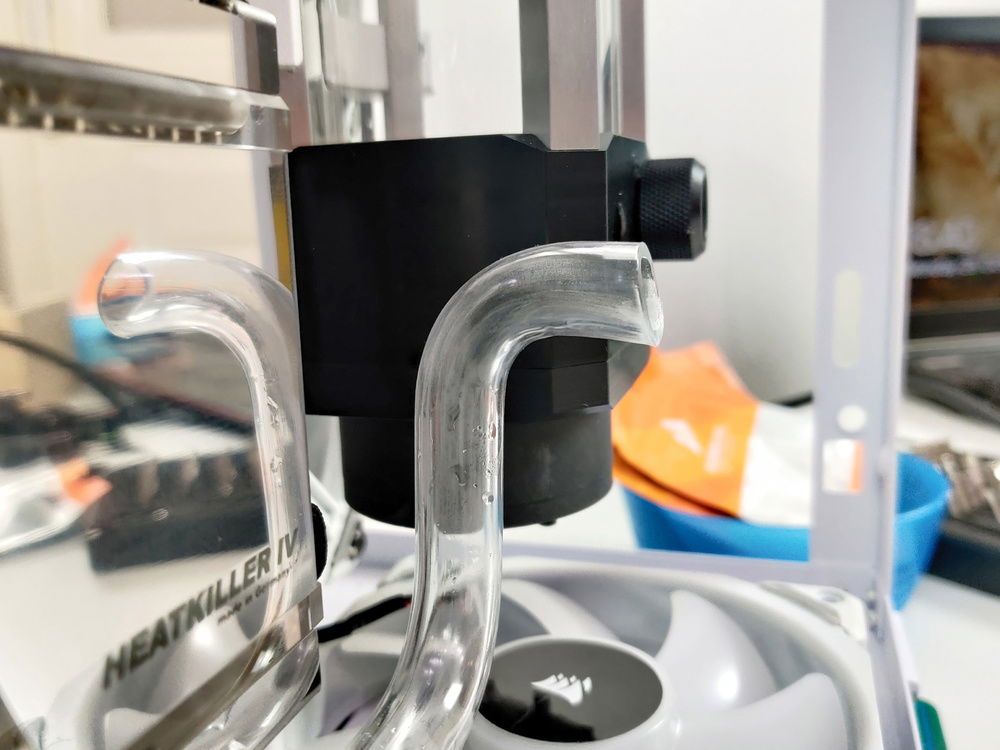
And in trying to get the last bit to bend perfectly, I ended up deforming it big time.
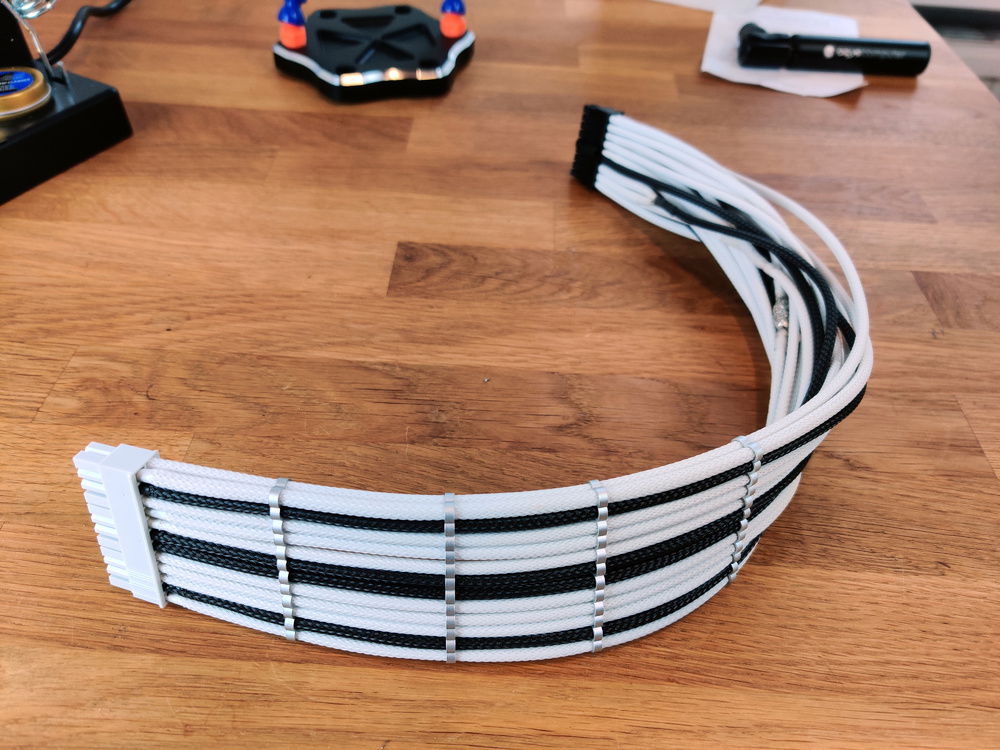
The wire lengths were not at all perfect. I guess I'm going to have to be a lot more careful with the next system I build. The MoBo cable definitely tested my patience.
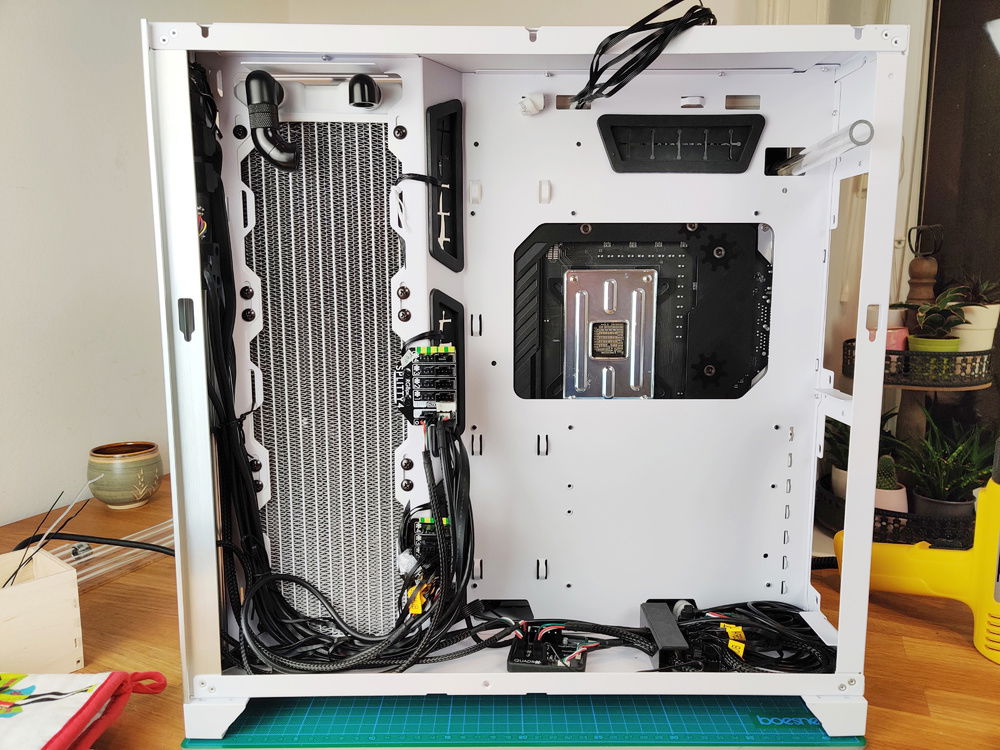
Decided to take a break with the tubing and get the cables in order.
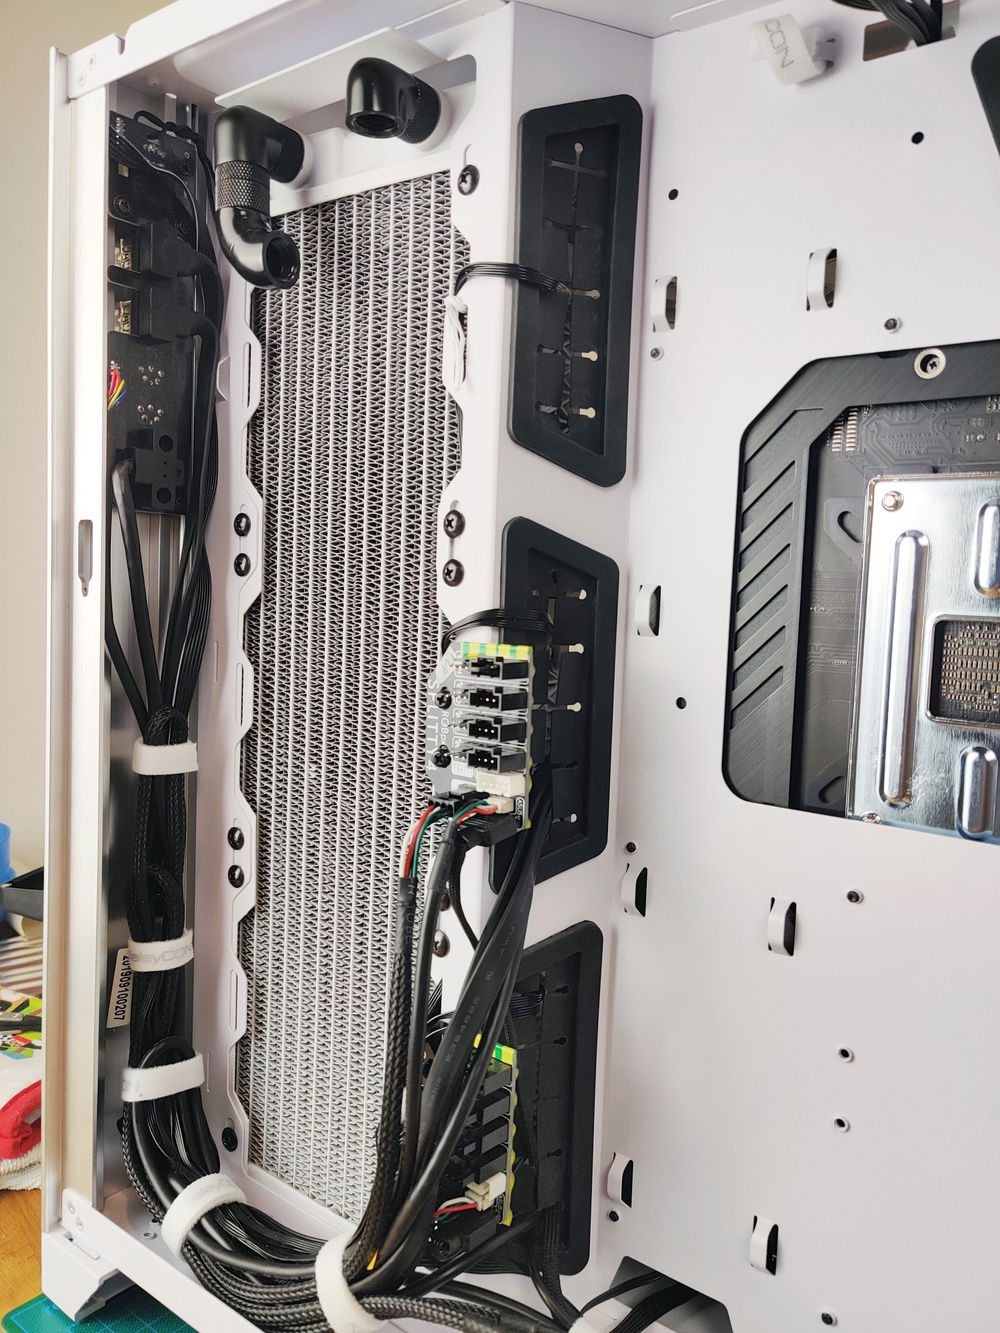
I say it again, velcro cable ties are amazing.
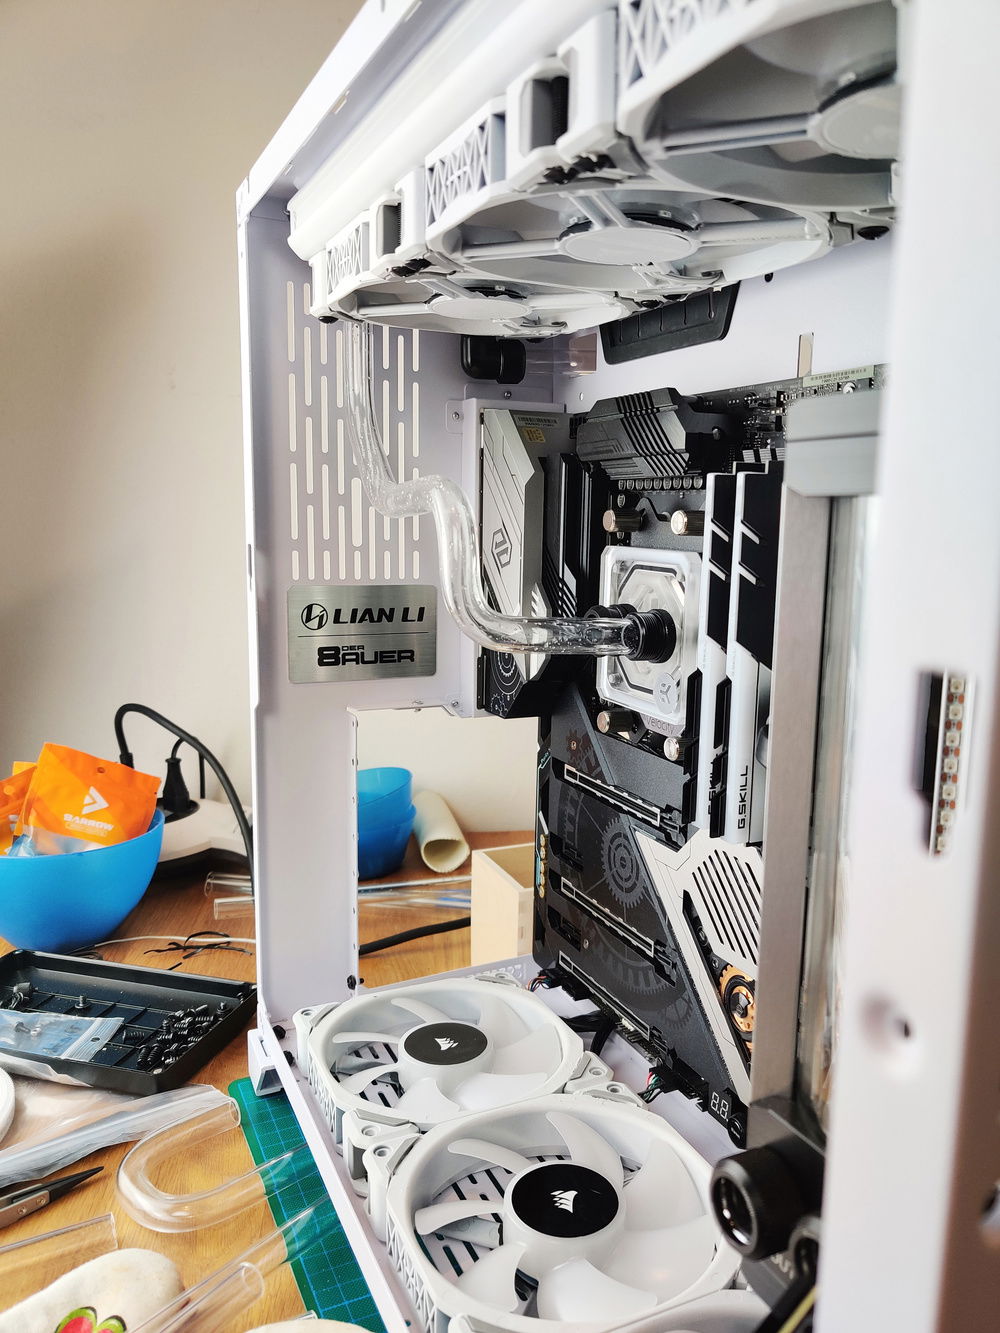
At least this run didn't need TOO much adjustment. Only took me 2½ hours.
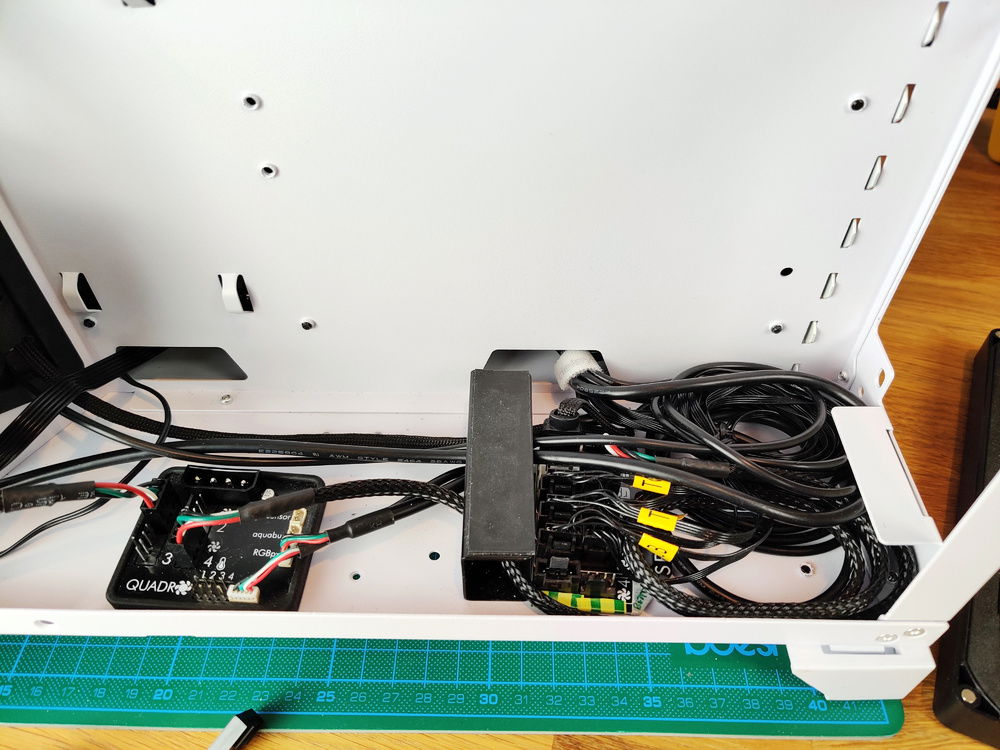
27th October 2020: Decided to take a break from tubing and focus on putting some of the electronic components back in.
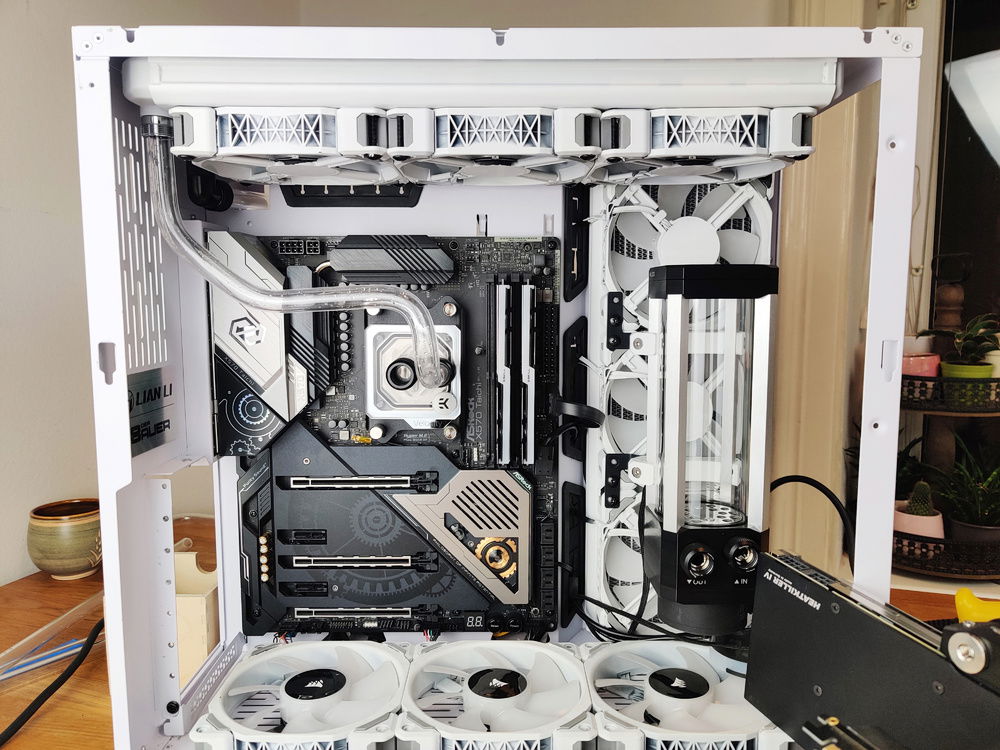
30th October 2020: Remember how I had installed the GPU already? Yeah that was a bad idea. Turns out that it's really hard to do the CPU to Radiator run with the GPU in the way. Oh well...
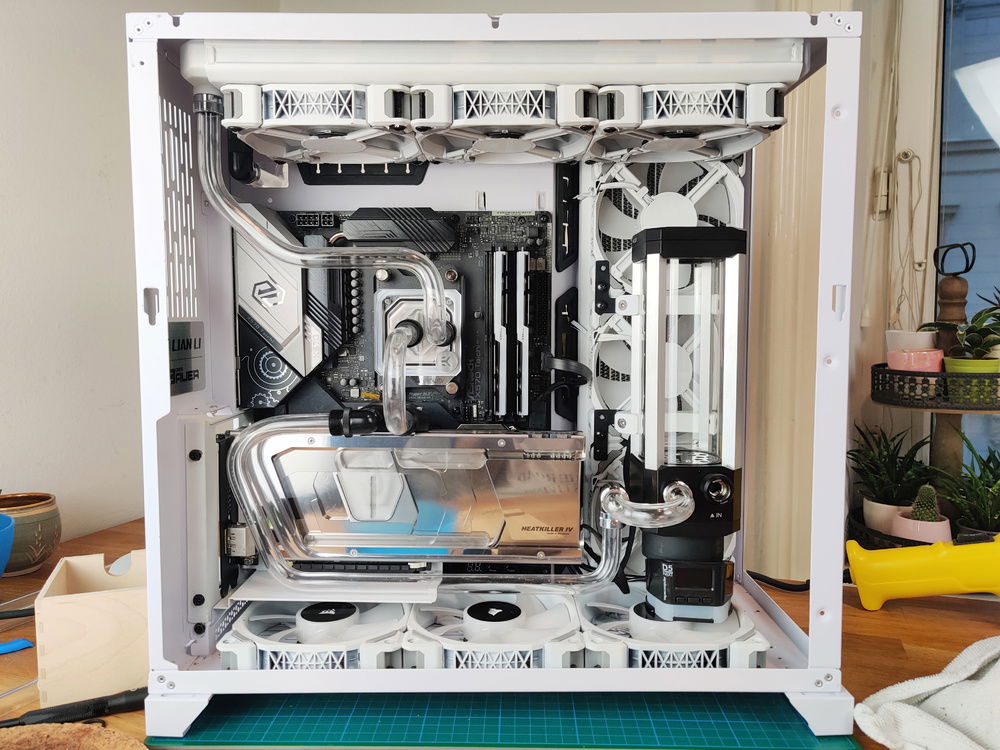
31st October 2020: I managed to get almost all the runs done. Or so I though.
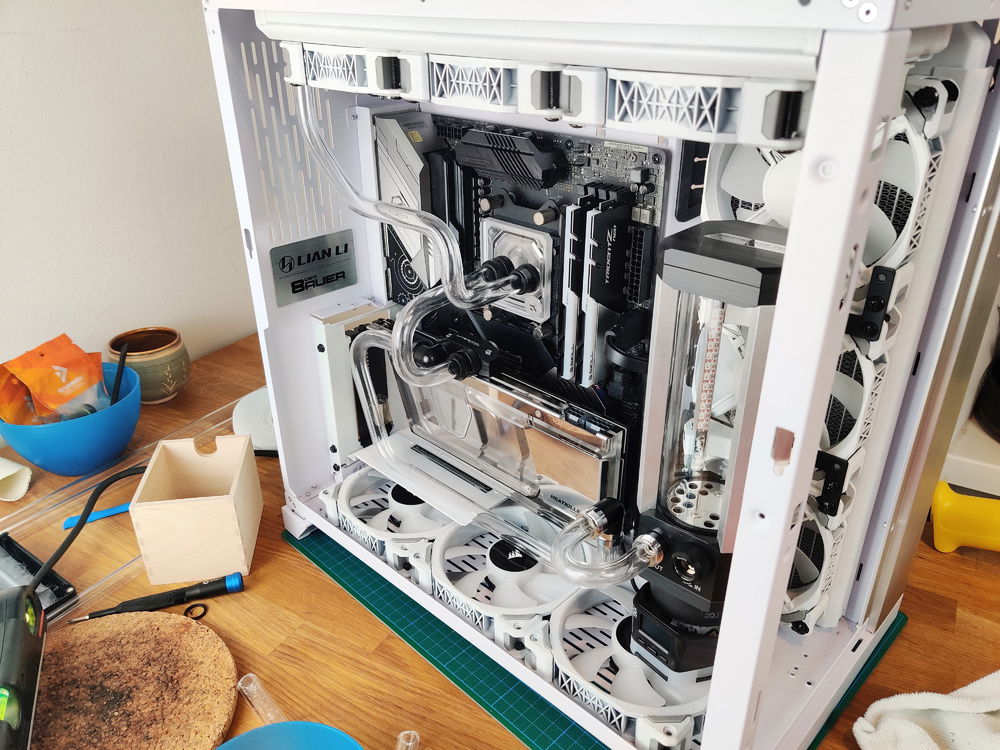
I promptly realised that there was no way to connect the radiator back to the pump through the cable management slats. Welp... Time to take the whole damn thing apart...
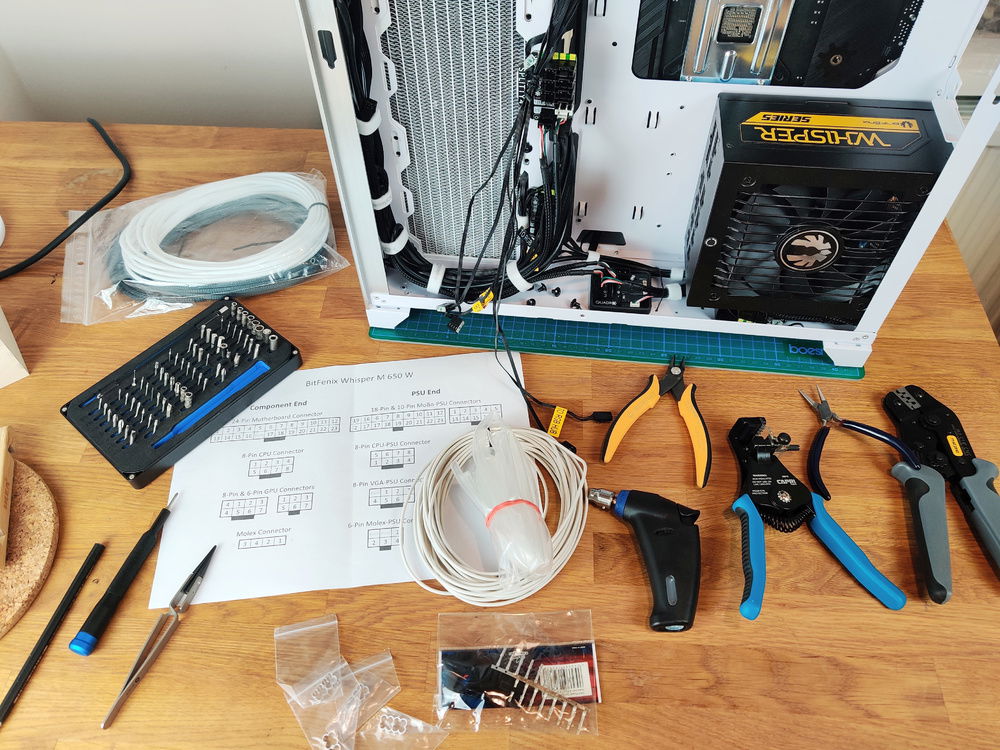
After getting frustrated with the tubing, I decided to start working on the cables for a bit, thinking it'd be less challenging. LOL
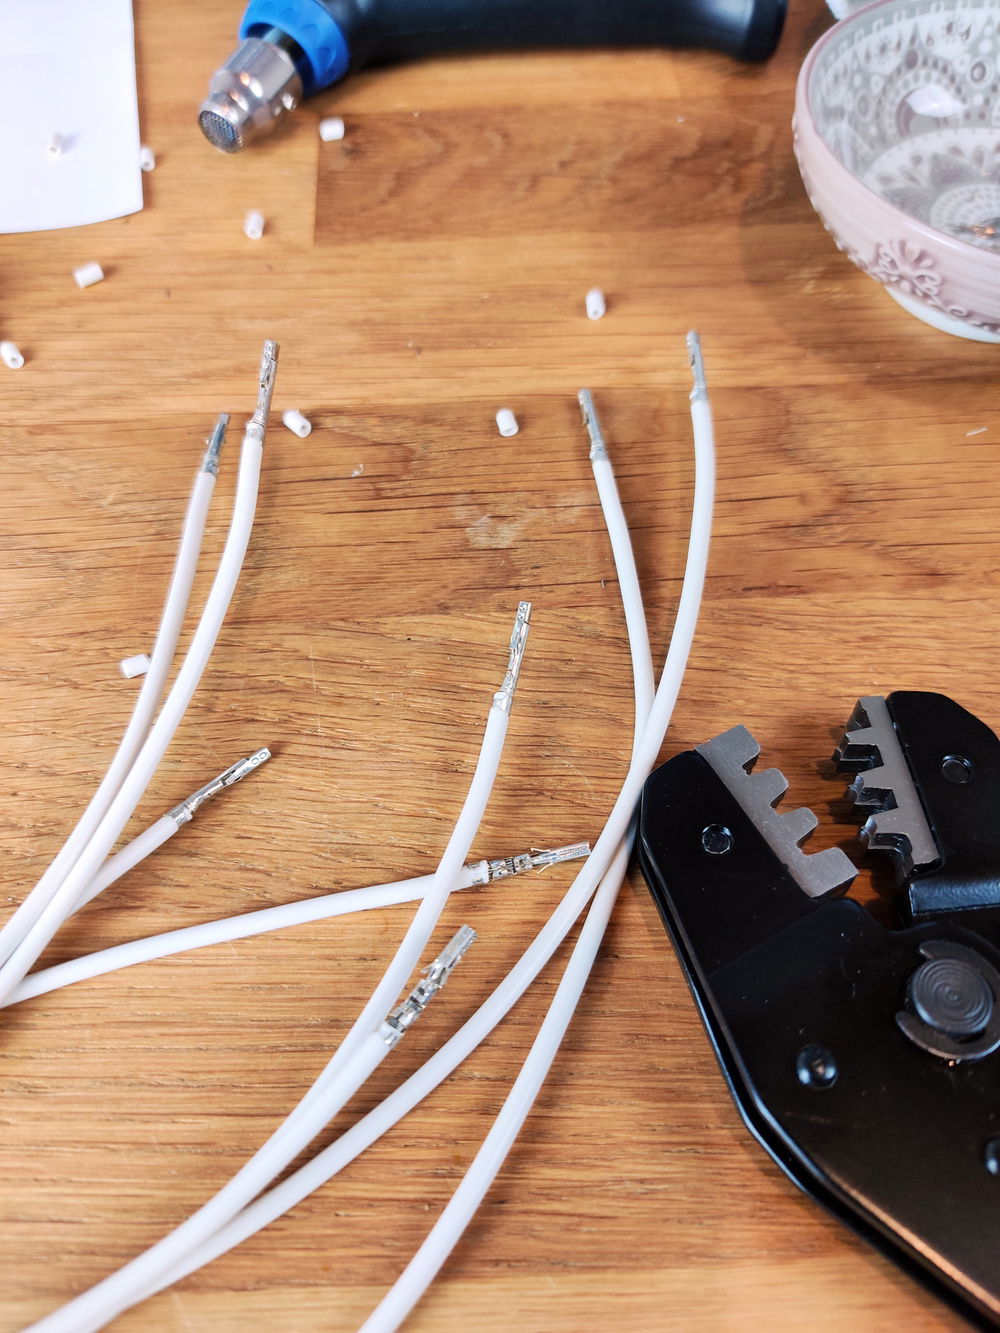
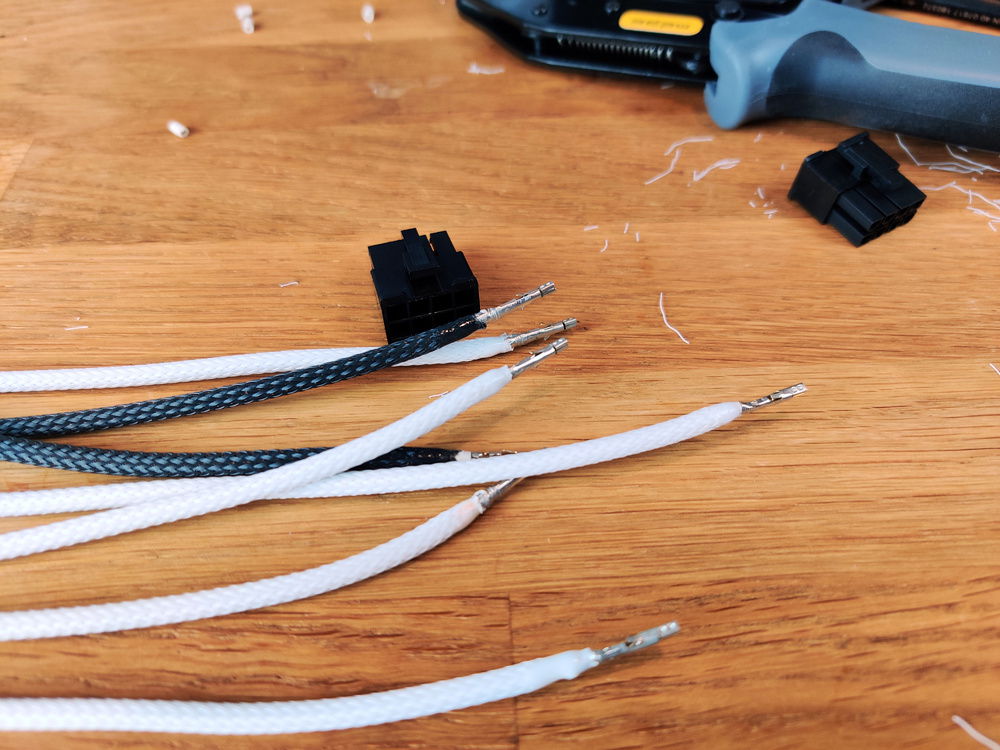
Stripping the wires and crimping pins on was pretty easy.
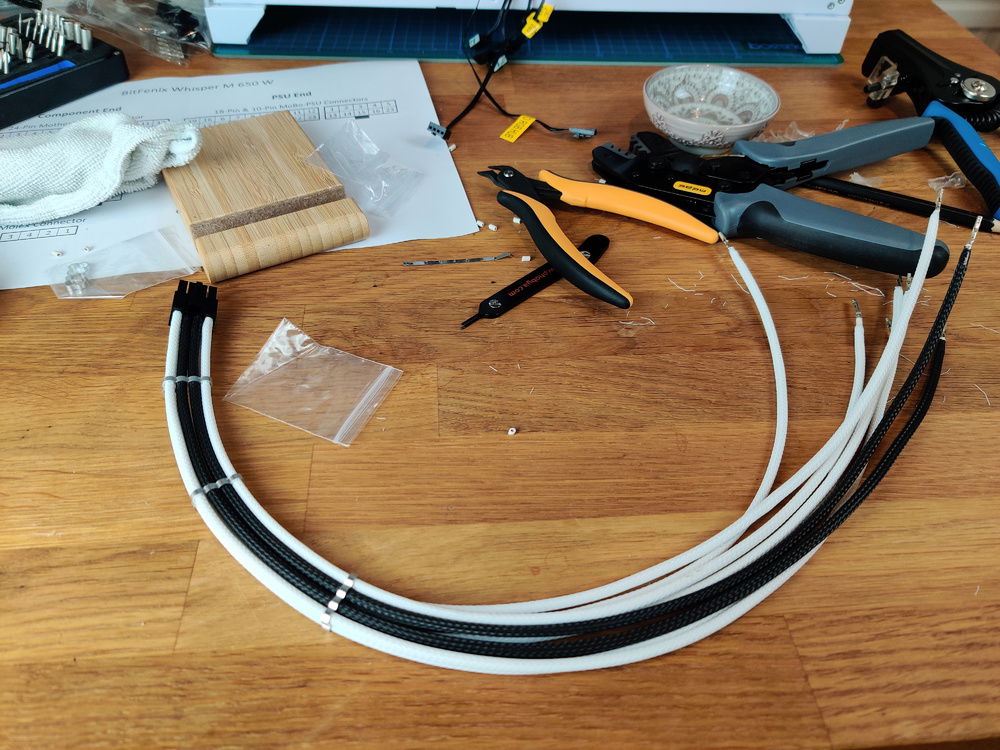
As was fixing one end of the sleeve.
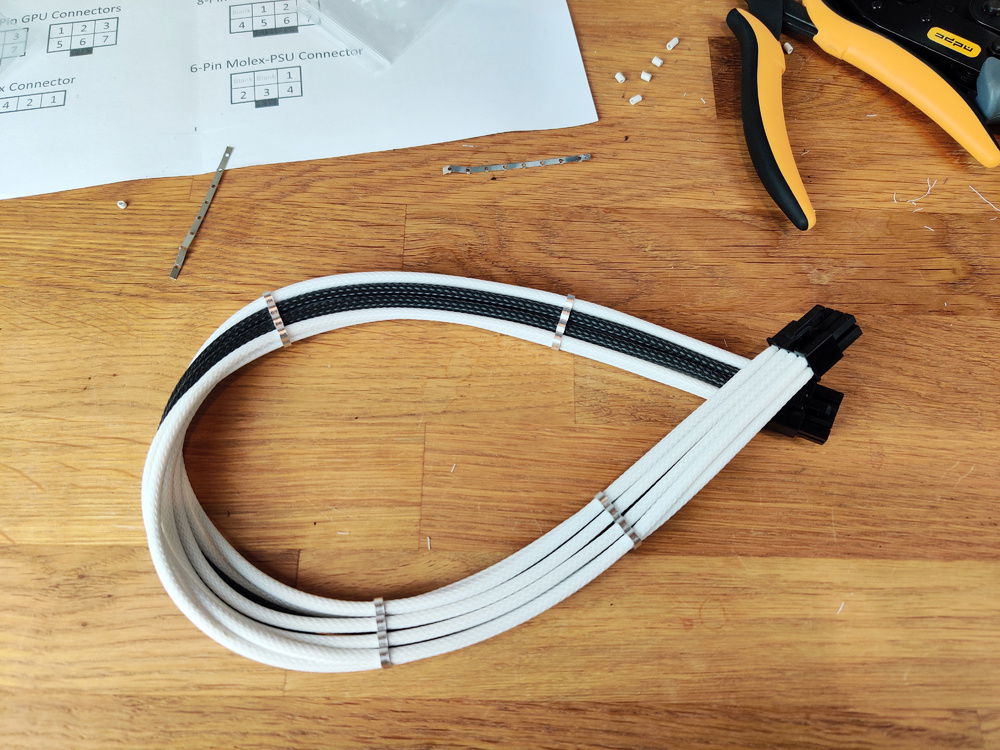
Pulling the sleeves taught was a completely different story though. Difficult, painful & not fun. But definitely was a satisfying outcome.
The first cable turned out really nicely.
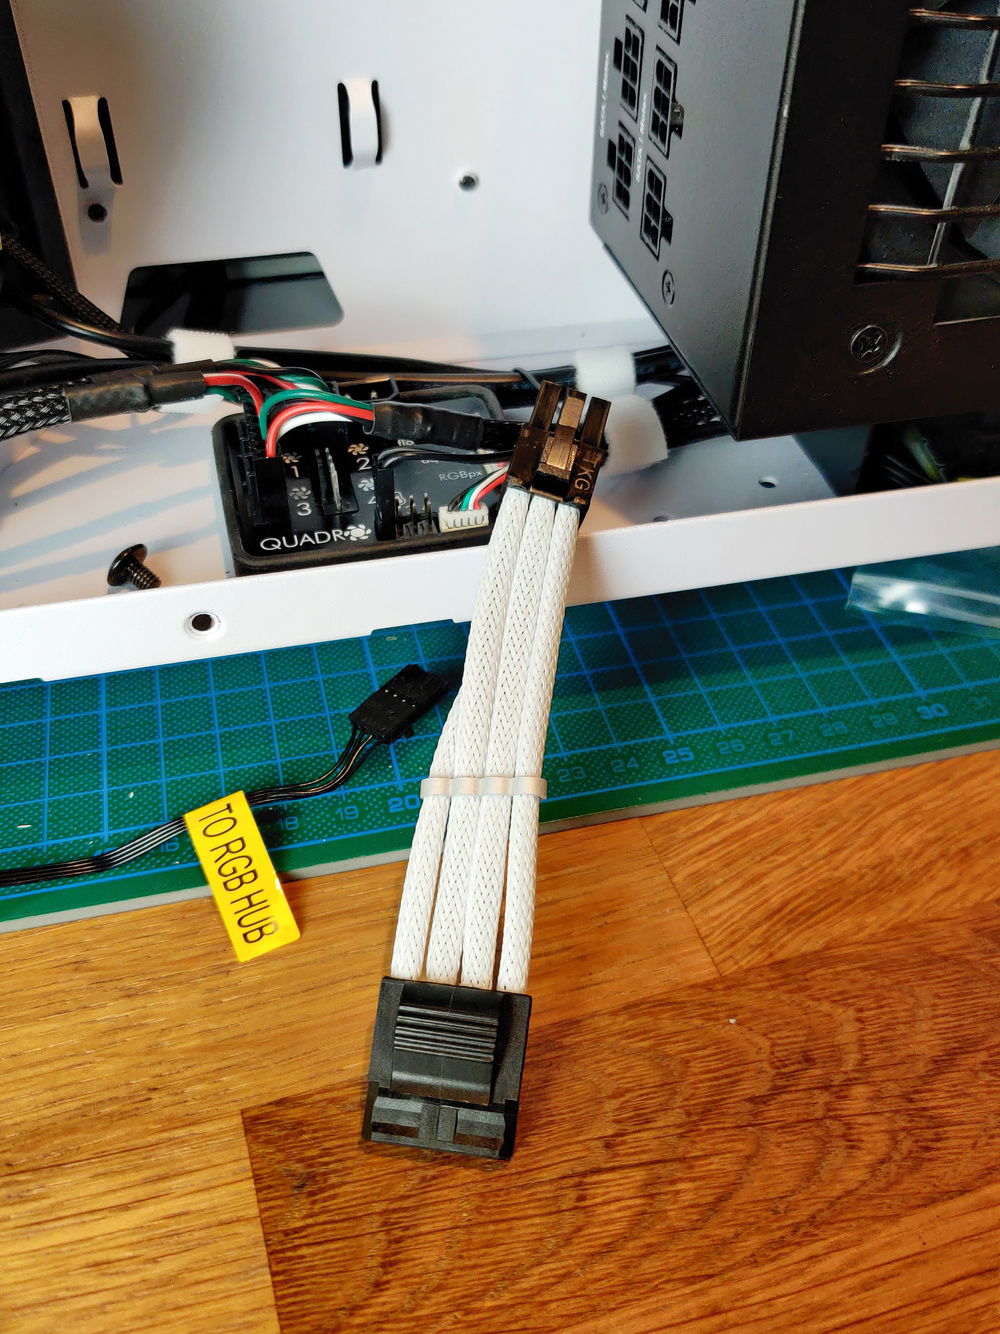
1st November 2020: The Molex power cable for the Quadro also turned out nicely. Or so I though. More on that later.
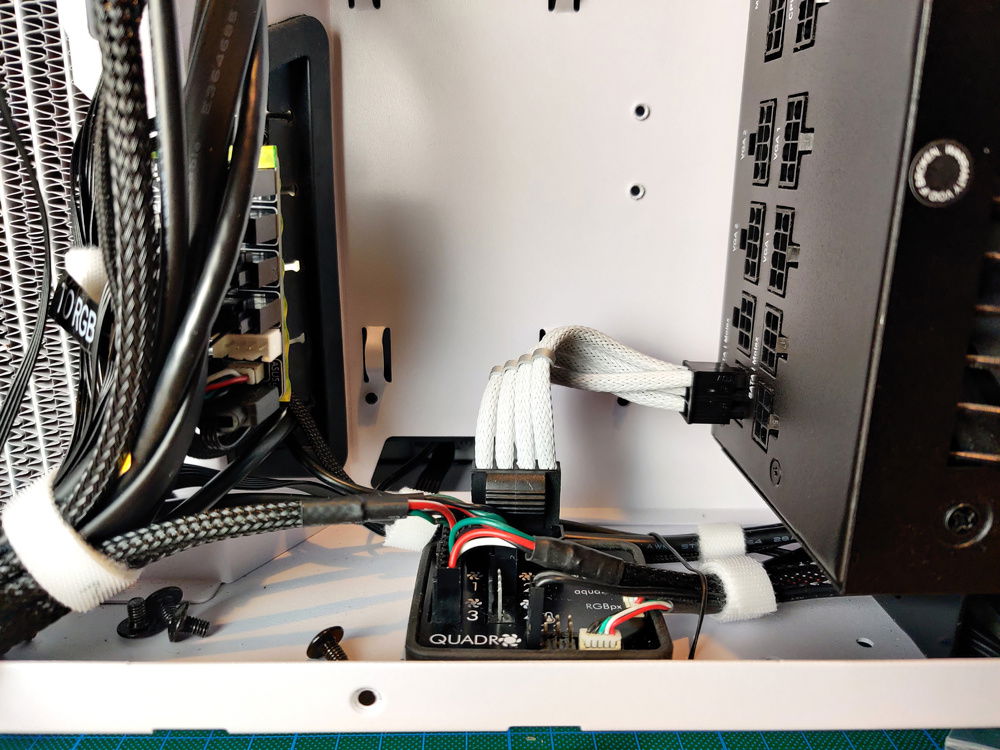
I've always hated Molex Power cables. But this one is deifinitely cute.
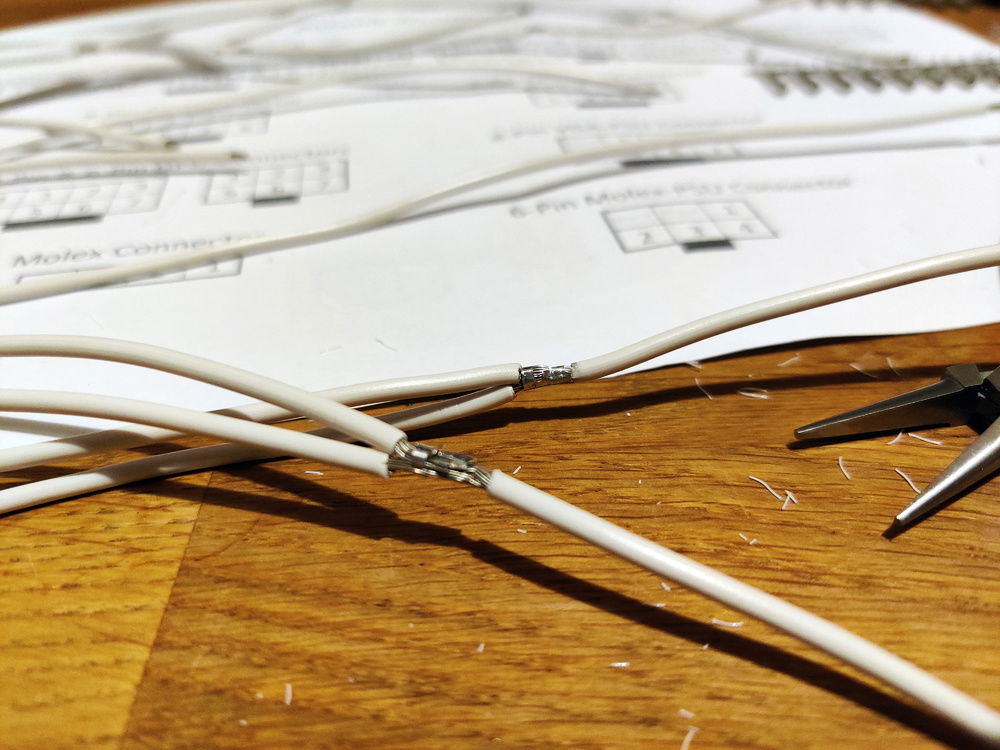
Finally, split cables. I was dreading having to do these, but there's no way around them I guess.
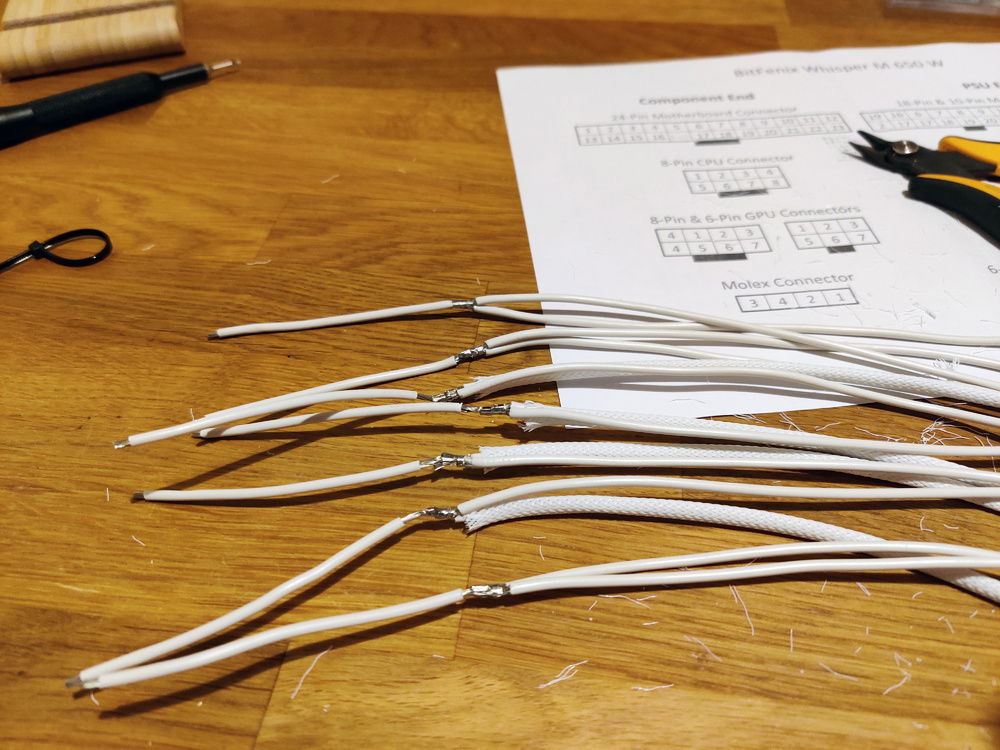
Putting all these together definitely took a lot of time. It was fiddly AF.
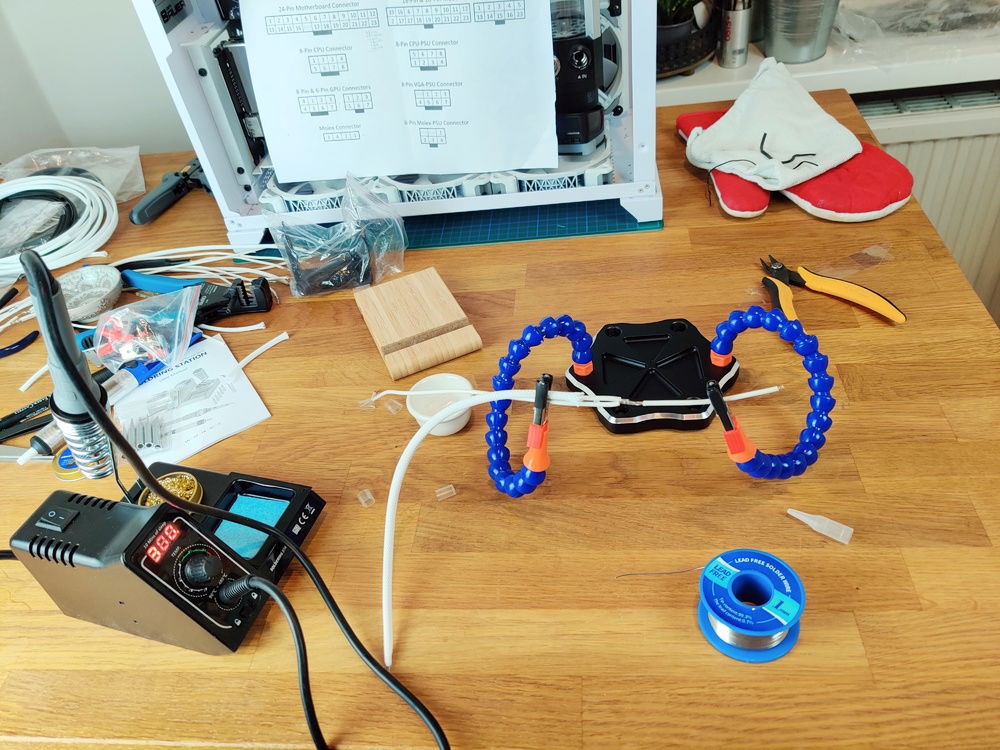
2nd November 20202: First ever time soldering anything at all.
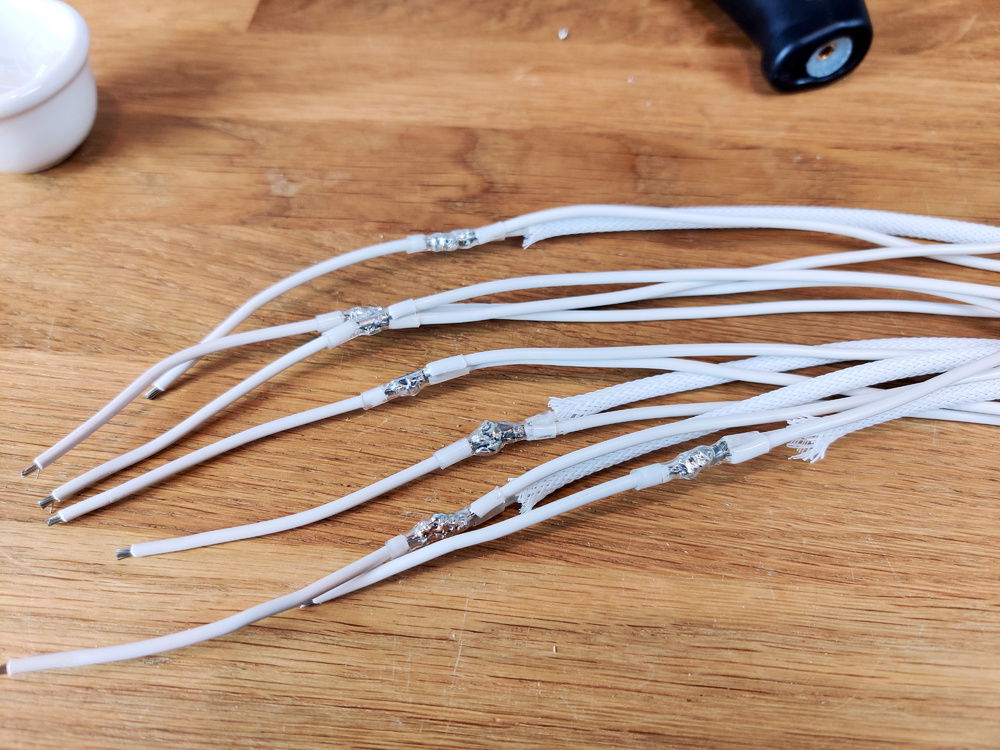
It ain't pretty, but it works. Way more than I could ask for for my first time.
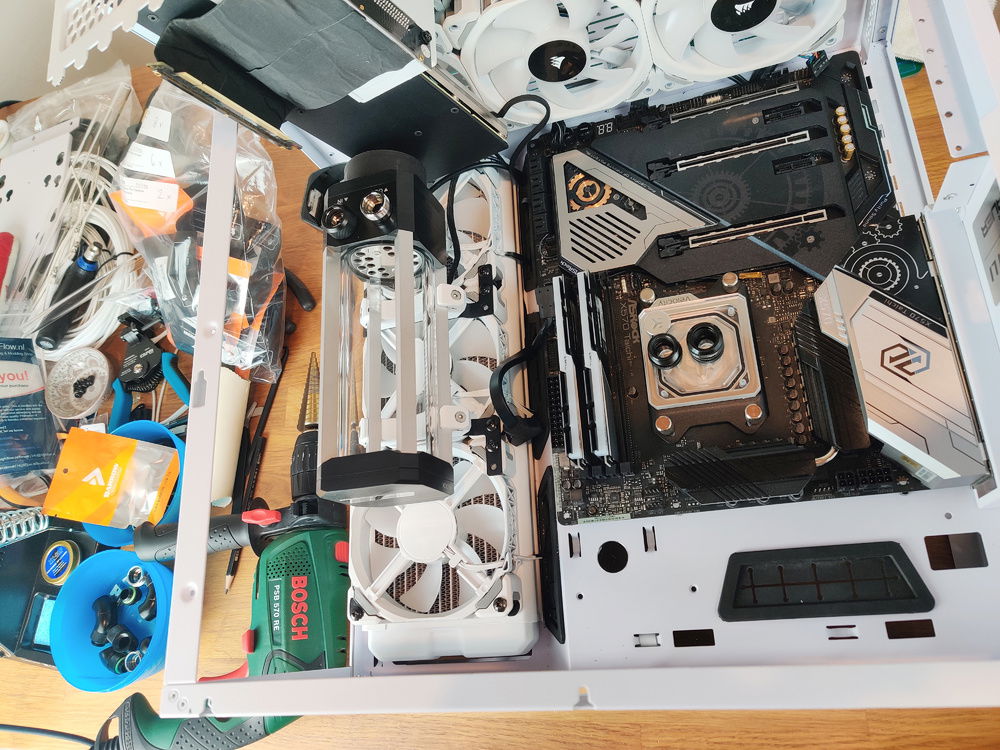
5th November 2020: Back to the problem of not being able to complete the loop. I had to order special drill bits and modify the case. This was definitely not in my game plan.
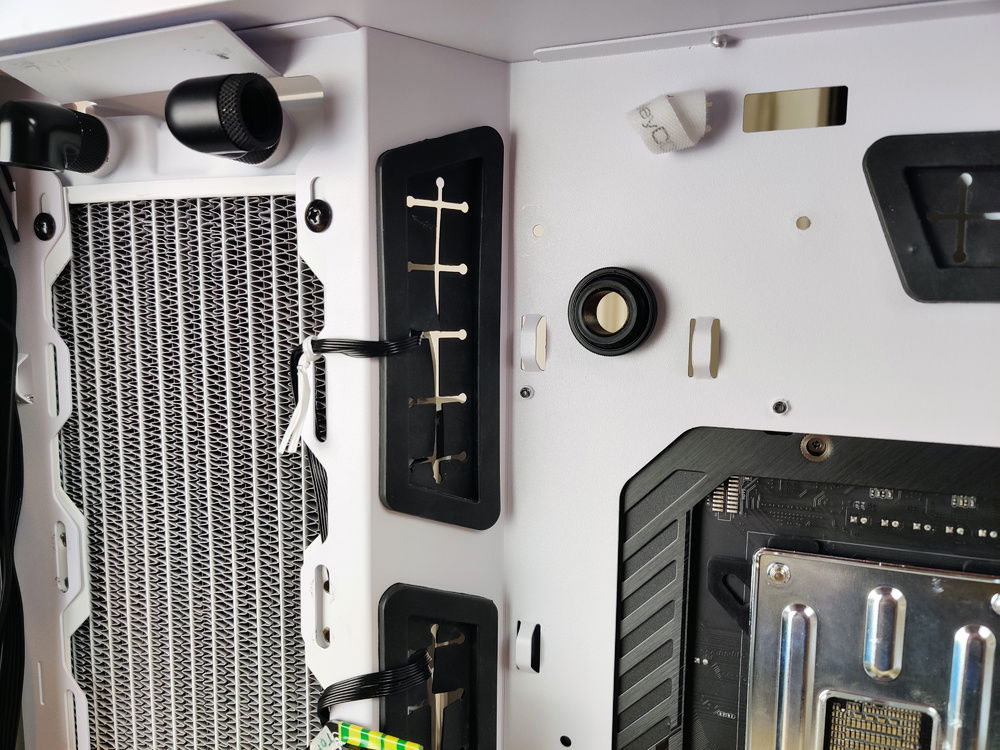
I managed to find get a pass-through fitting delivered in a week despite the COVID nonsense.
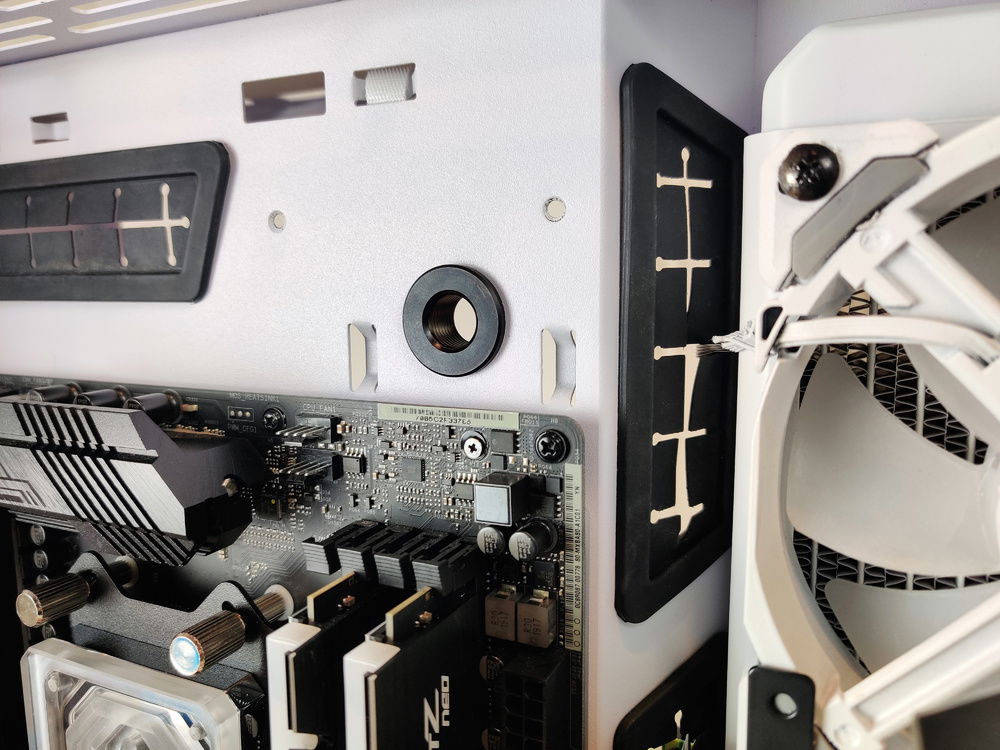
And with that, I could finally start putting the rest of the loop together!
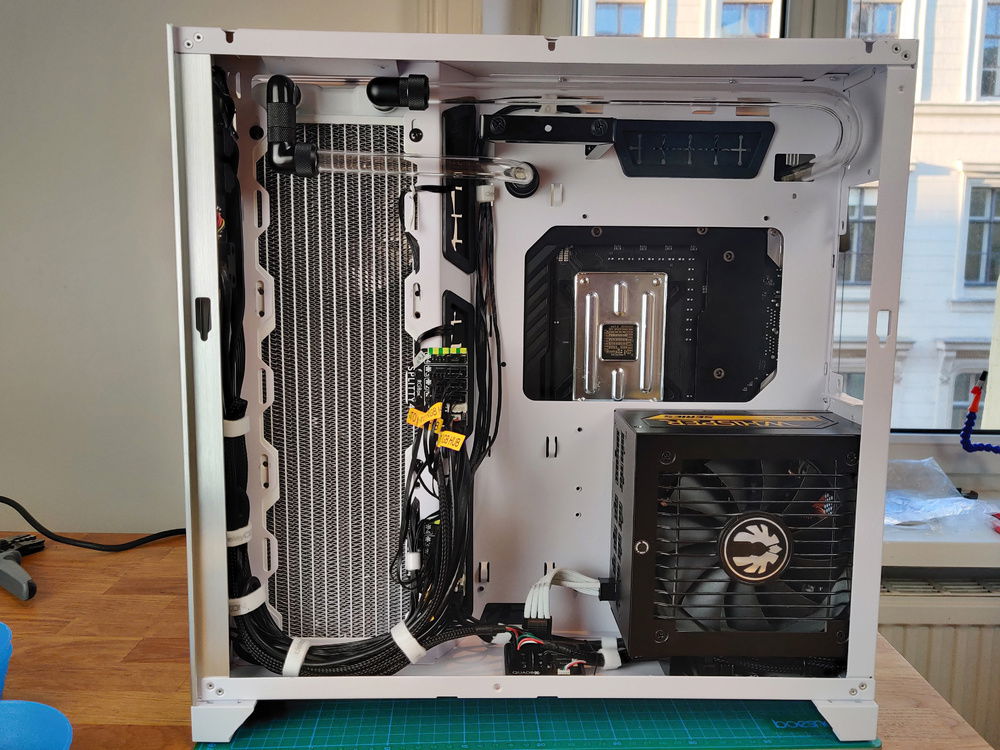
6th November 2020: Final bits of the back of the loop completed!
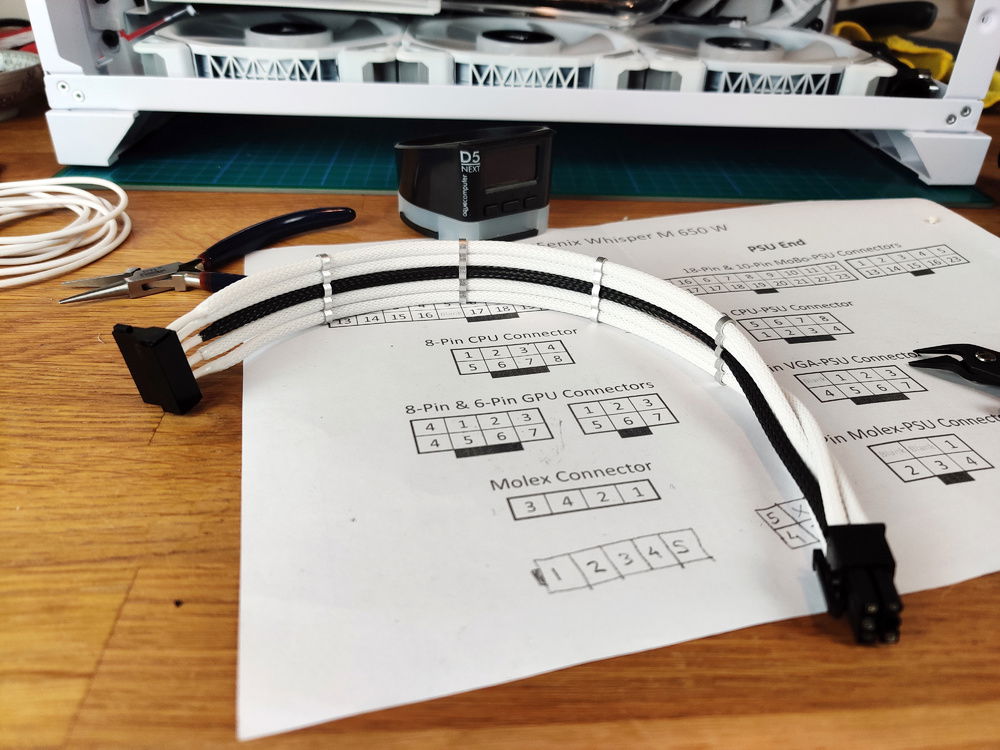
The SATA power cable for the pump, however, was much less of a problem compared to the MoBo cable and didn't take nearly as long.
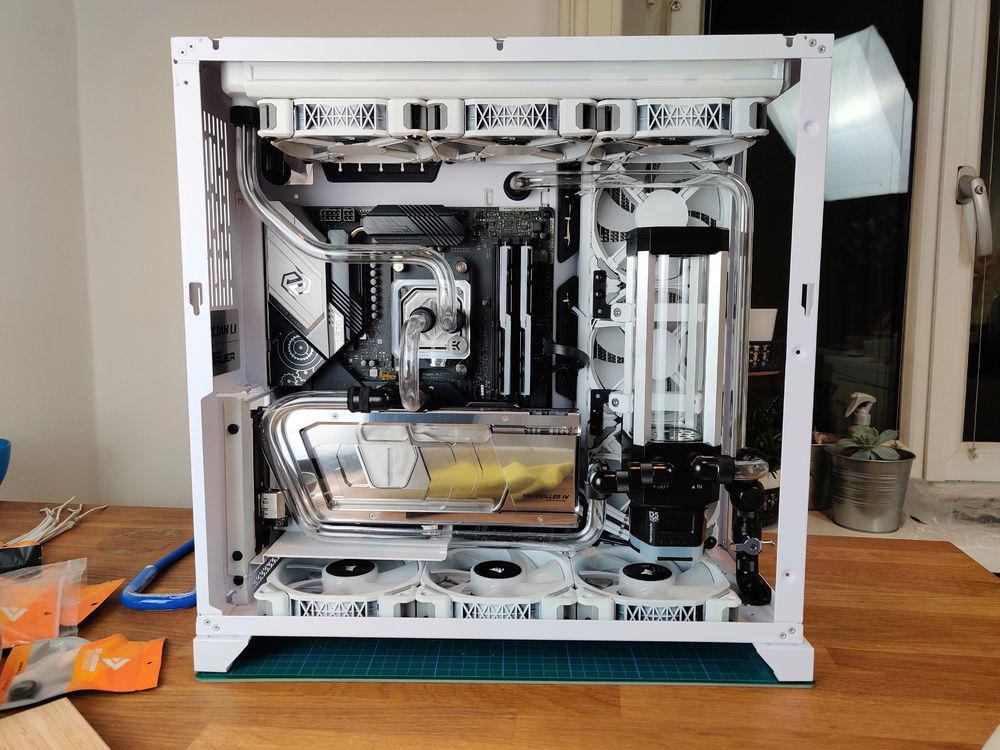
7th November 2020: It turned out that there was no way around using fittings to go from the GPU to the pump. Oh well. And with that, the loop was FINALLY complete!
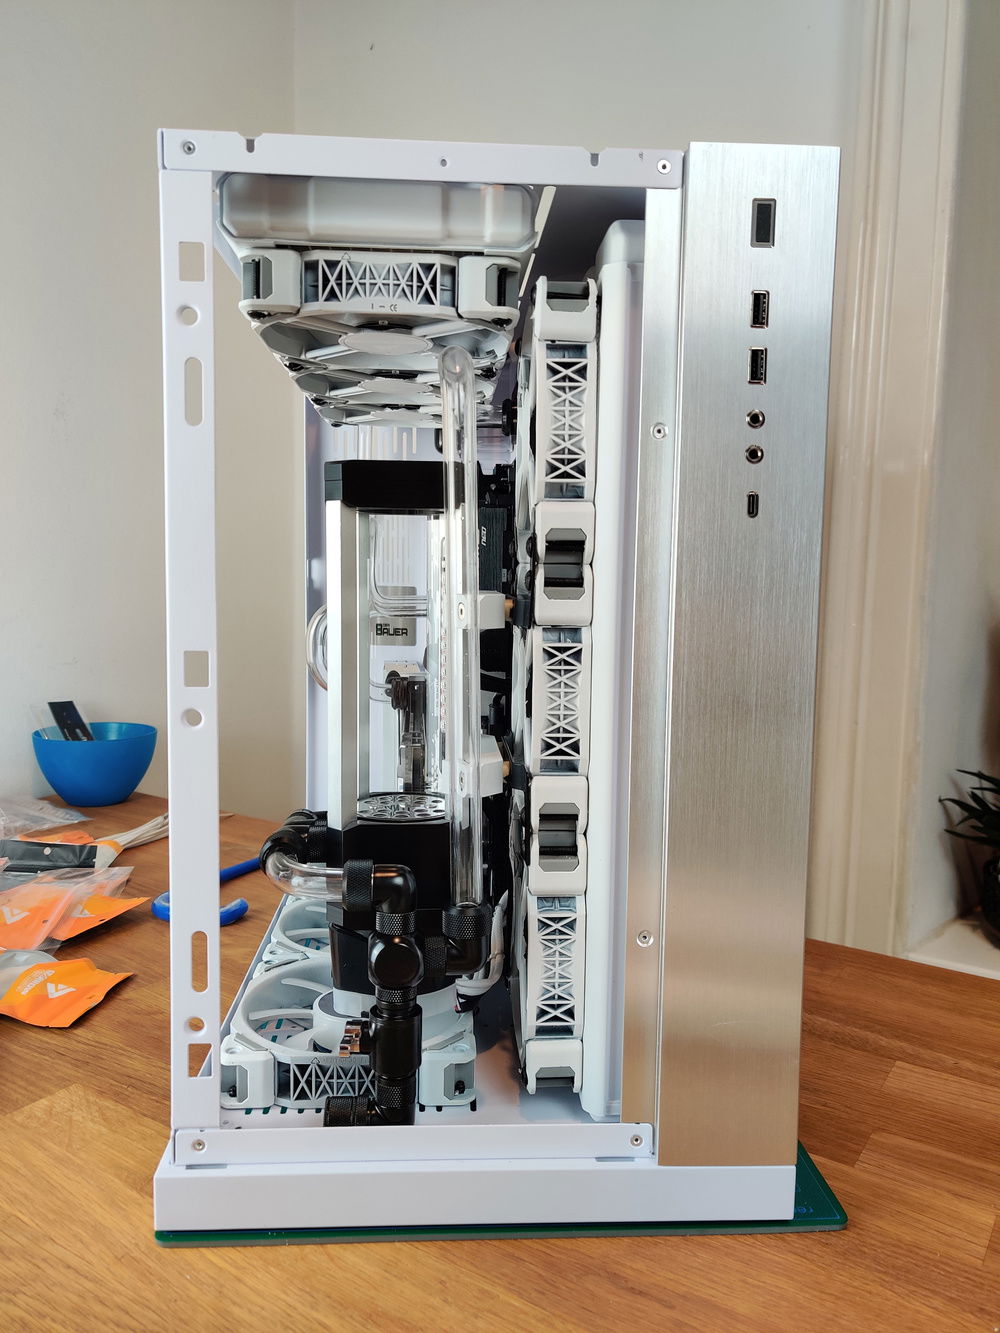
I installed the splitter and the drain port on the front.
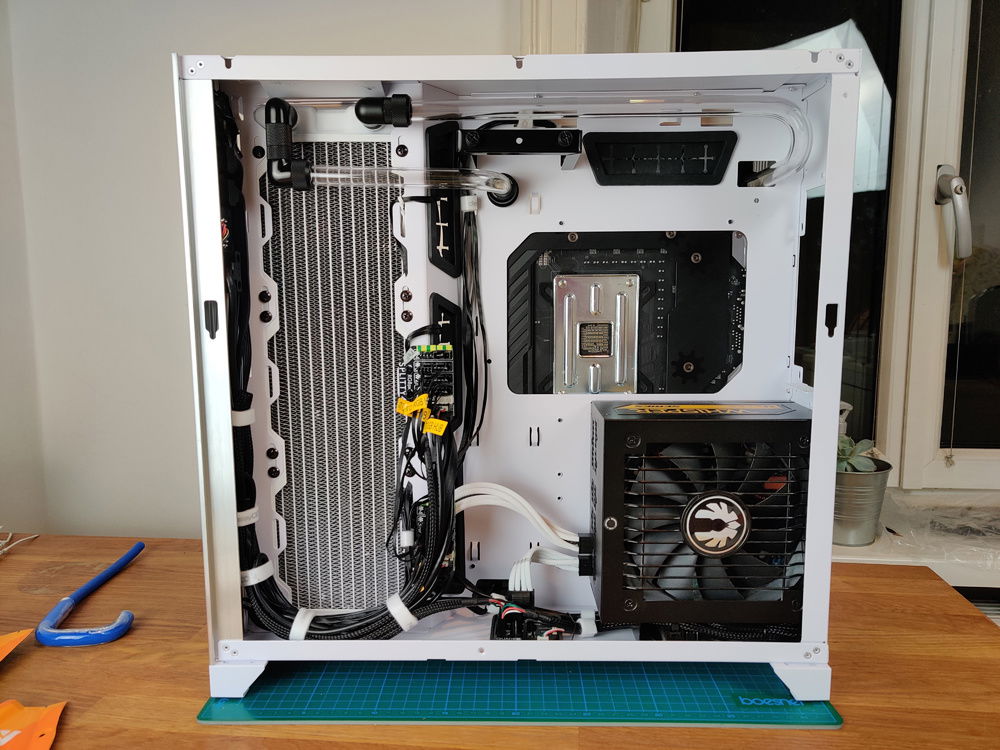
And cleaned most of the cabling up at the back
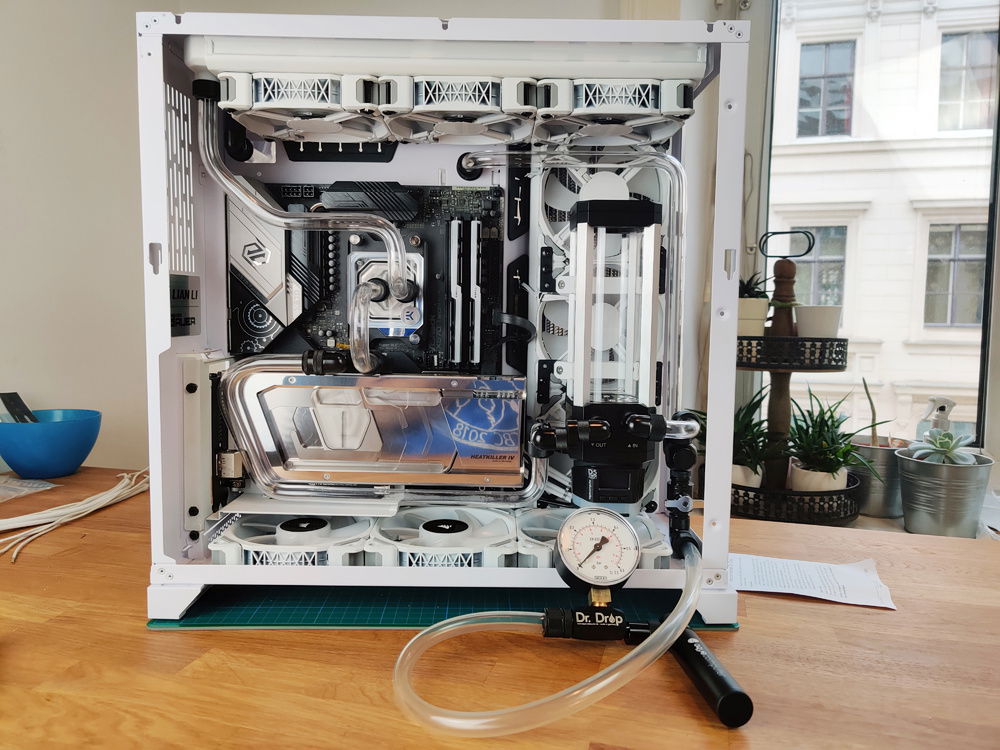
8th November 2020: I decided to use a pressure gauge to check if the loop had any major leaks. It turned out that the reservoir lid wasn't airtight, which meant there was only one way to do this.
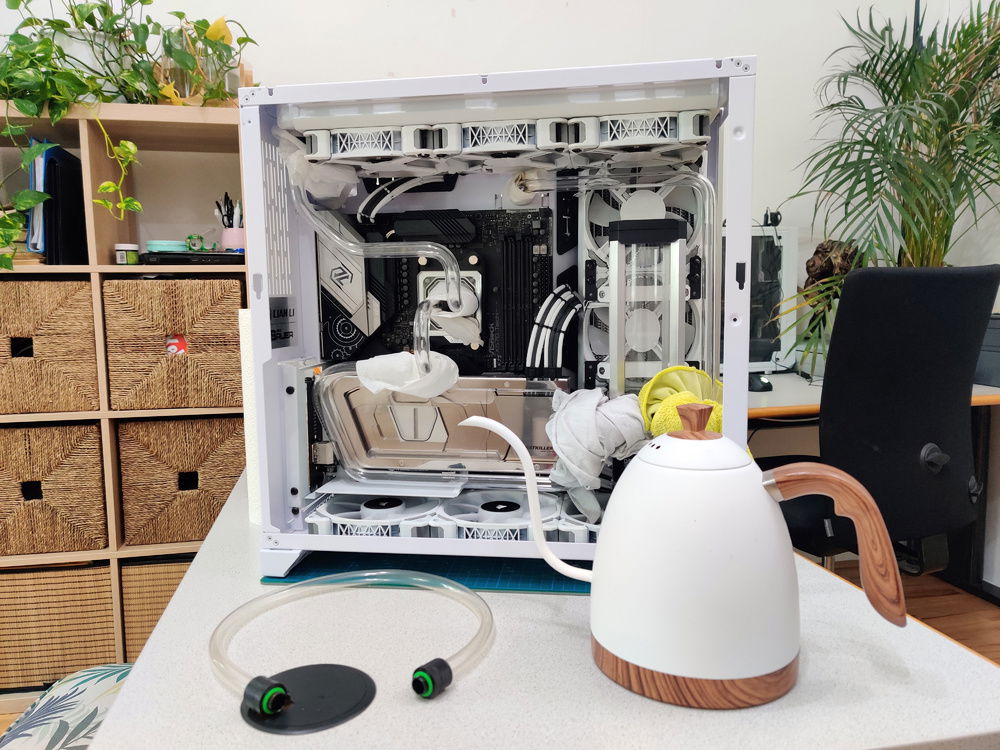
So I wrapped all the joints up, grabbed the pour-over kettle and decided to go for it.
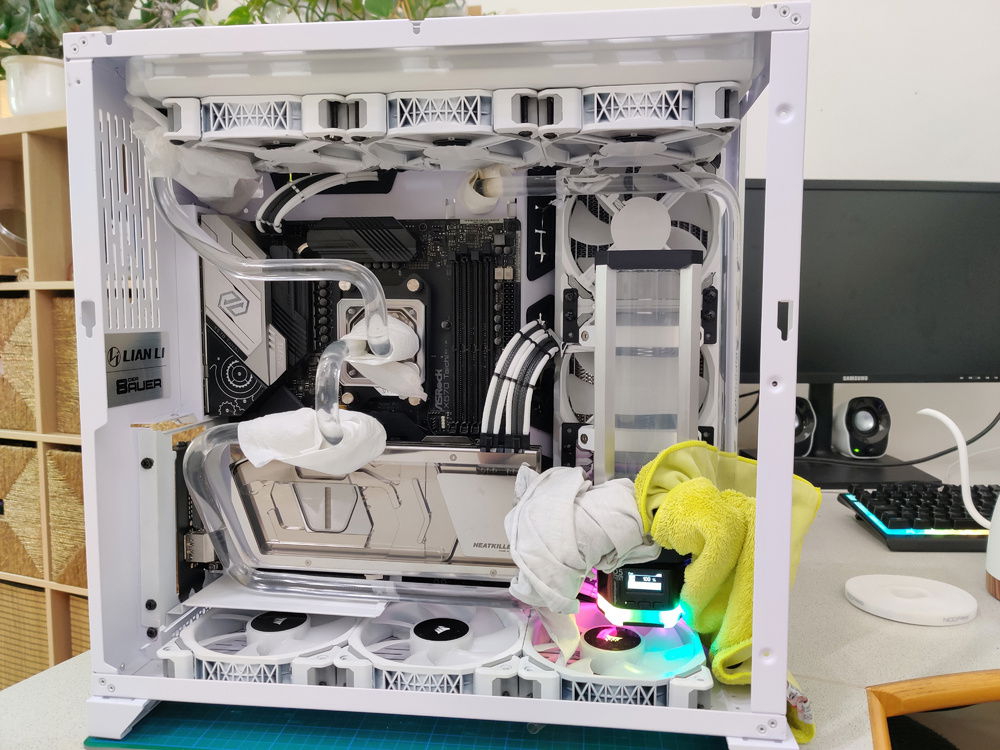
After running the loop for 2 hours, no leaks! Yay!
Project FishTank
Phase 2 has been started. Ran out of fittings so need to wait till they arrive.
Build Status:
[
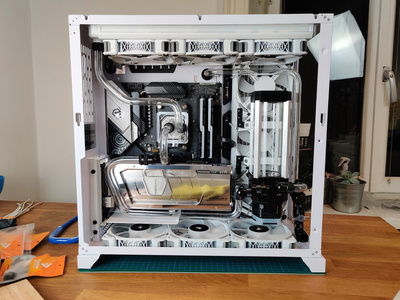
This is my very first Desktop! While it isn't my very first PC build (I helped the SO out with her desktop), it certainly is my first time at tackling something so elaborate. I'm totally ready to dive straight into the deep end!
I was thinking of calling it Project Whiteout, but the SO made some very convincing arguments & VETO'd Fishtank. It sounds much more fun anyway ¯\_(ツ)_/¯
Color(s): White
RGB Lighting? Yes
Theme: Color
Cooling: Custom Liquid Cooling
Size: ATX
Type: General Build
Build Updates
Tube bending, custom cables, and finishing the PC!
Bending the tubes was defnintely the second most challenging part of this build, shortly behind making custom sleeved cables.


26th October 2020: I decided to try using the Barrow tube bending tool to do my runs.

About 15 minutes in, it turned out that doing them freehand would be a TON easier.

Getting the two consecutive 90° bends correct was not as easy as I had expected it to be.

Despite trying to be as accurate as I could, the bends were still off. Took me loads of unbending and rebending to get this just right

The next challenge was the GPU run. Again, loads of unbending and rebending to get that one just right.

All the time and effort I put into it definitely paid off though. That run looks sick.

I wanted to do a couple of complex bends to avoid using too many fittings, but I ran out of tube.

And in trying to get the last bit to bend perfectly, I ended up deforming it big time.

So much so, that it was impossible to get the fitting to go over it.

27th October 2020: Decided to take a break from tubing and focus on putting some of the electronic components back in.

Decided to take a break with the tubing and get the cables in order.

I say it again, velcro cable ties are amazing.

30th October 2020: Remember how I had installed the GPU already? Yeah that was a bad idea. Turns out that it's really hard to do the CPU to Radiator run with the GPU in the way. Oh well...

At least this run didn't need TOO much adjustment. Only took me 2½ hours.

31st October 2020: I managed to get almost all the runs done. Or so I though.

I promptly realised that there was no way to connect the radiator back to the pump through the cable management slats. Welp... Time to take the whole damn thing apart...

After getting frustrated with the tubing, I decided to start working on the cables for a bit, thinking it'd be less challenging. LOL

Stripping the wires and crimping pins on was pretty easy.

As was fixing one end of the sleeve.

Pulling the sleeves taught was a completely different story though. Difficult, painful & not fun. But definitely was a satisfying outcome.

The first cable turned out really nicely.

1st November 2020: The Molex power cable for the Quadro also turned out nicely. Or so I though. More on that later.

I've always hated Molex Power cables. But this one is deifinitely cute.

Finally, split cables. I was dreading having to do these, but there's no way around them I guess.

Putting all these together definitely took a lot of time. It was fiddly AF.

2nd November 20202: First ever time soldering anything at all.

It ain't pretty, but it works. Way more than I could ask for for my first time.

The wire lengths were not at all perfect. I guess I'm going to have to be a lot more careful with the next system I build. The MoBo cable definitely tested my patience.

5th November 2020: Back to the problem of not being able to complete the loop. I had to order special drill bits and modify the case. This was definitely not in my game plan.

I managed to find get a pass-through fitting delivered in a week despite the COVID nonsense.

And with that, I could finally start putting the rest of the loop together!

6th November 2020: Final bits of the back of the loop completed!

The SATA power cable for the pump, however, was much less of a problem compared to the MoBo cable and didn't take nearly as long.

7th November 2020: It turned out that there was no way around using fittings to go from the GPU to the pump. Oh well. And with that, the loop was FINALLY complete!

I installed the splitter and the drain port on the front.

And cleaned most of the cabling up at the back

8th November 2020: I decided to use a pressure gauge to check if the loop had any major leaks. It turned out that the reservoir lid wasn't airtight, which meant there was only one way to do this.

So I wrapped all the joints up, grabbed the pour-over kettle and decided to go for it.

After running the loop for 2 hours, no leaks! Yay!
Started waterblocking the components & installing the rads.
After months and months of planning and waiting, I finally started working on the loop. Loads and loads of hurdles awaited my inexperienced ass haha!


24th October 2020: Before building the loop, I thought I'd run a bunch of benchmarks and get a baseline so I know whether or not I've improved performance. And I forgot to record the scores. So I decided to up the Air Cooling to cool the PC down and re-run the bunchmarks :P

25th October 2020: Time to void my GPU's warranty!

Steve's video helped a lot with taking the whole thing apart.

The most annoying part about the whole process was putting the thermal pads on and peeling the plastic off. For anyone attempting this - take the flat plastic off (it's a lot thicker) and put that side of the thermal pad on the GPU. The textured plastic is a lot thinner and easier to peel off. Otherwise, you will need to hold the pads down with something and peel the thicker plastic off. This can result in the thermal pads getting damaged and/or stretched and deformed.

The heatkiller GPU block looks amazing TBH.

The CPU block was really, REALLY easy to install.

Installing the pump in the res was quite easy too.

I did have to uninstall and reinstall it a couuple of times becuase I forgot to put the LED strip in...


Mounted the reserviour and pump too.

And then checked if the MoBo fit properly

I thought the cables at the back were a pain at this stage. Boy did it get worse...

Installed the GPU and things finally started coming together. For the moment.
GPU RMA
After 4 months of use, the Nvidia 2070 Super started dying. I'm glad I hadn't started water-cooling yet or I wouldn't have been able to claim warranty and RMA. I hadn't stressed it at all. No OC, no under-volt, full stock. I guess there was some factory defect. Oh well...
Arr Gee Bee!
My last order from finally got here today. With it came the Quadro which I just HAD to install right away! I can now use the Aquasuite and finally have some sensible control over the fans! Also, RGB!


![All lit up!
[Status as of 30th June 2020]](data:image/gif;base64,R0lGODlhAQABAIAAAAAAAP///yH5BAEAAAAALAAAAAABAAEAAAIBRAA7)


30th June 2020: The last few components finally reached! Radiators, fittings, EK CryoFuel Clear, a whole load of MDPCX stuff, wires and the Quadro!

These white rads look awesome! So glad I went with these! Totally worth the wait!

The first order of business was installing the Quadro so that I could finally have some reasonable control over the fans.

Getting to the USB 2 ports wasn't going to be possible without unmounting the GPU though.

Then, I had to take the PSU out and undo all the cable management. I then removed all the Splittys.

I had to bridge the pins on the fourth Corsair RGB connectors on the Splittys so I could get everything to work properly. I'm glad I spoke to Aquacomputer before I ordered - I wouldn't have known this otherwise.

Once the Splitty's were populated, I started mounting them back to their original positions. This will likely change once I have the Water Cooling stuff in because some of those components need to plug into the Splittys too.

So many cables...

This Splitty was particularly painful to install. Managing to hold the tiny little nut in place with so many plugs was really hard.

It took the better part of half an hour to get it properly fit.

The bottom Splitty and all its cables still fit nicely in this little gap.

And are properly hidden under the PSU. Hopefully it won't get obnoxiously hot under there.

Finally plugged that Quadro in. I can't wait to make the custom cables. That Molex power cable is a disaster, honestly.

Tied as many of the cables down as I could. Did I mention I can't wait to make my own cables?

For now, at least the shroud hides everything away nicely.
![All lit up!
[Status as of 30th June 2020]](https://p1.builds.gg/builds_pictures/25000/25229/142721/142721_1000.jpg)
All lit up!
[Status as of 30th June 2020]

Obligatory rainbow vomit.
(The G.Skill software crapped out so the RAM went dark)
MoBo is back, all fans are in!
The replacement X570 TaiChi arrived this week. I decided to put all the fans in and cable manage the whole thing.
Sub-update: The Splitty4s arrived too, so I figured I might as well put them in even if the Quadro will take some time.


Sub-update: The Splitty4s arrived too, so I figured I might as well put them in even if the Quadro will take some time.

21st May 2020: The replacement motherboard arrived today so I got the rest of the parts out of the basement. Decided to install all 9 fans since the Splitty4s should arrive in a couple of weeks. I had to hurridely put everything together since we were supposed to group for a trial in ESO in under 2 hours.

22nd May 2020: Decided to take the entire PC apart and cable manage everything.

The bottom fans needed to be done first. This could be a bit of a permanent setup since they won't be removed even after the system is watercooled. I used the fans themselves to lightly clamp the cables down and used cable twisties to secure the cables to the case.

I then used velcro cable ties to bundle everything up neatly. Only one of those fans will be running for now so the rest of the cables can sit under the PSU till I have my splitters.

I rotated the side fans so that all of their cables could be routed along the channel at the front of the case. None of those fans will be plugged in till the splitters arrive, so those cables can be stuffed away too.

The front panel cables were next. I used a cable-twisty to group and secure them to the case.

With all the cables cleaned up and secured, I could finally put the MoBo in.

I plugged the front panel cables and the fan cables in first. I could route some of the fan cables between the SATA ports to make things extra-clean!

Finally, the PSU and those horrendously stiff BitFenix cables could go in. Routing, binding and managing those cables was a pretty big pain.

I love the cable management shroud and how clean it makes everything look!

Finally, I used some velcro cable-tie to bind the GPU power cables together. I think it makes the cables look a little less hideous.

Side view of the bound GPU cables.

After close to 4 hours of work, it was time to put the side panels on again!

Here's what the setup looks like now.

Close-up of the system. r/ShittyHDR would be proud.

29th May 2020: The Aquatuning order finally arrived! That takes care of almost all of the water cooling parts and about half of the sleeving parts.

30th May 2020: Since the Splitty4s were here, I figured I could improve some airflow :D

The contacts on the back of the Splitty should not touch any electrical components. Just to be safe, I put some electrical tape on them.

The first Splitty4 will control the bottom exhust fans. I can't connect the RGB yet since that requires the Quadro and it'll arrive later.

It fits really nicely under the PSU.

I screwed the second Splitty4 to one of the holes at the back of the case.

I decided to put the third Splitty4 on the fans. However, screwing it on to the fans with all the plugs attached and the fans on the case was impossible so I had to take the fans off.

It was fiddly work, but it fits reall nicely.

Managed all the cables. There's a lot of excess cabling right now but that'll change once I build my own cables.

Shroud on - done!
Phase 2 Update: The painting is done!
After a couple of days of spraying, I'm finally done with painting all the components that I wanted to paint. I decided to not paint the reservoir because I don't think I can get the masking to be very clean. Since the reservoir will be VERY visible in the system, I don't want it to look crappy.


18th May 2020: I finally stopped procrastinating and peeled the paint and masking off of the last fan today. I had already finished the three fans and the res mounting hardware last week, but my fingers were sore from all the peeling so I put the last fan off for a bit.

PSA: Make sure you use a VERY sharp blade for unmasking small areas. Ideally, practice on something you don't mind getting ruined. Plasti-Dip is elastic AF and can be really hard to cut accurately. You'll end up with a lot of jagged edges if you aren't careful.

Another example of the kind of jagged edges you can end up with if you aren't careful.

PSA: Make sure to check what solvent your spray paint has and whether the plastics you are spraying can deal with the solvent. I bought 8 fans from one store and 1 fan on discount from a different store. This fan was likely from a different batch and Corsair probably changed something about their plastic composition between these batches. The spray's solvent has eaten into the rotor quite a bit.

The damage is not bad enough to trash the fan, but had I sprayed any more, it could have been worse. The rotor has a very matte finish now (it started off VERY glossy) and the edges have stress marks. I'm not sure how much this is going to reduce the life of the fan by.

With the painting out of the way, it's time to get to reverse-engineering my PSU cables. I couldn't find a pinout for the Whisper M 650W anywhere, but I'm glad @GTS81 told me how to figure the cables out. I'll write to BitFenix and once I have some sort of confirmation, put together a chart other folks can use :)
Phase 2 Update: Watercooling parts have started arriving. And some are delayed...
There's very little I can do till all the parts get here. I've ordered parts from Watercool, AquaTuning & HighFlow. Unfortunately, some of the components (incl. the rads) are back-ordered so I guess it will be a while till I receive everything.
So far, I've received:
I'm still waiting for


So far, I've received:
- Reservoir, res mounting hardware, res RGB, res top
- GPU Block, back-plate & RGB strip
- Tubes
- Thermal paste
- Whole load of fittings
- Pipe reamer
I'm still waiting for
- The pump
- Radiators
- Custom cabling gear
- Fan splitters & controllers
- More fittings
- Leak tester
- Coolant additive

4th May 2020: My watercool shipment arrived today. It was very well packaged. When I placed the order, 4 m of tubing seemed like overkill. Now that I look at the tubes, I'm not quite as certain...

I can see why the Heatkiller stuff is so pricey. Everything they have is chonky AF! This is good quality stuff right here.

8th May 2020: Someone on our local seconds website was selling a bunch of new, leftover barrow fittings from her build. I snagged this set for €55 and it arrived today.

10th May 2020: Spent about 4-5 hours over the past two days masking the four remaining fans and the Reservoir mounting hardware. Too spent to paint today so I'll start tomorrow. Hopefully everything will turn out nicely!

11th May 2020: Going to spend the better part of today painting the last couple of parts that need painting. Depending on how the plastic reservoir mounts turn out, I might consider painting the other black parts of the Res as well.

13th May 2020: Fans and res mounting hardware are as painted as they can be. I let them dry and de-stink overnight. Time to start taking the masking tape off.
Started Phase 2
The COVID-19 situation seems to be calming down in Austria. We're slowly getting back on our feet and there's a bit more certainty now. In light of the progress, I finally went ahead and ordered a few of the components I need for the loop. Once I have the custom cabling figured out, I will order the rest of them (since parts for the loop and for the cabling are coming from the same sources, it makes sense to order everything together so I can save on shipping costs).
With a ton of advice from Reddit, the Watercooling Discord and from Aquacomputer's Support, I put together and refined the connection plan for all the fans and RGB components.
I've been making some progress on the painting the fans as well! More info in the pictures below!


With a ton of advice from Reddit, the Watercooling Discord and from Aquacomputer's Support, I put together and refined the connection plan for all the fans and RGB components.
I've been making some progress on the painting the fans as well! More info in the pictures below!

26th April 2020: Hardware stores are now open in AUT and the SO's mom asked me if I could get some stuff. I was lucky enough to find the last respirator they had in stock! And conveniently, it was in the spray painting section!

So I decided to get the remaining fans out and paint them.

After a few hours of pretty detailed masking work, they were ready for the paint shop.

27th April 2020: Even though I'm not super satisfied with this painting method and brand, for the sake of consistency, I decided to not change anything. I ran out of paint with these four fans and had to order more. I guess I'll do the fans that are in the case at the moment once the new cans of paint arrive. Pretty cool way to spend my birthday NGL.

28th April 2020: Unmasking the fans, peeling the film off the rotors and reinstalling the corners took literal hours. I had to stop after three fans because my fingers were sore. I finished the last one the morning after. The paint job, while not yet perfect, is definitely a notch above my first attempt.

It doesn't cover the sticker text very nicely though. Oh well, guess I'll just cover it up with white vinyl ¯\_(ツ)_/¯

With a ton of advice from Reddit, the Watercooling Discord and from Aquacomputer's Support, I put together and refined the connection plan for all the fans and RGB components.
In case you need something like this for your build. I can send you an editable version of this schematic - feel free to drop me a line.
Motherboard RMA
About 2 weeks into using my new X570 TaiChi, on 18th April 2020, the RGB strip on the side of the motherboard started flickering and one of the LEDs died. Had to RMA the board :/
Phase 1 Complete!
The G.Skill RAM Kit I was waiting for finally arrived today. I installed it earlier this afternoon (17th April 2020) and with that, Phase 1 is finally complete! I'm already planning Phase 2; the folks at Aquacomputer have been very helpful with planning out the fan controllers and the parts I would need.
Once there is more concrete information from my workplace about how we will move forward after the whole COVID-19 situation, I'll start buying the parts for Phases 2 and 3![Emoji]()


Once there is more concrete information from my workplace about how we will move forward after the whole COVID-19 situation, I'll start buying the parts for Phases 2 and 3

17th April 2020: The G.Skill Trident Z Neo 3600 MHz CL 16 Kit I was waiting for for almost a month finally reached today!

Installing the RAM modules without removing the CPU cooler or any of the cables was very fiddly work. Why did I not remove the cables? Well, they're a pain to unplug and replug and leave me with fairly sore fingertips :P

All done! It booted just fine and the RAM seems to be okay!

Put the glass panels back on. Time for some F@H!

And with that, Phase 1 is finally complete!
Phase 1 Update: GPU is now vertical!
My paints finally arrived this week so I spent the past couple of days painting the Cooler Master vertical GPU mount and one of my Corsair ML120 Pro RGB fans white. I installed the GPU mount a few hours ago but the fans will still have to wait. More details in picture captions below:


6th April 2020: The Vertical GPU kit and some of the tools I'll need for Phase 3 arrived on the same day.

8th April 2020: Just two days later, the remaining tools for Phase 3 and four cans of "GummiDip" got here.

9th April 2020: Once the "GummiDip" was here, I searched the house for some masking tape and spent the evening masking off the rubber corners of one of the ML120 fans. I also masked the gap between the fan frame and the rotor so that paint wouldn't get in there and ruin the electronics.
Then I used the box that I received the MoBo and fans in as a little spraying shroud and got to work.

Over the course of the evening, I worked my way through an entire can. Almost 8-10 coats later, it looked like I had hit the point of diminishing returns, so I stopped and let everything dry overnight.

10th April 2020: This is the gap I was talking about. The ML120 PRO RGB fans cannot be safely disassembled to the best of my knowledge. Hence, I decided to use "GummiDip", an Austrian local Plastidip equivalent, to spray the entire fan and then peel the paint off the blades.

I managed to get the frame to be mostly white, but I'm not very happy with the paint job.

A side-effect of having to mask the gap between the rotor and the frame is that the fan cannot turn when you're spraying it. This results in very uneven cover. I will likely have to find a different way to paint the fans.

The GPU mount turned out just fine though. There's a bit of a colour mismatch with the case, but there was no way of checking the colour before I started painting. I guess I'll just have to live with it.

And there we go, the GPU is now vertical! Once the RAM is here, Phase 1 will be finally complete!
Started building, Phase 1 almost complete!
After over half a year of extremely aggressive saving, going back and forth over parts lists on Reddit, tons and tons of conversations in Discord communities, incessantly scouring geizhals (an Austrian price comparison portal) & willhaben (an Austrian secondhand platform), and waiting for everything to arrive, I finally started building on 30th March.
Phase 1 of Project FishTank is almost complete!


Phase 1 of Project FishTank is almost complete!

30th March 2020: Got most of the parts together.
The RAM & GPU mount haven't reached yet thanks to COVID-19. The SO was kind enough to lend me one of her RAM modules so I could start building.
There's a ton of fans in the build, but not all of them will be going in immediately.

Took Linus's advice and built everything outside first. As expected, it didn't POST.
Thankfully, the X570 TaiChi has debug LEDs - turned out that the GPU wasn't plugged in all the way.
Rookie mistake, but pretty easy to fix. Could have been worse...

With the system posting, I installed the PSU and 4 case fans. The remiaining 5 will have to wait for Phase 2 of the project. The PC-O11 Dynamic is a really nice case to work in!.

After getting the PSU and fans out of the way, the main bits could be installed and all the headers could be plugged in.

Gotta organize all those cables. Phase 2 will likely introduce more...
Can't wait for Phase 3 to get the cables very nicely sorted out!

I love how the cable management shroud makes everything look a lot cleaner

And there we go! The first part of Phase 1 is done!
I'll install the RAM and the vertical GPU mount once they are here and post an update. Hopefully they'll be along shortly.
Now it's time to plan Phases out 2 & 3 while I wait for the parts to arrive!
Hardware
Category / Value
Brand / Part
CPU
$ 217.64
Memory
$ 249.98
Graphics
$ 599.00
Case
$ 160.56
Case Fan
$ 421.02
Cooling
$ 220.99
Cooling
$ 40.72
Cooling
Cooling
$ 182.18
Cooling
Cooling
Cooling
Cooling
Accessories
$ 39.99
Accessories
Monitor
$ 481.30
1,987
18
Approved by:
