


Top of the case, chopped up. Only original part, or what's left of it, is the middle piece.
To the right is a piece of 3mm thick aluminium that'll mount to the original ''frame'', and holds up the 420mm radiator.
On the left is a sheet of perforated aluminium sheet, approx 1.2mm thick, that'll serve as a (mostly aesthetic) cover over the radiator fins.

Teared out the motherboard tray, mounted my custom top panel.
One step forward, a whole leap back!

Hand-bent 3mm thick aluminum sheet motherboard tray with integrated PSU shroud. Ready for painting.
The sharp-eyed enthusiasts might have noticed the cut-out ended up just a tad bit too big and made it unable to place the centre and left stand-offs. Oh well. Not going to try this AGAIN.

Getting there... If only I didn't forget the PCIe bracket cut-outs on the motherboard tray... Dôh!


Define Dark
AD:
As most of you can see from just looking at the pictures of this build, I really don't like bright colors all that much. Let alone RGB-lightning. All I want is subtle *actual* white LED's to highlight shiny details in an otherwise monochrome, dark aesthetic theme.
The build is based on what used to be a stock Fractal Design, Define S - the 1.0 variant, but soon received the good ol' Dremel-treatment. I really wanted to slap a badboy-420mm radiator in there, and without modifications it would just not fit in this case.
Keep in mind that I started this build before any information was available about the new iteration of this cases. Not even a word on R6 yet.
So what I did to make the radiator fit in the top-compartment of the case?
Easy. I chopped it up good.
Real good..
As you can see in the picture with the 3 custom made parts hanging to dry from a new coat of paint. Black paint of course.
So after that was taken care of, I kind of went down the rabbit-hole... You know, when you have a certain vision of what you want - and decide to dive straight in? Yeah. It's awesome.
As can be seen in the pictures, I got rid of the complete factory Motherboard mounting-plate. Pulled it straight out and replaced it with a nice, smooth, clean and minimal 3mm thick hand-bent sheet of aluminium with integrated PSU shroud.
After that, I cut out a couple more pieces of aluminium sheet to cover up the back of the case and finish it off, resulting in a minimalistic - clean - flat and (if you'd ask me) perfect package.
It was a nightmare at times.
But absolutely worth it in the end!
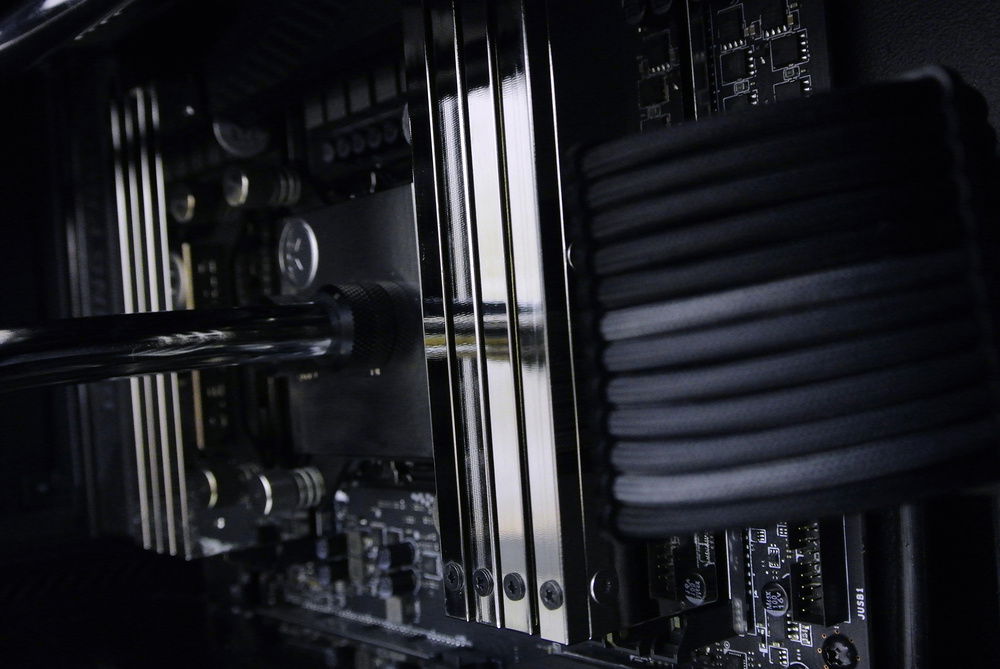
All cables are custom made by myself, as making custom sleeved cables and extensions is the first thing I picked up when I started building custom PC's. It didn't take too long before I wanted more![Emoji]()
The build is based on what used to be a stock Fractal Design, Define S - the 1.0 variant, but soon received the good ol' Dremel-treatment. I really wanted to slap a badboy-420mm radiator in there, and without modifications it would just not fit in this case.
Keep in mind that I started this build before any information was available about the new iteration of this cases. Not even a word on R6 yet.
So what I did to make the radiator fit in the top-compartment of the case?
Easy. I chopped it up good.
Real good..
As you can see in the picture with the 3 custom made parts hanging to dry from a new coat of paint. Black paint of course.
So after that was taken care of, I kind of went down the rabbit-hole... You know, when you have a certain vision of what you want - and decide to dive straight in? Yeah. It's awesome.
As can be seen in the pictures, I got rid of the complete factory Motherboard mounting-plate. Pulled it straight out and replaced it with a nice, smooth, clean and minimal 3mm thick hand-bent sheet of aluminium with integrated PSU shroud.
After that, I cut out a couple more pieces of aluminium sheet to cover up the back of the case and finish it off, resulting in a minimalistic - clean - flat and (if you'd ask me) perfect package.
It was a nightmare at times.
But absolutely worth it in the end!
All cables are custom made by myself, as making custom sleeved cables and extensions is the first thing I picked up when I started building custom PC's. It didn't take too long before I wanted more

Color(s): Black Gray Silver
RGB Lighting? No
Theme: Futuristic
Cooling: Custom Liquid Cooling
Size: ATX
Type: General Build
Contests
This build participated in 2 contests.
| Rank | Contest | Date |
|---|---|---|
| #14 | EK 10K Challenge | ended |
| #29 | The builds.gg 10K Challenge | ended |
Build Updates
Instability, frustration, more work - success!
Hardware
CPU
$ 72.99
Motherboard
$ 698.86
Memory
Graphics
$ 400.00
PSU
$ 597.00
Case
Case Fan
$ 28.95
Cooling
$ 53.47
Cooling
$ 205.22
Cooling
$ 168.14
Cooling
$ 14.45
Cooling
Cooling
$ 55.23
Cooling
$ 73.99
Accessories
$ 211.50
Accessories
$ 27.99
Approved by: