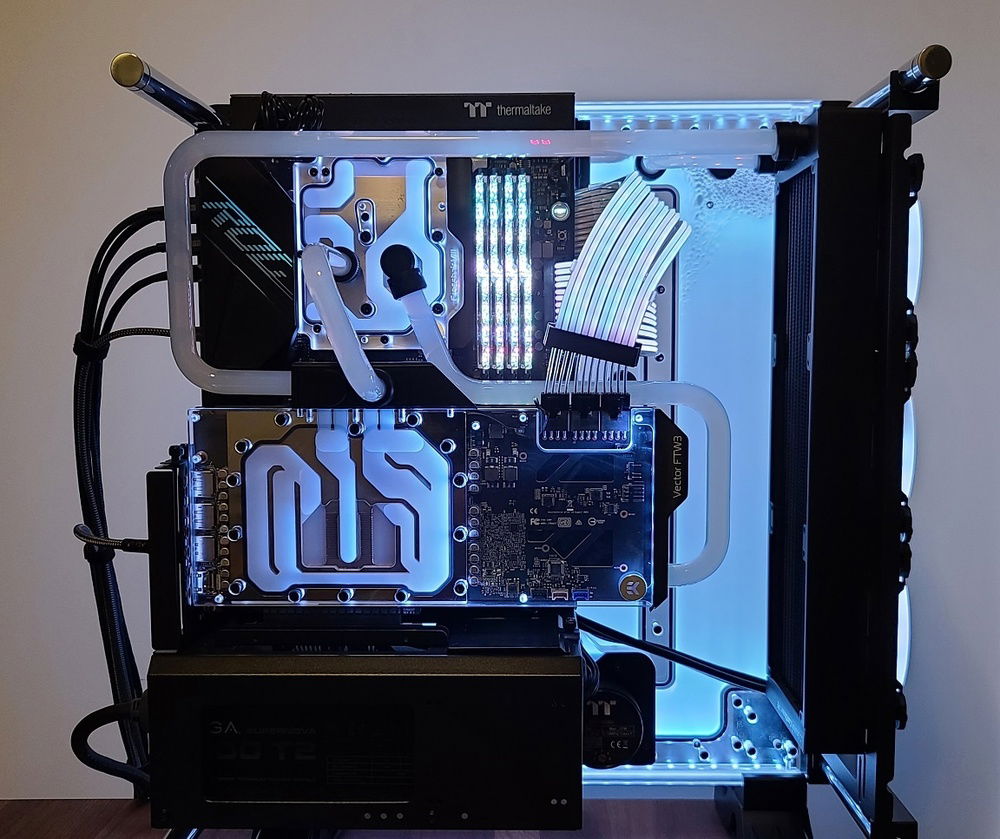
Front view
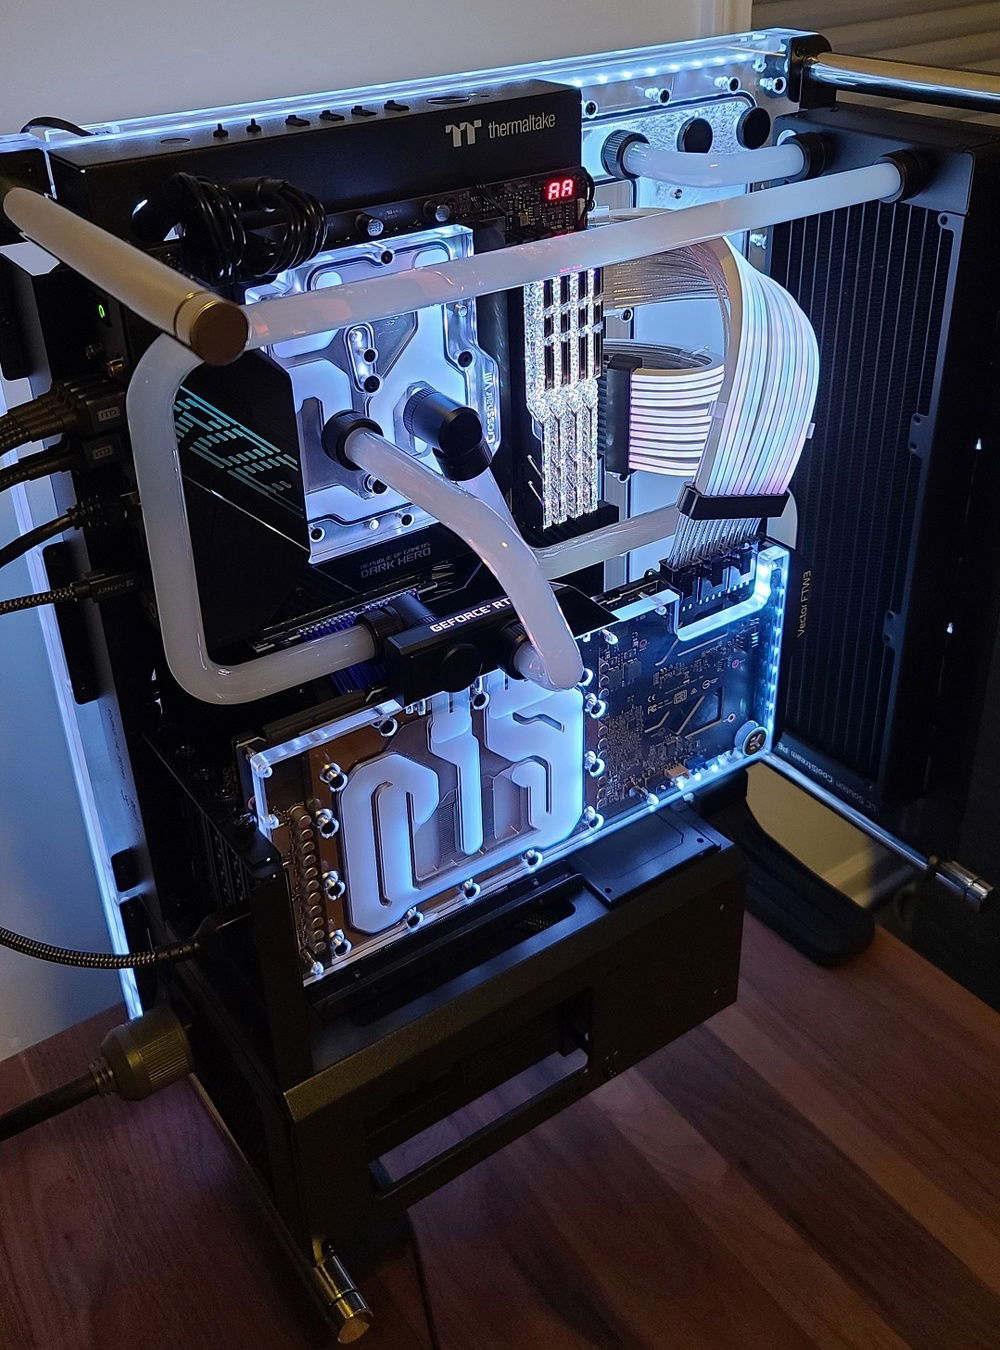
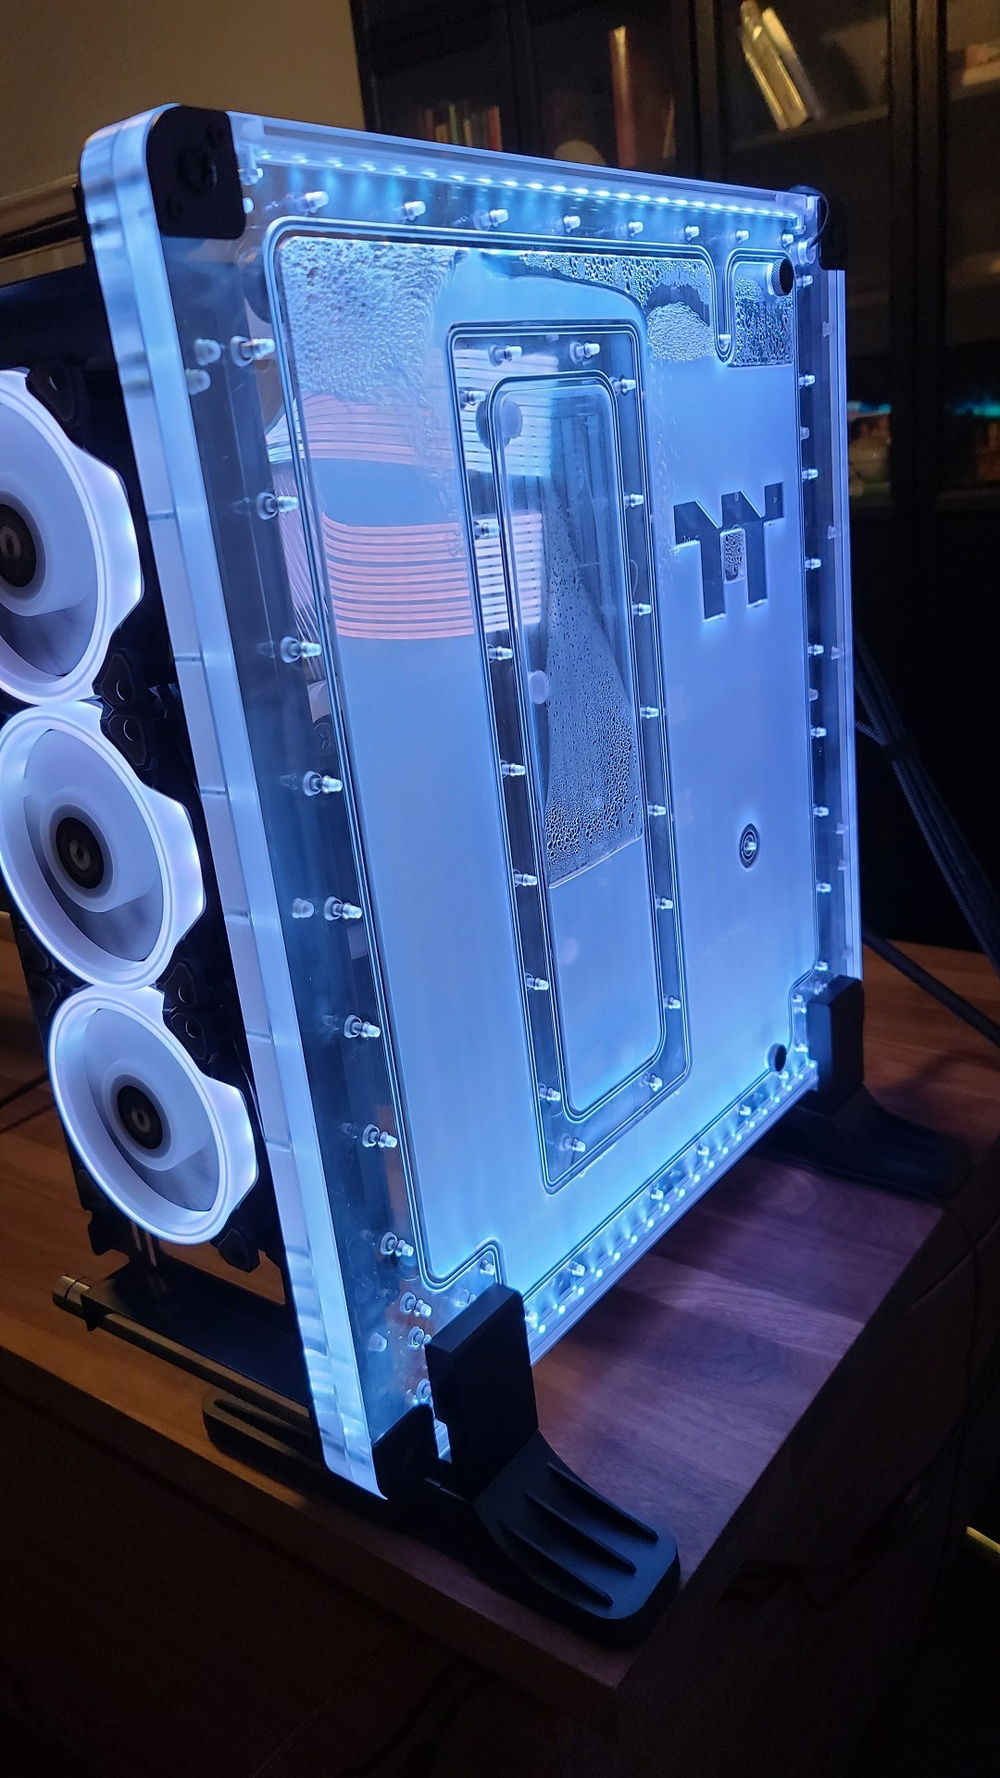
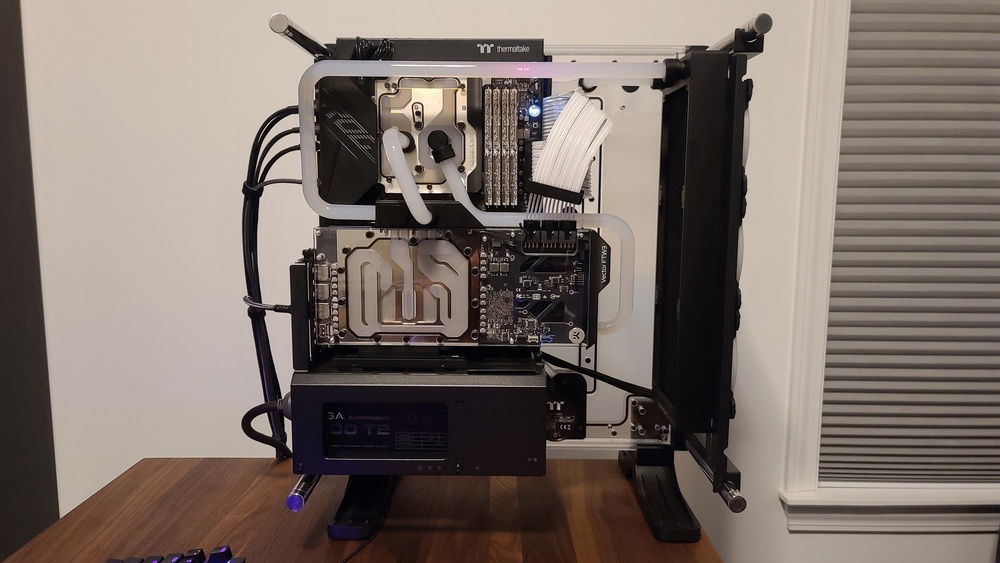
Back of case
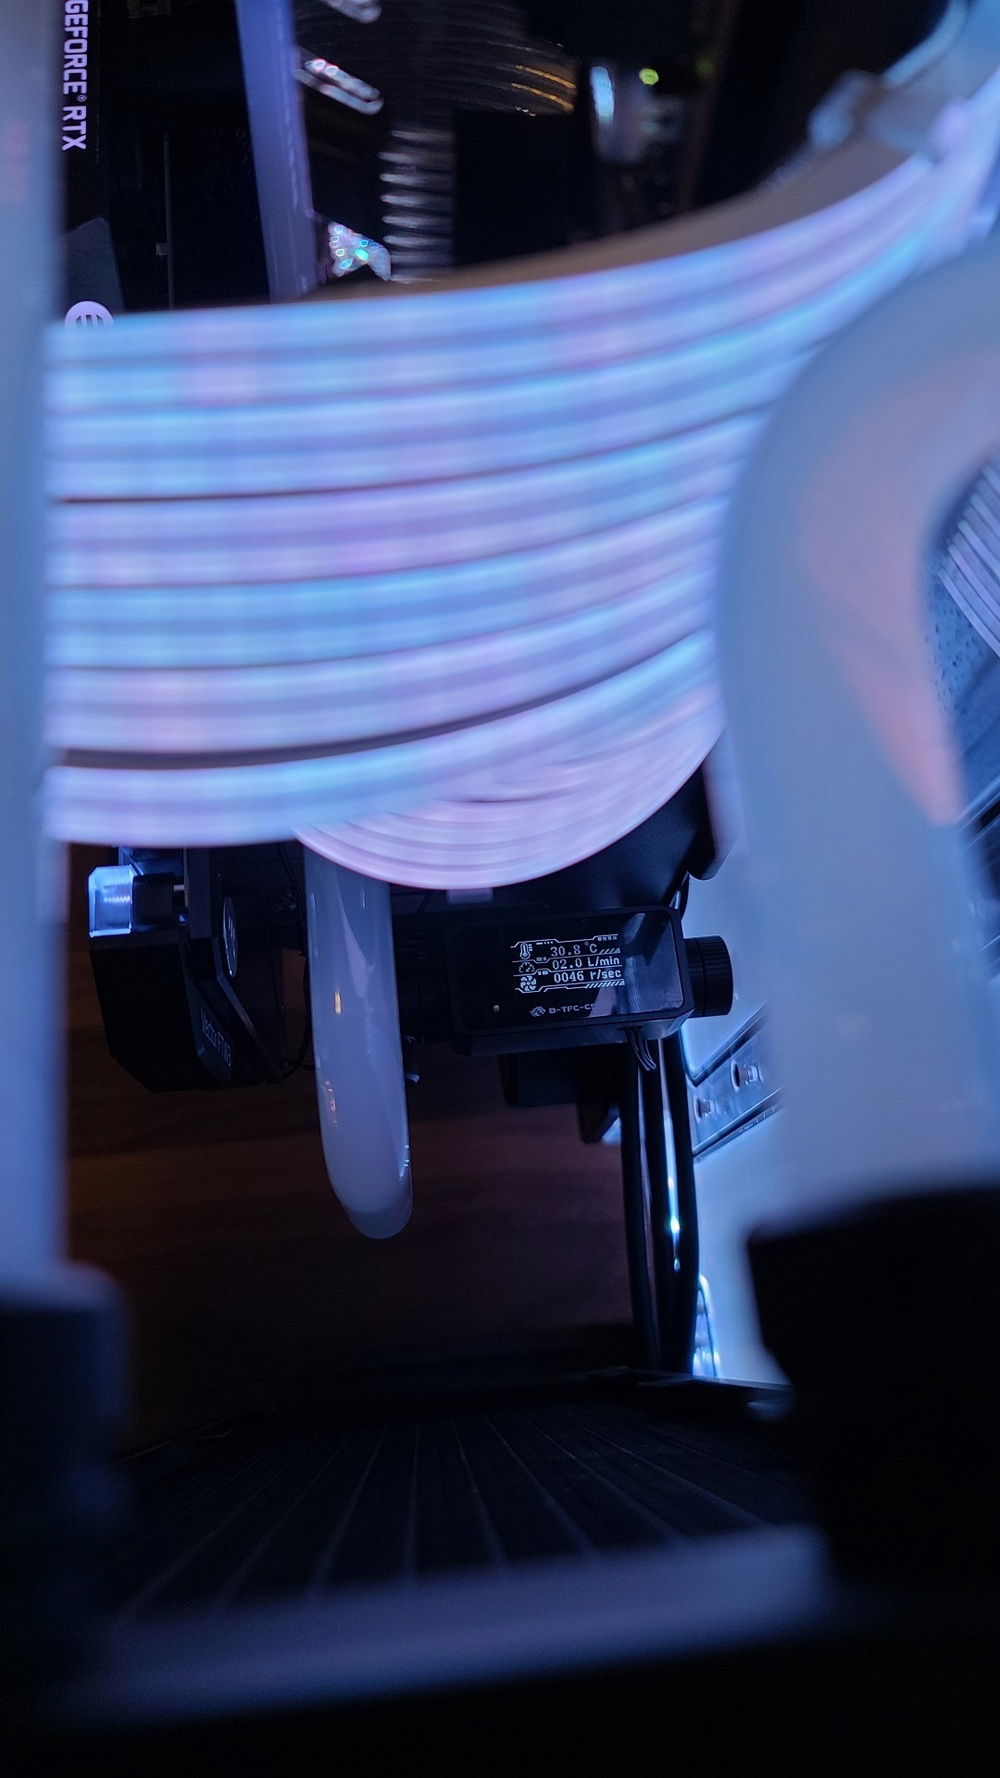
Bykski Temperature and flow sensor
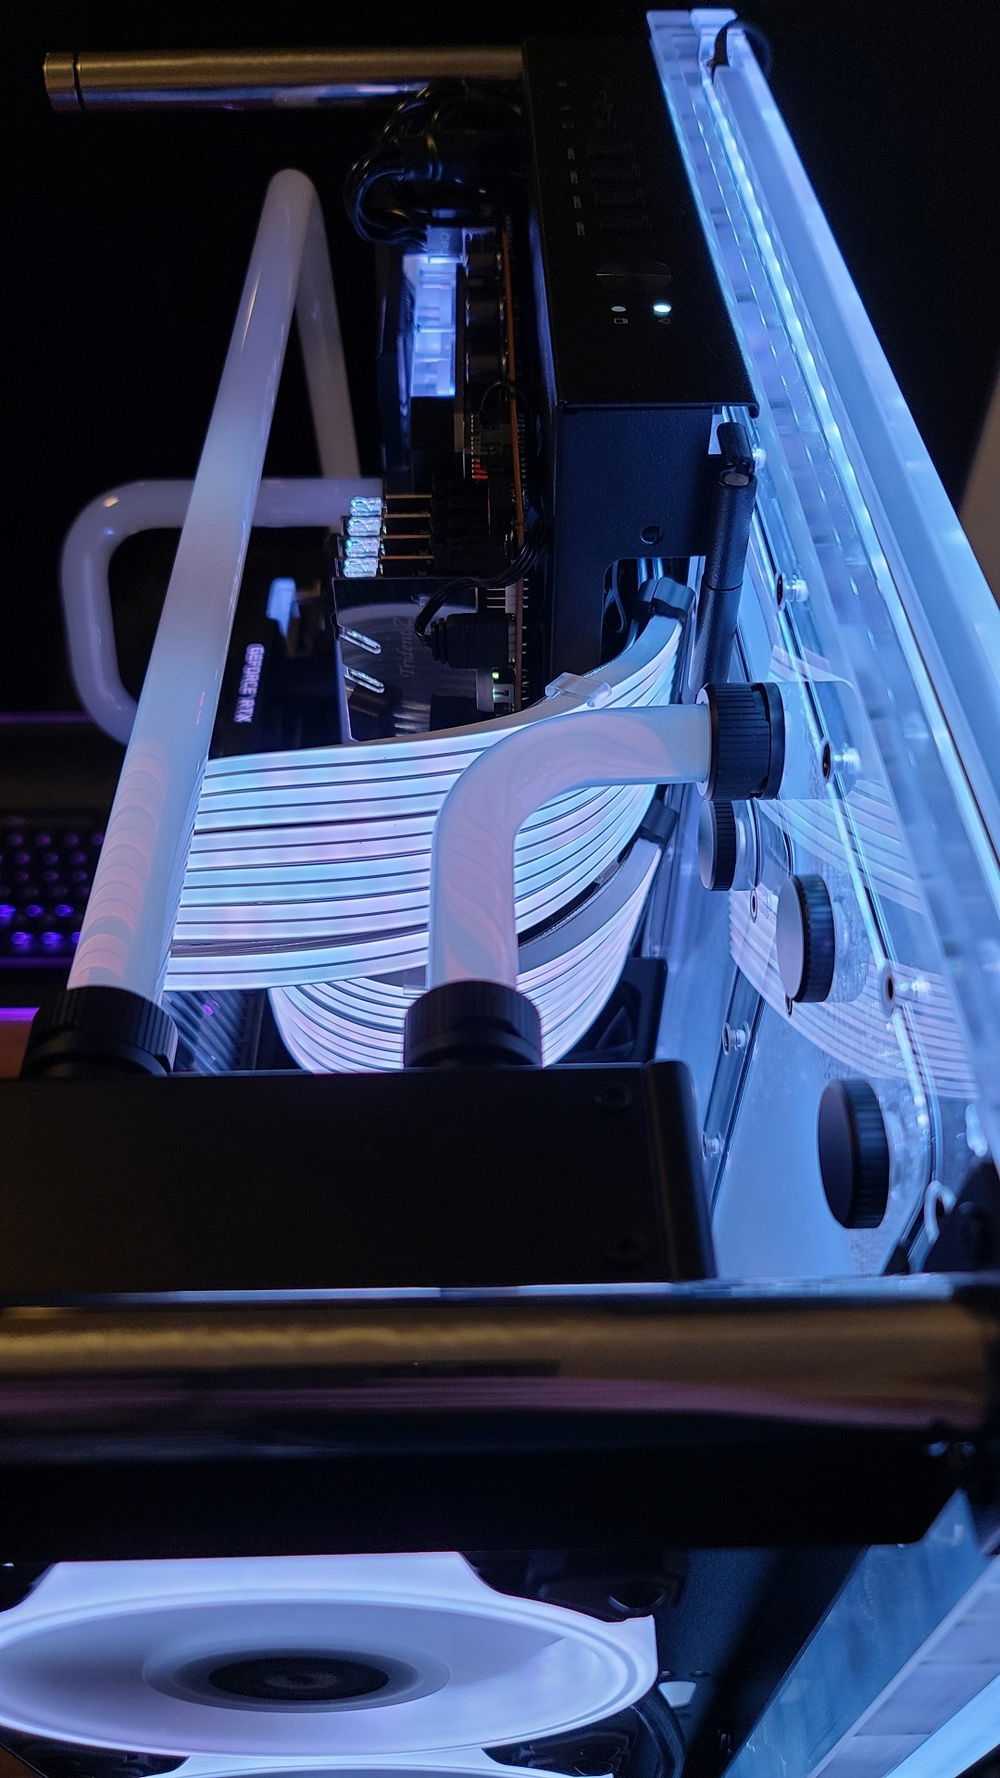
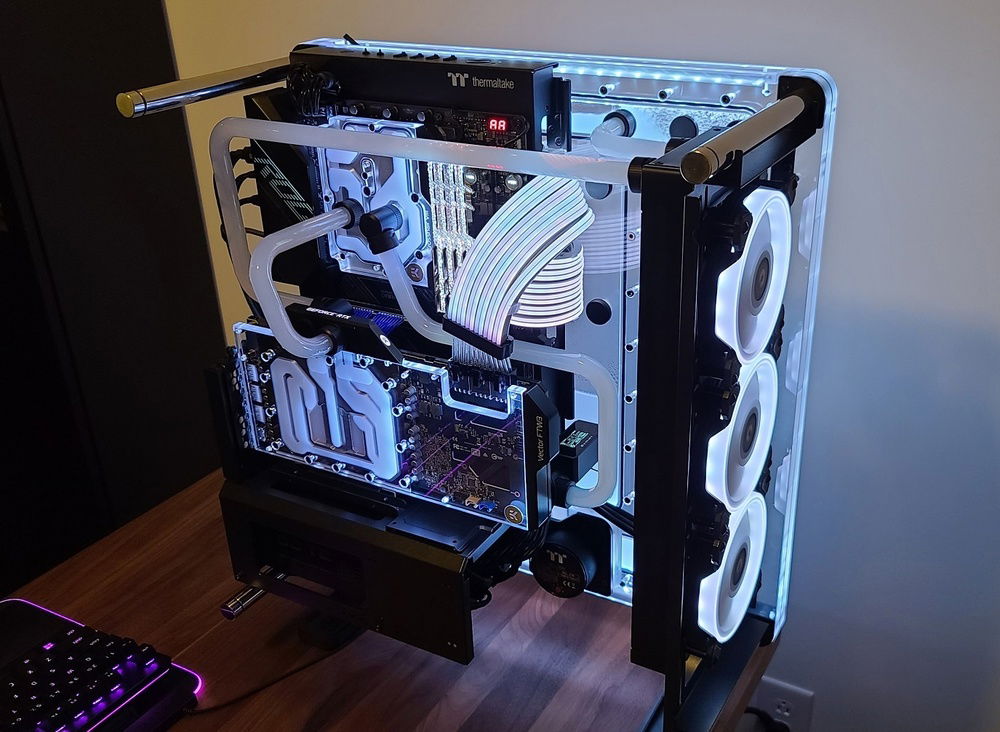
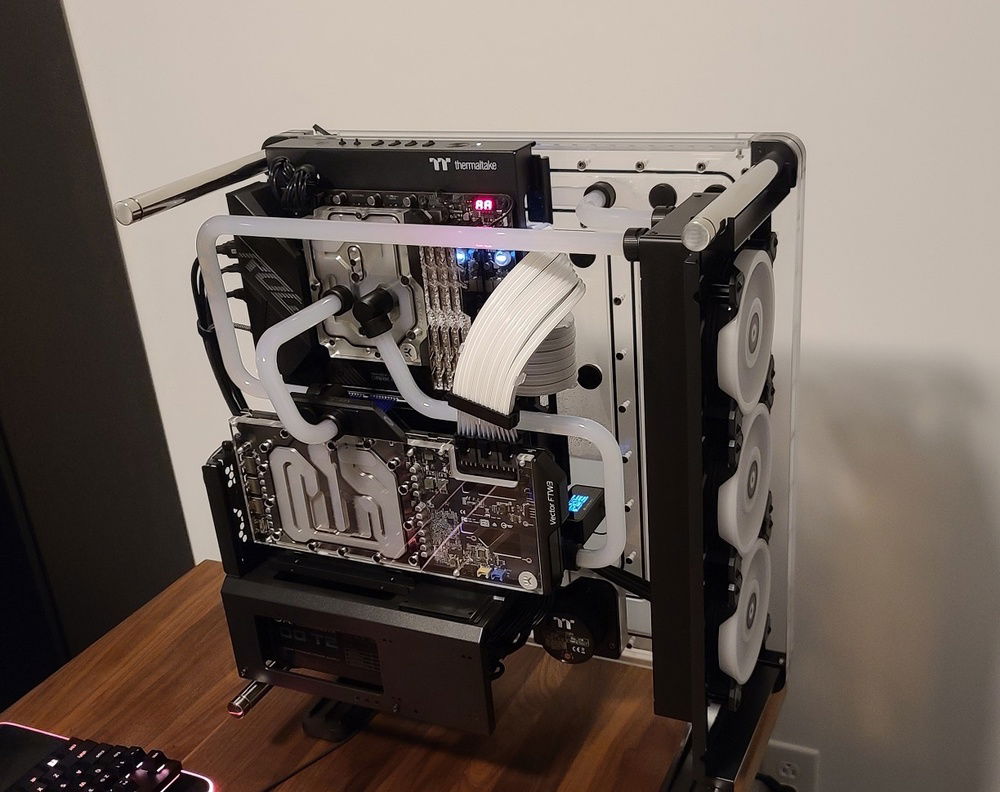
Top-down view rad side

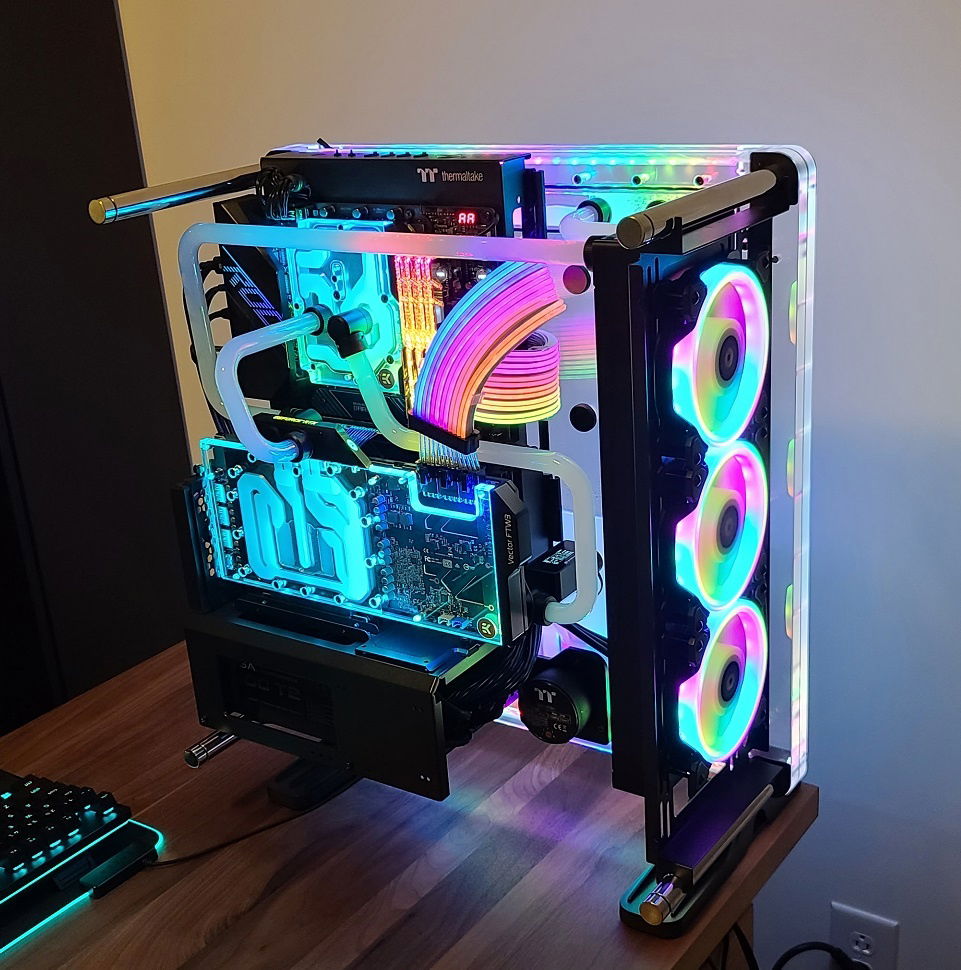
Tears
AD:
Since the beginning of my love for building computers I had always wanted to delve into the realm of custom loop cooling. Whether it was through a lack of means or free time I hadn't had the opportunity to try my hand at hard tubing, or any custom loop process, until this build. I started acquiring parts around November of last year and through some dumb luck I finally had everything I needed to begin assembling around February of this year.
I named this build "Tears" because that's exactly what bending acrylic brought me to... I had watched a few videos and figured it couldn't be that difficult to heat up some plastic. I only cried three times throughout the learning process but I got to a point where I was happy with the results. What you see is quite a few hours of part accrual, trial and error, assembly, waiting on more parts to arrive that I didn't think about, and sore finger-tips.
Other than learning to bend acrylic I would say that the cable management was the most challenging aspect of this build. I really wanted to use the EVGA 1600T2 but wrestling with the stock cables proved to be a test of my limited spatial reasoning as there isn't much room behind that motherboard mount. I was also forced to orient the PSU with the fan facing downwards and utilize only certain plugs due to the space constraint with the D5 pump. If there ever is a next build I will certainly go the route of custom cables. Along with the PSU cabling there is a Thermaltake controller for the radiator fans and case lighting amongst the rat-nest of other necessary wires. I did my best with the wiring but at the end of the day that case was closed with some hope, elbow grease, and strong case screws. Form over function I guess.
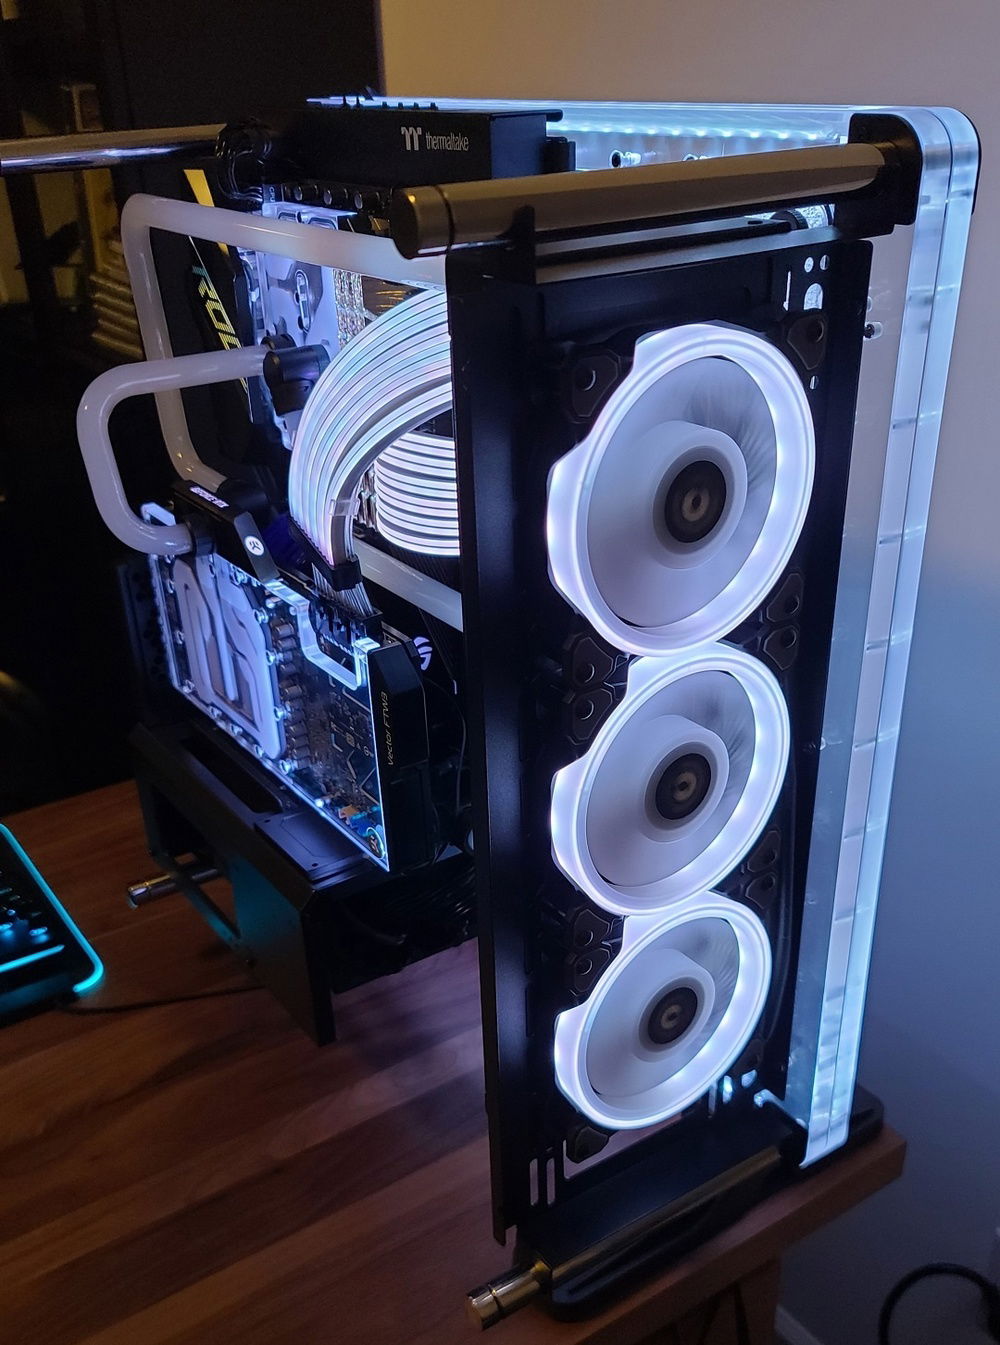
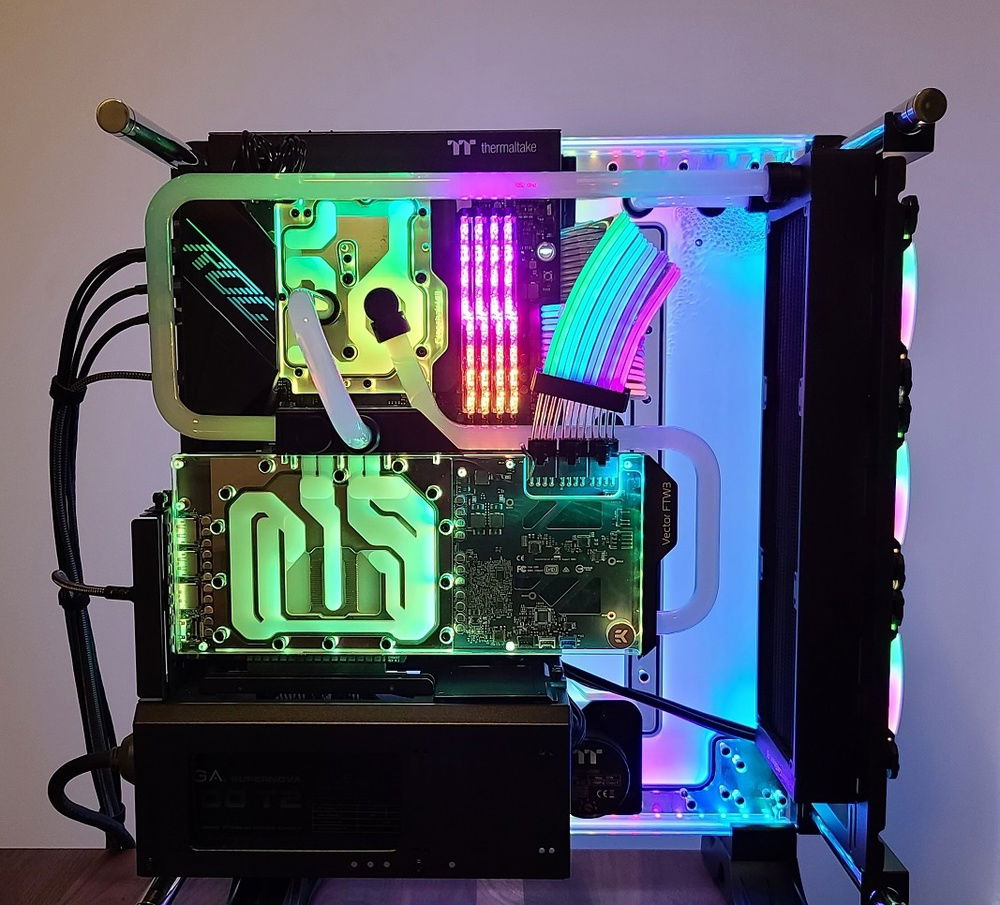
Planning out the loop runs was also not as simple as I had first imagined. The idea was to copy the look from Thermaltake's web page on this case. I hadn't done hard tubing before so I felt it was an appropriate goal for my first time and something that I would be happy with if successful. While looking through the installation manual on the mono-block I realized that it had a specific inlet and outlet. This forced me to get a bit more creative with how I was going to run the tubing and with the help of my wife's eye I came up with what you see in the pictures. My bends are certainly not like that of some of the ones I've seen here on Builds.gg but I'm happy with how they turned out. I strived hard to prevent flat spots and puckering through the curves and to space out bends into connections so that all the lines would be straight and parallel with one another. It was a humbling experience and I'm proud of how it all turned out.
Working with the all of the water cooling parts turned out to be a simple venture. I used all EKWB parts (sans the Bykski temp/flow sensor) and had zero issues with tolerances or ill-fitting parts. I really appreciated the compression fittings as they made mocking up fitments and final assembly very easy. Once all together I used EK's leak tester and after leaving it overnight without any air loss I filled it up with distilled for a rinse and then put in the Cryofuel Mystic Fog. Knock on wood, two weeks and no leaks.
There are still a few software kinks that I'm working out (my first ever AMD build) but it amazes me how far we've come with what I'd call prosumer computer equipment. This is quite overkill for the gaming and minor transcoding that I do but it sure does it all with ease. The only thing it won't do is the dishes but I think that's something I can live with. Thank you for looking at my project!
I named this build "Tears" because that's exactly what bending acrylic brought me to... I had watched a few videos and figured it couldn't be that difficult to heat up some plastic. I only cried three times throughout the learning process but I got to a point where I was happy with the results. What you see is quite a few hours of part accrual, trial and error, assembly, waiting on more parts to arrive that I didn't think about, and sore finger-tips.
Other than learning to bend acrylic I would say that the cable management was the most challenging aspect of this build. I really wanted to use the EVGA 1600T2 but wrestling with the stock cables proved to be a test of my limited spatial reasoning as there isn't much room behind that motherboard mount. I was also forced to orient the PSU with the fan facing downwards and utilize only certain plugs due to the space constraint with the D5 pump. If there ever is a next build I will certainly go the route of custom cables. Along with the PSU cabling there is a Thermaltake controller for the radiator fans and case lighting amongst the rat-nest of other necessary wires. I did my best with the wiring but at the end of the day that case was closed with some hope, elbow grease, and strong case screws. Form over function I guess.
Planning out the loop runs was also not as simple as I had first imagined. The idea was to copy the look from Thermaltake's web page on this case. I hadn't done hard tubing before so I felt it was an appropriate goal for my first time and something that I would be happy with if successful. While looking through the installation manual on the mono-block I realized that it had a specific inlet and outlet. This forced me to get a bit more creative with how I was going to run the tubing and with the help of my wife's eye I came up with what you see in the pictures. My bends are certainly not like that of some of the ones I've seen here on Builds.gg but I'm happy with how they turned out. I strived hard to prevent flat spots and puckering through the curves and to space out bends into connections so that all the lines would be straight and parallel with one another. It was a humbling experience and I'm proud of how it all turned out.
Working with the all of the water cooling parts turned out to be a simple venture. I used all EKWB parts (sans the Bykski temp/flow sensor) and had zero issues with tolerances or ill-fitting parts. I really appreciated the compression fittings as they made mocking up fitments and final assembly very easy. Once all together I used EK's leak tester and after leaving it overnight without any air loss I filled it up with distilled for a rinse and then put in the Cryofuel Mystic Fog. Knock on wood, two weeks and no leaks.
There are still a few software kinks that I'm working out (my first ever AMD build) but it amazes me how far we've come with what I'd call prosumer computer equipment. This is quite overkill for the gaming and minor transcoding that I do but it sure does it all with ease. The only thing it won't do is the dishes but I think that's something I can live with. Thank you for looking at my project!
Color(s): Black White
RGB Lighting? Yes
Theme: Futuristic
Cooling: Custom Liquid Cooling
Size: ATX
Type: General Build
Hardware
CPU
$ 799.99
Motherboard
$ 592.39
Memory
$ 599.99
Graphics
$ 1,645.00
PSU
$ 488.02
Case
$ 699.99
Case Fan
$ 84.85
Cooling
$ 52.99
Cooling
$ 209.06
Cooling
$ 154.99
Cooling
$ 83.99
Cooling
$ 7.99
Cooling
$ 22.45
Cooling
$ 29.97
Cooling
$ 45.99
Cooling
$ 184.99
Accessories
$ 32.87
Estimated total value of this build:
$ 6,004.23
Approved by: