


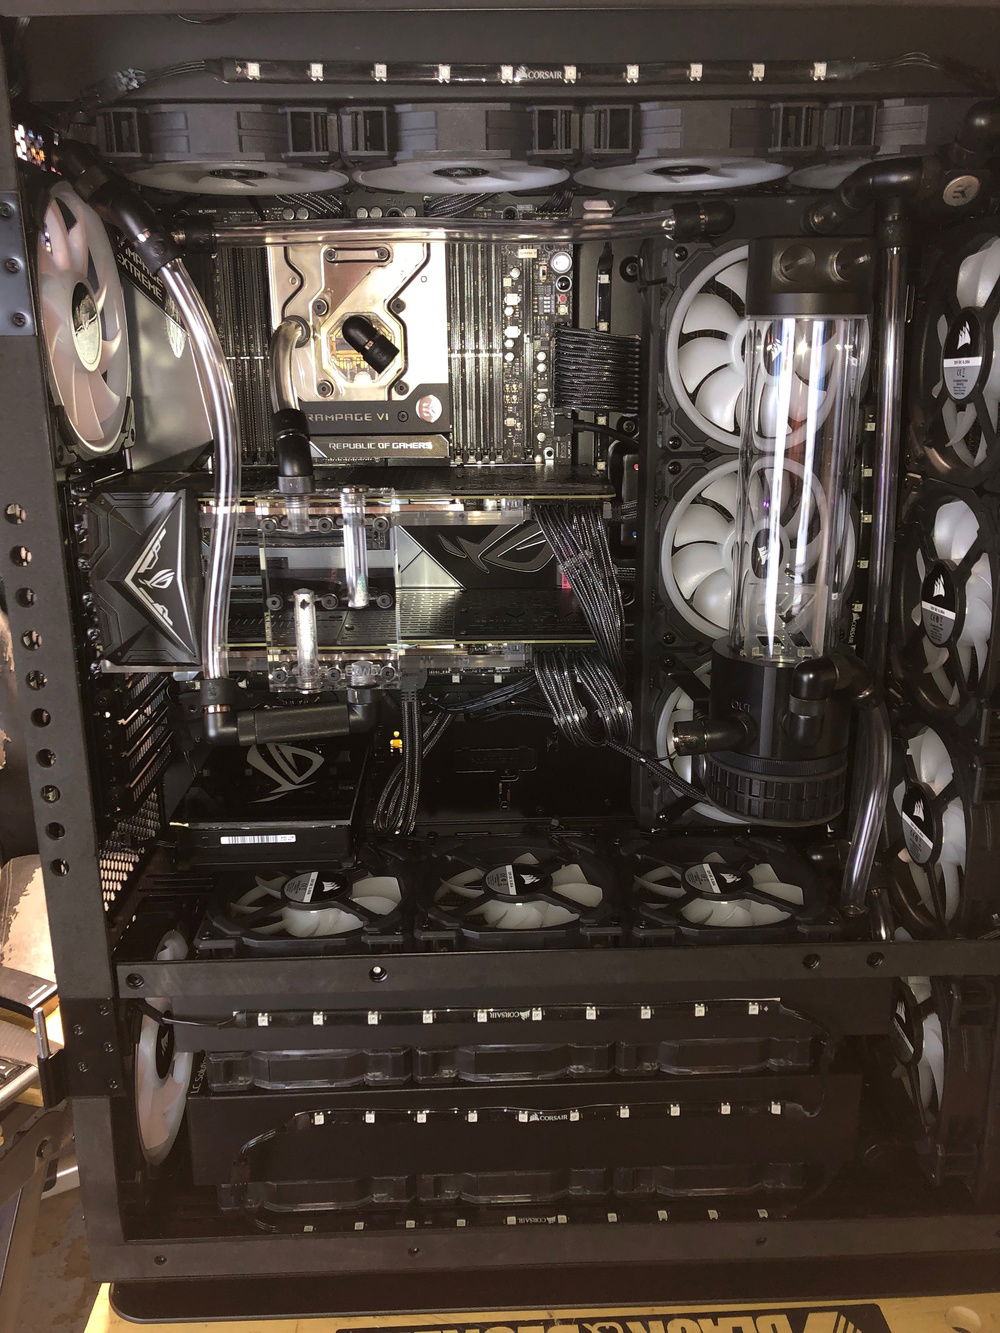
Before final tubing layout, case disassembled
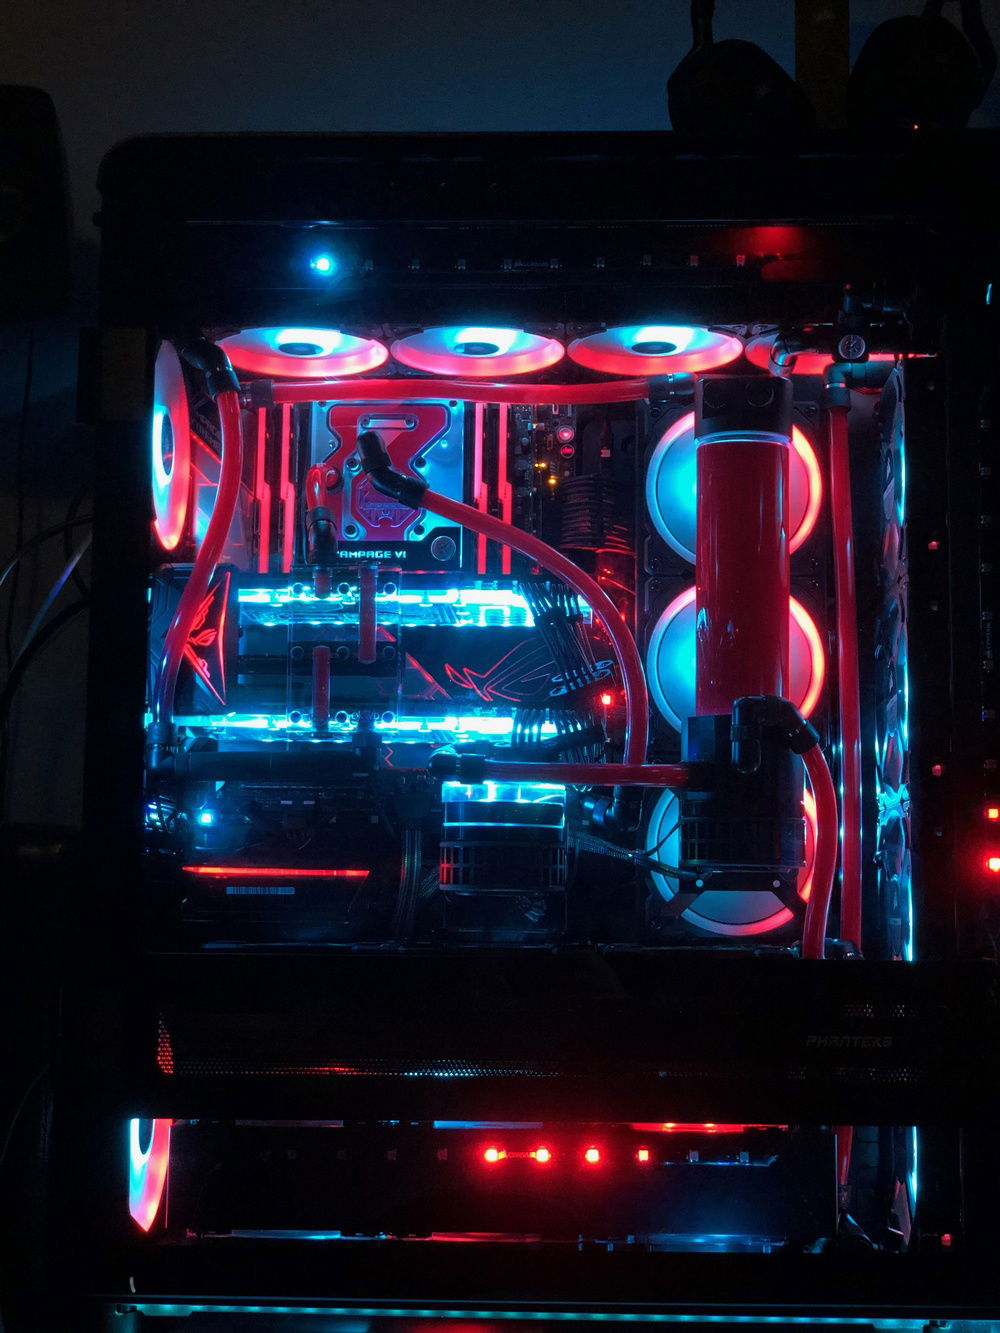
Initial lighting test
Ultimate Beast QRD (Quintuple Radiator Design)
AD:
This project is the latest in a long line of experimental builds dedicated to seeing what’s possible with custom water cooling loops. With plenty of inspiration drawn from the posts on builds.gg, whether it was personal builds or builds from professional YouTubers, it left me with a lot of "what if..." questions. Basically, the concept for this build is simple: What happens when you have much more radiators and head pressure than you need in a single custom water cooling loop?
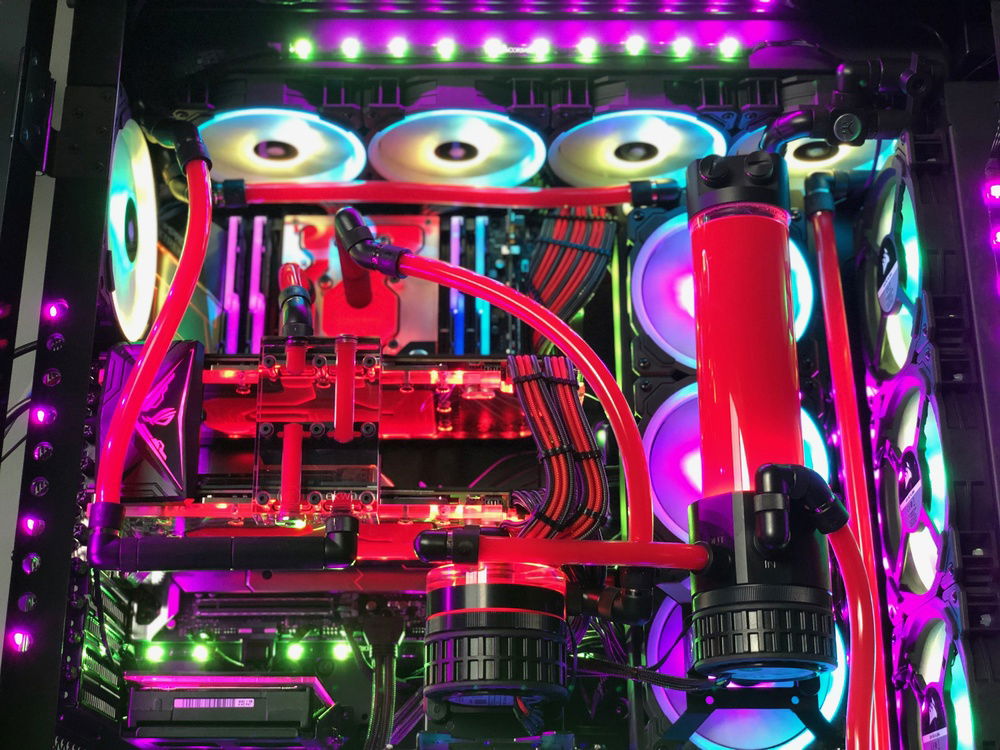
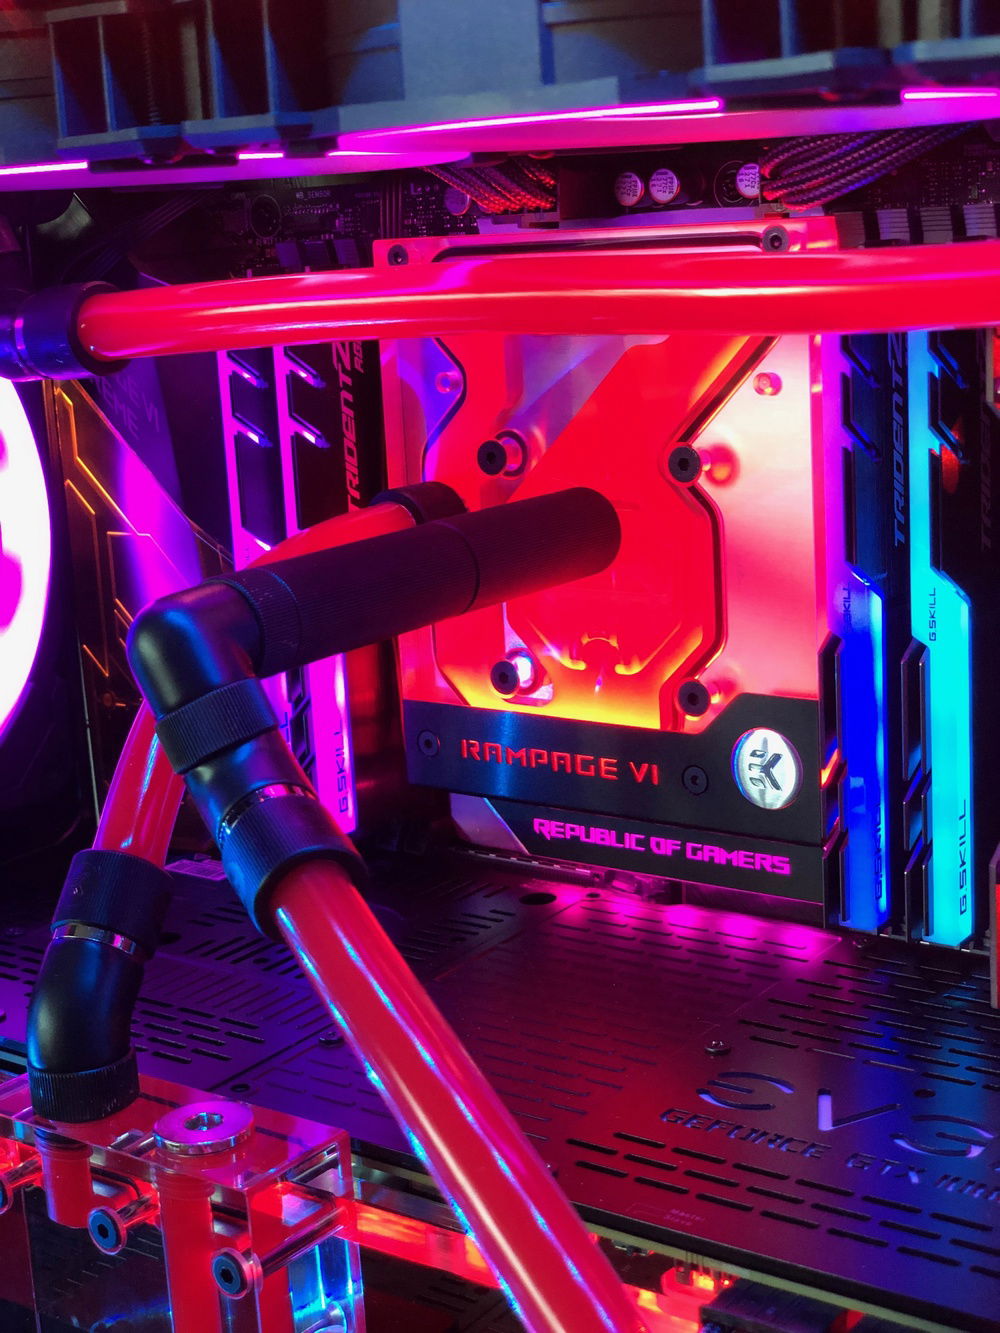
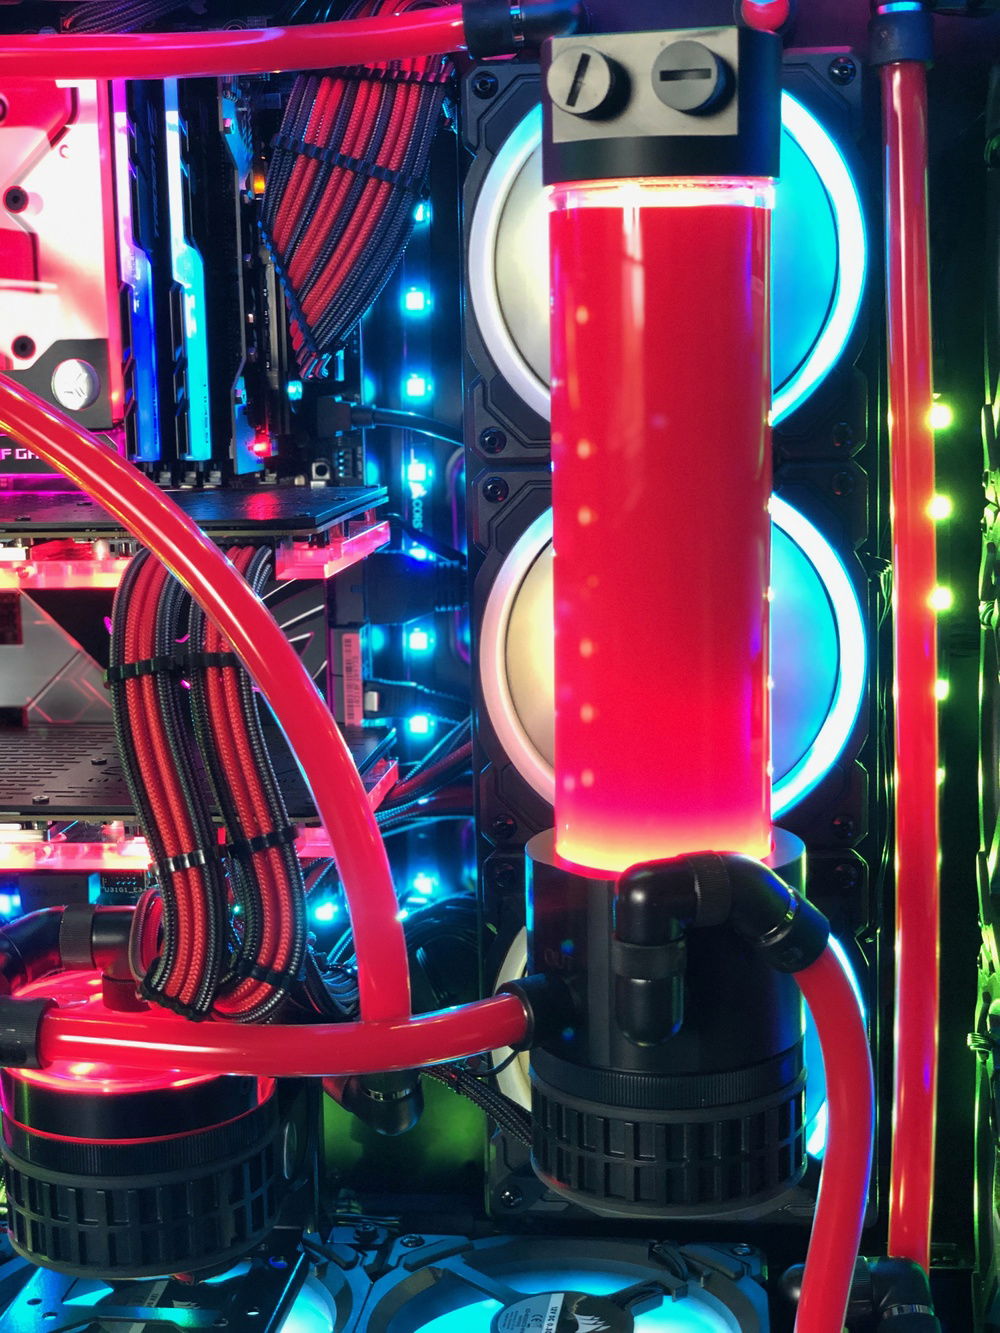
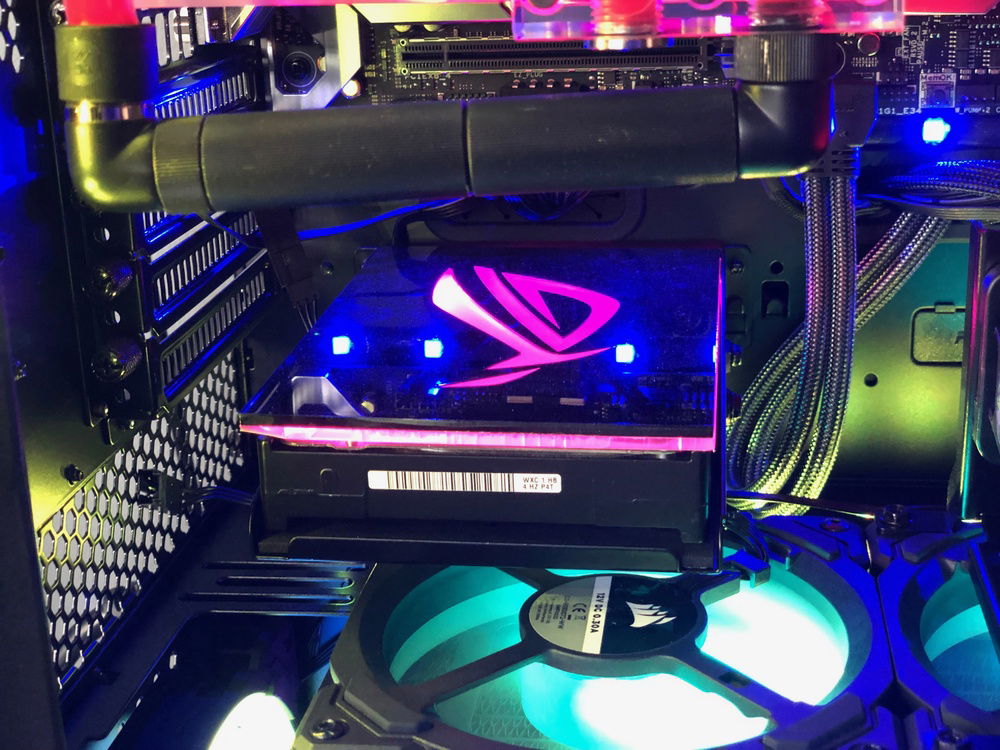
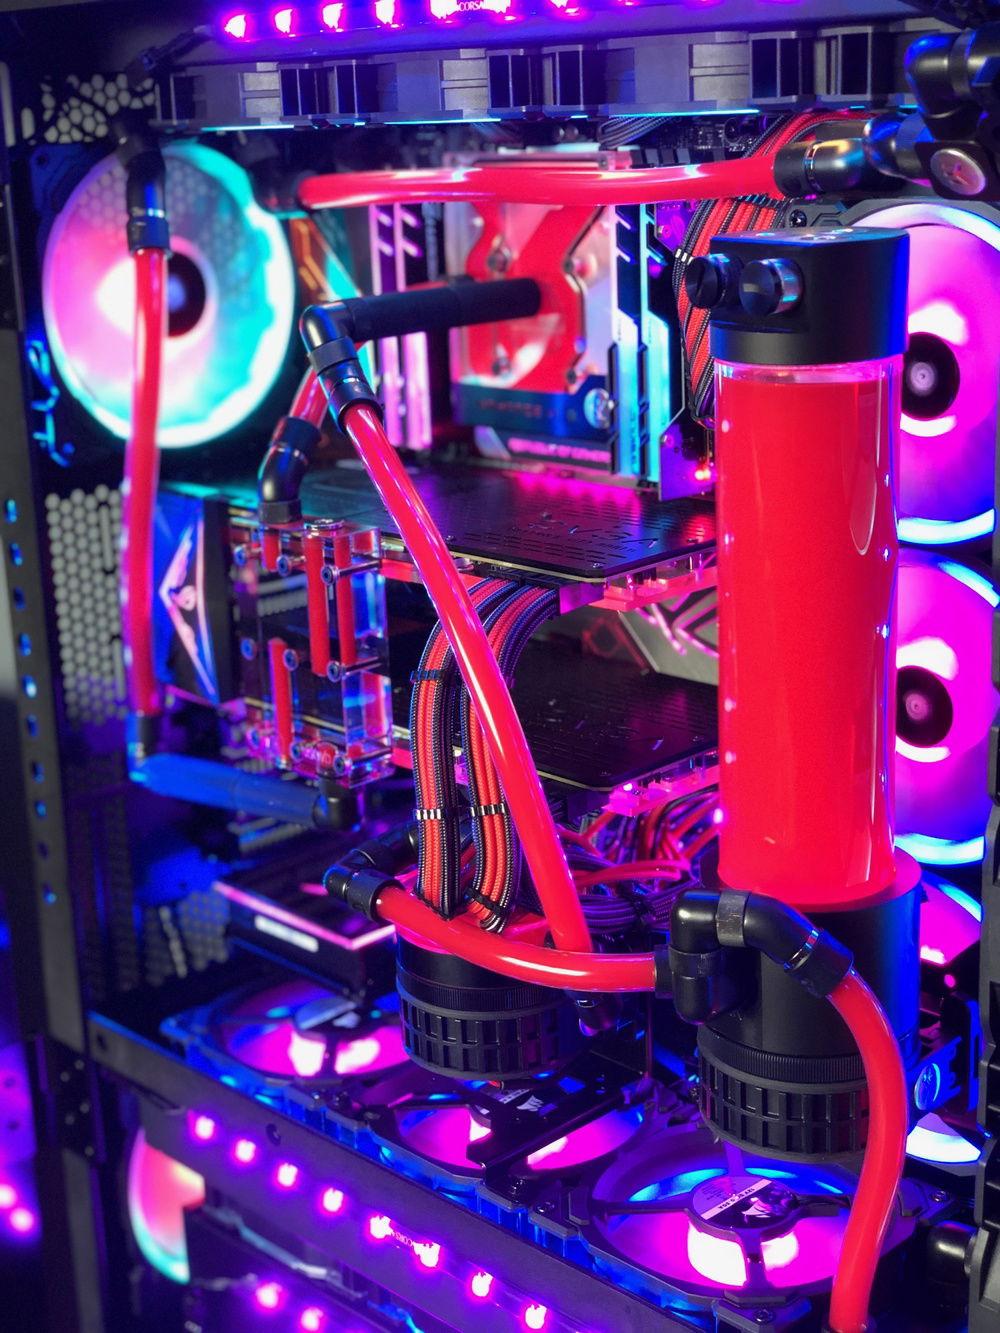
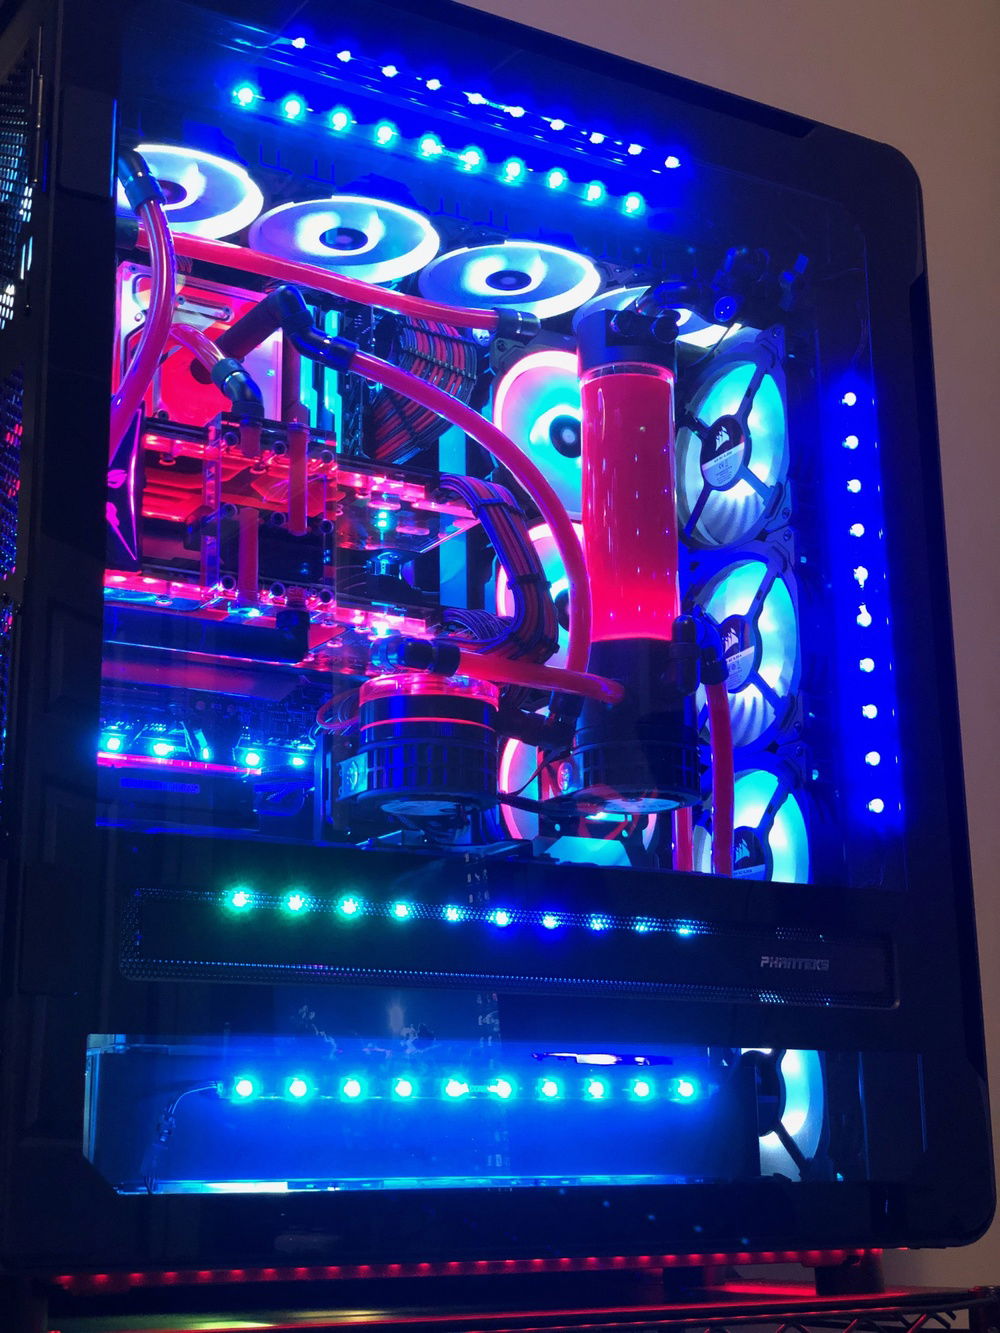
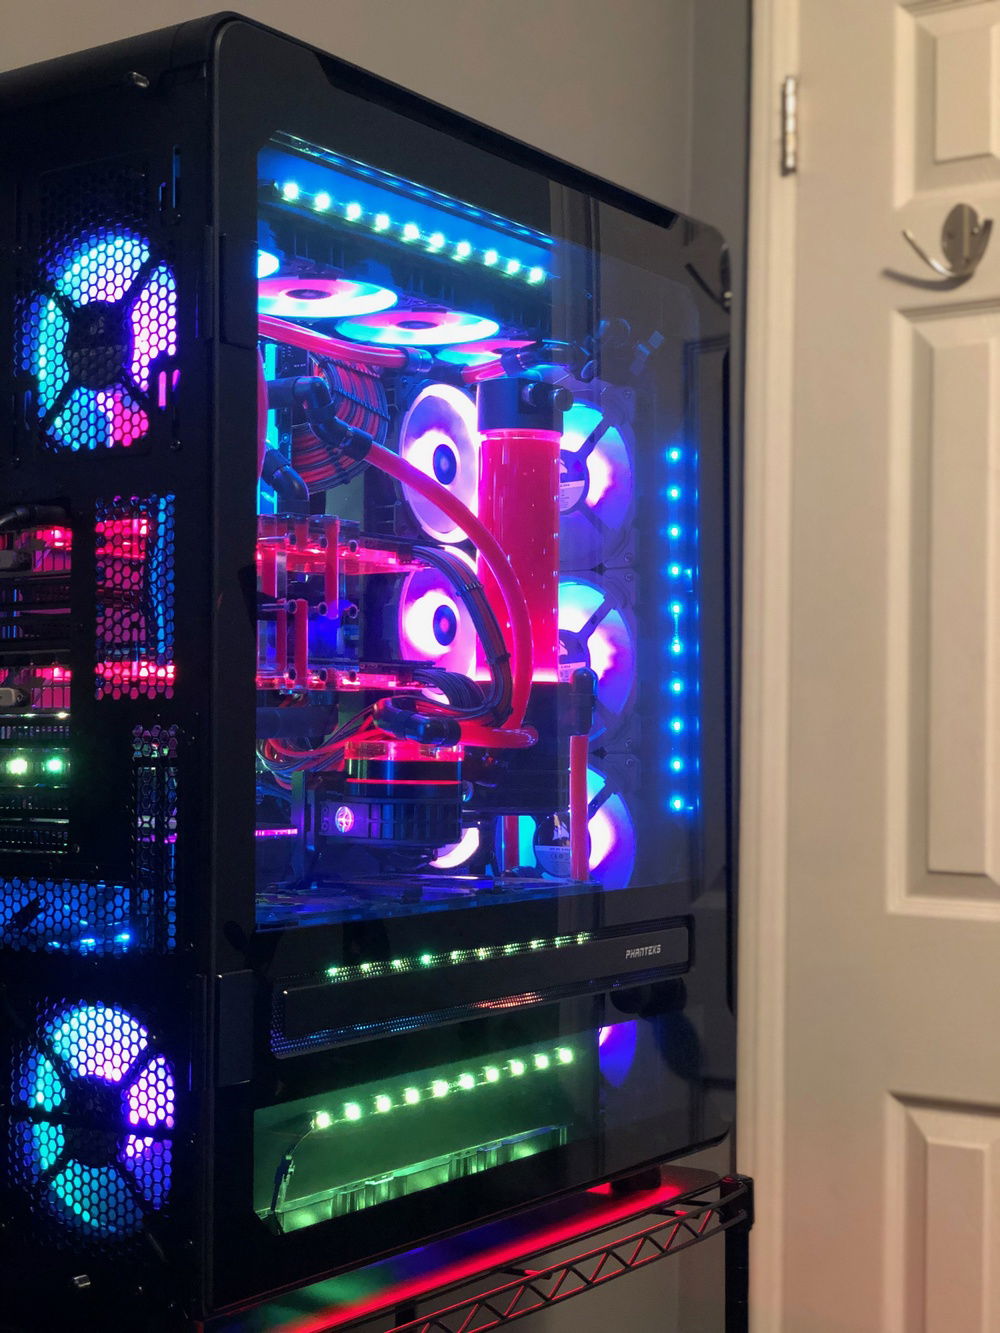
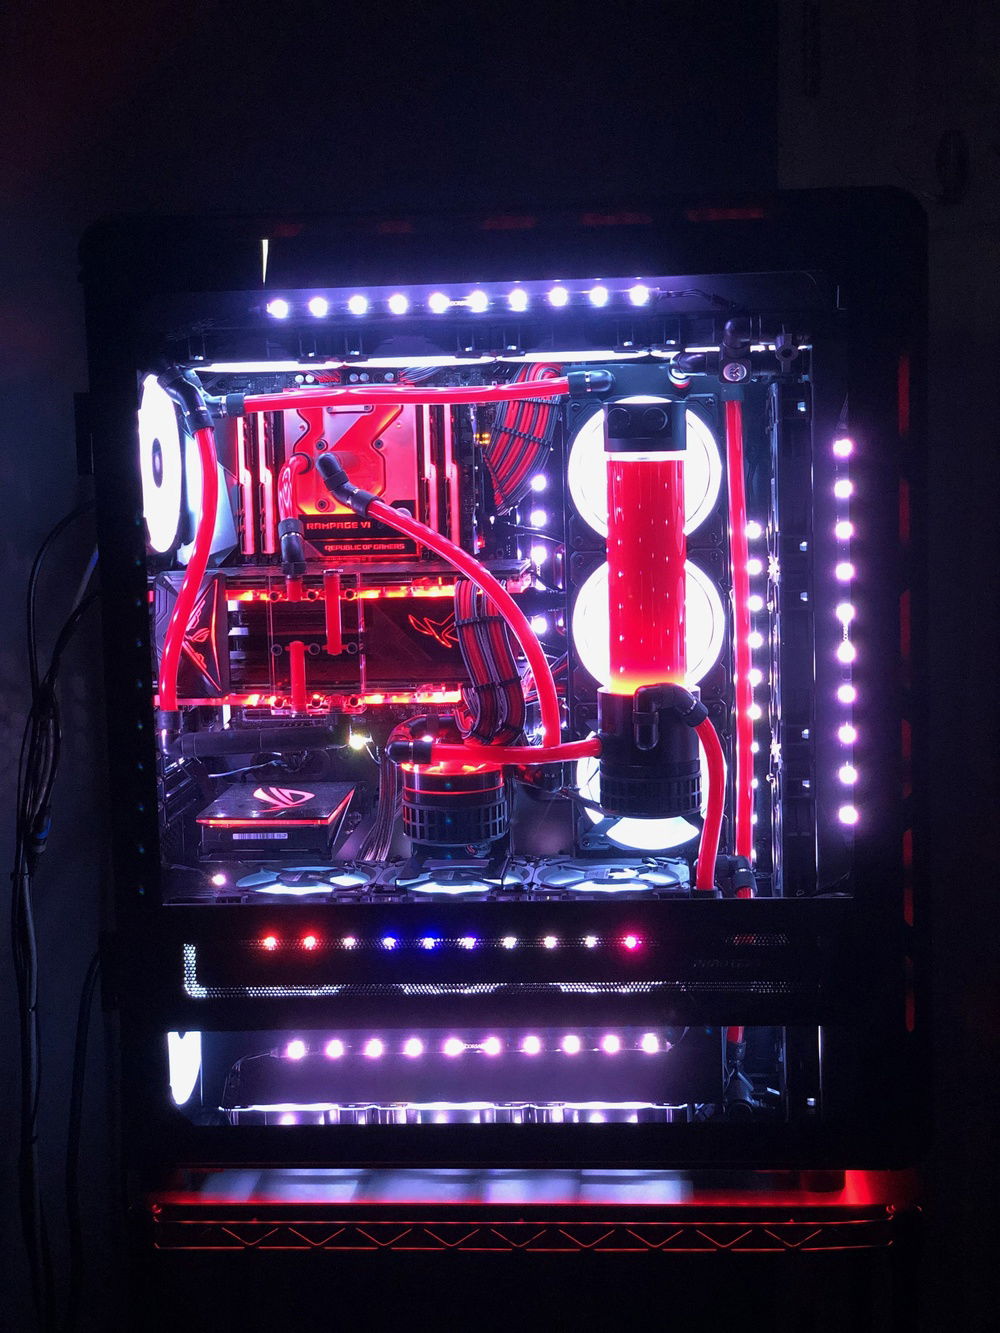
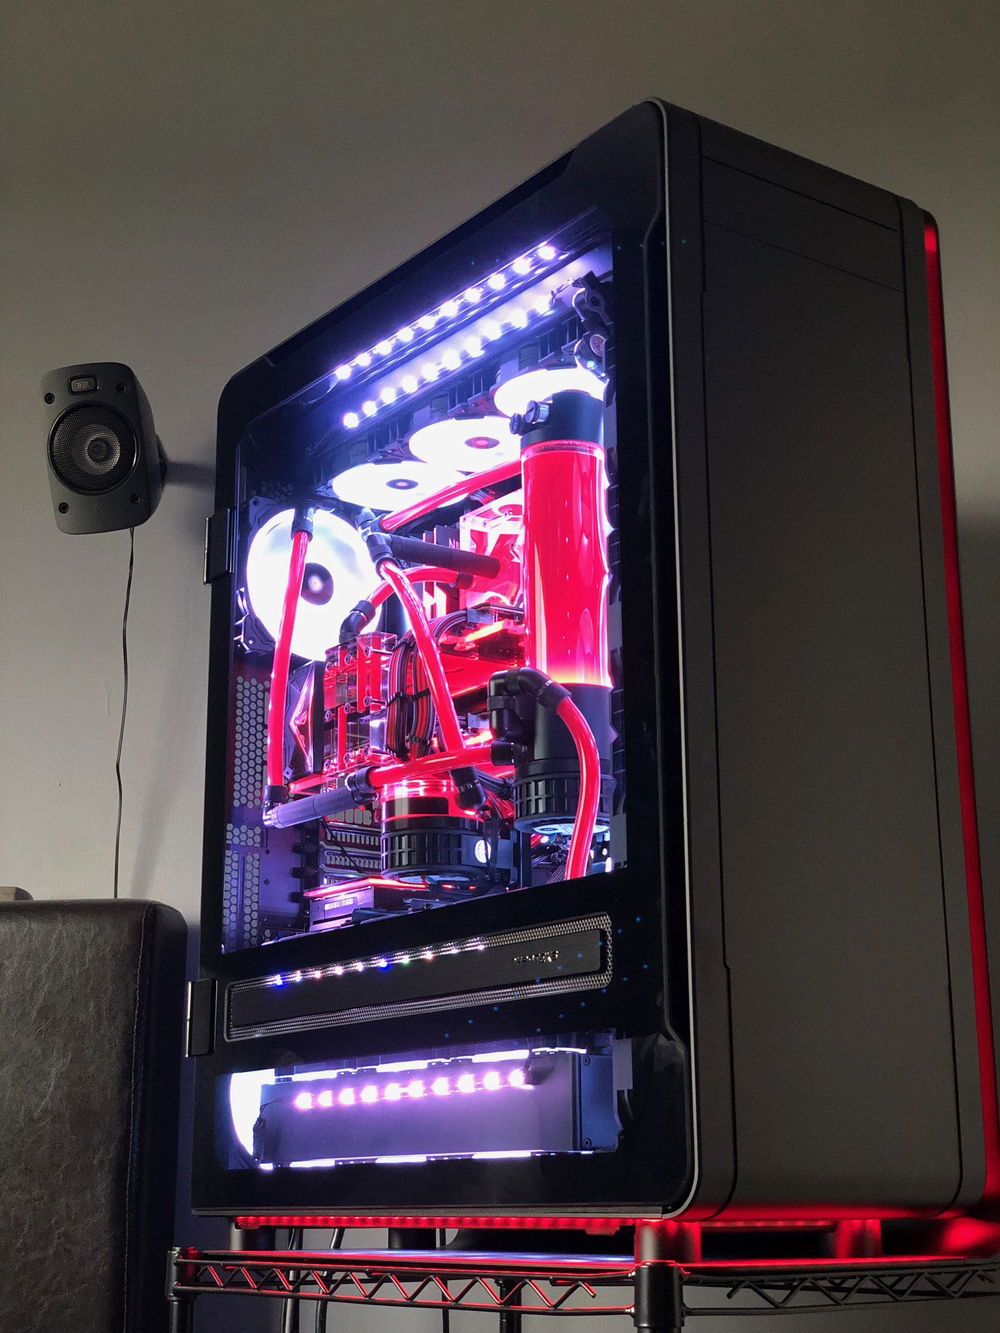
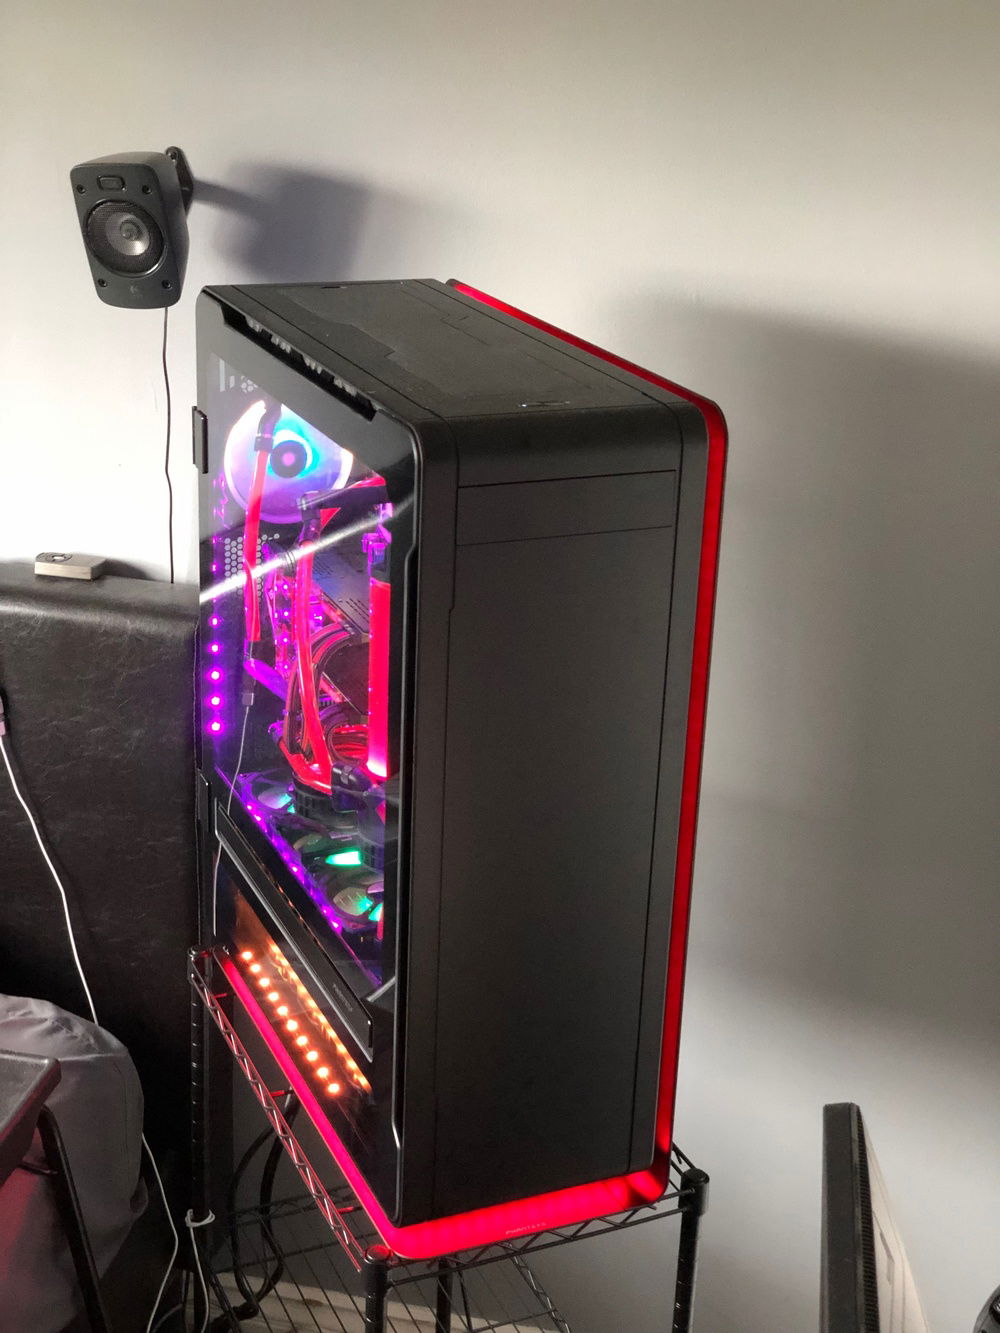
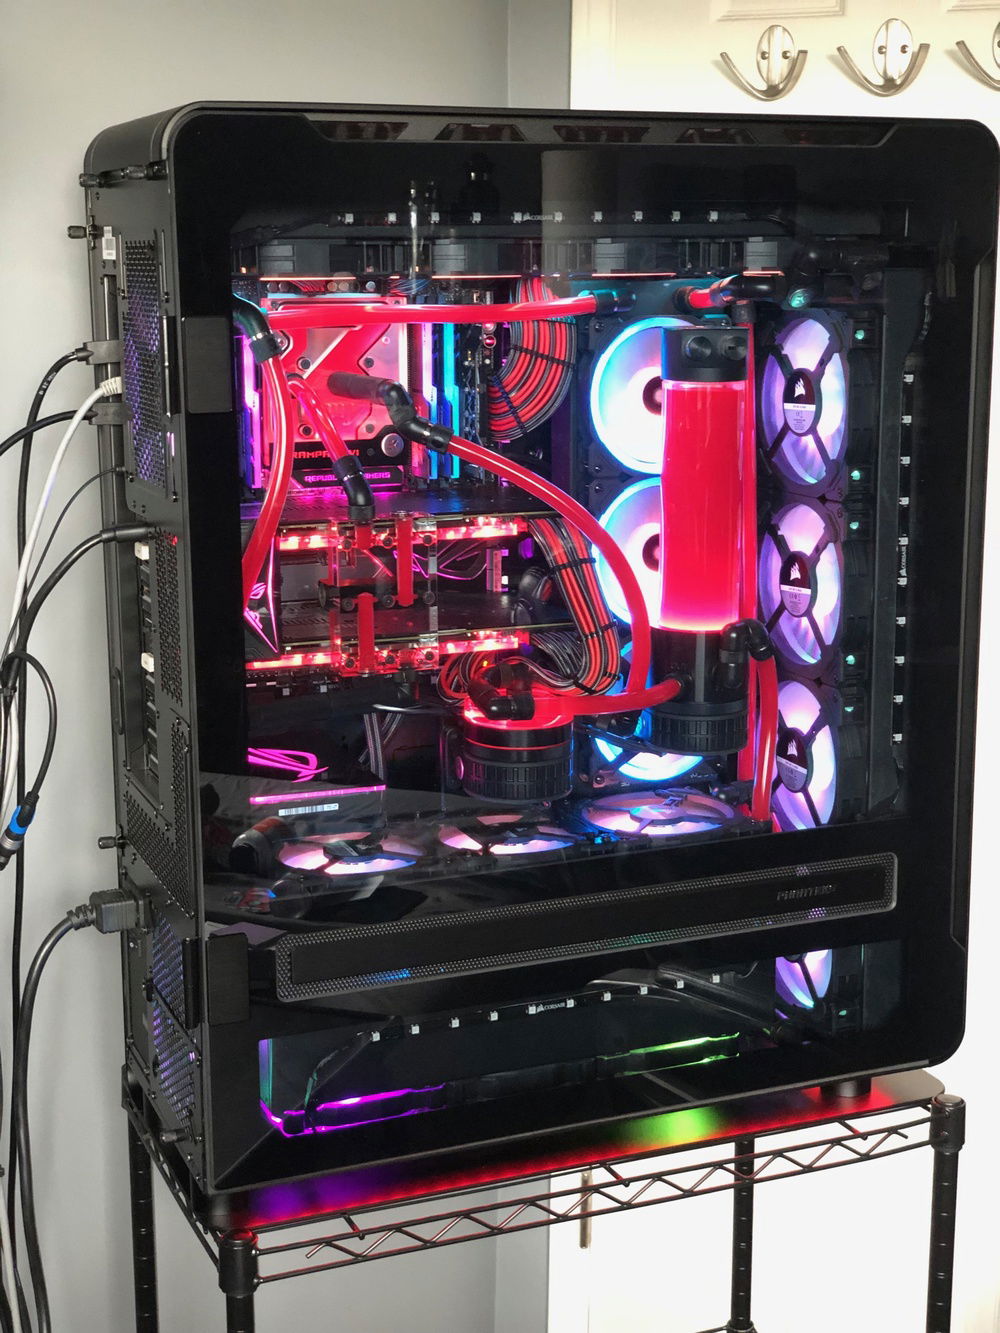
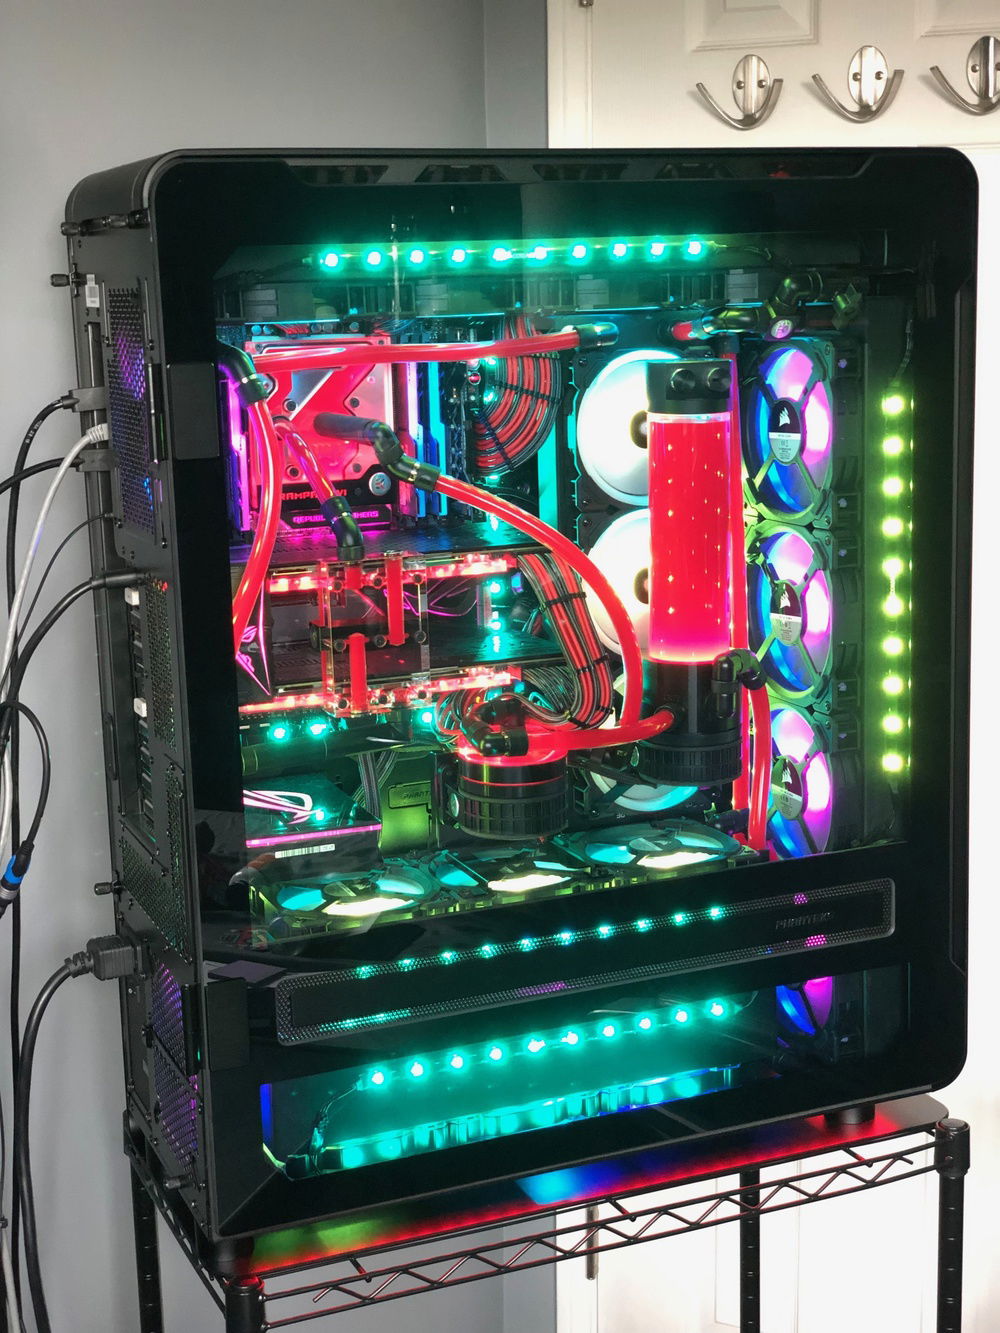
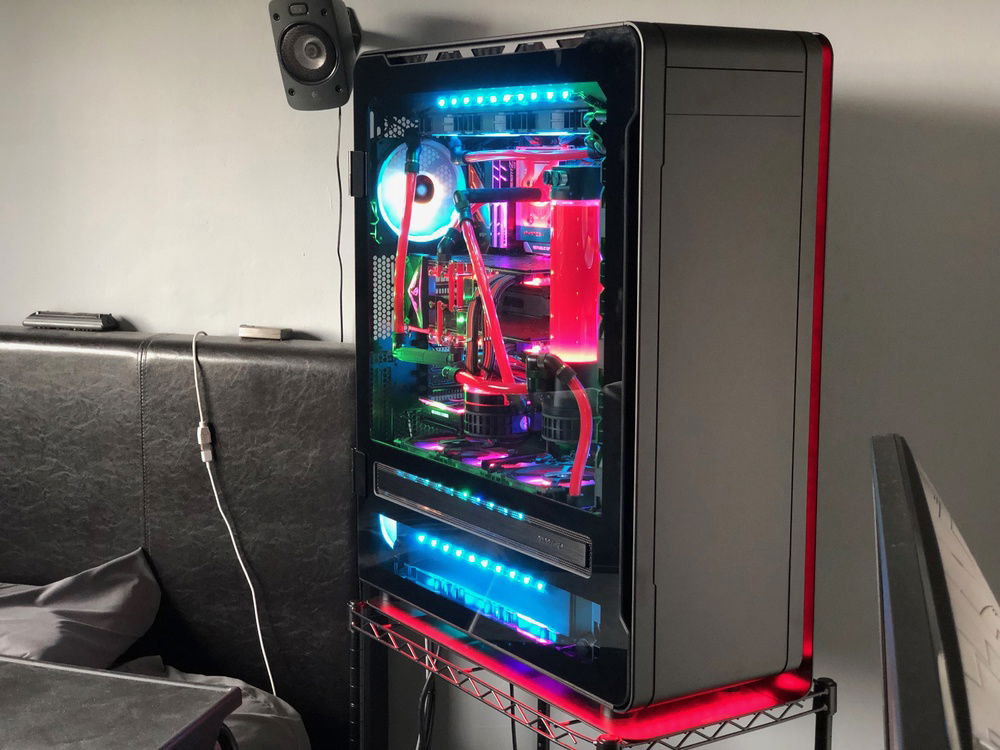
So I looked for the biggest case that I could find with the most water cooling potential and the intention of filling up every inch of the case. The obvious starting point became the Phanteks Enthoo Elite, so I went from there. The result was a single-loop with 5 radiators and 2 D5 pumps in series, which contains over half a gallon of fluid and has an estimated heat dissipation of 3,300 Watts. The system when filled with water weighs in excess of 120 lbs. In order to move air through all of the radiators, I chose to fill it with 22 fans, all RGB, with 16 of them being Corsair LL fans and the other 6 being Corsair HD fans. The layout is as follows:
Bottom: Intake (push/pull), EK XE 360 (triple) radiator, 6x Corsair HD120 RGB fans
Front: Intake (pull), EK CE 560 (quad) radiator, 4x Corsair LL140 RGB fans
Top: Exhaust (push), EK PE 480 (quad) radiator, 4x Corsair LL120 RGB fans
Rear: Exhaust, no radiators, 2x Corsair LL140 RGB fans
Mid-plate: Pass-through/intake (pull), EK PE 360 (triple) radiator, 3x Corsair LL120 RGB fans
Side: Exhaust (push), EK PE 360 (triple) radiator, 3x Corsair LL120 RGB fans
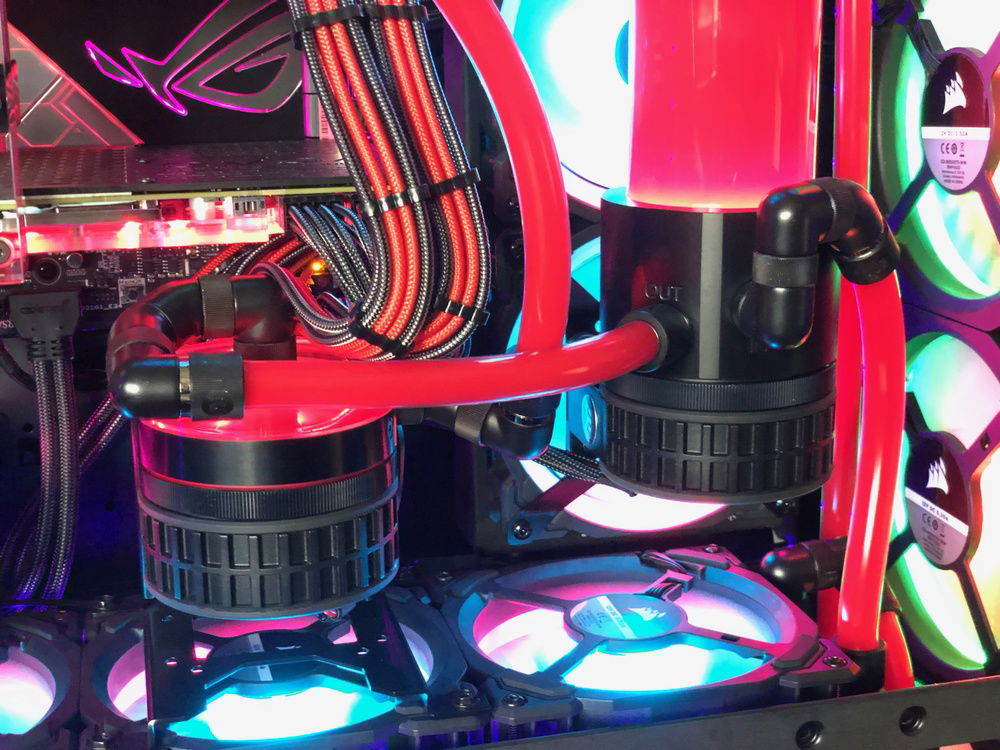
Pumps: 2x EK D5’s
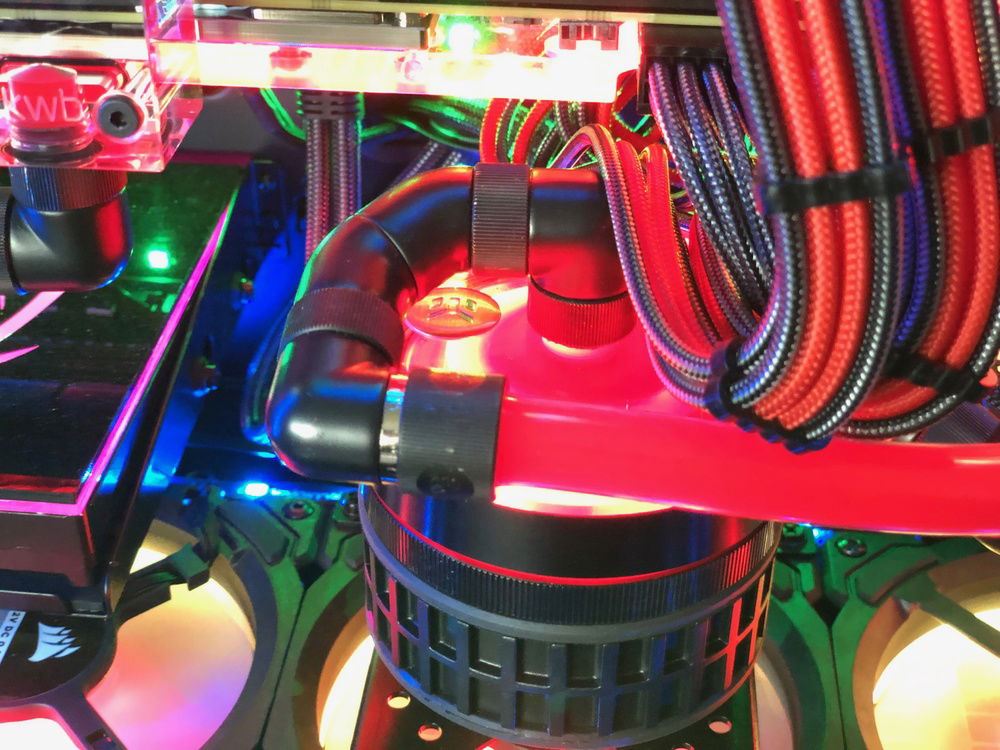
Tubing Type: Soft
The main criteria for me was that any overclocking done had to be stable, sustainable, and convenient for daily computing, so no one-off benchmarks or exotic cooling modifications. The system had to be fully stable, use safe voltages, and experience no throttling in its worst case scenarios. In addition, the whole system had to be self-contained (no open bench, additional external cooling, etc).
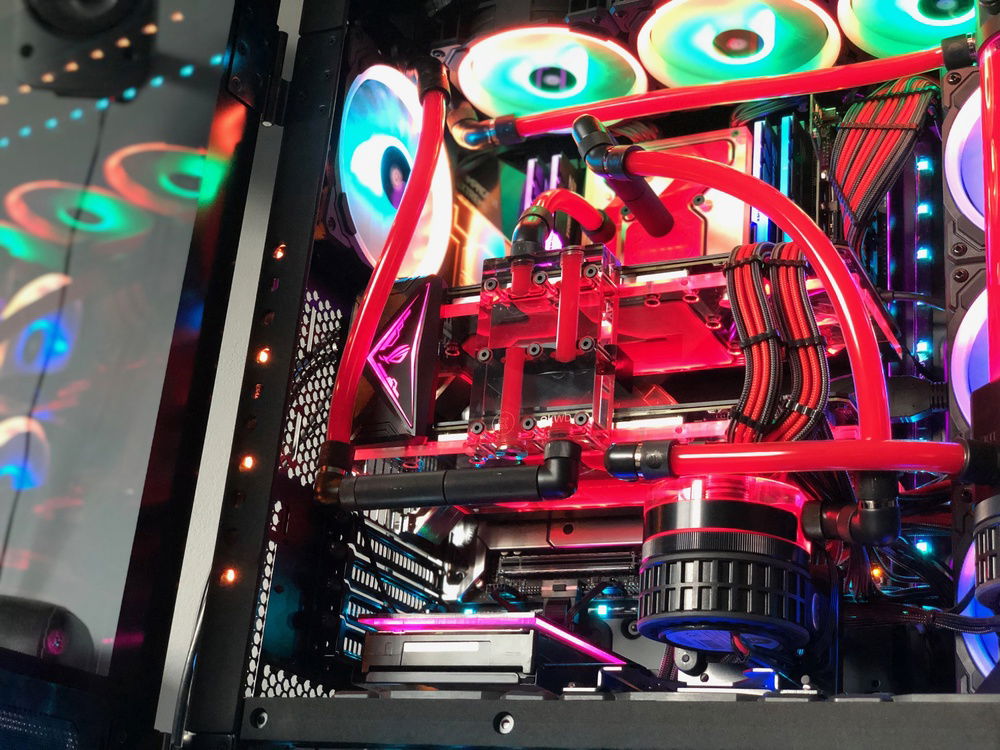
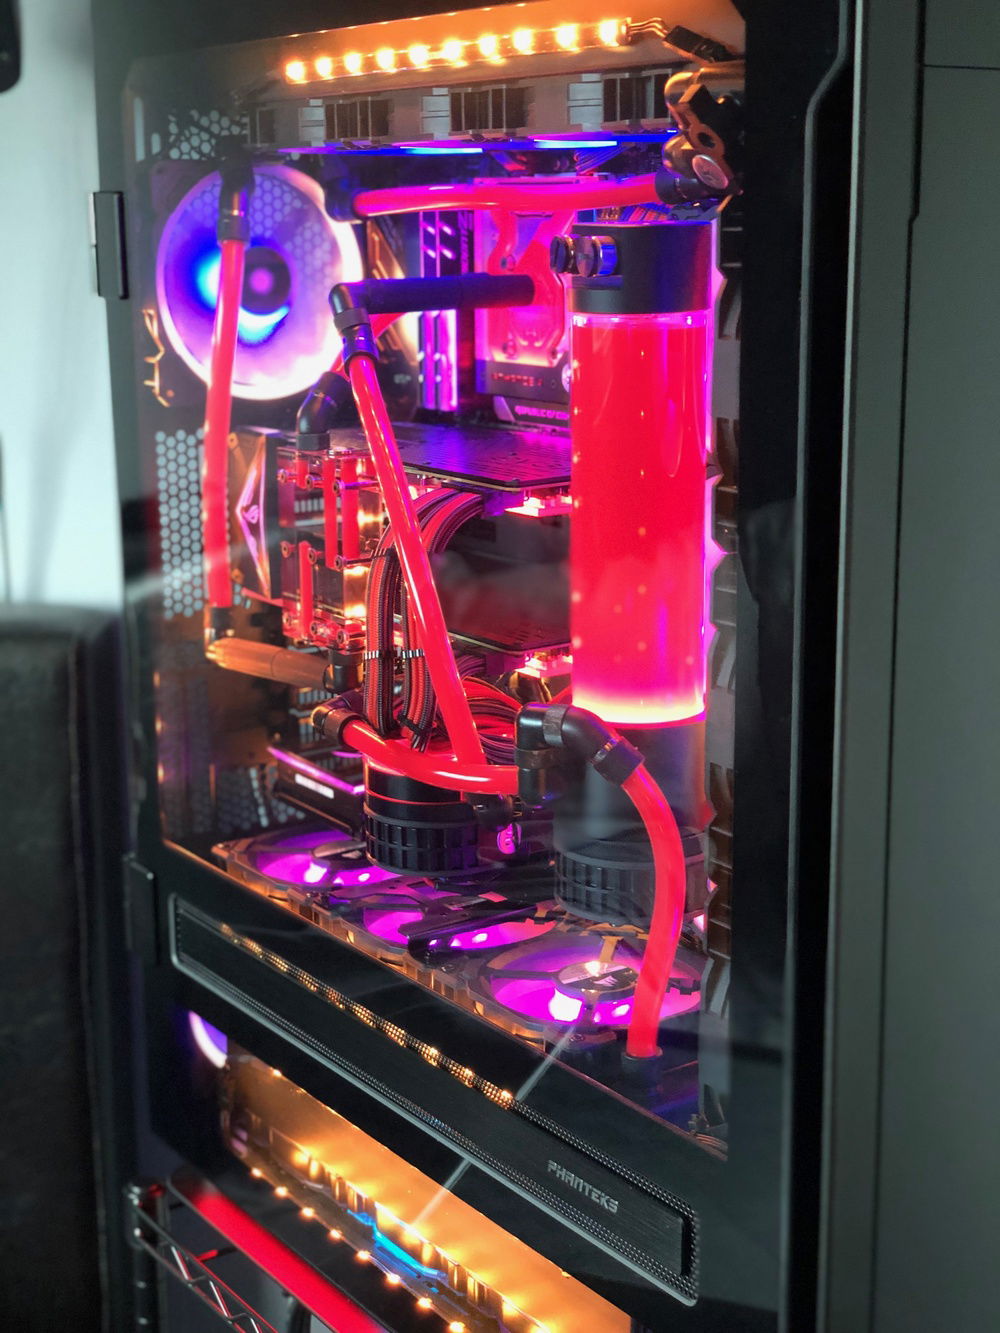
In the loop we have an i9 7940X overclocked to 4.7 GHz on all cores (1.25 V on all cores), along with 2x 1080 Ti FTW3's in SLI with a +60MHz overclock. With a delidded CPU on liquid metal, full monoblock for the motherboard, and full waterblocks for both GPUs, this loop results in (*Note – Ambient temperature at time of testing was 23 C):
Idle temperatures of ~30 C* on the CPU cores (~45 C* package) and 29/32 C* on the GPUs respectively.
Load temperatures of up to ~86 C* on the CPU cores (~90 C* package) and a score of 3426 in Cinebench along with a Heaven load temperature of ~40/43 C* on the GPUs respectively.
With no fans on and simply using passive water cooling (i.e. only water pumps on to cycle fluid), the CPU cores idle at ~35 C* (~50 C* package), with the GPUs at 30/33 C* respectively.
Benchmark scores are:
9,221 Time Spy Extreme (9,396 GPU / 8,341 CPU)
http://www.3dmark.com/spy/6471948
13,389 Fire Strike Ultra (13,567 GPU / 30,350 Physics / 6,915 Combined)
http://www.3dmark.com/fs/18589513
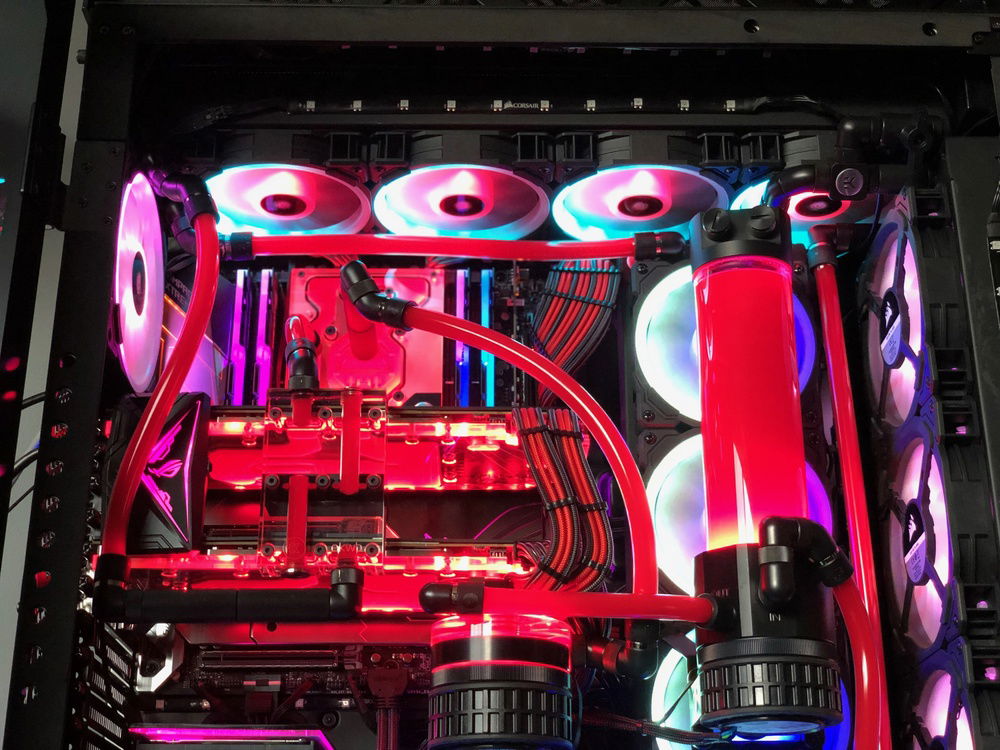
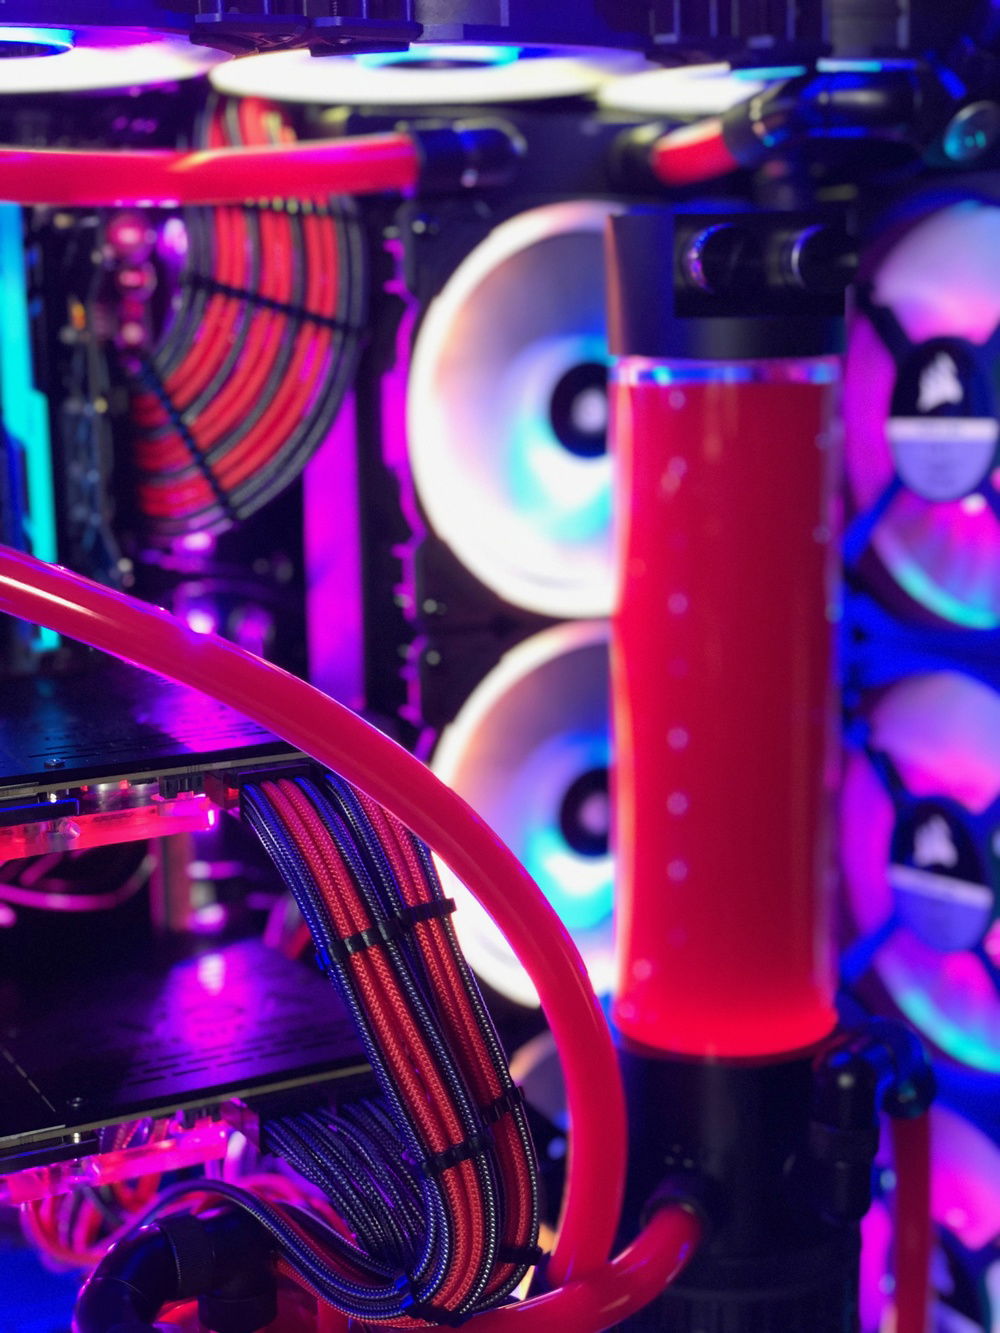
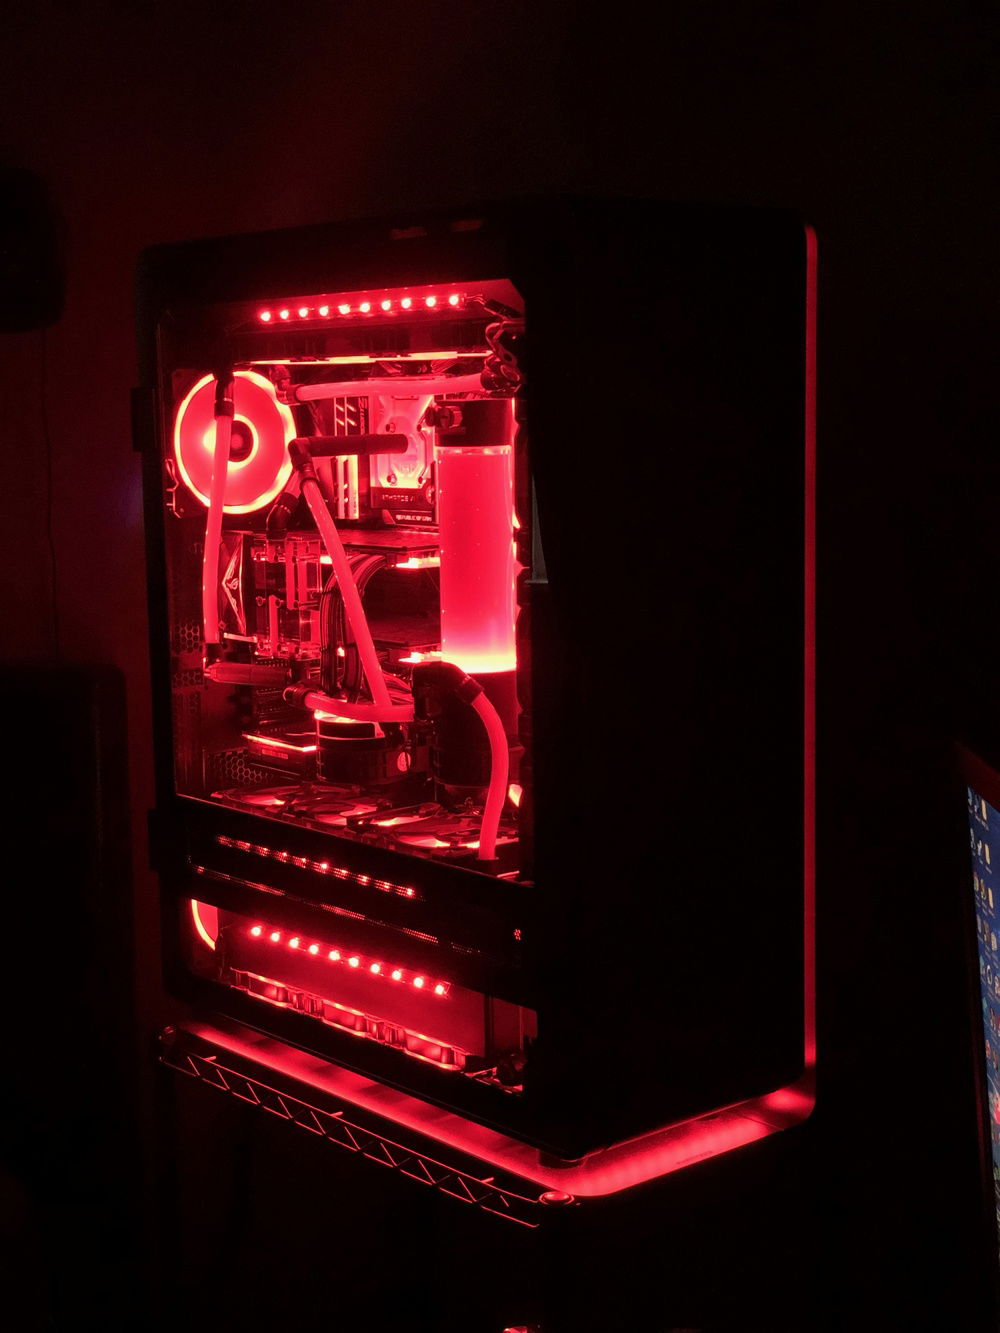
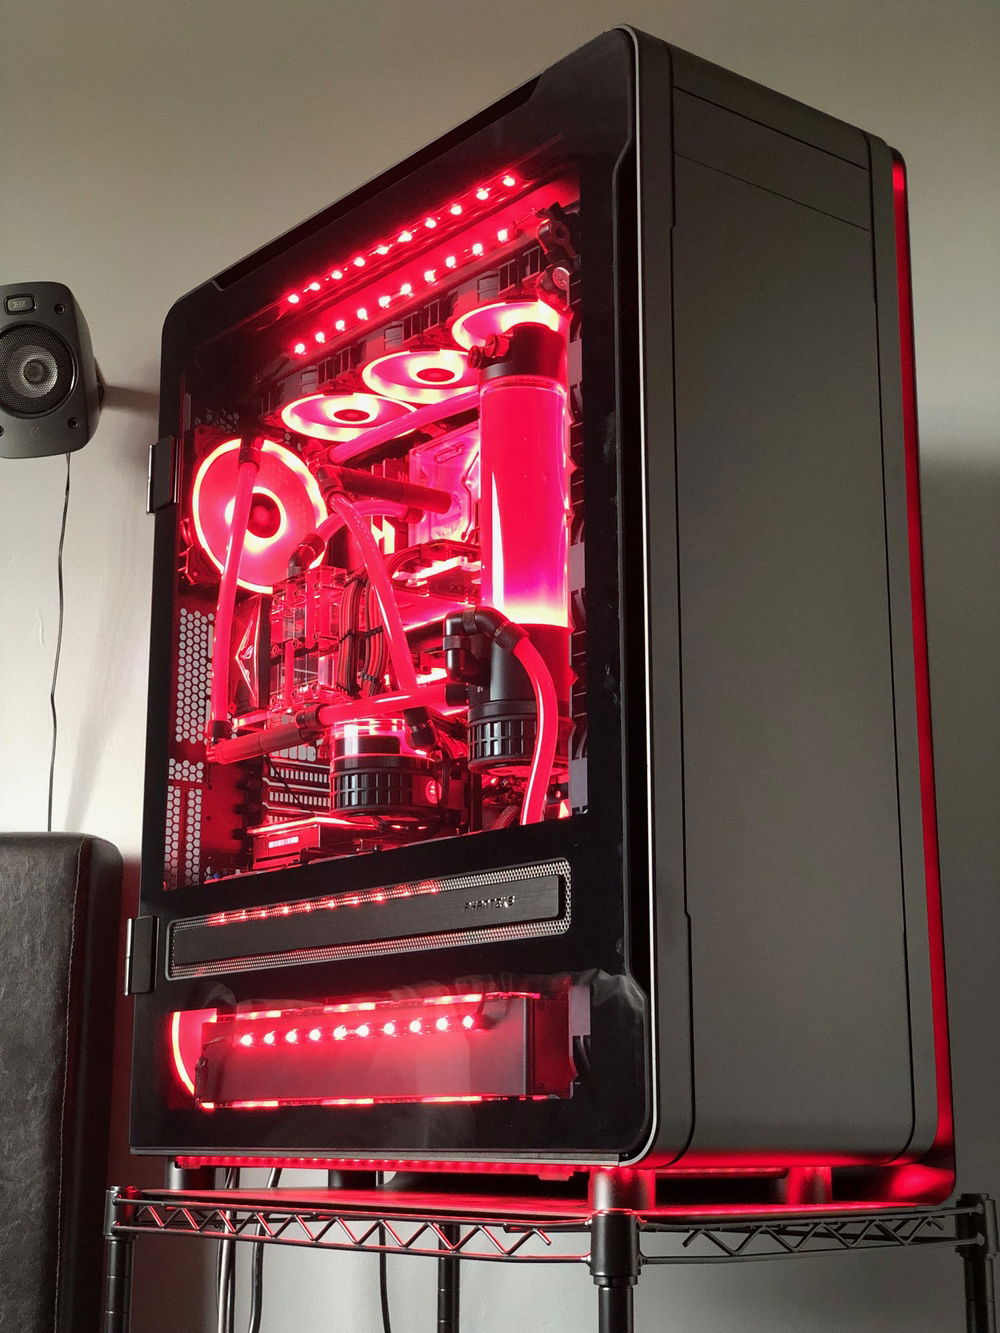
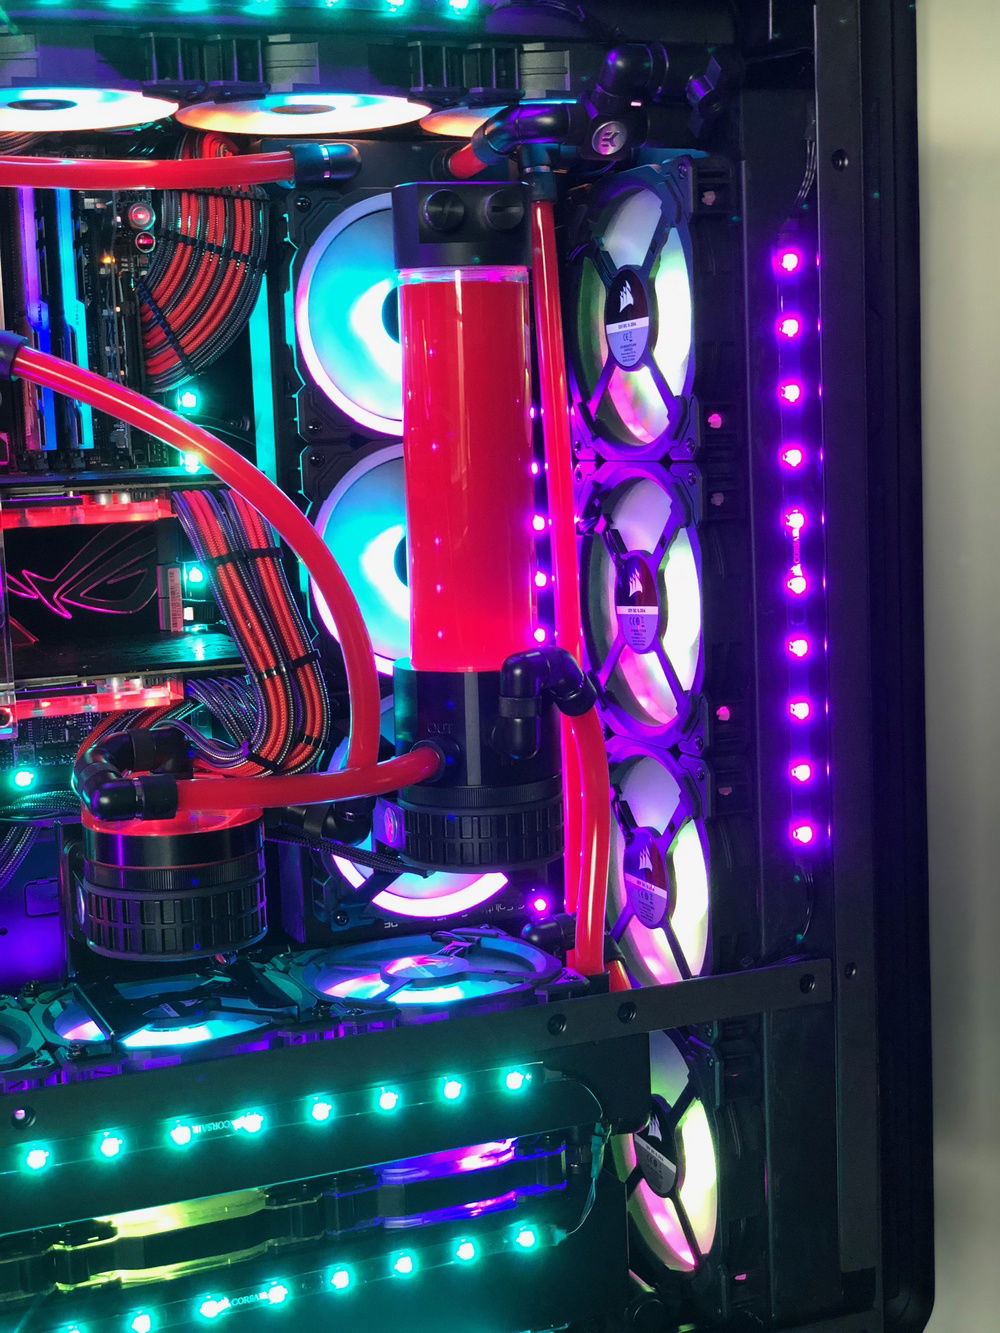
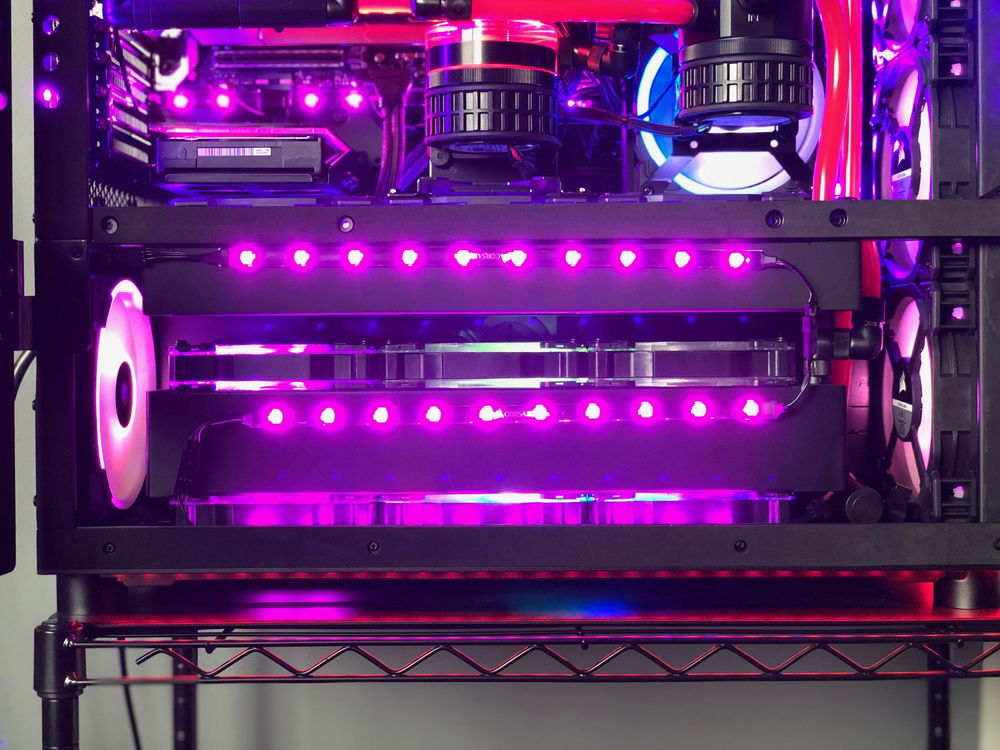
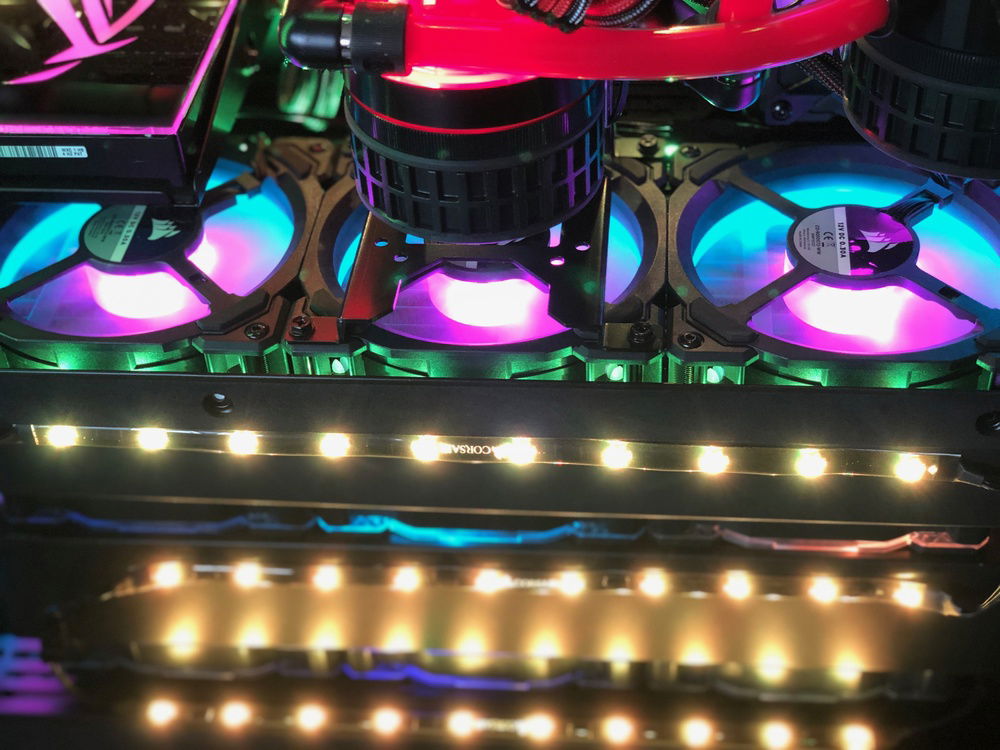
For the sake of some of the pictures and making it easier to distinguish different sections of the case, the fans and RGB strips were set to randomize colors by section, exterior lights/waterblocks/pumps were set to red, and motherboard/ram/SLI bridge were set to a rainbow cycle.
At the end of the day, the main benefit was a very stable and constant water temperature, ability to run the computer virtually silent (pumps only) when not under load, and rapid cool down of components after intense heat soak. The loop did what I was hoping it would do, which is keep the total average system temperature across multiple stressful loads below 60 C* (the average came out to ~58 C*). At idle with fans on, the system runs at ~8 C* above ambient.
This build represents my own desire to learn and grow, along with the urge to answer my own curiosity… I do my best to bring my own unique vision and style to a build, filling up space in a way that I think makes the most use of it. I have built over 50 computer systems since my first one back in 2001, but this marks only my second custom water cooling loop. Special thanks to all of you who encouraged venturing into water cooling and giving me the tools, knowledge, and confidence needed to dive in. I tend to learn best by doing, so I wanted to share with you all what I did and what I found out along the way so you can see how it all turned out. I hope you got something out of this as well and I appreciate you all taking the time to even have a look! And I’m thankful to everyone who posted their builds… it helped piece together what this system came out to look like and I look forward to seeing what I can get into next. Thank you!
So I looked for the biggest case that I could find with the most water cooling potential and the intention of filling up every inch of the case. The obvious starting point became the Phanteks Enthoo Elite, so I went from there. The result was a single-loop with 5 radiators and 2 D5 pumps in series, which contains over half a gallon of fluid and has an estimated heat dissipation of 3,300 Watts. The system when filled with water weighs in excess of 120 lbs. In order to move air through all of the radiators, I chose to fill it with 22 fans, all RGB, with 16 of them being Corsair LL fans and the other 6 being Corsair HD fans. The layout is as follows:
Bottom: Intake (push/pull), EK XE 360 (triple) radiator, 6x Corsair HD120 RGB fans
Front: Intake (pull), EK CE 560 (quad) radiator, 4x Corsair LL140 RGB fans
Top: Exhaust (push), EK PE 480 (quad) radiator, 4x Corsair LL120 RGB fans
Rear: Exhaust, no radiators, 2x Corsair LL140 RGB fans
Mid-plate: Pass-through/intake (pull), EK PE 360 (triple) radiator, 3x Corsair LL120 RGB fans
Side: Exhaust (push), EK PE 360 (triple) radiator, 3x Corsair LL120 RGB fans
Pumps: 2x EK D5’s
Tubing Type: Soft
The main criteria for me was that any overclocking done had to be stable, sustainable, and convenient for daily computing, so no one-off benchmarks or exotic cooling modifications. The system had to be fully stable, use safe voltages, and experience no throttling in its worst case scenarios. In addition, the whole system had to be self-contained (no open bench, additional external cooling, etc).
In the loop we have an i9 7940X overclocked to 4.7 GHz on all cores (1.25 V on all cores), along with 2x 1080 Ti FTW3's in SLI with a +60MHz overclock. With a delidded CPU on liquid metal, full monoblock for the motherboard, and full waterblocks for both GPUs, this loop results in (*Note – Ambient temperature at time of testing was 23 C):
Idle temperatures of ~30 C* on the CPU cores (~45 C* package) and 29/32 C* on the GPUs respectively.
Load temperatures of up to ~86 C* on the CPU cores (~90 C* package) and a score of 3426 in Cinebench along with a Heaven load temperature of ~40/43 C* on the GPUs respectively.
With no fans on and simply using passive water cooling (i.e. only water pumps on to cycle fluid), the CPU cores idle at ~35 C* (~50 C* package), with the GPUs at 30/33 C* respectively.
Benchmark scores are:
9,221 Time Spy Extreme (9,396 GPU / 8,341 CPU)
http://www.3dmark.com/spy/6471948
13,389 Fire Strike Ultra (13,567 GPU / 30,350 Physics / 6,915 Combined)
http://www.3dmark.com/fs/18589513
For the sake of some of the pictures and making it easier to distinguish different sections of the case, the fans and RGB strips were set to randomize colors by section, exterior lights/waterblocks/pumps were set to red, and motherboard/ram/SLI bridge were set to a rainbow cycle.
At the end of the day, the main benefit was a very stable and constant water temperature, ability to run the computer virtually silent (pumps only) when not under load, and rapid cool down of components after intense heat soak. The loop did what I was hoping it would do, which is keep the total average system temperature across multiple stressful loads below 60 C* (the average came out to ~58 C*). At idle with fans on, the system runs at ~8 C* above ambient.
This build represents my own desire to learn and grow, along with the urge to answer my own curiosity… I do my best to bring my own unique vision and style to a build, filling up space in a way that I think makes the most use of it. I have built over 50 computer systems since my first one back in 2001, but this marks only my second custom water cooling loop. Special thanks to all of you who encouraged venturing into water cooling and giving me the tools, knowledge, and confidence needed to dive in. I tend to learn best by doing, so I wanted to share with you all what I did and what I found out along the way so you can see how it all turned out. I hope you got something out of this as well and I appreciate you all taking the time to even have a look! And I’m thankful to everyone who posted their builds… it helped piece together what this system came out to look like and I look forward to seeing what I can get into next. Thank you!
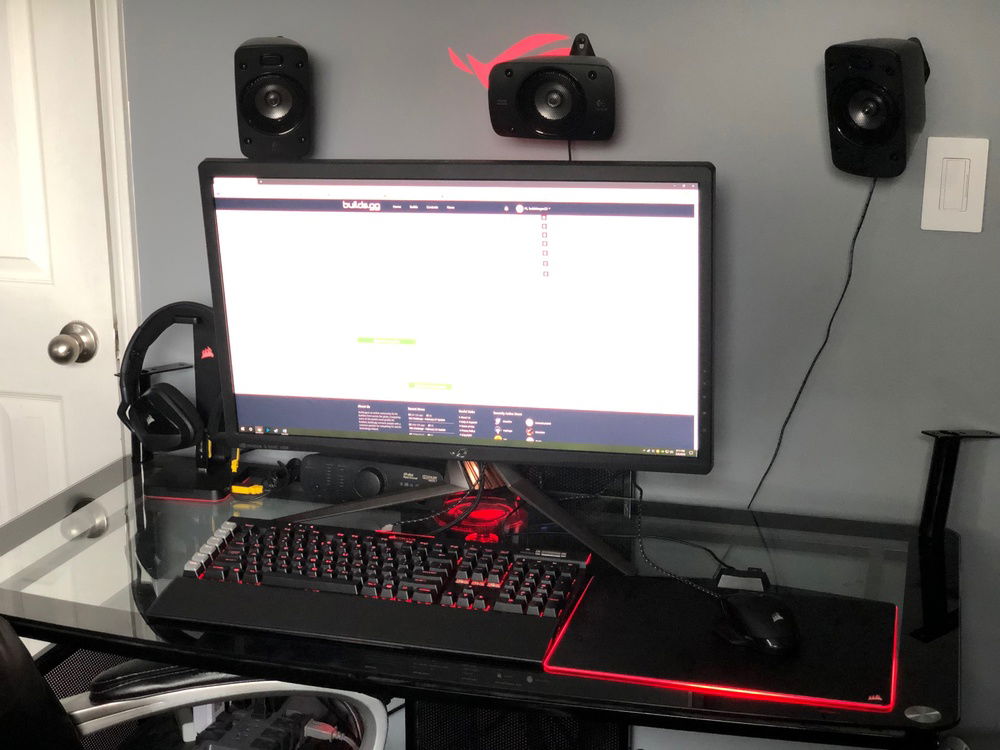
Color(s): Black Carbon Red
RGB Lighting? Yes
Theme: Futuristic
Cooling: Custom Liquid Cooling
Size: XL-ATX
Type: General Build
Contests
This build participated in 1 contest.
| Rank | Contest | Date |
|---|---|---|
| #320 | The builds.gg 10K Challenge | ended |
Hardware
CPU
$ 300.00
Motherboard
$ 1,286.86
Memory
$ 338.68
Graphics
$ 400.00
Graphics
$ 400.00
Storage
$ 245.00
Case
$ 1,232.96
Case Fan
$ 78.00
Case Fan
$ 39.61
Case Fan
$ 79.98
Cooling
$ 282.88
Cooling
$ 209.06
Cooling
$ 209.06
Cooling
$ 199.00
Cooling
$ 118.95
Cooling
$ 117.01
Cooling
Cooling
Cooling
$ 66.41
Cooling
$ 219.00
Cooling
$ 124.99
CableMod
$ 8.99
CableMod
$ 19.95
CableMod
$ 7.99
CableMod
CableMod
$ 24.95
CableMod
CableMod
Accessories
Accessories
$ 74.29
Accessories
$ 74.29
Accessories
$ 74.29
Accessories
$ 109.00
Accessories
$ 29.99
Accessories
$ 29.99
Accessories
$ 29.99
Accessories
$ 29.99
Accessories
$ 74.90
Accessories
$ 74.90
Accessories
$ 74.90
Accessories
$ 333.00
Accessories
$ 427.49
Accessories
$ 31.99
Keyboard
$ 139.97
Mouse
$ 98.68
Approved by: