
Rotating PC glowing
Fire in the RGB factory?
Advanced CAD modeling
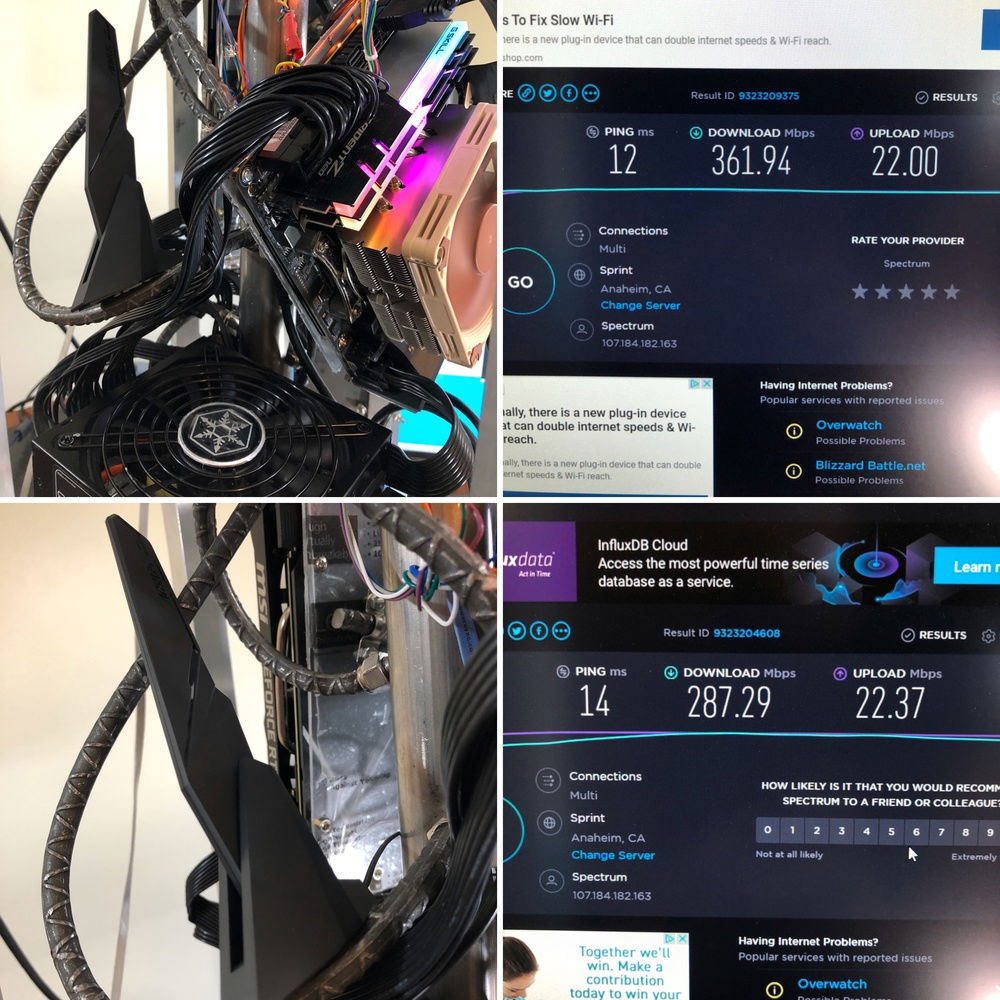
Testing rotating wi-fi antenna. It works better than when it’s stationary
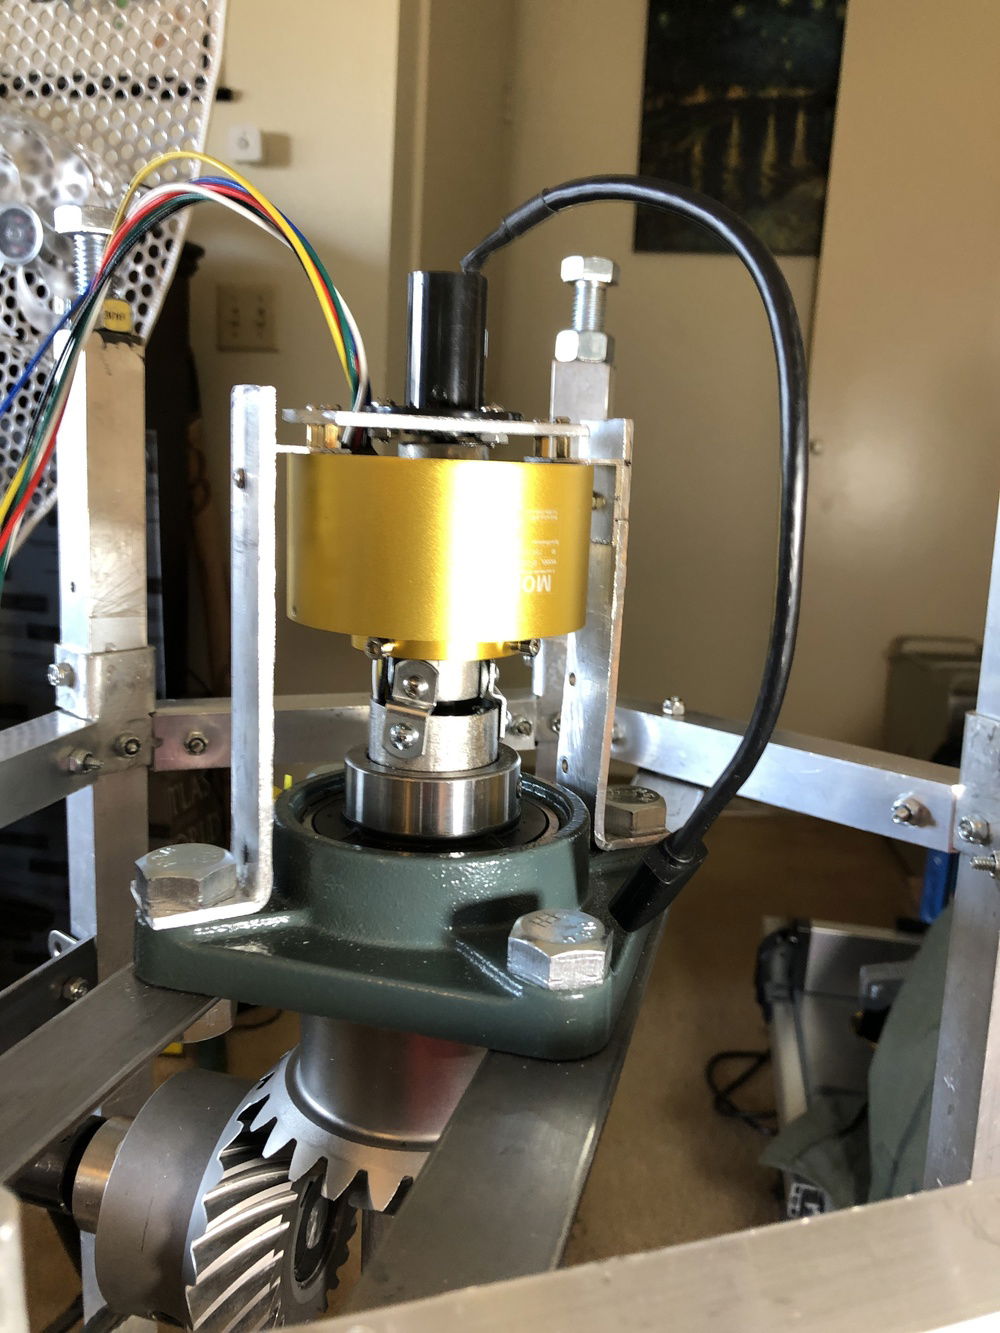
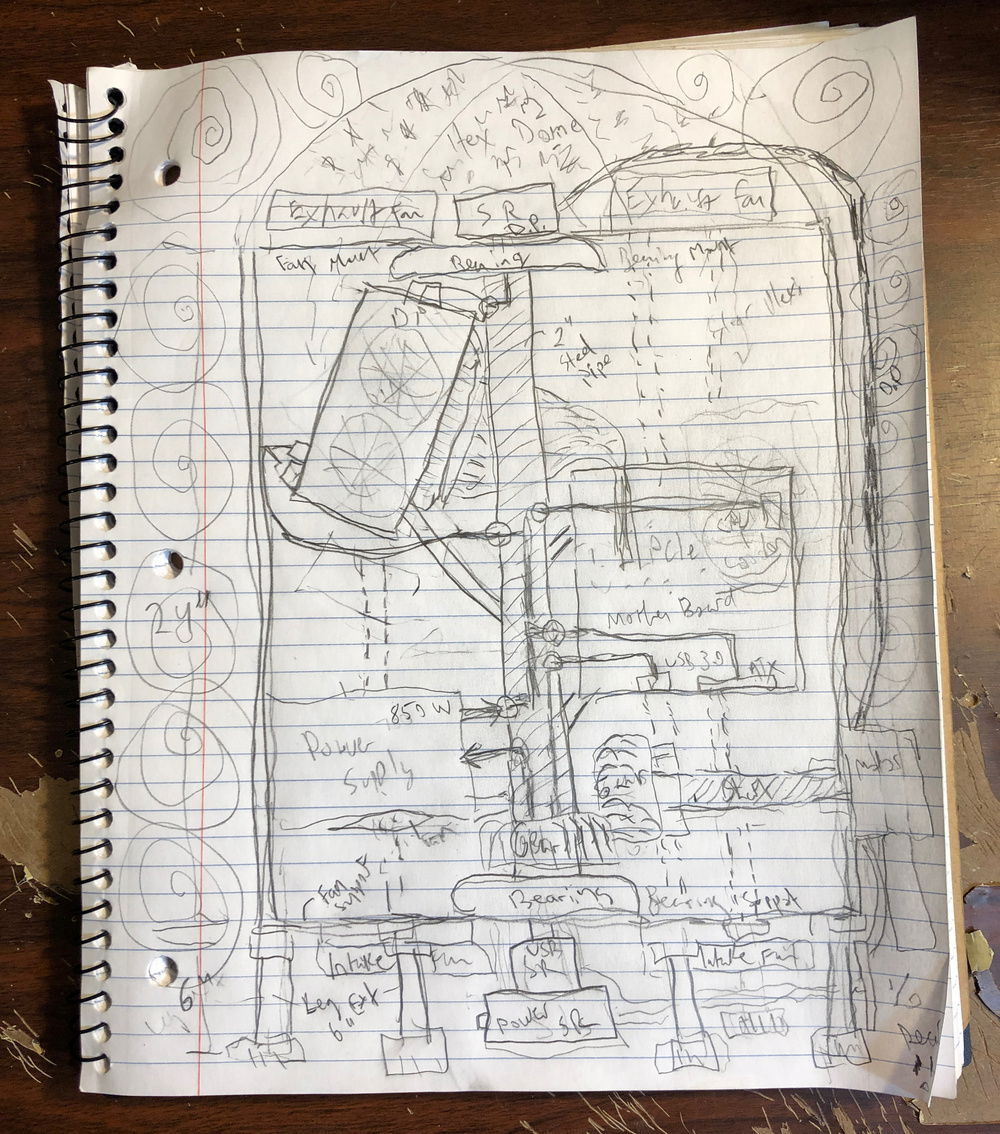
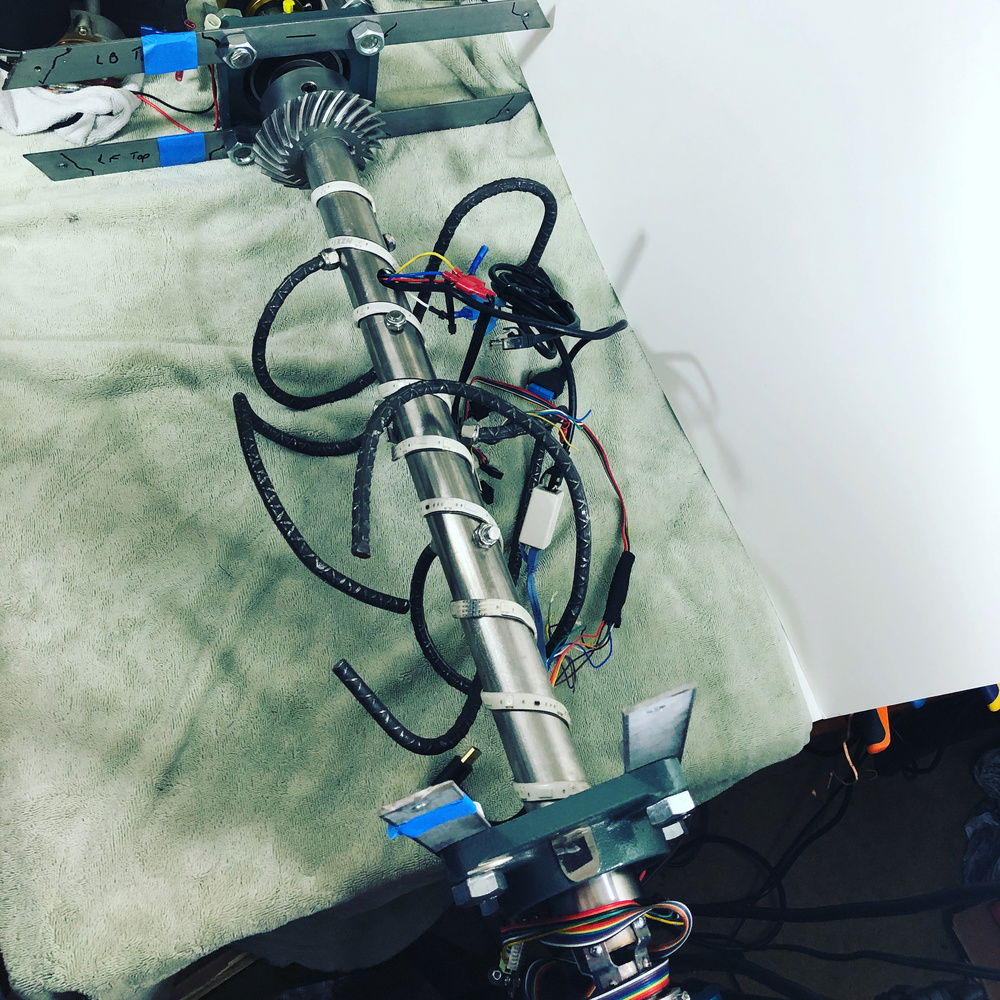
The power and USB3.0 slip rings mounted on the bottom
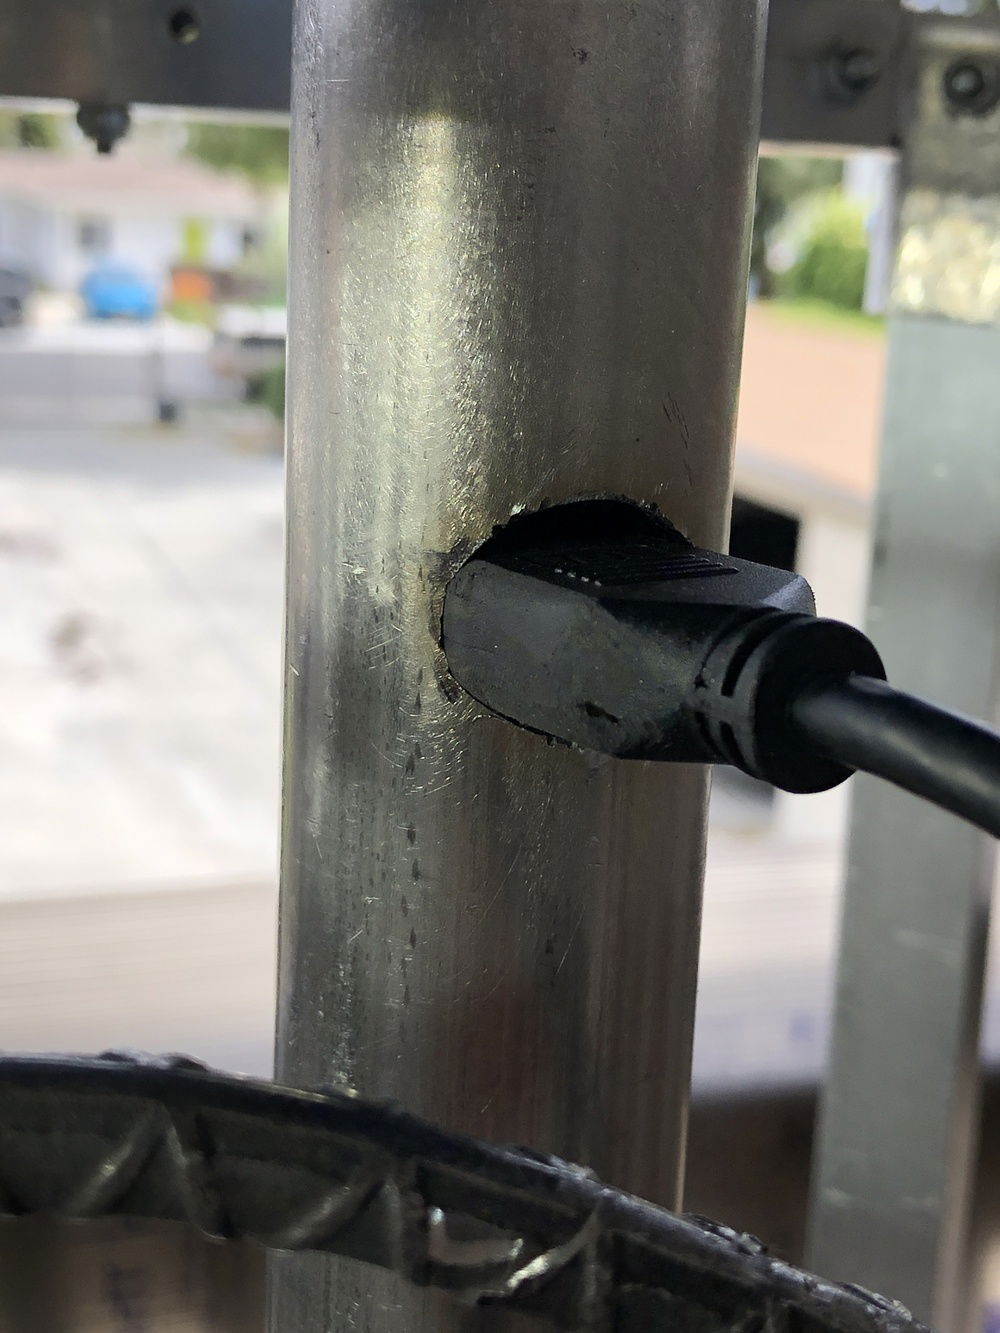
DisplayPort connectors make me angry
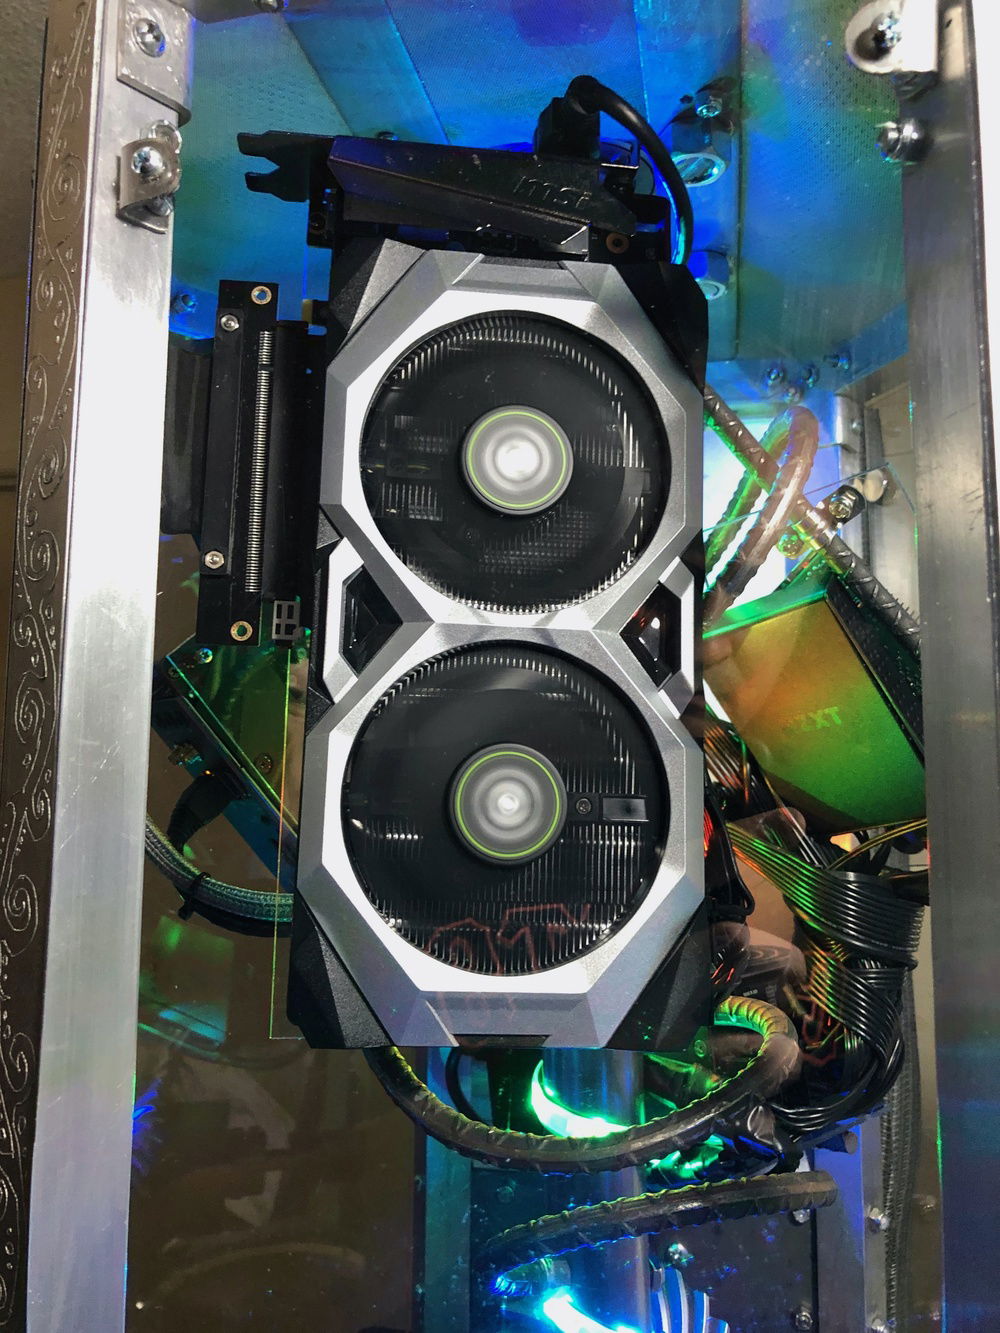
MSI Venutus RTX 2070 super
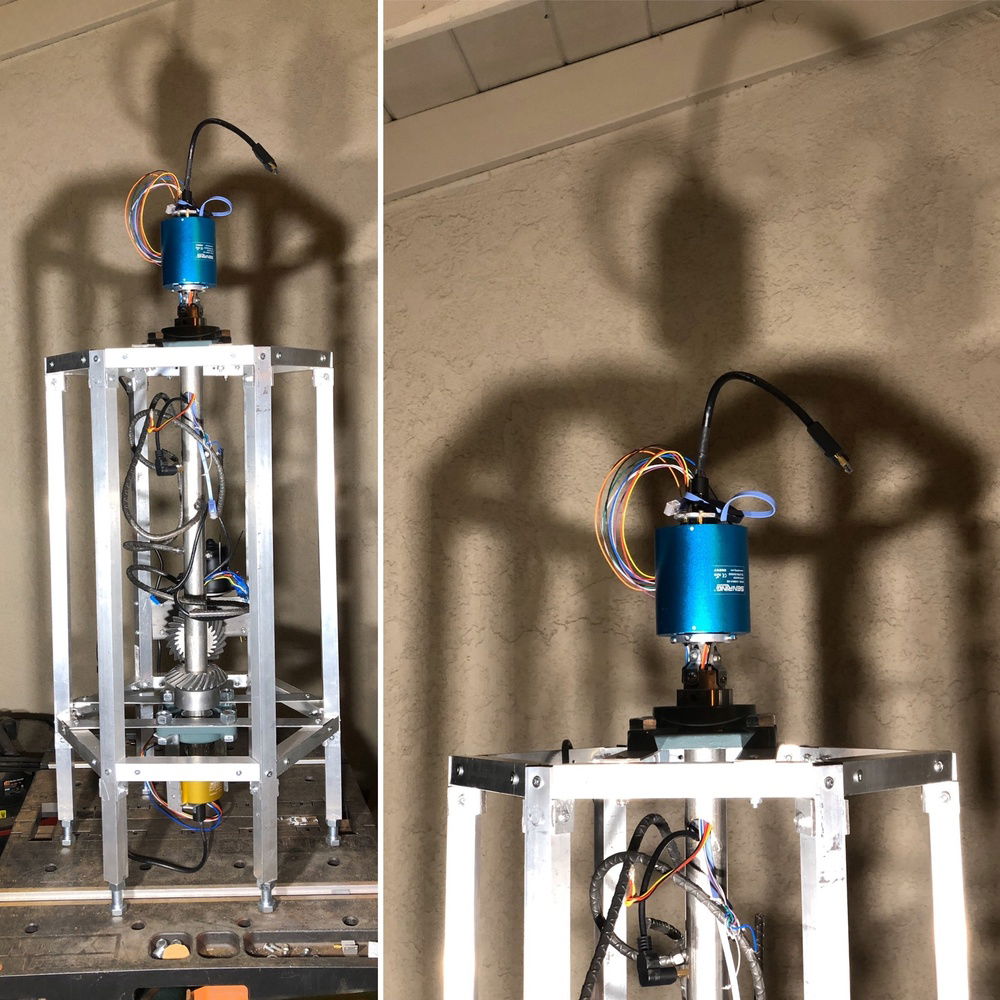
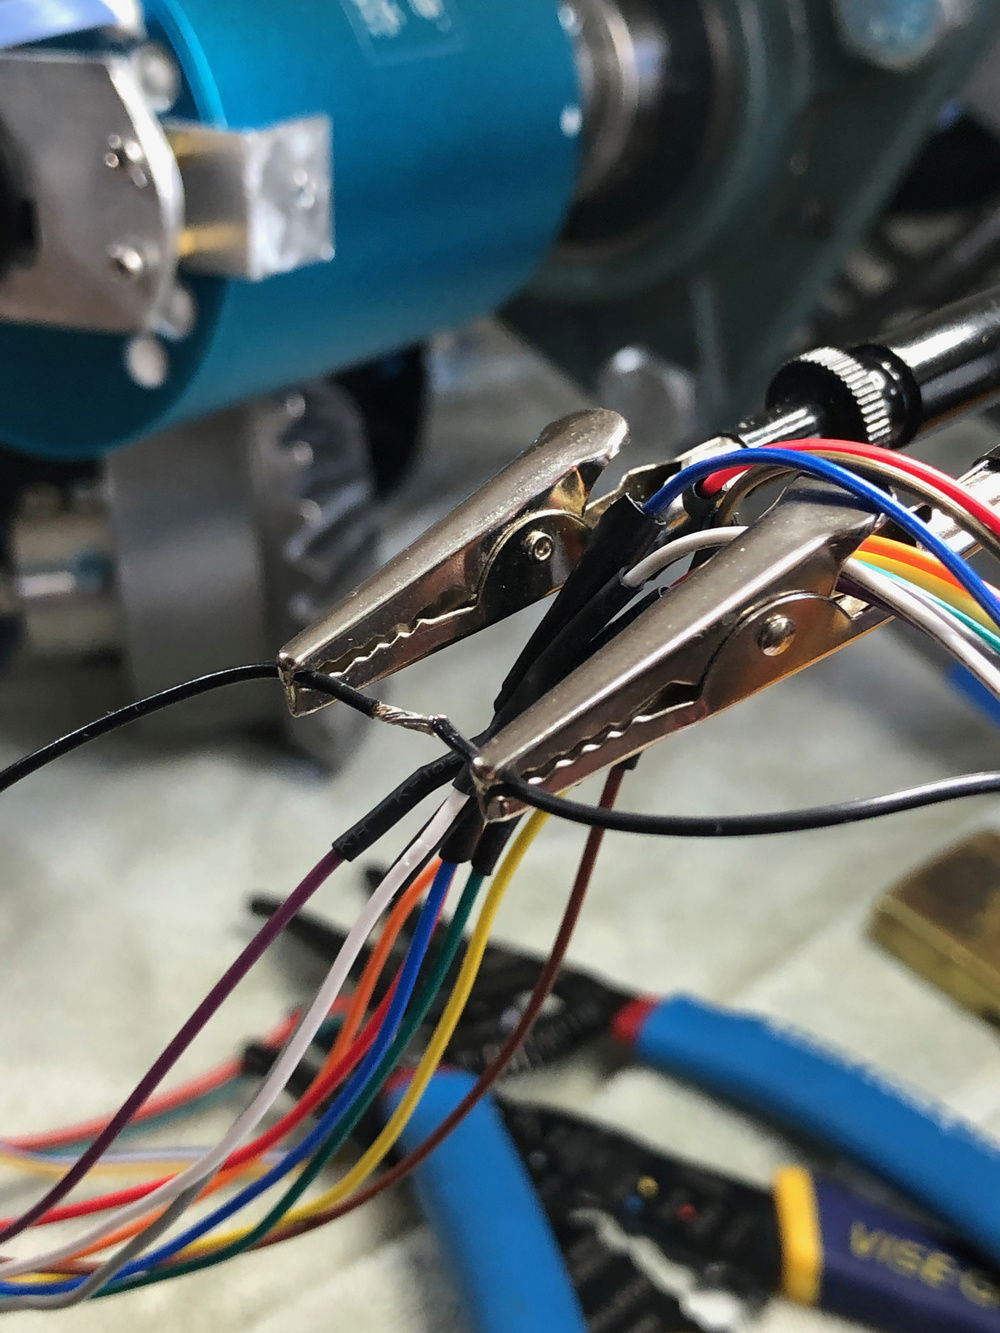
The big blue Ethernet slip ring haunts me
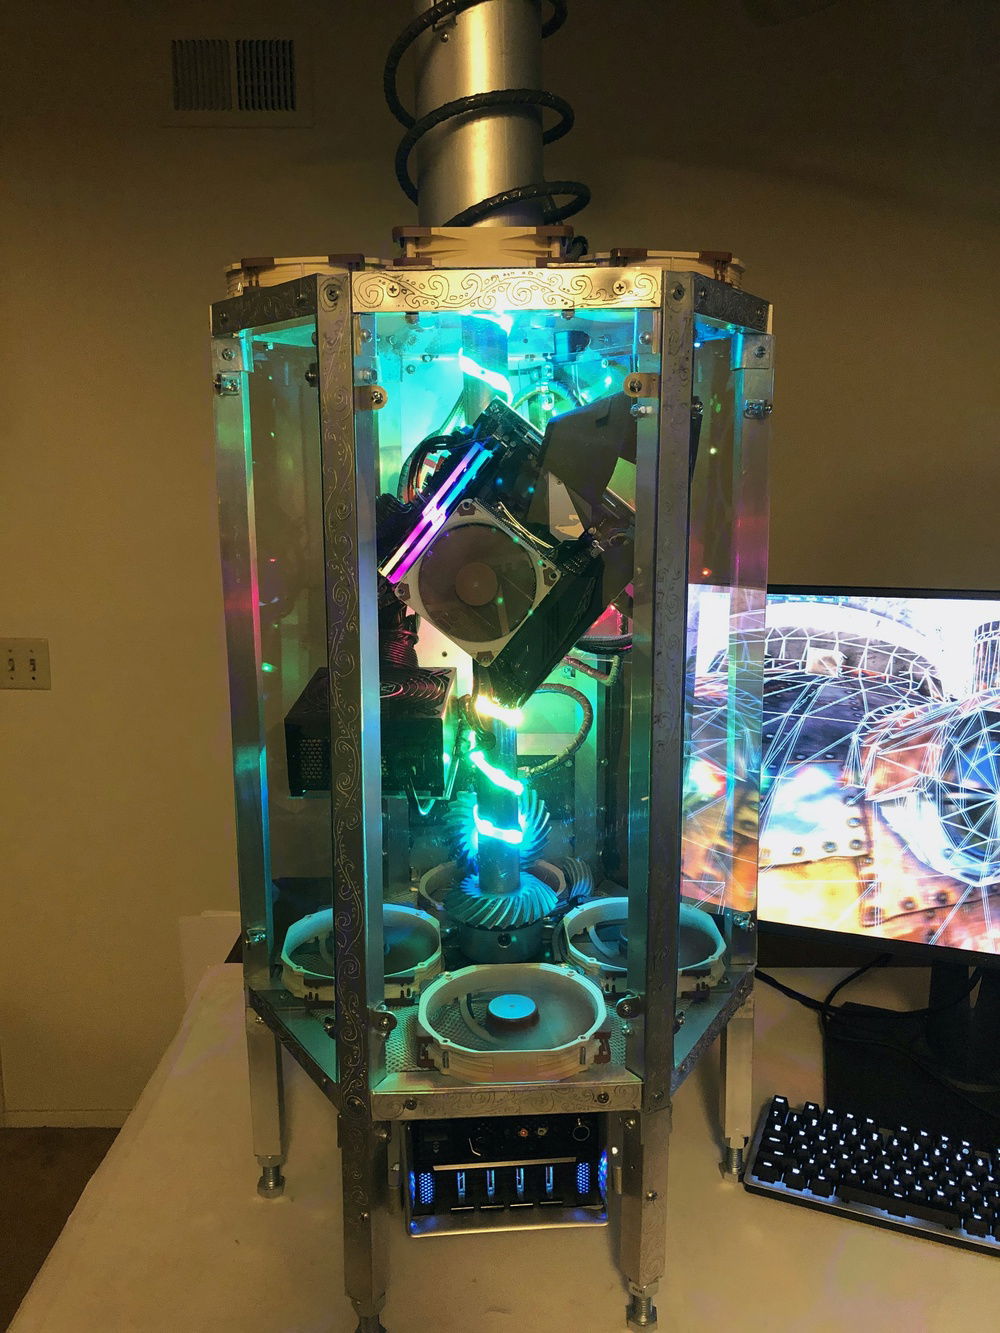
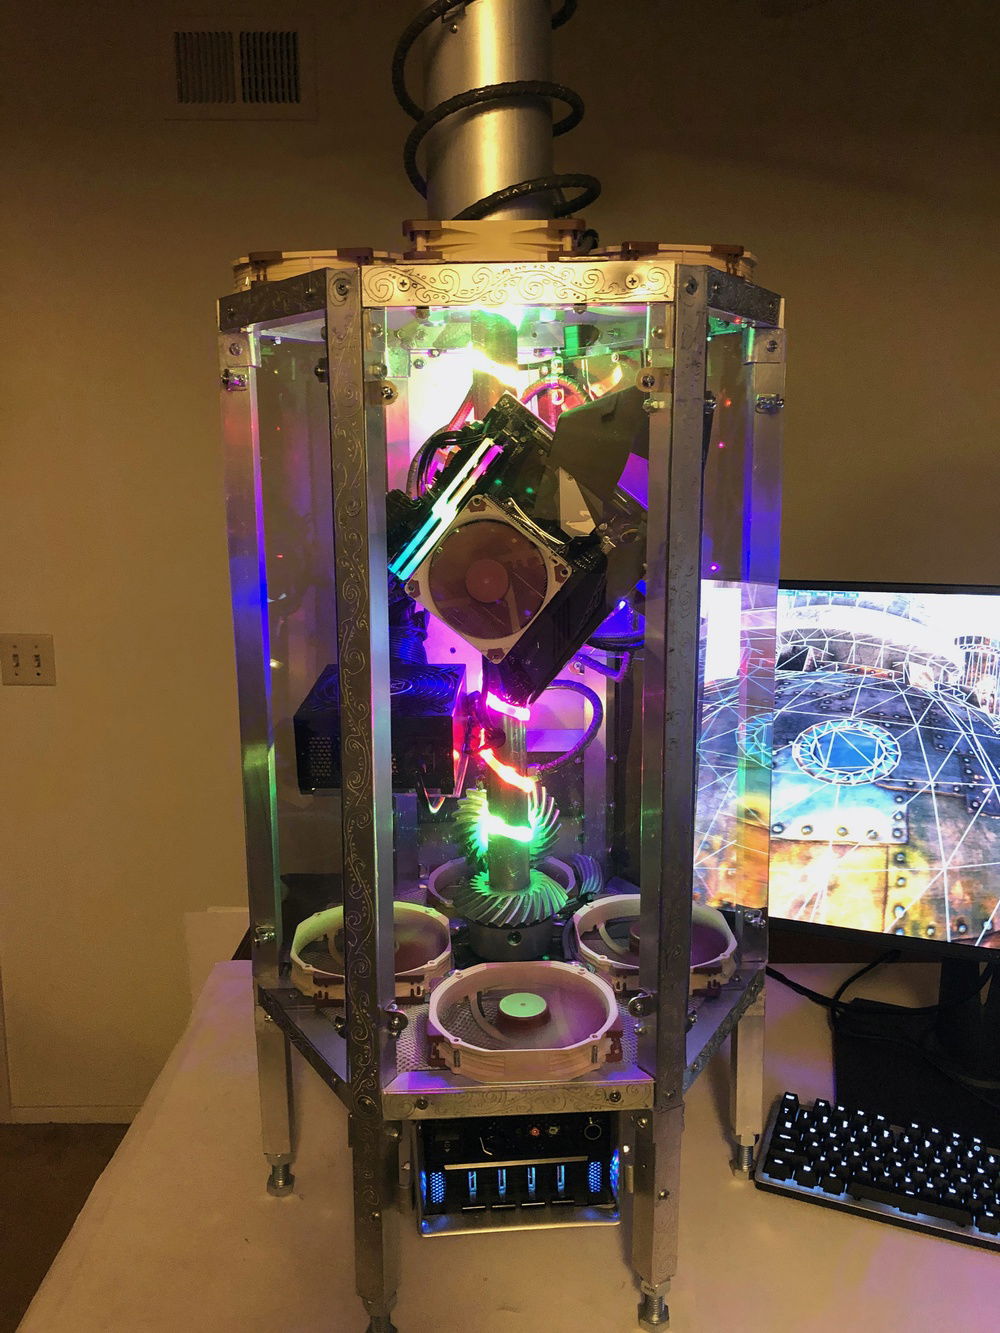
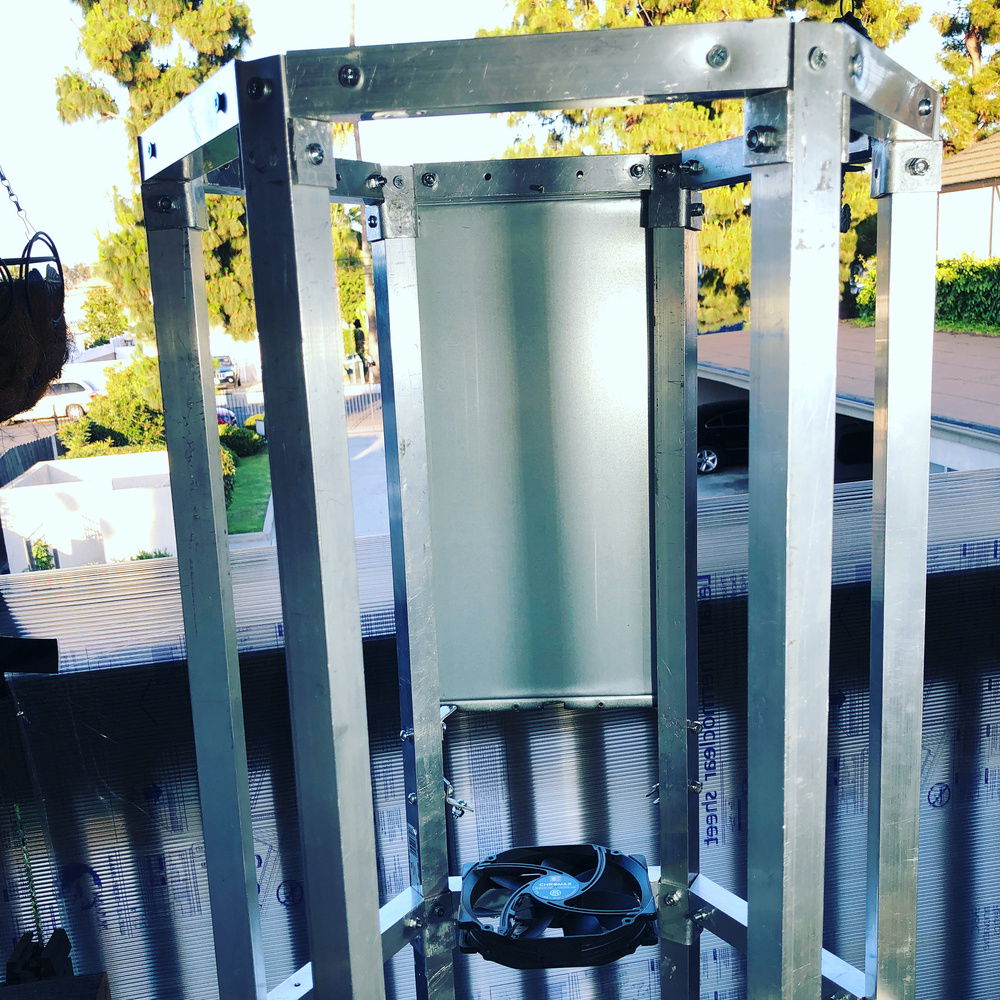
Rebar bent to hold components and attach them to the rotating center pole
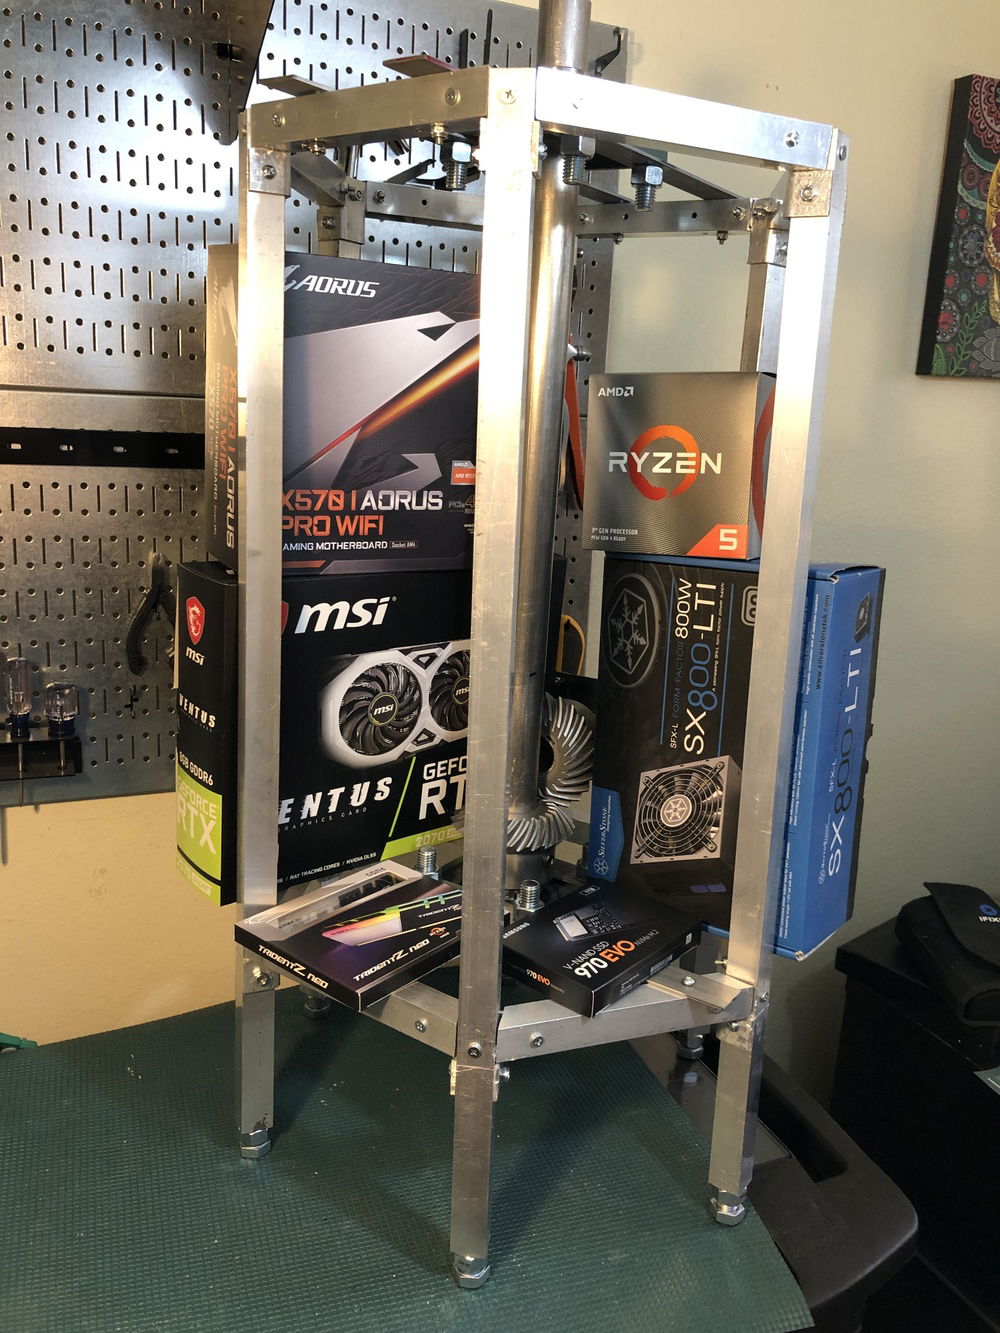
Christmas came in March!
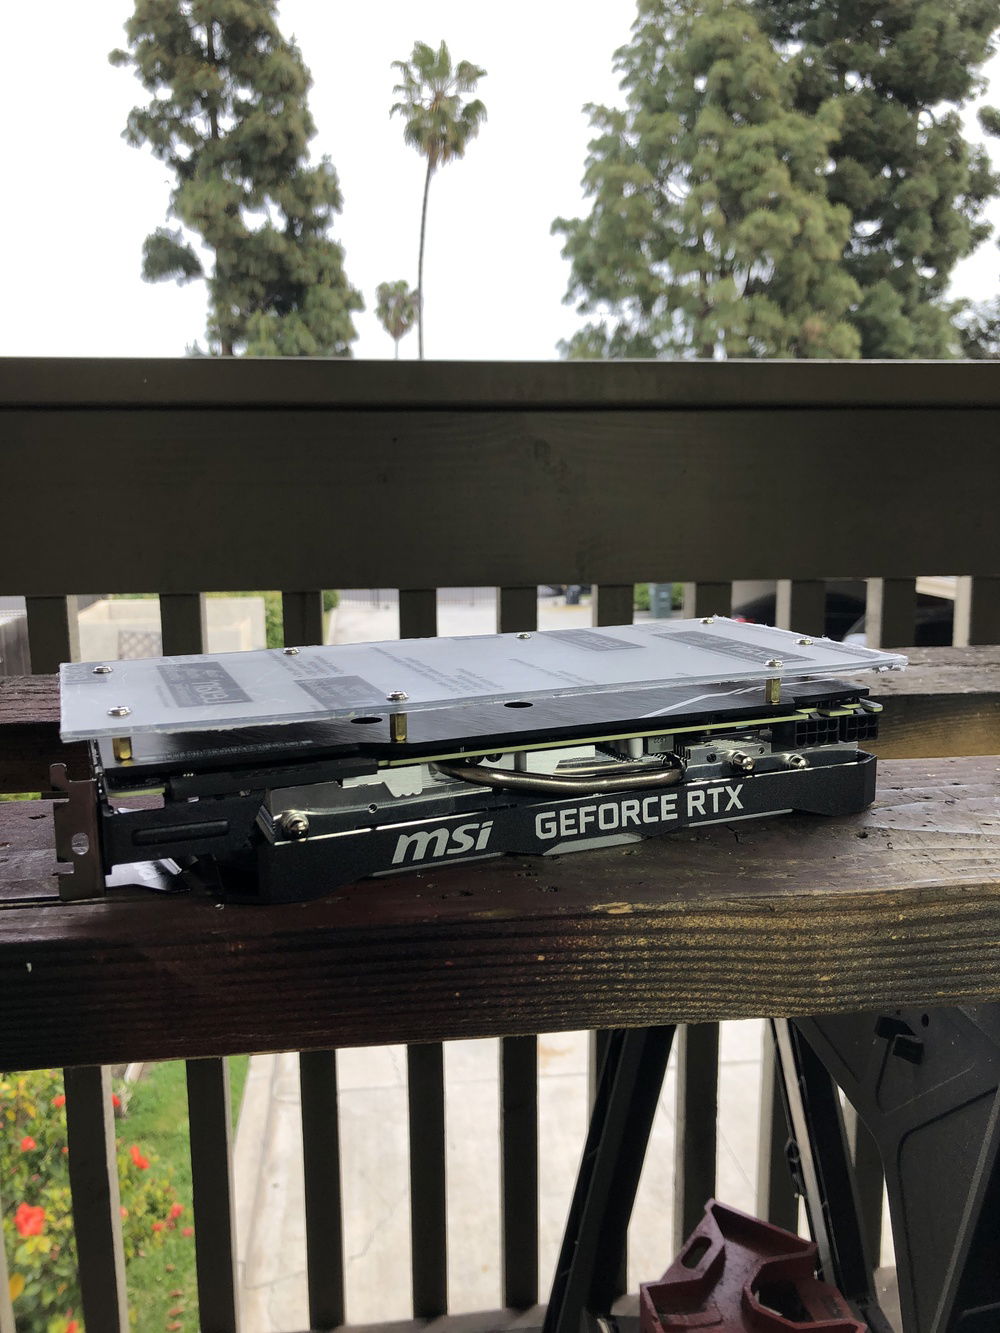
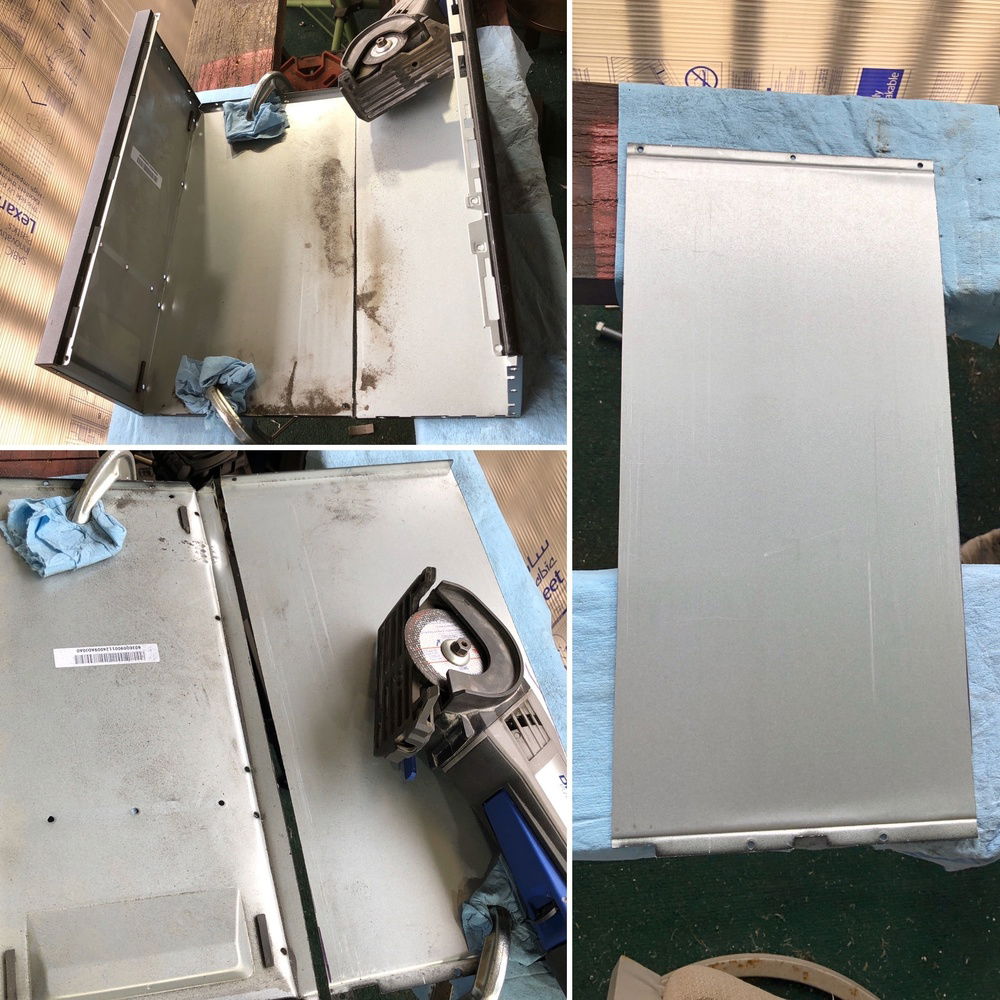
Mounted the video card like a motherboard after drilling holes and inserting screws inside it’s backplate
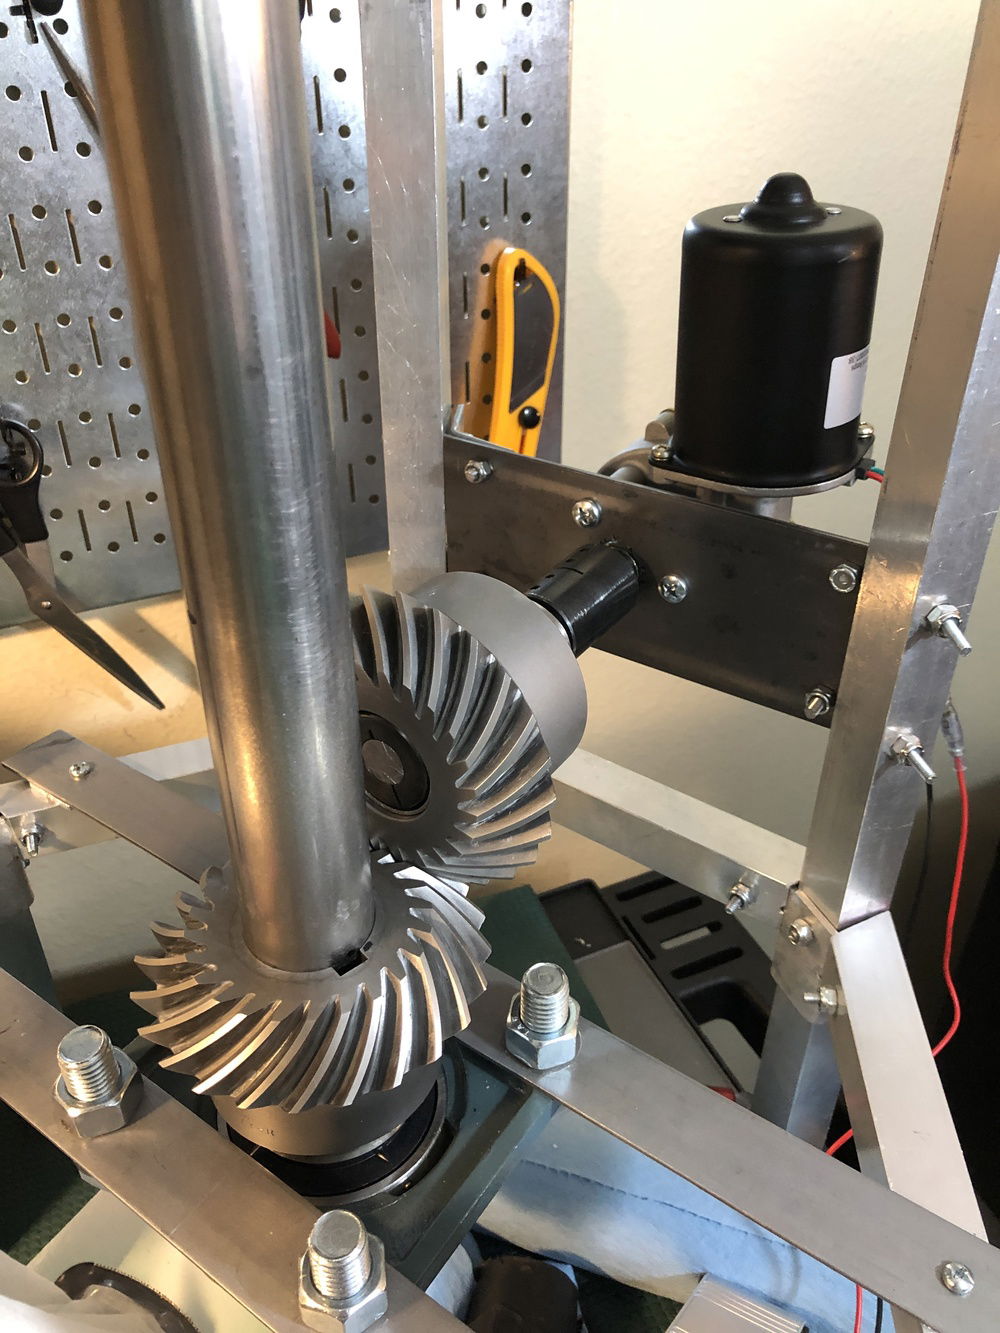
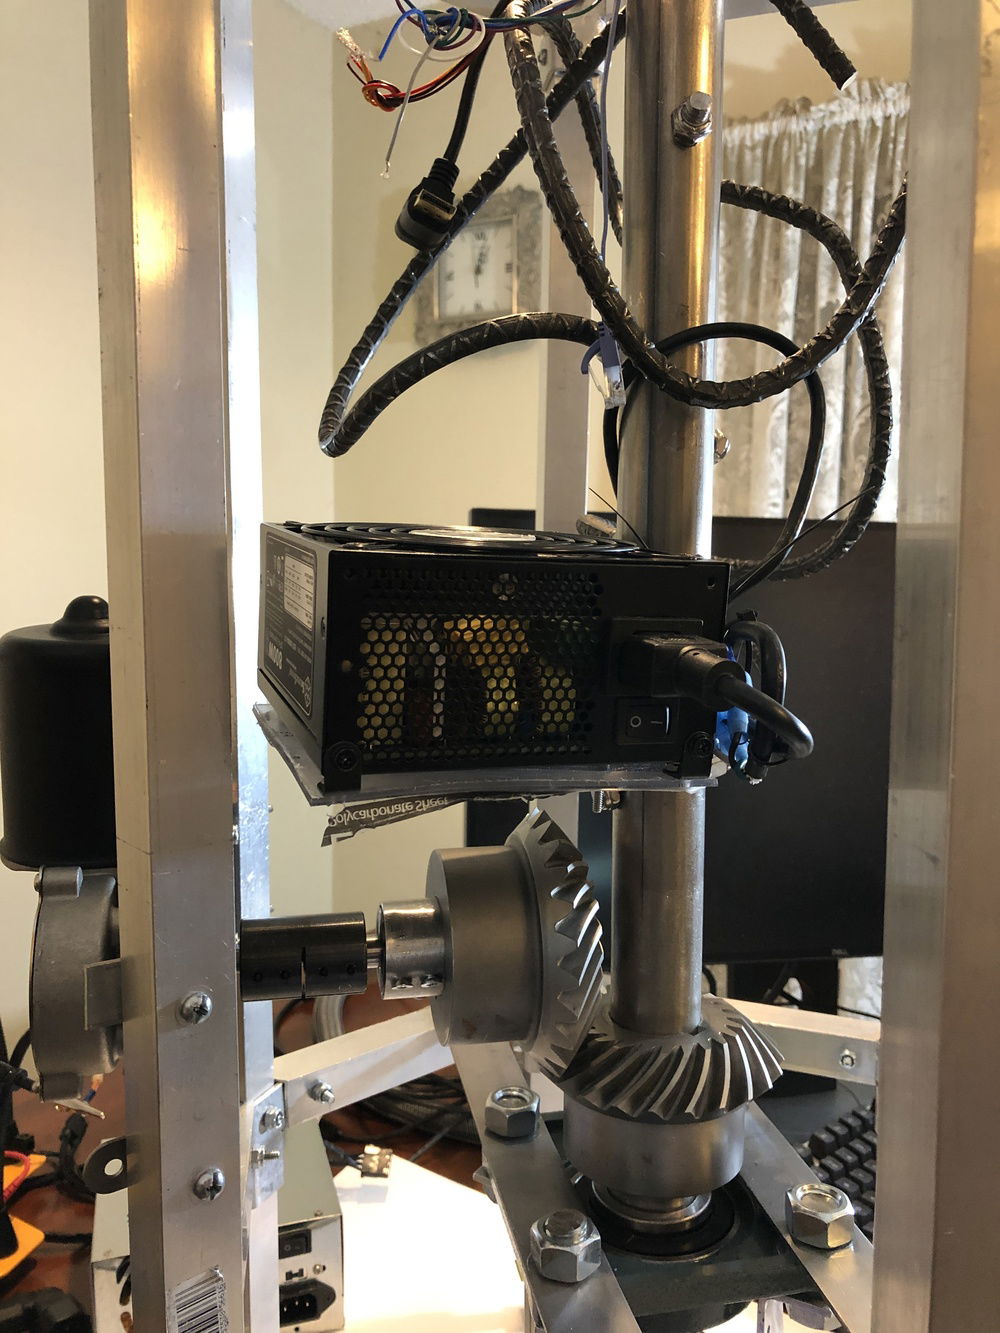
The spiral bevel gears that turn the center pole
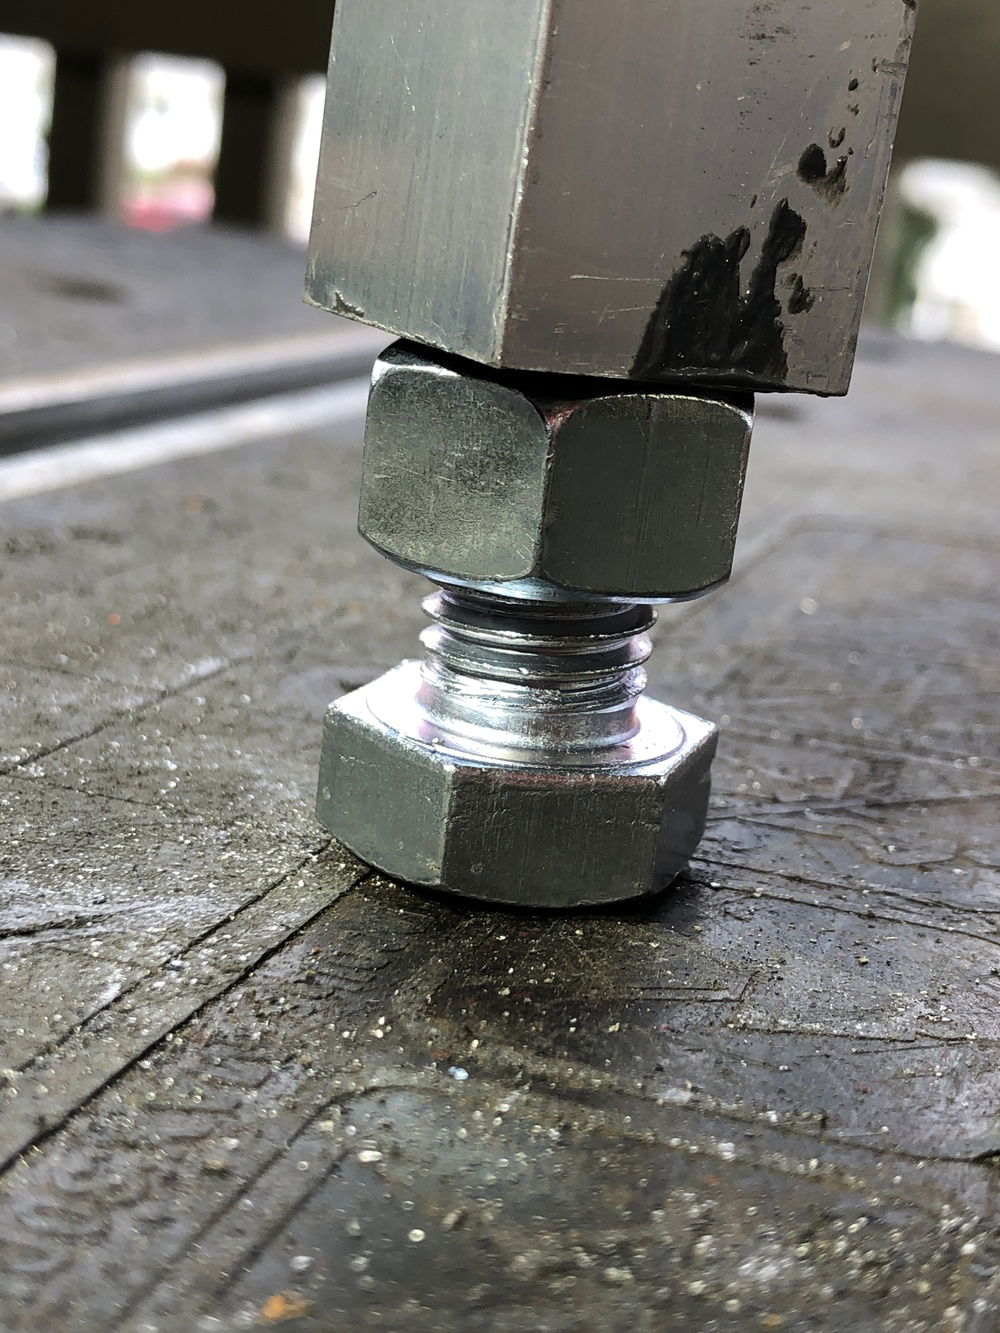
6 adjustable feet made with bolts and nuts. Level is very important in a moving build
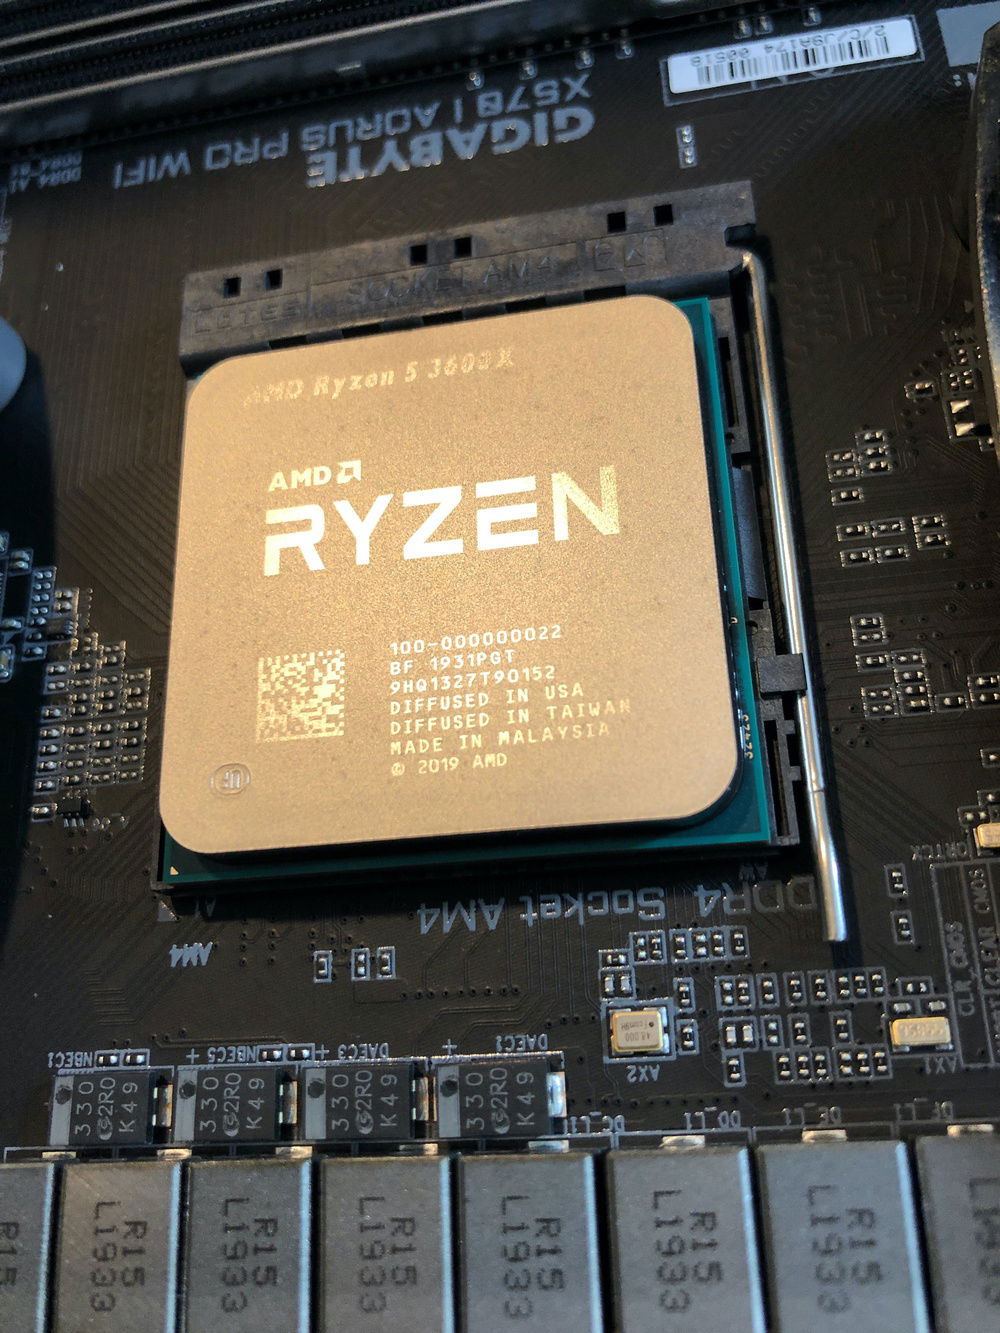
AMD chip
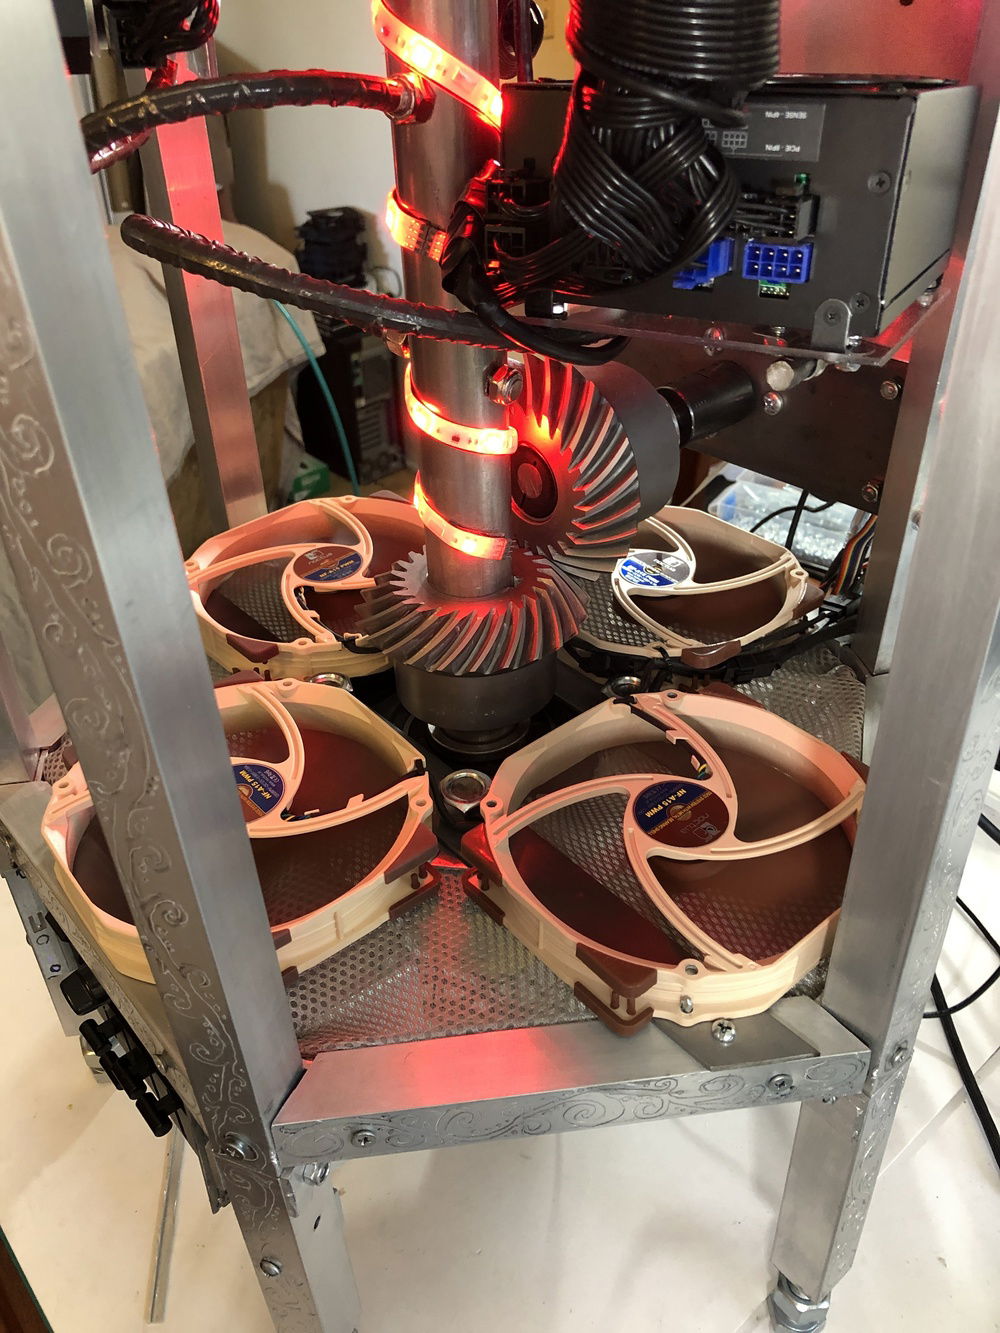
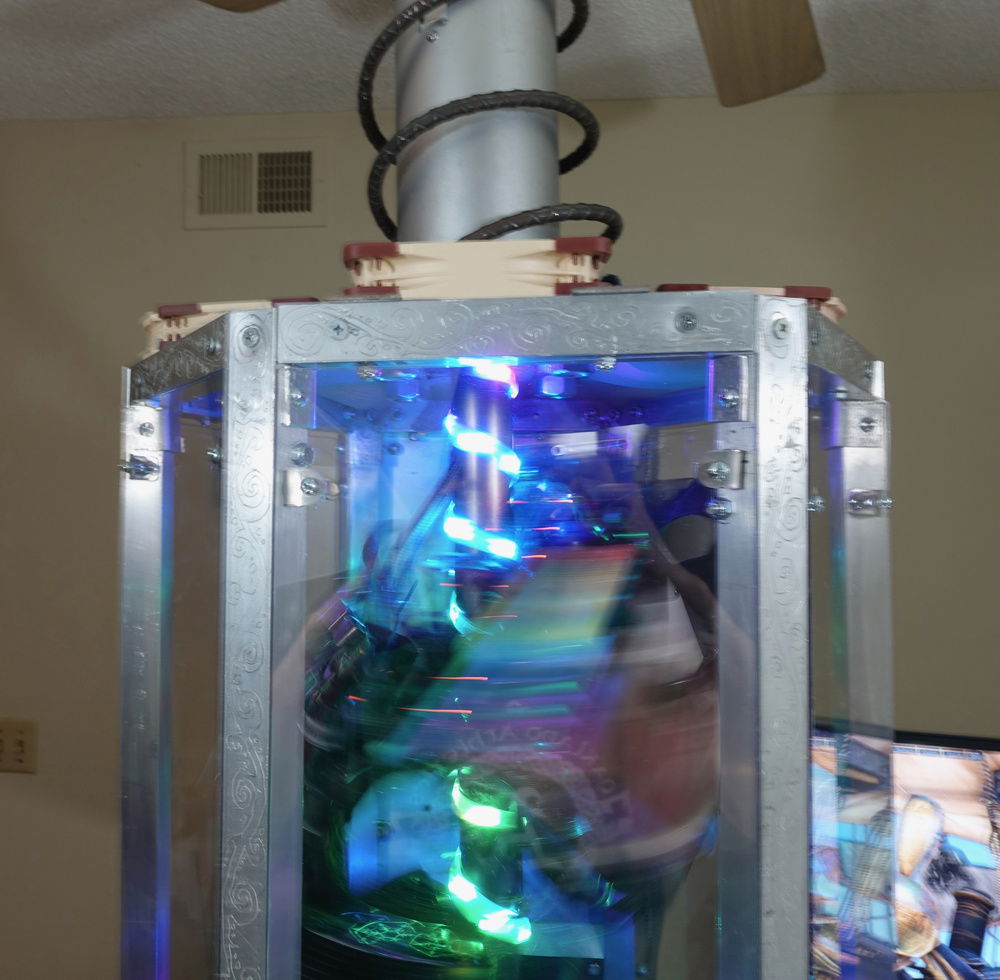
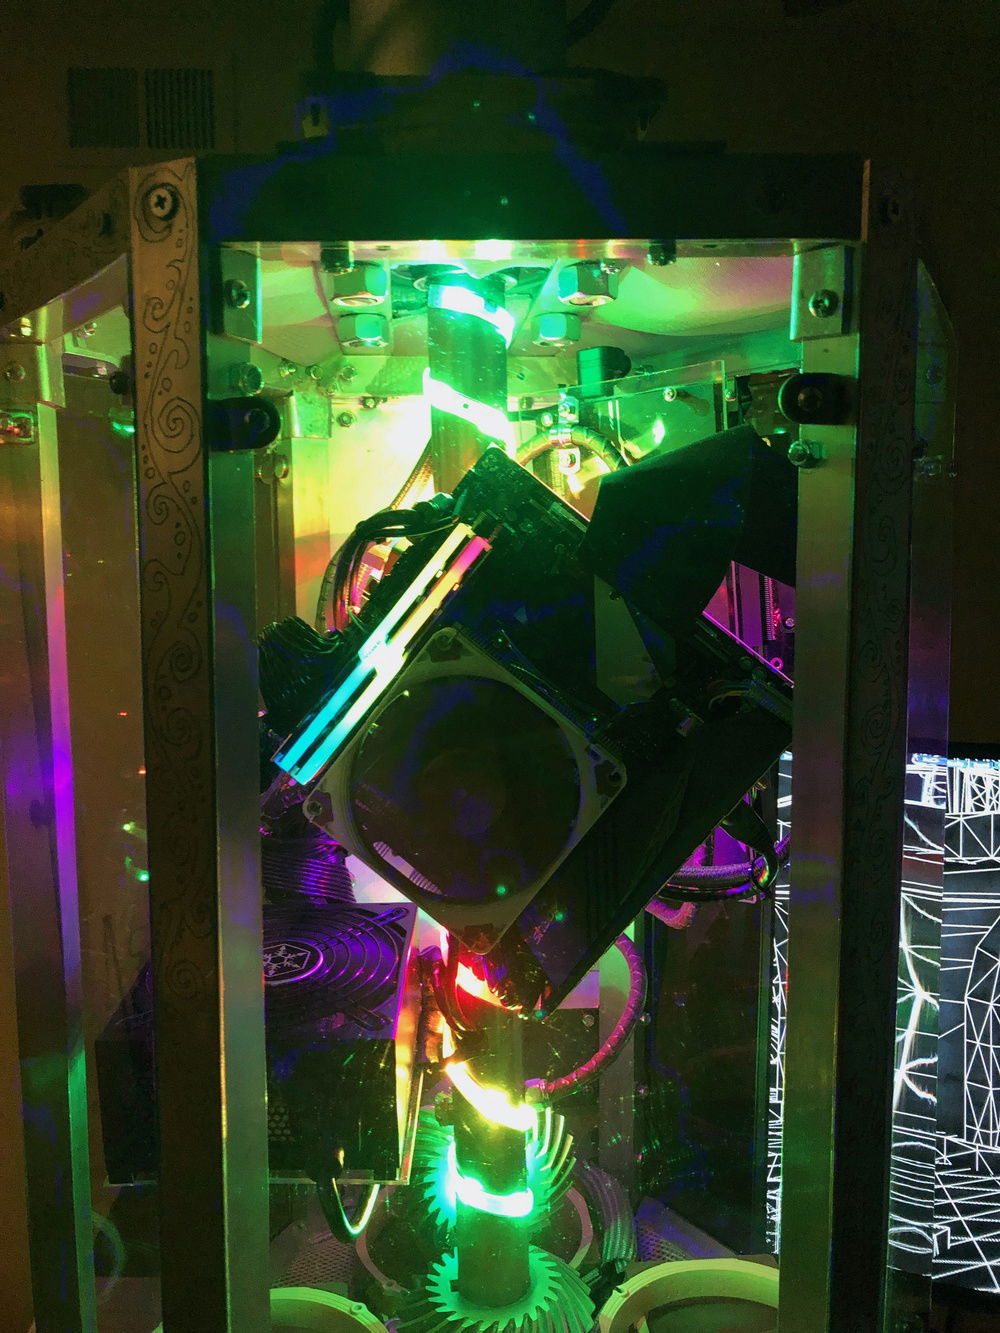
Center pole lit with barbershop pole style RGB.
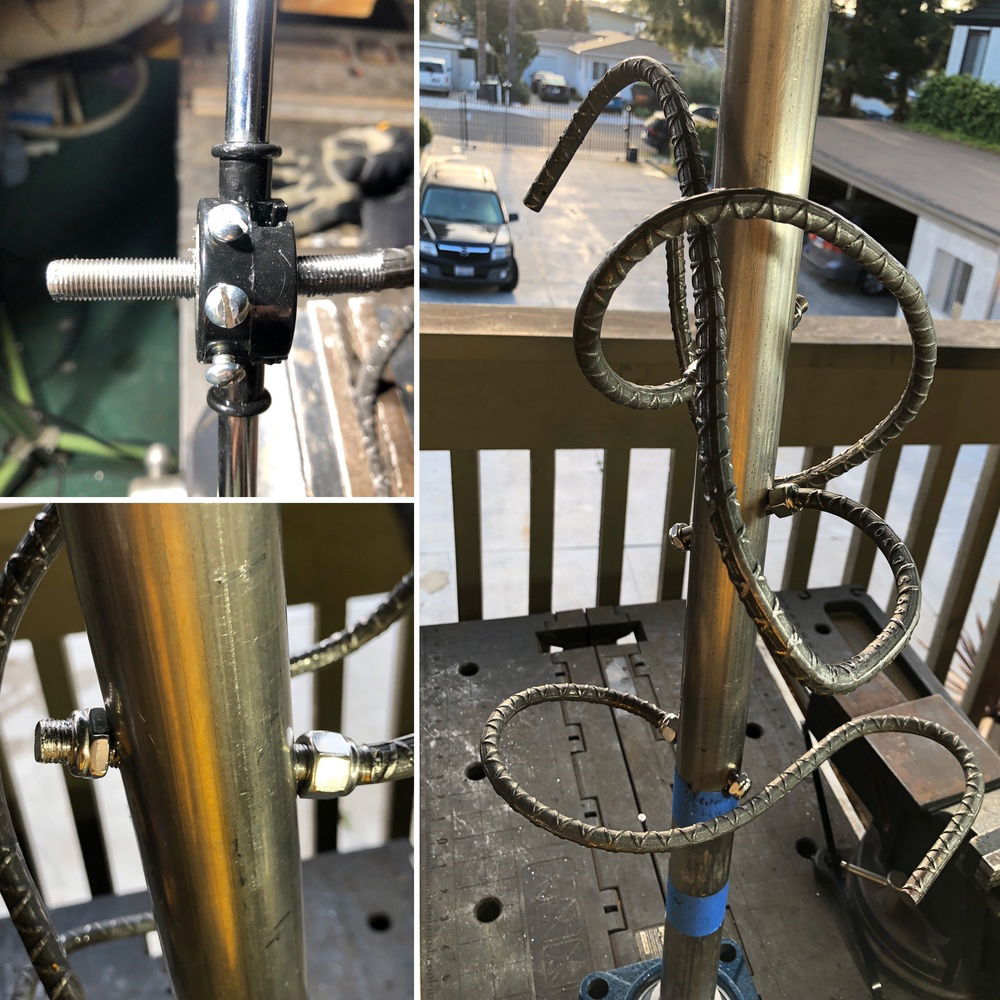
Mounting the bent rebar on the center pole by threading the ends and using a locknut on each side
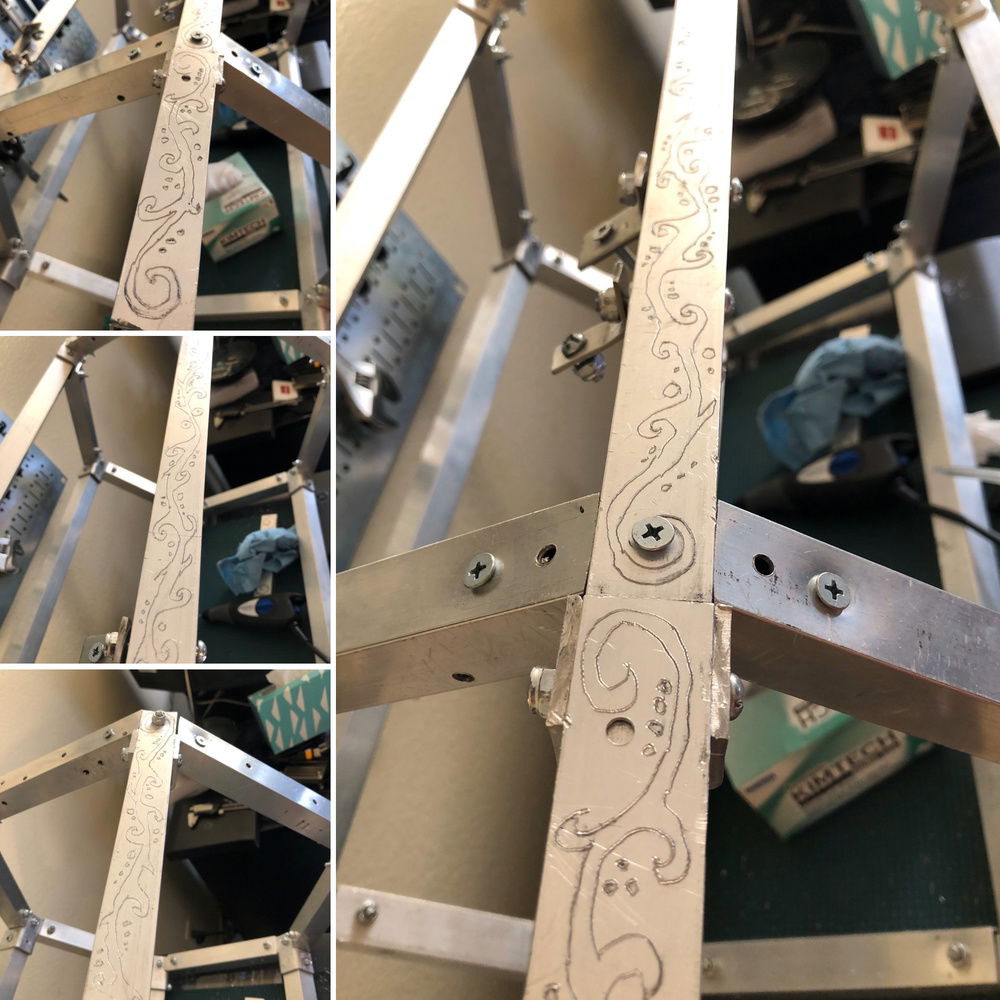
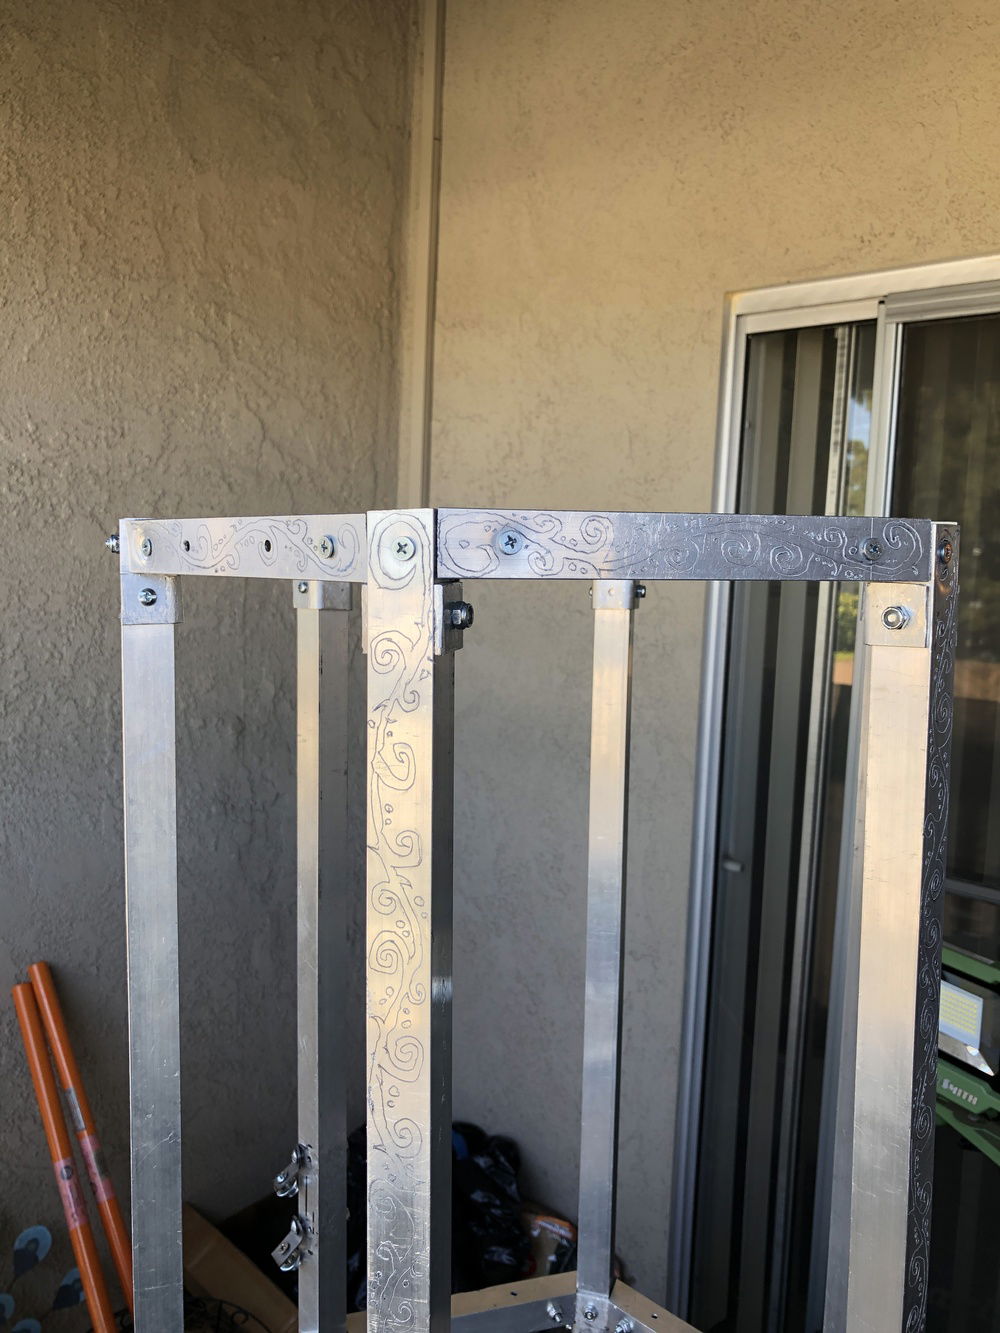
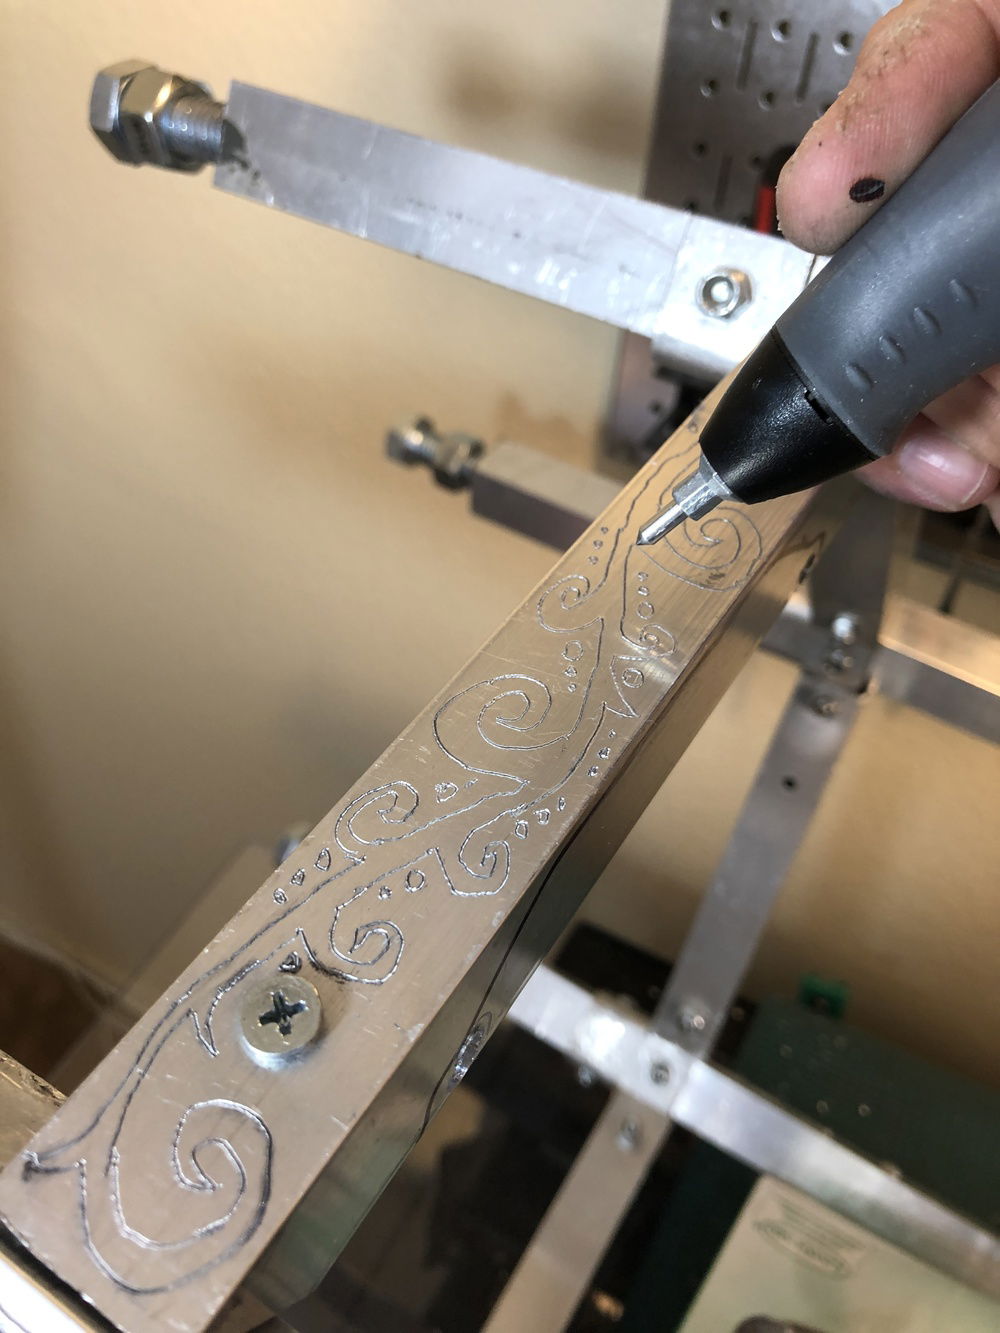
Engraving on the first leg of six on the Rotating PC's square pipe Aluminum frame.

Mesh dust filter bottom. First time doin upholstery work!
Back plate glows in the RGB
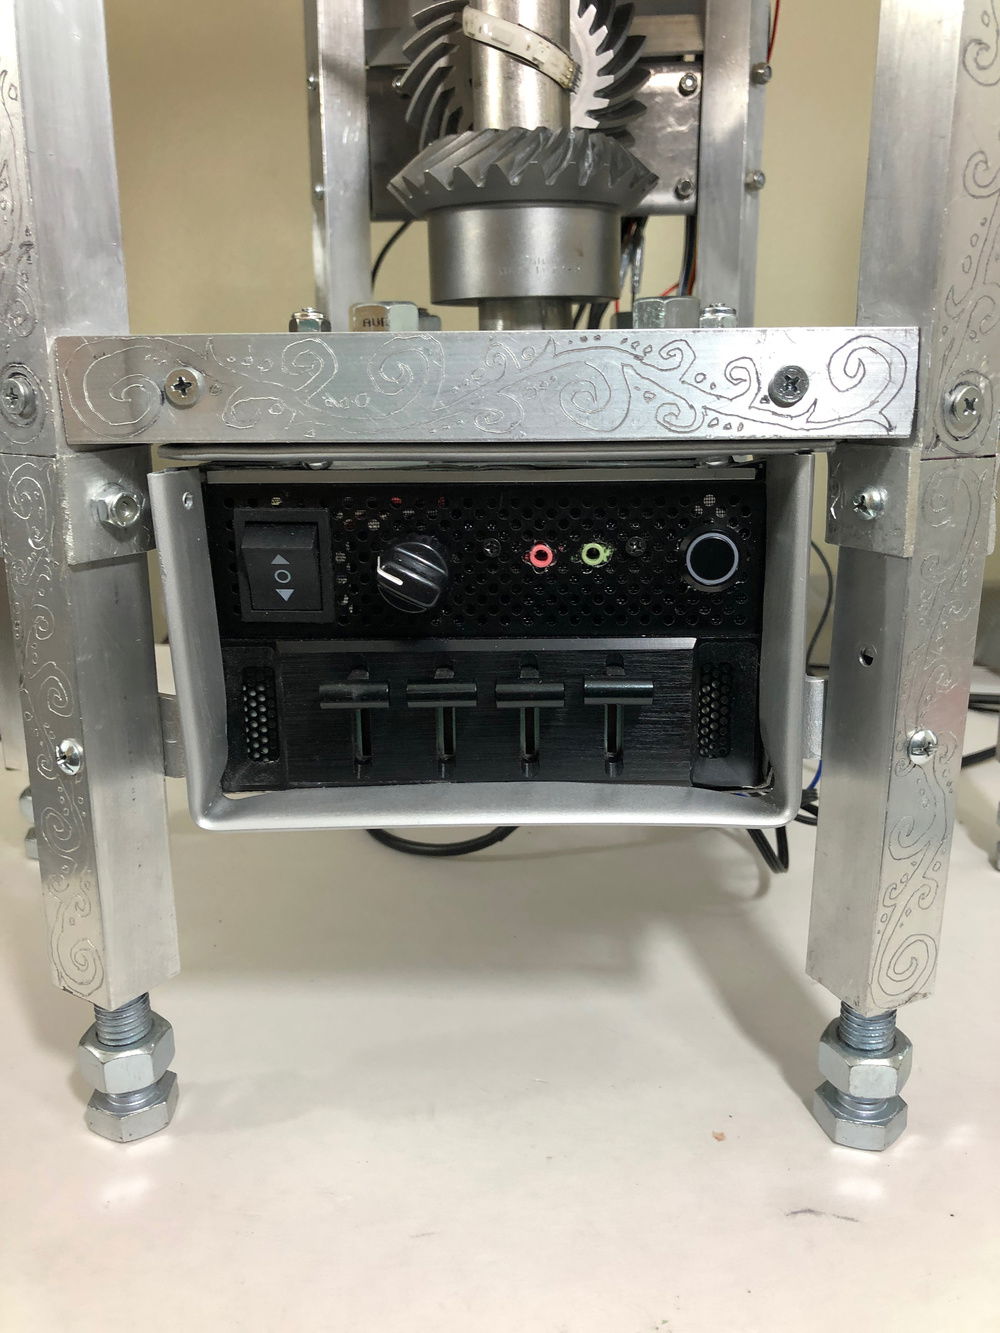
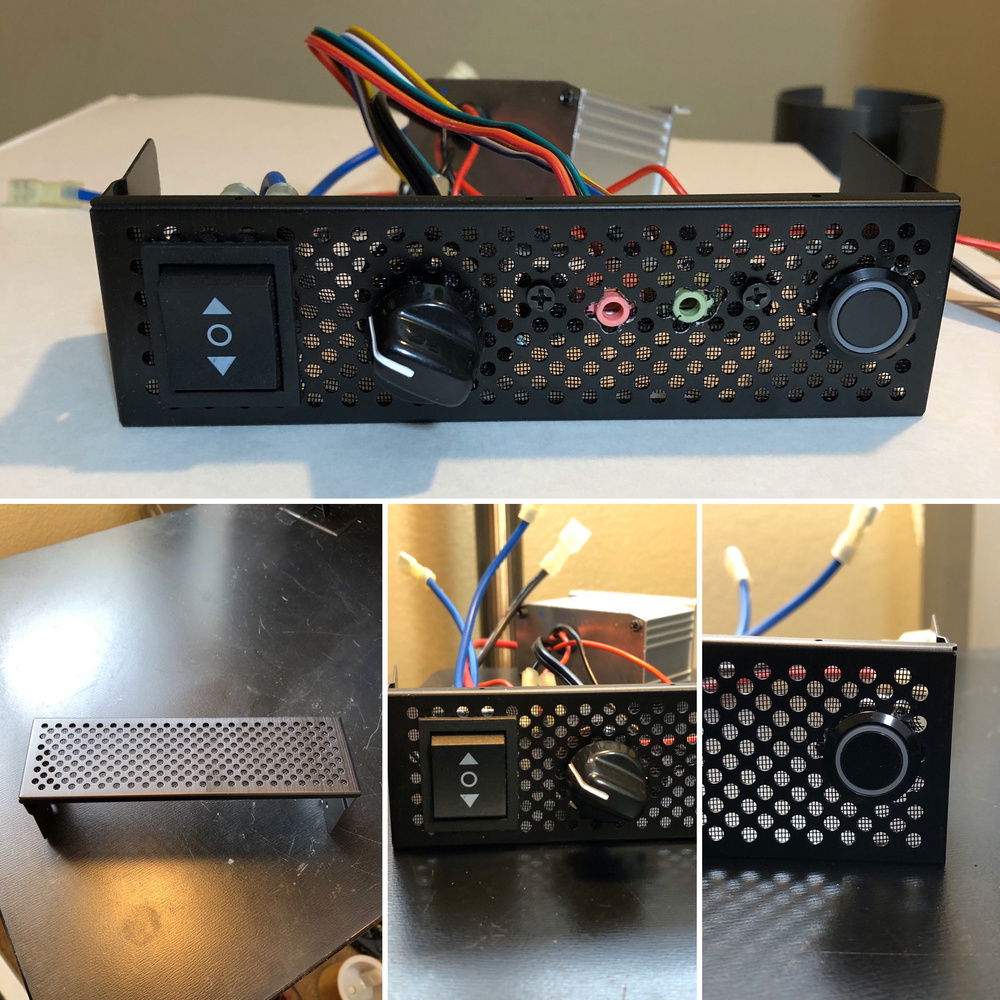
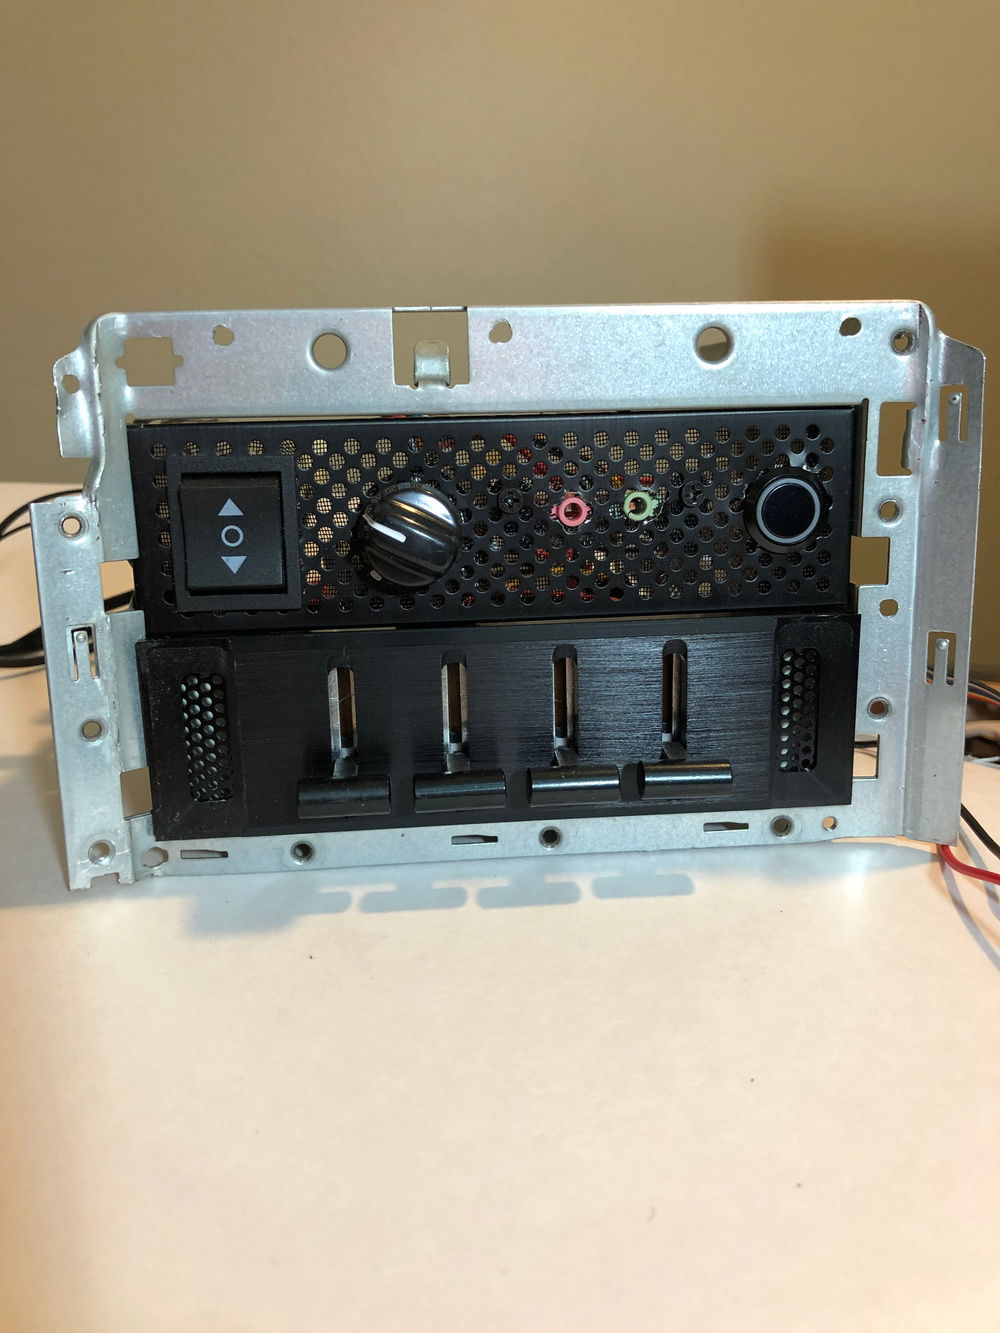
Front I/O with motor direction switch, speed adjustment knob, HD Audio jacks, power button, and fan controller
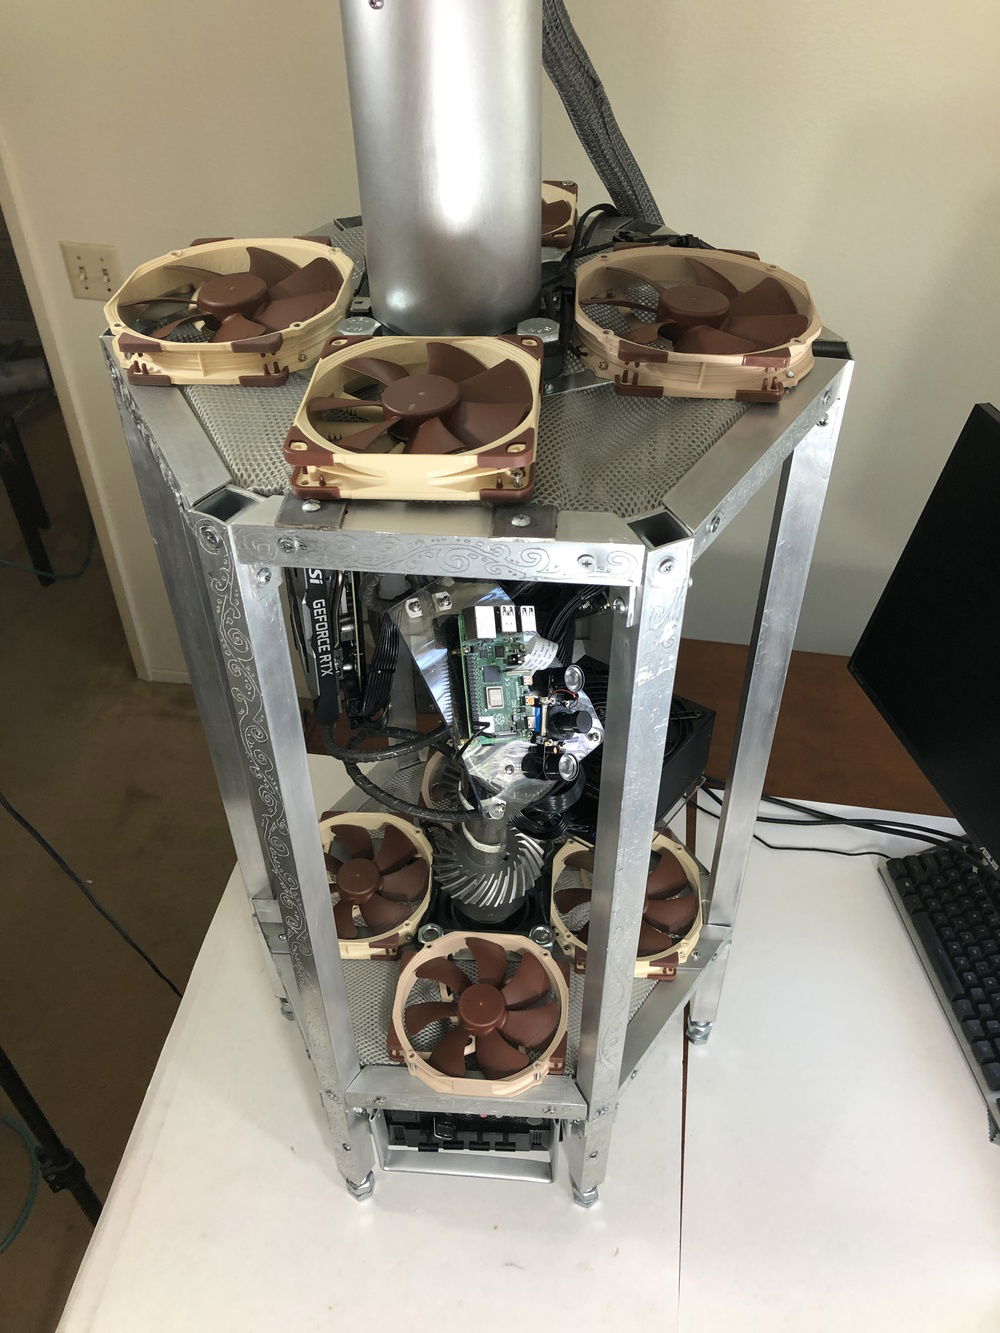
All 8 Noctuas installed!
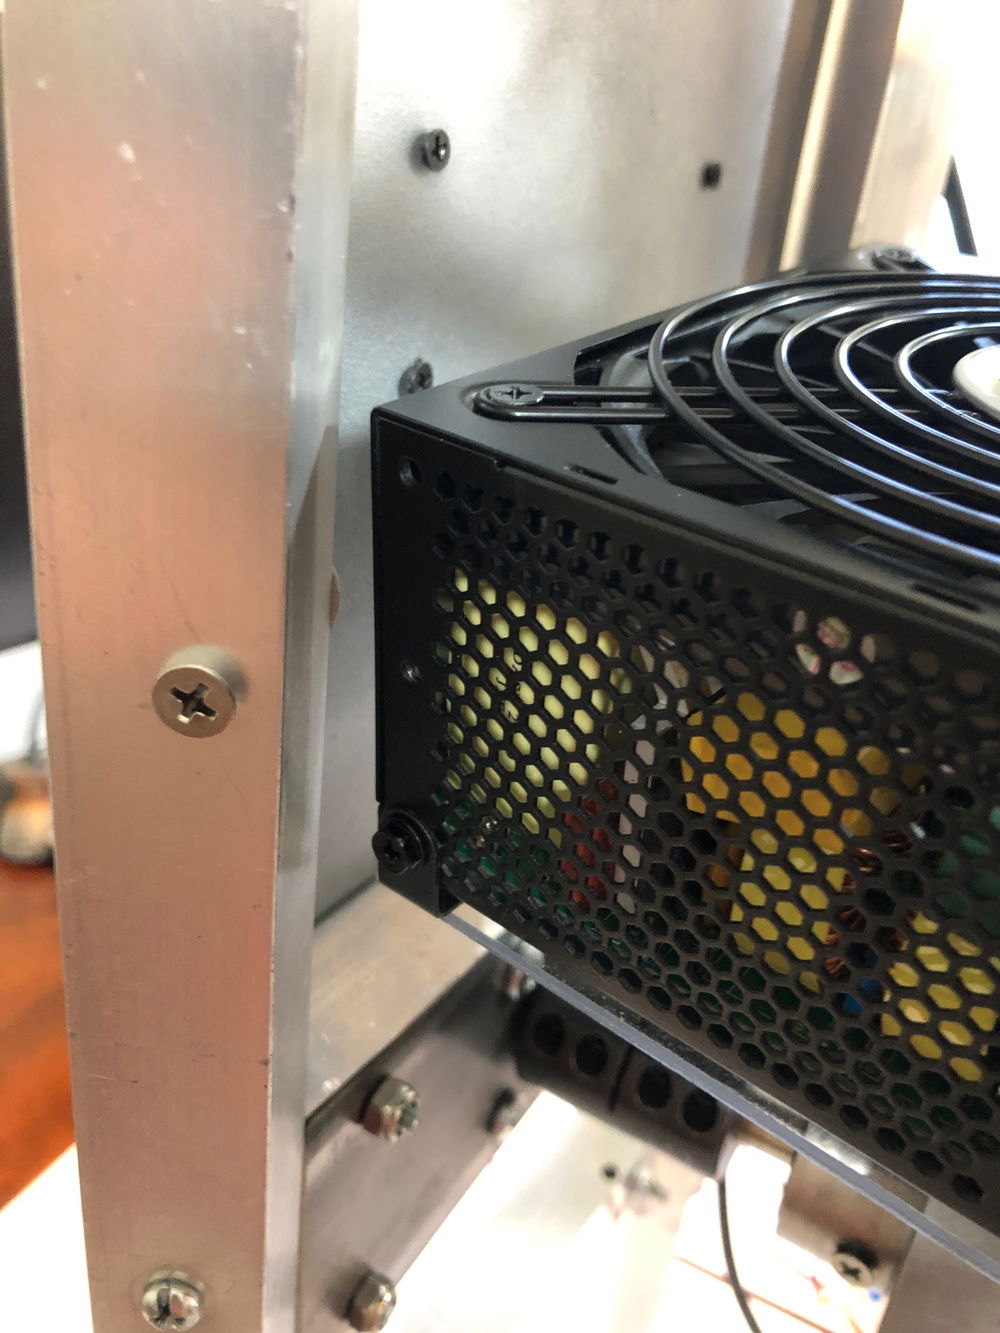
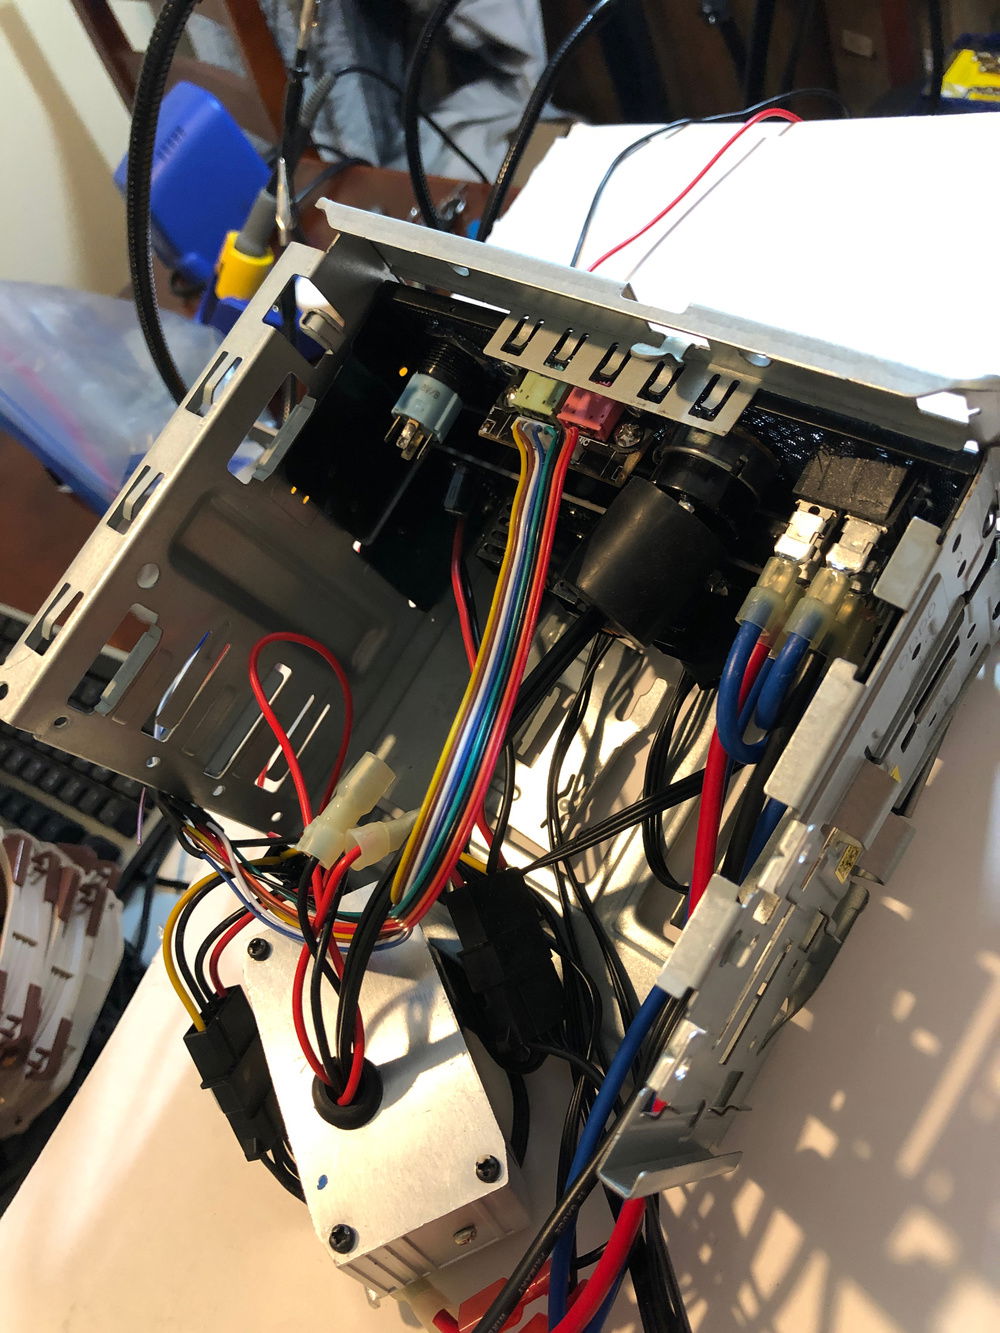
PSU clears the steel rear electronics plate by millimeters
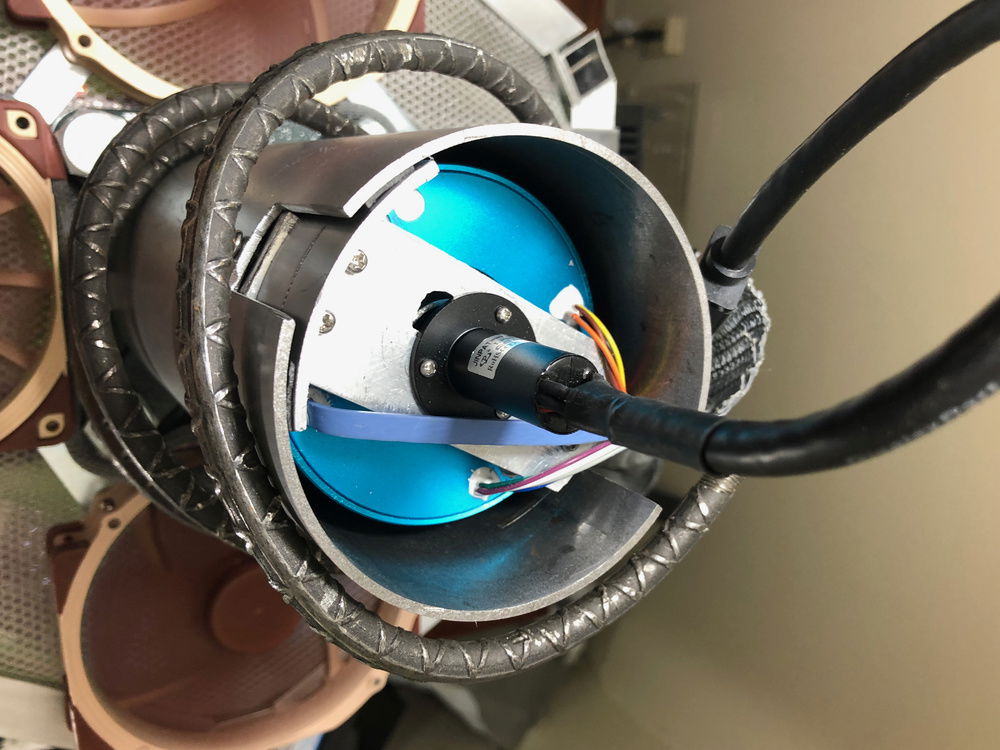
Birds eye view of the Ethernet/Signals and DisplayPort slip rings in their stabilizing stove pipe and corkscrew rebar accessory
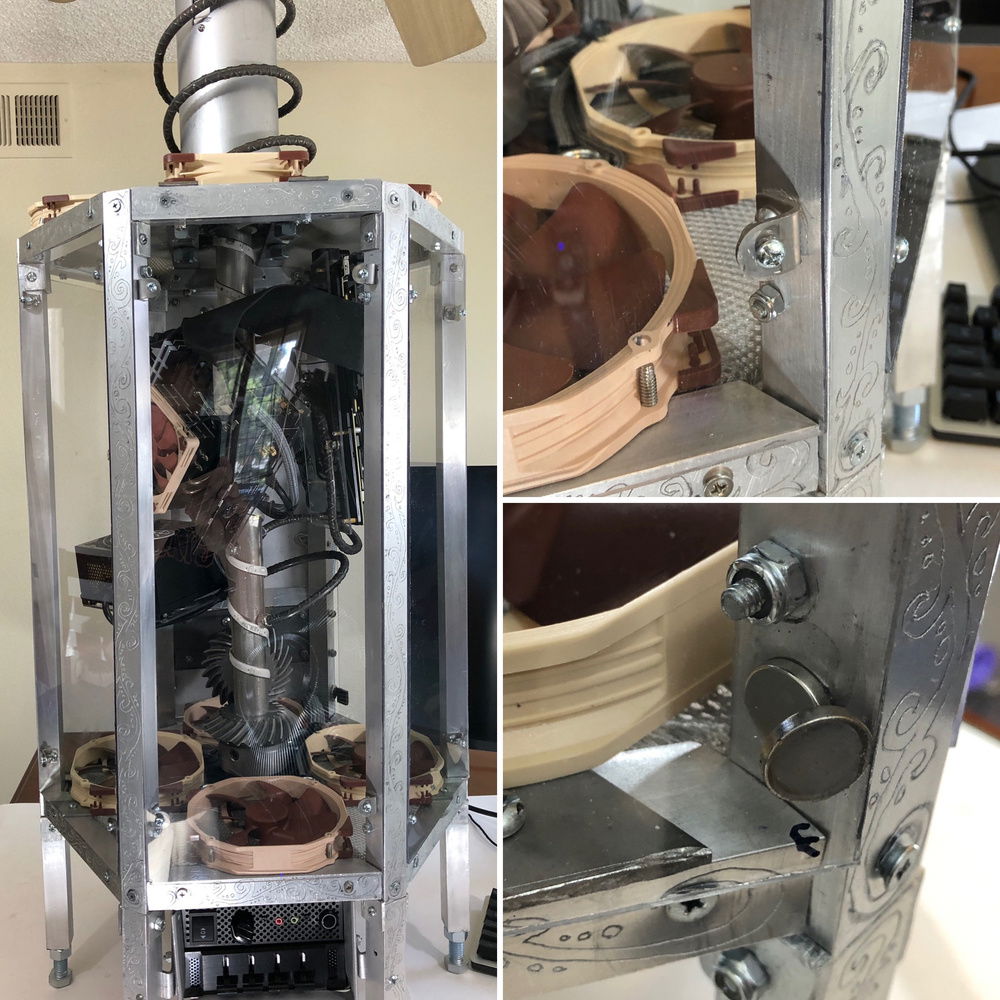
Clear Lexan polycarbonate sheet case doors attached by hardware (front 3) and neodymium magnets (rear 2 service doors)
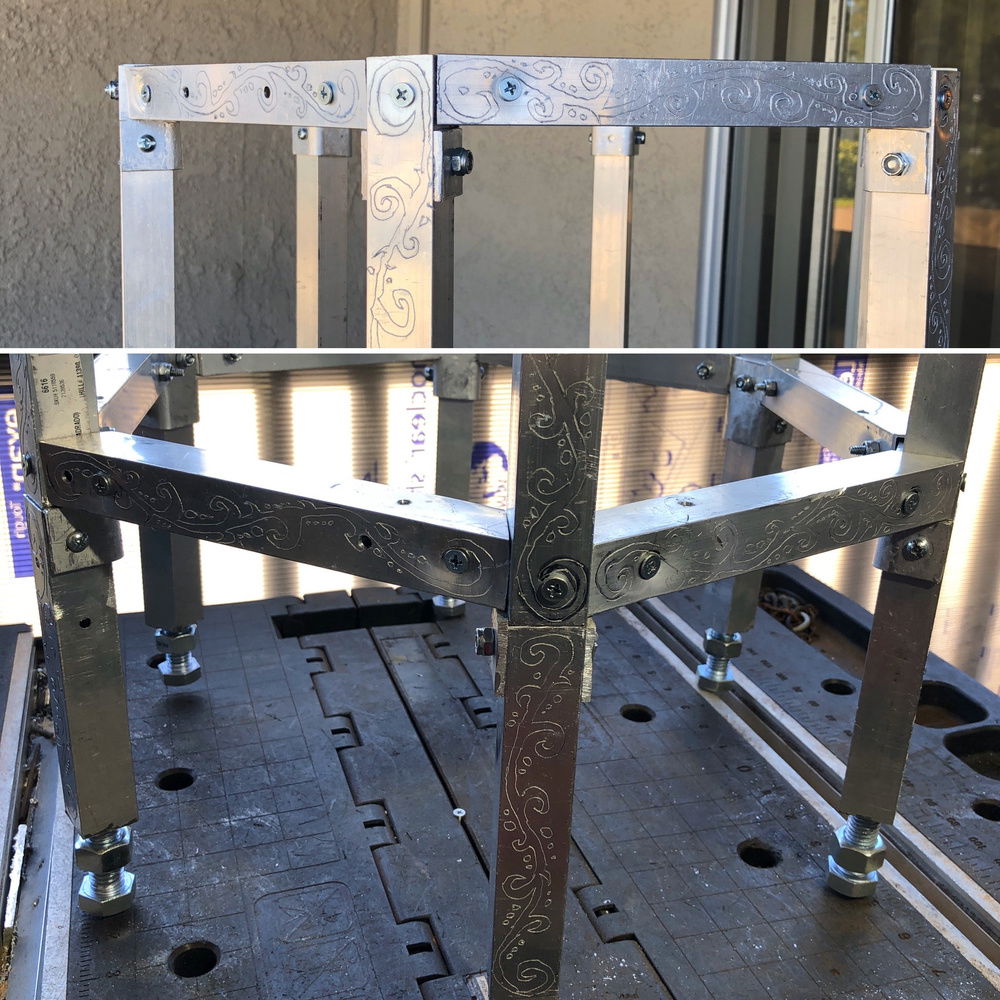
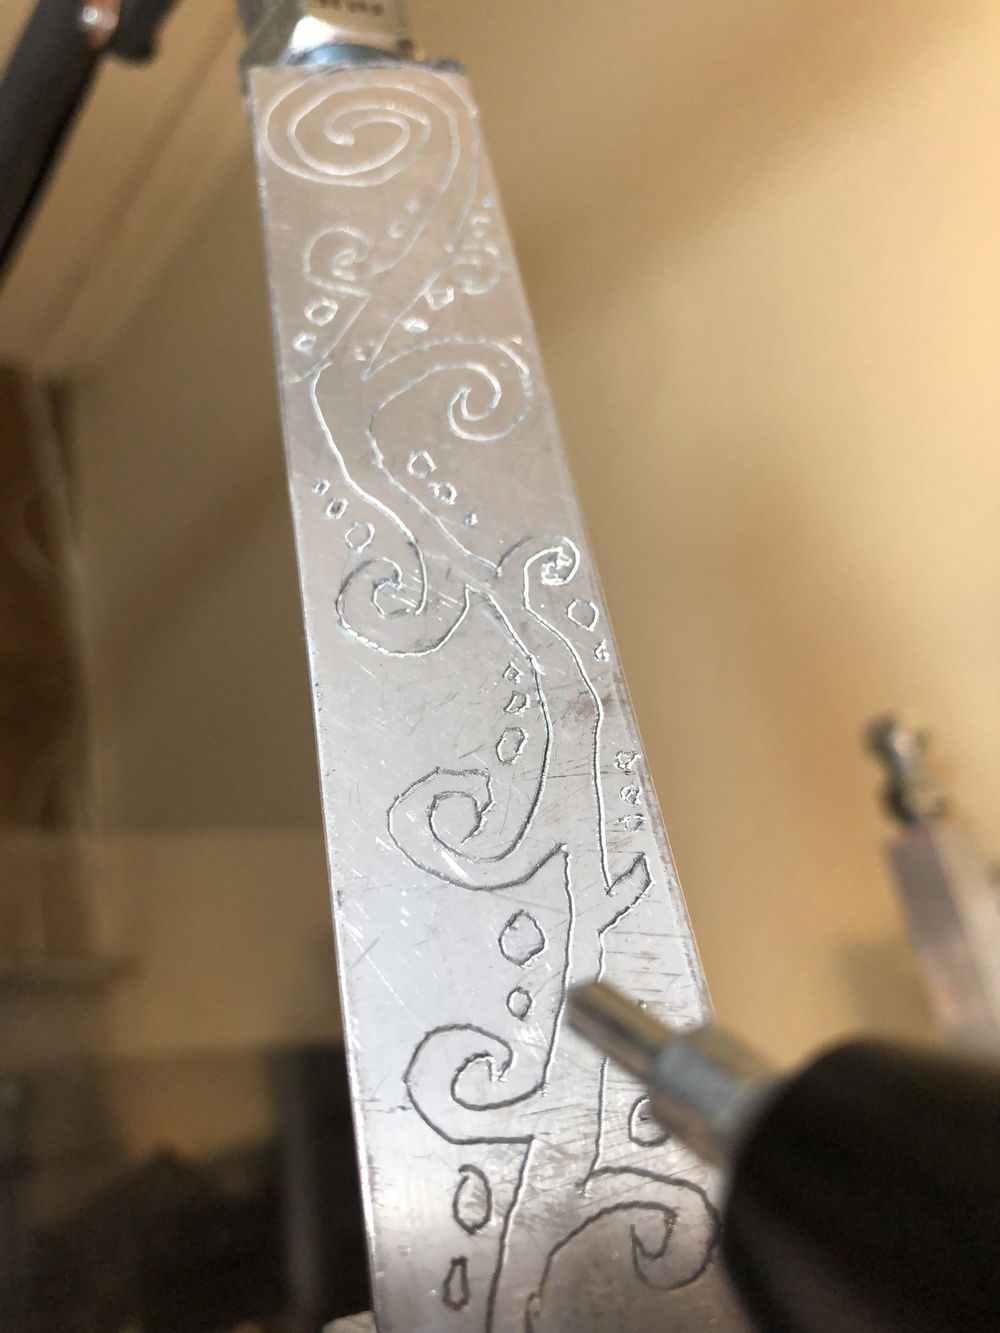
Engraved scroll pattern on the outward facing surfaces of the square pipe aluminum case frame
Rotating PC
AD:
The build is finally complete! See it rotating in slow motion, at regular speed, or at maximum speed!
This was a pretty intense 4 month build, with lots of fun problems to solve. I genuinely did not know whether it would work till 3 months in. But I just refused to believe it wouldn't work until it did. There are so many details about how I built it. If you're interested in an amateurish 10 minute snooze-fest, talked for ten minutes about the power train (gears, bearings, drive shafts, and motor) and slip rings. The slip rings are the key to how it can rotate without the cables getting twisted up. I needed four to do the basics (power, ethernet, signals, USB 3.0, and DisplayPort). Slip ring are used for anything electronic that has a stationary base with a rotating component attached. They are used everywhere from your ceiling fan, to an MRI machine, to a merry go round, or to a power generating wind turbine.
This is a backward and unnecessarily complicated application of slip rings. Normally, only the bare minimum electronics are installed on the rotating part, with the rest being on the stationary base. I've put most of the electronics (the PC) in the rotating chamber, just because I thought it was cool that you could. Someone would have made me one slip ring that does what I'm doing with 4, but that someone would also charge me a lot of cash. The 4 I used are OTC, I guess you could say, and therefore much more affordable. It did force me to embed them in each other, since all slip rings need to be on the rotational axis to work for any length of time.
I ran the cabling on the rotating side of the slip rings through the center pole and out into the rotating chamber to hook up to the components. Since everything attached to the center pole moves at the same RPM as the pole, they all maintain their position relative to each other, so they are essentially stationary. Unless they bump into things that aren't rotating, of course. And there are some very tight clearances. The PSU avoids hitting the steel back chamber wall by only a couple of millimeters, for example. The right angle DisplayPort connector on top of the 2070 Super has maybe a quarter inch to spare. I had to cut the ends off the bolts to make sure.
Rotation made no difference in benchmark performance, as you would expect. The wi-fi signal was substantially better and more consistent with the antenna onboard and rotating, however.
I wrapped the RGB strip around the center pole expecting a barbershop pole type effect. But I also got the cool Aurora Borealis type color flashes off the silver steel back case wall. A really nice surprise. I had a lot of fun bending rebar for support the components and to make the slip ring stove pipe on top look less loony. Engraving the outward facing square pipe Aluminum frame pieces was hard work but turned out better than I thought it would. I don't know why more people don't do it to their cases, since it's not hard to do and has a nice subtle look. It's hard to do artfully, but as long as you don't paint it, most people won't notice how rough it is.
I'm happy to answer any questions, up to and including, "What the hell is wrong with you?"
For a complete past build log, see my Instagram account @lairbearlair or just #rotatingpc. If you go to @lairbearlair, they are automatically list in reverse chronological order.
Color(s): Black Silver
RGB Lighting? Yes
Theme: Industrial
Cooling: Air Cooling
Size: Mini-ITX
Type: General Build
Build Updates
Almost finished!
Build Finished, Description Update, and Final Pics Added!
Adding electronics panel
Soldering the signals slip ring wires and mounting the rear electronics plate
Creating the I/O
Engraving the the Aluminum Square Pipe Frame
Finished engraving
Added barbershop pole style RGB
Hardware
CPU
$ 99.00
Motherboard
$ 415.29
Memory
$ 364.99
Graphics
$ 645.00
PSU
$ 249.99
Case Fan
$ 69.90
Case Fan
$ 95.80
Cooling
$ 59.95
Estimated total value of this build:
$ 3,199.91
Approved by: