The Scandinavian - A minimalist oak wood PC case
This build is from 2021. Back then I never even thought a community for modders existed, but hey, better late than never! You can read about the build here below, or you can read about it on my personal website mfoller.dk (it is in Danish, but I am sure Google Translate can help you out).
Please comment if you have ideas, suggestions or questions! I would love to hear, what I could have done better or just differently![Emoji]()
The specs
Dimensions (WxDxH): 58x38x21 cm (without legs).
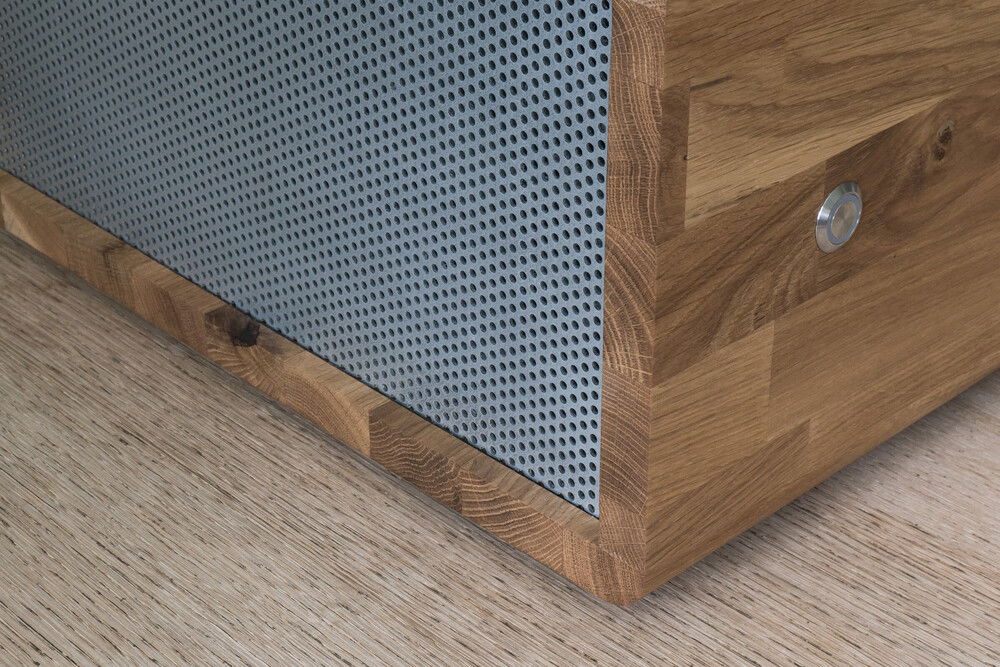
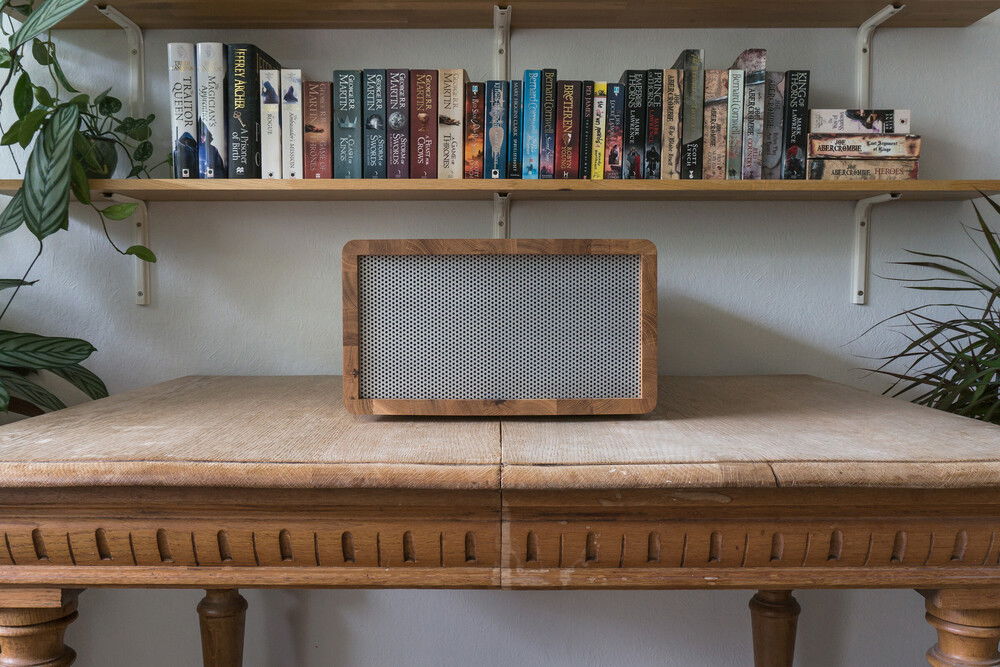
Primary materials: The case itself is made from 18 mm solid oak wood with aluminium mesh for air intake and exhaust. The various brackets and fittings on the inside are aluminium or steel. It's not a light case![Emoji]()
The exterior
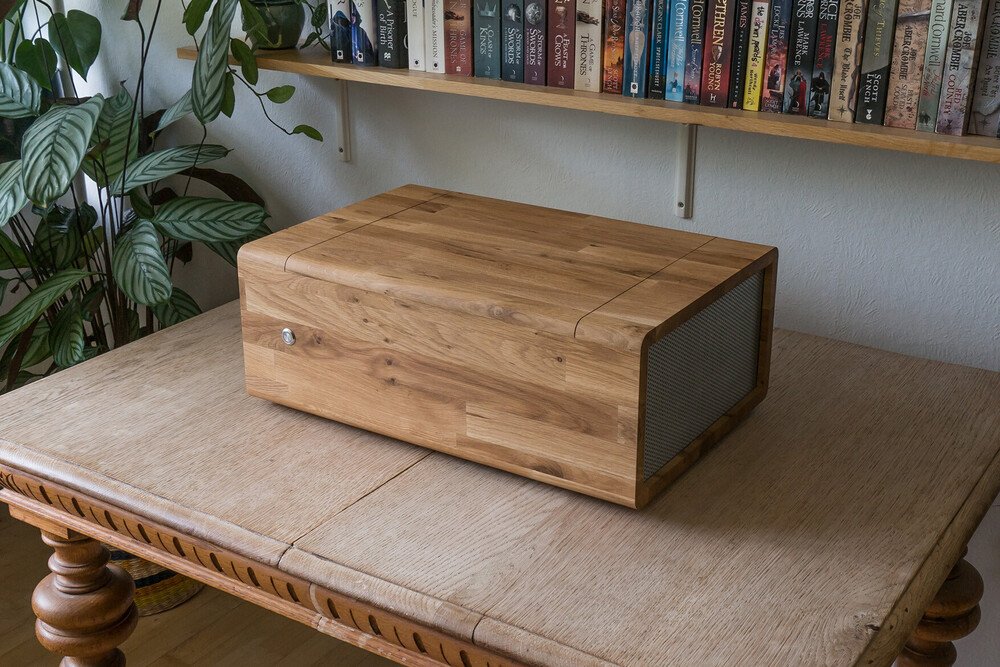
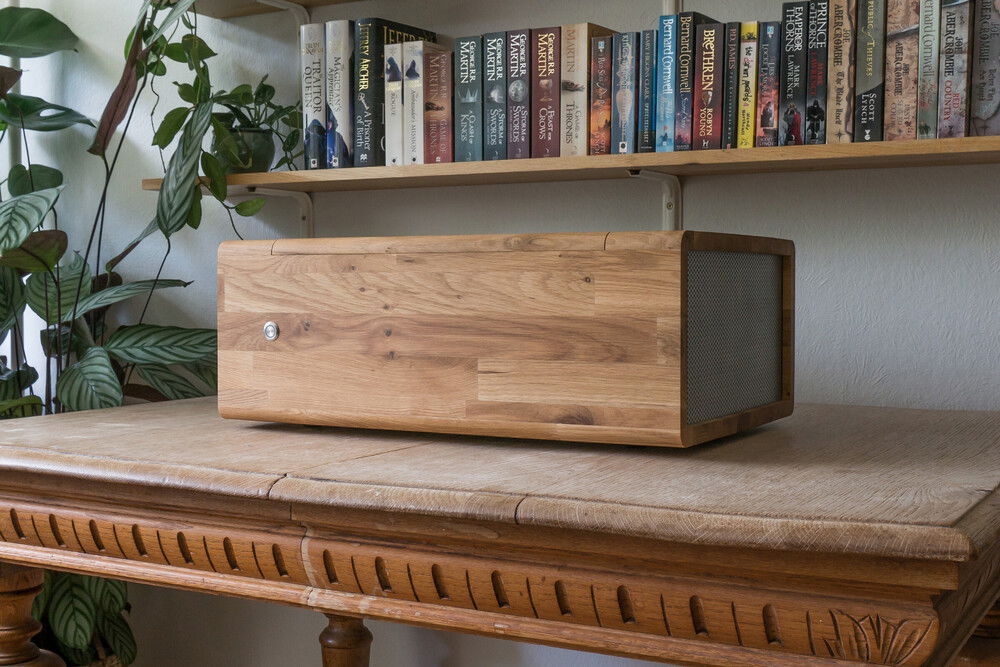
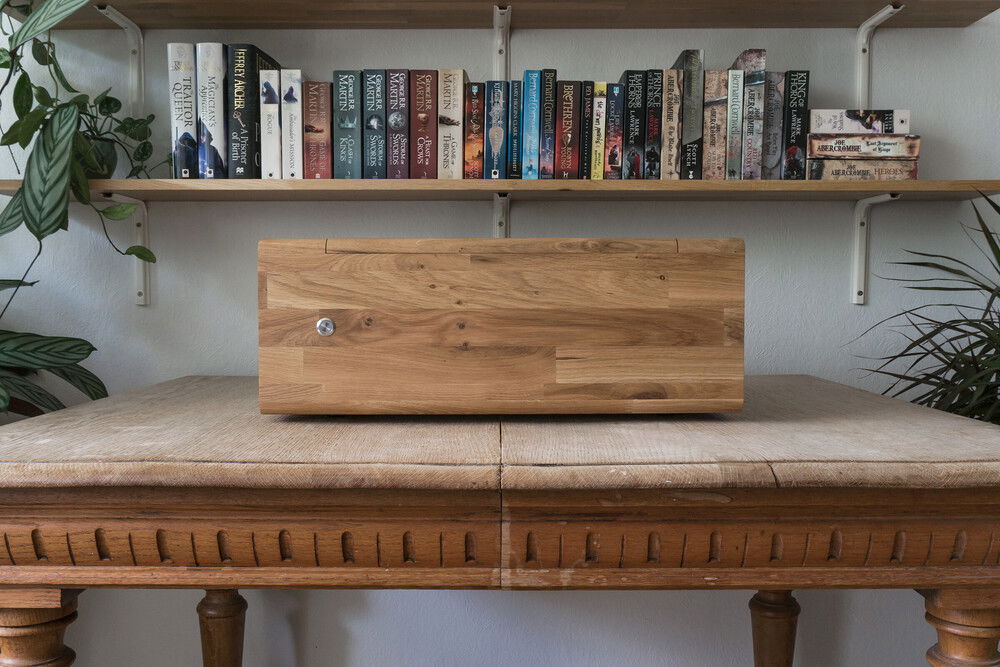
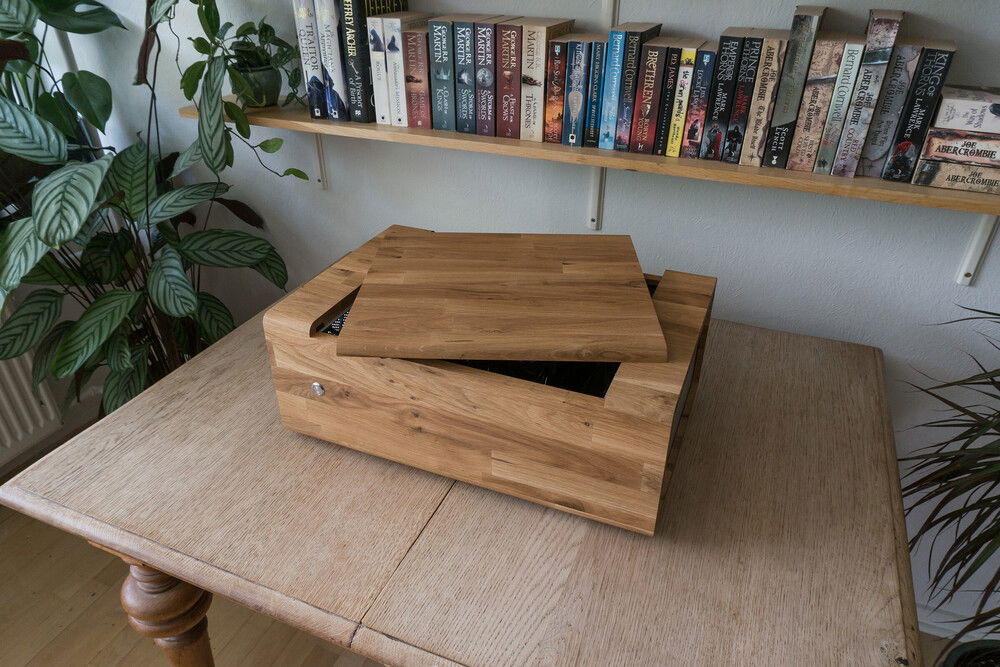
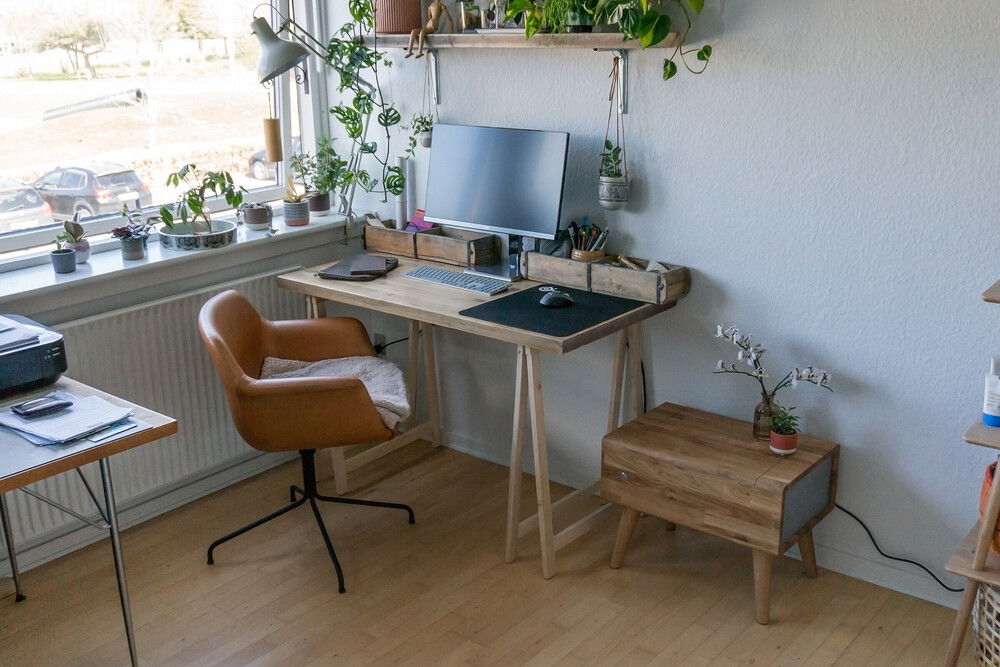
The title "The Scandinavian" alludes to my inspiration for the build. Not only am I from Denmark, but the clean and simplistic design is strongly inspired by the "golden age" of Danish, Scandinavian and Nordic furniture design from the 1930s to the 1970s. The case is made to resemble a side table or similar small piece of furniture.
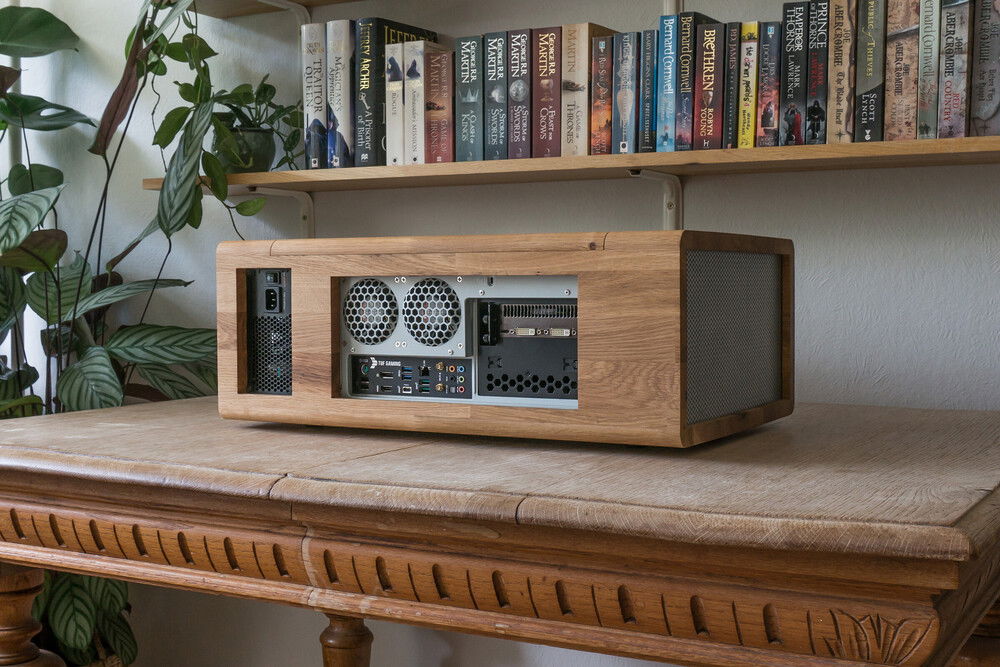
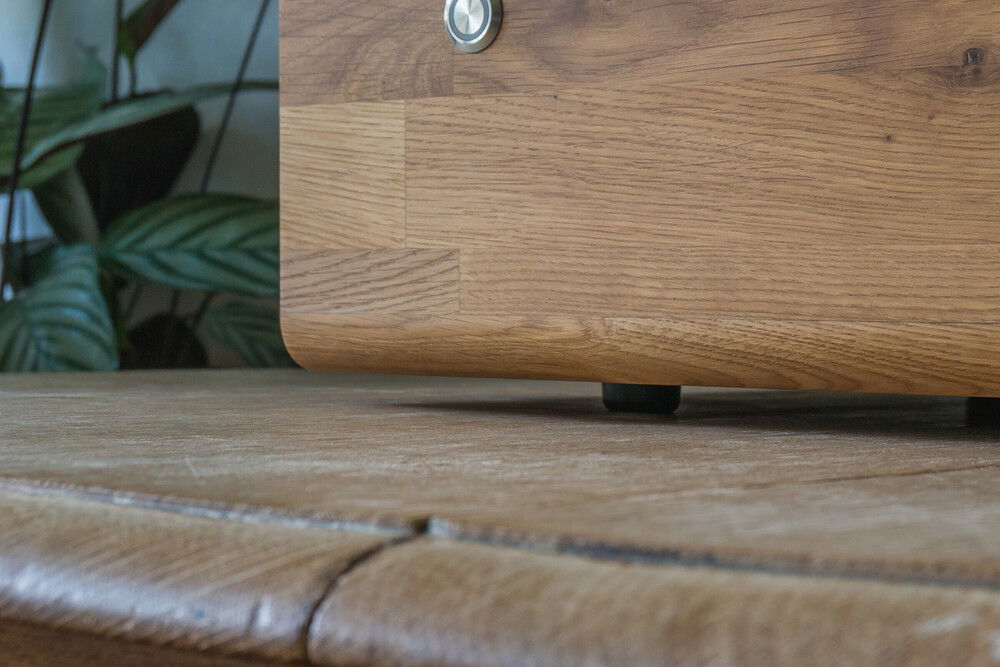
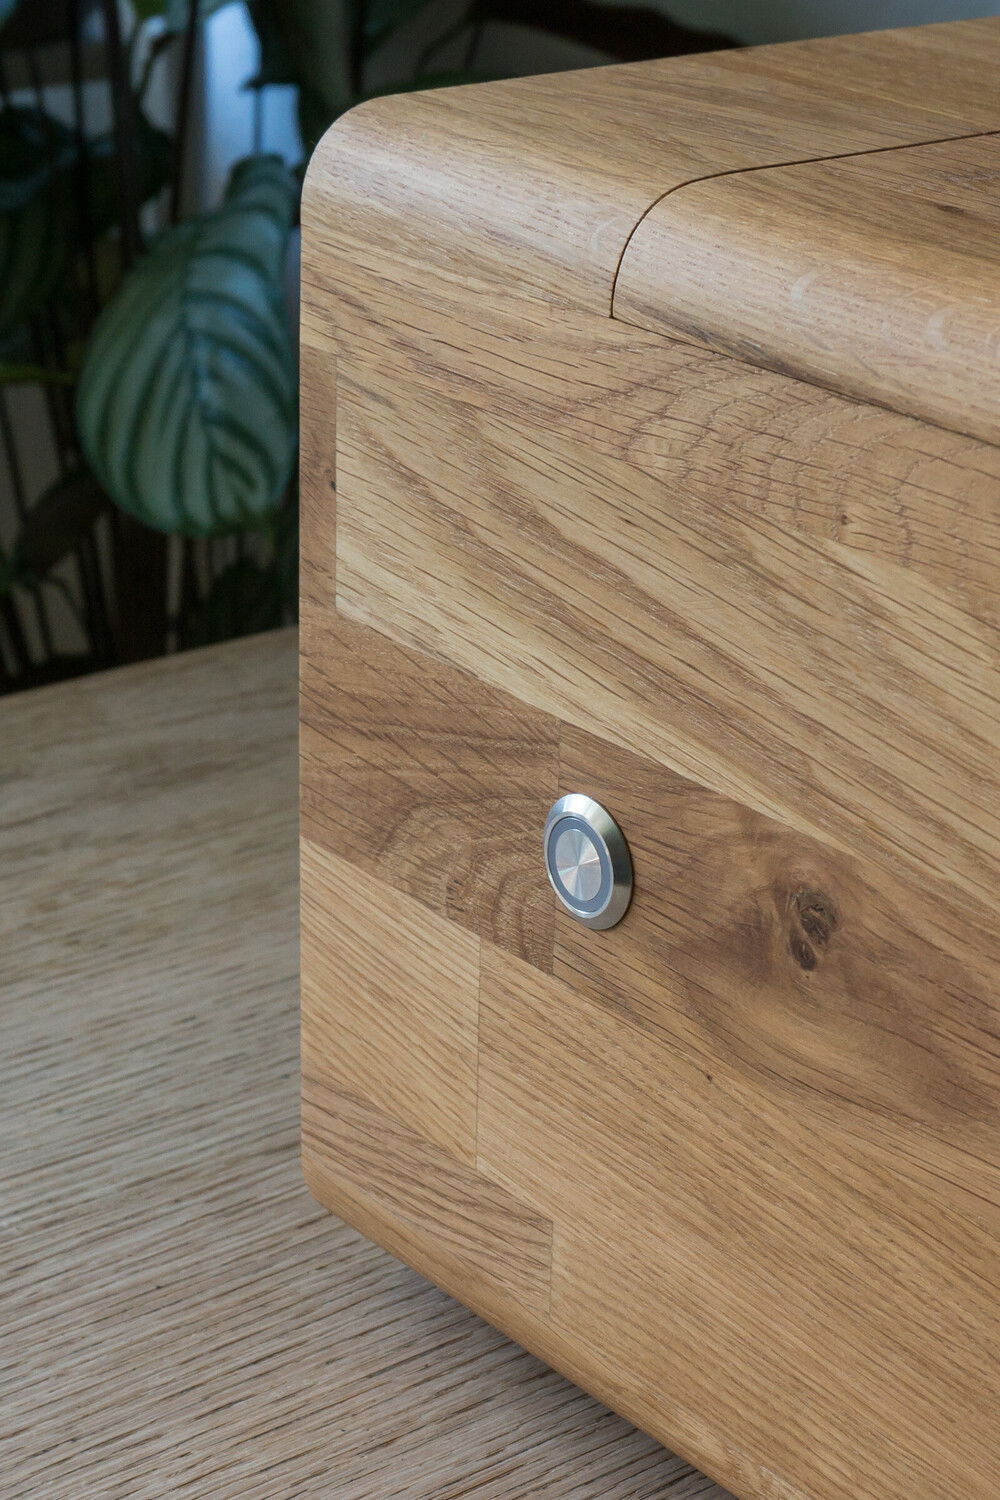
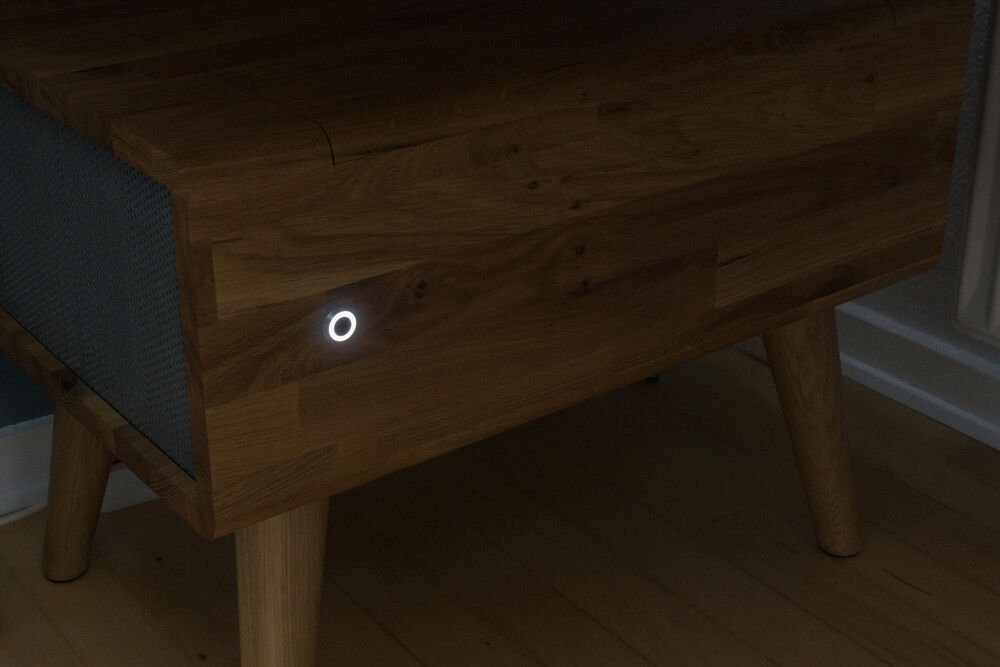
The case has a single lid that can be removed when you need access to the inside. The front of the case has only one feature element: the on/off button. All ports and connectors for power and external devices are located on the back to reduce visible and unaesthetic cable clutter. The default leg option is oak wood furniture legs, which can be mounted under the case. Alternatively, small rubber feet can be fitted under the case, for when/if it is placed on a desk or other surface. All the wooden parts of the case are treated with beeswax to bring out the glow and structure of the oak wood.
The interior
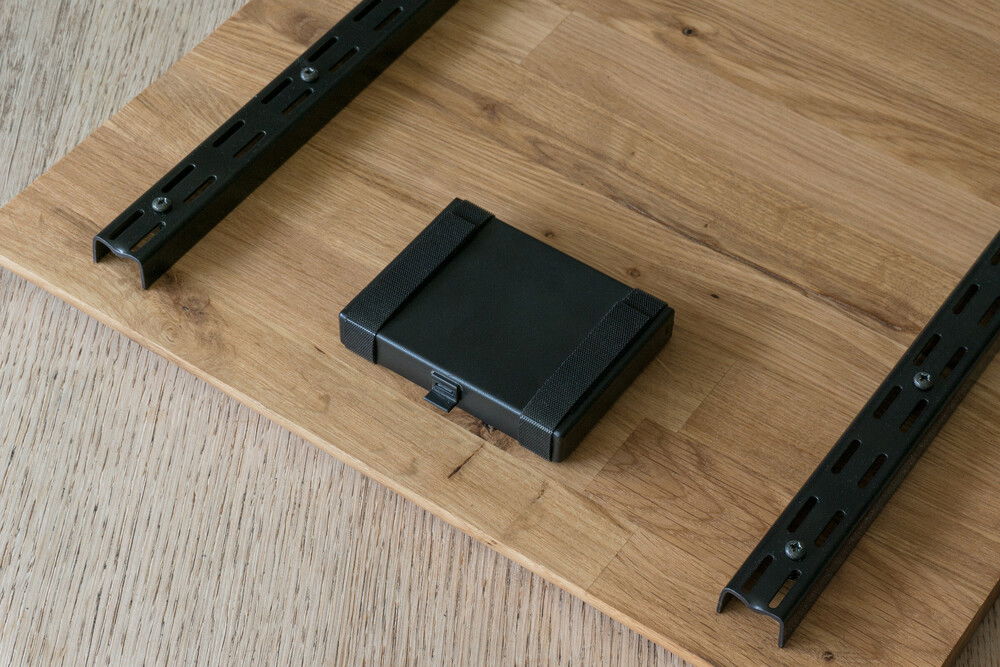
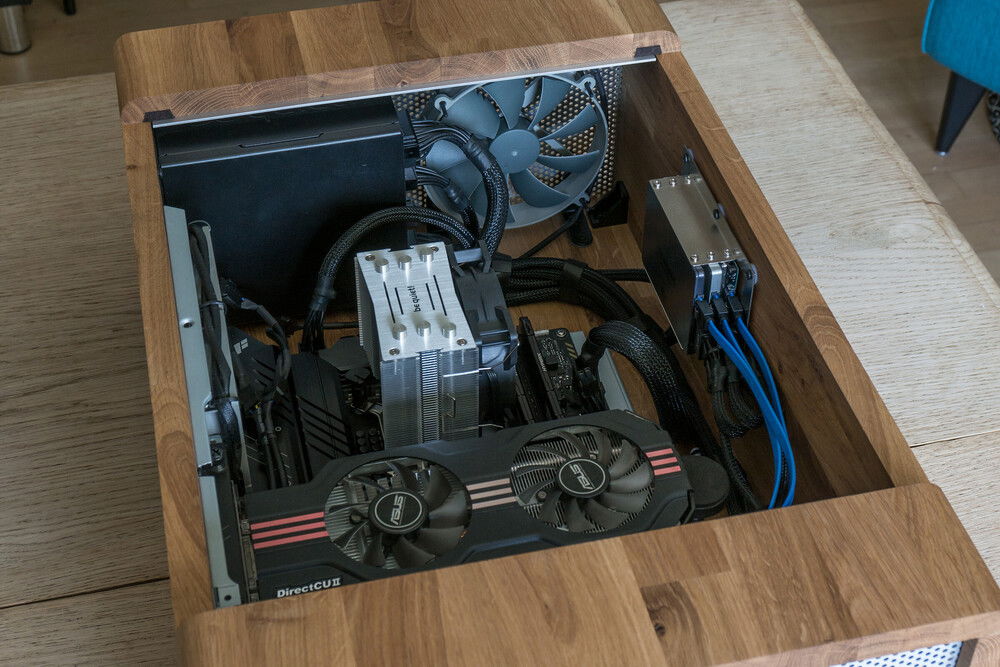
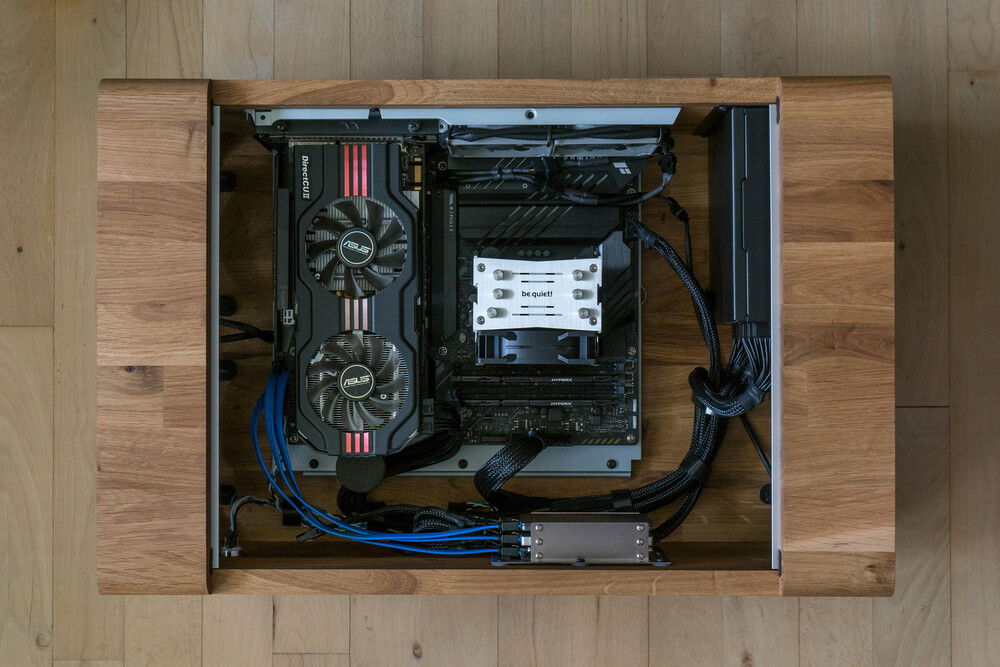
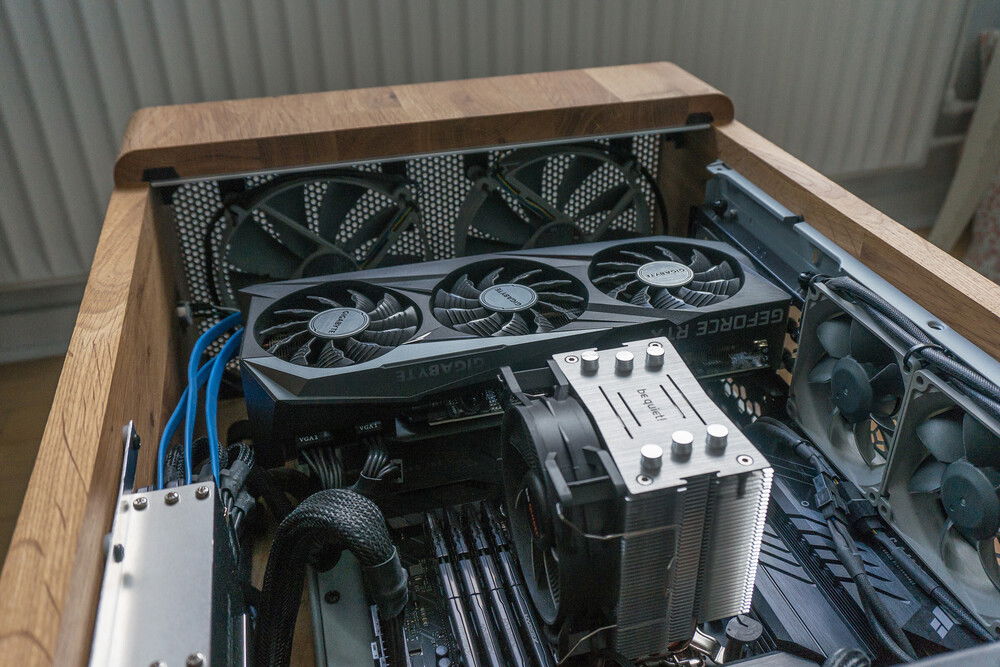
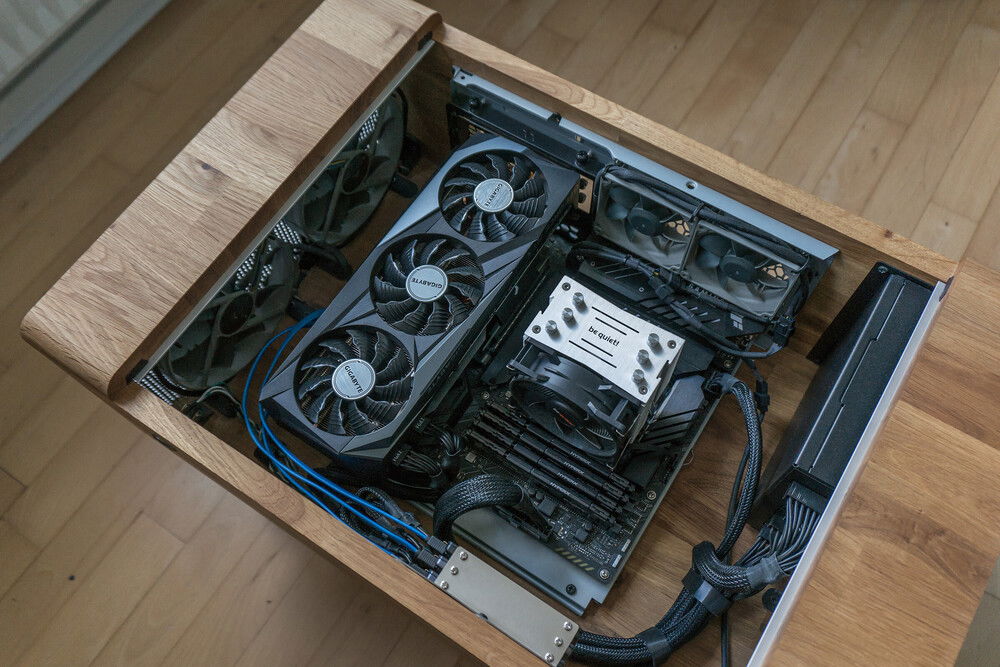
Flat aluminium bars under the lid prevent dust and dirt from falling down on to the components from above. The inside of the case is not visible without removing the lid, but I still wanted the interior to present itself in a somewhat elegant way. The cables are secured to the bottom with black hook-and-loop (velcro) fasteners, and the cable routing is kept fully visible for easy management down the road.
The main components are placed, so they present themselves neatly. The component colour scheme is kept rather basic using only black and grey with blue cables connecting the SSD-storage. No RGB. All mounting brackets and fittings are black or metallic grey, and all components, brackets, fittings etc. are mounted with black screws.
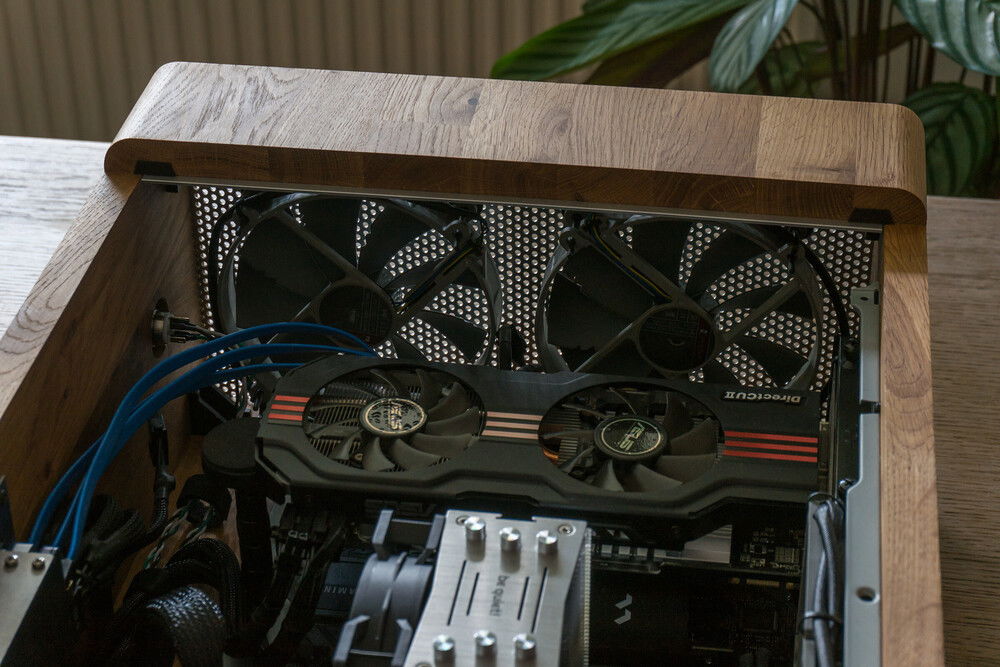
For mounting of the motherboard and rear fans I scavenged the base and back plate from a cheap Chieftec case. I made some modifications to make room for a vertical mount for the GPU (which actually places the GPU in a horizontal position) as well as for a height-adjustable support leg for the GPU.
Components and airflow
A critical point for me was to make the case extremely quiet, which required both good air flow (I am just not brave enough to use water cooling) and good vibration damping. I spent a long time sketching different solutions for component placement and assembly to find the best combination of air flow, aesthetics and accessibility.
All components are placed, so they allow the air to pass (mostly) unhindered. Two 140 mm fans provide cool air intake from one side, and another 140 mm fan and two 80 mm fans provide hot air exhaust out the other side and the back. The power supply has its own "secondary" air-flow and draws air in from the side and blows it out the back.
The work
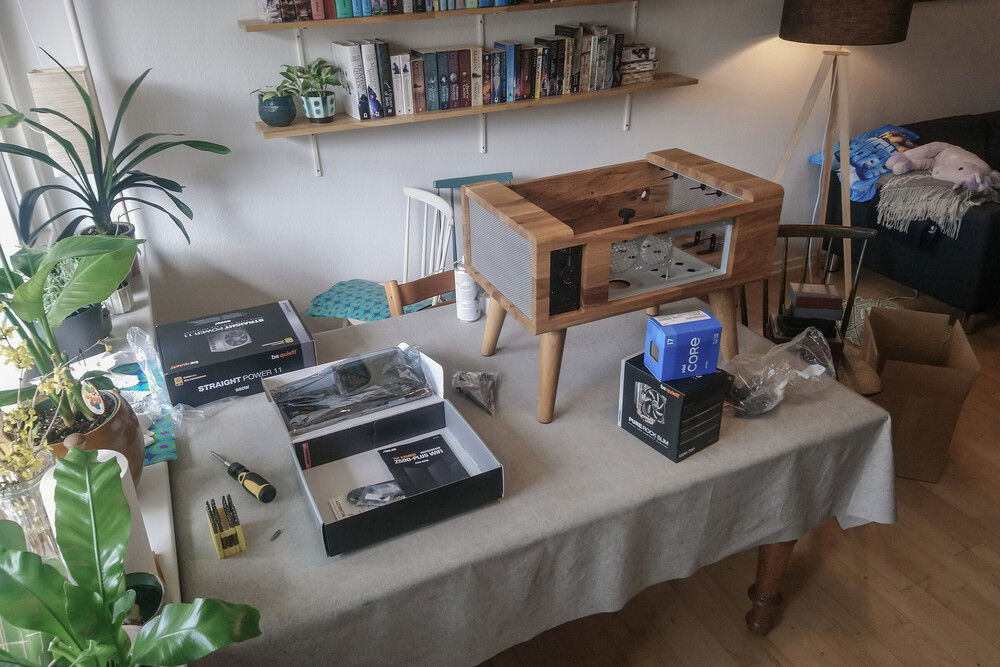
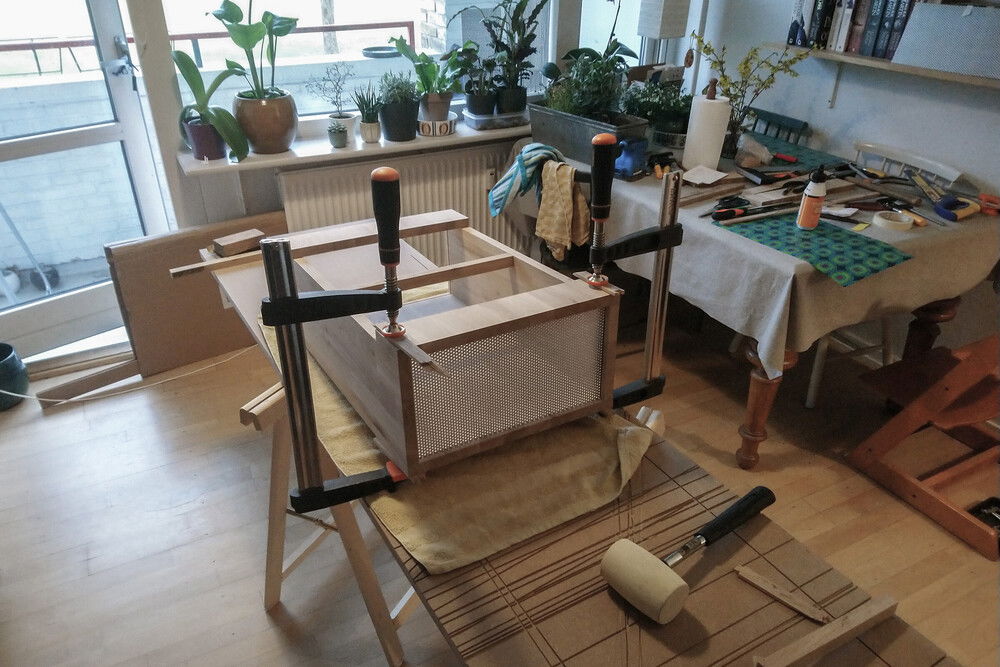
Carpentry requires precision and space, and the fact that I did not have access to a proper woodworking workshop made the build rather difficult. In order to achieve the result I was after, I had to convert half of my living room into a "workshop" for several days, and I ended up buying a plunge saw, so I could make sufficiently neat cuts.
All the wooden parts of the case are cut from one 2000x400x18 mm untreated oak shelf from my local hardware store. The case is assembled with dowels and wood glue, and aluminium angle brackets on the inside provide extra reinforcement. The edges of the case are rounded by hand with rasp and file to the same radius as the wood thickness, i.e. 18 mm. All wooden parts of the case are sanded smooth before being treated with beeswax.
Please comment if you have ideas, suggestions or questions! I would love to hear, what I could have done better or just differently
The specs
Dimensions (WxDxH): 58x38x21 cm (without legs).
Primary materials: The case itself is made from 18 mm solid oak wood with aluminium mesh for air intake and exhaust. The various brackets and fittings on the inside are aluminium or steel. It's not a light case
The exterior
The title "The Scandinavian" alludes to my inspiration for the build. Not only am I from Denmark, but the clean and simplistic design is strongly inspired by the "golden age" of Danish, Scandinavian and Nordic furniture design from the 1930s to the 1970s. The case is made to resemble a side table or similar small piece of furniture.
The case has a single lid that can be removed when you need access to the inside. The front of the case has only one feature element: the on/off button. All ports and connectors for power and external devices are located on the back to reduce visible and unaesthetic cable clutter. The default leg option is oak wood furniture legs, which can be mounted under the case. Alternatively, small rubber feet can be fitted under the case, for when/if it is placed on a desk or other surface. All the wooden parts of the case are treated with beeswax to bring out the glow and structure of the oak wood.
The interior
Flat aluminium bars under the lid prevent dust and dirt from falling down on to the components from above. The inside of the case is not visible without removing the lid, but I still wanted the interior to present itself in a somewhat elegant way. The cables are secured to the bottom with black hook-and-loop (velcro) fasteners, and the cable routing is kept fully visible for easy management down the road.
The main components are placed, so they present themselves neatly. The component colour scheme is kept rather basic using only black and grey with blue cables connecting the SSD-storage. No RGB. All mounting brackets and fittings are black or metallic grey, and all components, brackets, fittings etc. are mounted with black screws.
For mounting of the motherboard and rear fans I scavenged the base and back plate from a cheap Chieftec case. I made some modifications to make room for a vertical mount for the GPU (which actually places the GPU in a horizontal position) as well as for a height-adjustable support leg for the GPU.
Components and airflow
A critical point for me was to make the case extremely quiet, which required both good air flow (I am just not brave enough to use water cooling) and good vibration damping. I spent a long time sketching different solutions for component placement and assembly to find the best combination of air flow, aesthetics and accessibility.
All components are placed, so they allow the air to pass (mostly) unhindered. Two 140 mm fans provide cool air intake from one side, and another 140 mm fan and two 80 mm fans provide hot air exhaust out the other side and the back. The power supply has its own "secondary" air-flow and draws air in from the side and blows it out the back.
The work
Carpentry requires precision and space, and the fact that I did not have access to a proper woodworking workshop made the build rather difficult. In order to achieve the result I was after, I had to convert half of my living room into a "workshop" for several days, and I ended up buying a plunge saw, so I could make sufficiently neat cuts.
All the wooden parts of the case are cut from one 2000x400x18 mm untreated oak shelf from my local hardware store. The case is assembled with dowels and wood glue, and aluminium angle brackets on the inside provide extra reinforcement. The edges of the case are rounded by hand with rasp and file to the same radius as the wood thickness, i.e. 18 mm. All wooden parts of the case are sanded smooth before being treated with beeswax.
Color(s): Beige Black Blue Brown Gray
RGB Lighting? No
Theme: Case Mod
Cooling: Air Cooling
Size: ATX
Type: General Build
Build Updates
[Mar. 2022] The "real" GPU
[Apr. 2021] Some assembly required
[Nov. 2020] The "before-picture"
Hardware
CPU
$ 395.00
Motherboard
$ 134.66
Memory
$ 290.04
Graphics
$ 548.49
PSU
$ 136.21
Case
$ 37.48
Case Fan
$ 44.85
Case Fan
$ 27.90
Cooling
$ 74.00
Accessories
$ 56.04
Estimated total value of this build:
$ 2,032.56
Approved by:
