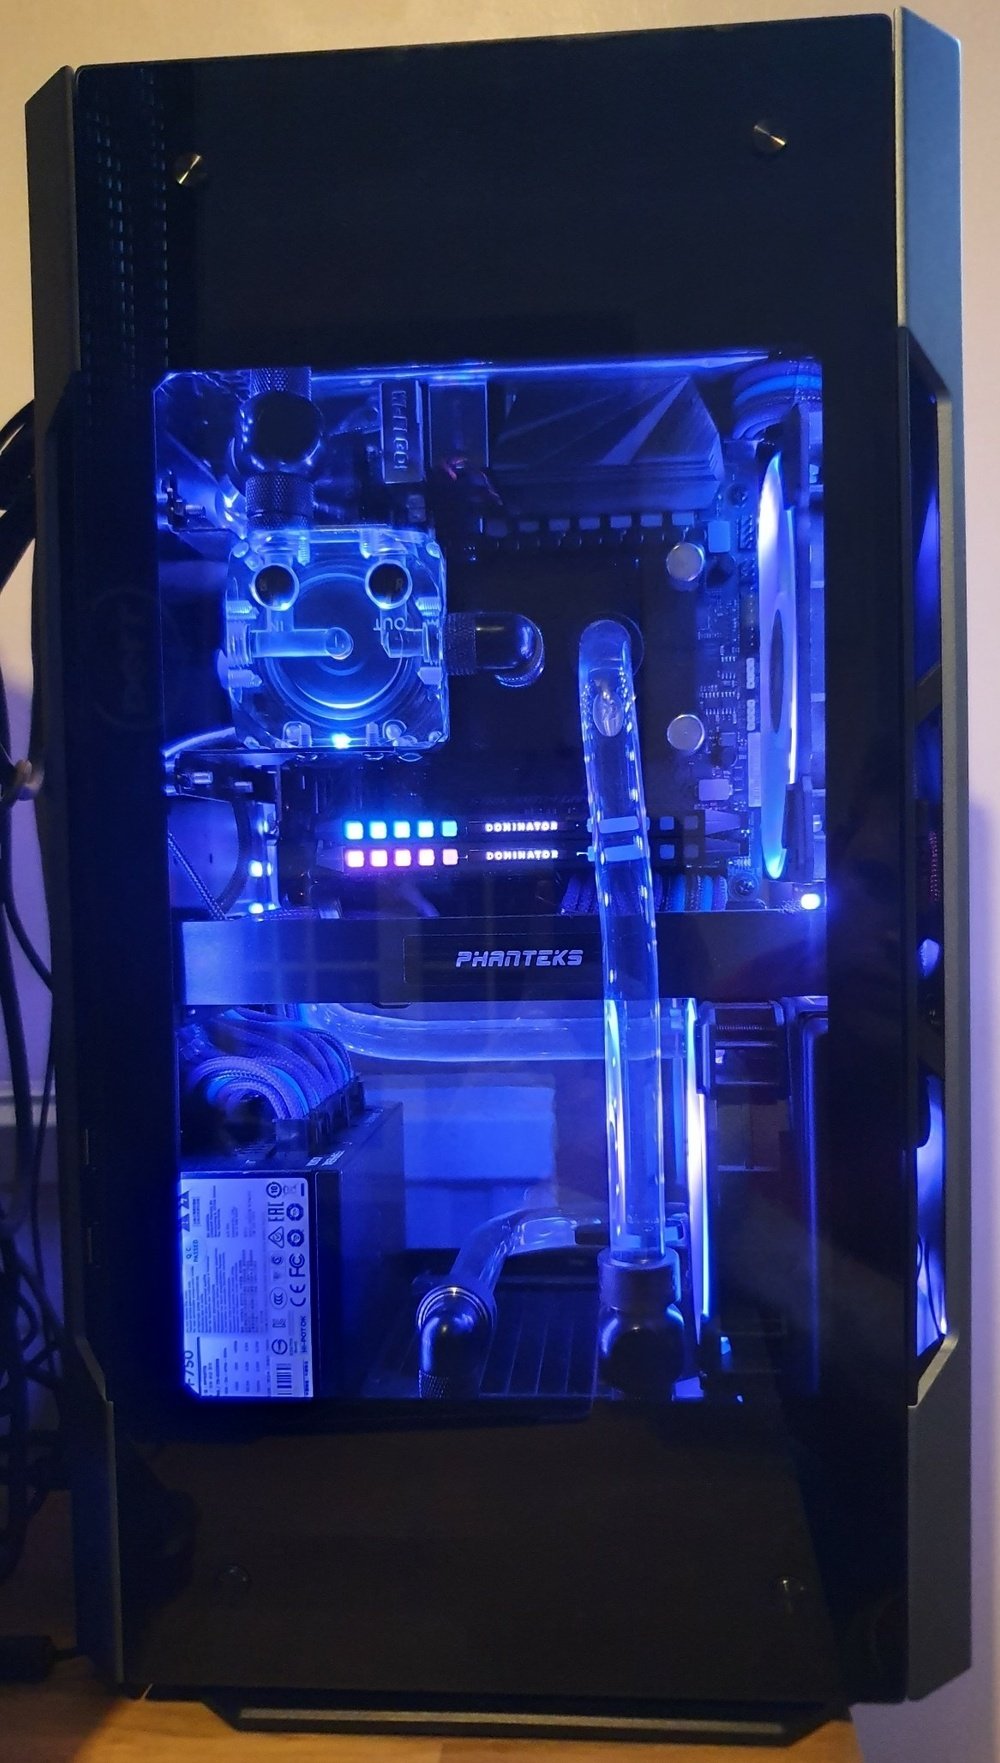
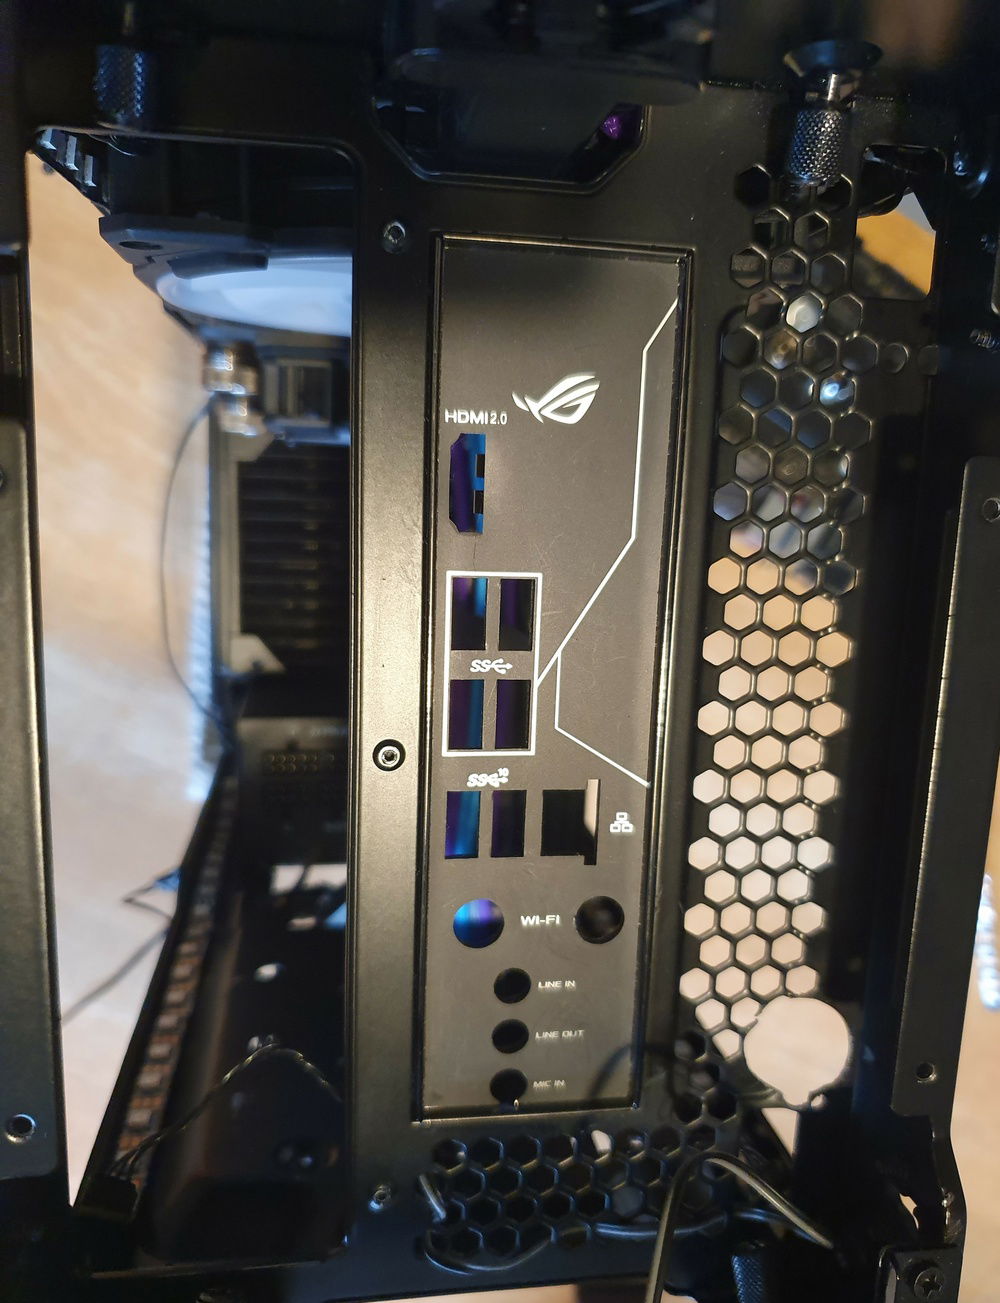
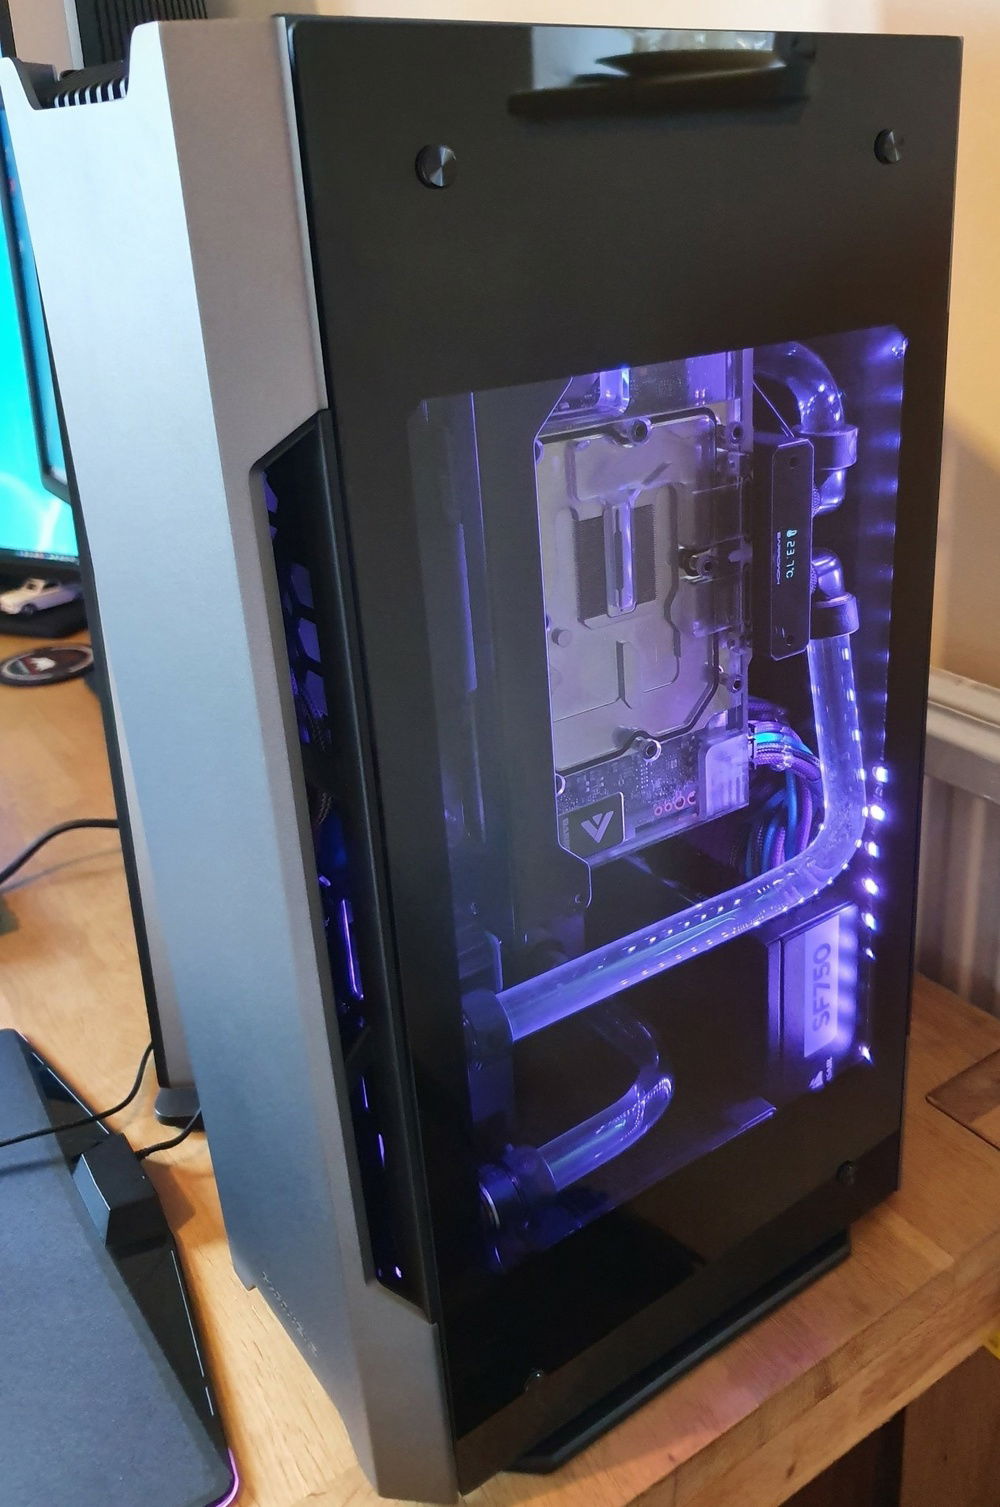
Front
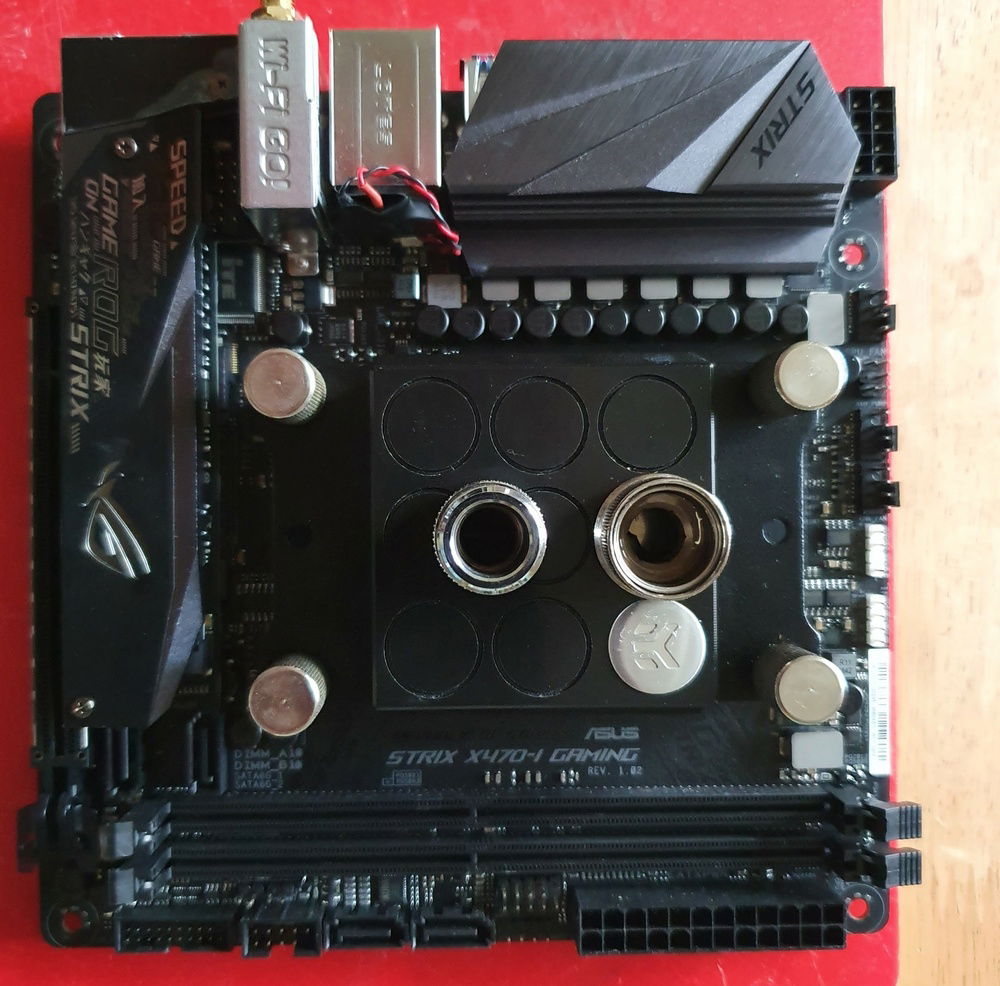
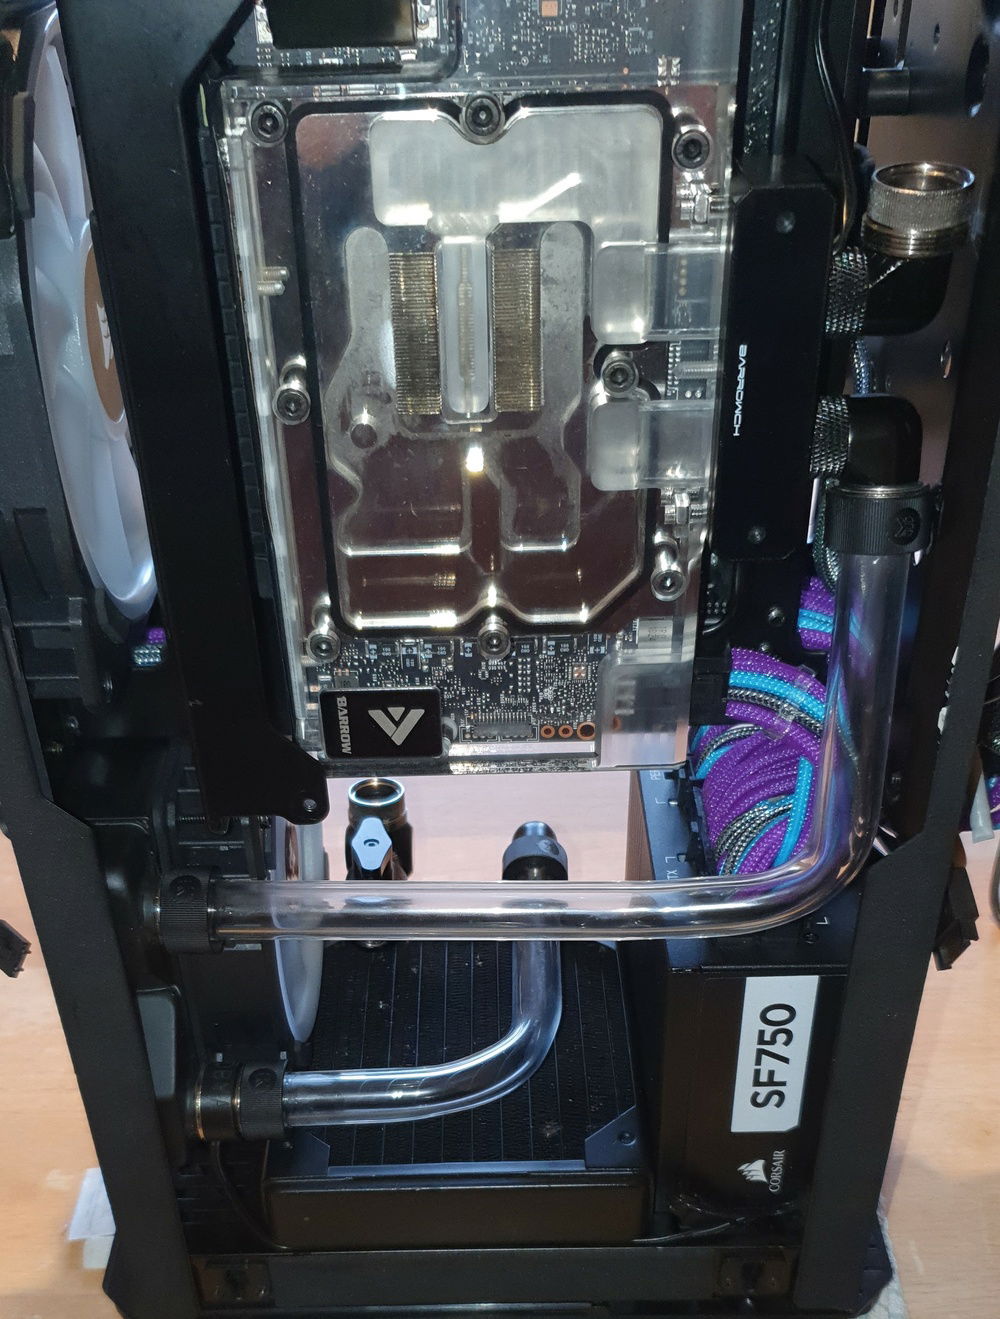
Mobo with Block Fitted - One standard EK fitting and one extender fitting.

Home Sleeved Cables - 18AWG white wire covered with 4mm braided sleeving with clear cable combs.
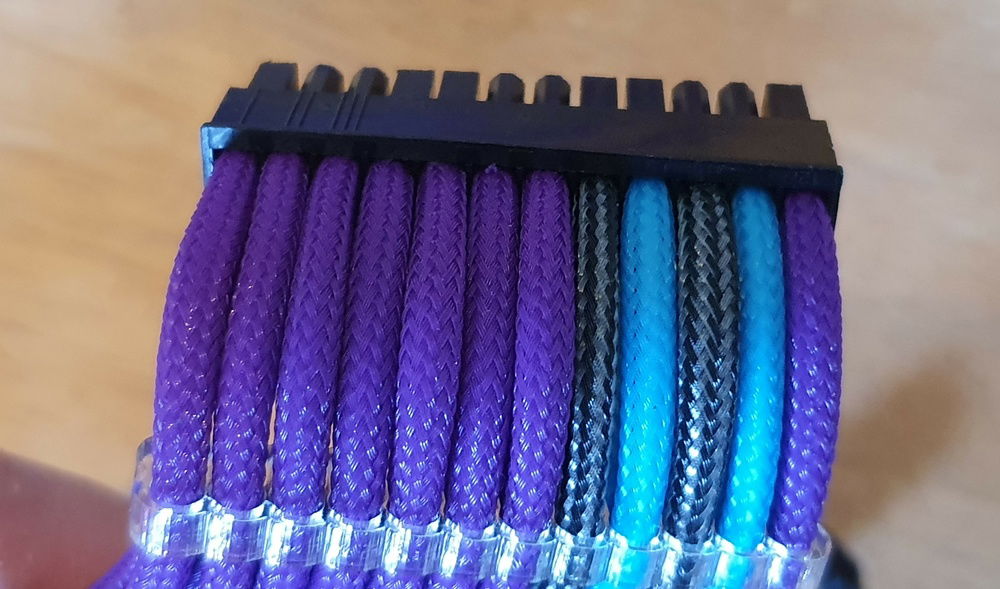
24 Pin Cable - Not bad for a first attempt.
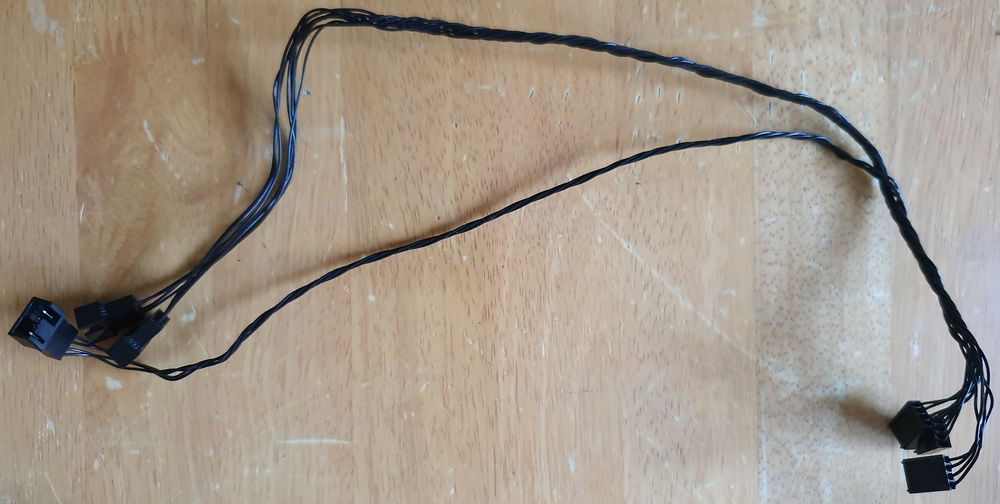
Homemade Fan Extension Cables - I did sleeve these at first however they were too thick to route where needed. Bare twisted cables it is then!
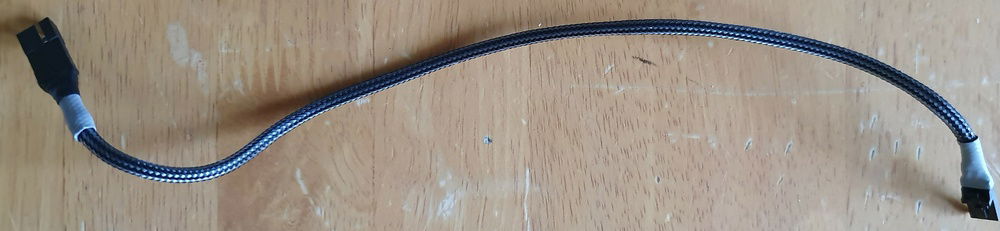
Homemade RGB Extension Cable
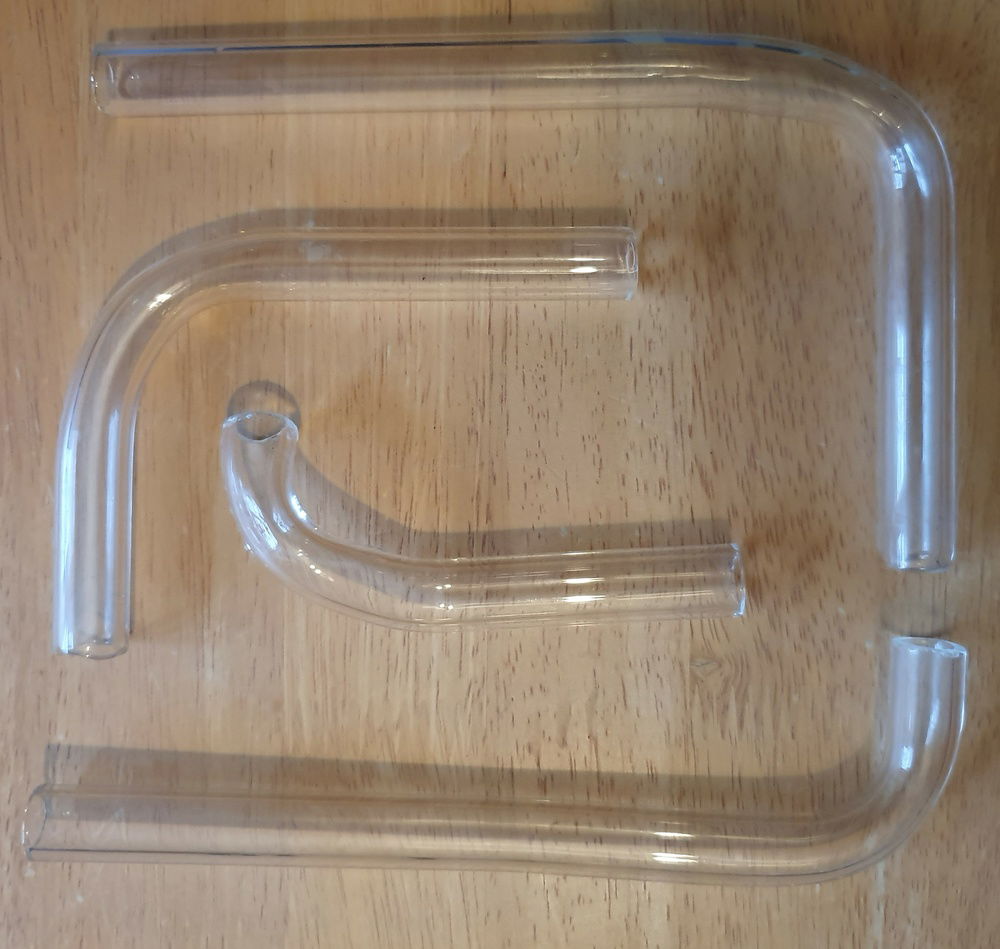
Glass Pipes - Self bent (can you tell lol!) I bought straight 16mm OD Boro tube from a glass supplier and bent and shaped with a MAP Gas torch. The ends were cut with a diamond blade cutting disc and flame polished.
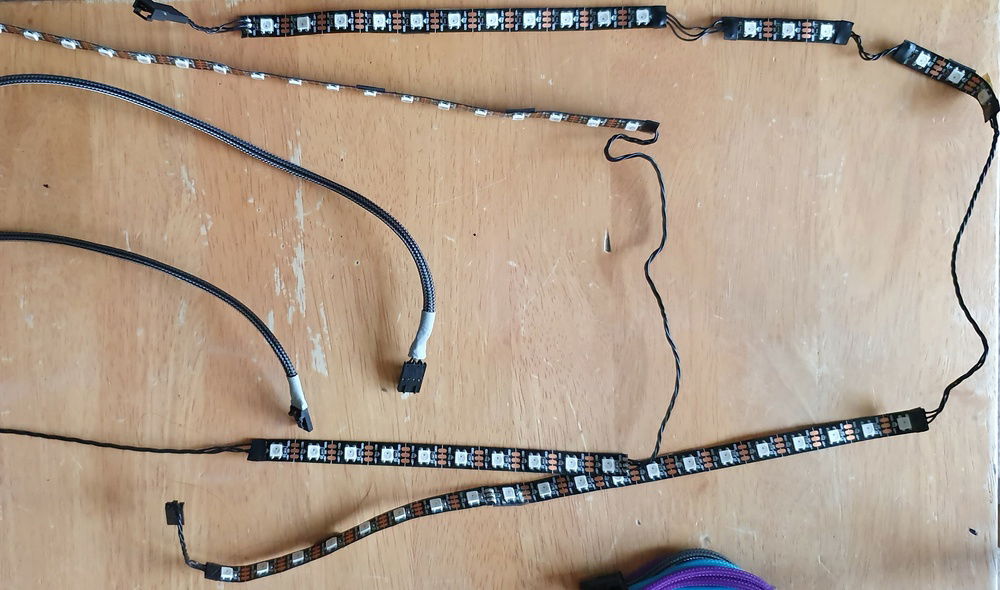
Homemade RGB Strips - I won't be getting job offers from Corsair anytime soon lol!
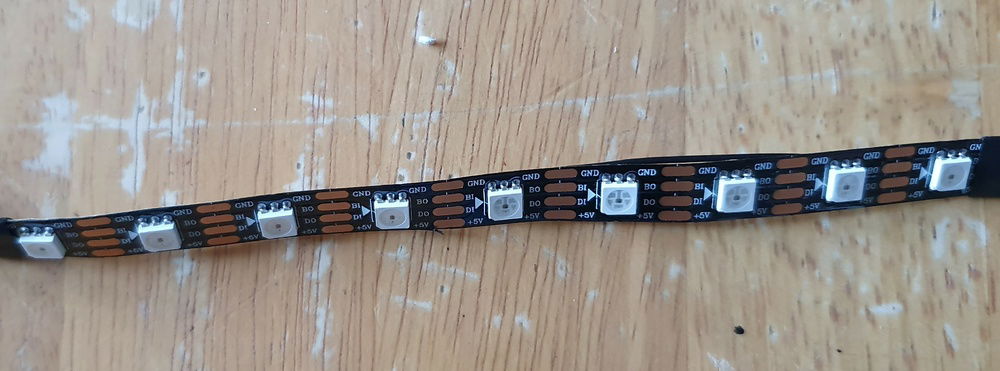
RGB Strip - Corsair RGB Hub Compatible - These are WS2813 RGB Strips that work with the Corsair Fan RGB Hub. I used these to replace the stock RGB LEDs in the GPU Block and Pump Top.
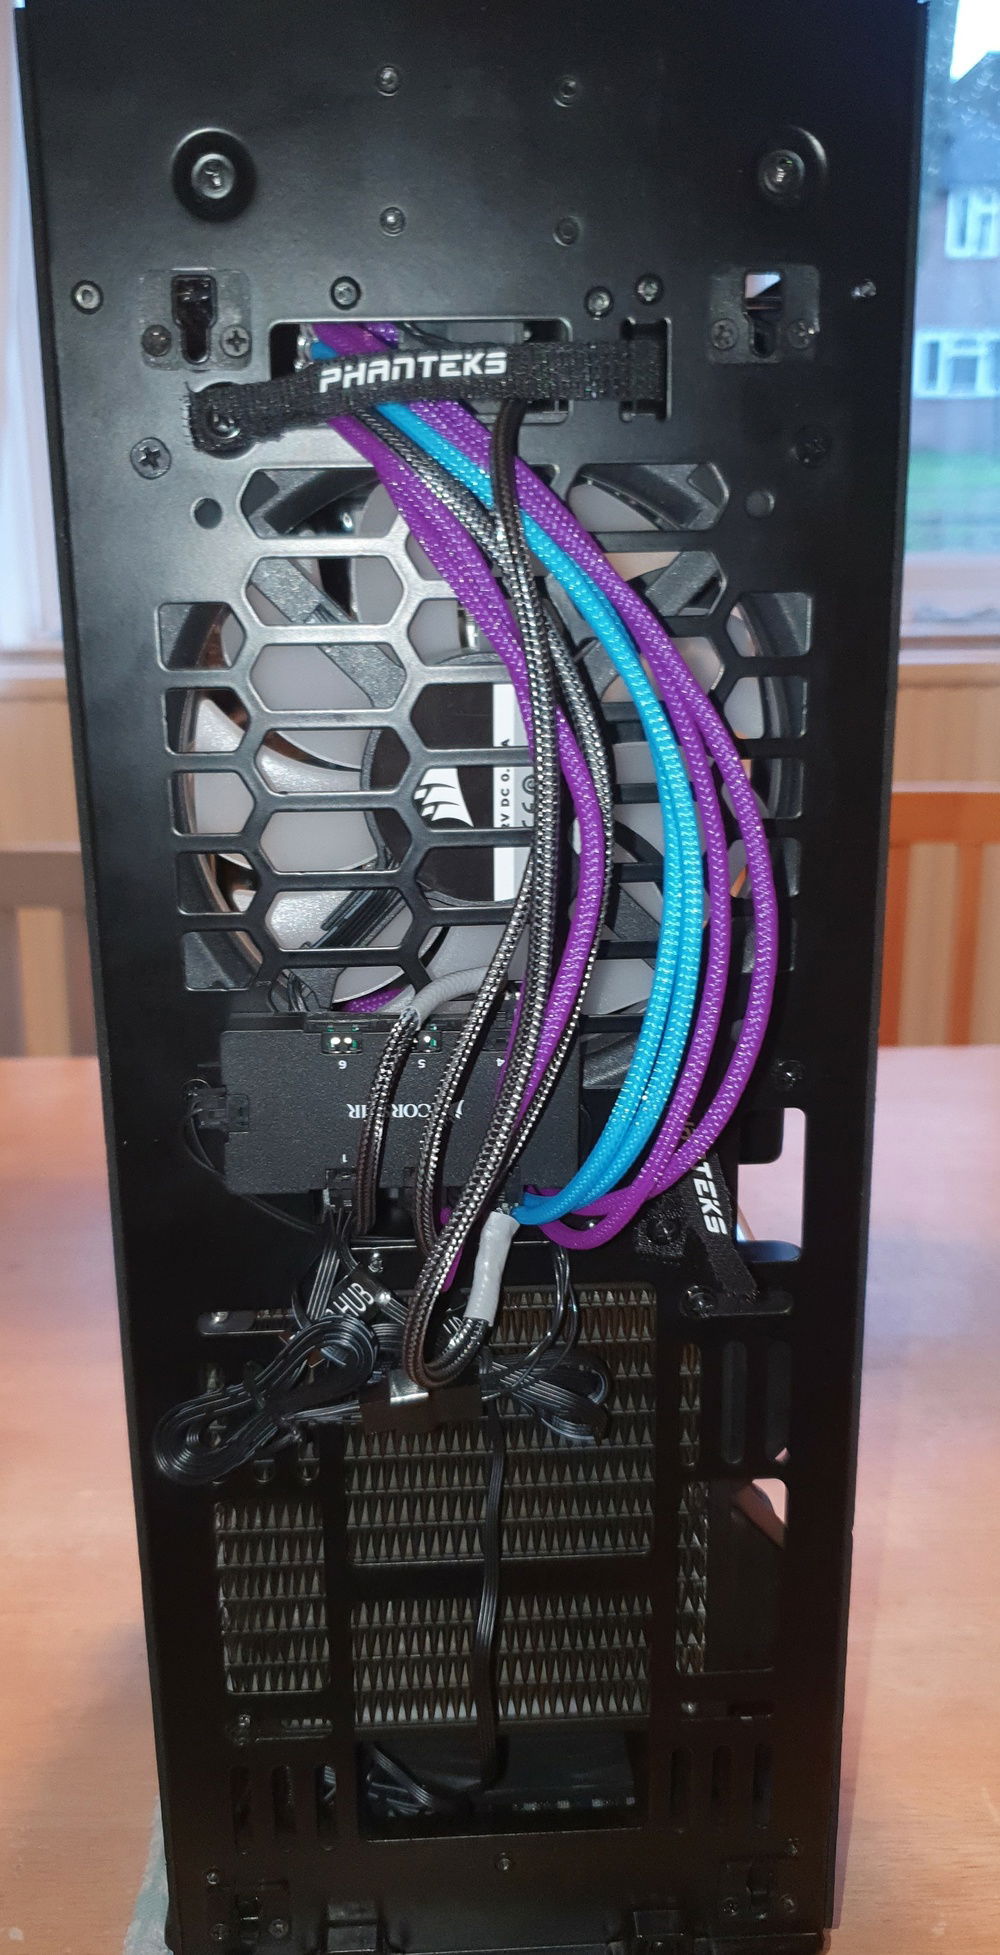
Cable Management - Intake/Exhaust Side - Cables are loose so they push from fan to side of case allowing for better airflow.
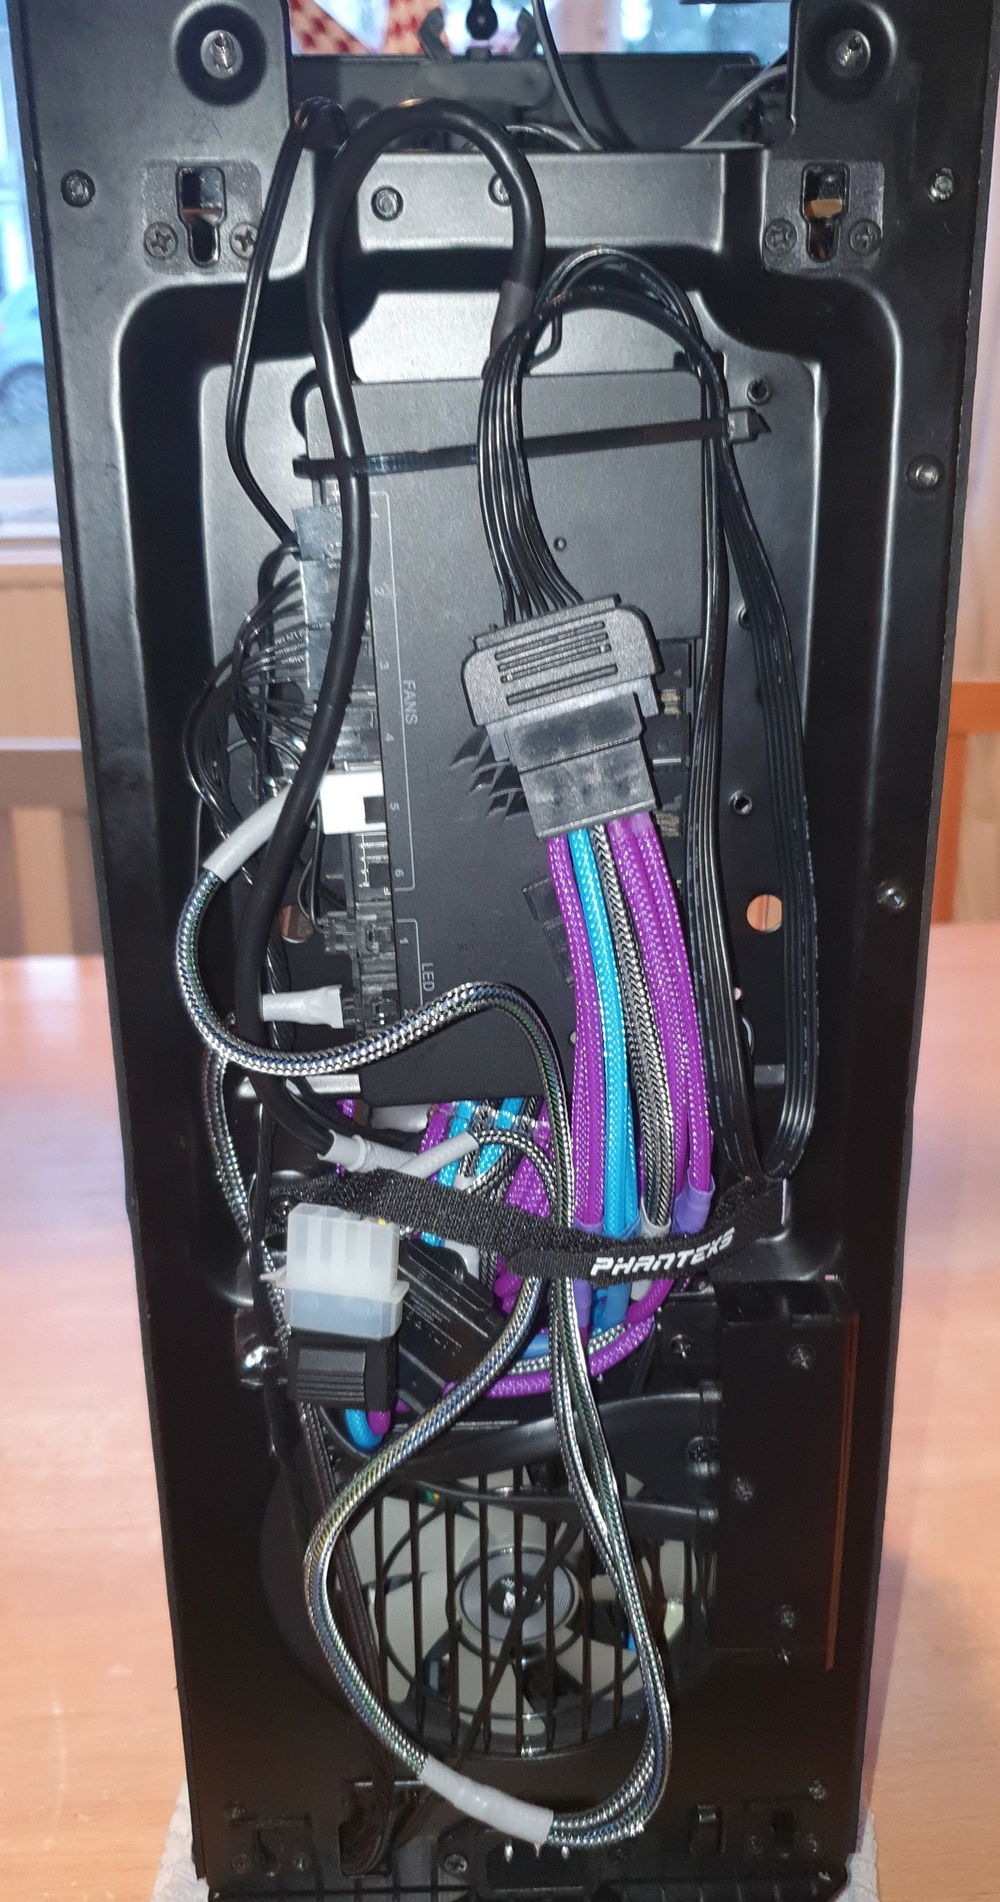
Cable Management - PSU Side - I ran out of black USB connectors so left the white one on the Pump! This will bug me
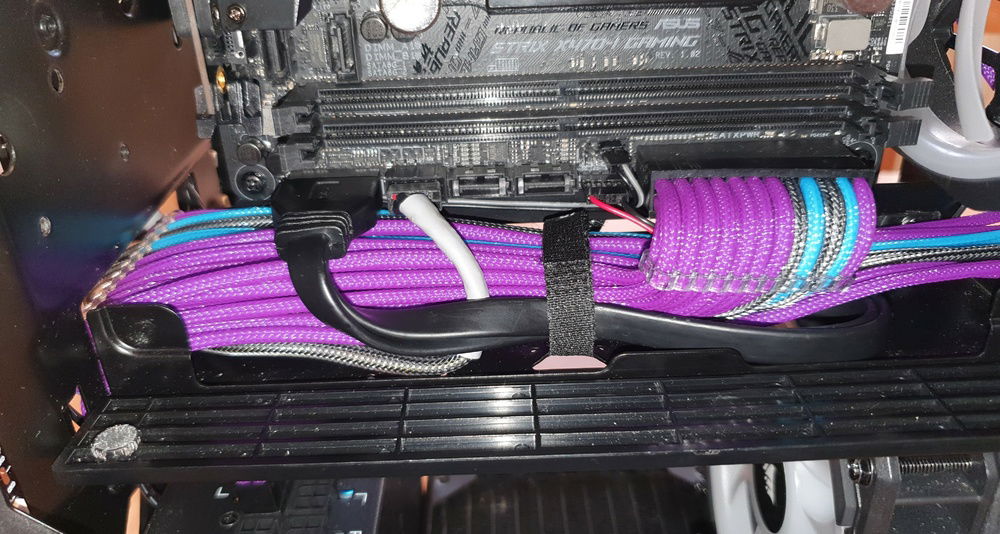
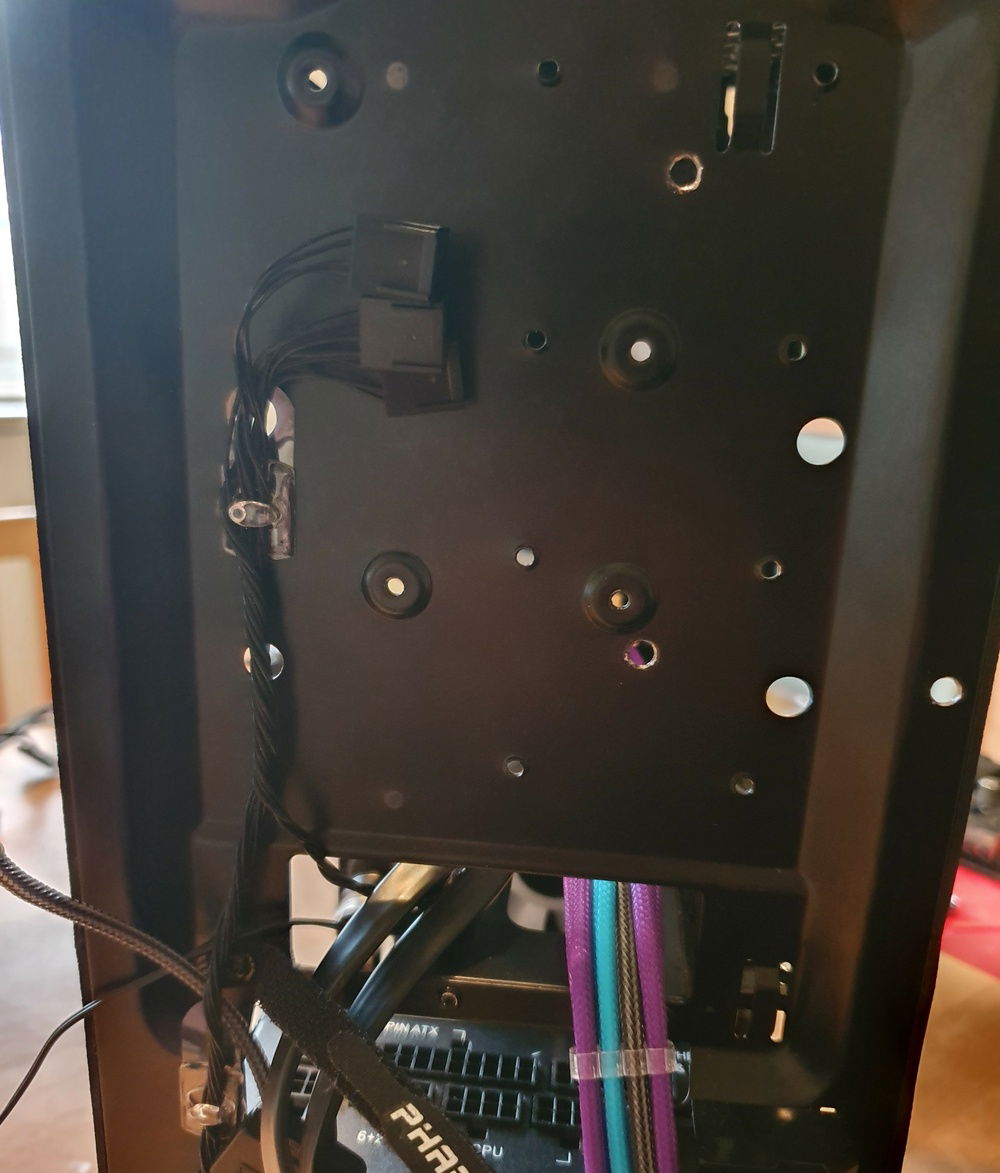
Cable Management - Centre Channel - The USB cable on the shift is too long and a pain to manage.
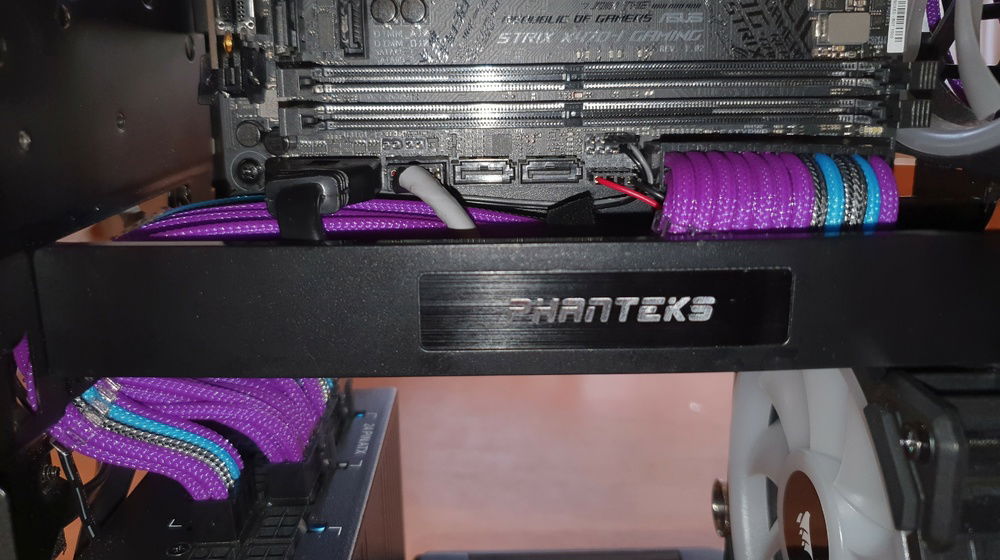
Cable Management - Centre Channel (Door Closed) - Mobo speaker is fitted for troubleshooting, will be removed later
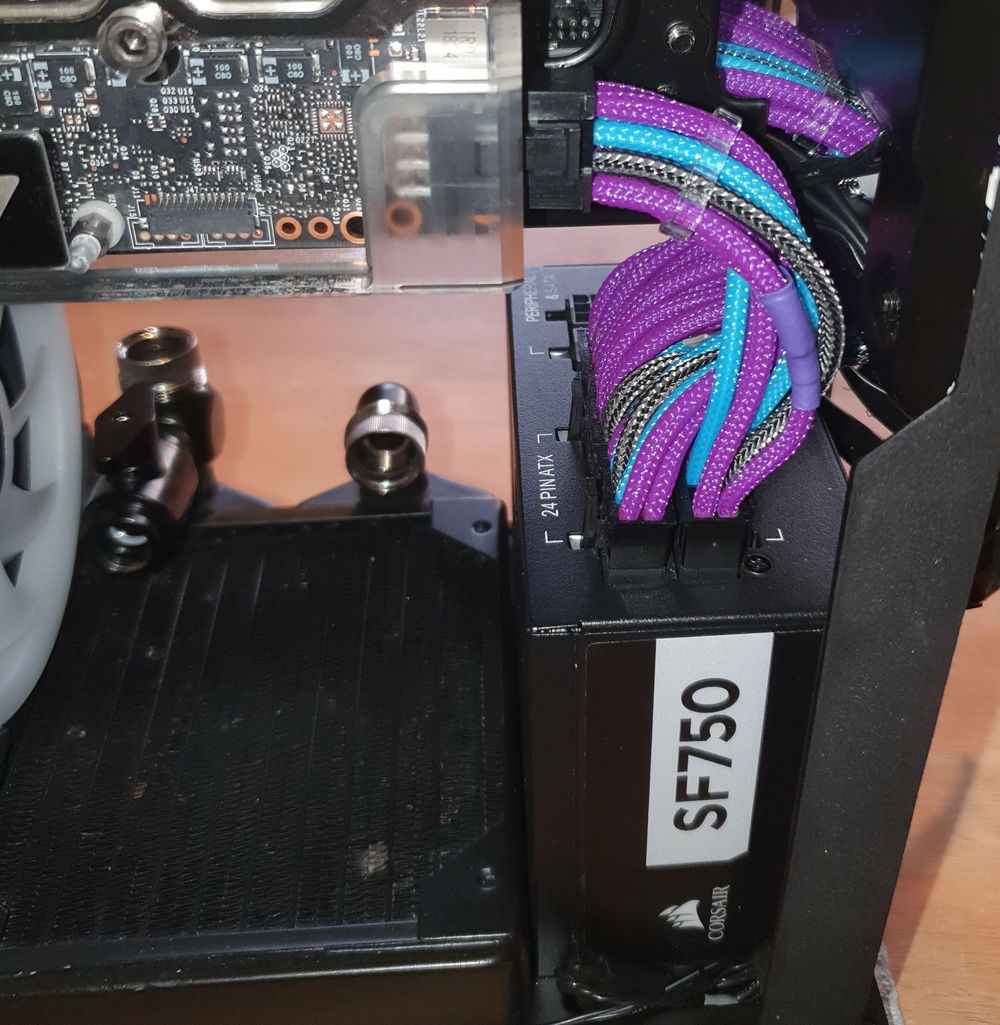
PSU Cables - Shortest GPU cable ever!
CoPro Mounting Location - I used some sticky hooks for hanging fairy lights to cable-manage here.
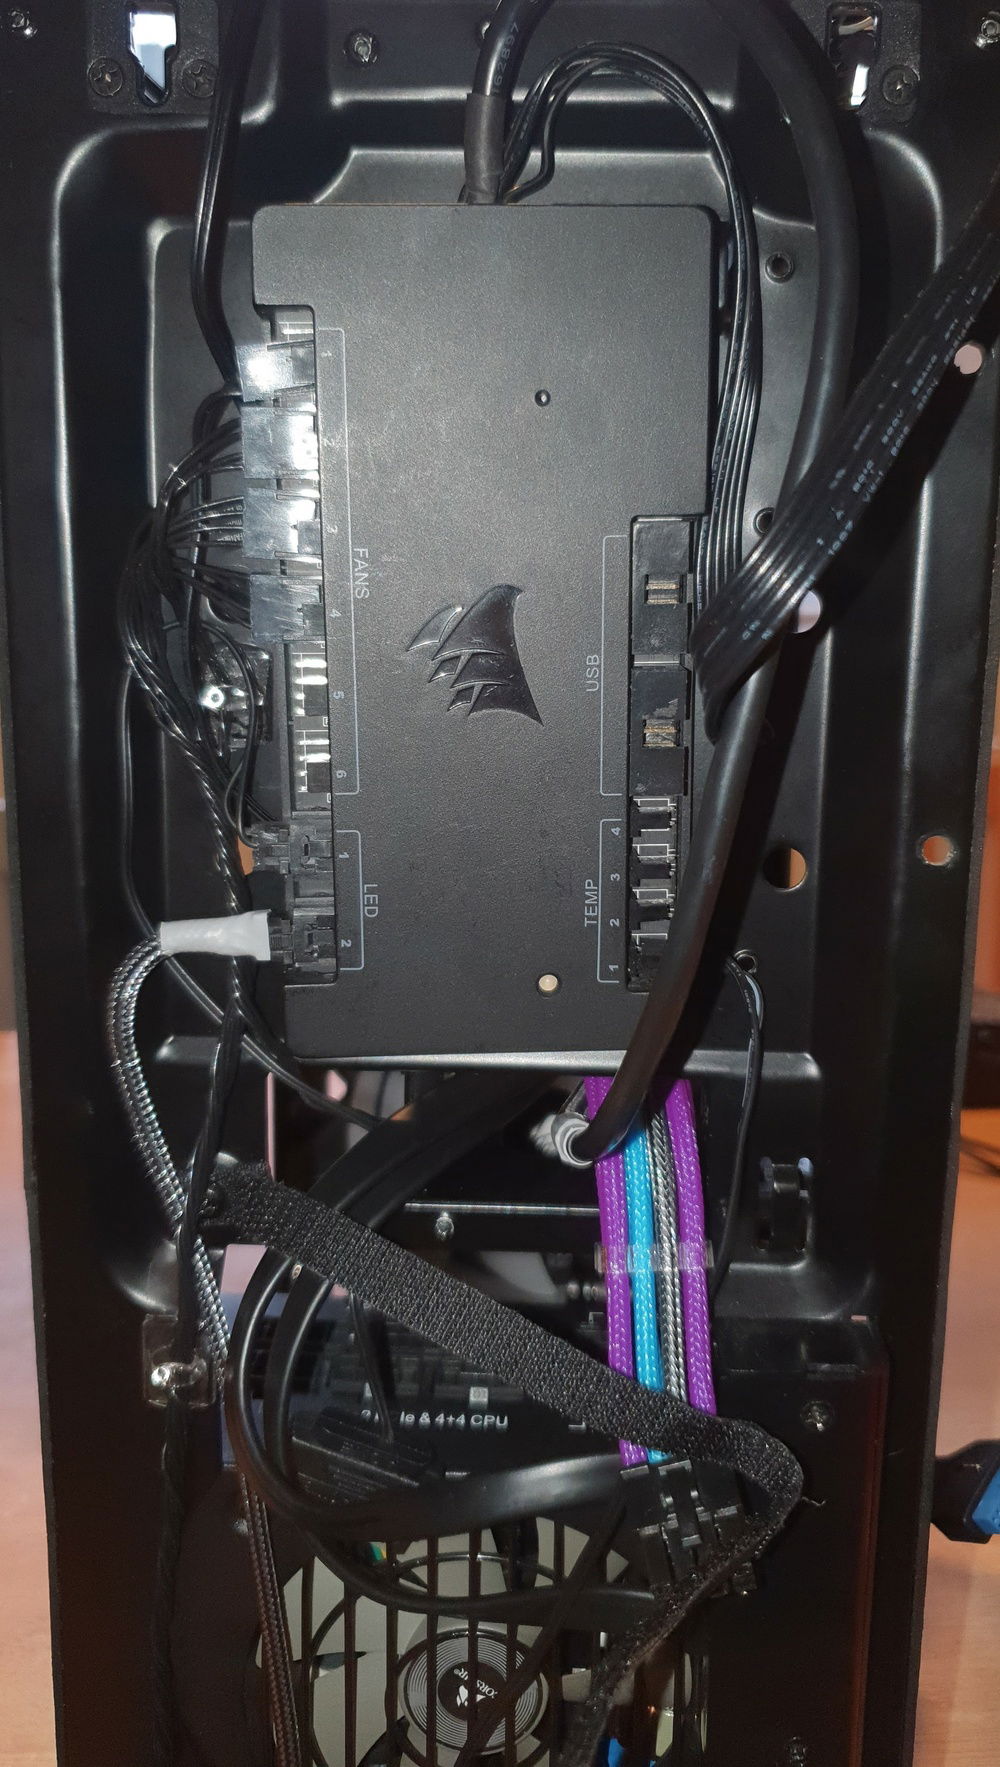
COPro Mounted - The CoPro is only held in by the cables here. I will fit a cable tie to secure it but it doesn't really need one.
Fill Port from Top - I cut a hole in the top of the chassis and mounted a pass-through to act as a fill port.
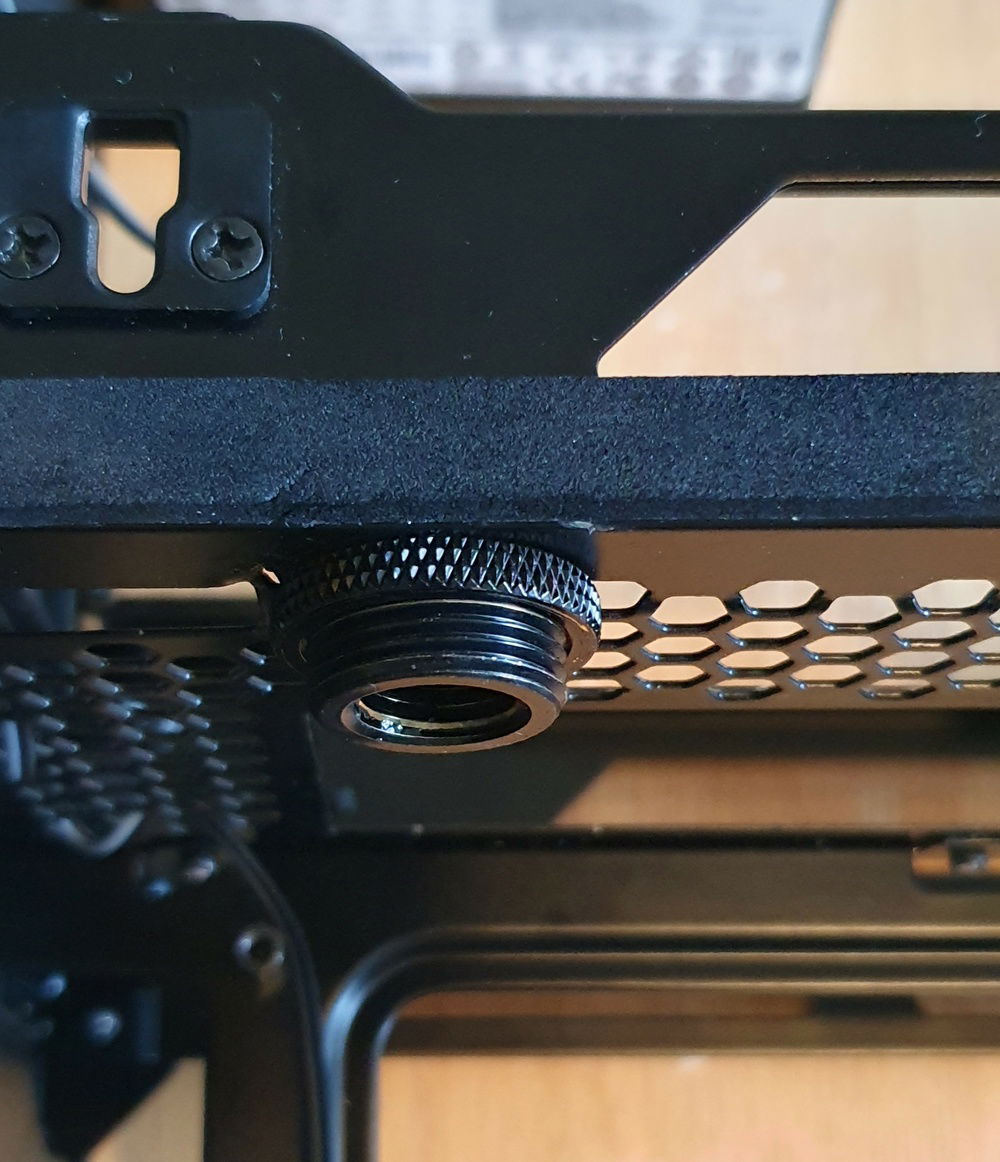
Fill Port Underside
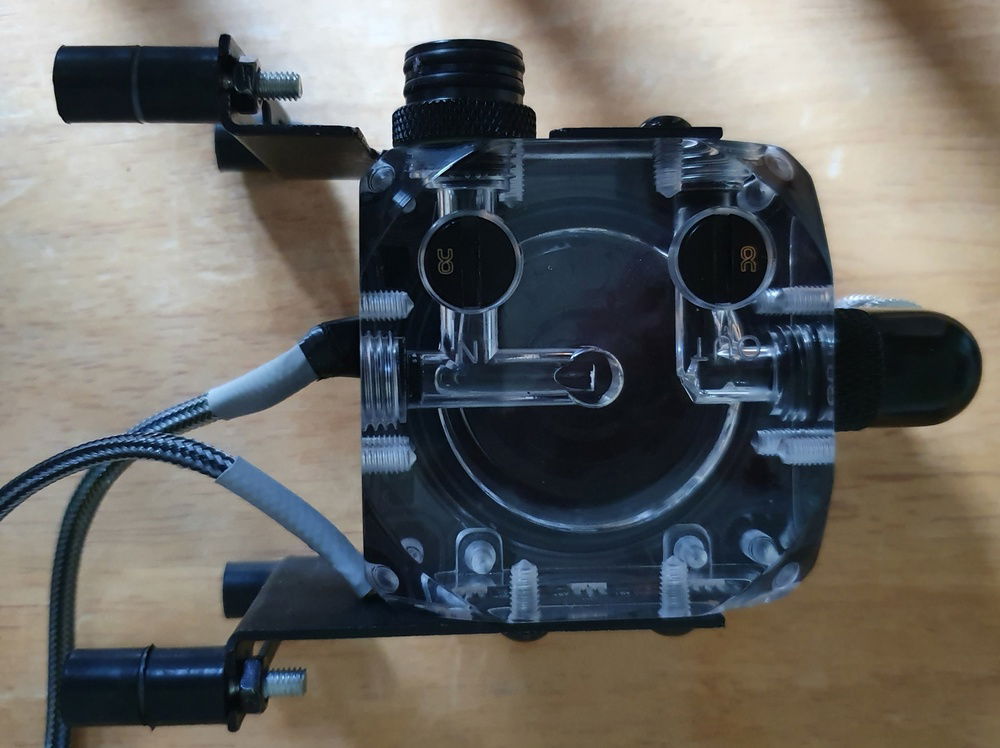
Pump and Top with modified mounting plates - I used the standard mounting plates and cut holes for the D Plug. The rubber mounts are from the EK 3.2 Pump mounting kit.

D Plug on Pump
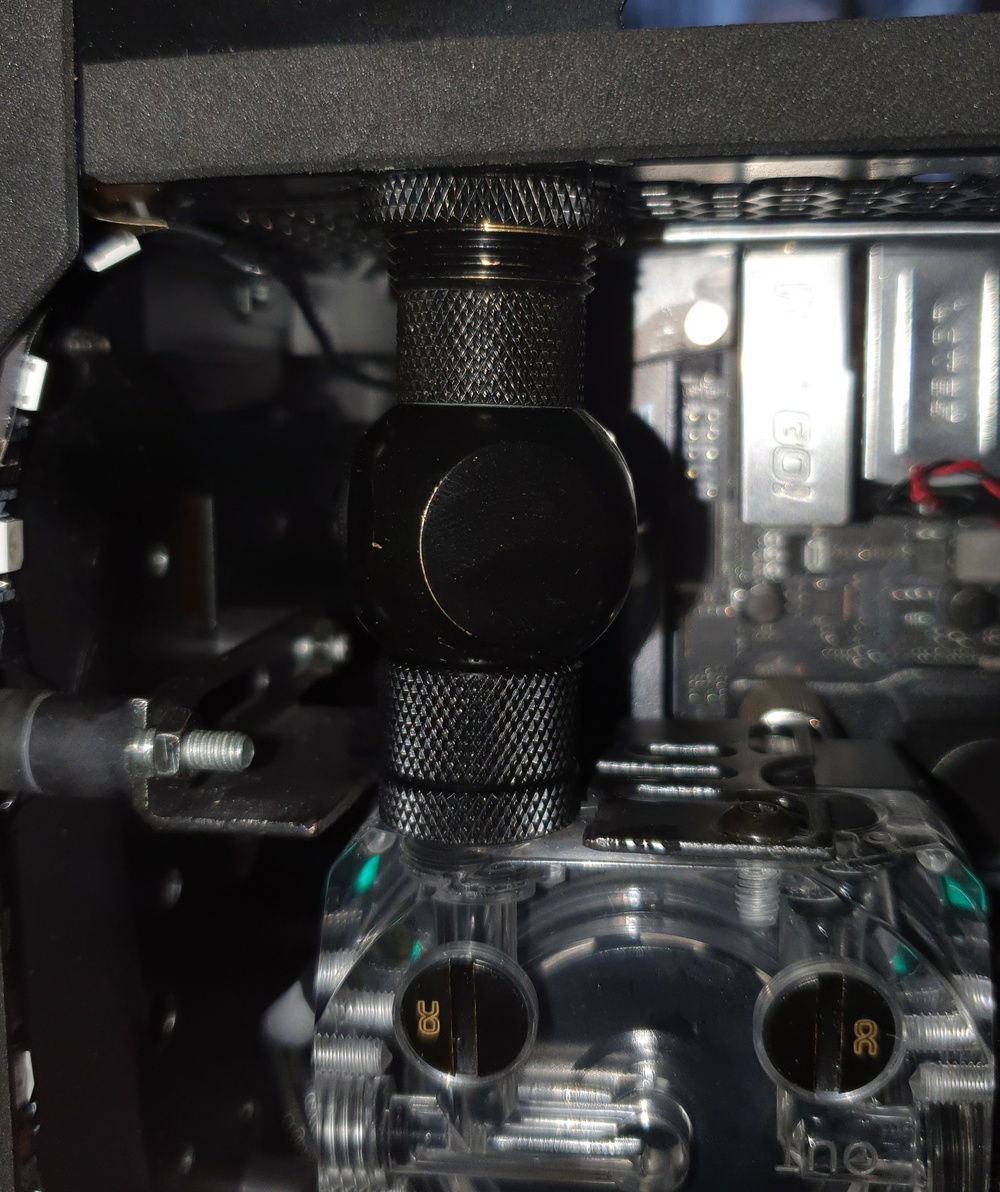
D Plug to Fill Port - Smallest reservoir ever!
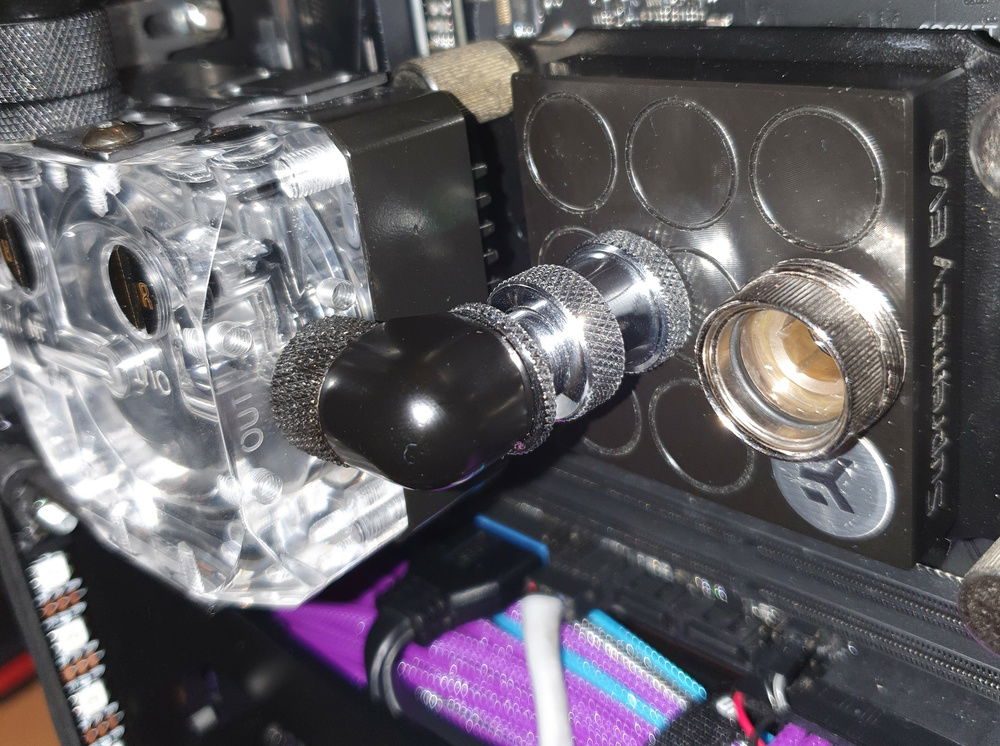
Extendable Fitting - I'll change this for a black one at some point!
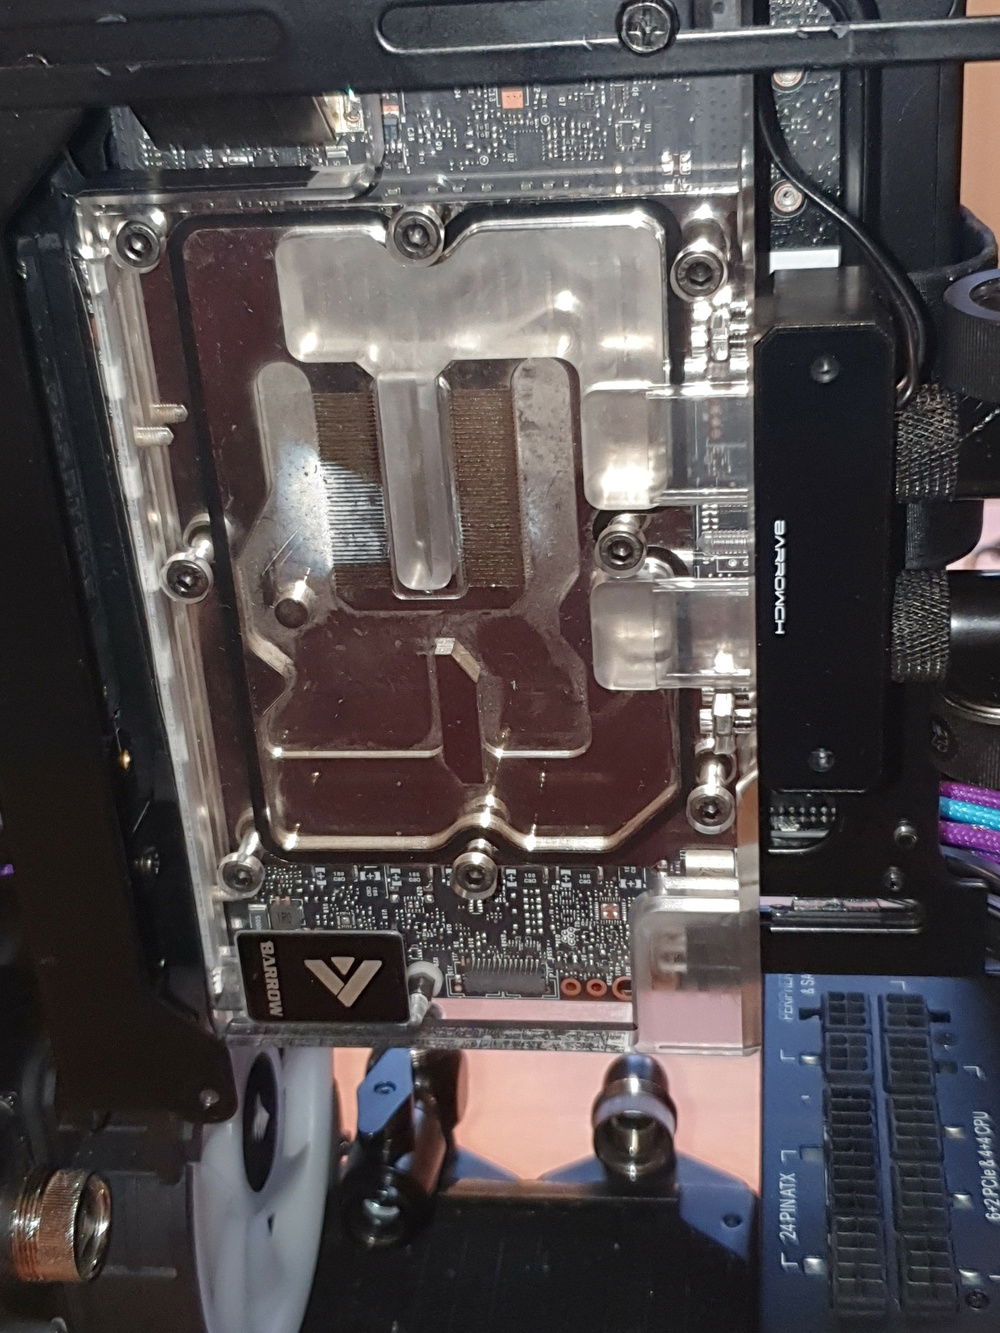
GPU Block - I fitted a digital temp gauge to the block. The original block had the fittings oriented towards the outer panel which meant the wouldn't fit. The gauge re-orients the fittings in-line with the block.

GPU Mounting Screw - Don't forget to tighten before finishing the cables in the centre channel.
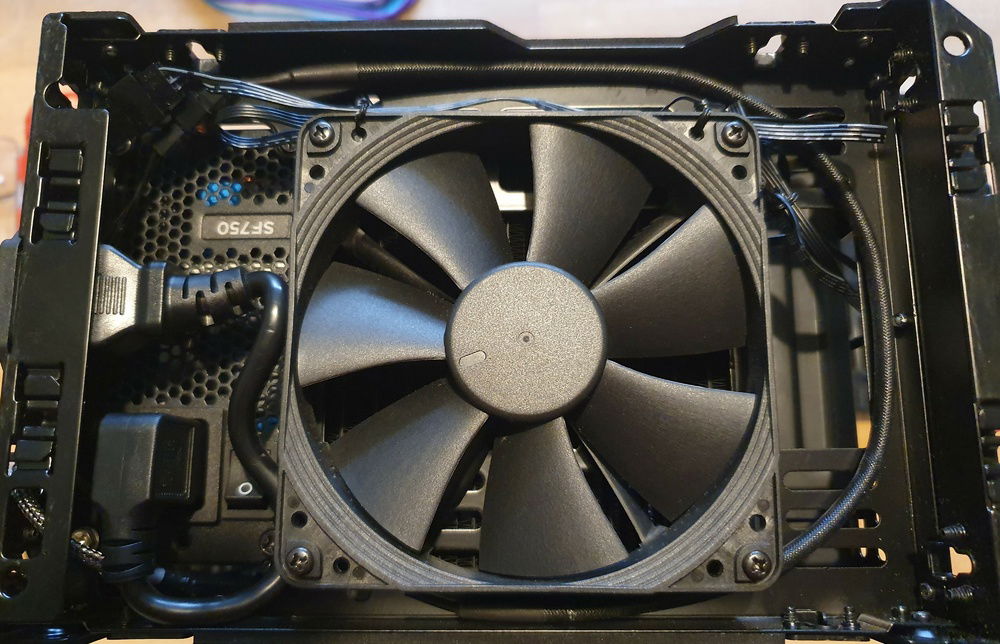
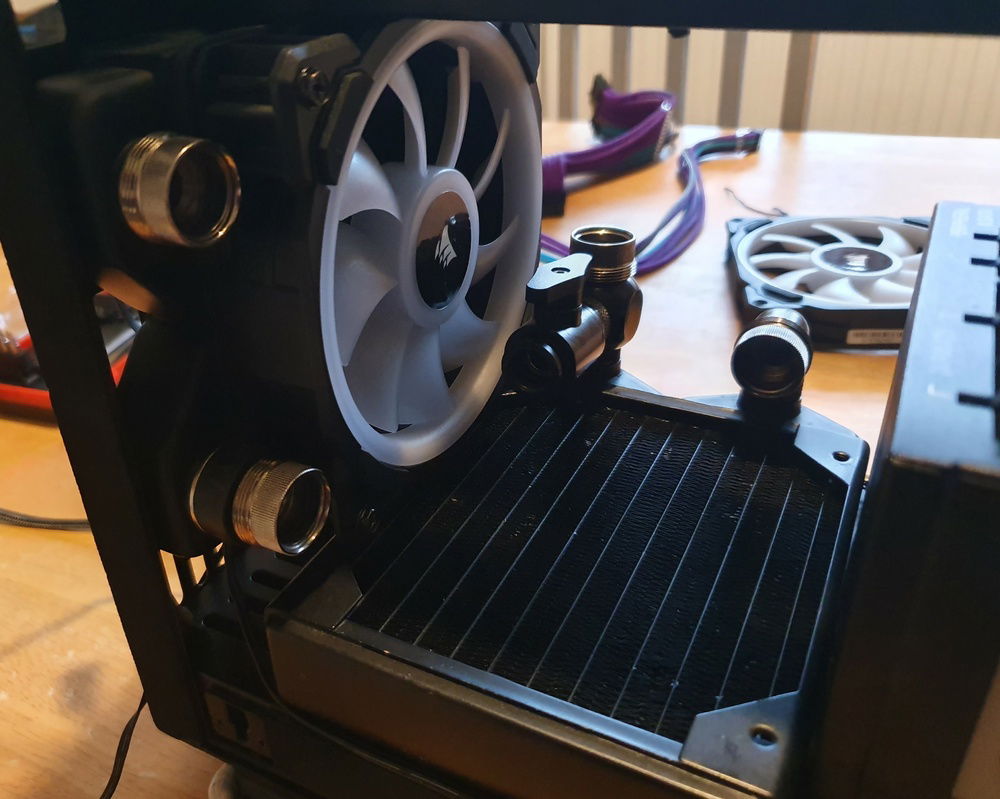
Main intake - Noctua Industrial 3000 High Pressure fan. This is fitted to the 30FPI Rad on the bottom. The power cable is really tightly packed in!
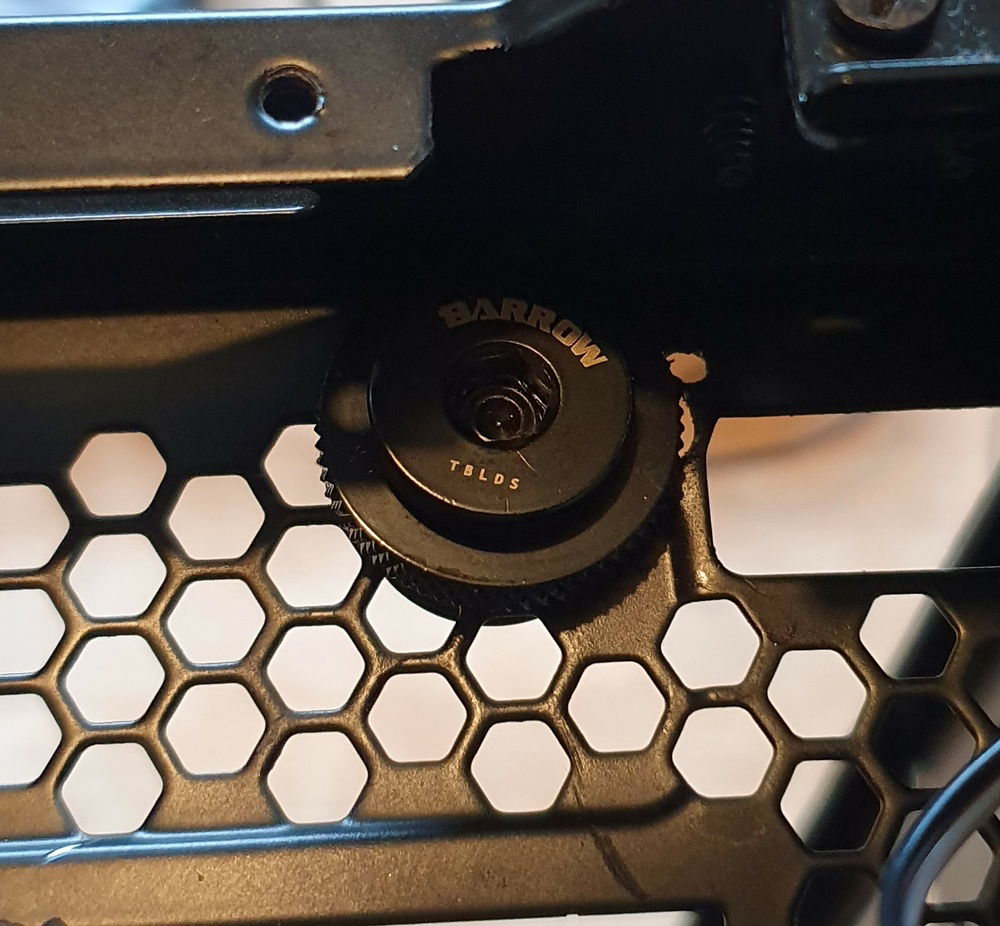
Lower Chamber - I mounted a ball valve to act as a drain port. This has been soooo helpful. Not only for draining, but also inverting the case and filling to bleed the loop.
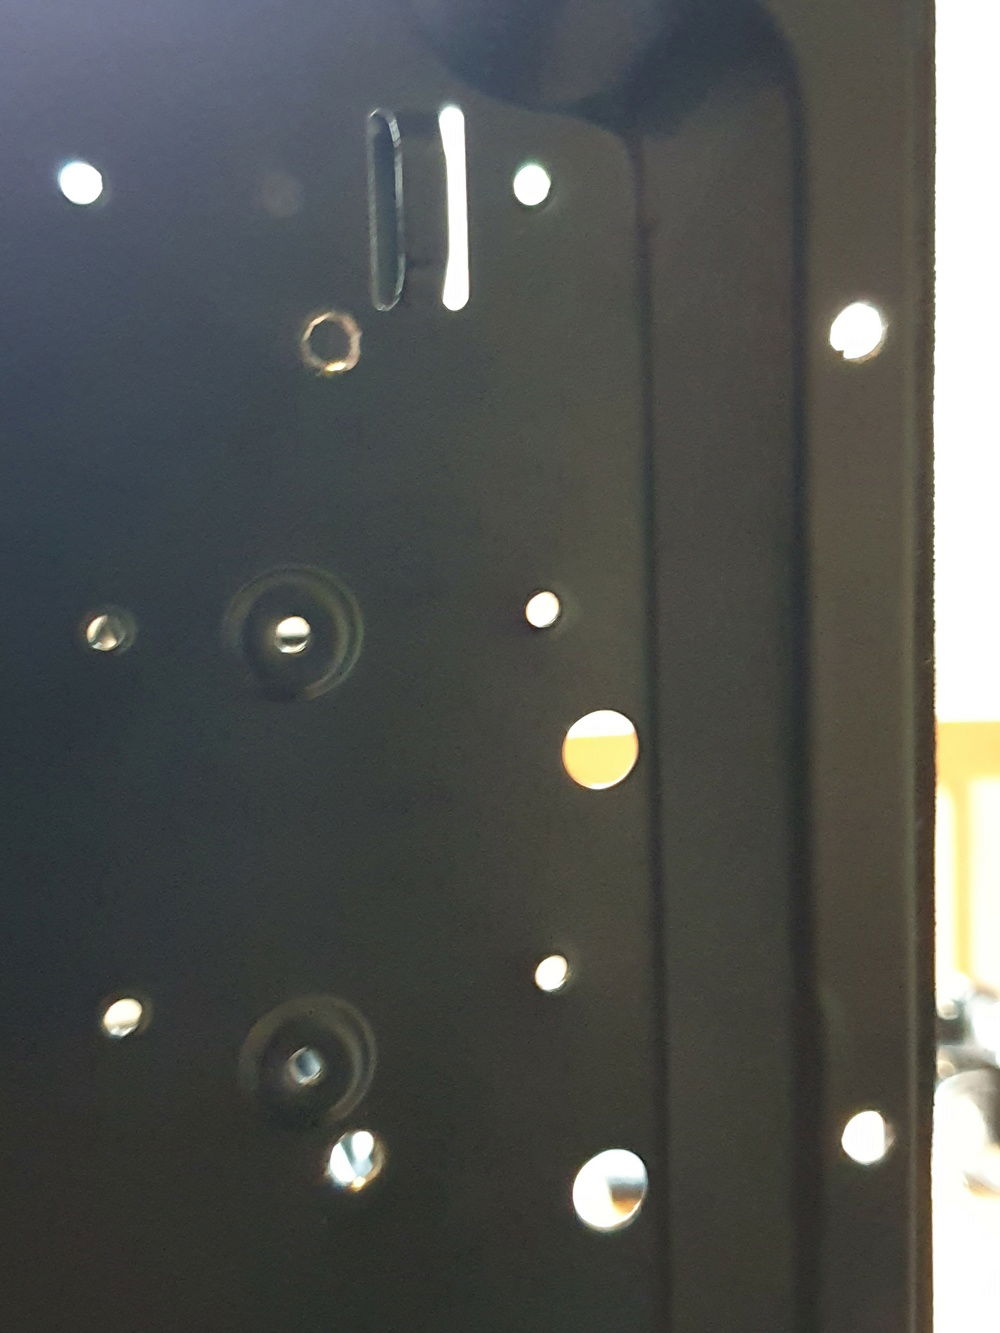
Pump Mounting Hole - 4 drilled holes to mount the pump to the upper chamber in the chassis. The holes to the right of the photo need low profile screws and a small amount of plastic shaved out of the cover to fit.
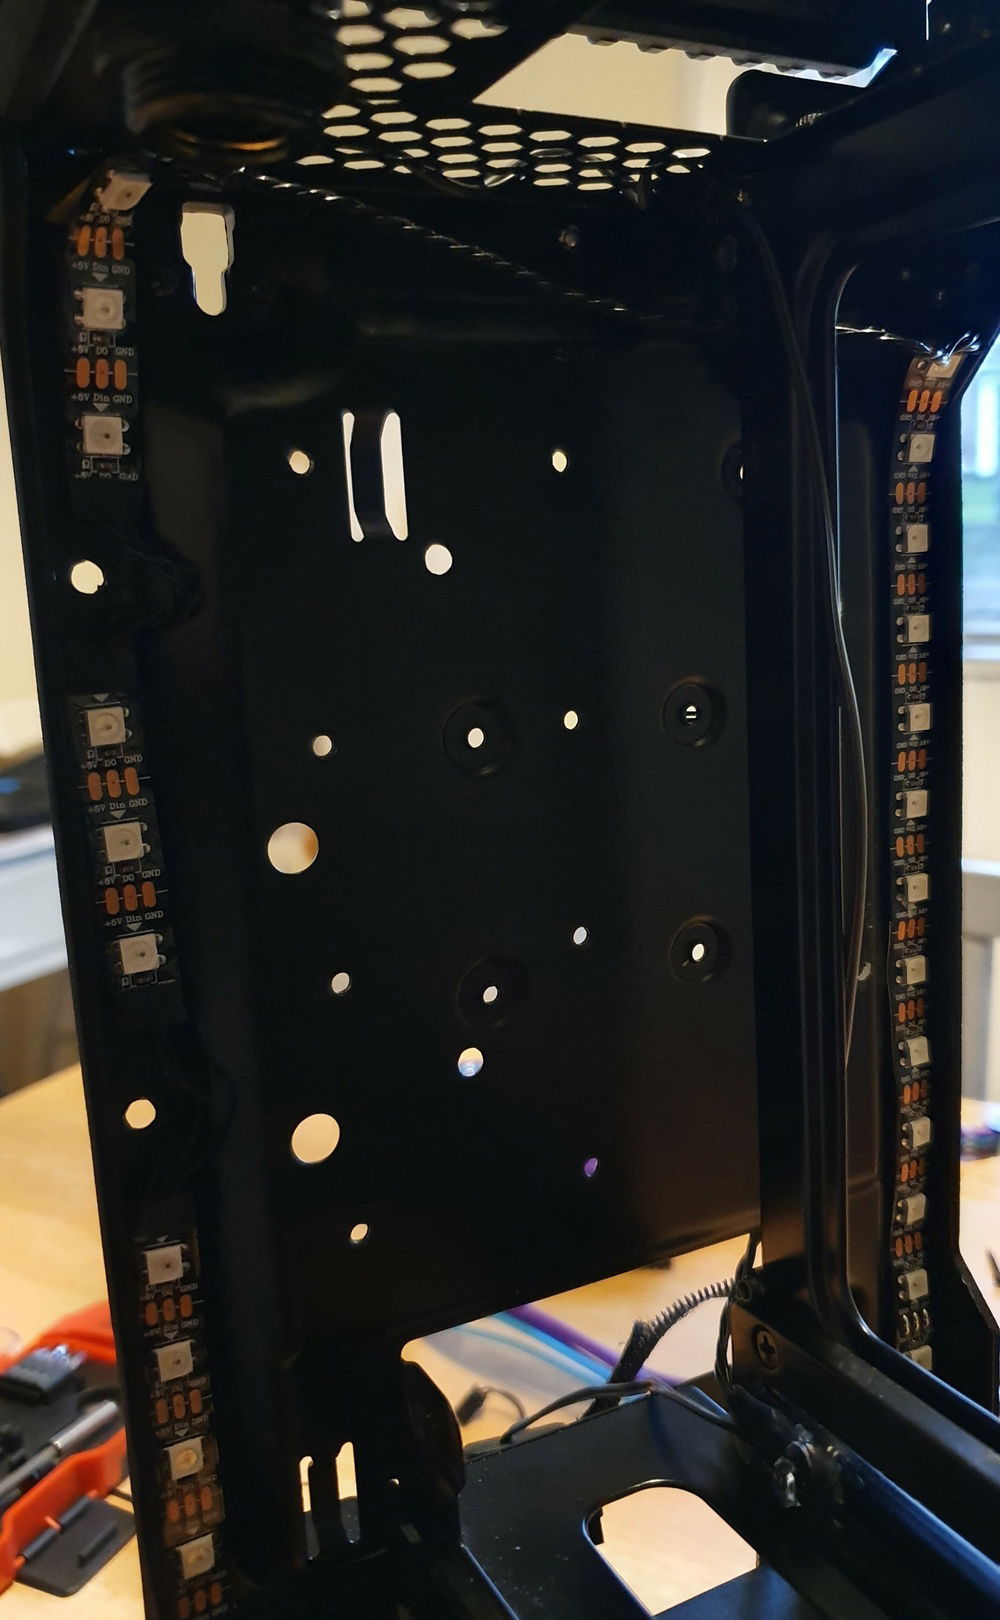
RGB Strips - These are WS2812B strips that connect directly to the CoPro lighting channel. I used mag strips to mount them. The one on the left had to be cut and extended around the pump mounting holes.
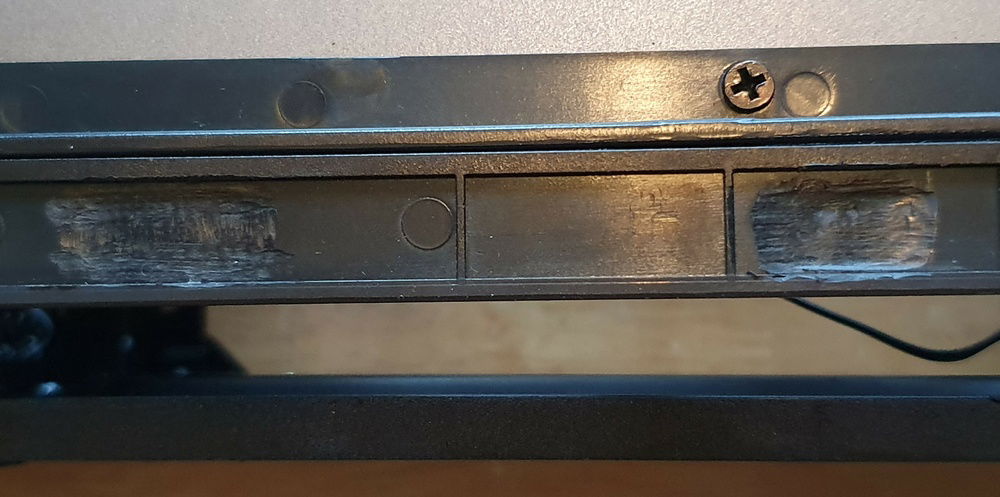
Plastic removed from cover - This allows th cover to remain flush where I have mounted the pump.
Rear tube runs - lower rad to side rad. Side rad to GPU.
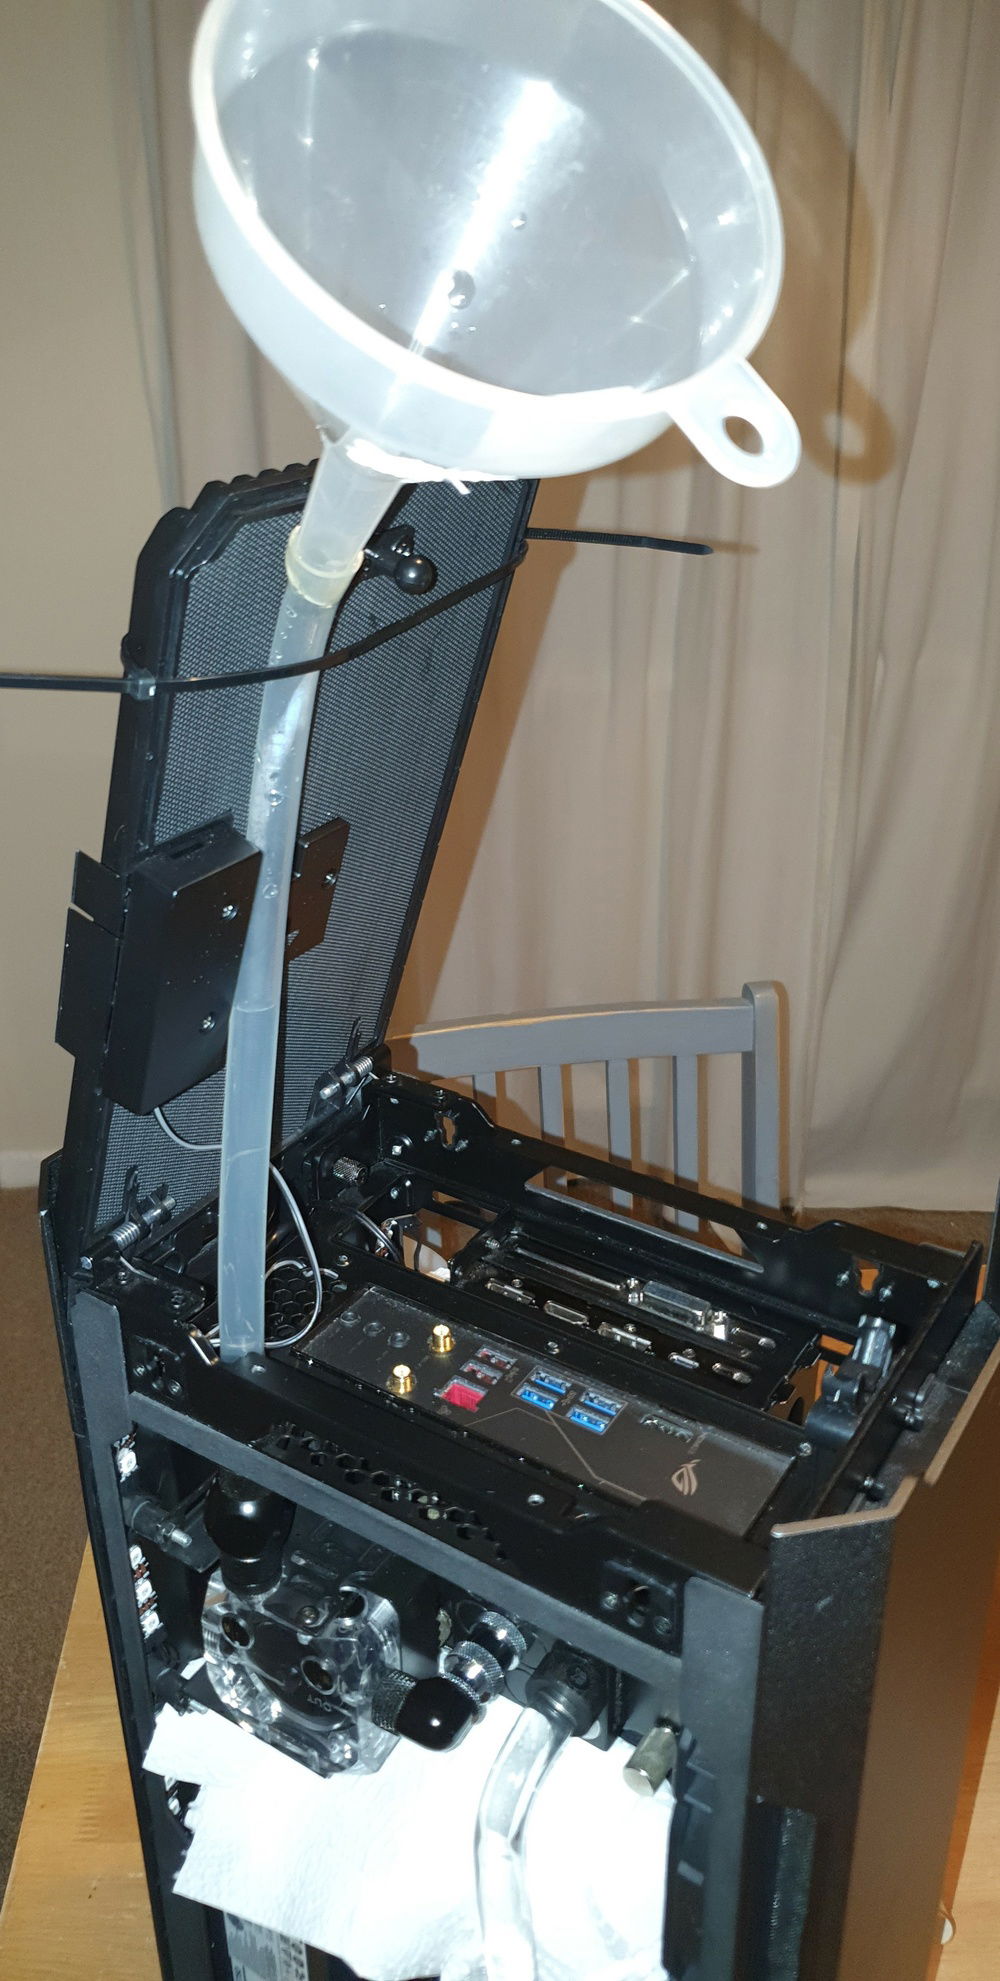
Filling the system
Rear - GPU has a row of LED but the photo caught the moment in-between flashes! GPU Block guage catches idle temp (ambient 16)
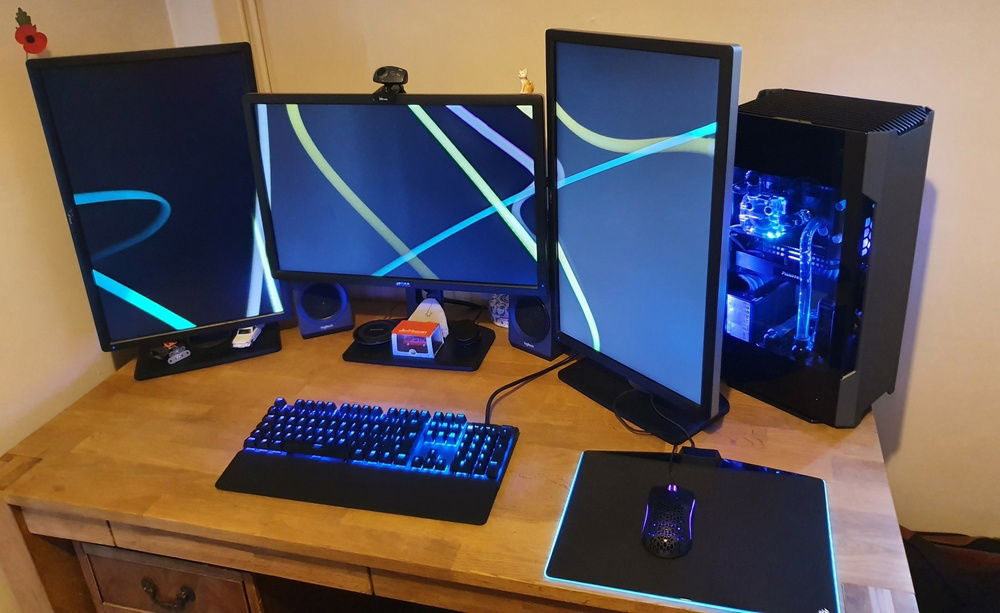
Where I work and game :)
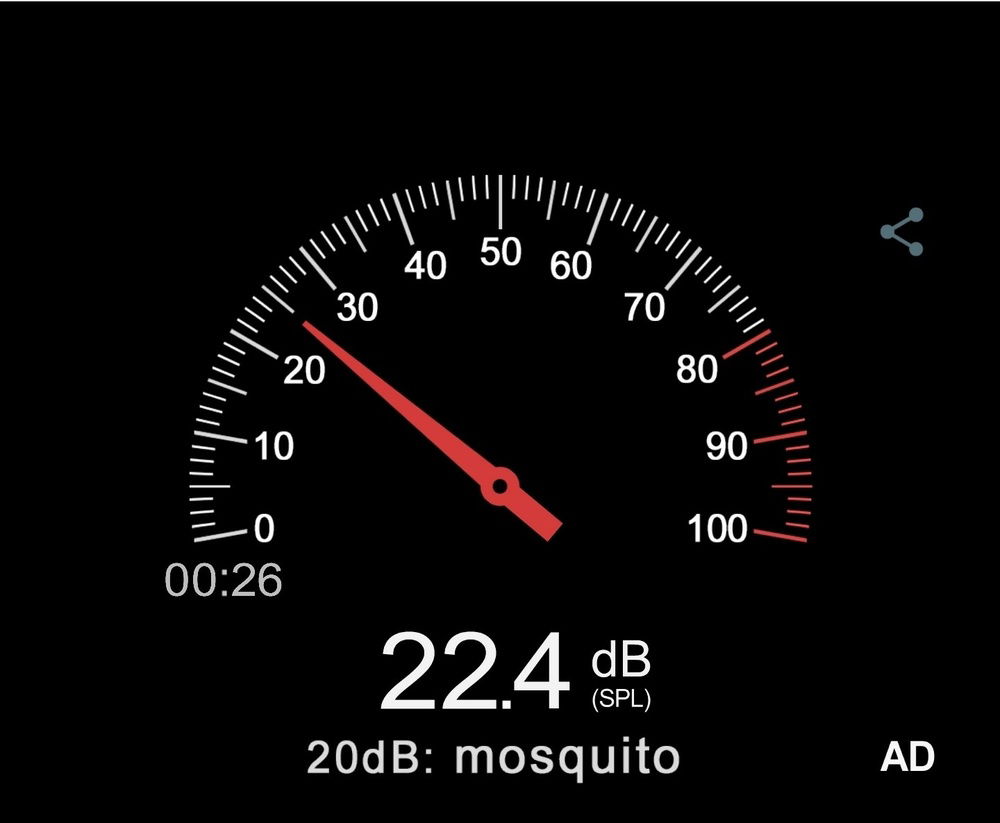
dB at Idle (TG Panels Off)
Evolv Shift Custom Loop with Glass Tubing
AD:
Since I saw a review of the Evolv Shift in 2018 I knew I had to build a system in one. I love the look and the footprint even if the thermals leave a lot to be desired. I have built PCs before, but they have always been air-cooled ATX or Micro ATX systems. I was really taken by small form factor builds so the next project had to be Mini-ITX.
I was bought this case in Feb 19 where I started to collect parts for the build. What I knew is that I wanted to do something a bit different. I was inspired by several hard-line builds (links below); I did not want to do a dual AIO setup. As all the reviews said this case suffered with poor airflow, I wanted to do something that gave the maximum amount of space for air to move in the case by mounting the pump/res in the top chamber, something these builds didn’t.
love this build by Jorge
Superb build by Antony with machined panels
The finish of this one by Jakub is excellent
This one by RedPencil used the top chamber like I wanted to, but also had a lot in the bottom chamber
RedPencil
It was Lurues’s build that confirmed to me it was possible to mount a pump in the top chamber. But, I couldn’t get an Apogee Drive II here in the UK very easily, so I looked for a different way to do it.
Lerues' build with an Apogee Drive II
Being a novice to water-cooling, I didn’t realise that it could be done without a reservoir, Nanook’s build helped me here helping me realise I could dump the reservoir.
Nanook's quick connect reservoir
Part Selection
CPU. I was originally going to get a 2700X. When 3rd Gen was released I knew second-hand CPUs would start to come down in price. However, I got a fab deal on a 3700X and the lower TDP would help with the thermals, or so I told myself.
Mobo. Aiming for the 2700X I wanted the B450i or X470i Strix. Both boards looked amazing and I thought I could find one second hand. I bought a B450i on a good deal and then I managed to find an X470i for less!
RAM. It had to be Dominator Platinum RGB! I love the look of this RAM and it would fit perfectly with the rest of the RGB in the system (I planned to go all Corsair early on). I managed to find 16Gb of 3200 C16 RAM at a great price.
SSD. I had not used an M.2 before so I researched the best one to get. I originally looked for a Samsung 970 Evo but they were really expensive. I then stumbled across this Adata SX8200 1Tb card. It was excellently priced and run at similar speeds to the 970.
PSU. The SF600 was my original choice, but the SF750 was then released. Its platinum rating meant that the fan would rarely spin in this system. It is an excellent PSU.
GPU. I needed a GPU that wouldn’t get so hot that it would overpower the loop, one that I could get a water block for, and one that was short enough not to clash with the PSU or the hardline loop. I found the EVGA 2070 Black had a PCB that was much shorter than the stock cooler. In fact, it used a PCB that was almost identical to the reference model. It was an efficient GPU, I could get a water block from AliExpress, and the PCB was only around 190mm; perfect!
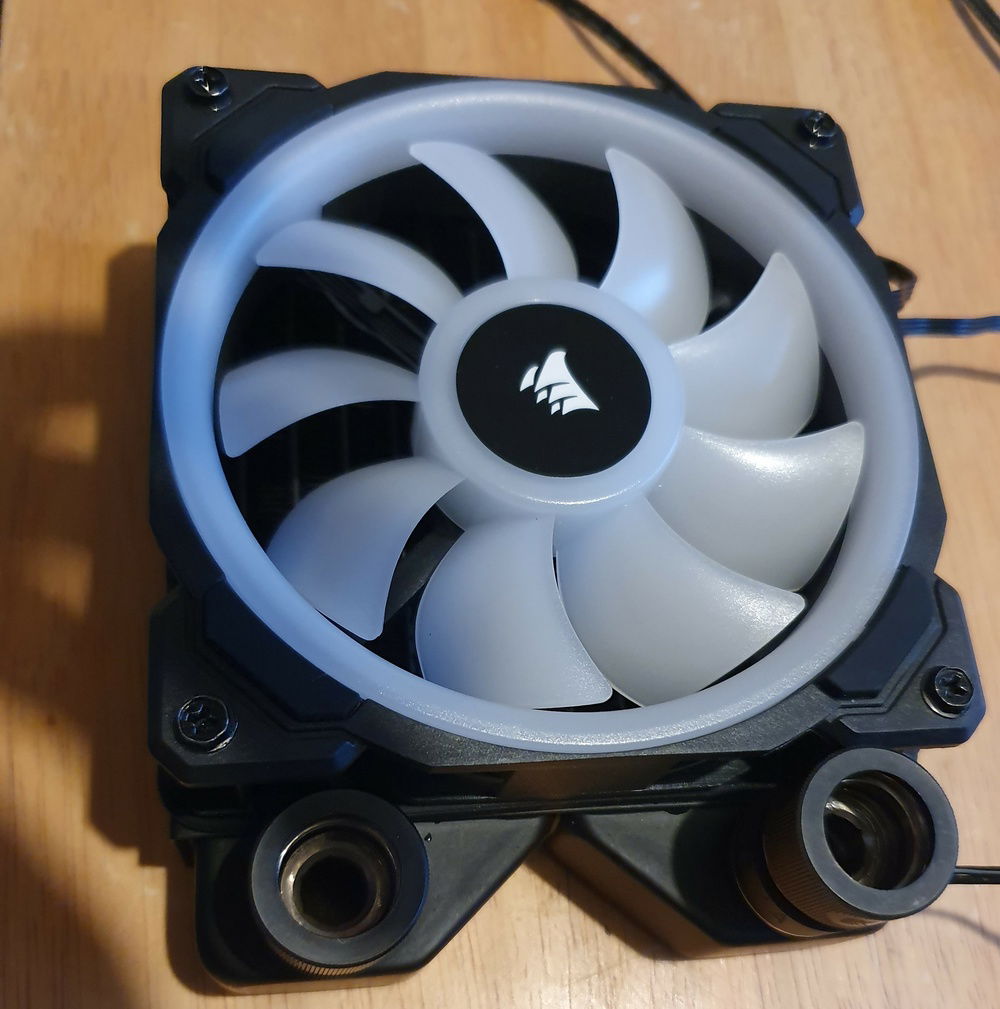
Cooling. I knew I would need a strong fan for the intake, so I found a Noctua Industrial 3000rpm fan to go in the bottom of the case. Initially, I paired this with 140 and 120mm Corsair HD fans. Using the HDs would have allowed me to change the top and bottom fans to intake or exhaust as necessary because the LEDs could be seen from each side. I then came across some LL fans which look amazing! Forgetting the ability to swap them around I got them. Unfortunately, this meant that both side fans would be exhaust. Annoyingly, Corsair have just released the QL fans which are like LLs but the RGB can be seen from both sides, this will likely be my next upgrade because we all know RGB makes everything better! Update I have replaced the industrial with a Noctua 12x25 PWM. This has improved temps while making the system quieter at full load. The industrial fans are amazing, but boy are they loud!
As I mentioned earlier, I picked up the GPU block from AliExpress. The fittings and CPU block I found separately as excellent individual deals. This was becoming a bargain build! I found an EK 3.2 Elite DDC pump which I paired with a Alphacool Eisdecke Plexi top. This came with a set of mount plates which I thought I could modify. I found a 30fpi, 22mm thick rad for the bottom, and 16fpi, 25mm rad for the side. These couldn’t be any thicker or they would not fit. I planned to use PETG tubing, but then I saw some builds with borosilicate glass tubing. The tubes look so bright and clear. As I was already making everything else it thought, why not!
Cabling. I am familiar with electrics so I thought, why not make my own cables. This is where Lutro0 came in. His videos on YouTube were exactly what I needed to learn how to make and sleeve my own cables. lutro0 Customs I bought some 18AWG wire in white, some 24 AWG wire in black, and some terminals and connectors for all the PSU cables. I bought some purple, blue, and grey sleeving as I knew the colour scheme would be something along those lines. JayzTwoCents then stole the colour for his Nebula machine; typical lol! Very jealous 😊 Jayz Nebula Build
RGB. This was my first RGB build so I went for the same brand throughout. I was already on Corsair for the fans, and I had bought a Commander Pro to control them. Standard Corsair RGB strips would not fit so in the spirit of making things, custom RGB strips it is then! I bought WS2812B and WS2813 strips and the appropriate connectors to make homemade Corsair compatible lighting.
The Build
There was a lot of guesswork and luck in this build!
The mobo build was completely standard, nothing to report here.
After some fine measuring with a carboard mock-up of a mobo mounted in the case; I was sure that a DDC pump and top mounted on its side would fit above it. I just need to work out a way to mount the pump. I modified the Eisdecke mounting plates with the EK DDC pump rubber mounts. I drilled 4 holes in the side of the case and used the screws from the EK mounting kit (two of which I had to shorten.) I had to remove some of the plastic on one of the metal panels to accommodate the screw heads. Mounting the pump so high I knew I had to have the return loop and the fill port immediately above it in a small space. This is where I took a Dremmel to the case and put in the fill port directly above where the inlet to the pump would be. I used a 3 way and a D Plug to connect the fill port to the pump. This has really helped with assembly and alignment.
The loop was as simple as it could be. Pump Outlet>>CPU Block>>Bottom Rad>>Side Rad>>GPU Block>>Pump Inlet. The inlet to the pump would be the highest point in the loop to ensure that the pump would not run dry while filling. I also hoped that by connecting a pipe to the fill port and leaving it there for a while it would act as a small reservoir to initially bleed the system; it worked! The pump was mounted so that it connected directly to the CPU Block. I couldn’t find a block extending fitting that would suit so I had to use a silver one. You don’t notice it when looking from the front so I might just keep it there rather than finding a black one.
I mounted the radiators in the lower chamber. To fit the fan in I had to remove one of the rubber grommets from the cable channel. The side radiator had to be mounted as far away from the fittings as could be managed. Even then, the upper fitting wore into the fan housing when tightening. The lower one was offset with a Phobya temp sensor, but that had to be mounted first because the wire wouldn’t allow it to be turned with the fan fitted. I used a F/F fitting, a t piece, and a ball valve to create a drain point above the lower rad. This was the lowest point I could put it and it has been invaluable in bleeding the system.
The GPU Block came with connections that emerged at 90 degrees to the GPU. This would have interfered with the glass side panel. I found a cool loop temp gauge that let the connections emerge in-line with the GPU. This was simple to fit and gave me the flexibility to run the pipes under and around the GPU.
Next was the cabling. I measured the runs and used the stock cables as pinouts. I made all the PSU cables to be as short as possible ensure there was not bundles of wires restricting air moving through the case. I did not have a PSU tester so triple checking my work was essential. There were several dual cables that were very tricky. This was very time consuming and the results are by no means perfect, but I am very happy with how my first attempt came out. The GPU cable was particularly difficult as it is only 4 inches long, and it has a 2-into-1 cable!
The RGB strips were quite simple to make however, two different types of strips were required to make it work. The case lighting was run directly from a lighting channel on the Commander Pro. For this I used the 3 pin (5V, Din, Gnd), WS2812B 5050 strips. The connected easily and worked first time. I wanted to control the RGB on the pump and the GPU Block separately which meant plugging it into the Corsair RGB hub. This meant using 4 Pin (5v, Bi/BO, DI/DI, Gnd), WS2813 5050 strips. These required wiring differently as each item connected to the hub are connected in series. The 5v, DI, and Gnd connectors were wired at one end of the strip. A wire then had to run from the BO terminal at the other end of the strip back to the plug. The Corsair strips only connect at one end as the do this return loop internally. The RGB hub with both LL fans, the Pump and the GPU block are all controlled from channel 2 on the Commander Pro.
I used YouTube to learn how to bend glass. I got a MAP Gas torch to heat the glass. This was more fun than making the cables. The bends are terrible by any standard, but I was getting better towards the end. I used a diamond cutting disc to gently cut the tubes to size. Eye and lung protection were essential here as the glass dust is hazardous. I used some sandpaper to rough the ends and a flame to polish them smooth. There were many casualties during this process. If you want to do this yourself, get more glass than you need, and practice, lots!
Before you put the glass tubes in the loop, make sure you clean them thoroughly. I didn’t clean them enough on the first assemble and ended up with micro shards of glass in the GPU Block. Once I realised, I did a reverse pump of the radiators and disassembled and cleaned the blocks. Top tip: the plate fins on the EK block is directional as I found out when the CPU hit 95 degrees! Be sure to assemble it carefully!
Performance
The 3700X idles quite high. Even using a Noctua L9a when I assembled the mobo on its box it idled in the 40-50°C range. As I type this the system has been running for a few hours and its idling at 45-50°C. The GPU is at 34°C, and the loop temp is 35°C (21°C ambient). This is at 22.4 dB, I had to turn the heating off to measure the sound as my house radiators are making more noise than this thing!
Using Prime95 blend test, the CPU peaks at 84°C but settles at 74 once the fan curve catches up, and the loop temp peaks at 38°C. The noise of the system increases to 38 dB. The CPU is at 4.2GHz all cores throughout only dipping to 3.9GHz when the CPU hits its peak temp (30 seconds). This is with PBO enabled. I'm sure this will get better with some more tuning.
Gaming in CSGO, Rocket League, or BF5 (all max settings) the system is nowhere near this stressed. The system peaks at CPU 65°C/GPU 44°C (BF5) after a few hours (21°C ambient).
Conclusion
I am very happy with the build. I wanted a daily use, SFF PC that is capable enough for work and gaming, but also one that is quiet and looks good. I have learnt a lot, especially about glass bending and wiring. Also, everything is better with RGB!
I hope you enjoyed reading about the build.
G
I was bought this case in Feb 19 where I started to collect parts for the build. What I knew is that I wanted to do something a bit different. I was inspired by several hard-line builds (links below); I did not want to do a dual AIO setup. As all the reviews said this case suffered with poor airflow, I wanted to do something that gave the maximum amount of space for air to move in the case by mounting the pump/res in the top chamber, something these builds didn’t.
love this build by Jorge
Superb build by Antony with machined panels
The finish of this one by Jakub is excellent
This one by RedPencil used the top chamber like I wanted to, but also had a lot in the bottom chamber
RedPencil
It was Lurues’s build that confirmed to me it was possible to mount a pump in the top chamber. But, I couldn’t get an Apogee Drive II here in the UK very easily, so I looked for a different way to do it.
Lerues' build with an Apogee Drive II
Being a novice to water-cooling, I didn’t realise that it could be done without a reservoir, Nanook’s build helped me here helping me realise I could dump the reservoir.
Nanook's quick connect reservoir
Part Selection
CPU. I was originally going to get a 2700X. When 3rd Gen was released I knew second-hand CPUs would start to come down in price. However, I got a fab deal on a 3700X and the lower TDP would help with the thermals, or so I told myself.
Mobo. Aiming for the 2700X I wanted the B450i or X470i Strix. Both boards looked amazing and I thought I could find one second hand. I bought a B450i on a good deal and then I managed to find an X470i for less!
RAM. It had to be Dominator Platinum RGB! I love the look of this RAM and it would fit perfectly with the rest of the RGB in the system (I planned to go all Corsair early on). I managed to find 16Gb of 3200 C16 RAM at a great price.
SSD. I had not used an M.2 before so I researched the best one to get. I originally looked for a Samsung 970 Evo but they were really expensive. I then stumbled across this Adata SX8200 1Tb card. It was excellently priced and run at similar speeds to the 970.
PSU. The SF600 was my original choice, but the SF750 was then released. Its platinum rating meant that the fan would rarely spin in this system. It is an excellent PSU.
GPU. I needed a GPU that wouldn’t get so hot that it would overpower the loop, one that I could get a water block for, and one that was short enough not to clash with the PSU or the hardline loop. I found the EVGA 2070 Black had a PCB that was much shorter than the stock cooler. In fact, it used a PCB that was almost identical to the reference model. It was an efficient GPU, I could get a water block from AliExpress, and the PCB was only around 190mm; perfect!
Cooling. I knew I would need a strong fan for the intake, so I found a Noctua Industrial 3000rpm fan to go in the bottom of the case. Initially, I paired this with 140 and 120mm Corsair HD fans. Using the HDs would have allowed me to change the top and bottom fans to intake or exhaust as necessary because the LEDs could be seen from each side. I then came across some LL fans which look amazing! Forgetting the ability to swap them around I got them. Unfortunately, this meant that both side fans would be exhaust. Annoyingly, Corsair have just released the QL fans which are like LLs but the RGB can be seen from both sides, this will likely be my next upgrade because we all know RGB makes everything better! Update I have replaced the industrial with a Noctua 12x25 PWM. This has improved temps while making the system quieter at full load. The industrial fans are amazing, but boy are they loud!
As I mentioned earlier, I picked up the GPU block from AliExpress. The fittings and CPU block I found separately as excellent individual deals. This was becoming a bargain build! I found an EK 3.2 Elite DDC pump which I paired with a Alphacool Eisdecke Plexi top. This came with a set of mount plates which I thought I could modify. I found a 30fpi, 22mm thick rad for the bottom, and 16fpi, 25mm rad for the side. These couldn’t be any thicker or they would not fit. I planned to use PETG tubing, but then I saw some builds with borosilicate glass tubing. The tubes look so bright and clear. As I was already making everything else it thought, why not!
Cabling. I am familiar with electrics so I thought, why not make my own cables. This is where Lutro0 came in. His videos on YouTube were exactly what I needed to learn how to make and sleeve my own cables. lutro0 Customs I bought some 18AWG wire in white, some 24 AWG wire in black, and some terminals and connectors for all the PSU cables. I bought some purple, blue, and grey sleeving as I knew the colour scheme would be something along those lines. JayzTwoCents then stole the colour for his Nebula machine; typical lol! Very jealous 😊 Jayz Nebula Build
RGB. This was my first RGB build so I went for the same brand throughout. I was already on Corsair for the fans, and I had bought a Commander Pro to control them. Standard Corsair RGB strips would not fit so in the spirit of making things, custom RGB strips it is then! I bought WS2812B and WS2813 strips and the appropriate connectors to make homemade Corsair compatible lighting.
The Build
There was a lot of guesswork and luck in this build!
The mobo build was completely standard, nothing to report here.
After some fine measuring with a carboard mock-up of a mobo mounted in the case; I was sure that a DDC pump and top mounted on its side would fit above it. I just need to work out a way to mount the pump. I modified the Eisdecke mounting plates with the EK DDC pump rubber mounts. I drilled 4 holes in the side of the case and used the screws from the EK mounting kit (two of which I had to shorten.) I had to remove some of the plastic on one of the metal panels to accommodate the screw heads. Mounting the pump so high I knew I had to have the return loop and the fill port immediately above it in a small space. This is where I took a Dremmel to the case and put in the fill port directly above where the inlet to the pump would be. I used a 3 way and a D Plug to connect the fill port to the pump. This has really helped with assembly and alignment.
The loop was as simple as it could be. Pump Outlet>>CPU Block>>Bottom Rad>>Side Rad>>GPU Block>>Pump Inlet. The inlet to the pump would be the highest point in the loop to ensure that the pump would not run dry while filling. I also hoped that by connecting a pipe to the fill port and leaving it there for a while it would act as a small reservoir to initially bleed the system; it worked! The pump was mounted so that it connected directly to the CPU Block. I couldn’t find a block extending fitting that would suit so I had to use a silver one. You don’t notice it when looking from the front so I might just keep it there rather than finding a black one.
I mounted the radiators in the lower chamber. To fit the fan in I had to remove one of the rubber grommets from the cable channel. The side radiator had to be mounted as far away from the fittings as could be managed. Even then, the upper fitting wore into the fan housing when tightening. The lower one was offset with a Phobya temp sensor, but that had to be mounted first because the wire wouldn’t allow it to be turned with the fan fitted. I used a F/F fitting, a t piece, and a ball valve to create a drain point above the lower rad. This was the lowest point I could put it and it has been invaluable in bleeding the system.
The GPU Block came with connections that emerged at 90 degrees to the GPU. This would have interfered with the glass side panel. I found a cool loop temp gauge that let the connections emerge in-line with the GPU. This was simple to fit and gave me the flexibility to run the pipes under and around the GPU.
Next was the cabling. I measured the runs and used the stock cables as pinouts. I made all the PSU cables to be as short as possible ensure there was not bundles of wires restricting air moving through the case. I did not have a PSU tester so triple checking my work was essential. There were several dual cables that were very tricky. This was very time consuming and the results are by no means perfect, but I am very happy with how my first attempt came out. The GPU cable was particularly difficult as it is only 4 inches long, and it has a 2-into-1 cable!
The RGB strips were quite simple to make however, two different types of strips were required to make it work. The case lighting was run directly from a lighting channel on the Commander Pro. For this I used the 3 pin (5V, Din, Gnd), WS2812B 5050 strips. The connected easily and worked first time. I wanted to control the RGB on the pump and the GPU Block separately which meant plugging it into the Corsair RGB hub. This meant using 4 Pin (5v, Bi/BO, DI/DI, Gnd), WS2813 5050 strips. These required wiring differently as each item connected to the hub are connected in series. The 5v, DI, and Gnd connectors were wired at one end of the strip. A wire then had to run from the BO terminal at the other end of the strip back to the plug. The Corsair strips only connect at one end as the do this return loop internally. The RGB hub with both LL fans, the Pump and the GPU block are all controlled from channel 2 on the Commander Pro.
I used YouTube to learn how to bend glass. I got a MAP Gas torch to heat the glass. This was more fun than making the cables. The bends are terrible by any standard, but I was getting better towards the end. I used a diamond cutting disc to gently cut the tubes to size. Eye and lung protection were essential here as the glass dust is hazardous. I used some sandpaper to rough the ends and a flame to polish them smooth. There were many casualties during this process. If you want to do this yourself, get more glass than you need, and practice, lots!
Before you put the glass tubes in the loop, make sure you clean them thoroughly. I didn’t clean them enough on the first assemble and ended up with micro shards of glass in the GPU Block. Once I realised, I did a reverse pump of the radiators and disassembled and cleaned the blocks. Top tip: the plate fins on the EK block is directional as I found out when the CPU hit 95 degrees! Be sure to assemble it carefully!
Performance
The 3700X idles quite high. Even using a Noctua L9a when I assembled the mobo on its box it idled in the 40-50°C range. As I type this the system has been running for a few hours and its idling at 45-50°C. The GPU is at 34°C, and the loop temp is 35°C (21°C ambient). This is at 22.4 dB, I had to turn the heating off to measure the sound as my house radiators are making more noise than this thing!
Using Prime95 blend test, the CPU peaks at 84°C but settles at 74 once the fan curve catches up, and the loop temp peaks at 38°C. The noise of the system increases to 38 dB. The CPU is at 4.2GHz all cores throughout only dipping to 3.9GHz when the CPU hits its peak temp (30 seconds). This is with PBO enabled. I'm sure this will get better with some more tuning.
Gaming in CSGO, Rocket League, or BF5 (all max settings) the system is nowhere near this stressed. The system peaks at CPU 65°C/GPU 44°C (BF5) after a few hours (21°C ambient).
Conclusion
I am very happy with the build. I wanted a daily use, SFF PC that is capable enough for work and gaming, but also one that is quiet and looks good. I have learnt a lot, especially about glass bending and wiring. Also, everything is better with RGB!
I hope you enjoyed reading about the build.
G
Color(s): Blue Gray Purple
RGB Lighting? Yes
Theme: none
Cooling: Custom Liquid Cooling
Size: Mini-ITX
Type: General Build
Hardware
CPU
$ 278.99
Motherboard
$ 256.45
Memory
$ 129.60
Storage
$ 62.99
Case
$ 149.99
Case Fan
$ 39.61
Case Fan
$ 79.98
Case Fan
$ 34.95
Cooling
Cooling
Cooling
$ 174.60
Cooling
$ 48.95
Accessories
$ 74.29
Approved by: