


Most Recent Build
Best Build
AD:

Spotlight for Spidey.
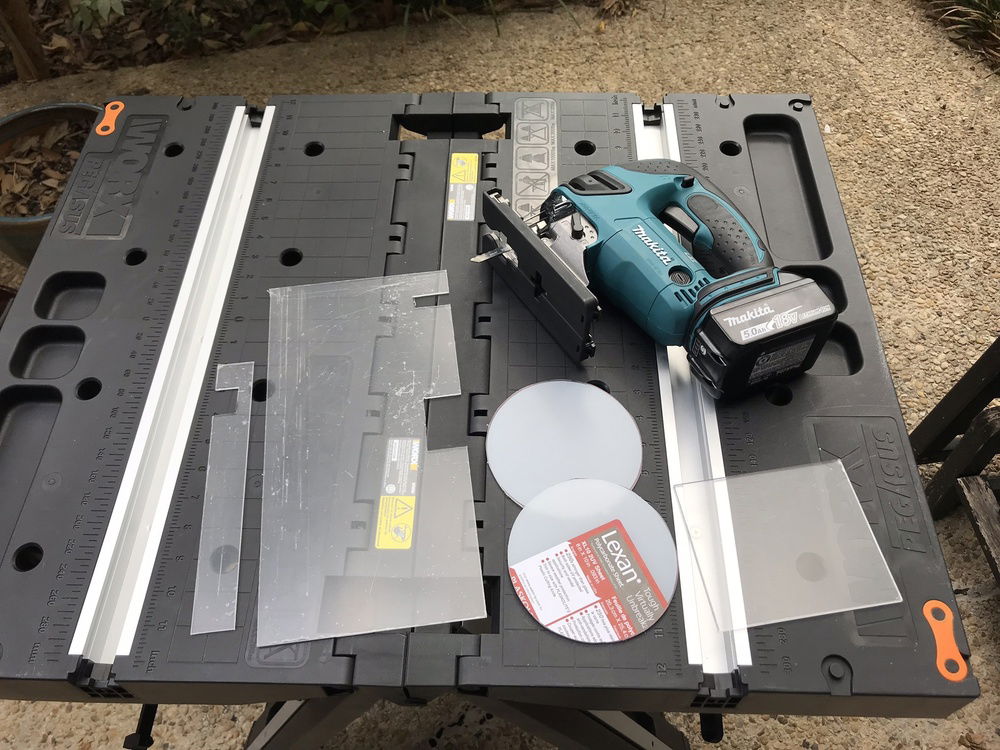
Making the 3 main panels. Only 2 ended up getting used.
Test fitting the cut panels.
Chamfering the edges and ready to paint.
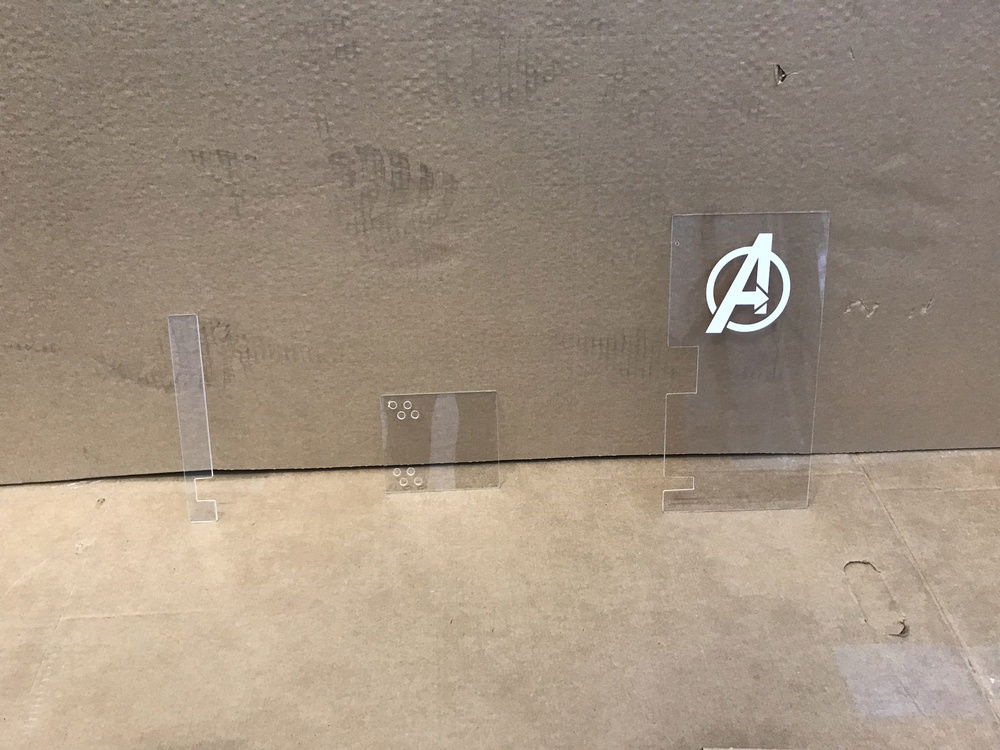
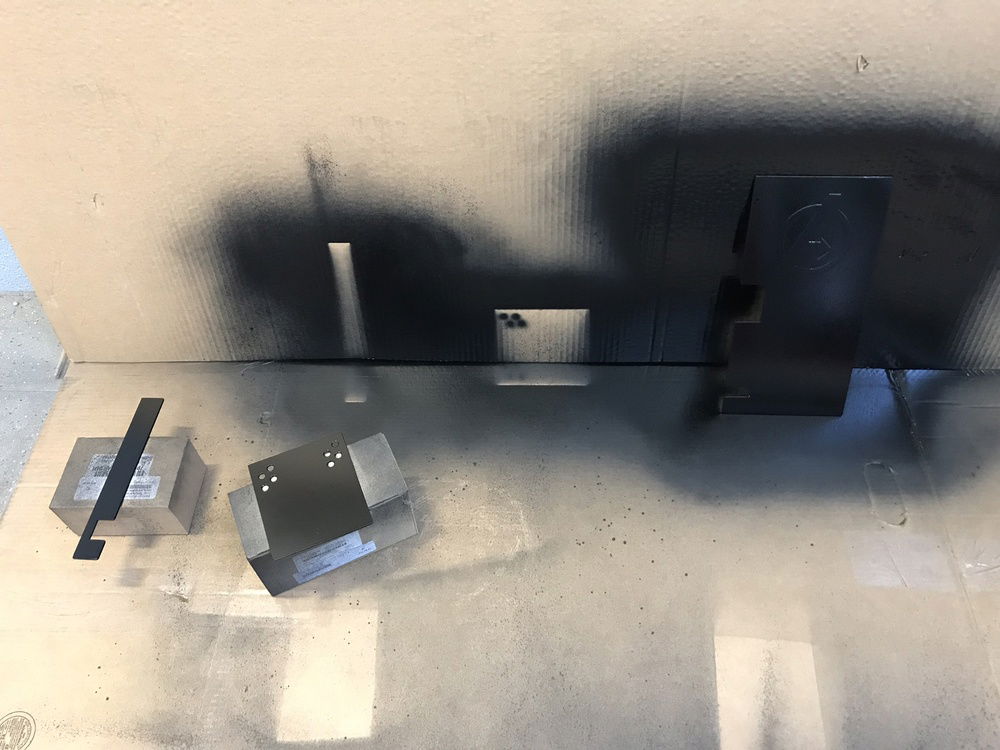
The middle panel unfortunately had to be abandoned.
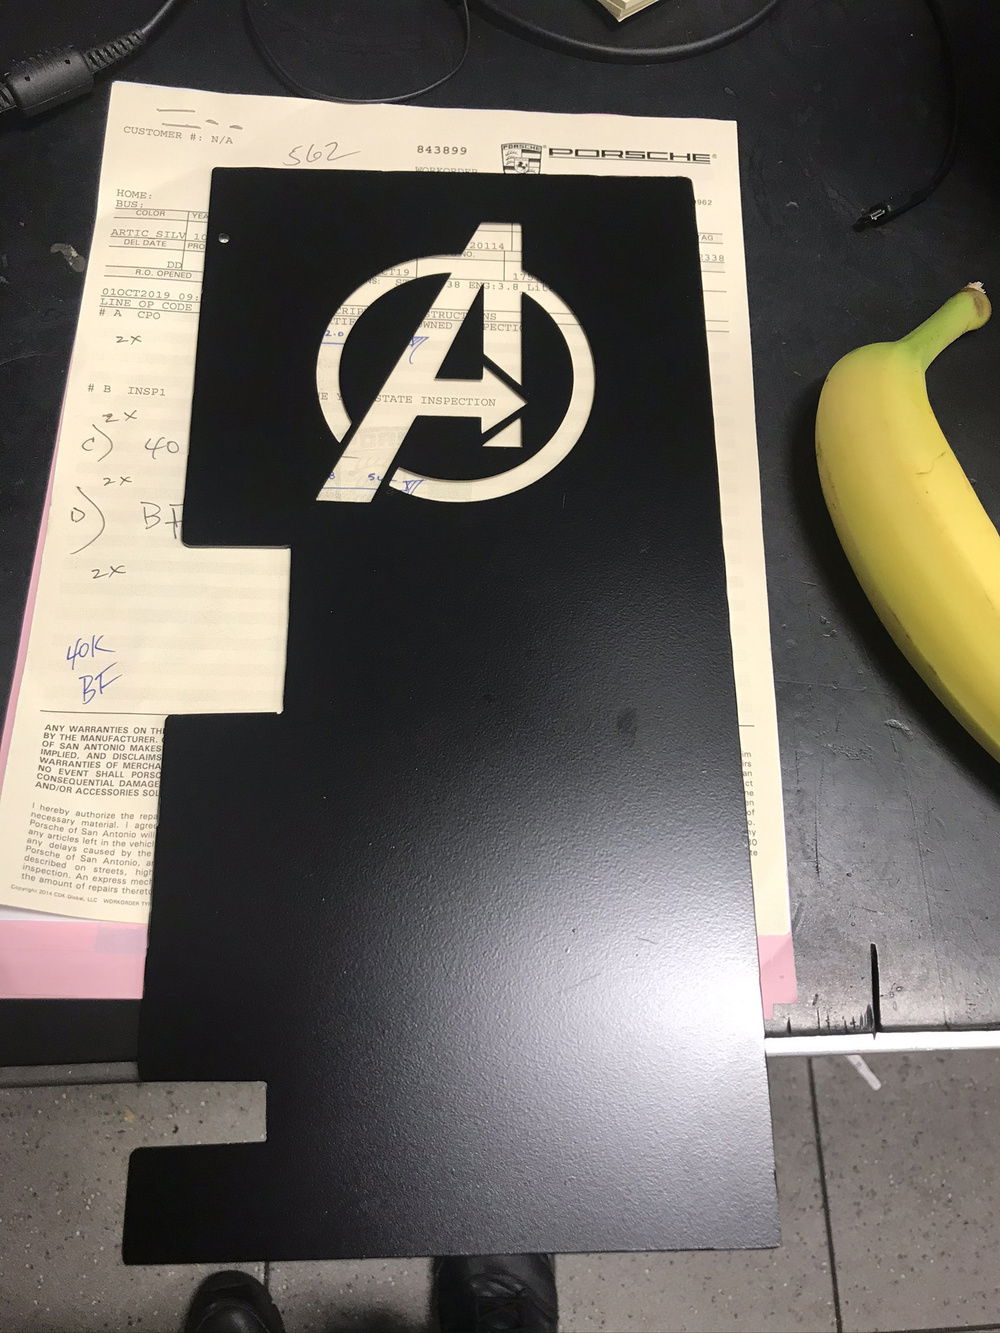
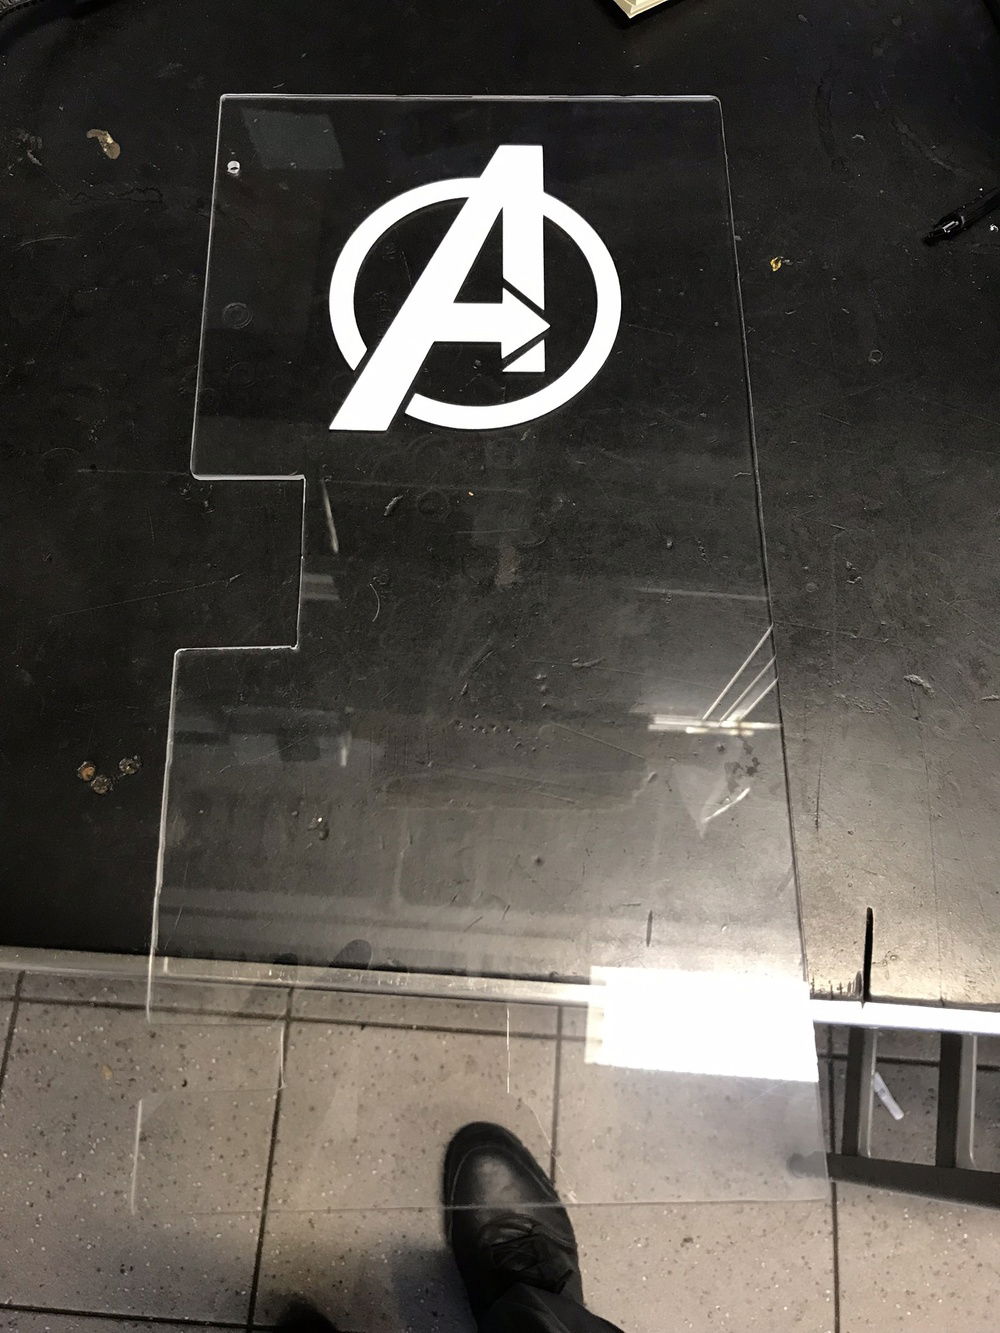
Painted at work and left in the shop overnight. I couldn't wait to pull the vinyl off to see how it came out.
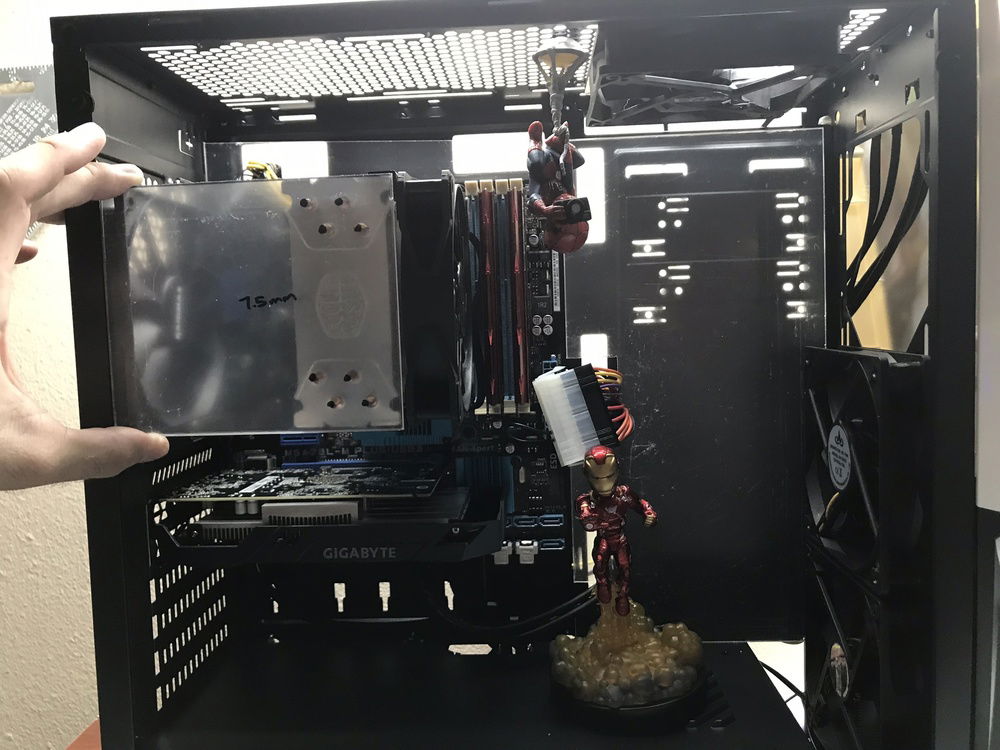
Backside of the Avengers panel.
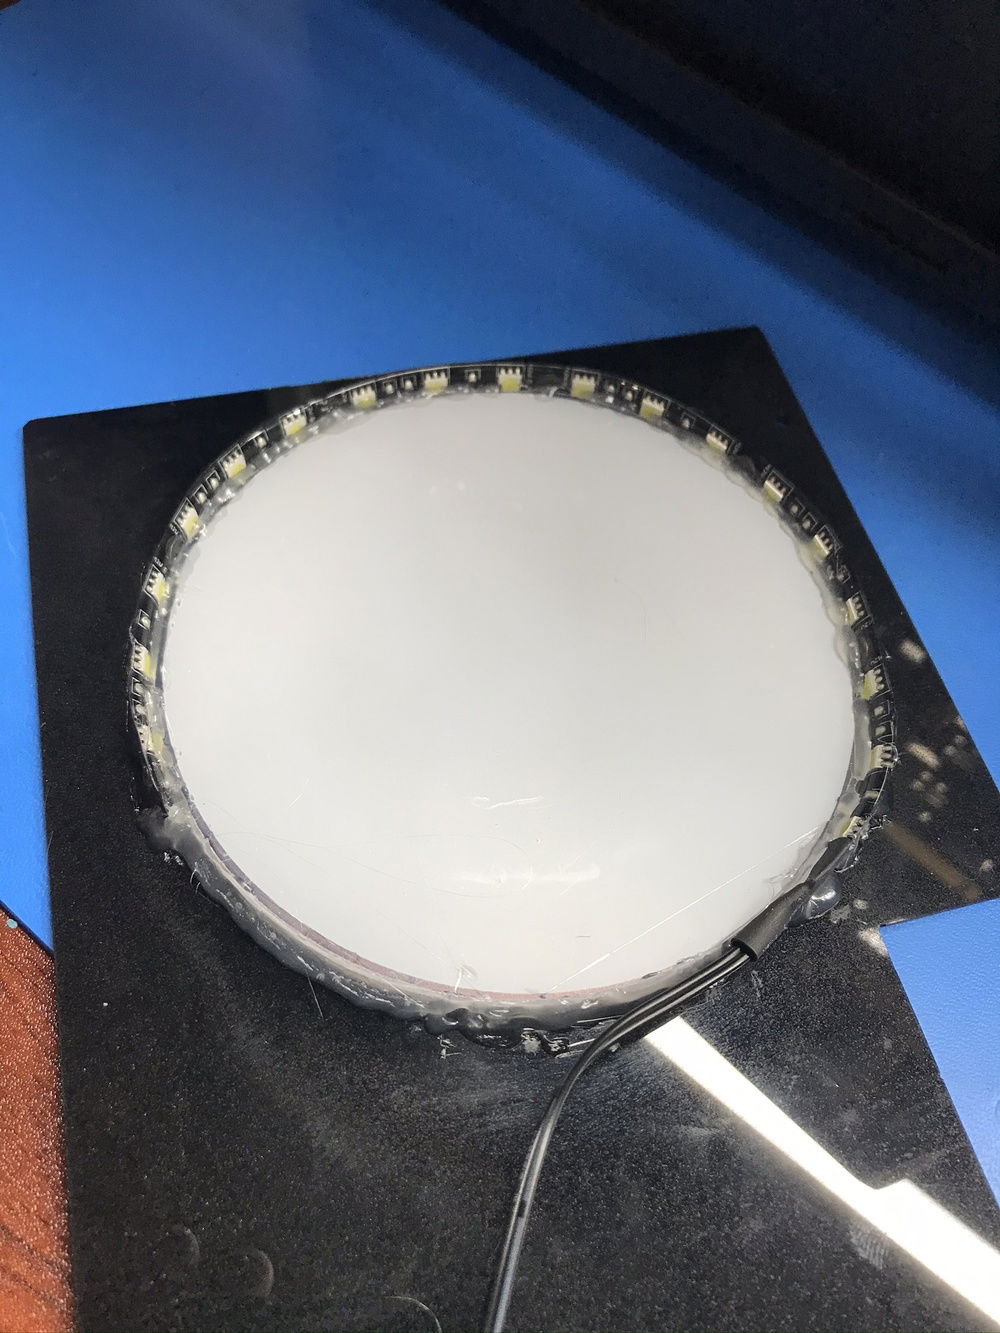
Cool, but lots of light leaking out from the back.

Cheap solution. It looks ghetto but it worked really well. The Avengers panel got about twice as bright. Hard to tell in the pictures of course. I was a little concerned about heat so I let it run for several hours closed up in the case and it never got too hot to touch.
Sames X19
AD:
This system was built for my 12 and 14 year old nephews who had recently discovered a 2004 Dell in the closet and were disappointed that it wouldn't run Fortnite. I pieced this system together as an Xmas gift for them and tried to add some flare that will hopefully get the next generation interested in PC building. I took the CPU, motherboard, RAM, SSD and Windows 10 from an existing system of mine, and for the rest I had a small budget of about $300. I also found a bunch of games on sale and pre-loaded the system with a variety of titles, new and old. I convinced myself that games had to have a separate budget :P
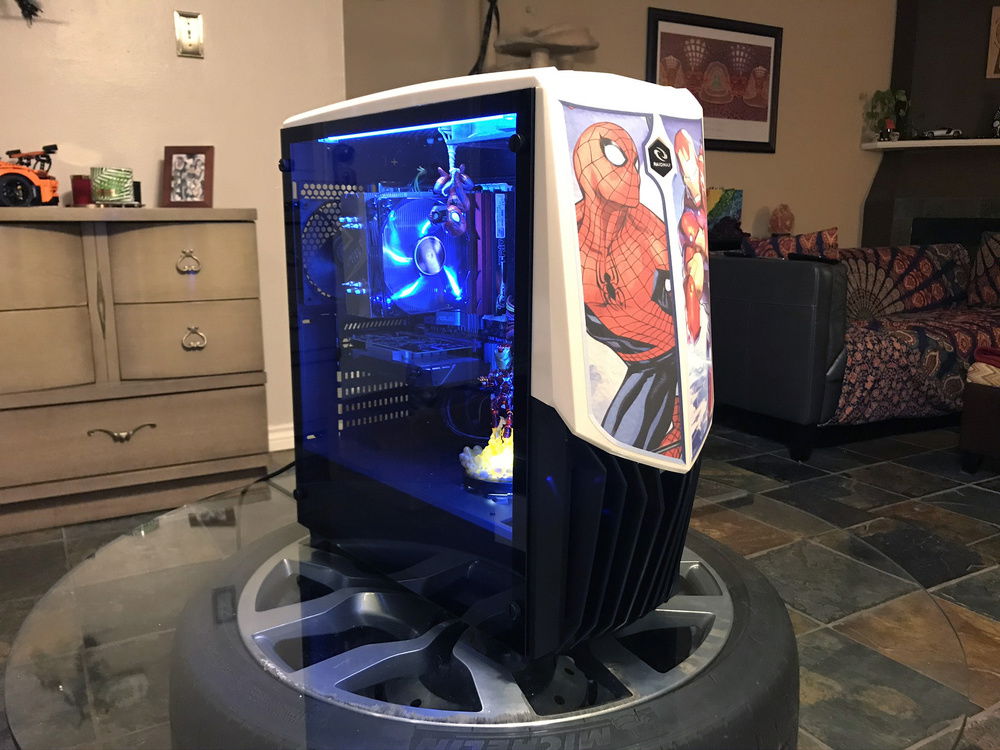
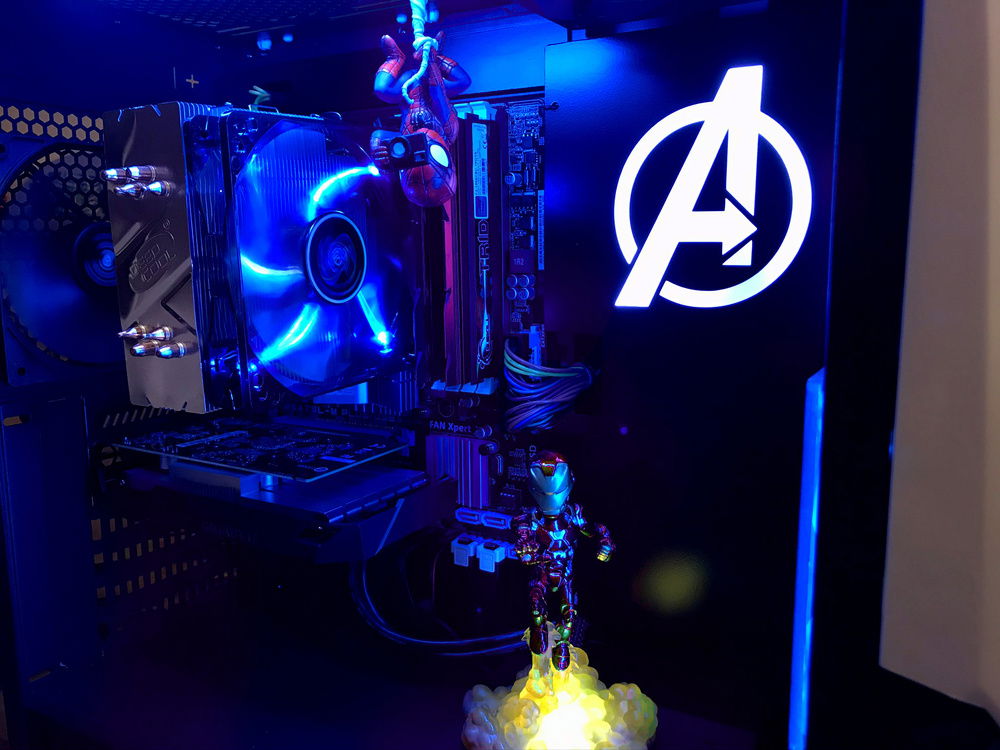
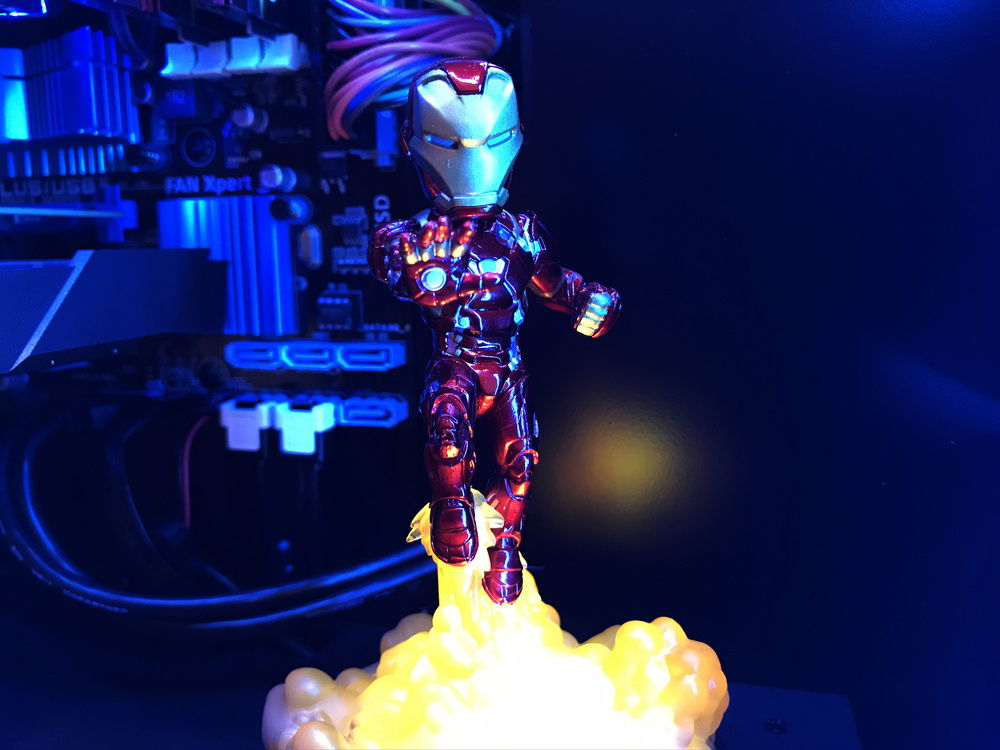
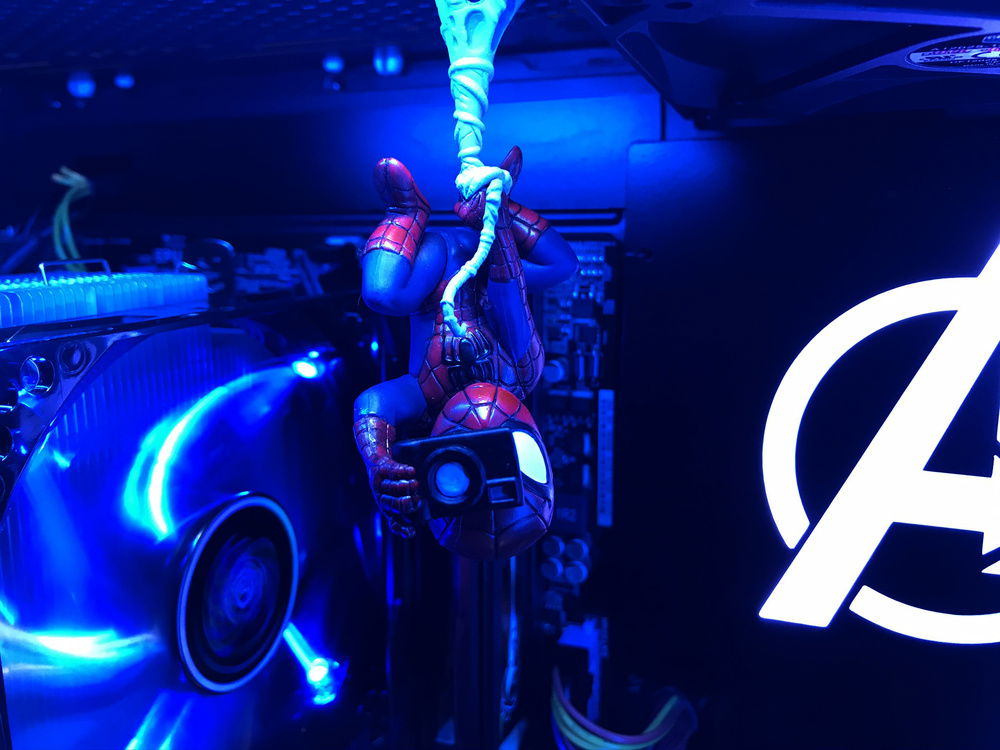
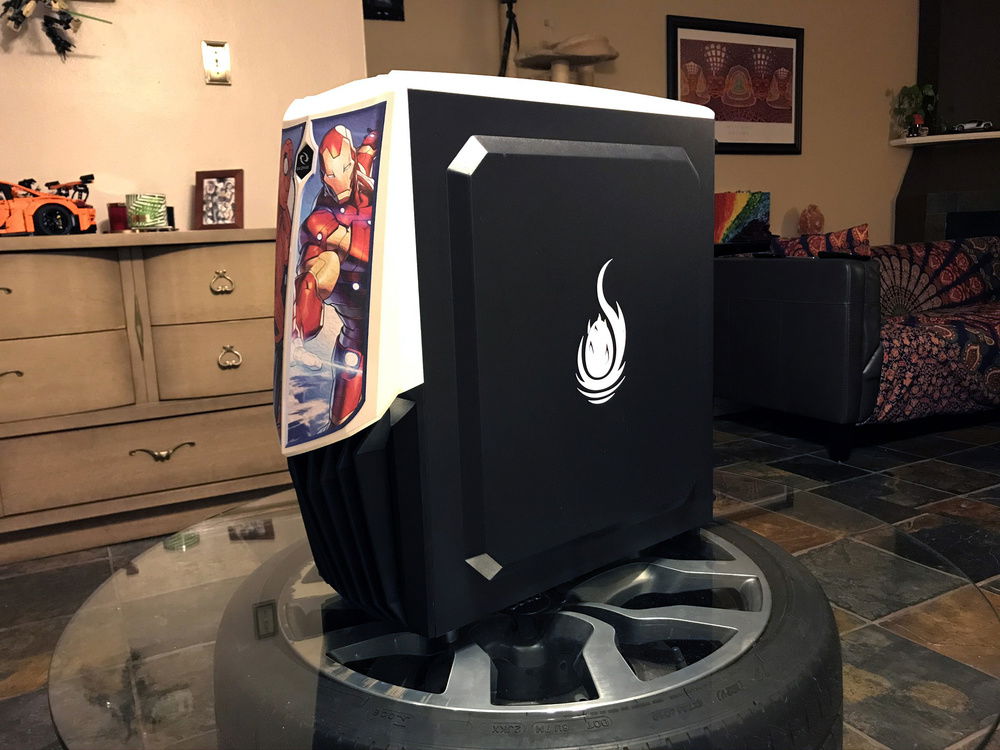
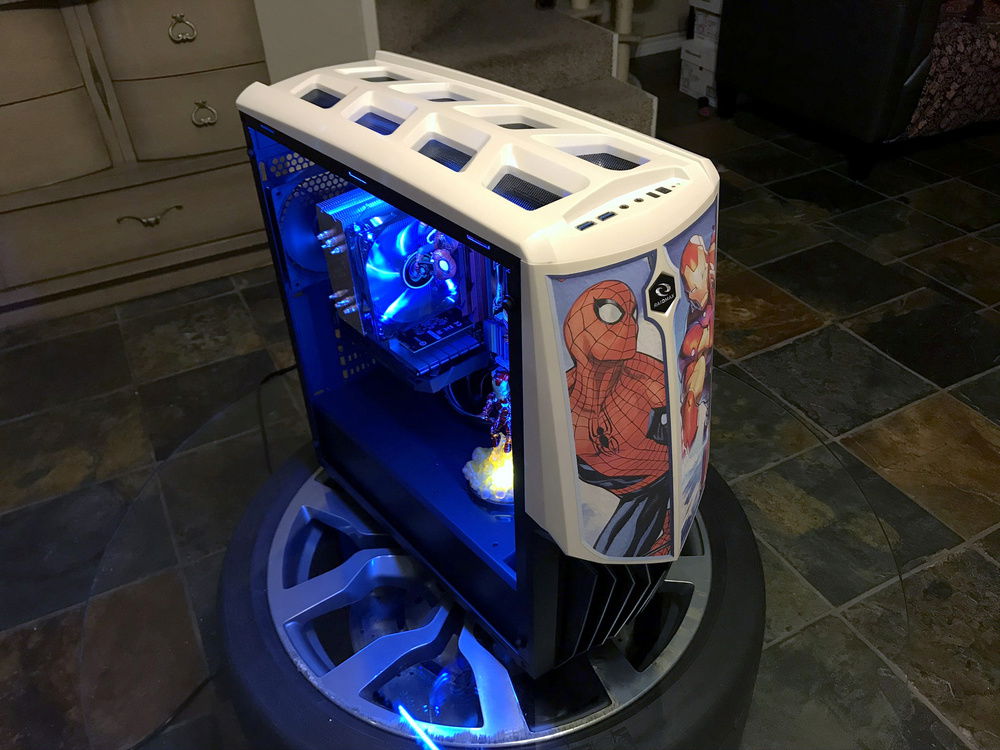
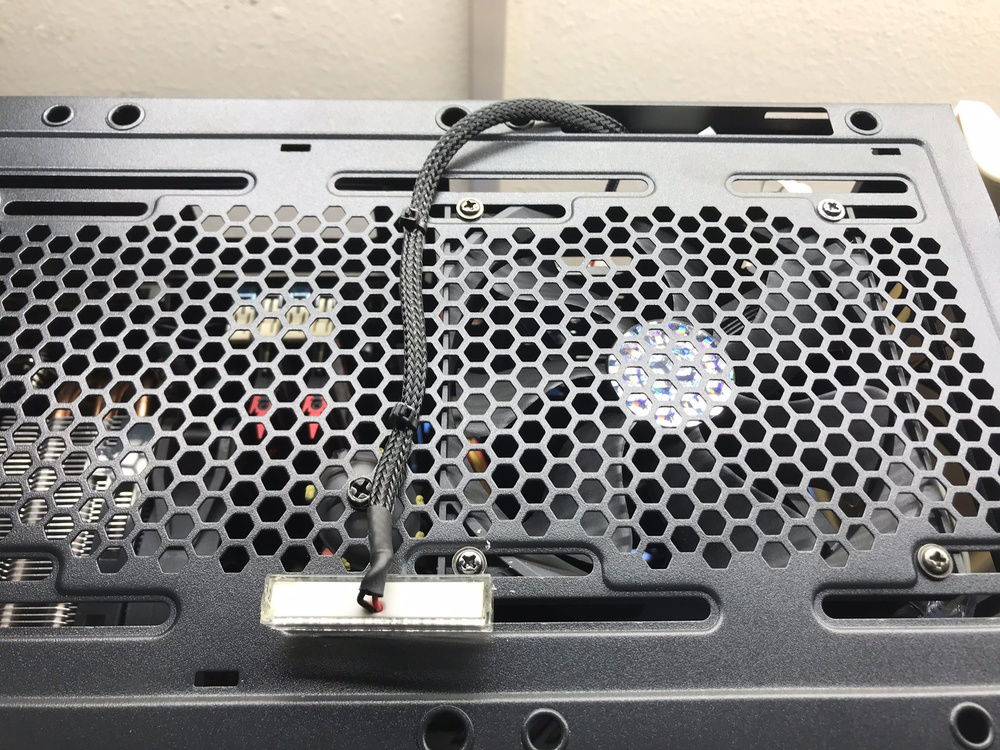
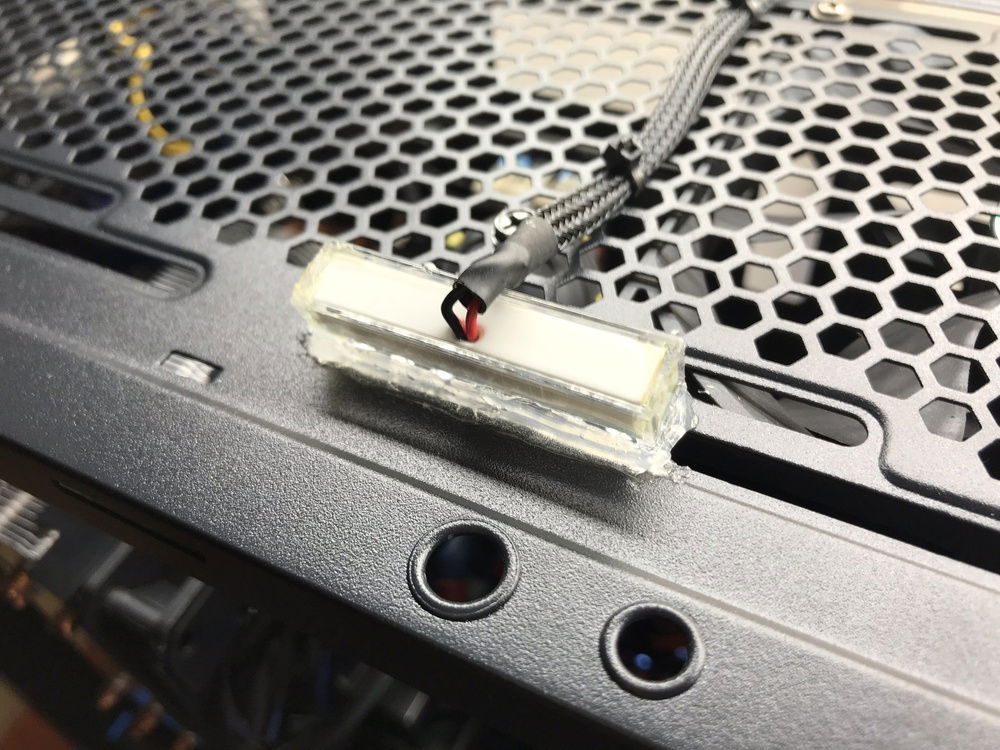
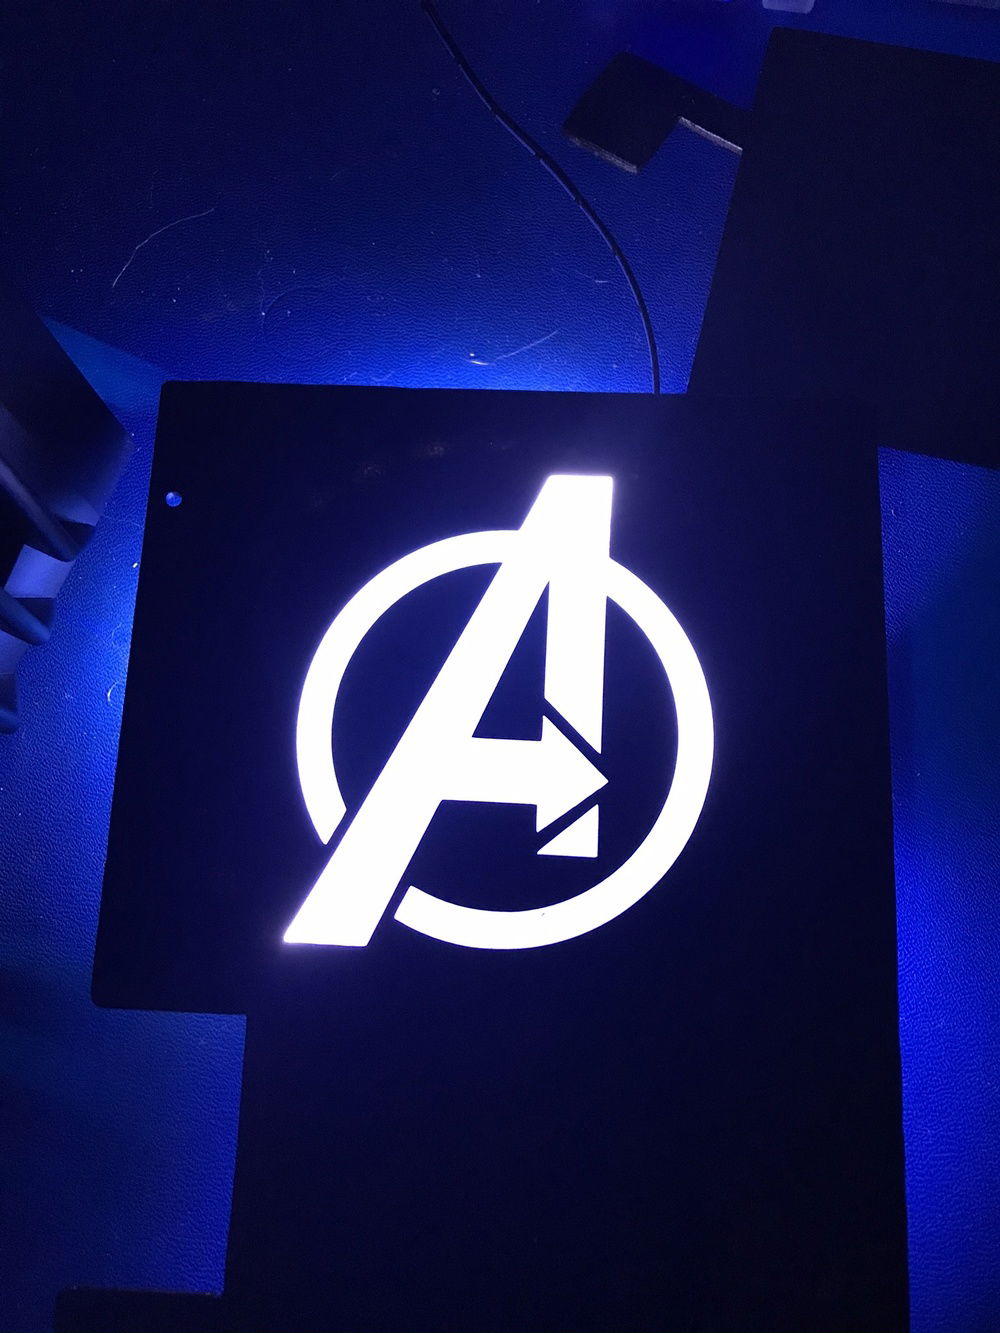
The boys are big Avengers fans and Spidey and Iron Man are their favorites. I already had the Iron Man statue from a loot crate so I found a matching Spider Man one and hung him from the ceiling. I had to add a tiny spotlight above Spidey so he didn't just appear blue from the blue lights. It helped but I could have used a much brighter light. The Iron Man statue originally had a light inside that was battery operated. I removed that and carved out a larger opening and installed a molex powered LED. The Avengers panel was made from scratch. I photoshopped the front graphic and had it printed onto vinyl at a print shop. It looks good but tied up a large chunk of my budget, unfortunately. There was a lot of light seeping through the cheap, thin plastic of the front cover so I painted the inside white, as to not dull the finish of the outside, then black so that it matched the rest of the interior.
A keen eye will notice I used 3 intake fans and 1 exhaust fan, which was intentional. Mostly, I wanted to ensure adequate air flow across the board. I found this board in its previous system would overheat and throttle the CPU under load without lots of air moving across it. This was even true at stock voltages, so overclocking really wasn't an option (full disclosure, I am a novice overclocker). So my thought was that using the front upper fan as an intake would feed the CPU cooler, then the two front casefans would be able to feed the GPU and flow straight over the board between the CPU cooler and the GPU. I also just like to ensure there is positive pressure inside my systems for dust control. It ended up being louder than I wanted, partially because of this, but also because of the quality of fans I ended up using.
Originally I had a Cooler Master Hyper 212 for the CPU but it was just BARELY too tall and the glass would touch the ends of the heat pipes. So I cut the tips down a couple of millimeters not realizing there was a pressurized gas inside the pipes, and destroyed the cooler. I had made and painted an additional panel to go between the cooler and the rear exhaust fan (see it in paint pics). I replaced the Hyper 212 with the DeepCool version that was slightly shorter but looked like it might have the same heat pipe dimensions and would work with the cover, but no such luck. I ran out of time and didn't get to make another panel to fit this cooler.
Considering it all I am somewhat satisfied with how it turned out. The boys were super excited and that's what really counts![Emoji]()
The boys are big Avengers fans and Spidey and Iron Man are their favorites. I already had the Iron Man statue from a loot crate so I found a matching Spider Man one and hung him from the ceiling. I had to add a tiny spotlight above Spidey so he didn't just appear blue from the blue lights. It helped but I could have used a much brighter light. The Iron Man statue originally had a light inside that was battery operated. I removed that and carved out a larger opening and installed a molex powered LED. The Avengers panel was made from scratch. I photoshopped the front graphic and had it printed onto vinyl at a print shop. It looks good but tied up a large chunk of my budget, unfortunately. There was a lot of light seeping through the cheap, thin plastic of the front cover so I painted the inside white, as to not dull the finish of the outside, then black so that it matched the rest of the interior.
A keen eye will notice I used 3 intake fans and 1 exhaust fan, which was intentional. Mostly, I wanted to ensure adequate air flow across the board. I found this board in its previous system would overheat and throttle the CPU under load without lots of air moving across it. This was even true at stock voltages, so overclocking really wasn't an option (full disclosure, I am a novice overclocker). So my thought was that using the front upper fan as an intake would feed the CPU cooler, then the two front casefans would be able to feed the GPU and flow straight over the board between the CPU cooler and the GPU. I also just like to ensure there is positive pressure inside my systems for dust control. It ended up being louder than I wanted, partially because of this, but also because of the quality of fans I ended up using.
Originally I had a Cooler Master Hyper 212 for the CPU but it was just BARELY too tall and the glass would touch the ends of the heat pipes. So I cut the tips down a couple of millimeters not realizing there was a pressurized gas inside the pipes, and destroyed the cooler. I had made and painted an additional panel to go between the cooler and the rear exhaust fan (see it in paint pics). I replaced the Hyper 212 with the DeepCool version that was slightly shorter but looked like it might have the same heat pipe dimensions and would work with the cover, but no such luck. I ran out of time and didn't get to make another panel to fit this cooler.
Considering it all I am somewhat satisfied with how it turned out. The boys were super excited and that's what really counts

Color(s): Black Blue White
RGB Lighting? No
Theme: Comics
Cooling: Air Cooling
Size: Micro-ATX
Type: General Build
Contests
This build participated in 1 contest.
| Rank | Contest | Date |
|---|---|---|
| #63 | Build of the Month - December 2020 | ended |
Hardware
Motherboard
$ 118.02
Memory
$ 264.99
Graphics
$ 229.90
Storage
$ 42.99
PSU
$ 145.00
Cooling
$ 22.99
Estimated total value of this build:
$ 1,097.94
Approved by: