


Most Recent Build
Best Build
AD:


Projeto Titanfall
AD:
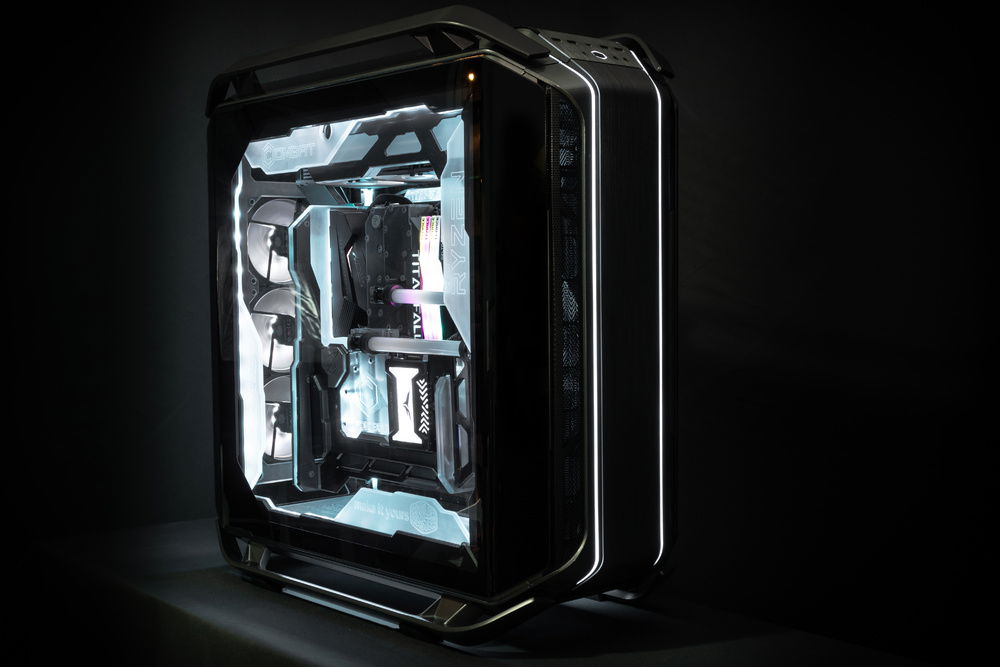
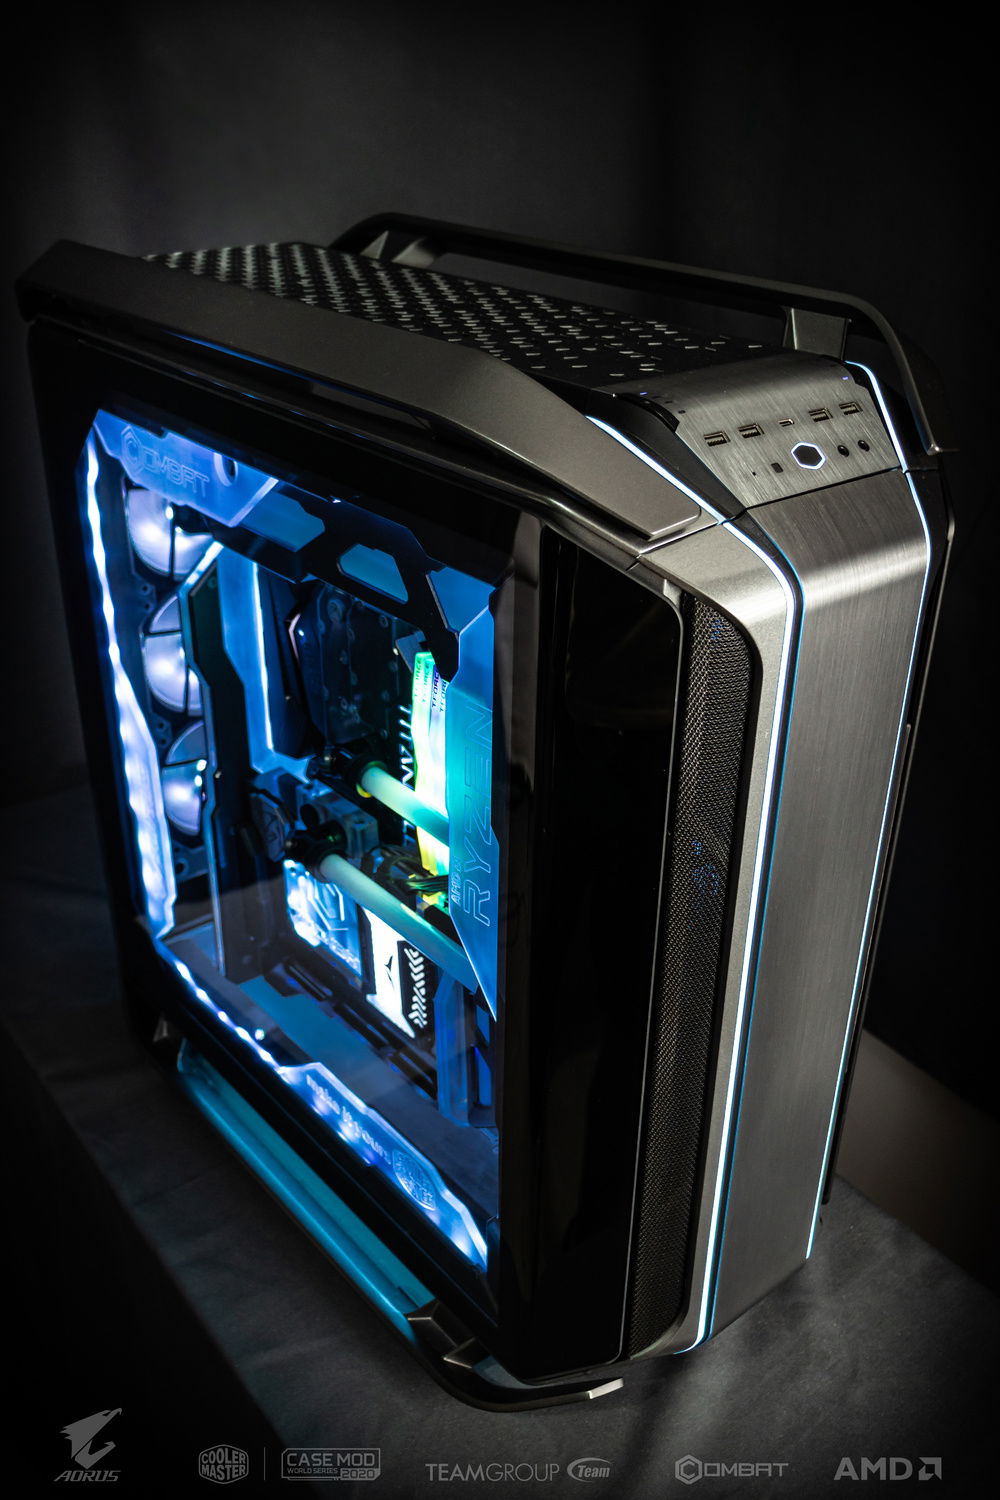
Project Titanfall I always liked the design of the titanfall game, the futuristic design and the diagonal lines call my attention then after observing the drawings of the community game to build possible projects. I work in the following way, whenever I'm looking at something, always wondering if it would match a project I'm about to do.When possible, I prefer to do the structural drawing when I already have the pieces, because this way I can take the measurements and I can in the sketchup get closer to the reality that the project will become. Luckily for me, I got all the pieces of the project well before his planned delivery. In this way, I was able to take measurements of all the components, so that I could assemble the drawing. Specification of the parts that were used in the project:
Aorus Elite X570 motherboard
AMD Ryzen 5 2600 processor
Galax HOF 1080ti video card
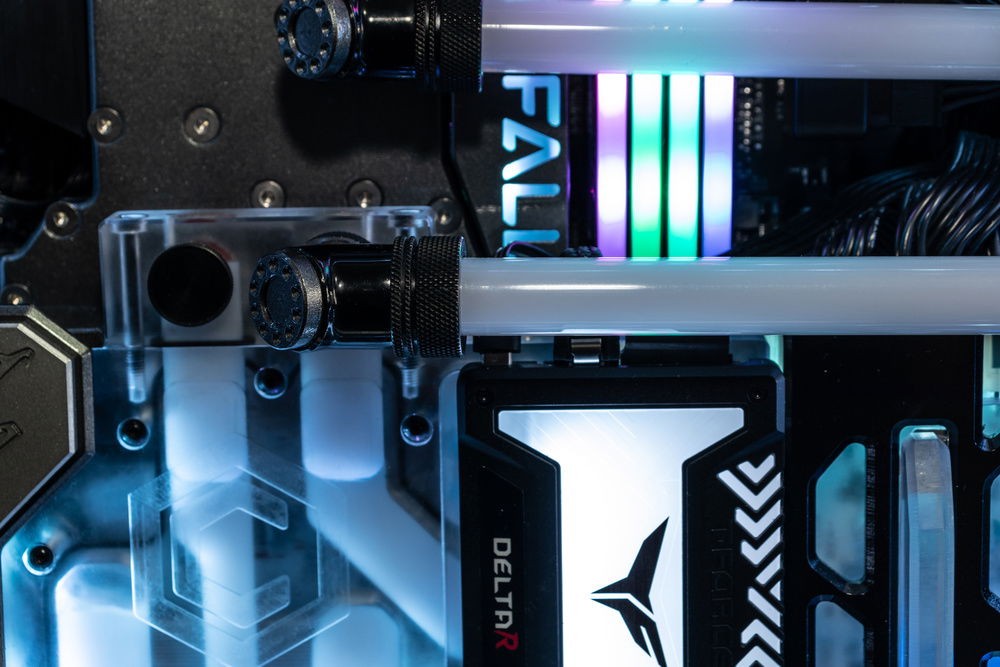
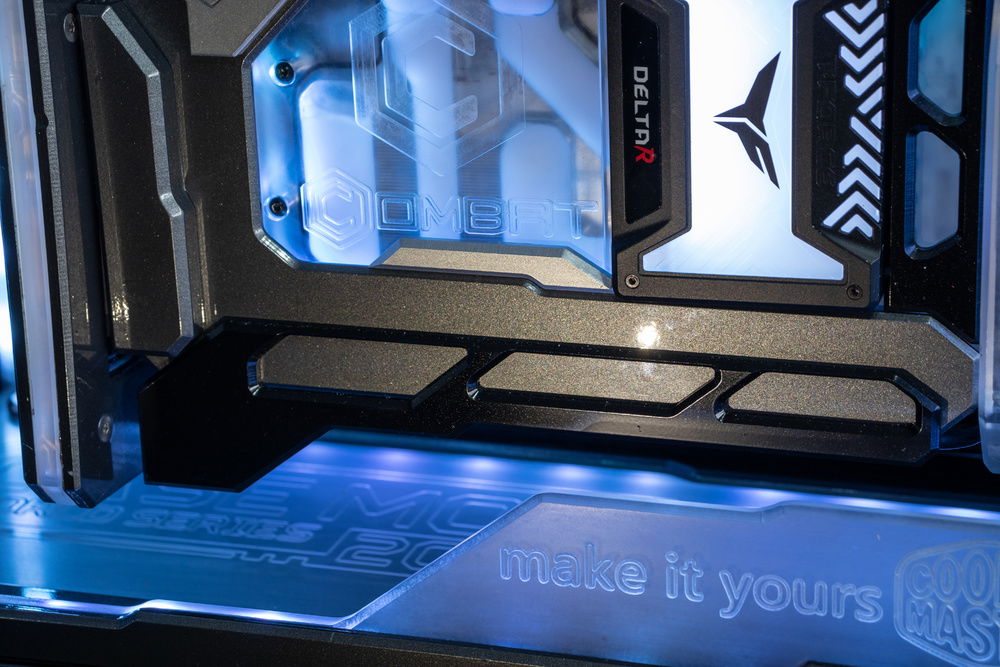
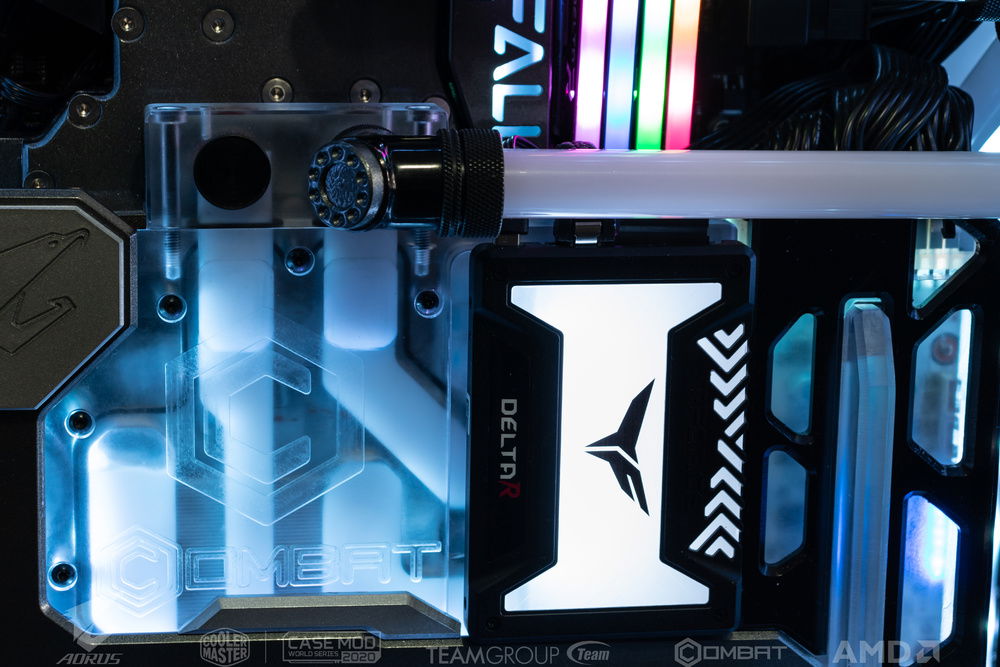
Ssd Delta R Team Group
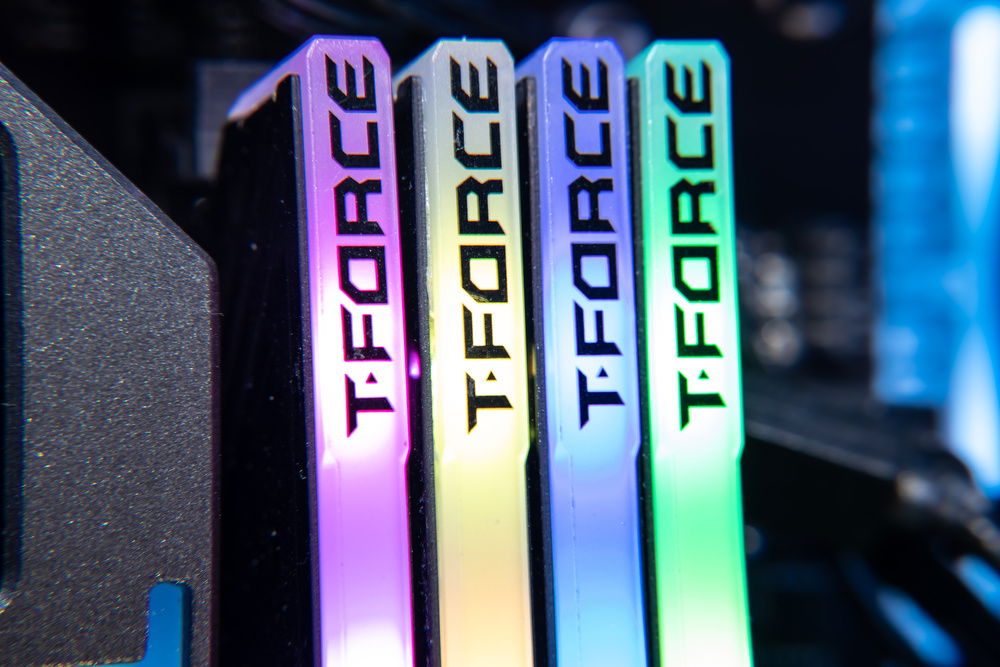
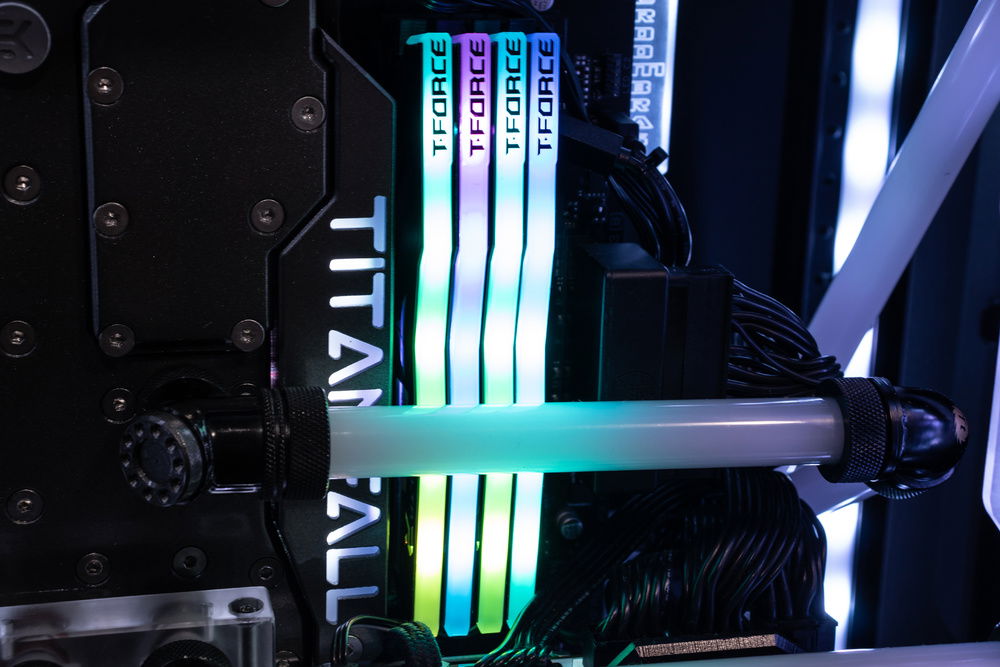
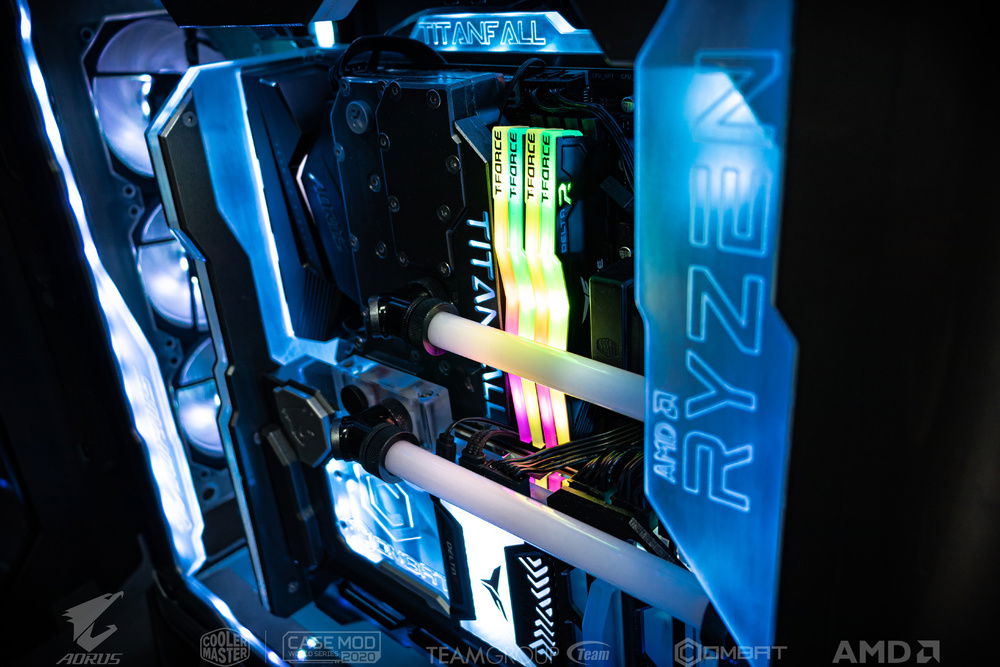
T Force Team Group Memories 32gb (4x8gb)
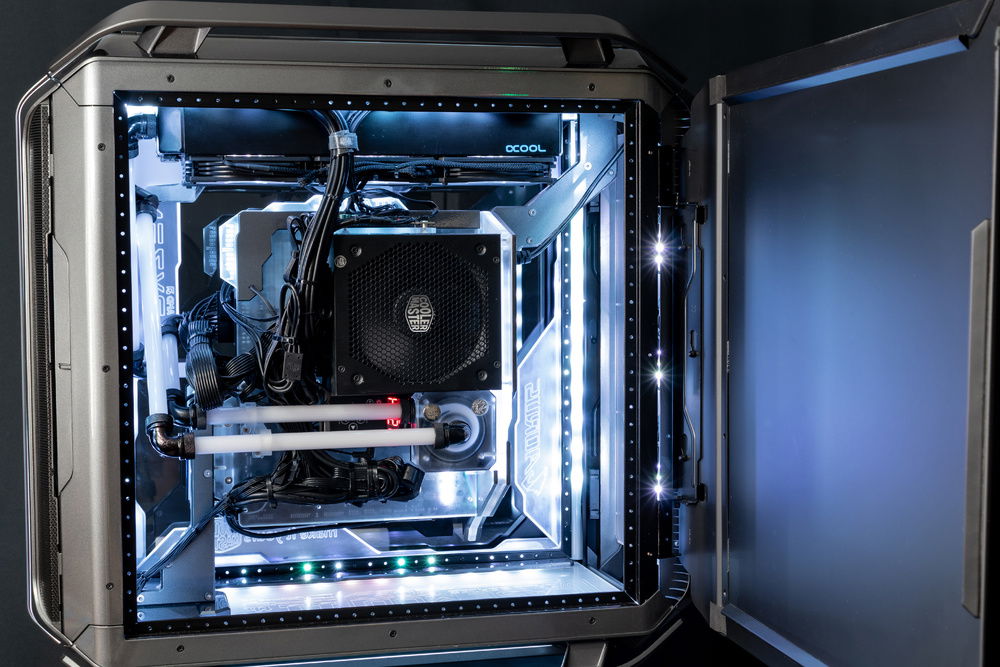
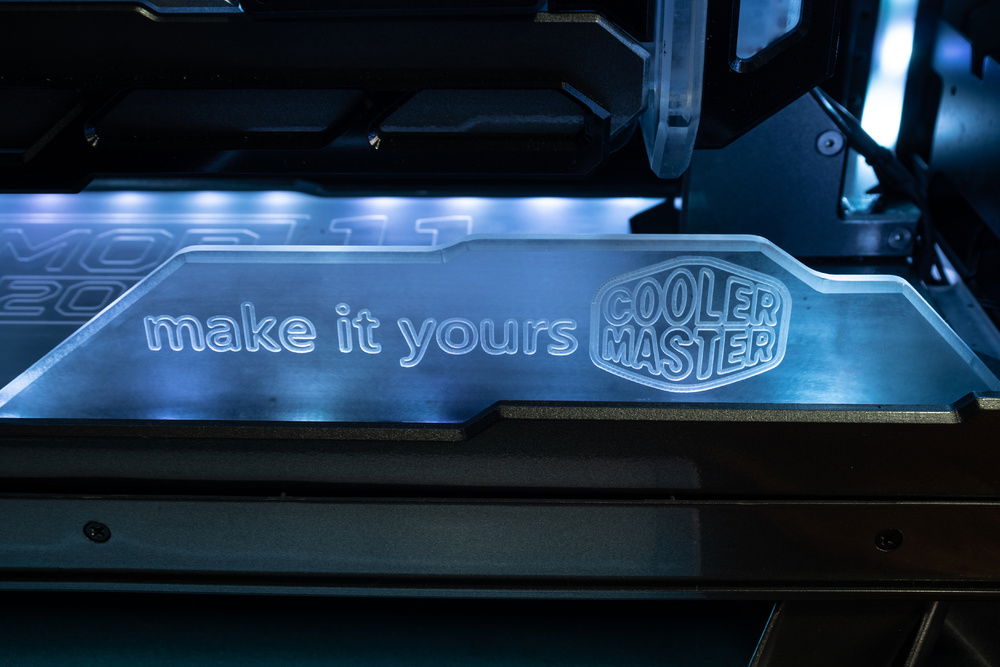
Cooler Master 850w 80 Plus Gold Full Modular Power Supply v850
Alphacool NexXxoS UT60 Full Cooper 360 mm radiator
6x Fans Cooler Master 120mm Masterfan SF120R ARGB
2x Cooler Master 140mm Fans Fittings of various brands (scarce in brazil)
Block CPU Barrow
Block GPU Bitspower
Pump Bitspower
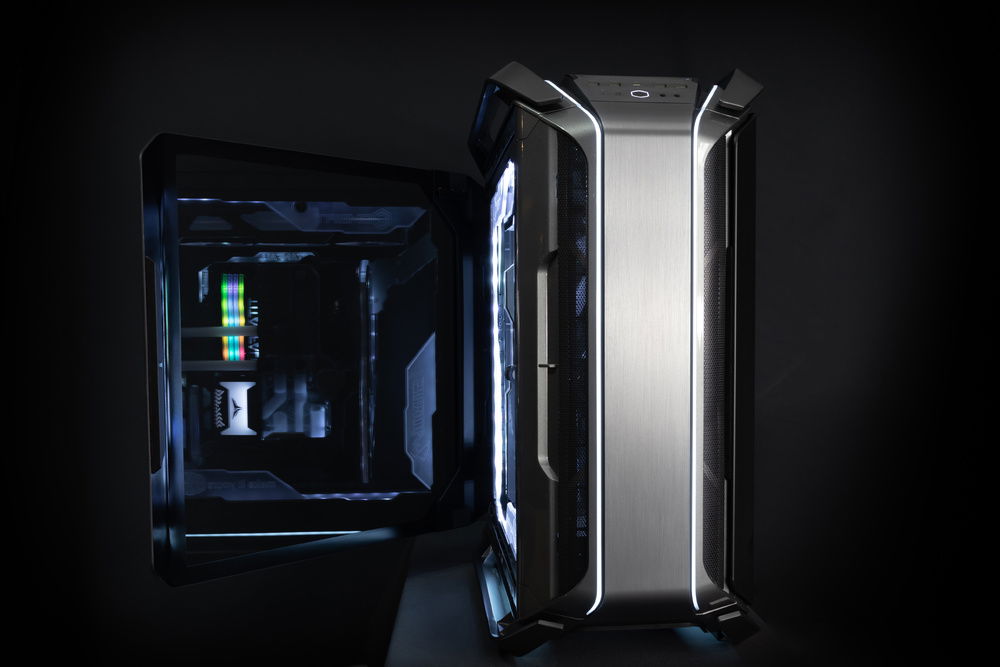
Cooler Master Cosmos C700M Case
Custom reservoir.
When I put all these pieces together, I started putting together the project. Because there is no model on the internet and due to the difficulty of assembling the case design, I used the main structure only as a parameter to observe how the project would look, I disassembled the entire cabinet to know its details as well as the possibilities of assembly.
I ended up opting for the second one because it would not be as polluted as the other one Besides believing that it combines more with the external design.
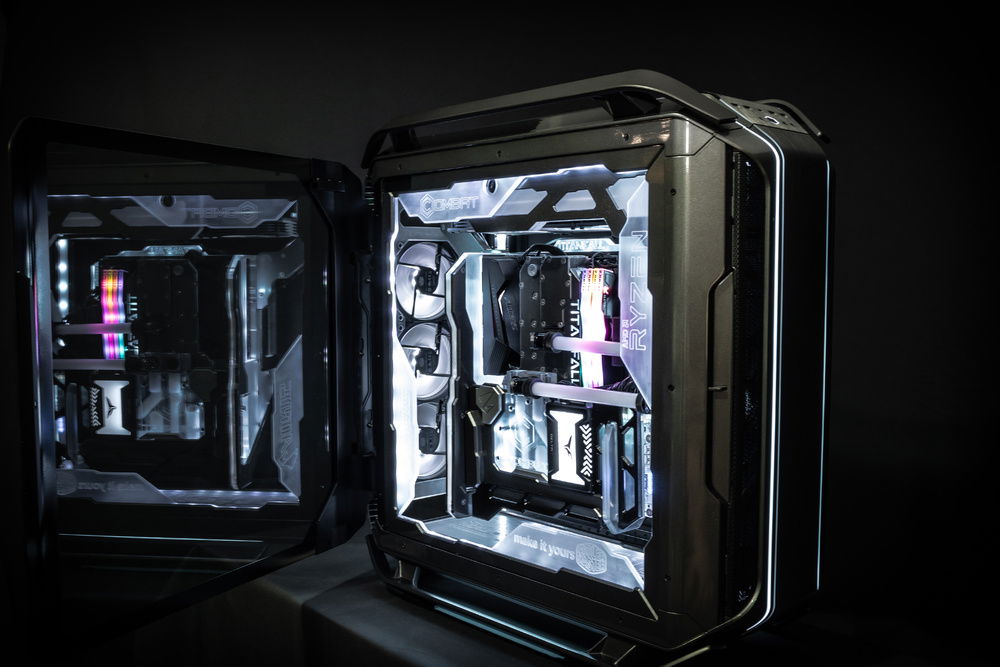
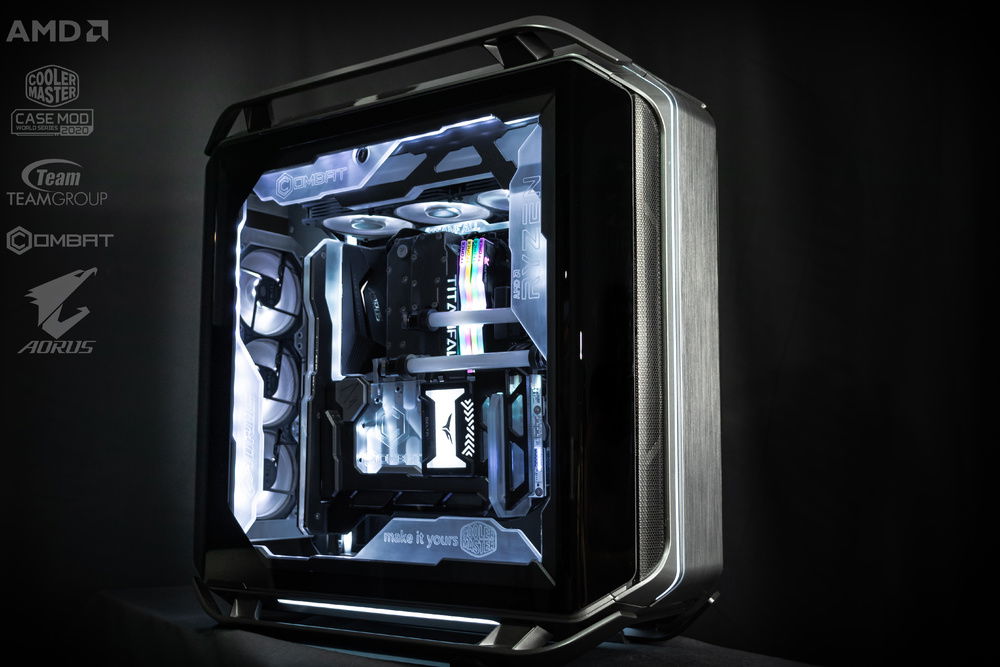
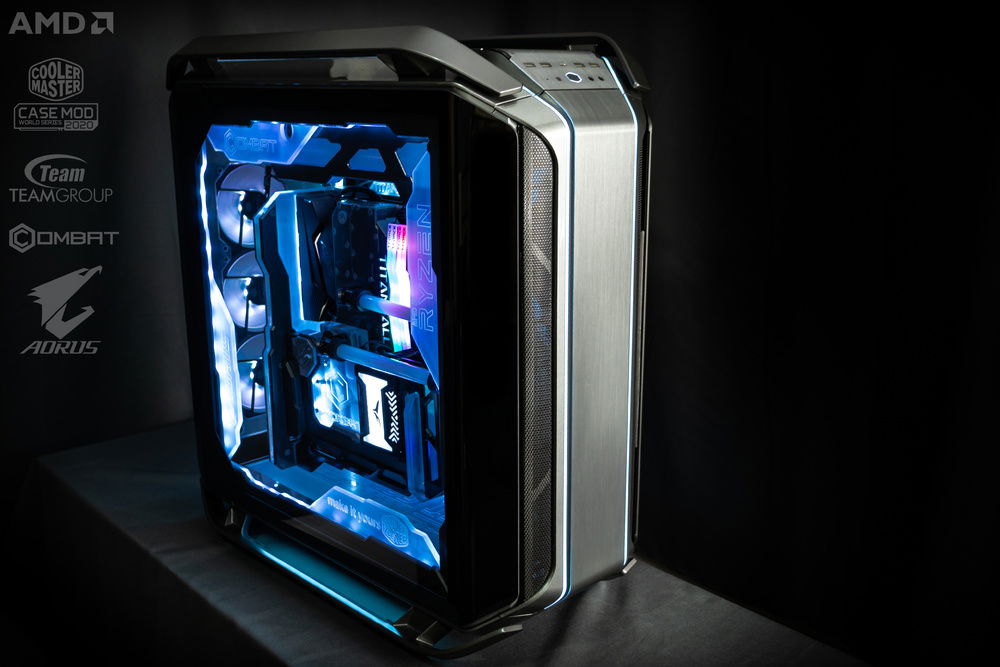
The idea of the design was as if the components concentrated in the middle of the project gave the idea that there is the main component of the machine, which is kkkk. when I drew, I tried to make something that goes under the impression that it would be floating, so to support the main part I used only two supports, one in the lower right corner and the other in the upper left corner. as the pictures exposed above.
Well, as I drew as I would more or less like, I started designing piece by piece, being precise in its measurements, and as I was cutting the main bases, I was already assembling the pieces.
I used only acrylic for the construction of the structure. I used plates of 15, 10, 5 and 3 millimeters.
Luckily for me, the motherboard had an exact model for sketchup. So it was easier to get a real sense of how it would look in the surroundings.
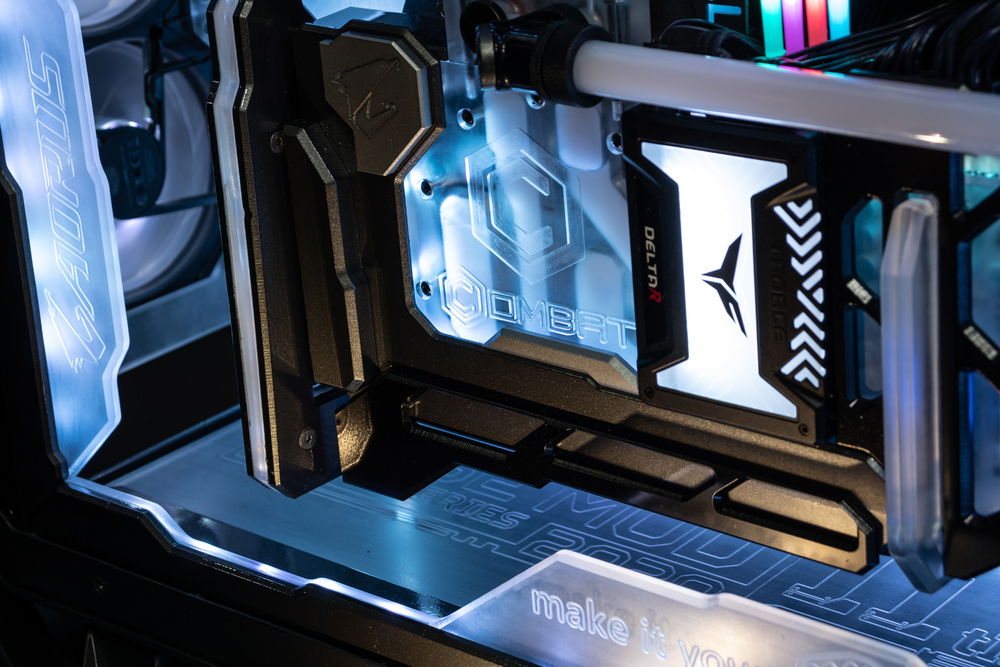
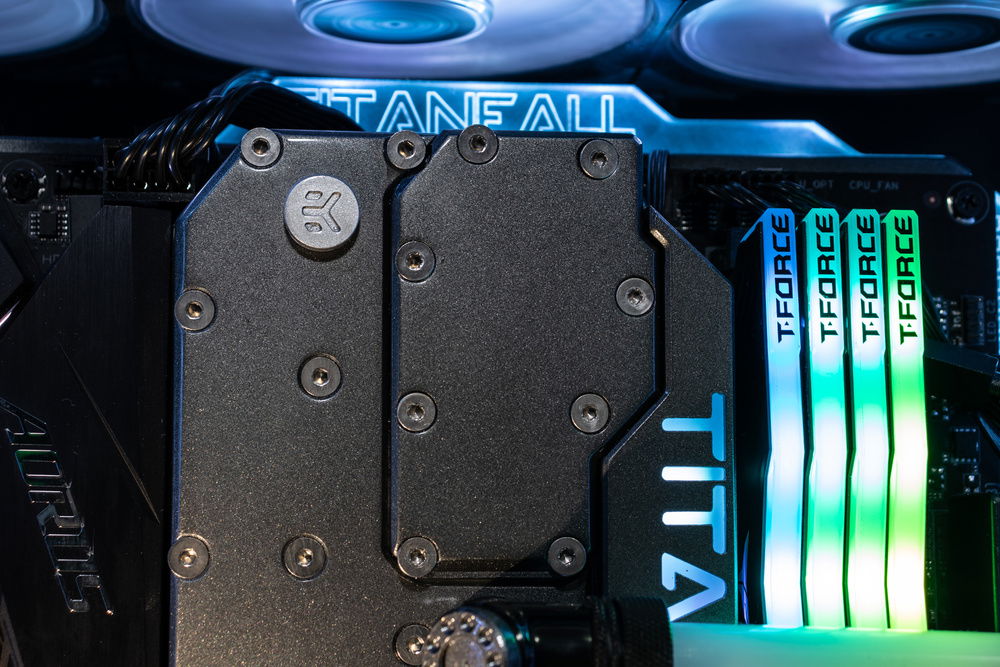
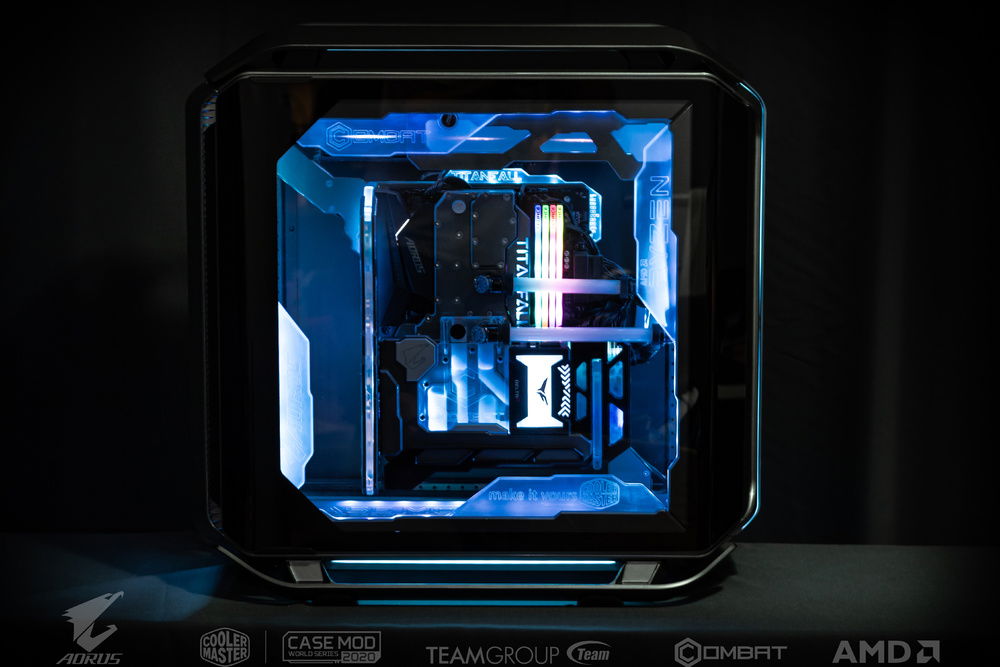
After the basic design of the project was ready, the first thing I suggested to do was a different CPU block, for that I used a barrow block. No use gentlemen, I do not accept the simplicity kkkk I really always want to show something different. Lately there are some models of blocks that in addition to cooling the processor, it also performs the cooling of some components on the motherboard. But still wanted a bigger challenge kkkk, why not a block that cools the CPU the components the SSD m.2 and its output is directly to the entrance of the GPU Block, it would be incredible right?
Modesty part I must say that these things require great precision and a certain level of madness, in case something goes wrong, there is a great possibility of burning some component or even losing some part.
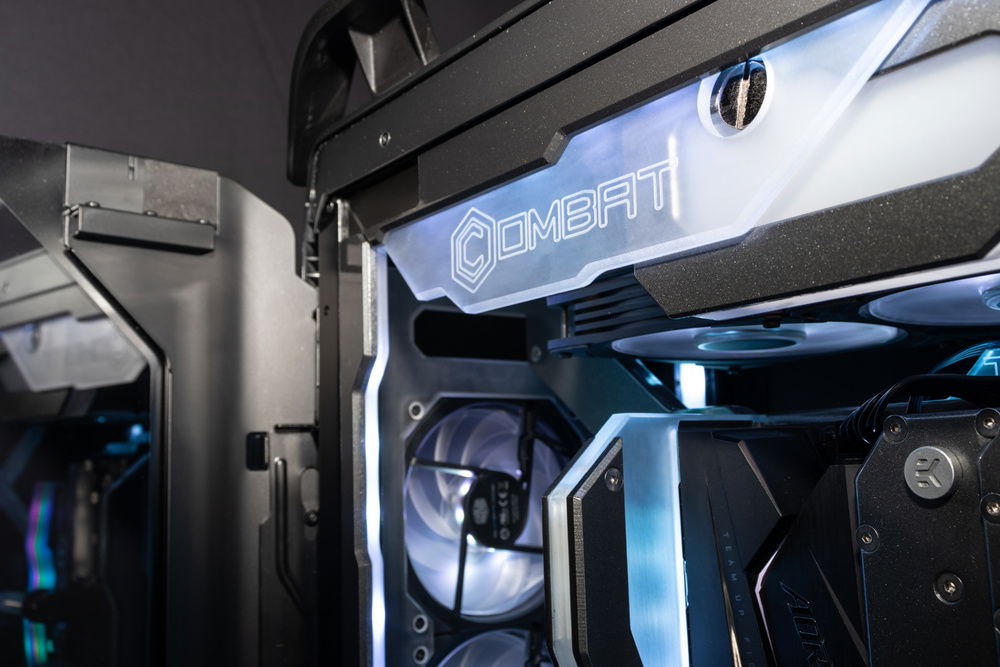
I designed the piece taking into account the aspect of the game.
Here are the photos to note here that for every drawing a cutting plan has to be made, this is a hassle. Follow the block cutting plans and I can point out that there were more, these are the ones that were saved.
I used the Barrow CPU block, I took the measurements of the surroundings and placed it very tightly in a 15mm thick environment, then I used a 10mm acrylic as the surrounding cover, I made another cover that redirects the liquid that comes out of the block to pass this surrounding and cooling the motherboard components and then cooling the ssd m.2 after a lot of work, I managed to assemble it, hear several mishaps, but in the end everything went well. I used 5mm copper sheets to make the cutouts that would cool the components, taking the measurements, the sheets had to decrease their thickness, and I lost a 4mm cutter in the cutouts, I still understand how the material should be cut, for via doubts I tried to do it in the safest way. Unfortunately my CNC Router is not one of the best ones causing a lot of inconvenience during the cuts.
During the cutting process I broke the acrylic piece of the original block, I had to make another one. Sad and laborious lol.
To cut the copper I put the following speeds.
I used a straight cutter with 4 cuts for carbide, the speed was around 25000 rpm, movement z 400 mpm (millimeters per minute) movement x / y 600 mpm, each step of 0.2 mm all this with the nebulizer connected to cool the cutter and workpiece. I reinforce that all of these are ways that I use through error and trial, if someone can give me tips to do that I appreciate it. To fix the copper piece I use screws on the sacrifice board and also double-sided tape.
For the cutting of acrylic for roughing I usually use double-sided tape only. Use 4mm helical cutter (suitable for acrylic) with a speed of 2300 rpm, speed. y: 1200 speed. x / z: 1500 with 1mm pitch. After roughing, use speed: 23000 rpm, with speed. y 600 and speed. x / Y: 800 with 0.5 mm pitch.
I use the sketchup program for the cuts, it has the sketchucam that makes it possible to use the drawing on the cut lines, building the g code for the cut. The program that controls the CNC router is mach3.
Lately I have been using 12mm stainless steel flat head countersunk screws. The head is 8 mm in diameter, so I drill a countersunk hole with a diameter of 8.5 mm.
When I make a rubber seal, I usually leave a 40 mm gap between one screw and another. I use 2.5 mm diameter rubber for the seal. I use a 1.8 mm deep groove and a 2.5 laterality groove. This groove is at least 1.5 mm away from the groove through which the liquid passes.
I repeat that I suffer with my Router because no matter how much I adjust it and the sacrifice board sometimes cuts the depth of the grooves with different measures, sometimes it reaches the fence.
For this project, the sealing of the bottom part was done differently, due to lack of space, I bought a 1mm thick rubber and made a cut of the size of the piece in the cut that comes in contact with the acrylic. Until it closed well. However, in order not to take the risk, I put glue on it.
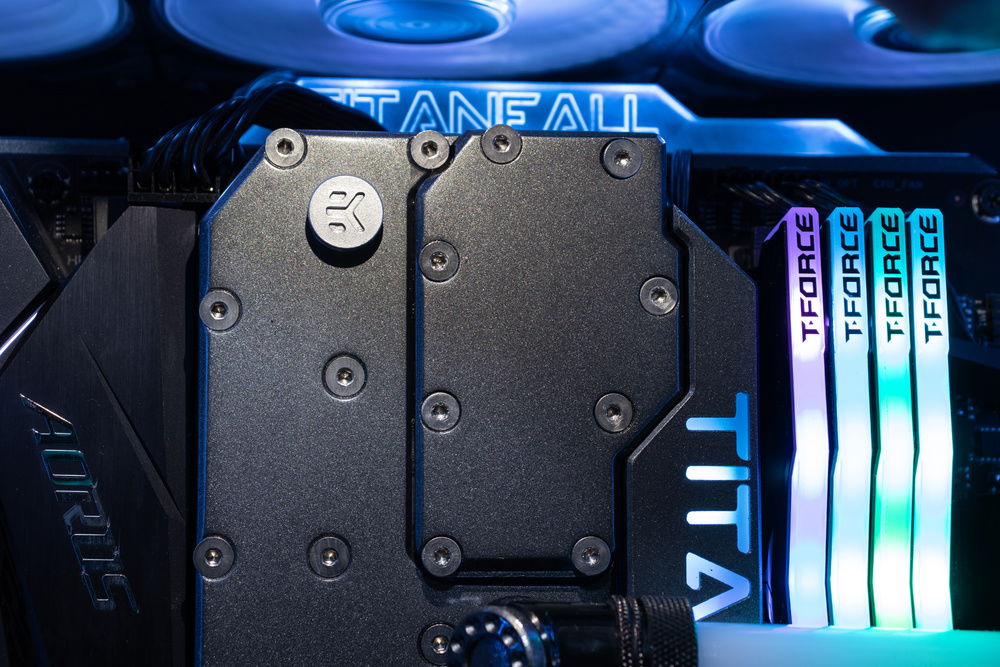
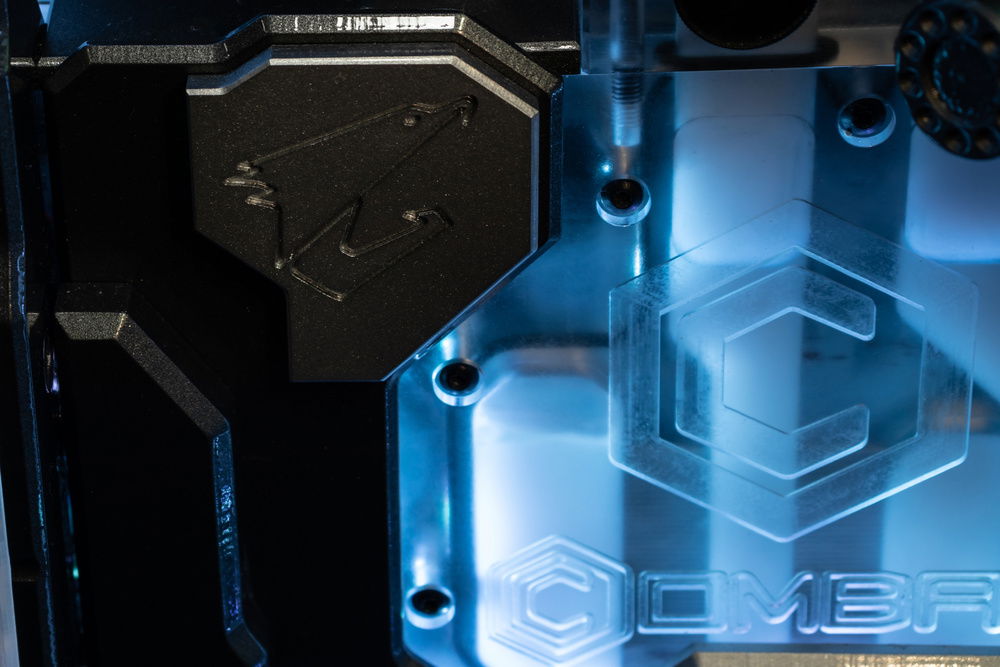
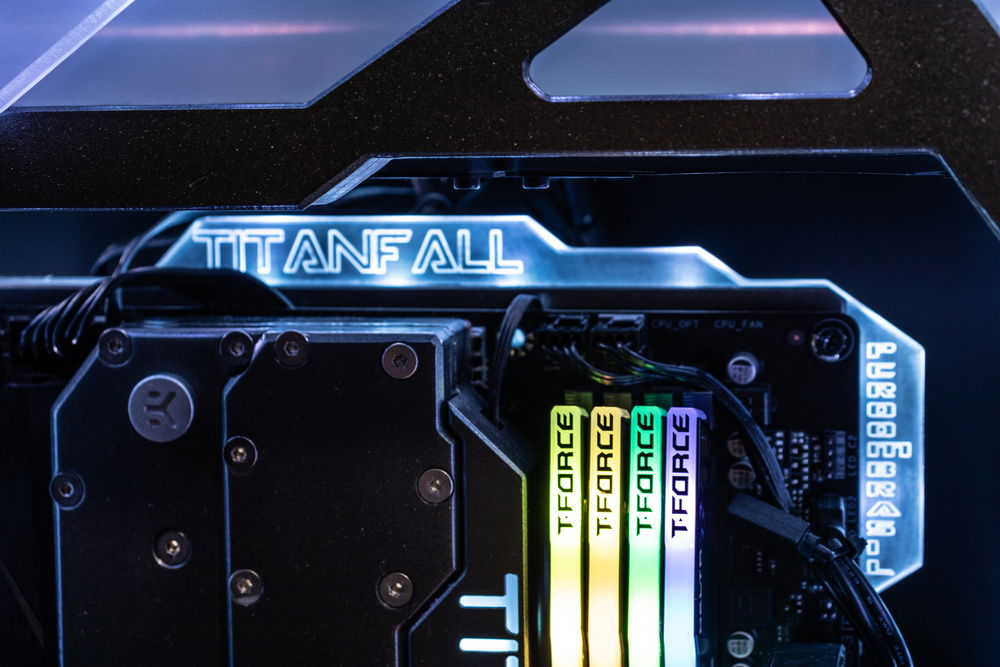
So the Block was differentiated, lol, as a way to thank the support that the company EK has given me, I put her Symbol in this block kkkkk.
For the video card I used my Galax warrior, to be honest I couldn't get sponsorship for the video card so I used the one I use on my private PC. But I customized it to put the project's sponsors around her.
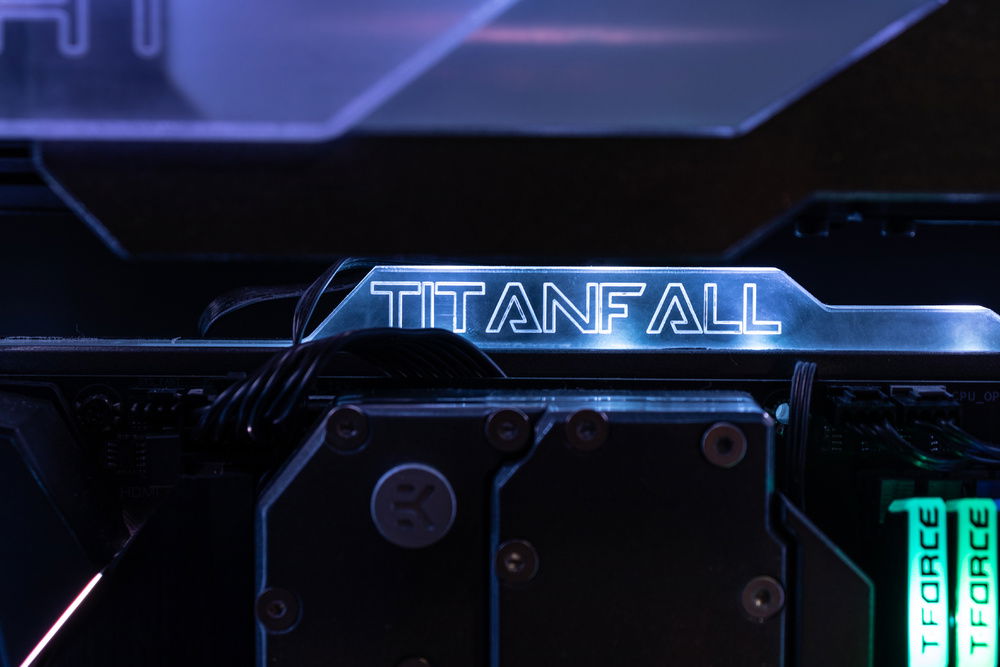
After cutting everything assembled that I installed, I had to disassemble it twice to get the details right. But in the end it worked. I decided to put the titanfall script in the block, I found it very good.
From there I derived to make a structure that supports the pieces, as the project would be centralized I would have to make two pieces that fit perpendicularly to fix the pieces. And two other pieces to hold the whole. So it was like this:
This is where the details come in, so that I could place the LED strips I had to study the positions so that they did not appear and their wires did not appear, as I said, I wanted to keep the project very clean.
Unfortunately Sketchucam is not yet optimized, but as it is the only program I use to make the cuts, it had to be himself, this creates a lot more work. The whole edge was cut with an ACM cutter with a 90º 6mm shank, the finish is very good. I used the same speed for finishing.
On the acrylic plate that I installed the motherboard we are part of the central hole of the block as well as for the passage of some wires, on that plate the motherboard was fixed at the source, through it the video card holder was also installed it was in it that the two acrylic supports that are attached to the structure of the cabinet were fixed.
It should be noted that I usually do the project in 3D, but many details are carried out and measured on the spot. Especially because many times during editing I change my mind, having to redo certain things. I'm very indecisive kkk.
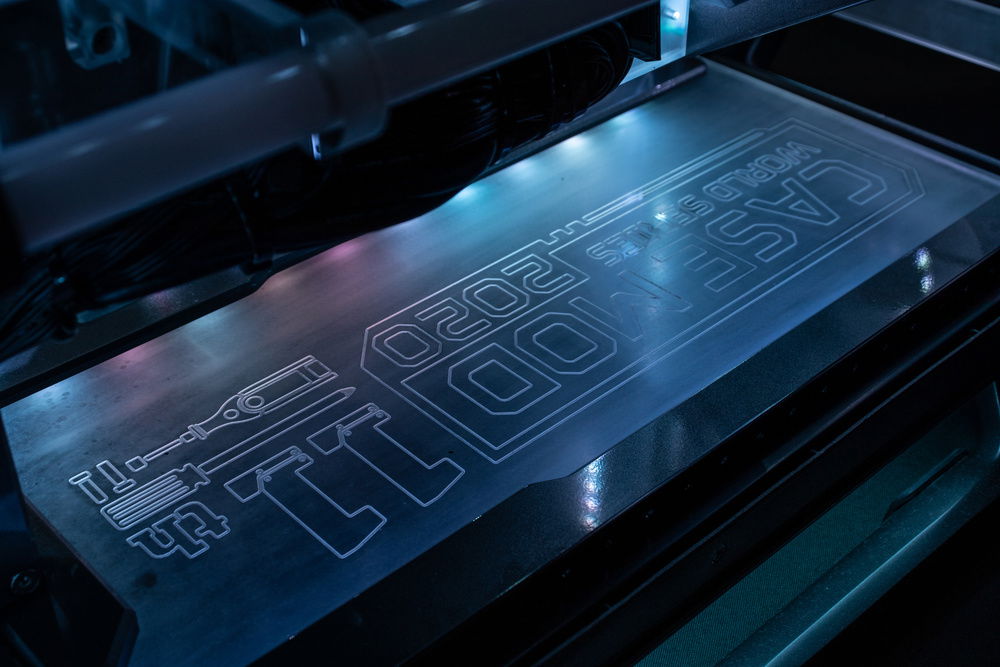
On the base I put RGB digital LED strip 6803 with controller, of these models that serve to decorate an environment. The good thing is that it is cheap and I have up to 328 effects.
For better dispersion of acrylic lighting, I used sandpaper 320.
Whenever you put the leds on, understand that there is a middle ground, if you touch the acrylic it will show the points of light, if you leave it it will not illuminate enough, so to help a little in this propagation of light, I painted it white around where it is hidden or where it wants to dissipate, this increases the hue a lot.
So, for the parts that covered the LEDs, I used white acrylic.
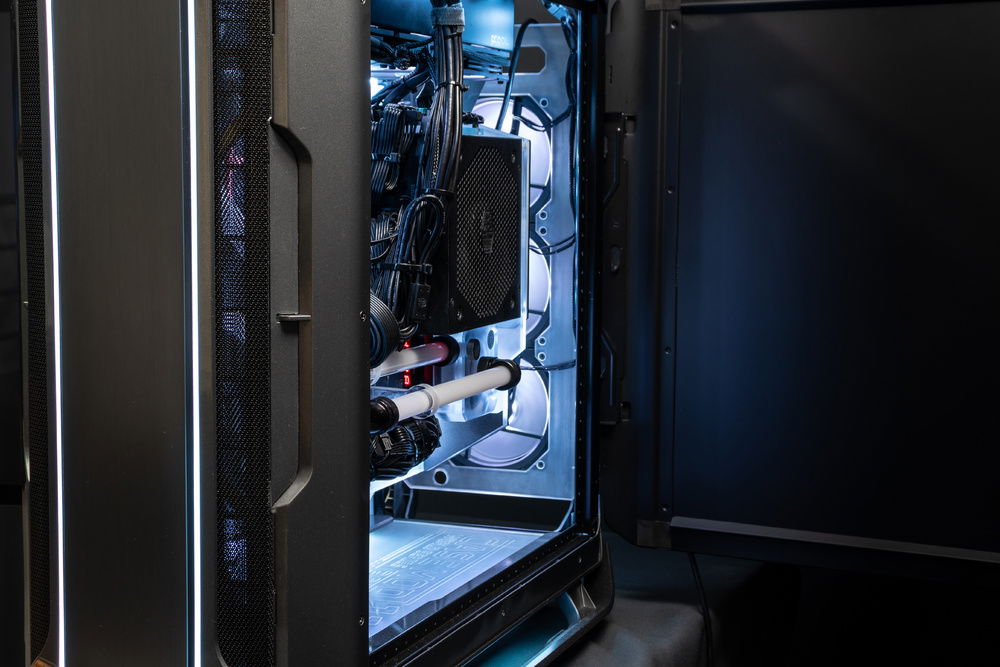
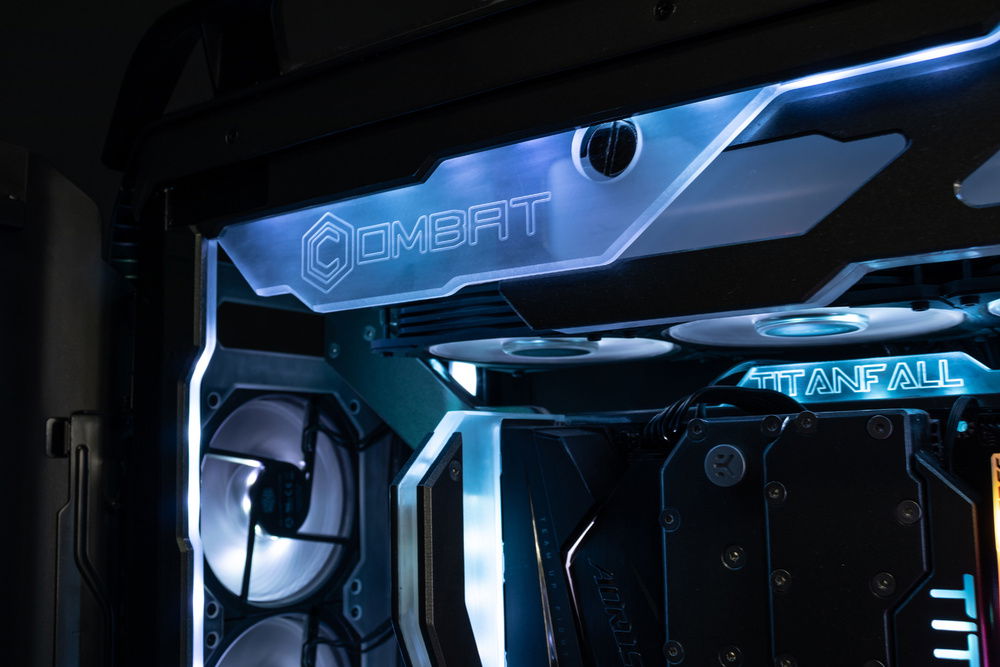
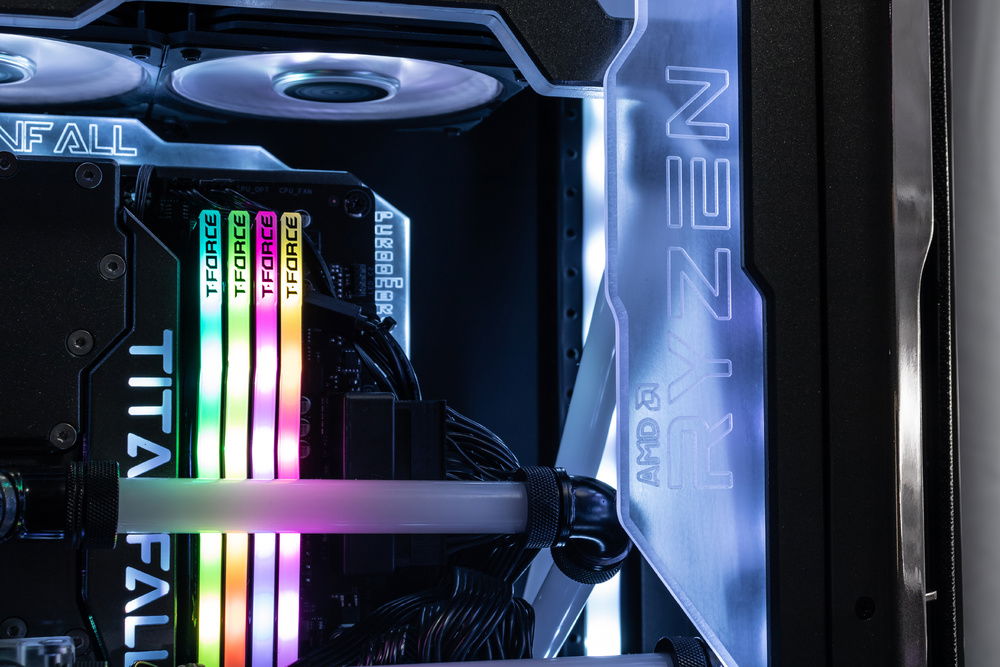
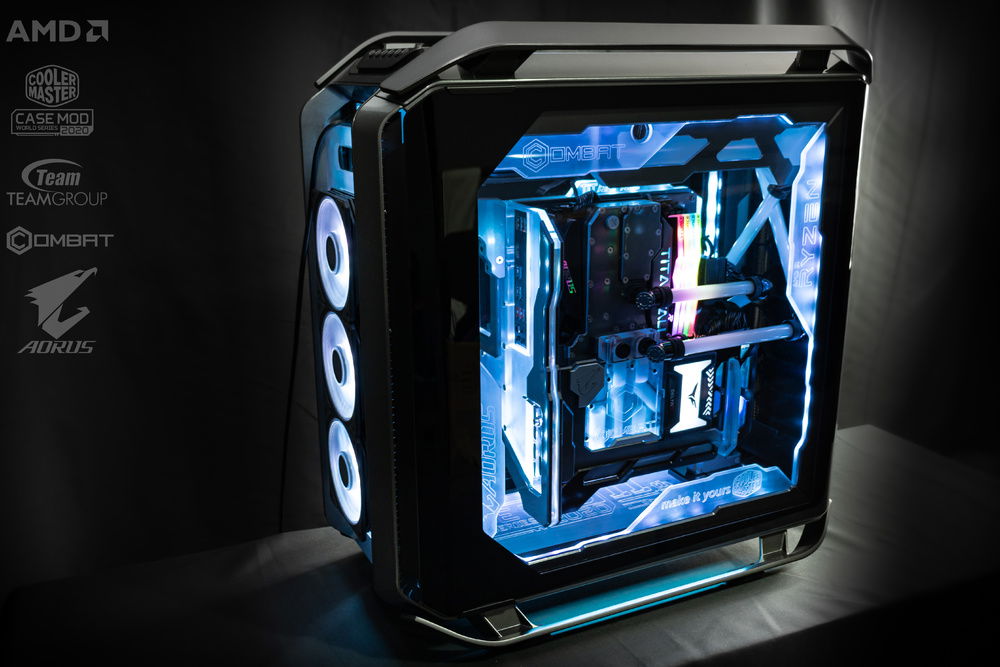
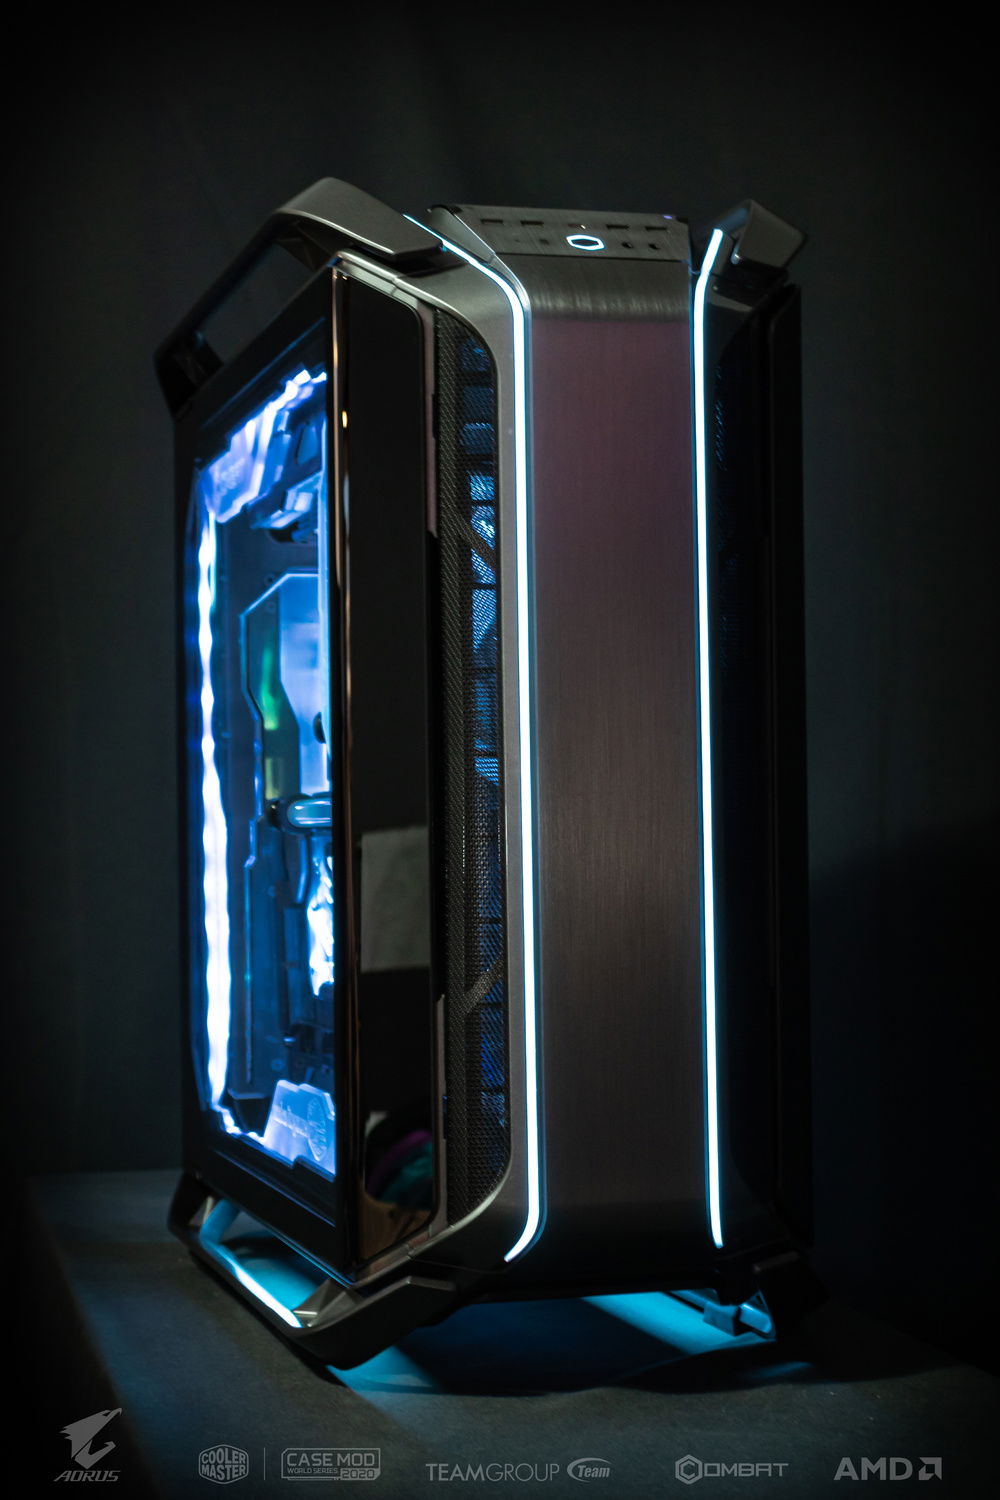
In this project I imagined that it would have to be very clear inside, so I installed LED strips in the structure's columns with a light scattering cover.
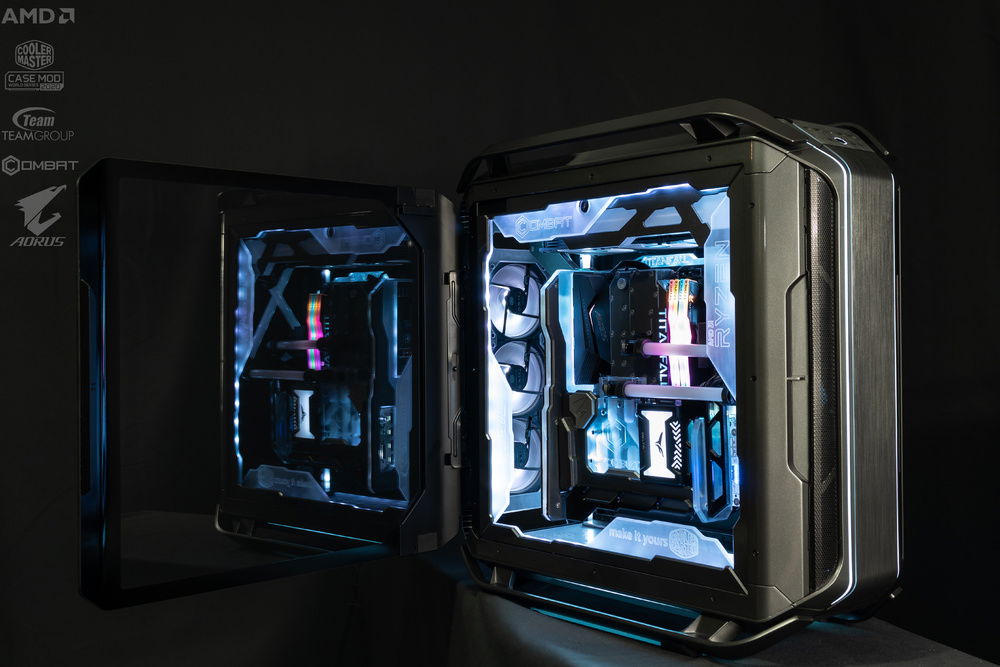
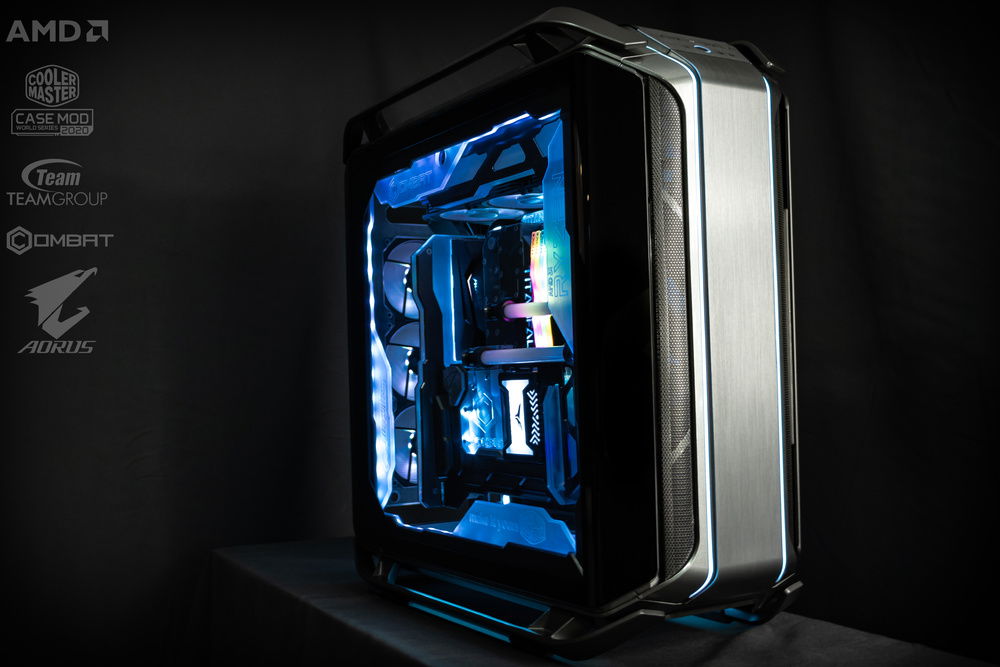
In the front I made some cutouts of pieces that fit perfectly in the front, I placed two acrylic sheets, the first to illuminate the sponsors, the second to give more prominence to the design and also to cover the leds that run throughout the front. Now that the spaces have been installed and determined, I started to assemble the main part. After positioning the parts and doing the function test, I placed the main structure assembled with the external structure also assembled, this helps in the final visualization of the project.
For those who think the projects are simple take a look at how much design I had to do in 3D. I comment that it was much more than that, but it serves as a sample.
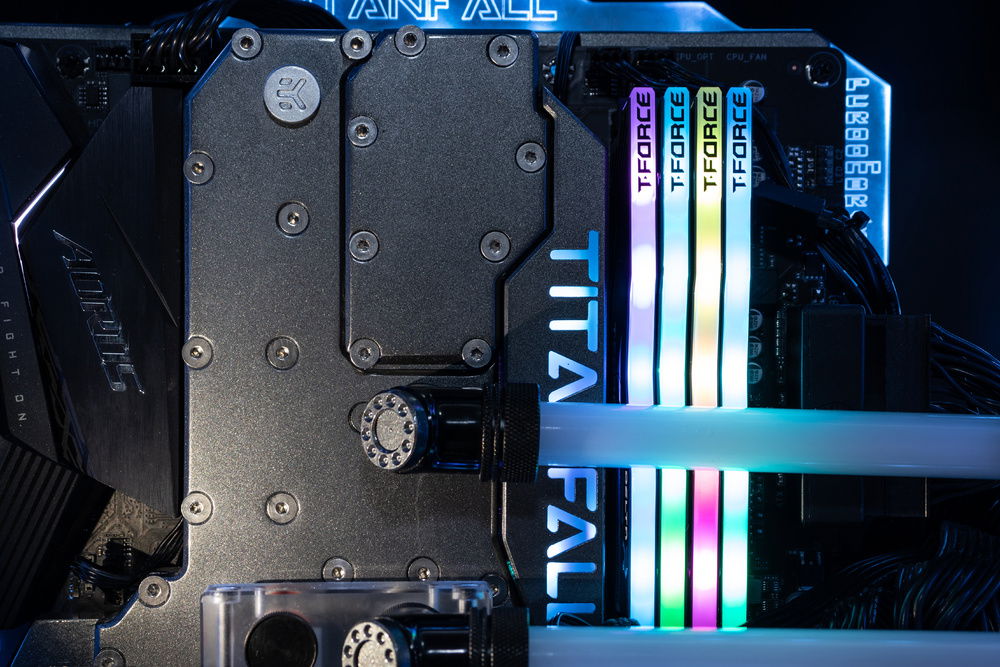
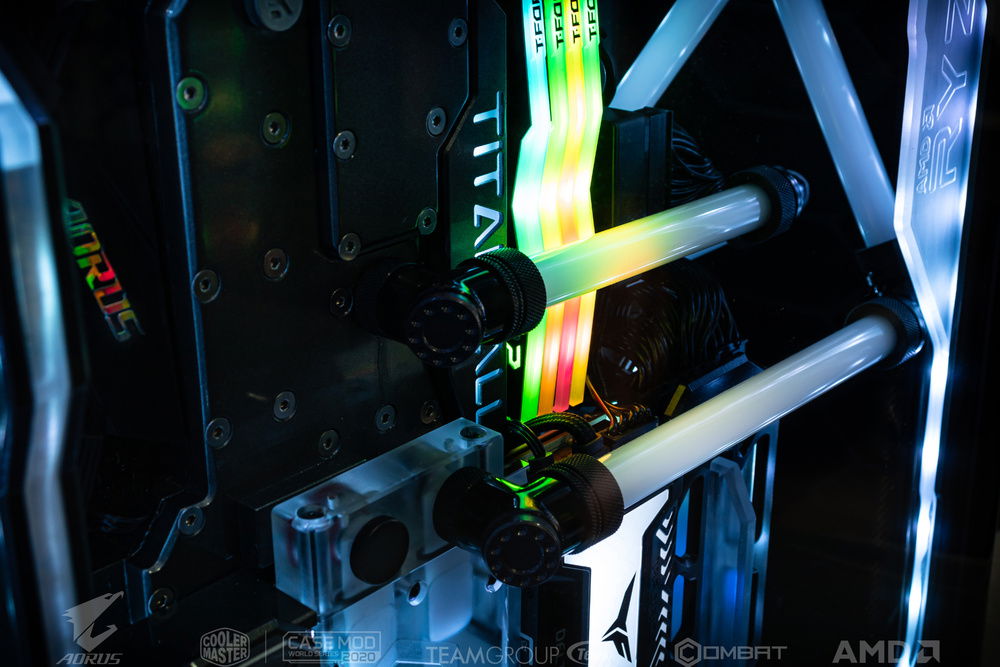
So, I started hitting the tubes as well as their supports. There I realized that installing the tank on the top would give a much superior appearance and so I did.
After a good part of the parts already prepared, I manufactured it to assemble and test its functionality.
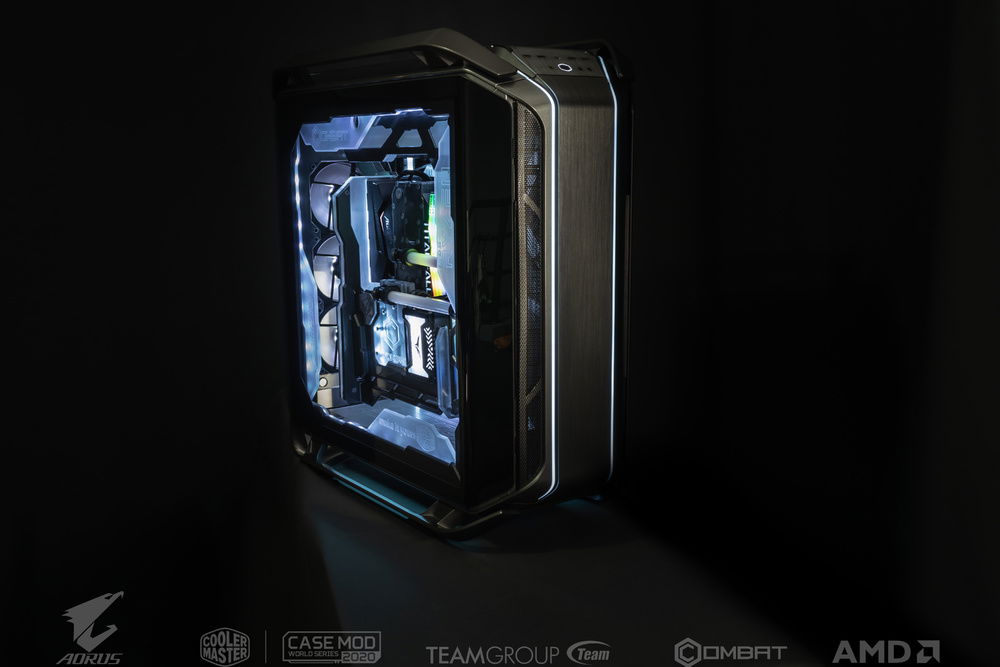
When I looked at the assembled cosmopolitan pieces to imagine the best color for the project and I came to the conclusion that nothing better than a contrast of gray with white fluid. The LEDs I planned to make all white in color along with the other components that are RGB.
Finally, I organized the cables, in this project I didn't want to use a sleeve, using normal power cables would bring the subject closer.
Anyway I finished the job I hope you like it.
After cutting everything assembled I installed, I had to disassemble twice to get details right. But in the end it worked. I decided to put the titanfall script in the block, I thought it was very good.
After that I started to make the structure that supports the pieces, as the project would be centralized I would have to make two pieces that fit perpendicularly to fix the pieces. And two other pieces to hold the whole. So it was like this:
Aorus Elite X570 motherboard
AMD Ryzen 5 2600 processor
Galax HOF 1080ti video card
Ssd Delta R Team Group
T Force Team Group Memories 32gb (4x8gb)
Cooler Master 850w 80 Plus Gold Full Modular Power Supply v850
Alphacool NexXxoS UT60 Full Cooper 360 mm radiator
6x Fans Cooler Master 120mm Masterfan SF120R ARGB
2x Cooler Master 140mm Fans Fittings of various brands (scarce in brazil)
Block CPU Barrow
Block GPU Bitspower
Pump Bitspower
Cooler Master Cosmos C700M Case
Custom reservoir.
When I put all these pieces together, I started putting together the project. Because there is no model on the internet and due to the difficulty of assembling the case design, I used the main structure only as a parameter to observe how the project would look, I disassembled the entire cabinet to know its details as well as the possibilities of assembly.
I ended up opting for the second one because it would not be as polluted as the other one Besides believing that it combines more with the external design.
The idea of the design was as if the components concentrated in the middle of the project gave the idea that there is the main component of the machine, which is kkkk. when I drew, I tried to make something that goes under the impression that it would be floating, so to support the main part I used only two supports, one in the lower right corner and the other in the upper left corner. as the pictures exposed above.
Well, as I drew as I would more or less like, I started designing piece by piece, being precise in its measurements, and as I was cutting the main bases, I was already assembling the pieces.
I used only acrylic for the construction of the structure. I used plates of 15, 10, 5 and 3 millimeters.
Luckily for me, the motherboard had an exact model for sketchup. So it was easier to get a real sense of how it would look in the surroundings.
After the basic design of the project was ready, the first thing I suggested to do was a different CPU block, for that I used a barrow block. No use gentlemen, I do not accept the simplicity kkkk I really always want to show something different. Lately there are some models of blocks that in addition to cooling the processor, it also performs the cooling of some components on the motherboard. But still wanted a bigger challenge kkkk, why not a block that cools the CPU the components the SSD m.2 and its output is directly to the entrance of the GPU Block, it would be incredible right?
Modesty part I must say that these things require great precision and a certain level of madness, in case something goes wrong, there is a great possibility of burning some component or even losing some part.
I designed the piece taking into account the aspect of the game.
Here are the photos to note here that for every drawing a cutting plan has to be made, this is a hassle. Follow the block cutting plans and I can point out that there were more, these are the ones that were saved.
I used the Barrow CPU block, I took the measurements of the surroundings and placed it very tightly in a 15mm thick environment, then I used a 10mm acrylic as the surrounding cover, I made another cover that redirects the liquid that comes out of the block to pass this surrounding and cooling the motherboard components and then cooling the ssd m.2 after a lot of work, I managed to assemble it, hear several mishaps, but in the end everything went well. I used 5mm copper sheets to make the cutouts that would cool the components, taking the measurements, the sheets had to decrease their thickness, and I lost a 4mm cutter in the cutouts, I still understand how the material should be cut, for via doubts I tried to do it in the safest way. Unfortunately my CNC Router is not one of the best ones causing a lot of inconvenience during the cuts.
During the cutting process I broke the acrylic piece of the original block, I had to make another one. Sad and laborious lol.
To cut the copper I put the following speeds.
I used a straight cutter with 4 cuts for carbide, the speed was around 25000 rpm, movement z 400 mpm (millimeters per minute) movement x / y 600 mpm, each step of 0.2 mm all this with the nebulizer connected to cool the cutter and workpiece. I reinforce that all of these are ways that I use through error and trial, if someone can give me tips to do that I appreciate it. To fix the copper piece I use screws on the sacrifice board and also double-sided tape.
For the cutting of acrylic for roughing I usually use double-sided tape only. Use 4mm helical cutter (suitable for acrylic) with a speed of 2300 rpm, speed. y: 1200 speed. x / z: 1500 with 1mm pitch. After roughing, use speed: 23000 rpm, with speed. y 600 and speed. x / Y: 800 with 0.5 mm pitch.
I use the sketchup program for the cuts, it has the sketchucam that makes it possible to use the drawing on the cut lines, building the g code for the cut. The program that controls the CNC router is mach3.
Lately I have been using 12mm stainless steel flat head countersunk screws. The head is 8 mm in diameter, so I drill a countersunk hole with a diameter of 8.5 mm.
When I make a rubber seal, I usually leave a 40 mm gap between one screw and another. I use 2.5 mm diameter rubber for the seal. I use a 1.8 mm deep groove and a 2.5 laterality groove. This groove is at least 1.5 mm away from the groove through which the liquid passes.
I repeat that I suffer with my Router because no matter how much I adjust it and the sacrifice board sometimes cuts the depth of the grooves with different measures, sometimes it reaches the fence.
For this project, the sealing of the bottom part was done differently, due to lack of space, I bought a 1mm thick rubber and made a cut of the size of the piece in the cut that comes in contact with the acrylic. Until it closed well. However, in order not to take the risk, I put glue on it.
So the Block was differentiated, lol, as a way to thank the support that the company EK has given me, I put her Symbol in this block kkkkk.
For the video card I used my Galax warrior, to be honest I couldn't get sponsorship for the video card so I used the one I use on my private PC. But I customized it to put the project's sponsors around her.
After cutting everything assembled that I installed, I had to disassemble it twice to get the details right. But in the end it worked. I decided to put the titanfall script in the block, I found it very good.
From there I derived to make a structure that supports the pieces, as the project would be centralized I would have to make two pieces that fit perpendicularly to fix the pieces. And two other pieces to hold the whole. So it was like this:
This is where the details come in, so that I could place the LED strips I had to study the positions so that they did not appear and their wires did not appear, as I said, I wanted to keep the project very clean.
Unfortunately Sketchucam is not yet optimized, but as it is the only program I use to make the cuts, it had to be himself, this creates a lot more work. The whole edge was cut with an ACM cutter with a 90º 6mm shank, the finish is very good. I used the same speed for finishing.
On the acrylic plate that I installed the motherboard we are part of the central hole of the block as well as for the passage of some wires, on that plate the motherboard was fixed at the source, through it the video card holder was also installed it was in it that the two acrylic supports that are attached to the structure of the cabinet were fixed.
It should be noted that I usually do the project in 3D, but many details are carried out and measured on the spot. Especially because many times during editing I change my mind, having to redo certain things. I'm very indecisive kkk.
On the base I put RGB digital LED strip 6803 with controller, of these models that serve to decorate an environment. The good thing is that it is cheap and I have up to 328 effects.
For better dispersion of acrylic lighting, I used sandpaper 320.
Whenever you put the leds on, understand that there is a middle ground, if you touch the acrylic it will show the points of light, if you leave it it will not illuminate enough, so to help a little in this propagation of light, I painted it white around where it is hidden or where it wants to dissipate, this increases the hue a lot.
So, for the parts that covered the LEDs, I used white acrylic.
In this project I imagined that it would have to be very clear inside, so I installed LED strips in the structure's columns with a light scattering cover.
In the front I made some cutouts of pieces that fit perfectly in the front, I placed two acrylic sheets, the first to illuminate the sponsors, the second to give more prominence to the design and also to cover the leds that run throughout the front. Now that the spaces have been installed and determined, I started to assemble the main part. After positioning the parts and doing the function test, I placed the main structure assembled with the external structure also assembled, this helps in the final visualization of the project.
For those who think the projects are simple take a look at how much design I had to do in 3D. I comment that it was much more than that, but it serves as a sample.
So, I started hitting the tubes as well as their supports. There I realized that installing the tank on the top would give a much superior appearance and so I did.
After a good part of the parts already prepared, I manufactured it to assemble and test its functionality.
When I looked at the assembled cosmopolitan pieces to imagine the best color for the project and I came to the conclusion that nothing better than a contrast of gray with white fluid. The LEDs I planned to make all white in color along with the other components that are RGB.
Finally, I organized the cables, in this project I didn't want to use a sleeve, using normal power cables would bring the subject closer.
Anyway I finished the job I hope you like it.
After cutting everything assembled I installed, I had to disassemble twice to get details right. But in the end it worked. I decided to put the titanfall script in the block, I thought it was very good.
After that I started to make the structure that supports the pieces, as the project would be centralized I would have to make two pieces that fit perpendicularly to fix the pieces. And two other pieces to hold the whole. So it was like this:
Color(s): Gray
RGB Lighting? Yes
Theme: Video Game
Cooling: Custom Liquid Cooling
Size: ATX
Type: General Build
Hardware
CPU
$ 69.99
Motherboard
$ 345.12
Memory
Graphics
Storage
PSU
$ 99.99
Case
$ 570.99
Case Fan
$ 179.94
Approved by: