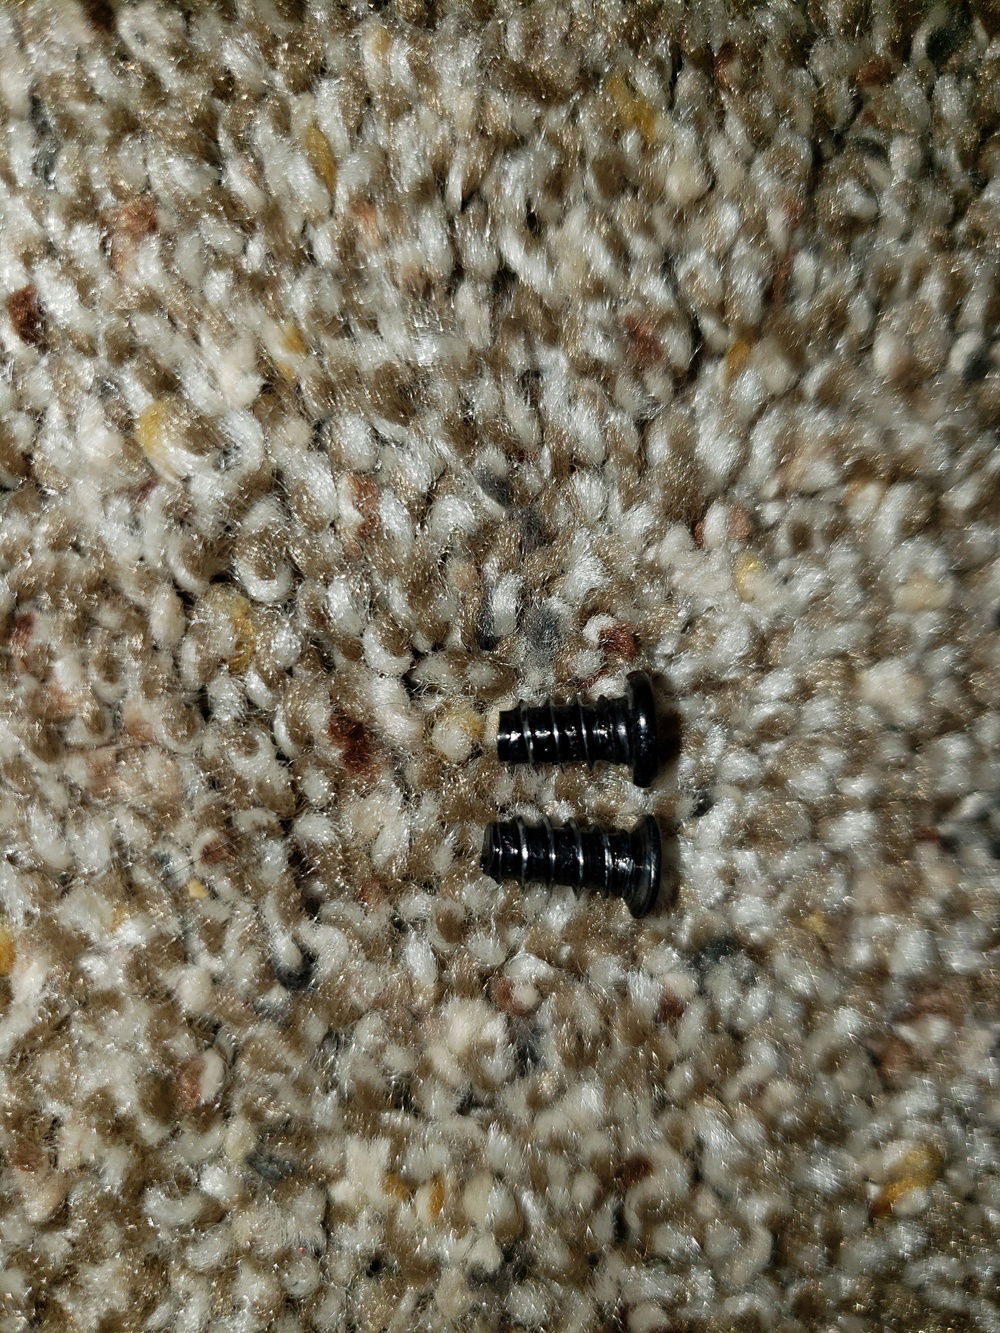
round top screws prevented me from mounting the 280 rad flush.

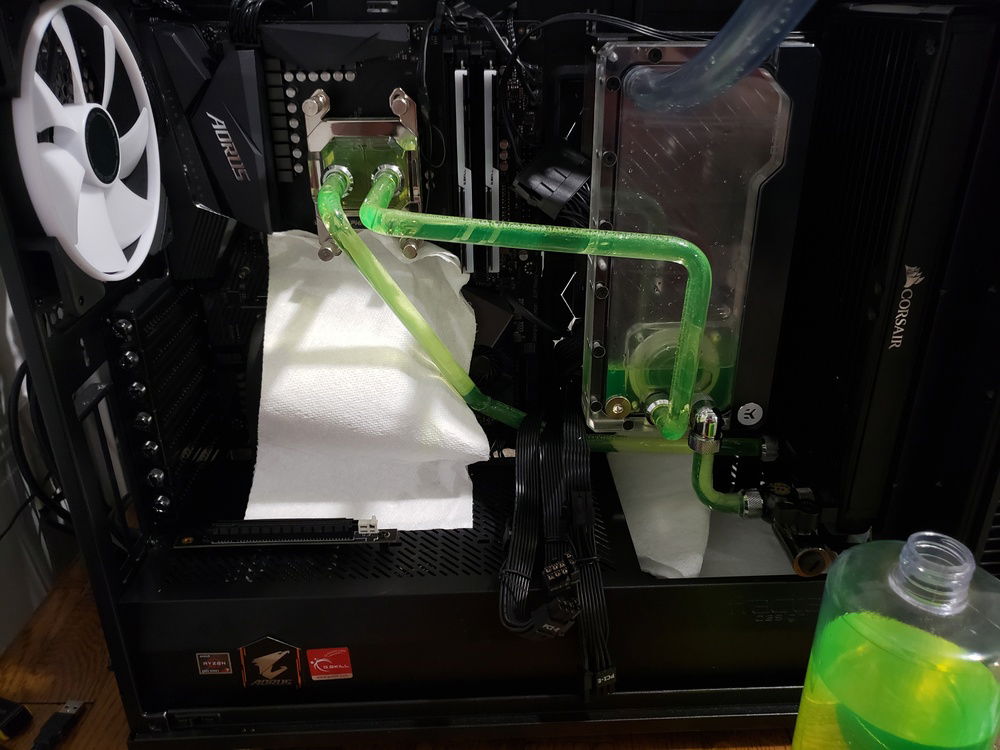
added an acrylic plate to mount the res to so i could extend it further to the left. the CPU mounted at this point was a 3200g, which posted just fine.
I should've stopped here and at least made sure the system would post before bending my tubes for the next day and a half.
i'm still not sure if i should flip that bottom radiator to put all of the pipes on the far side. it might make it less risky to mount all of the pipes on one side, but making those bends sounds like a nightmare.
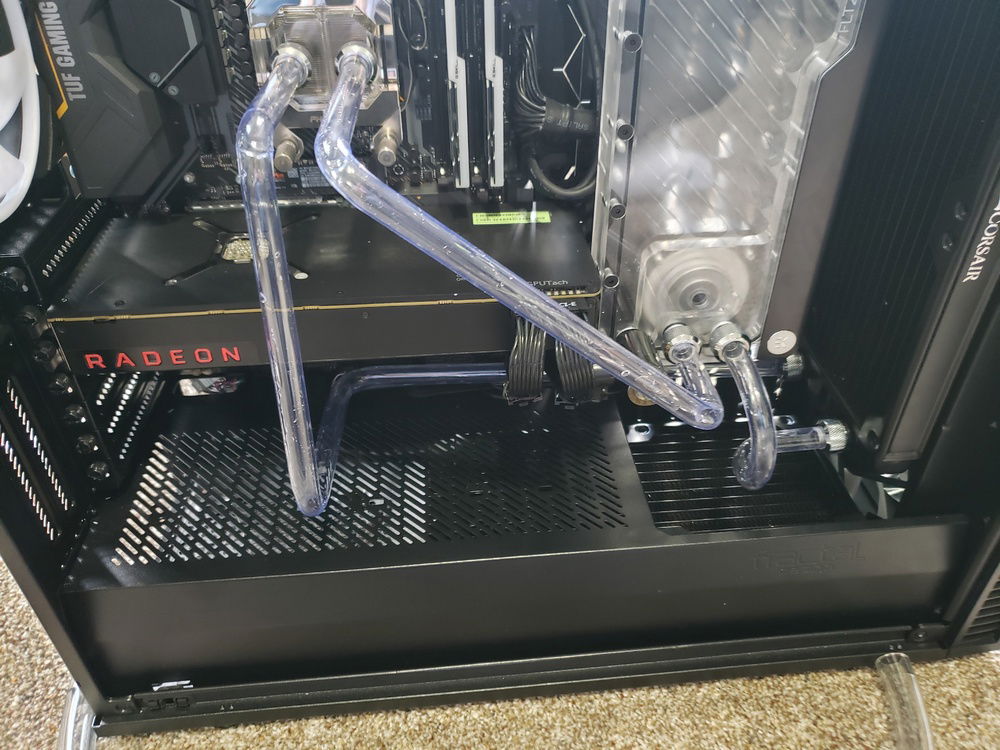
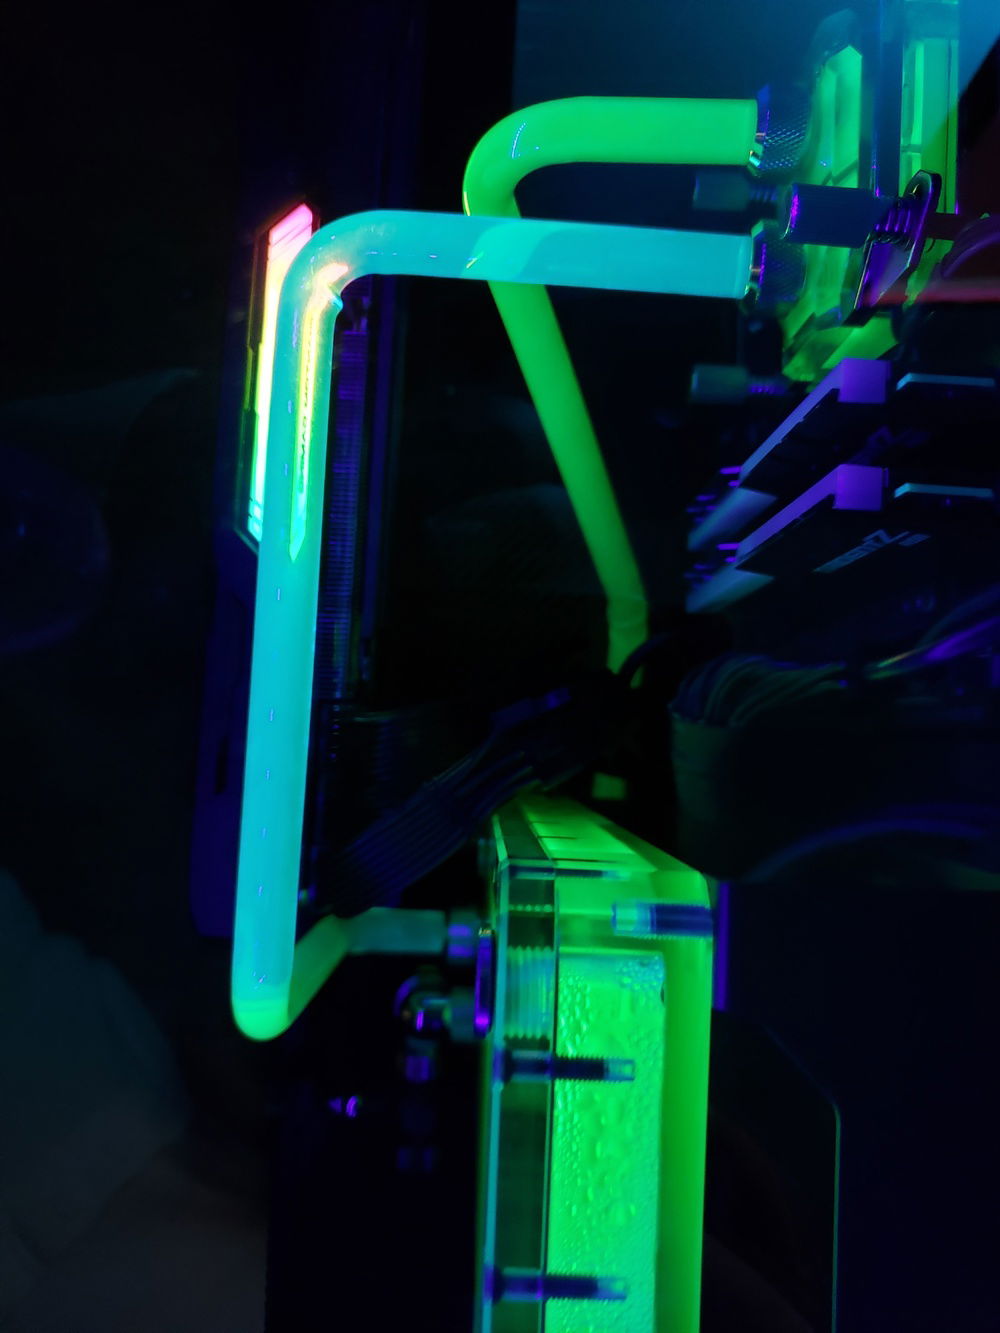
the shortest pipe in this build was the hardest. i quickly figured that i couldn't do 2 short 90 bends. so i curled the pipe to give myself more play, a little tension from a slightly off bend is more easily diffused with more pipe.
passed the leak test without problems but then i discovered the system wouldn't post.

Drained the loop, 3 hours of troubleshooting with 3 GPUs later and i found that the PCIE slots are faulty on the TUF board.
Fortunately there's Microcenter about 45 mins away. Not only did i score an Aorus X570, a Truck brought in a shipment of ASROCK 6800XTs while i was there. MicroCenter ftw.

I got the 5800x installed and working on the Aorus board, but obviously the 6800xt won't fit in the slot, so i had to wait for a riser cable to arrive.
draining the loop yet again.
New bends to leak test around the riser cable and the 6800XT which is much larger. also moved the drain port to a better location which should be the only permanent bend in the loop.
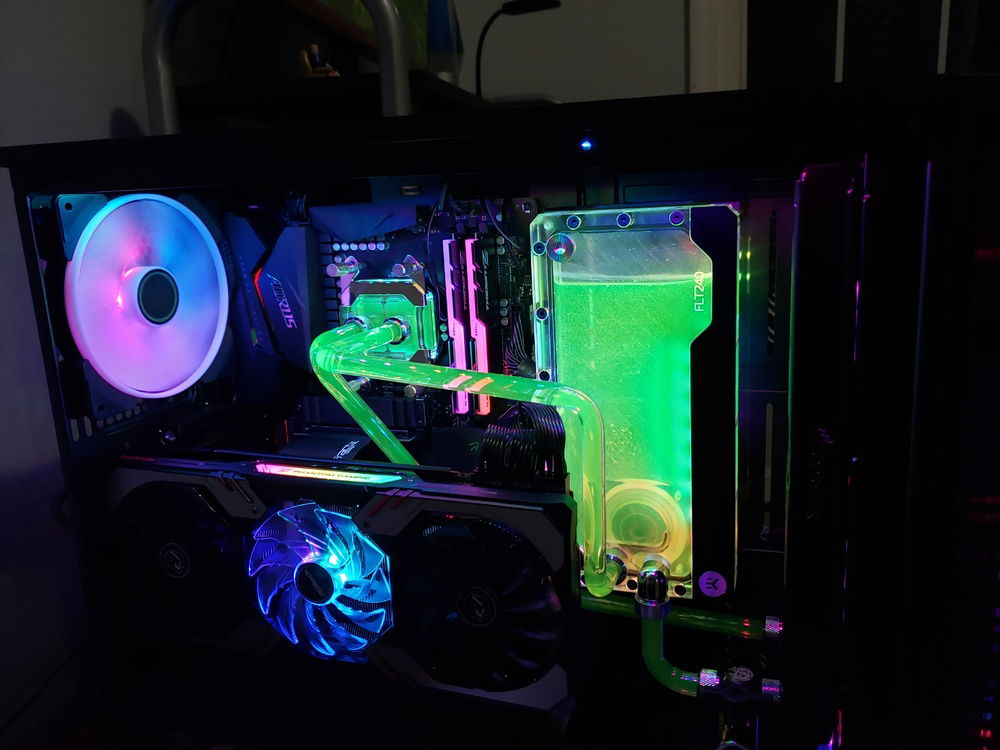
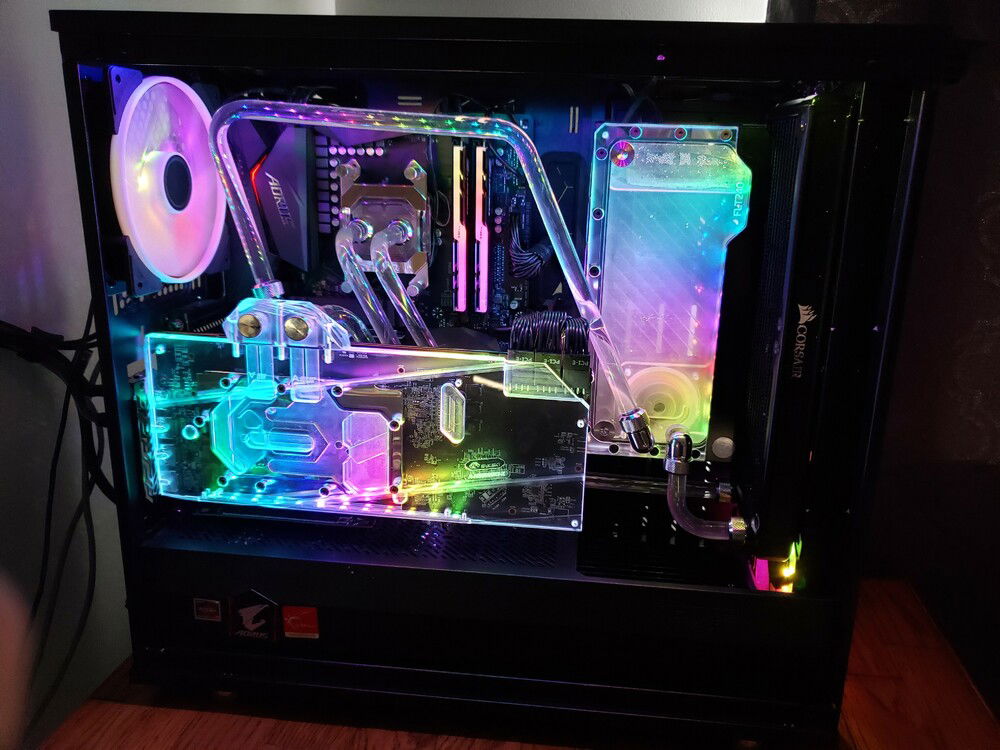
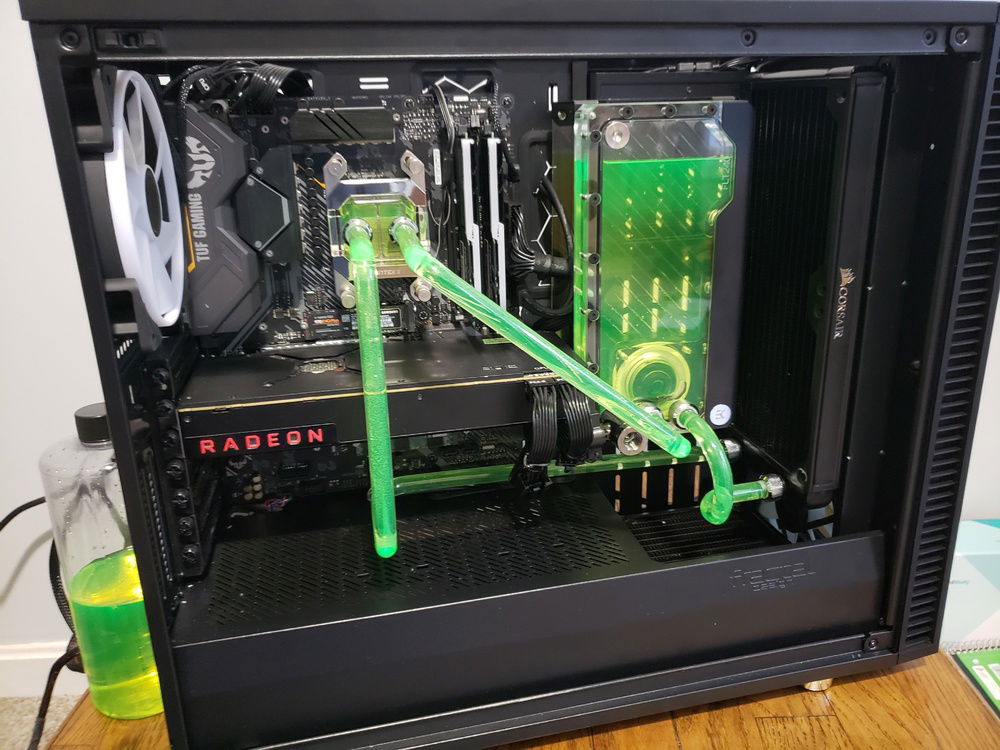
one of the reasons i love the S2 vision is the top down view through glass. here the RGB lights are off except the GPU which i haven't figured out how to control. the crossover tube is the UV acrylic and you can see it turning blue here. not quite as dramatic as i'd hoped.
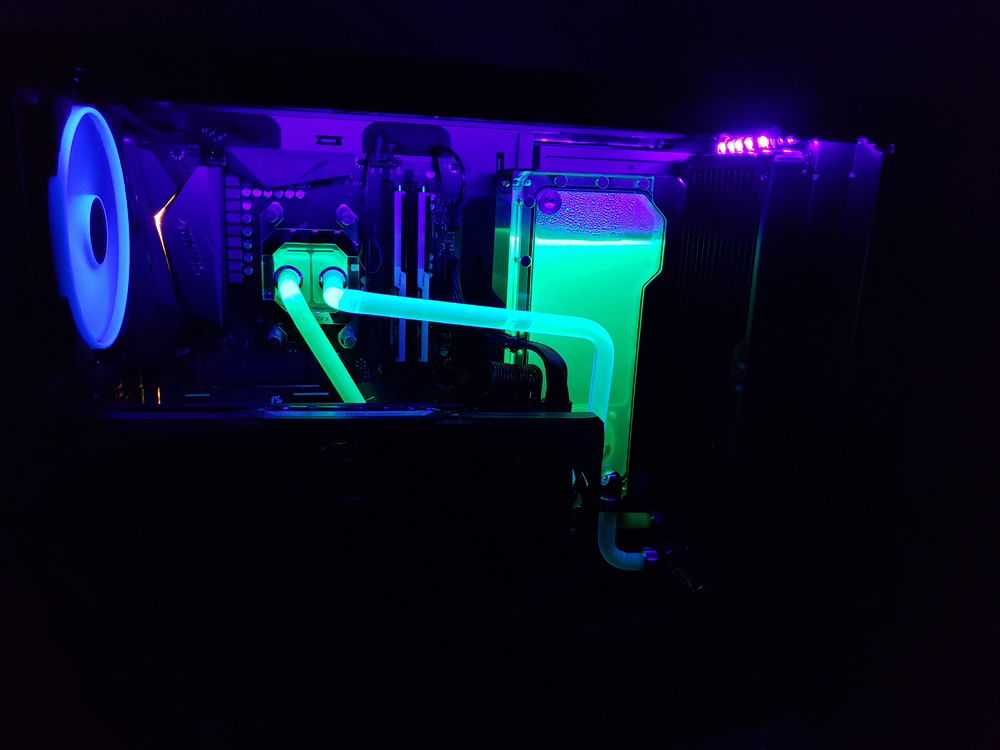
After i figured out how to turn off the RGB on the gpu, this is how i game, the uv strip is set to breathe


Paralellogram
This is my first open-loop system so i was really nervous the first night after bending and fitting all of my pipes. i unplugged it when i went to bed in case it leaked. This is replacing TheDarkness as my gaming rig. I was sad to leave the small form factor build behind for a full size tower but since this was my first attempt at hardline tubes and i was starting with Acrylic i figured i could use the leeway. also, i've always loved the look of the S2 vision. The light show feels like a club while i'm video editing.
Challenges:
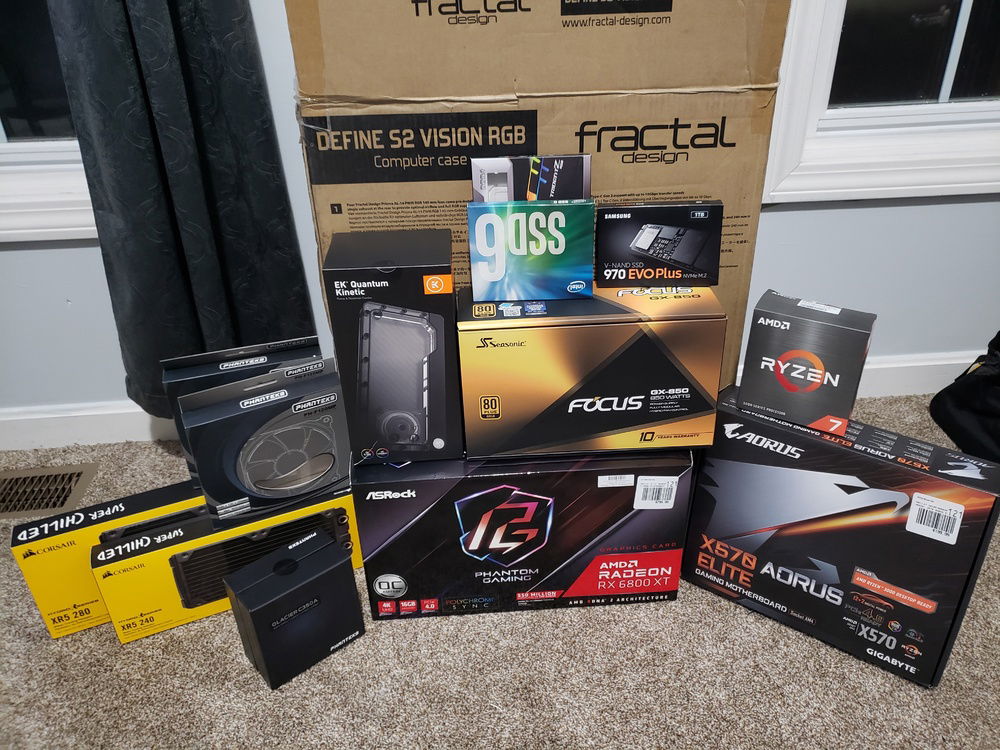
Originally this build started with an Asus Tuf wifi Plus board. which led me to no end of trouble. it booted up with a 3200g without problem so i loaded up software and started putting components together. after updating the bios so it would take a ryzen 5000 series cpu i bent my first set of hard line tubes for a day and a half and powered it on. and nothing. after a frantic hour of troubleshooting i found that the TUF board, which i had gotten as an openbox should've been in a junk box. it didn't detect a gpu in the pcie slot no matter what i did, verified with 3 known-good gpus. so i set it up for a return to newegg, and went down to microcenter where i got the aorus elite board instead. Really i should thank that TUF board because i was at microcenter that day when the truck pulled in with ASROCK 6800XTs. i got one for 800 which appears to be the new tariff-normal pricing. Microcenter is the best.
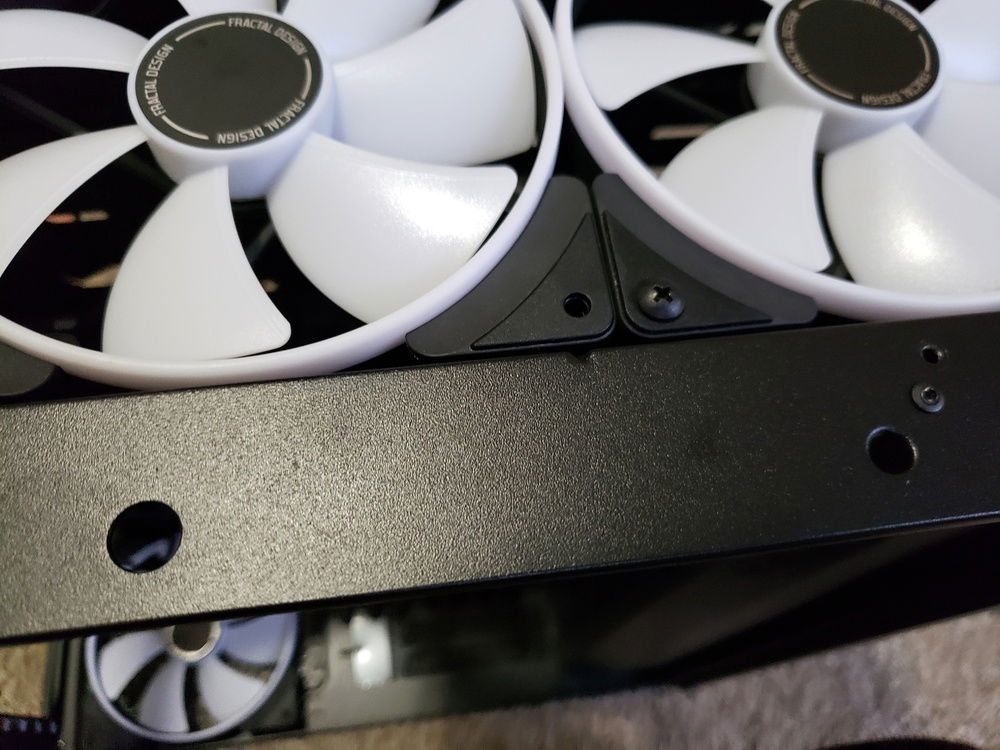
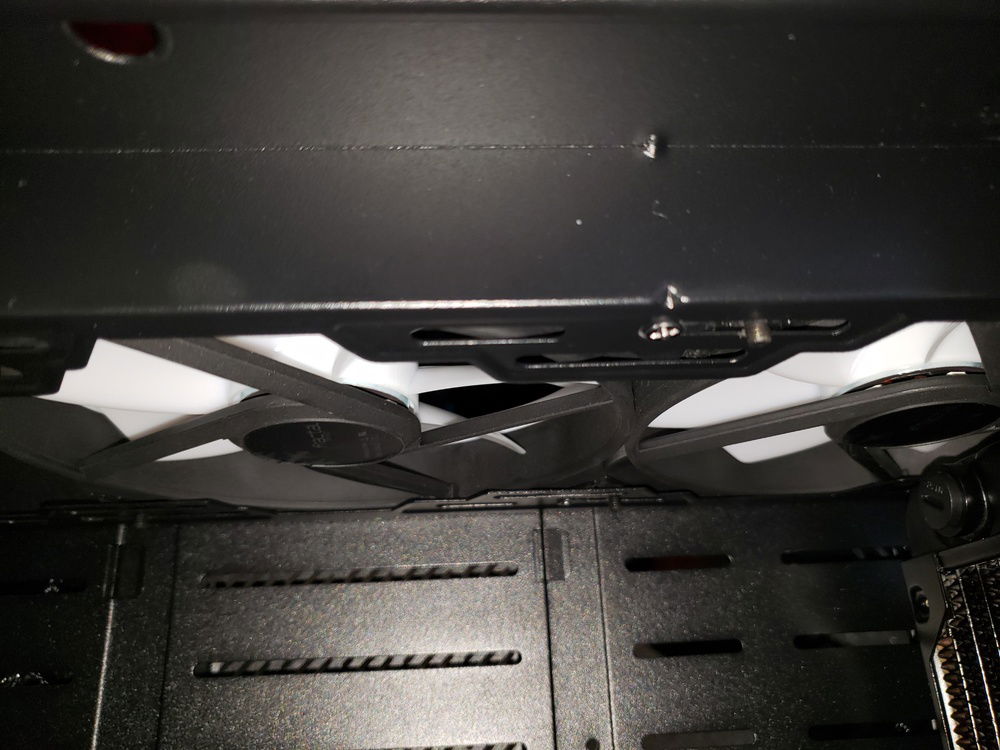
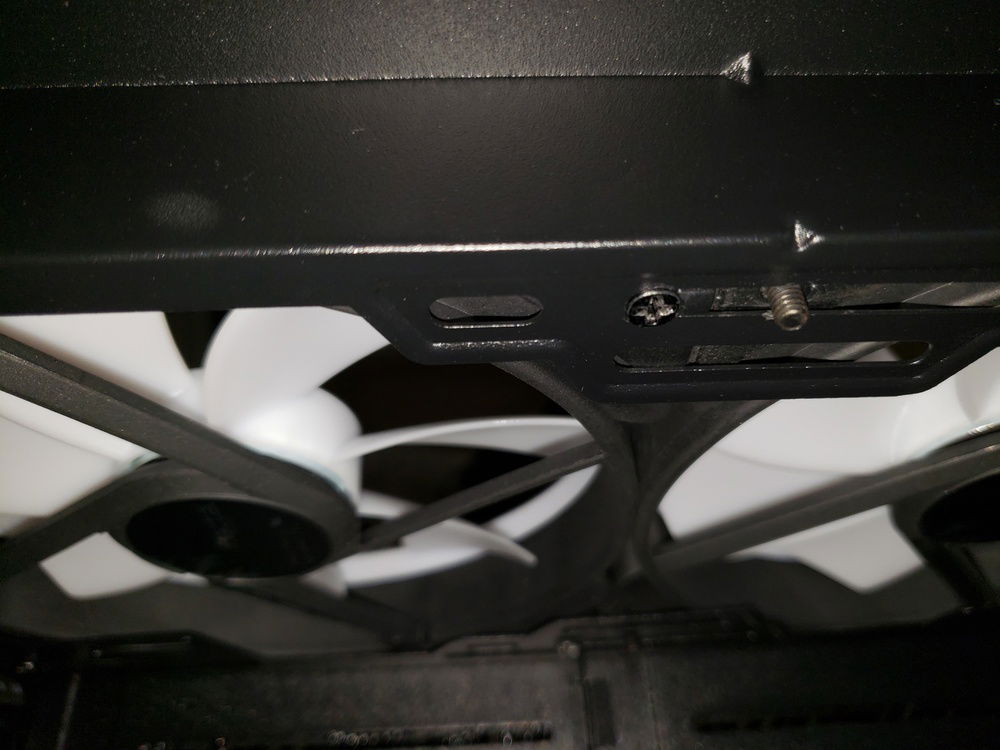
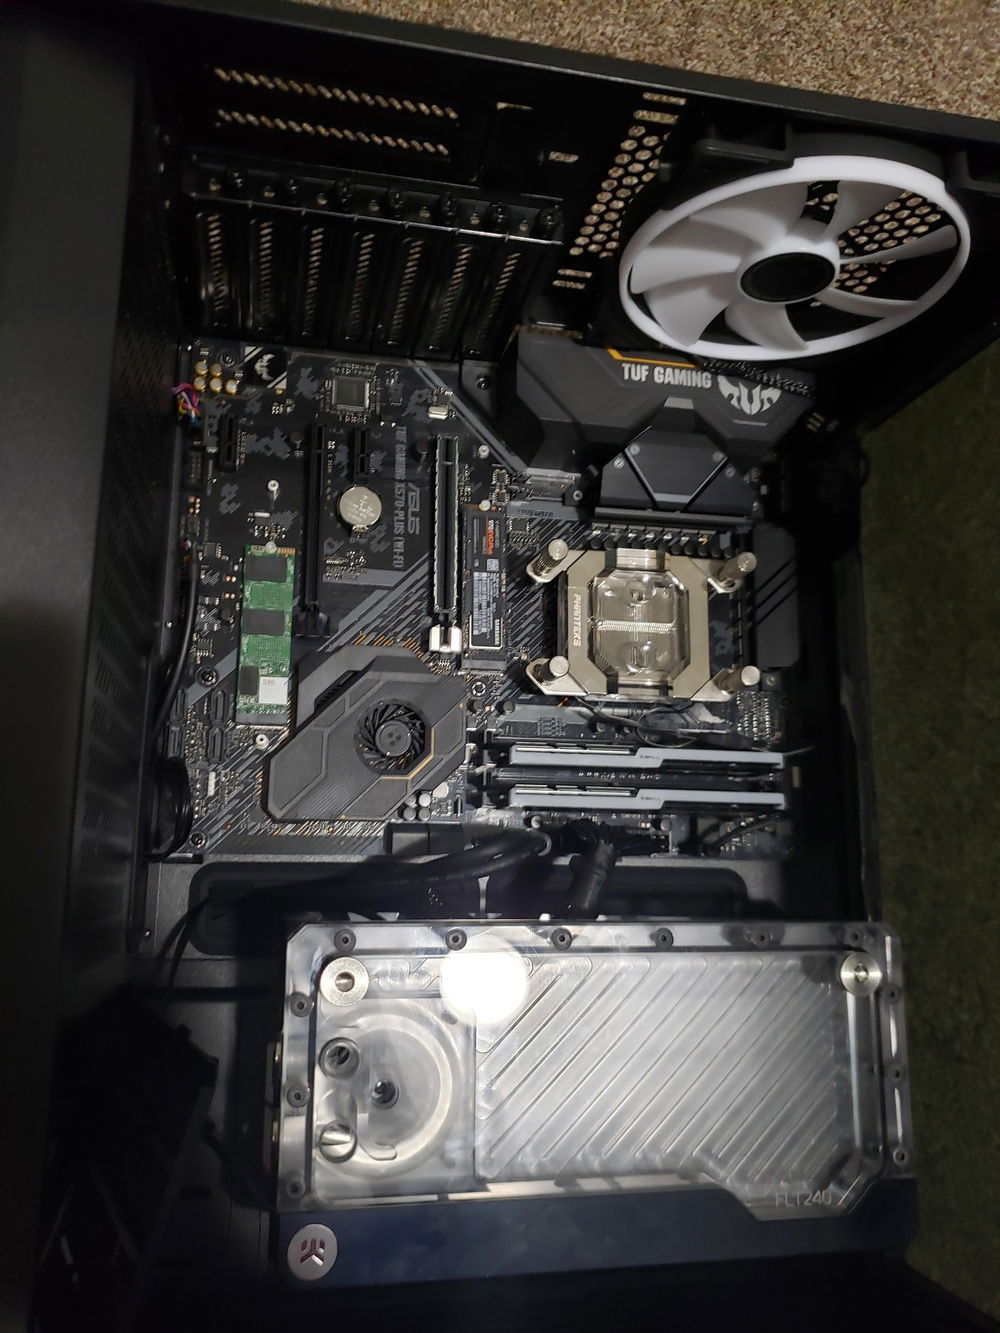
I really wanted a 280 rad and i didn't want to loose one of the 140 mm intake fans on front but of course the manual recommends it because the rad sticks up too far to just mount normally on the top 2 fan mounts. and i couldn't set it into the bottom 2 because i've already installed a 240 rad which i'll add to the loop later when i'm also watercooling my GPU. so i took out the round top screws that the fans came with and alternated some flat tops with the radiator's extended screws so i could mount the rad offset a little from the normal mounts. its using 2 screws in the bottom of the top fan and 2 in the bottom of the second fan.
The FLT 240 res doesn't mount to a 280 radiator, so i fabricated a mount using an acrylic plate with holes drilled into it. the radiator has 2 screws in the plate and 2 screws that span the plate and wall mount, and the plate has 2 more screws into the wall mount. seems solid enough so far.
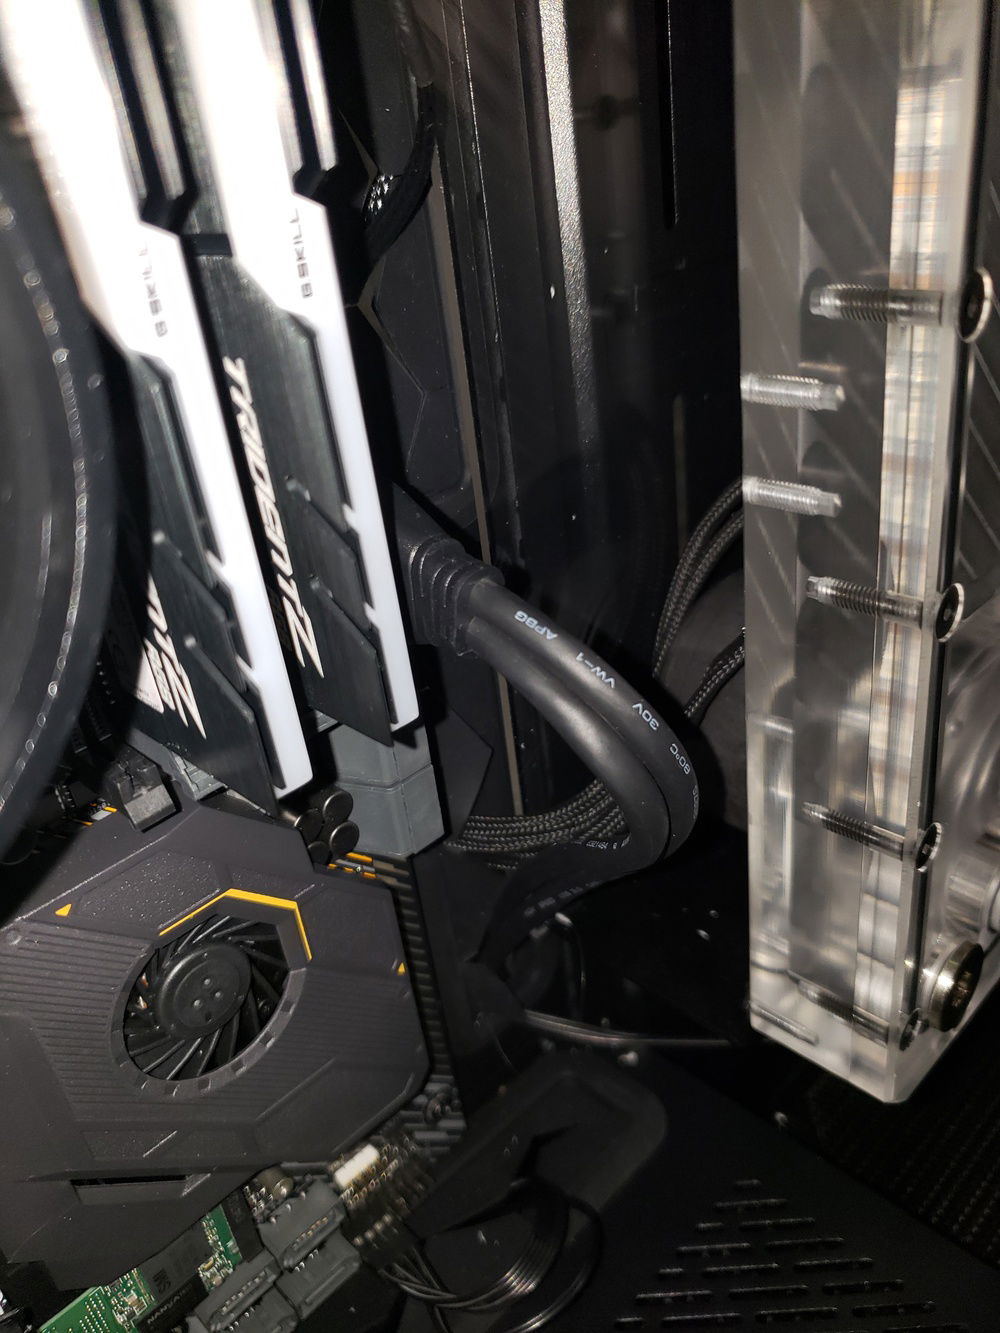
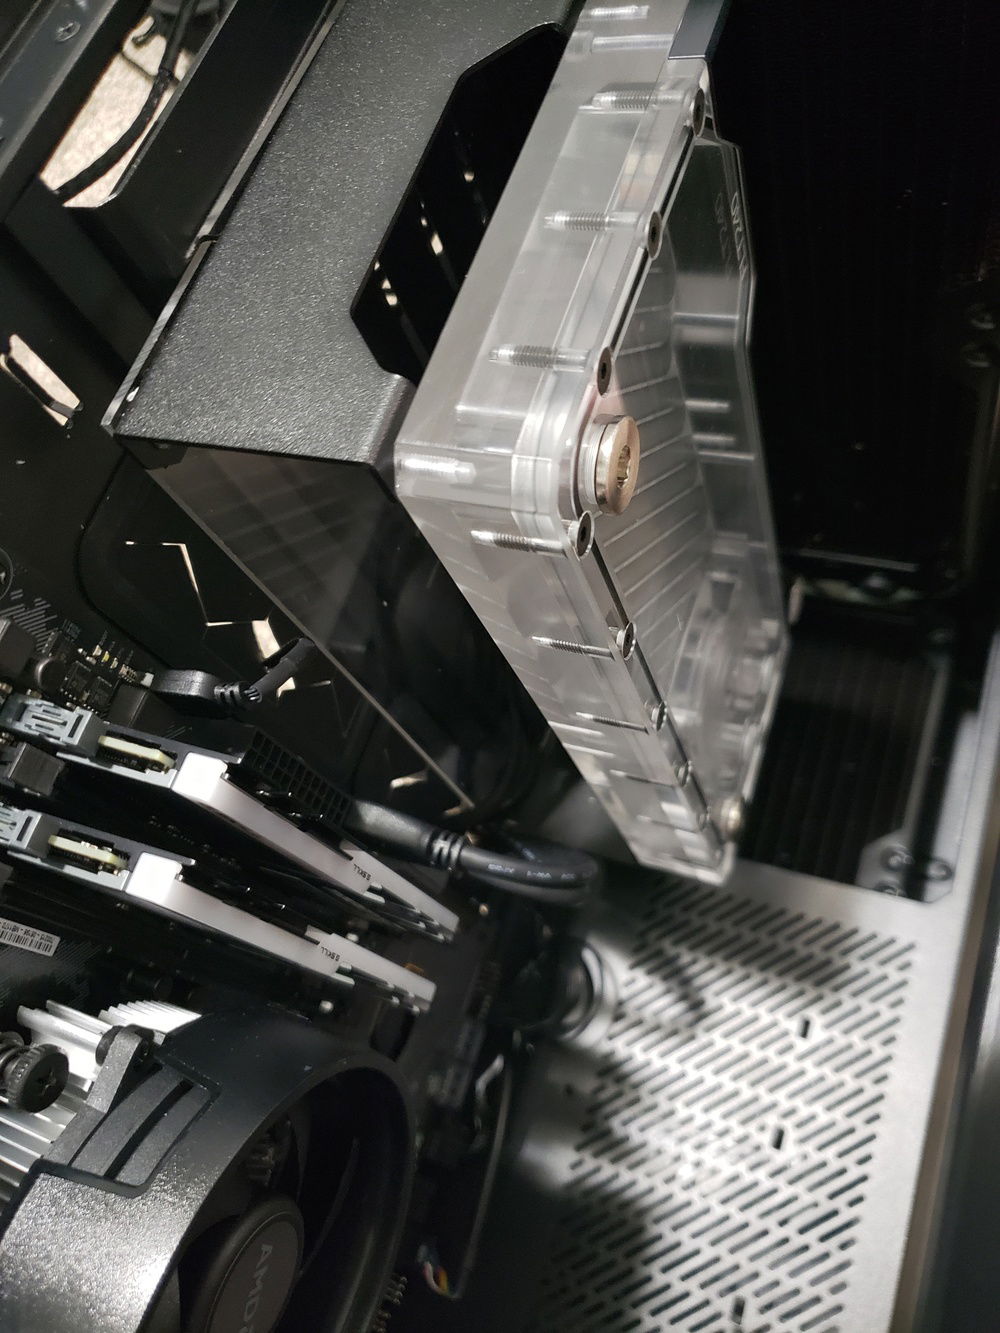
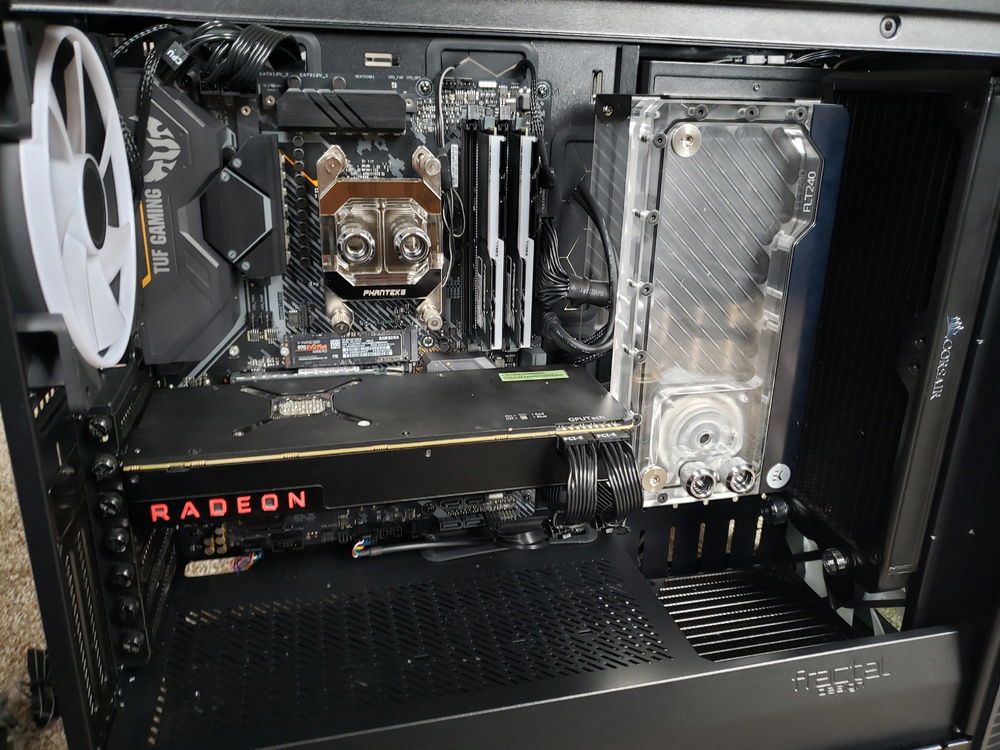
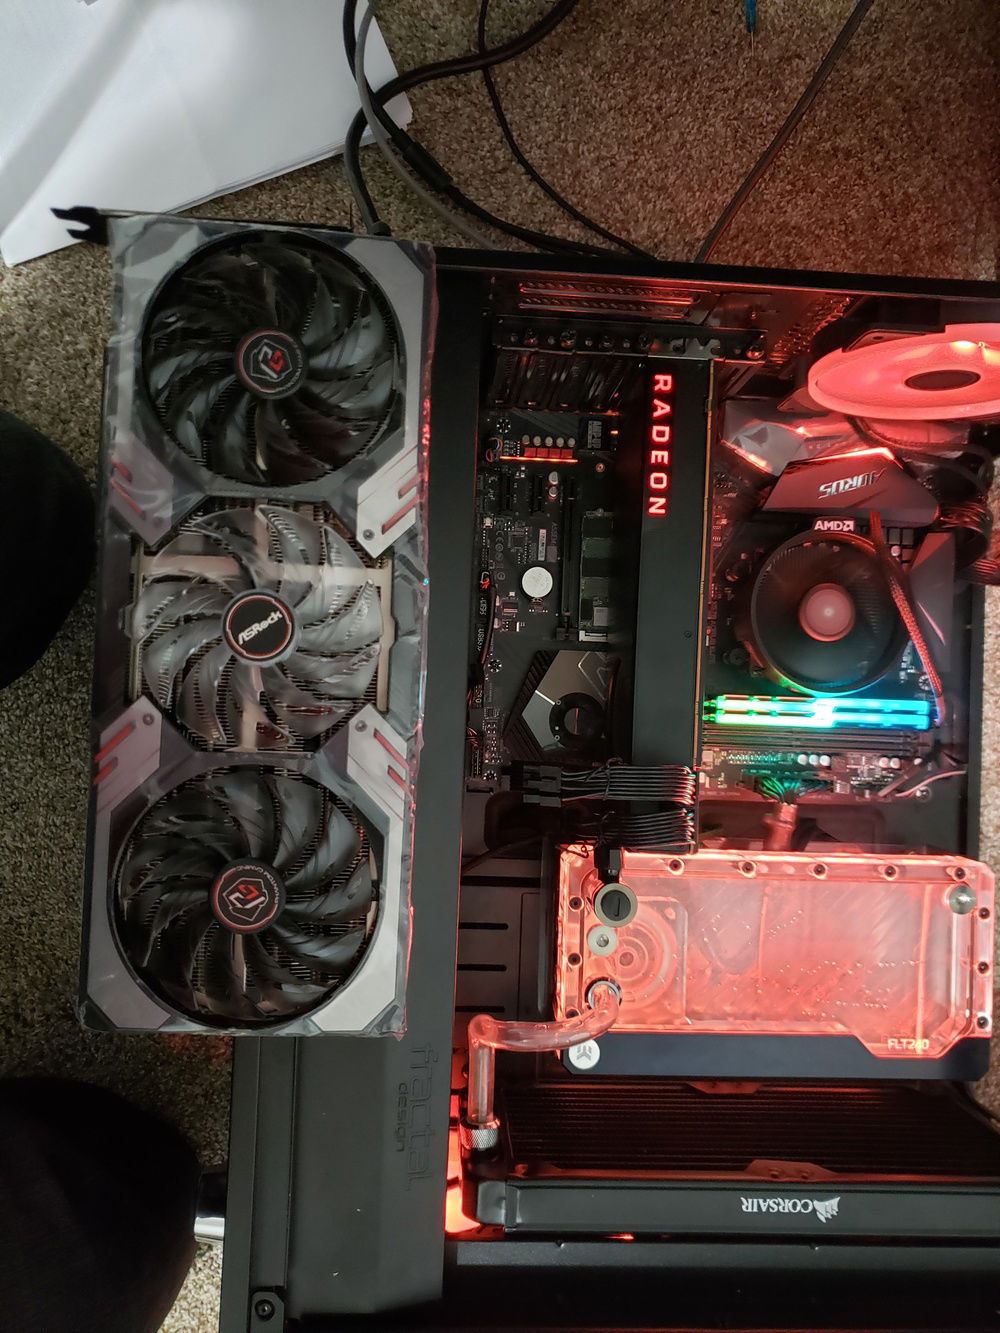
The ASRock 6800XT required a vertical mount because its too long to fit in with the reservoir. fortunately bykski is making a waterblock now, so the 2.5" slot cooler isn't being choked anymore
other thoughts: I originally used acrylic tube because it was UV reactive. but turns out it really is as difficult to work with as everyone says so now its all traded out for PETG, which unfortunately is not UV reactive. I've got a UV LED strip installed next to the RGB strip that comes standard with the case and i have the lights set to pulse so all of the RGB turns off and only the UV is on to try and make the fluid pop. it worked great with UV reactive primochill ice, i rinsed it out and i'm currently using clear liquid, I'm going to try out some mayhems fluid next time.
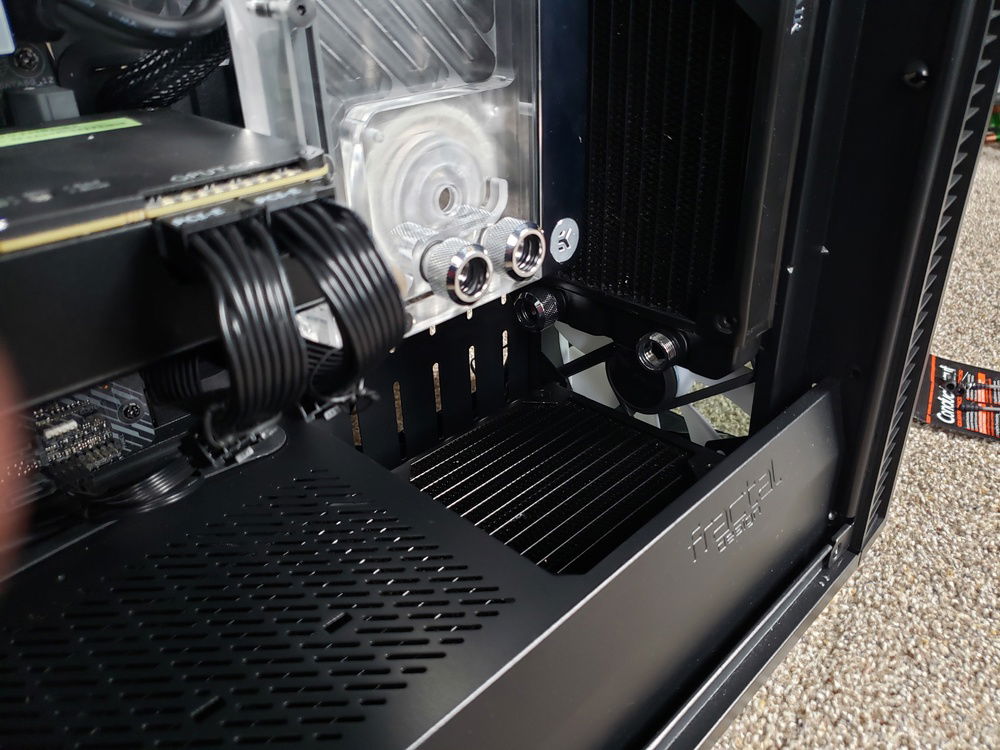
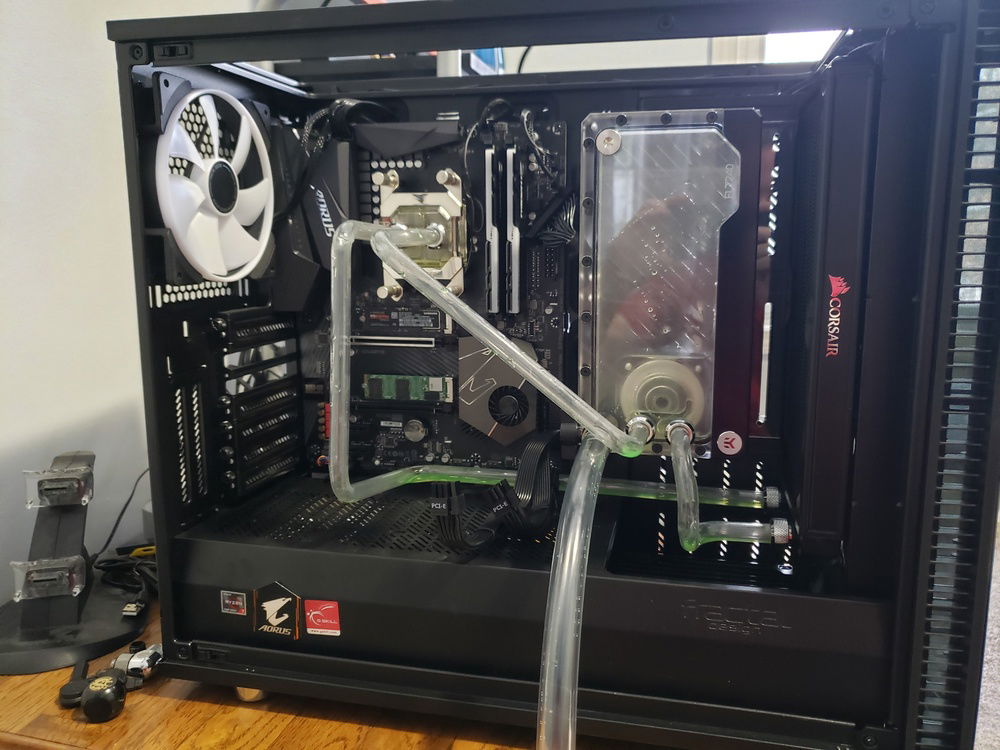
After i cut a hole in the PSU shroud i had to bend the tubes from the gpu and cpu to connect to the basement rad. so i matched the angles with the main pipe and decided to name it parallelogram. I moved the drain under the shroud. It is accessible from the back when the glass is removed. It still doesn't drain the whole loop easily because my order is pump to gpu to lower rad to cpu to side rad to reservoir.
Challenges:
Originally this build started with an Asus Tuf wifi Plus board. which led me to no end of trouble. it booted up with a 3200g without problem so i loaded up software and started putting components together. after updating the bios so it would take a ryzen 5000 series cpu i bent my first set of hard line tubes for a day and a half and powered it on. and nothing. after a frantic hour of troubleshooting i found that the TUF board, which i had gotten as an openbox should've been in a junk box. it didn't detect a gpu in the pcie slot no matter what i did, verified with 3 known-good gpus. so i set it up for a return to newegg, and went down to microcenter where i got the aorus elite board instead. Really i should thank that TUF board because i was at microcenter that day when the truck pulled in with ASROCK 6800XTs. i got one for 800 which appears to be the new tariff-normal pricing. Microcenter is the best.
I really wanted a 280 rad and i didn't want to loose one of the 140 mm intake fans on front but of course the manual recommends it because the rad sticks up too far to just mount normally on the top 2 fan mounts. and i couldn't set it into the bottom 2 because i've already installed a 240 rad which i'll add to the loop later when i'm also watercooling my GPU. so i took out the round top screws that the fans came with and alternated some flat tops with the radiator's extended screws so i could mount the rad offset a little from the normal mounts. its using 2 screws in the bottom of the top fan and 2 in the bottom of the second fan.
The FLT 240 res doesn't mount to a 280 radiator, so i fabricated a mount using an acrylic plate with holes drilled into it. the radiator has 2 screws in the plate and 2 screws that span the plate and wall mount, and the plate has 2 more screws into the wall mount. seems solid enough so far.
The ASRock 6800XT required a vertical mount because its too long to fit in with the reservoir. fortunately bykski is making a waterblock now, so the 2.5" slot cooler isn't being choked anymore
other thoughts: I originally used acrylic tube because it was UV reactive. but turns out it really is as difficult to work with as everyone says so now its all traded out for PETG, which unfortunately is not UV reactive. I've got a UV LED strip installed next to the RGB strip that comes standard with the case and i have the lights set to pulse so all of the RGB turns off and only the UV is on to try and make the fluid pop. it worked great with UV reactive primochill ice, i rinsed it out and i'm currently using clear liquid, I'm going to try out some mayhems fluid next time.
After i cut a hole in the PSU shroud i had to bend the tubes from the gpu and cpu to connect to the basement rad. so i matched the angles with the main pipe and decided to name it parallelogram. I moved the drain under the shroud. It is accessible from the back when the glass is removed. It still doesn't drain the whole loop easily because my order is pump to gpu to lower rad to cpu to side rad to reservoir.
Color(s): Black Green Yellow
RGB Lighting? Yes
Theme: none
Cooling: Custom Liquid Cooling
Size: ATX
Type: General Build
Contests
This build participated in 1 contest.
| Rank | Contest | Date |
|---|---|---|
| #880 | EK 10K Challenge | ended 2021-03-29 |
Hardware
CPU
$ 169.95
Motherboard
$ 322.73
Memory
$ 82.99
Graphics
$ 800.00
Case
$ 332.34
Case Fan
$ 39.98
Cooling
$ 41.87
Cooling
$ 96.20
Cooling
$ 79.19
Cooling
$ 73.38
Cooling
$ 210.00
EKWB - EK-Quantum Kinetic FLT 240 D5 PWM D-RGB - Plexi
Type: Pump/Reservoir Combo
Size (WxHxD): 240 mm
Cooling
$ 80.00
CableMod
$ 30.00
Estimated total value of this build:
$ 2,813.76
Approved by: