


Simple, clean lines.

Photo credit to Mike Bruno


Shame this side will be against a wall.
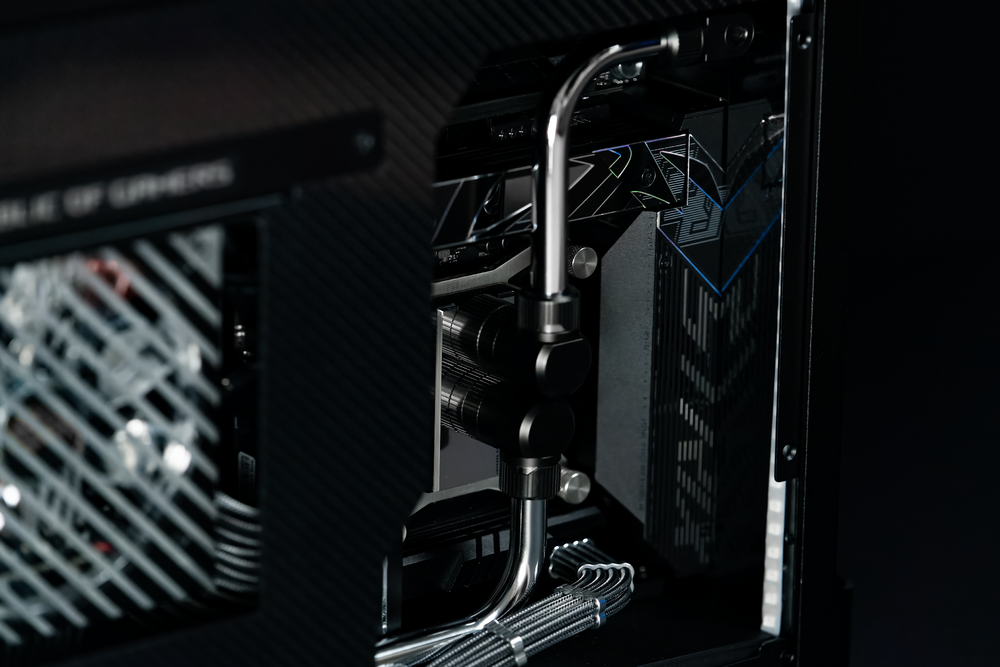
Photo credit to Mike Bruno

Nice how black/chrome/black of the CPU block matches the RAM heatsink

The Z790 Strix mobo was perfect for this aesthetic

ROG logo on the ram. Again, only visible if you look for it.

RGB is hard to photograph, but you get the idea.

Photo credit to Mike Bruno

Retrowave


Photo credit to Mike Bruno
Keyboard QDC for external rad power

ROG painted on the top radiator. Only visible when you take the top dust filter off.

Details
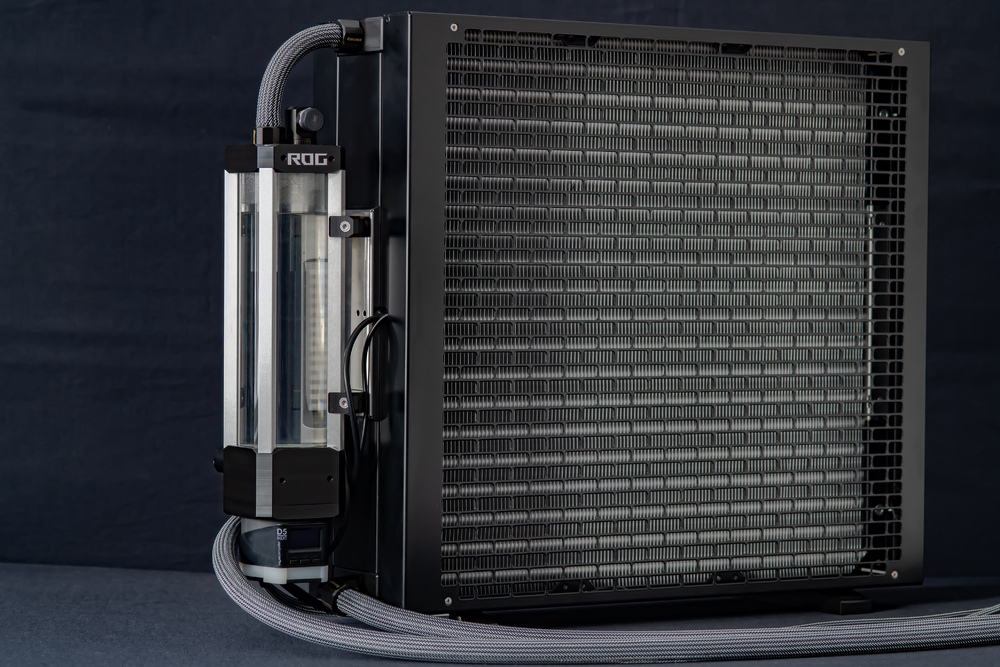


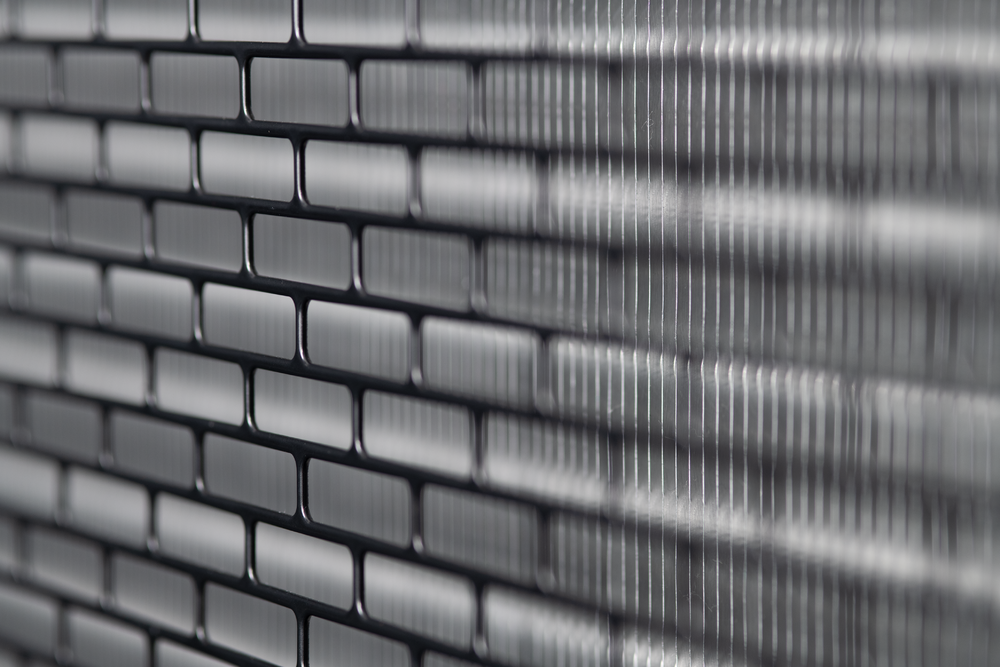

Photo credit to Mike Bruno

Custom acrylic panels to clean up the inside of the case

Better dust filters and grip tape
Black Series
AD:
Easily, my best build to date. No blood or tears, but this took a lot of sweat. The client wanted a subtle, “supercar” PC. The best car that fit that bill to my mind was the AMG GT Black Series, hence the name for this build.
Key highlights:
Due to the client’s limited desk space, a small case and external radiator was always the gameplan. However, on option we wanted to keep open is the build being able to be used without the external radiator should the client travel with the computer. This is why there is 1 pump in the case, and 1 pump on the external radiator.
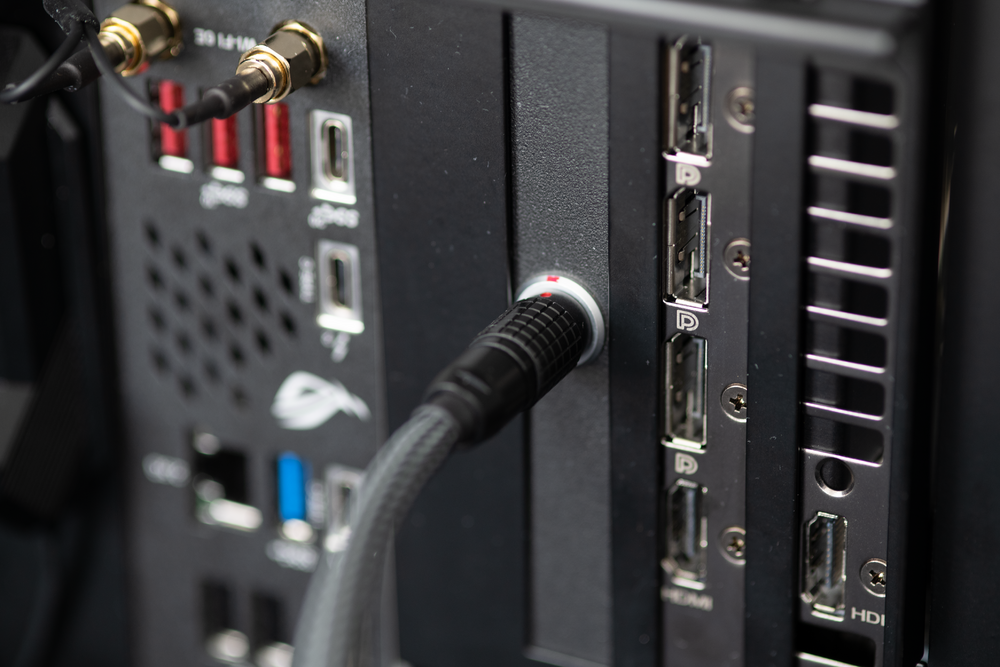
The radiator is connected to the main system with soft tube runs and Koolance QDC fittings. The D5 Next pump on the external radiator is connected to the main system with a SATA to MOLEX cable that terminates to a keyboard cable QDC connector. This clips into the rear I/O of the case and then connects to the PSU. I did not want any chance of the power being disconnected accidently. All the connections are sleeved with MDPC-X Carbon PGB Big sleeving.
For the “supercar” theme, I didn’t want to be too literal with it. Instead, just incorporate elements you would find on a supercar. Carbon fiber is an obvious element. Real CF is expensive and hard to work with so I went with vinyl. Vinyl CF often looks unconvincing, but the Tinybot Gloss 6D Carbon Fiber vinyl I went with is pretty close to real wet CF. I decided to keep things pretty subtle on the GPU side, with just the background in CF. The CPU side is more overt, but once covered with the dark tinted glass, the effect is subtle. Another supercar element is branding. Badge here, logo there, but not over the top. Some of the logos I added would only be visible if you took the glass off or opened the top dust filter. Some are very hidden, like the R O G letters on the 3D printed fan hub covers. In the same way you open the hood of a car and see the logo on the engine. The carbon sleeving also gives off that braided fuel line look. Finally, I wanted the external radiator to play a part as well. I added RGB strips to the inner wall of the open side of the radiator (that connect to the D5 Next). The lighting can be set to increase in brightness and color intensity depending on the system load or water temp. This would mimic the visual radiant heat of exhausts or brakes under load in a car.
Another focus I had was keeping the black on chrome theme consistent throughout the entire build. I replaced most of the fasteners with countersunk screws and CableMod chrome fender washers. I added a small strip of chrome vinyl to the ram heatsinks. Even the stock black screws on the D5 pump cover were replaced with special order chrome ones.
There are also some thoughtful quality of life modifications. The main system is quite heavy for its size and it’s a bit hard to grip, so I added skateboard grip tape to the bottom. Since the system may be moved, this seemed like a good idea. For the tube runs to the radiator, I wanted to make sure the right tube was secured to the right port. I took some red and blue EK Torque fitting accent rings and added them to the fitting assembly on the case and the end of the tube runs (also red and blue ROG eye stickers). Red to red, blue to blue. Easy to plug things in the wrong way… ask me how I know…
In terms of mods, I kept things pretty simple. I designed the acrylic interior case covers (that got vinyl wrapped) in Fusion 360 and fellow NY area builder nycdarkness was kind enough to cut them for me. The fan hub covers were 3D printed (nyc). I also designed printed cable covers for the motherboard area. The ROG logo on the radiator was just some chrome rattle can paint and a hand cut stencil. In order to get the reservoir to mount I had to do some Dremeling, but nothing crazy. The hard part was just getting everything to sit “just right”.
Performance is obviously “super”. Water temp never goes more than 8c above ambient, even with >850w of steady load. GPU in the 40s. CPU in the 50-70s. External rad fans stay at 550rpm. 4090/13900K you know the deal. This loop will handle any future hardware upgrade.
Water cooling specs:
- CPU block: Watercool Heatkiller IV Pro w/Heavy backplate and Thermalright contact frame
- GPU block: Watercool Heatkiller V Pro for 4090 TUF/STRIX
- Radiator: Watercool Heatkiller RAD-S 360 (internal) and Watercool Mo-Ra 3 420 Pro (external)
- Reservoirs: Steelkey Uni 120D (internal) and Watercool Heatkiller Tube 200 D5 MP (external)
- Pumps: EK D5 G3 PWM w/Convection cover (internal) and Aquacomputer D5 Next (external)
- Fittings: EK Torque (12mm HDC), Bitspower (12mm) and Koolance (QD3)
- Tubing: Bitspower Silver Shining brass hard tubing (12mm) and EK ZMT 10/16mm soft tubing
- Fluid: Aquacomputer Double Protect Ultra
- Fans: Noctua A12-15 Chromax, Noctua A12-25 Chromax (internal), Noctua NF A20 HS Chromax (external)
- Controllers: Aquacomputer Quadro, High Flow Next and D5 Next
Key highlights:
Due to the client’s limited desk space, a small case and external radiator was always the gameplan. However, on option we wanted to keep open is the build being able to be used without the external radiator should the client travel with the computer. This is why there is 1 pump in the case, and 1 pump on the external radiator.
The radiator is connected to the main system with soft tube runs and Koolance QDC fittings. The D5 Next pump on the external radiator is connected to the main system with a SATA to MOLEX cable that terminates to a keyboard cable QDC connector. This clips into the rear I/O of the case and then connects to the PSU. I did not want any chance of the power being disconnected accidently. All the connections are sleeved with MDPC-X Carbon PGB Big sleeving.
For the “supercar” theme, I didn’t want to be too literal with it. Instead, just incorporate elements you would find on a supercar. Carbon fiber is an obvious element. Real CF is expensive and hard to work with so I went with vinyl. Vinyl CF often looks unconvincing, but the Tinybot Gloss 6D Carbon Fiber vinyl I went with is pretty close to real wet CF. I decided to keep things pretty subtle on the GPU side, with just the background in CF. The CPU side is more overt, but once covered with the dark tinted glass, the effect is subtle. Another supercar element is branding. Badge here, logo there, but not over the top. Some of the logos I added would only be visible if you took the glass off or opened the top dust filter. Some are very hidden, like the R O G letters on the 3D printed fan hub covers. In the same way you open the hood of a car and see the logo on the engine. The carbon sleeving also gives off that braided fuel line look. Finally, I wanted the external radiator to play a part as well. I added RGB strips to the inner wall of the open side of the radiator (that connect to the D5 Next). The lighting can be set to increase in brightness and color intensity depending on the system load or water temp. This would mimic the visual radiant heat of exhausts or brakes under load in a car.
Another focus I had was keeping the black on chrome theme consistent throughout the entire build. I replaced most of the fasteners with countersunk screws and CableMod chrome fender washers. I added a small strip of chrome vinyl to the ram heatsinks. Even the stock black screws on the D5 pump cover were replaced with special order chrome ones.
There are also some thoughtful quality of life modifications. The main system is quite heavy for its size and it’s a bit hard to grip, so I added skateboard grip tape to the bottom. Since the system may be moved, this seemed like a good idea. For the tube runs to the radiator, I wanted to make sure the right tube was secured to the right port. I took some red and blue EK Torque fitting accent rings and added them to the fitting assembly on the case and the end of the tube runs (also red and blue ROG eye stickers). Red to red, blue to blue. Easy to plug things in the wrong way… ask me how I know…
In terms of mods, I kept things pretty simple. I designed the acrylic interior case covers (that got vinyl wrapped) in Fusion 360 and fellow NY area builder nycdarkness was kind enough to cut them for me. The fan hub covers were 3D printed (nyc). I also designed printed cable covers for the motherboard area. The ROG logo on the radiator was just some chrome rattle can paint and a hand cut stencil. In order to get the reservoir to mount I had to do some Dremeling, but nothing crazy. The hard part was just getting everything to sit “just right”.
Performance is obviously “super”. Water temp never goes more than 8c above ambient, even with >850w of steady load. GPU in the 40s. CPU in the 50-70s. External rad fans stay at 550rpm. 4090/13900K you know the deal. This loop will handle any future hardware upgrade.
Water cooling specs:
- CPU block: Watercool Heatkiller IV Pro w/Heavy backplate and Thermalright contact frame
- GPU block: Watercool Heatkiller V Pro for 4090 TUF/STRIX
- Radiator: Watercool Heatkiller RAD-S 360 (internal) and Watercool Mo-Ra 3 420 Pro (external)
- Reservoirs: Steelkey Uni 120D (internal) and Watercool Heatkiller Tube 200 D5 MP (external)
- Pumps: EK D5 G3 PWM w/Convection cover (internal) and Aquacomputer D5 Next (external)
- Fittings: EK Torque (12mm HDC), Bitspower (12mm) and Koolance (QD3)
- Tubing: Bitspower Silver Shining brass hard tubing (12mm) and EK ZMT 10/16mm soft tubing
- Fluid: Aquacomputer Double Protect Ultra
- Fans: Noctua A12-15 Chromax, Noctua A12-25 Chromax (internal), Noctua NF A20 HS Chromax (external)
- Controllers: Aquacomputer Quadro, High Flow Next and D5 Next
Color(s): Black Chrome Silver
RGB Lighting? Yes
Theme: Industrial
Cooling: Custom Liquid Cooling
Size: Mini-ITX
Type: General Build
Hardware
CPU
$ 539.99
Motherboard
$ 577.93
Memory
$ 519.99
Graphics
$ 2,849.22
PSU
$ 219.99
Case Fan
$ 89.85
Case Fan
$ 113.85
Case Fan
Accessories
$ 144.30
Approved by: