Cum Cooled PC (Build log)
Hello there! ![Emoji]()
I’m from Belarus, so I Immediately apologize for possible misunderstandings in the text or errors, idk English very well.
This build log will be about my history of building my first custom liquid cooled PC with a distro plate. Here will be described in great detail all the stages and difficulties that I faced.
Perhaps this will inspire someone to create some of their own projects and warn about possible difficulties along the way, but the most important thing is not to give up and be sure to try to implement your idea!
The final build will be posted later in a separate post after completion (If I ever do finish it![Emoji]() ),
),
Let me start by saying that I had a regular build with Ryzen 5 2600 and GTX 1080. At one point I decided to build myself a custom water cooling system.
So, I built it, everything, I really liked it, I was proud that I could build it with my own hands without any experience. (I have a separate build of this PC in my profile, if anyone is interested![Emoji]() )
)
And one day, sitting in VK, my friend sended me the meme "Cum Cooled PC".
I decided to look at similar builds and I couldn't find a real “Cum Cooled PC” with all-white components.
After that, I knew right away that I wanted to make this meme a reality and build an all-white "Cum Cooled" PC. All-white means completely white: white case, white fans, white motherboard with white PCB, white fittings, white cables, all white!
It wasn't as easy as I thought it would be. It would seem that 2020 (at the time of the start of the build), there are a bunch of different offerings on the market, but it's not that simple.
The first thing I decided to do was to replace the biggest part of the build - the case.
At first I wanted to paint it, but in the end I didn't decide to do it, because I was afraid of just spoiling the hull. Painting was more difficult than I thought, I would have to completely disassemble the case, drill it, then put it back together. In general, this way is not for me.
In the CIS at the time Lian Li cases won’t sold anywhere. It was necessary to order them, for example, from ComputerUniverse, but it was very expensive and hard. So I decided to postpone changing case and start with something less wide scale and more affordable.
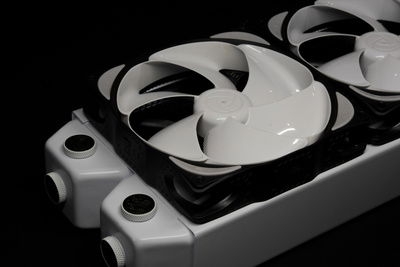
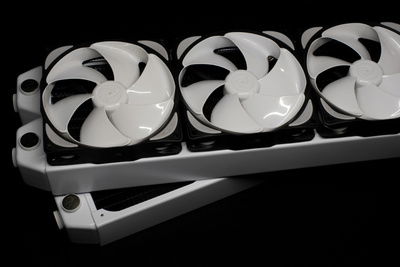
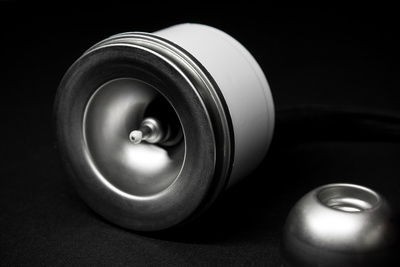
I noticed the Noiseblocker NB-eLoop B12-PS fans a long time ago. I saw them somewhere, I don't even remember where, and immediately fell in love with them. Very interesting and elegant design, the shape of the blades, which are made as a single element, white rubber inserts on the edges. I could describe them for a long time.
I started looking for them at different flea markets, in Russia it’s "Avito", and bought them used by the piece (about $14 apiece). Since it was half the price, and I doubt that something can happen to the fans for year, because they're very expensive and, I think, should be of high quality and dependable.
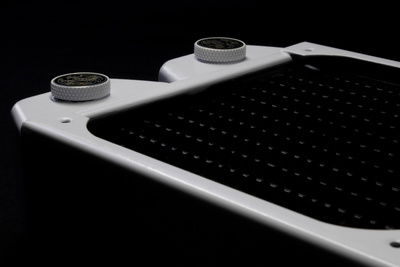
So I bought about 5 fans in a couple of weeks and then I got a chance to buy a 60mm thick copper 360mm Bykski radiator on the same Avito. I figured why not and ordered it.
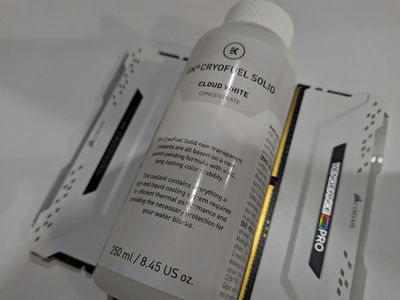
Also at that time my friend from Moscow offered me three bottles of branded EKWB Cryofuel Solid Cloud White concentrates for a good price. They were just lying around on his shelf. What happened next I think you've already understood.
Then came one of the most difficult stages - finding a motherboard with white textolite. More precisely, this search began long before the purchase of the first fan. I began to explore the proposals of different manufacturers, options in stores and realized that at that time and now there was no motherboard on the AM4 with white PCB.
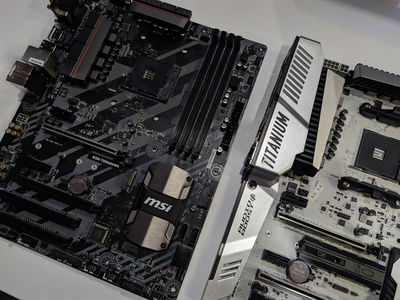
Why? Why doesn't anyone make them? Is white PCB so much more expensive or difficult to produce that motherboards with such PCB can be written in the red book? As far as I know, there are only three motherboards with white PCB on the market, all from MSI:
– MSI B350 Tomahawk Arctic;
– MSI B450M Mortar Titanium;
– MSI X370 XPower Gaming Titanium.
At the time I had a motherboard also from MSI, namely the MSI B350 Tomahawk. It seemed absurd to me to replace the B350 with the exact same B350, but it’s white Tomahawk Arctic version, so I continued searching and found the MSI B450M Mortar Titanium and rejected it too because of its form factor. I think it’s not necessary to explain that in this case, this mATX baby would look just ridiculous and unserious.![Emoji]()
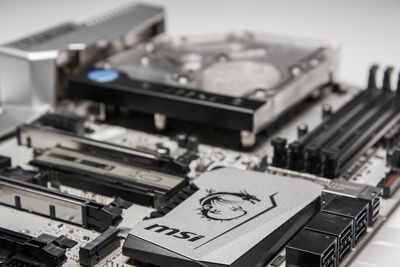
And now it was the turn of the MSI X370 XPower Gaming Titanium and I started looking for where to buy it. Nowhere. It’s impossible to buy it anywhere, since this is 2017 production year, and it has long been gone from the shelves in stores. So I went looking for it on Avito, where I found my new motherboard. It was on sale for $105.
Yep, unfortunately it came with an incomplete kit, w/o back cover, it has a couple of nasty scratches on the plastic cover to the left of the processor on the letter "T", but there weren't many options. My budget is very modest, as you can understand from the introduction, so I couldn’t take the motherboard from the second ad, where it was in almost perfect condition and with a native plug, because it was more expensive by $70.![Emoji]()
Unfortunately, I'm not the luckiest person, and while I was lucky enough to find it on sale and for pretty good price, I was very unlucky with the shipping.
As I said before there was no complete kit, so the seller sent it in a different non-original box, which somehow crumpled up the bottom right corner of the PBC during shipping. I was worried sick about this, but luckily there were no tracks and the motherboard worked fine. Idk if I was lucky or not...![Emoji]()
The next thing after changing the motherboard was the RAM, and here everything was simpler. I thought about buying the white Crucial Ballistix, but even though they are white, they didn't have a particularly attractive appearance.
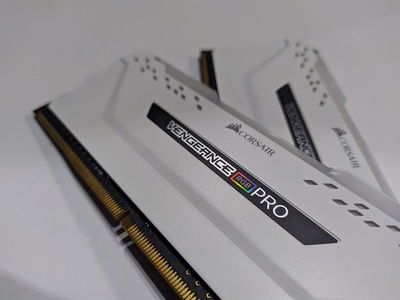
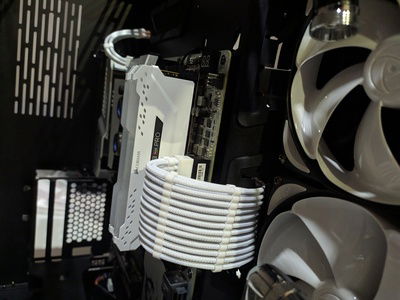
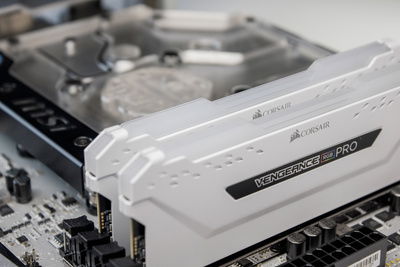
I even thought about taking some simple RAM, ordering some radiators from AliExpress, painting them white and installing it on the RAM. But it turned out to be more difficult than I thought. All of the radiators were either with some kind of frankly ugly Chinese design, or with separating strips on top, where the LEDs are located. Then I saw the Corsair Vengeance Pro RGB in some build - neat, white, minimalistic, with nice RGB lighting, everything I needed. I actually bought them for $90 for a 16GB 3200MHz.
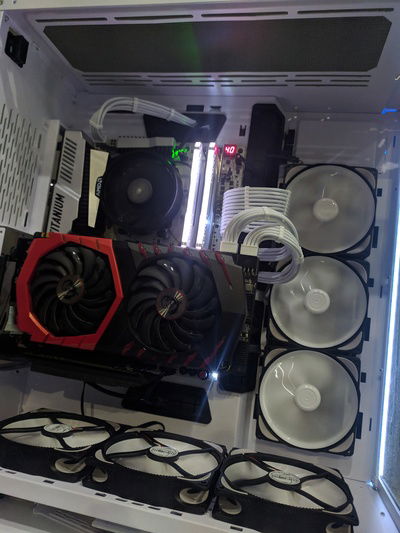
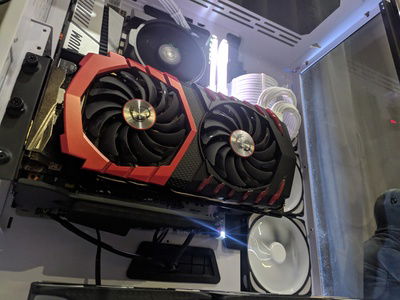
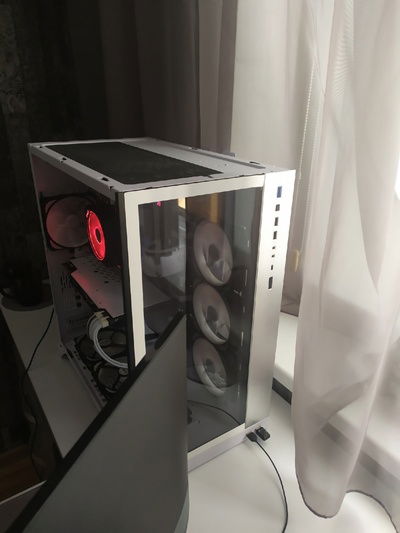
And now I already have a small white starter pack and a new thick 60mm Bykski radiator with which I decided to rebuild my PC in an old black Lian Li PC-O11 Dynamic (Razer Edition). I installed a new white motherboard, put in white RAM and installed my existing fans into the case, at that time I already had 8 of them.
At this point I really liked what I was getting, but it was too early to rejoice, cuz there were still so many things to change and redo.
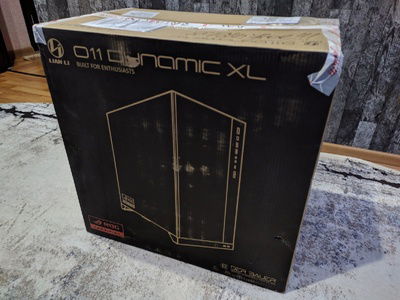
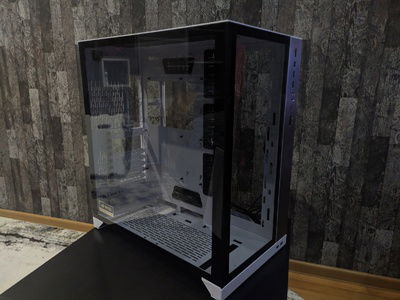
So we slowly moved on to changing the case. It's already 2021, 2nd of January and a new white Lian Li PC-O11D XL ROG Certified came to me. Btw, I bought it also on the Avito for $190.
It turned out to be noticeably bigger than its smaller black brother, which was a plus for water cooling. Thanks to this, I could install thicker radiators, I'll come back to that later.
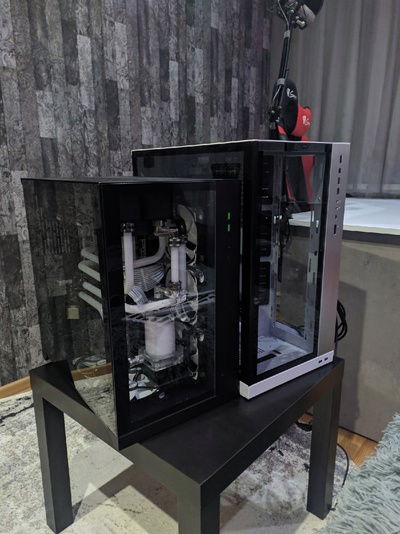
At this stage, I had to return everything to the factory look, disassemble the entire loop, return the graphics card to air cooling and for the first time get the boxed Ryzen cooler out of the box. Rebuilding on water cooling in a new case didn't make any sense, cuz it was just a waste of new tubes. It's unknown how soon the build will change again, cause after that I wasn’t going to stop and wanted to finish the build ASAP.
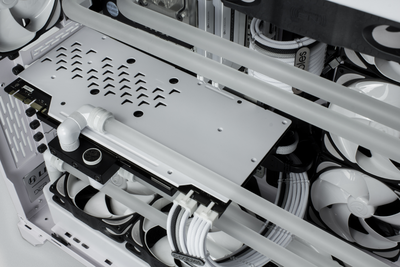
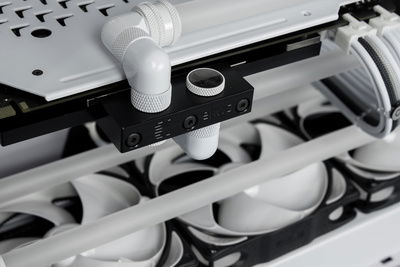
The most important and difficult part of my build, imho, is ofc the custom distro plate, which I wanted to make for this build.
I’ve wanted to create a loop with a distro plate for a very long time. This can be seen from the previous version of my PC in the black Razer Edition case, where all the tubes from the water blocks went in parallel to the front of the case and were distributed there.
I wanted to use in my build a distro plate, and not just any distro plate, but a front one, which would be installed instead of the front glass, so that it would take up its entire area. As for me, side plates aren’t as interesting as front plates, cuz with a front distro plate you can just sit in front of your computer and forever watch how the fluid flows in the loop.
I looked at various offerings from Barrow, Bykski and EKWB, but they were all made for specific water blocks and for thin radiators, which didn't fit for me. Let me remind you, at the time I had 60mm and 40mm radiators.
The best option was EKWB, but it was too expensive for me, I wasn’t ready to pay €300 for a piece of acrylic. And it wouldn't match my CPU, GPU water blocks and motherboard. So, anyway I would have to use extenders, adapters, etc., which isn’t very aesthetically pleasing and nice-looking.
And then I thought: why don't I make my own custom distro plate? Then it would perfectly match my water blocks, radiators, since I decided where and what ports and channels would be.
Ofc, w/o anyone else's help I couldn’t make it myself, so I turned to my friend Ilya from St. Petersburg, who has skillful fingers and his own CNC machine on which he himself has made several custom distro plates. So I decided to trust him and make my own plate together with him. We have been looking at ready-made solutions for a long time, looking at various forums on custom plates for this case and how people make them.
Everything seemed quite simple, all we had to do was take down the exact dimensions for the ports, make a 3D model and start building. But there was a small, no, a big problem which questioned the feasibility of the custom distro plate - the mounting.
How do you mount a huge piece of acrylic, so that it will hold well and not accidentally fall out or something? Slovenes from EKWB offered angled mounts for their plates, which screw into the distro on one side and to the case on the other.
Unfortunately, my friend Ilya wouldn’t be able to do this, so we started thinking further. Mb it would be possible to somehow screw it into the case through the factory holes? I decided to see how the Chinese guys from Bykski and Barrow did it and it turned out that they didn’t screw it to the case at all. They just put them in and that's it. Seriously, no mounts. They made the distro plate as close to the edges of the case as possible, so that the distro would fit tightly in the case. I asked around on build.gg and everyone told me that yes, it isn’t attached in any way, and that it didn’t fall out of the case or wobble.
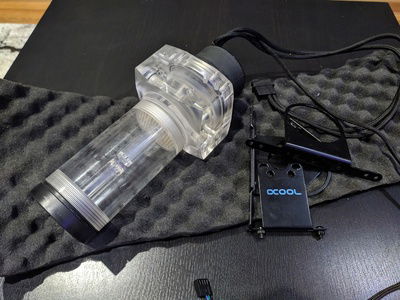
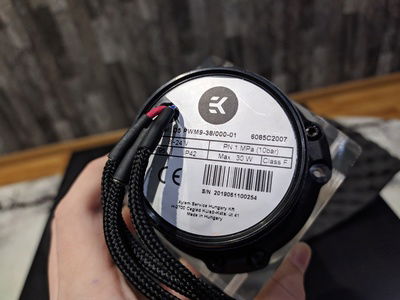
After that, the question of mounting the distro plate in the case was solved and we moved on to the choice of pump type. Here it's obvious - it's a D5. Previously I had a DDC pump, I had no experience with D5 pumps, but D5 pumps are powerful, efficient and quiet solutions. At this point my luck finally turned around and I got a great deal on an EKWB pump with an Alphacool reservoir for only $48. I only needed the pump from there, but at this price, why not get it along with the reservoir.
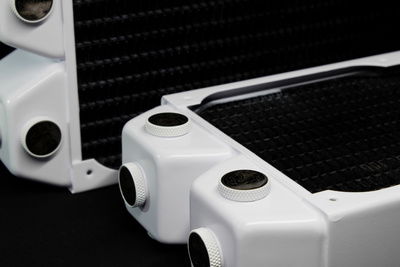
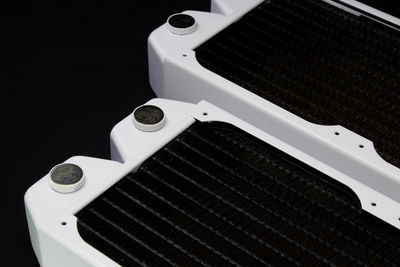
Also this seller had two identical 360mm Alphacool NexXxoS XT45 radiators for $55 each. A very good offer, quality copper German Alphacool radiators, and moreover identical, which means they will look symmetrical and aesthetically in the case. I didn't think and immediately paid for the radiators and the pump.
In between, I kept on hunting down Noiseblocker fans on Avito and buying them. I didn't have to choose a model, almost all were high-speed B12-4 fans, but I also found a couple with PWM control (B12-P/B12-PS). These fans ended up frustrating me a bit… As ridiculous and contradictory as it may sound, they’re rather Noisemakers, cuz the older models (B12-3/B12-4) have some crackling and strange hum at low RPM. Yep, at higher RPM this noise isn’t noticeable, but the air passing through the fan already starts making noise. In general, it isn’t very pleasant...![Emoji]()
Sound test video - youtube.com/watch?v=GNdCKlzP9iw
For a long time I thought about what to do with these fans, cause it would be very expensive to change them for others, and I really liked their look a lot. There are white Corsair LL120 and Lian Li Uni Fan SL120 with nice RGB, but as I already said all of them are very expensive and used fans like them are even more rare than Noiseblockers.
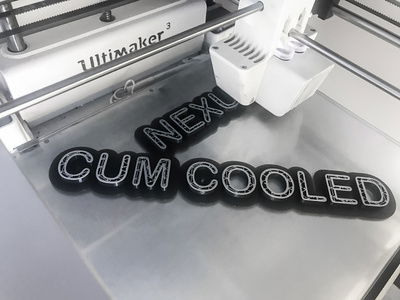
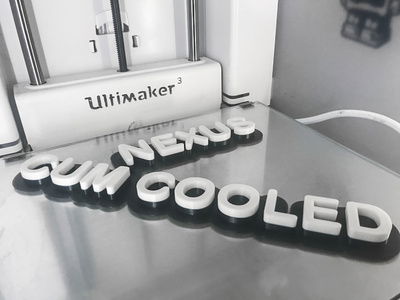
Then I thought about how to creatively sign the build, so that it would look like the caption from the "Cum Cooled PC" meme and I remembered about the existence of 3D printers. I found a person in Belarus who can print it and ordered two prints - Cum Cooled and Nexus (my nickname).
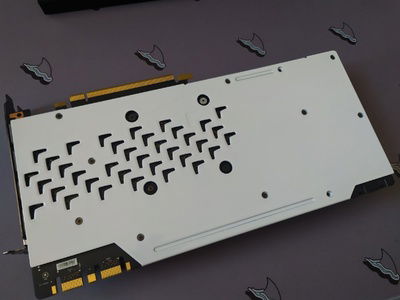
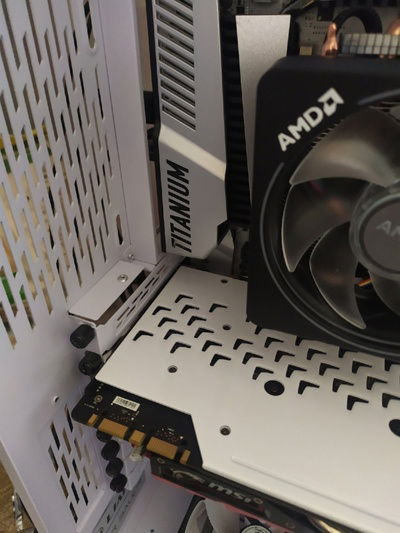
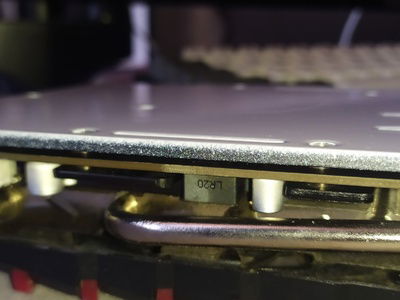
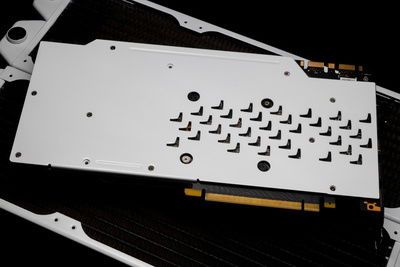
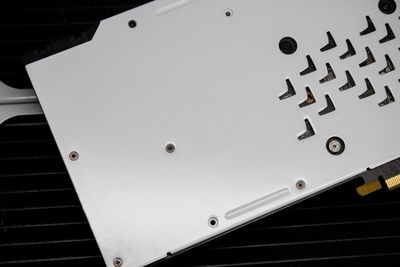
To give the text height and make them stand out, I decided to make them in two layers, the bottom one of black plastic and the top one of white, so that it stands out against the white radiators. They'll be attached to the radiators, which, as I said earlier, will be repainted white, just like the graphics card backplate.
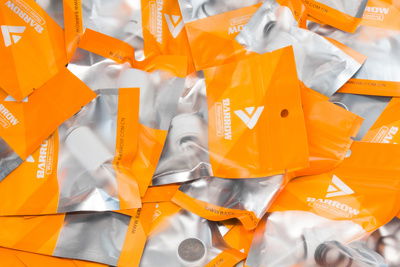
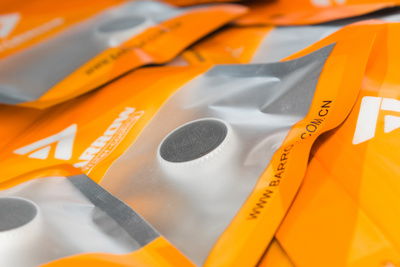
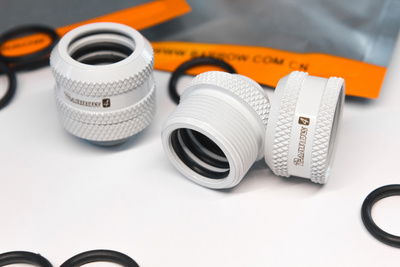
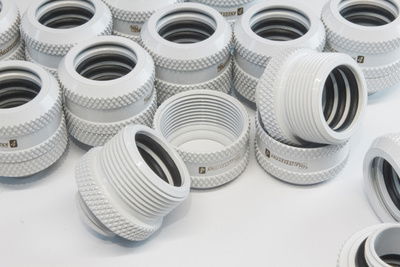
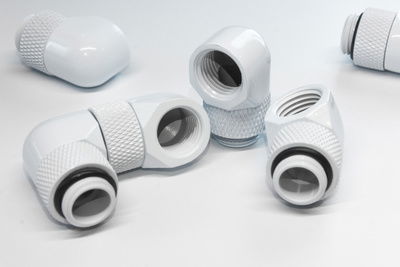
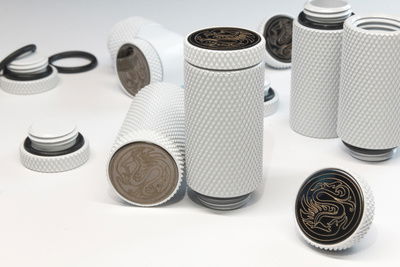
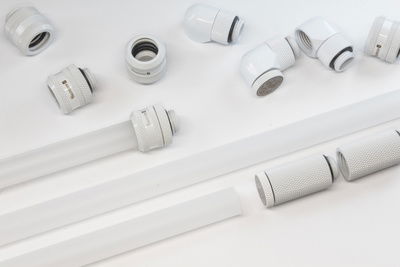
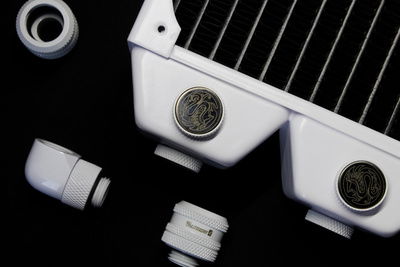
Around the same time my new radiators arrived, I ordered various white fittings, angles and adapters from Aliexpress that I would need in the build, namely:
– 16x Barrow 14x10 white fittings;
– 14x Barrow white plugs;
– 6x Barrow white 90° adapters;
– 4x Barrow white 30 mm extenders;
– 8x Bykski 14x10 acrylic frosted tubes.
At this point, btw, I bought an old Canon 550D. All future photos will be taken on it.
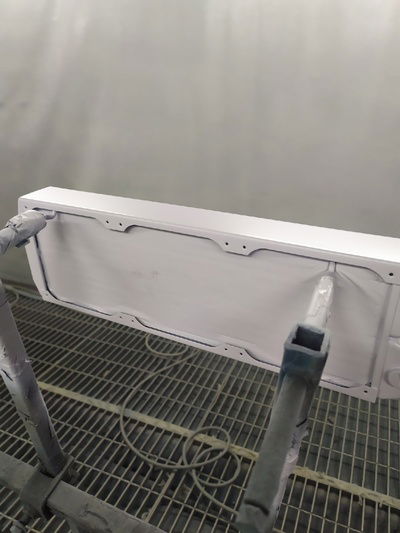
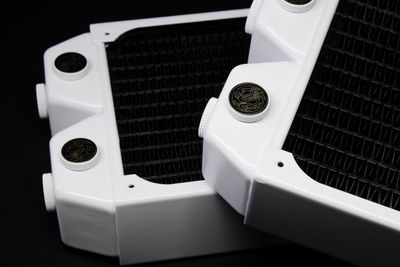
It's April, I found in my city, as it seemed to me, a good painter, who could match the color and paint the radiators, backplate and also the pump body. I decided to paint it too, so it wouldn’t stand out.
As a result, he painted everything terrible, there were leaks, unpainted areas on the radiators, the paint wasn’t only glossy and not matte, as I wanted, but also a warmer white color and not cold, as I asked...
I didn’t expect this and went to look for another painter. I found another painter, seemed to explain all the requirements for the paint, color, and gave it away for repainting. I live in a relatively small Belarusian town with a total population of 100,000, so the matching of color was challenging.
And so, almost a month has passed. I called the painter to find out how it's progressing, whether it'll be ready soon. To which he told me that in two days everything will be ready, you can take it away, now they’re still drying. Three days later I came to his garage, took the radiators from the paint camera, everything was fine, there were no leaks, etc., they painted really well. I put them in my backpack and went home.
When I take them out at home, I notice that they smell strongly of paint and aren’t dry at all. The edges, that were in contact with the inside of the backpack, now had the texture of the fabric, and there were dirty fingerprints from the painter on one of the sides of the radiator... Idk why he didn't warn me that the radiators weren’t fully dry and so casually took them with his hands, leaving fingerprints.
Anyway, I was disappointed again, but at least the color was well matched.![Emoji]()
Also later, already in the process of screwing fittings and bolts, I realized that he painted them wrong, w/o primer. When I screwed in fittings and screws the paint literally fell off in some places, i.e. very poorly adhered to the surface of the radiator. This is a failure...
I don't even know whether to repaint the radiators for the third time. To be honest it’s just scary that the radiators won’t survive this, but it seems like I found a better painter from Minsk.
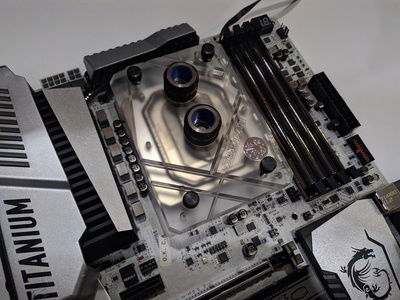
Meanwhile, while I was waiting for the radiators, in early May I was also thinking about changing my CPU water block. In general, my old one might look fine, but I decided to look for something else and saw that EKWB used to make a monoblock for my motherboard. it was only available at Overhard.ru, a russian store for custom liquid cooling and modding for around $95.
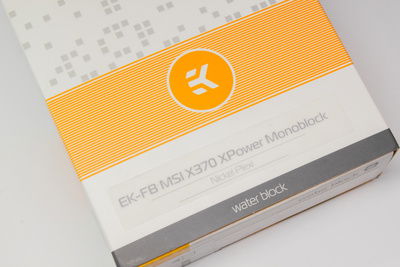
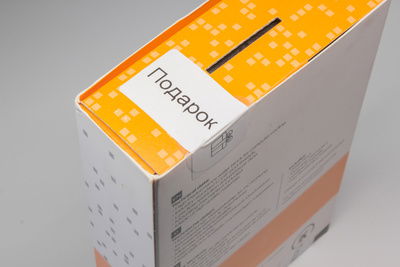
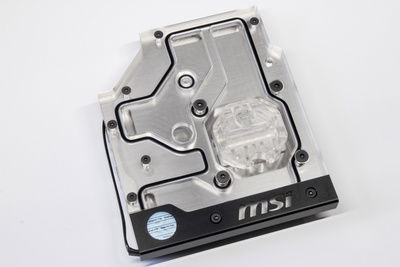
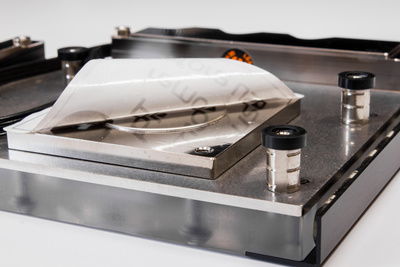
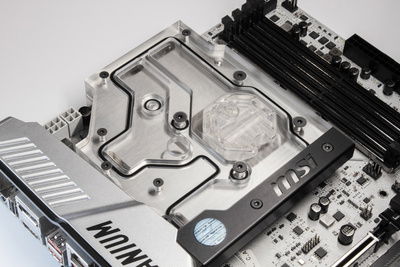
In the West, as I know, various vendors often support modders and send them their hardware for builds. I'm not a popular modder/builder, but I decided to give it a try and write to them. Surprisingly, they agreed and gladly provided me with an EK-FB MSI X370 XPower RGB monoblock for my project, and thanks a lot for that. I've always been interested in trying out a monoblock in the build.
Well, you have to agree, this monoblock looks really cool on this mobo!
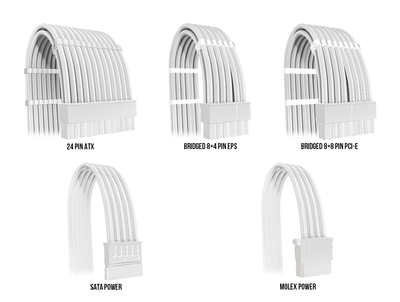
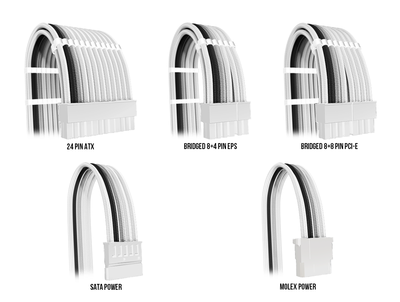
Then Alexander from C-Cables helped me a lot and together we made custom modular PSU cables for my PC. We thought a lot about the color combination for the cables, went through a lot of different designs.
Below I have attached a couple of example combinations we were thinking about.
Originally the build was supposed to be all white, so the cables had to be white with white connectors too.
But I thought it would look too boring, and anyway some black or gray elements in the build will remain. There is no way to get rid of this, no matter how i want, although it may be even better.
Finally we have stopped at the following color scheme:
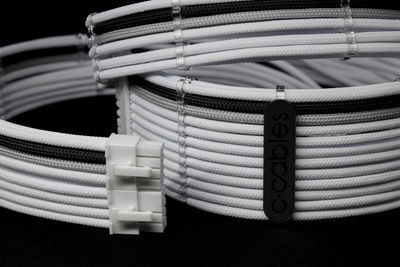
Black and gray stripe with one wire indented from the left. (White, Gunmetal Gray, Gray, White, White...)
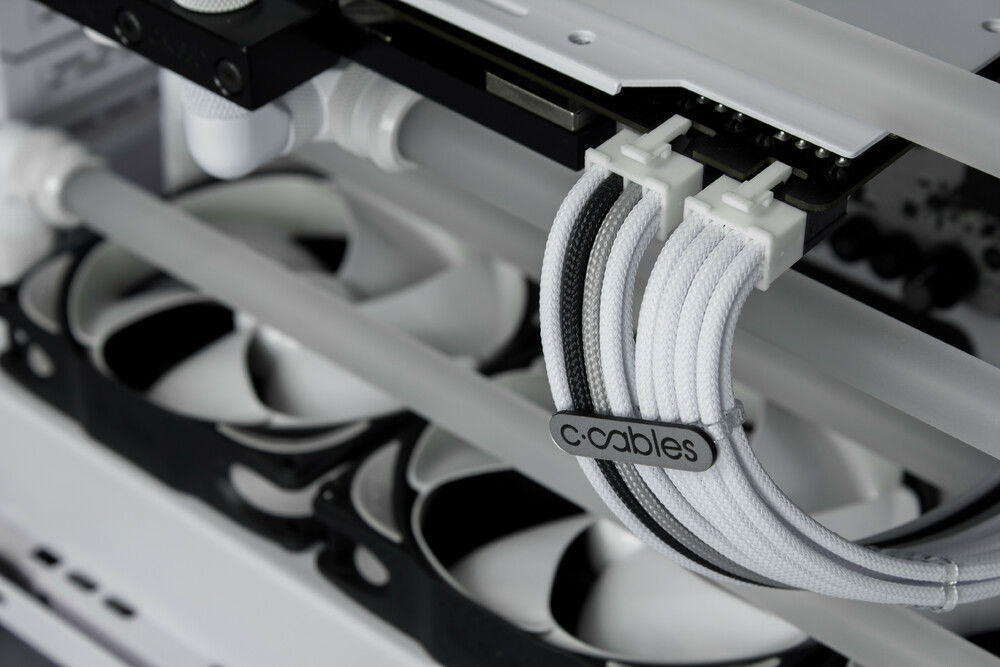
White connectors were used on both sides, both on the component side and the PSU output. Yeah, they're also not pure white, but milky as always. I don’t understand what the problem is to make white be white instead of milky or coffee color. I don't think it's that difficult in manufacturing. There is no way to get pure white connectors at all, even the expensive JMT one have a similar shade.
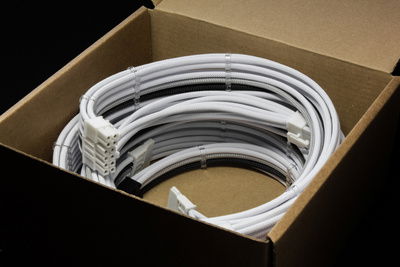
I took all the dimensions , we talked about how and where the cables would be placed, and Alexander began to make them. In just two days he finished them and they were already on their way to me!
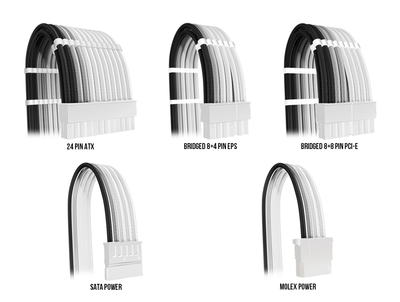
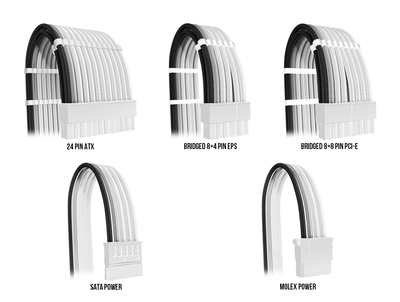
I received 24-pin modular cables for the mobo, bridged 8+8-pin for PCI-E and I also decided if I wanted to make custom cables, I had to make them properly, so we made a bridged 8+4 pin EPS. Yep, in the beginning I wrote that I have Ryzen 5 2600 in my PC. I totally agree with you that it doesn't need 8+4-pin power, but I didn't want to leave the 4-pin connector empty.
C-Cables also made peripheral cables for me: a dual SATA power cable for SSD, a short 10cm SATA power cable for the RGB controller, and a one for the D5 pump to connect it directly to the PSU via a 6 pin connector, w/o Molex adapters, and a white 4 pin cable with a white connector to control the pump speed.
Included with the cables I got some white sleeving and heat shrink to sleeve the front panel and the RGB controller cables.
There are a few more cables ahead. Later, custom fan cables will be made to keep everything clean. It'll be of a right length and, ofc, in white color. Right now C-Cables doesn't have enough connectors to make the fan cables, they’ll come a bit later. And they'll be soldered instead of using the native short connectors of the Noiseblockers, to remove the extra unnecessary connections at the most visible place. Yeah, it may be convenient that you can connect the cable of the required length, but in my situation, these connectors will only ruin the picture.
SATA data cables from SSD to mobo will be ordered from AliExpress, there is no way to make white custom ones, they aren’t disassembled as well as USB 3.0 from the front panel.
And for USB 3.0, on the same AliExpress, I accidentally found an extension cable with a demountable connector, which I, ofc, ordered and then it'll also be sleeved.
Once again, a huge thanks to C-Cables for this opportunity!![Emoji]()
Suddenly at the beginning of June the boys from Overhard wrote to me and said, that they decided to enter the market of pastel opaque coolants and offered to send me a sample of white one. I, ofc, agreed, why not. I was curious about the coolant, how it would behave, etc.
Surprisingly, the color turned out to be exactly what I wanted - white, not milky, not some kind of greenish.
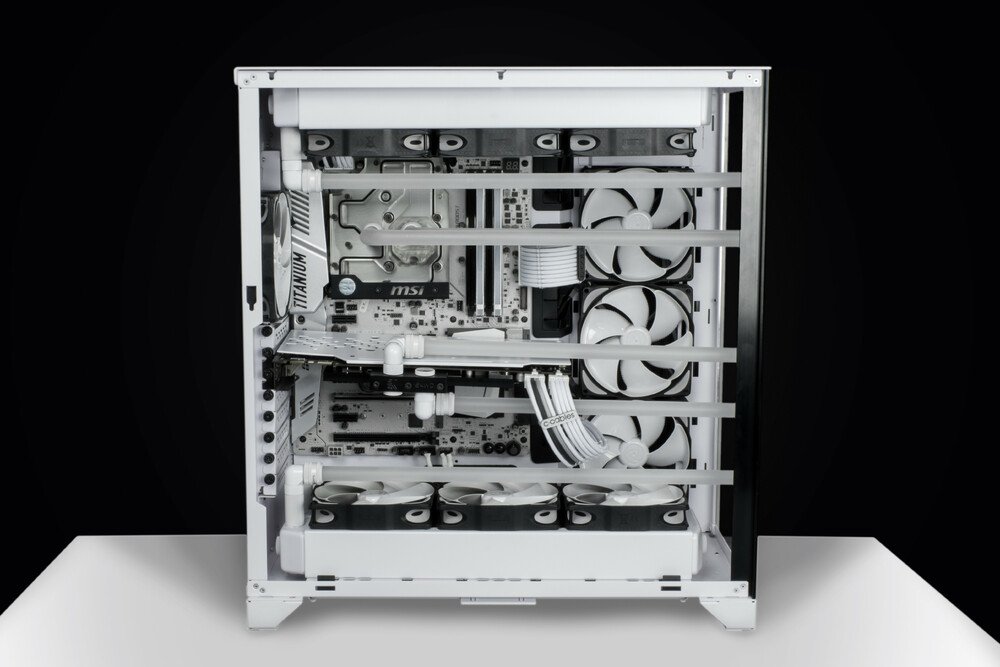
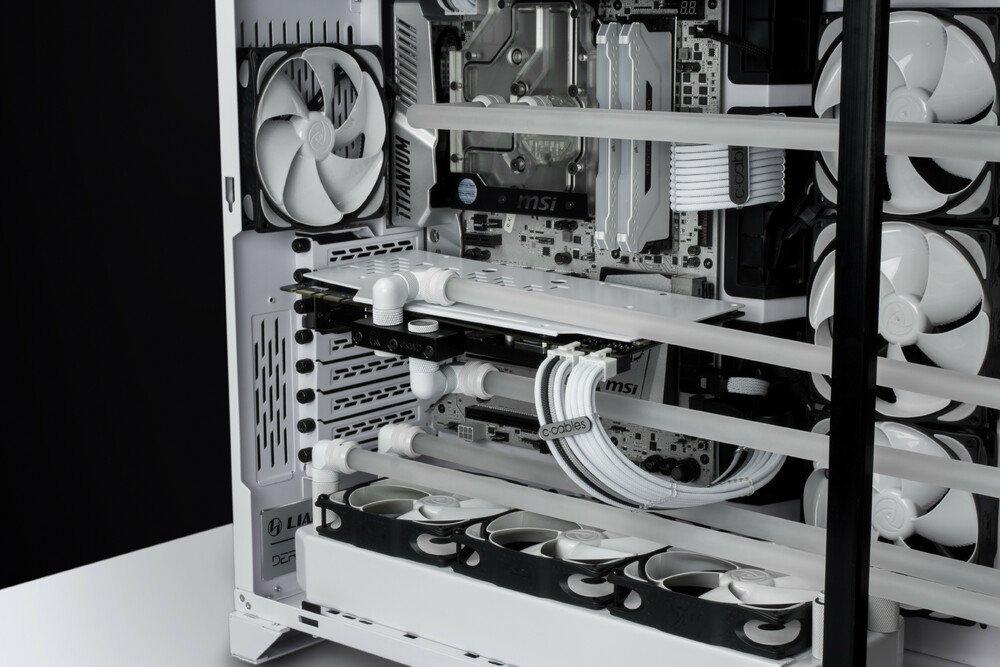
It would seem that I already have almost everything to build a PC, now I have to assemble a test build, connect all the tubes, make bends in the right places, see if I miscalculated somewhere. After that I measured the coordinates and dimensions of the tubes to mark out the ports of the distro plate, so we can begin to create a 3D model and then make it. I did it, and at the same time I took part in AMD Russia #RyzenЗаСборку contest for the best build, where the author of the most beautiful build according to the viewers vote will get the main prize - a brand new Ryzen 5 5600X. And I just got the new softboxes, which allowed me to take these pretty photos. But the background was made in photoshop, I haven't any stands and color backgrounds, but let's skip this.![Emoji]()
Btw, just look at that silver C-Cables logo, it looks unreal stylish on these cables!![Emoji]()
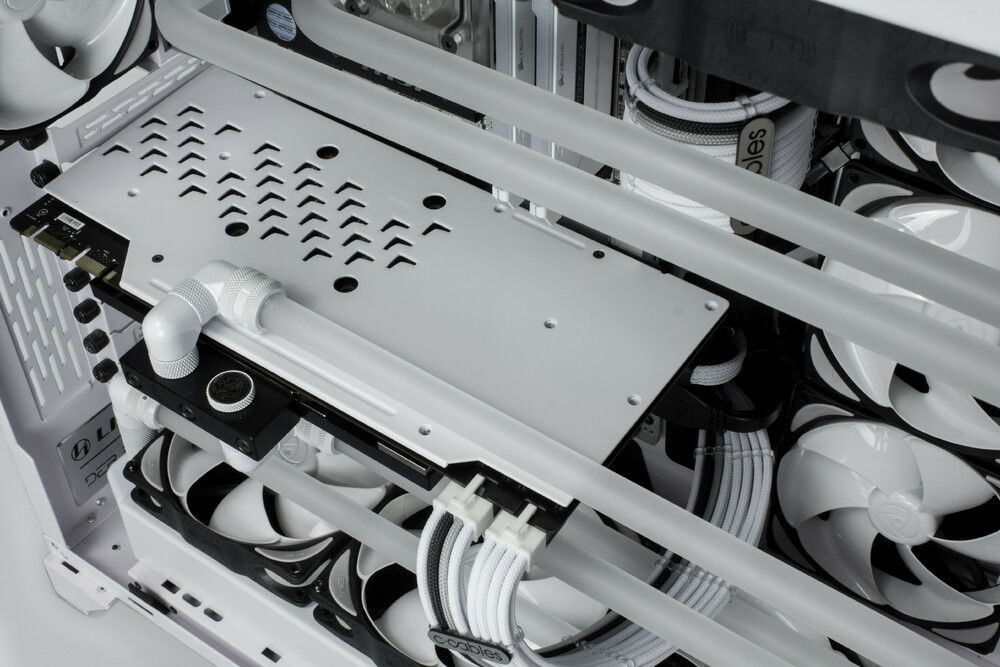
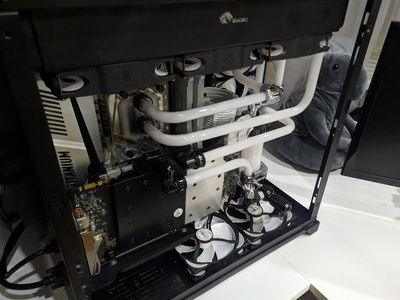
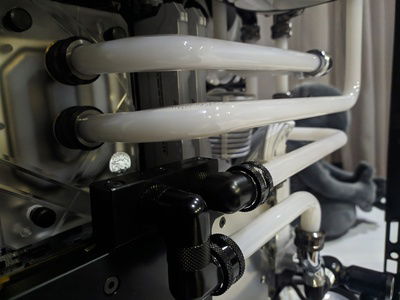
This is how the build looks like at the moment. Yep, the graphics card is a lot saggy, which makes sense, cuz I don't have the distro plate, it's not mounted anywhere, it just hangs under its own weight. Don't worry, the tubes in the final build with the distro plate will be straight (I hope), and for the GPU I’ll use the native Lian Li bracket from the kit to align it (Idk why I didn't think about it before).
Unfortunately I didn’t win the contest. I didn’t even passed in the final, but this is a long story, I see no reason to tell it, I can only say that only the administration or a jury consists of the bloggers/modders should choose the winner in such contests. Not subscribers, because then reigned utter chaos, everyone asked to help their friends in various other groups to vote, someone even brazenly cheating voices with bots.
Without further ado, I present to you the winner of this contest:
I'm not kidding. Don't even ask me how "it" not only passed to the finals, where for some reason I didn't even make it, but also won the Ryzen 5 5600X... I have nothing to say, frankly, it's complete nonsense.![Emoji]()
Now I'm thinking about painting the GPU water block, SSD basket, PSU body and rubber plugs for cables. Maybe it makes sense just to replace the water block with a transparent full cover version from MSI Sea Hawk EK X, which you can get after mining on Avito for about $40. I don't even know if I need it. Difficult choice...
I'll definitely paint the SSD basket and the PSU body. This time I'll send them to another painter from Minsk, whom I wrote about earlier. Let's see how he will paint.
I wish the PC to look nice on both sides: the back side as well and nothing stands out as it does now. The only thing is that if I paint the PSU, I'll lose the Corsair warranty, cuz I have to tear off the seal.
As for the rubber plugs - I thought about buying them on AliExpress, but Lian Li has very specific rubber plugs, I didn't find them, and the round ones wouldn't fit at all. I consulted with a painter and he said that they can be painted for the PC build. In theory, the paint won’t crack. I'll bend them max of 3-4 times when laying them in the final build, I won’t bend them every day 24/7.![Emoji]()
But recently one not so pleasant moment happened. Mostly, ofc, it was my fault. I'll tell you about it now.
Well, as you know, Lian Li recently introduced their new O11D Mini model, which has an incredible Snow White version. This version is completely white. I can say with certainty that it's a dream case, cause all the case parts are white. White dust filters, white rubber cable plugs, silver screws, and a white frame around the edges of the glass. That's what I’m going to talk about now.
To be honest, I even thought for a few days about changing the build completely and moving it to the new O11D Mini Snow White. But this would be impossible, since I have an ATX mobo, which wouldn't allow me to put radiators on top and bottom of the case. I wanted to place the radiators exactly like that so that it looked symmetrical. And there were many other nuances...
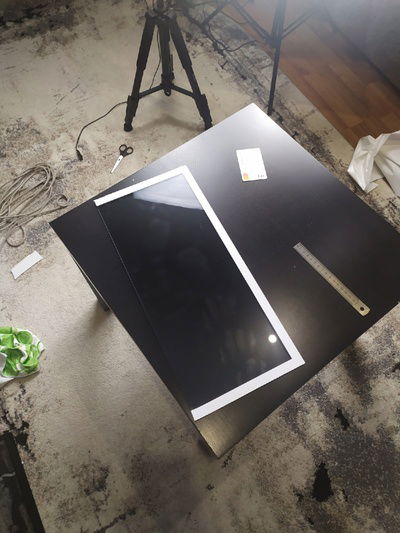
Idk about u, but my Lian Li XL really pisses me off with the black frame around the edges. Yea, mb it somehow accents its shapes and stuff. I'm not a designer, but I wanted a white frame. I thought for a long time about how to do it, cuz the old black paint can't be removed. There was an alternative, to either repaint with white paint over the black, but Idk how that would look, or just buy a matte white film. I chose the second one, as the film can always be removed. After searching online, I chose a German self-adhesive film DC Fix 346-8006, it seemed suitable to me.
As it arrived to me, I was instantly disappointed. Wrong shade, milky again, lmao...
I decided that if I had bought it, I would at least give it a try. And that became my mistake. I have never had any experience with wrapping anything before, so it was very tricky for me. It's hard to describe how many curses were uttered and nerves were wasted. In the end, I did it somehow. I cut around the edges of the old black frame. It was a little crooked the first time. I went to try it on the case and realized that it was a completely different shade. I removed the film off the glass and realized that I'm a complete dumbass...
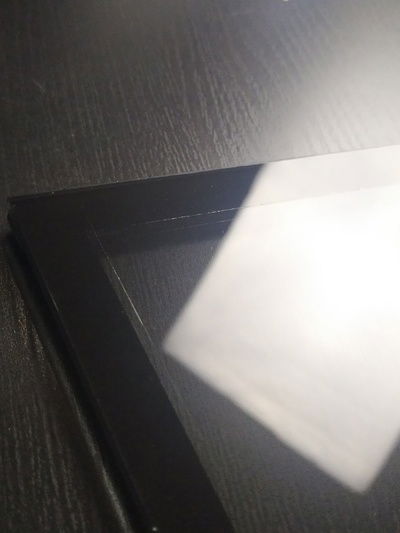
Idk how it happened and why I didn't even think about it, but I scratched the glass all the way around the edges...
Well, next time I'll know I shouldn't do that...
Now I have glass not only with a black frame, but also with scratches, nice!![Emoji]()
Maybe later I'll send the glass to the same painter from Minsk, if he paints the PSU case and the SSD basket well.
This is the end of the build log. Now Ilya and I are modeling the 3D model of the distro plate. Any further news will be added to this page.
I hope whoever is reading this now found it interesting to walk this path with me!
Thanks, I really appreciate it.![Emoji]()
I’m from Belarus, so I Immediately apologize for possible misunderstandings in the text or errors, idk English very well.
This build log will be about my history of building my first custom liquid cooled PC with a distro plate. Here will be described in great detail all the stages and difficulties that I faced.
Perhaps this will inspire someone to create some of their own projects and warn about possible difficulties along the way, but the most important thing is not to give up and be sure to try to implement your idea!
The final build will be posted later in a separate post after completion (If I ever do finish it
Let me start by saying that I had a regular build with Ryzen 5 2600 and GTX 1080. At one point I decided to build myself a custom water cooling system.
So, I built it, everything, I really liked it, I was proud that I could build it with my own hands without any experience. (I have a separate build of this PC in my profile, if anyone is interested
And one day, sitting in VK, my friend sended me the meme "Cum Cooled PC".
I decided to look at similar builds and I couldn't find a real “Cum Cooled PC” with all-white components.
After that, I knew right away that I wanted to make this meme a reality and build an all-white "Cum Cooled" PC. All-white means completely white: white case, white fans, white motherboard with white PCB, white fittings, white cables, all white!
It wasn't as easy as I thought it would be. It would seem that 2020 (at the time of the start of the build), there are a bunch of different offerings on the market, but it's not that simple.
The first thing I decided to do was to replace the biggest part of the build - the case.
At first I wanted to paint it, but in the end I didn't decide to do it, because I was afraid of just spoiling the hull. Painting was more difficult than I thought, I would have to completely disassemble the case, drill it, then put it back together. In general, this way is not for me.
In the CIS at the time Lian Li cases won’t sold anywhere. It was necessary to order them, for example, from ComputerUniverse, but it was very expensive and hard. So I decided to postpone changing case and start with something less wide scale and more affordable.
I noticed the Noiseblocker NB-eLoop B12-PS fans a long time ago. I saw them somewhere, I don't even remember where, and immediately fell in love with them. Very interesting and elegant design, the shape of the blades, which are made as a single element, white rubber inserts on the edges. I could describe them for a long time.
I started looking for them at different flea markets, in Russia it’s "Avito", and bought them used by the piece (about $14 apiece). Since it was half the price, and I doubt that something can happen to the fans for year, because they're very expensive and, I think, should be of high quality and dependable.
So I bought about 5 fans in a couple of weeks and then I got a chance to buy a 60mm thick copper 360mm Bykski radiator on the same Avito. I figured why not and ordered it.
Also at that time my friend from Moscow offered me three bottles of branded EKWB Cryofuel Solid Cloud White concentrates for a good price. They were just lying around on his shelf. What happened next I think you've already understood.
Then came one of the most difficult stages - finding a motherboard with white textolite. More precisely, this search began long before the purchase of the first fan. I began to explore the proposals of different manufacturers, options in stores and realized that at that time and now there was no motherboard on the AM4 with white PCB.
Why? Why doesn't anyone make them? Is white PCB so much more expensive or difficult to produce that motherboards with such PCB can be written in the red book? As far as I know, there are only three motherboards with white PCB on the market, all from MSI:
– MSI B350 Tomahawk Arctic;
– MSI B450M Mortar Titanium;
– MSI X370 XPower Gaming Titanium.
At the time I had a motherboard also from MSI, namely the MSI B350 Tomahawk. It seemed absurd to me to replace the B350 with the exact same B350, but it’s white Tomahawk Arctic version, so I continued searching and found the MSI B450M Mortar Titanium and rejected it too because of its form factor. I think it’s not necessary to explain that in this case, this mATX baby would look just ridiculous and unserious.
And now it was the turn of the MSI X370 XPower Gaming Titanium and I started looking for where to buy it. Nowhere. It’s impossible to buy it anywhere, since this is 2017 production year, and it has long been gone from the shelves in stores. So I went looking for it on Avito, where I found my new motherboard. It was on sale for $105.
Yep, unfortunately it came with an incomplete kit, w/o back cover, it has a couple of nasty scratches on the plastic cover to the left of the processor on the letter "T", but there weren't many options. My budget is very modest, as you can understand from the introduction, so I couldn’t take the motherboard from the second ad, where it was in almost perfect condition and with a native plug, because it was more expensive by $70.
Unfortunately, I'm not the luckiest person, and while I was lucky enough to find it on sale and for pretty good price, I was very unlucky with the shipping.
As I said before there was no complete kit, so the seller sent it in a different non-original box, which somehow crumpled up the bottom right corner of the PBC during shipping. I was worried sick about this, but luckily there were no tracks and the motherboard worked fine. Idk if I was lucky or not...
The next thing after changing the motherboard was the RAM, and here everything was simpler. I thought about buying the white Crucial Ballistix, but even though they are white, they didn't have a particularly attractive appearance.
I even thought about taking some simple RAM, ordering some radiators from AliExpress, painting them white and installing it on the RAM. But it turned out to be more difficult than I thought. All of the radiators were either with some kind of frankly ugly Chinese design, or with separating strips on top, where the LEDs are located. Then I saw the Corsair Vengeance Pro RGB in some build - neat, white, minimalistic, with nice RGB lighting, everything I needed. I actually bought them for $90 for a 16GB 3200MHz.
And now I already have a small white starter pack and a new thick 60mm Bykski radiator with which I decided to rebuild my PC in an old black Lian Li PC-O11 Dynamic (Razer Edition). I installed a new white motherboard, put in white RAM and installed my existing fans into the case, at that time I already had 8 of them.
At this point I really liked what I was getting, but it was too early to rejoice, cuz there were still so many things to change and redo.
So we slowly moved on to changing the case. It's already 2021, 2nd of January and a new white Lian Li PC-O11D XL ROG Certified came to me. Btw, I bought it also on the Avito for $190.
It turned out to be noticeably bigger than its smaller black brother, which was a plus for water cooling. Thanks to this, I could install thicker radiators, I'll come back to that later.
At this stage, I had to return everything to the factory look, disassemble the entire loop, return the graphics card to air cooling and for the first time get the boxed Ryzen cooler out of the box. Rebuilding on water cooling in a new case didn't make any sense, cuz it was just a waste of new tubes. It's unknown how soon the build will change again, cause after that I wasn’t going to stop and wanted to finish the build ASAP.
The most important and difficult part of my build, imho, is ofc the custom distro plate, which I wanted to make for this build.
I’ve wanted to create a loop with a distro plate for a very long time. This can be seen from the previous version of my PC in the black Razer Edition case, where all the tubes from the water blocks went in parallel to the front of the case and were distributed there.
I wanted to use in my build a distro plate, and not just any distro plate, but a front one, which would be installed instead of the front glass, so that it would take up its entire area. As for me, side plates aren’t as interesting as front plates, cuz with a front distro plate you can just sit in front of your computer and forever watch how the fluid flows in the loop.
I looked at various offerings from Barrow, Bykski and EKWB, but they were all made for specific water blocks and for thin radiators, which didn't fit for me. Let me remind you, at the time I had 60mm and 40mm radiators.
The best option was EKWB, but it was too expensive for me, I wasn’t ready to pay €300 for a piece of acrylic. And it wouldn't match my CPU, GPU water blocks and motherboard. So, anyway I would have to use extenders, adapters, etc., which isn’t very aesthetically pleasing and nice-looking.
And then I thought: why don't I make my own custom distro plate? Then it would perfectly match my water blocks, radiators, since I decided where and what ports and channels would be.
Ofc, w/o anyone else's help I couldn’t make it myself, so I turned to my friend Ilya from St. Petersburg, who has skillful fingers and his own CNC machine on which he himself has made several custom distro plates. So I decided to trust him and make my own plate together with him. We have been looking at ready-made solutions for a long time, looking at various forums on custom plates for this case and how people make them.
Everything seemed quite simple, all we had to do was take down the exact dimensions for the ports, make a 3D model and start building. But there was a small, no, a big problem which questioned the feasibility of the custom distro plate - the mounting.
How do you mount a huge piece of acrylic, so that it will hold well and not accidentally fall out or something? Slovenes from EKWB offered angled mounts for their plates, which screw into the distro on one side and to the case on the other.
Unfortunately, my friend Ilya wouldn’t be able to do this, so we started thinking further. Mb it would be possible to somehow screw it into the case through the factory holes? I decided to see how the Chinese guys from Bykski and Barrow did it and it turned out that they didn’t screw it to the case at all. They just put them in and that's it. Seriously, no mounts. They made the distro plate as close to the edges of the case as possible, so that the distro would fit tightly in the case. I asked around on build.gg and everyone told me that yes, it isn’t attached in any way, and that it didn’t fall out of the case or wobble.
After that, the question of mounting the distro plate in the case was solved and we moved on to the choice of pump type. Here it's obvious - it's a D5. Previously I had a DDC pump, I had no experience with D5 pumps, but D5 pumps are powerful, efficient and quiet solutions. At this point my luck finally turned around and I got a great deal on an EKWB pump with an Alphacool reservoir for only $48. I only needed the pump from there, but at this price, why not get it along with the reservoir.
Also this seller had two identical 360mm Alphacool NexXxoS XT45 radiators for $55 each. A very good offer, quality copper German Alphacool radiators, and moreover identical, which means they will look symmetrical and aesthetically in the case. I didn't think and immediately paid for the radiators and the pump.
In between, I kept on hunting down Noiseblocker fans on Avito and buying them. I didn't have to choose a model, almost all were high-speed B12-4 fans, but I also found a couple with PWM control (B12-P/B12-PS). These fans ended up frustrating me a bit… As ridiculous and contradictory as it may sound, they’re rather Noisemakers, cuz the older models (B12-3/B12-4) have some crackling and strange hum at low RPM. Yep, at higher RPM this noise isn’t noticeable, but the air passing through the fan already starts making noise. In general, it isn’t very pleasant...
Sound test video - youtube.com/watch?v=GNdCKlzP9iw
For a long time I thought about what to do with these fans, cause it would be very expensive to change them for others, and I really liked their look a lot. There are white Corsair LL120 and Lian Li Uni Fan SL120 with nice RGB, but as I already said all of them are very expensive and used fans like them are even more rare than Noiseblockers.
Then I thought about how to creatively sign the build, so that it would look like the caption from the "Cum Cooled PC" meme and I remembered about the existence of 3D printers. I found a person in Belarus who can print it and ordered two prints - Cum Cooled and Nexus (my nickname).
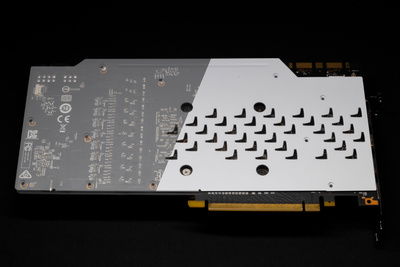
To give the text height and make them stand out, I decided to make them in two layers, the bottom one of black plastic and the top one of white, so that it stands out against the white radiators. They'll be attached to the radiators, which, as I said earlier, will be repainted white, just like the graphics card backplate.
Around the same time my new radiators arrived, I ordered various white fittings, angles and adapters from Aliexpress that I would need in the build, namely:
– 16x Barrow 14x10 white fittings;
– 14x Barrow white plugs;
– 6x Barrow white 90° adapters;
– 4x Barrow white 30 mm extenders;
– 8x Bykski 14x10 acrylic frosted tubes.
At this point, btw, I bought an old Canon 550D. All future photos will be taken on it.
It's April, I found in my city, as it seemed to me, a good painter, who could match the color and paint the radiators, backplate and also the pump body. I decided to paint it too, so it wouldn’t stand out.
As a result, he painted everything terrible, there were leaks, unpainted areas on the radiators, the paint wasn’t only glossy and not matte, as I wanted, but also a warmer white color and not cold, as I asked...
I didn’t expect this and went to look for another painter. I found another painter, seemed to explain all the requirements for the paint, color, and gave it away for repainting. I live in a relatively small Belarusian town with a total population of 100,000, so the matching of color was challenging.
And so, almost a month has passed. I called the painter to find out how it's progressing, whether it'll be ready soon. To which he told me that in two days everything will be ready, you can take it away, now they’re still drying. Three days later I came to his garage, took the radiators from the paint camera, everything was fine, there were no leaks, etc., they painted really well. I put them in my backpack and went home.
When I take them out at home, I notice that they smell strongly of paint and aren’t dry at all. The edges, that were in contact with the inside of the backpack, now had the texture of the fabric, and there were dirty fingerprints from the painter on one of the sides of the radiator... Idk why he didn't warn me that the radiators weren’t fully dry and so casually took them with his hands, leaving fingerprints.
Anyway, I was disappointed again, but at least the color was well matched.
Also later, already in the process of screwing fittings and bolts, I realized that he painted them wrong, w/o primer. When I screwed in fittings and screws the paint literally fell off in some places, i.e. very poorly adhered to the surface of the radiator. This is a failure...
I don't even know whether to repaint the radiators for the third time. To be honest it’s just scary that the radiators won’t survive this, but it seems like I found a better painter from Minsk.
Meanwhile, while I was waiting for the radiators, in early May I was also thinking about changing my CPU water block. In general, my old one might look fine, but I decided to look for something else and saw that EKWB used to make a monoblock for my motherboard. it was only available at Overhard.ru, a russian store for custom liquid cooling and modding for around $95.
In the West, as I know, various vendors often support modders and send them their hardware for builds. I'm not a popular modder/builder, but I decided to give it a try and write to them. Surprisingly, they agreed and gladly provided me with an EK-FB MSI X370 XPower RGB monoblock for my project, and thanks a lot for that. I've always been interested in trying out a monoblock in the build.
Well, you have to agree, this monoblock looks really cool on this mobo!
Then Alexander from C-Cables helped me a lot and together we made custom modular PSU cables for my PC. We thought a lot about the color combination for the cables, went through a lot of different designs.
Below I have attached a couple of example combinations we were thinking about.
Originally the build was supposed to be all white, so the cables had to be white with white connectors too.
But I thought it would look too boring, and anyway some black or gray elements in the build will remain. There is no way to get rid of this, no matter how i want, although it may be even better.
Finally we have stopped at the following color scheme:
Black and gray stripe with one wire indented from the left. (White, Gunmetal Gray, Gray, White, White...)
White connectors were used on both sides, both on the component side and the PSU output. Yeah, they're also not pure white, but milky as always. I don’t understand what the problem is to make white be white instead of milky or coffee color. I don't think it's that difficult in manufacturing. There is no way to get pure white connectors at all, even the expensive JMT one have a similar shade.
I took all the dimensions , we talked about how and where the cables would be placed, and Alexander began to make them. In just two days he finished them and they were already on their way to me!
I received 24-pin modular cables for the mobo, bridged 8+8-pin for PCI-E and I also decided if I wanted to make custom cables, I had to make them properly, so we made a bridged 8+4 pin EPS. Yep, in the beginning I wrote that I have Ryzen 5 2600 in my PC. I totally agree with you that it doesn't need 8+4-pin power, but I didn't want to leave the 4-pin connector empty.
C-Cables also made peripheral cables for me: a dual SATA power cable for SSD, a short 10cm SATA power cable for the RGB controller, and a one for the D5 pump to connect it directly to the PSU via a 6 pin connector, w/o Molex adapters, and a white 4 pin cable with a white connector to control the pump speed.
Included with the cables I got some white sleeving and heat shrink to sleeve the front panel and the RGB controller cables.
There are a few more cables ahead. Later, custom fan cables will be made to keep everything clean. It'll be of a right length and, ofc, in white color. Right now C-Cables doesn't have enough connectors to make the fan cables, they’ll come a bit later. And they'll be soldered instead of using the native short connectors of the Noiseblockers, to remove the extra unnecessary connections at the most visible place. Yeah, it may be convenient that you can connect the cable of the required length, but in my situation, these connectors will only ruin the picture.
SATA data cables from SSD to mobo will be ordered from AliExpress, there is no way to make white custom ones, they aren’t disassembled as well as USB 3.0 from the front panel.
And for USB 3.0, on the same AliExpress, I accidentally found an extension cable with a demountable connector, which I, ofc, ordered and then it'll also be sleeved.
Once again, a huge thanks to C-Cables for this opportunity!
Suddenly at the beginning of June the boys from Overhard wrote to me and said, that they decided to enter the market of pastel opaque coolants and offered to send me a sample of white one. I, ofc, agreed, why not. I was curious about the coolant, how it would behave, etc.
Surprisingly, the color turned out to be exactly what I wanted - white, not milky, not some kind of greenish.
It would seem that I already have almost everything to build a PC, now I have to assemble a test build, connect all the tubes, make bends in the right places, see if I miscalculated somewhere. After that I measured the coordinates and dimensions of the tubes to mark out the ports of the distro plate, so we can begin to create a 3D model and then make it. I did it, and at the same time I took part in AMD Russia #RyzenЗаСборку contest for the best build, where the author of the most beautiful build according to the viewers vote will get the main prize - a brand new Ryzen 5 5600X. And I just got the new softboxes, which allowed me to take these pretty photos. But the background was made in photoshop, I haven't any stands and color backgrounds, but let's skip this.
Btw, just look at that silver C-Cables logo, it looks unreal stylish on these cables!
This is how the build looks like at the moment. Yep, the graphics card is a lot saggy, which makes sense, cuz I don't have the distro plate, it's not mounted anywhere, it just hangs under its own weight. Don't worry, the tubes in the final build with the distro plate will be straight (I hope), and for the GPU I’ll use the native Lian Li bracket from the kit to align it (Idk why I didn't think about it before).
Unfortunately I didn’t win the contest. I didn’t even passed in the final, but this is a long story, I see no reason to tell it, I can only say that only the administration or a jury consists of the bloggers/modders should choose the winner in such contests. Not subscribers, because then reigned utter chaos, everyone asked to help their friends in various other groups to vote, someone even brazenly cheating voices with bots.
Without further ado, I present to you the winner of this contest:
I'm not kidding. Don't even ask me how "it" not only passed to the finals, where for some reason I didn't even make it, but also won the Ryzen 5 5600X... I have nothing to say, frankly, it's complete nonsense.
Now I'm thinking about painting the GPU water block, SSD basket, PSU body and rubber plugs for cables. Maybe it makes sense just to replace the water block with a transparent full cover version from MSI Sea Hawk EK X, which you can get after mining on Avito for about $40. I don't even know if I need it. Difficult choice...
I'll definitely paint the SSD basket and the PSU body. This time I'll send them to another painter from Minsk, whom I wrote about earlier. Let's see how he will paint.
I wish the PC to look nice on both sides: the back side as well and nothing stands out as it does now. The only thing is that if I paint the PSU, I'll lose the Corsair warranty, cuz I have to tear off the seal.
As for the rubber plugs - I thought about buying them on AliExpress, but Lian Li has very specific rubber plugs, I didn't find them, and the round ones wouldn't fit at all. I consulted with a painter and he said that they can be painted for the PC build. In theory, the paint won’t crack. I'll bend them max of 3-4 times when laying them in the final build, I won’t bend them every day 24/7.
But recently one not so pleasant moment happened. Mostly, ofc, it was my fault. I'll tell you about it now.
Well, as you know, Lian Li recently introduced their new O11D Mini model, which has an incredible Snow White version. This version is completely white. I can say with certainty that it's a dream case, cause all the case parts are white. White dust filters, white rubber cable plugs, silver screws, and a white frame around the edges of the glass. That's what I’m going to talk about now.
To be honest, I even thought for a few days about changing the build completely and moving it to the new O11D Mini Snow White. But this would be impossible, since I have an ATX mobo, which wouldn't allow me to put radiators on top and bottom of the case. I wanted to place the radiators exactly like that so that it looked symmetrical. And there were many other nuances...
Idk about u, but my Lian Li XL really pisses me off with the black frame around the edges. Yea, mb it somehow accents its shapes and stuff. I'm not a designer, but I wanted a white frame. I thought for a long time about how to do it, cuz the old black paint can't be removed. There was an alternative, to either repaint with white paint over the black, but Idk how that would look, or just buy a matte white film. I chose the second one, as the film can always be removed. After searching online, I chose a German self-adhesive film DC Fix 346-8006, it seemed suitable to me.
As it arrived to me, I was instantly disappointed. Wrong shade, milky again, lmao...
I decided that if I had bought it, I would at least give it a try. And that became my mistake. I have never had any experience with wrapping anything before, so it was very tricky for me. It's hard to describe how many curses were uttered and nerves were wasted. In the end, I did it somehow. I cut around the edges of the old black frame. It was a little crooked the first time. I went to try it on the case and realized that it was a completely different shade. I removed the film off the glass and realized that I'm a complete dumbass...
Idk how it happened and why I didn't even think about it, but I scratched the glass all the way around the edges...
Well, next time I'll know I shouldn't do that...
Now I have glass not only with a black frame, but also with scratches, nice!
Maybe later I'll send the glass to the same painter from Minsk, if he paints the PSU case and the SSD basket well.
This is the end of the build log. Now Ilya and I are modeling the 3D model of the distro plate. Any further news will be added to this page.
I hope whoever is reading this now found it interesting to walk this path with me!
Thanks, I really appreciate it.
Color(s): Black Gray White
RGB Lighting? No
Theme: Industrial
Cooling: Custom Liquid Cooling
Size: ATX
Type: General Build
Hardware
CPU
$ 99.99
Motherboard
$ 543.39
Memory
$ 228.00
Storage
$ 154.90
Case
$ 219.00
Case Fan
$ 269.50
Cooling
$ 269.98
Cooling
$ 72.00
Cooling
$ 98.99
Cooling
Cooling
$ 120.00
Approved by:
