

Best Build
AD:


Kirby!
AD:
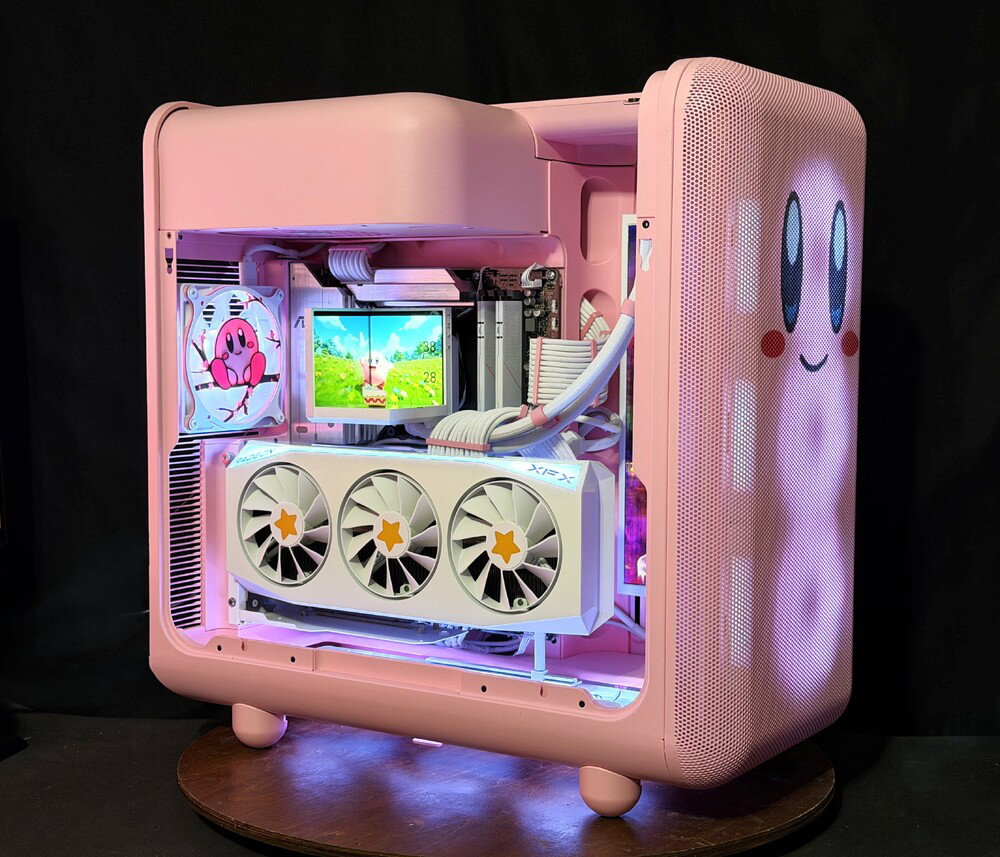
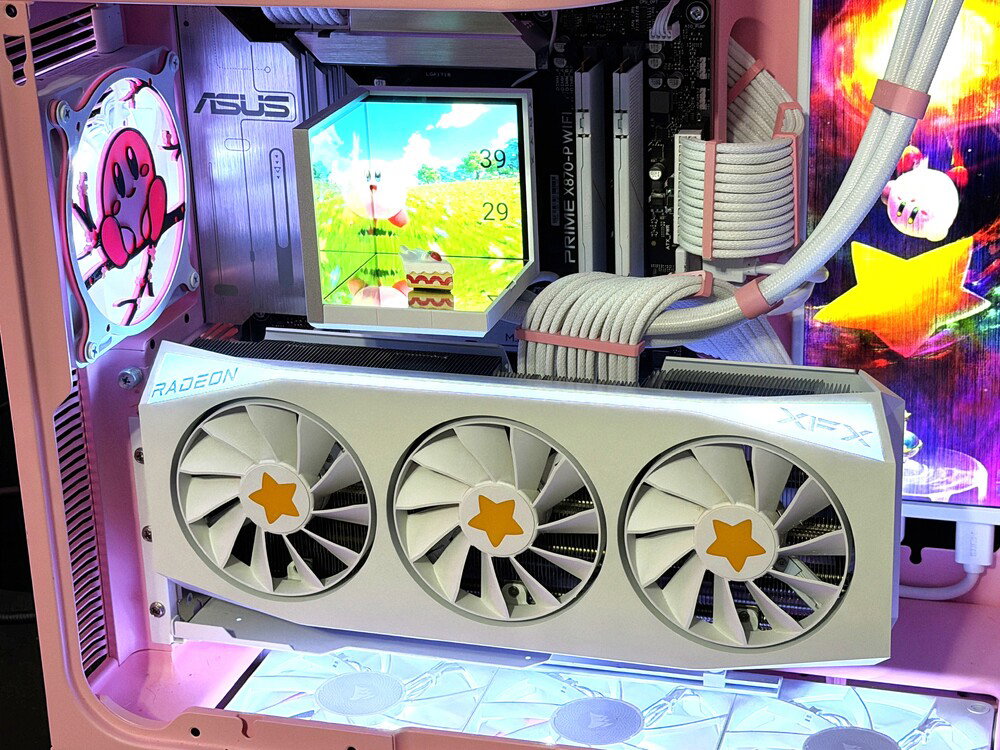
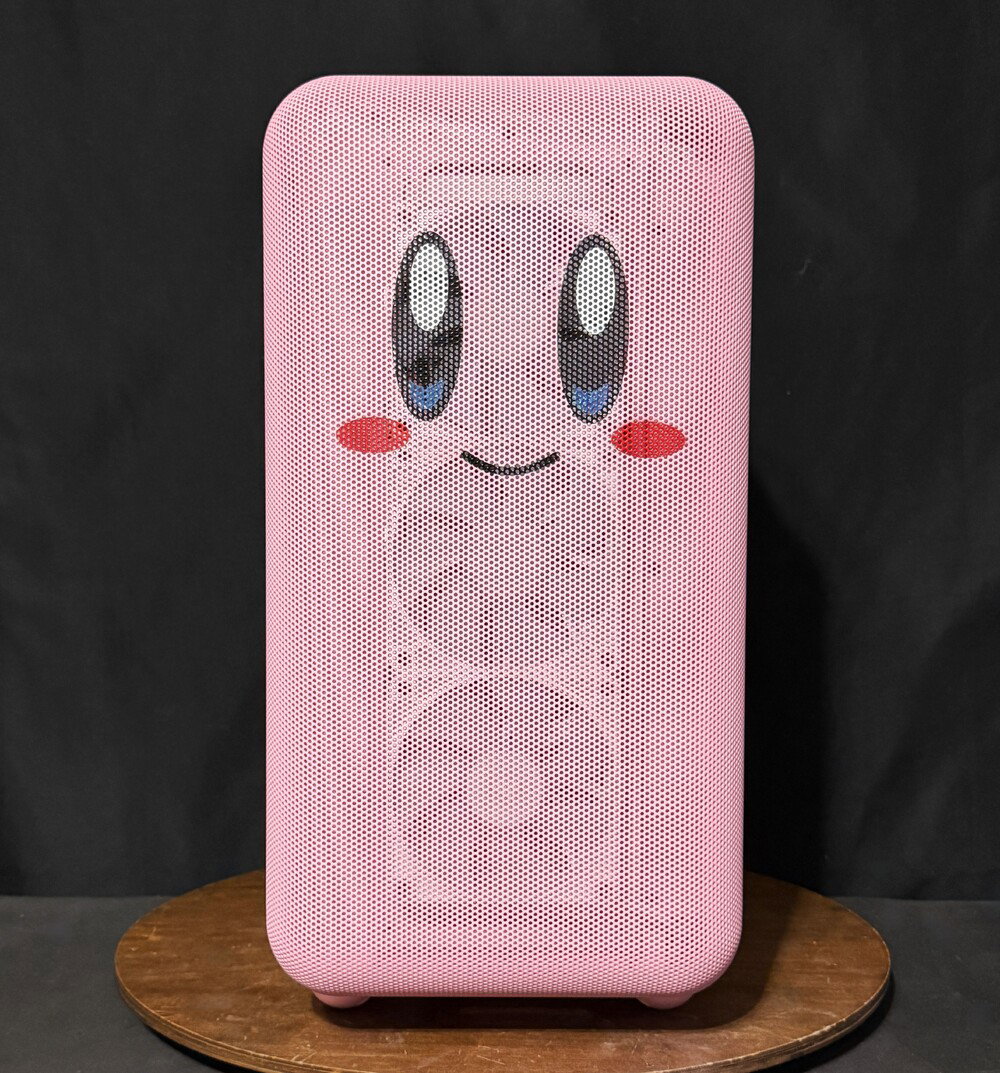
Just finished this build for a friend's sister who is a huge Kirby fan. He wanted to get her a new PC, so we decided to go with the theme. The Hyte X50 in pink (they call it Strawberry Milk) was the perfect choice. It was also a case I'd been wanting to build in since it released. If you're curious about the work put into the build, you may find some helpful info below.
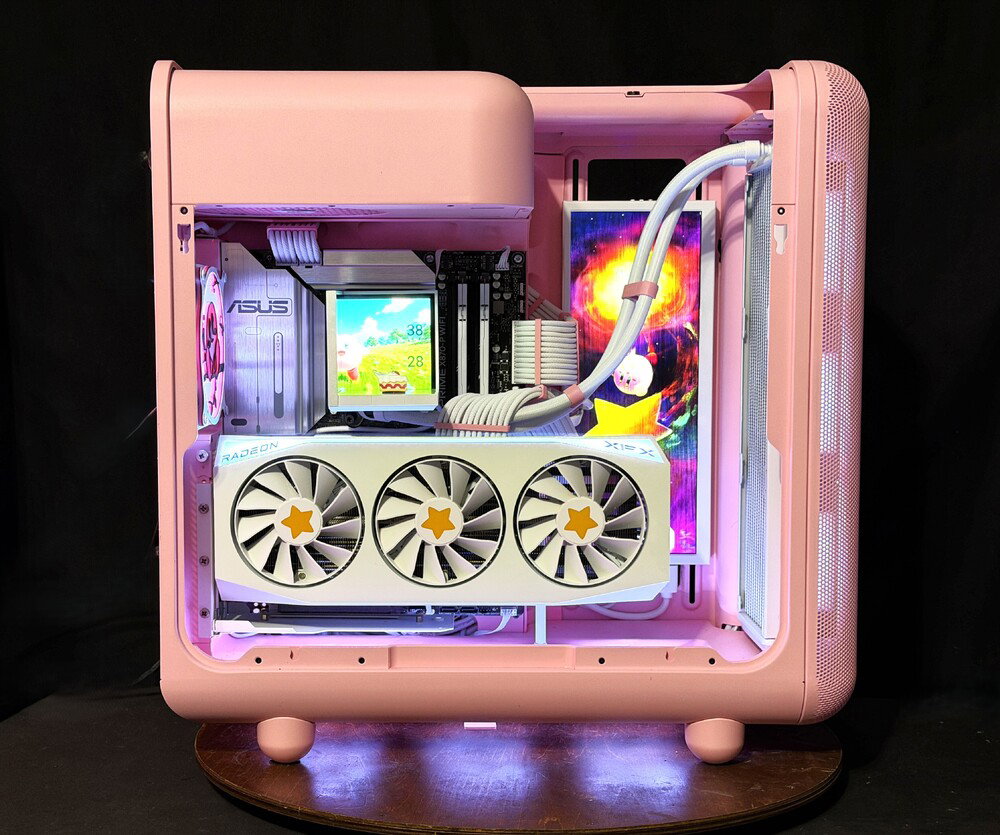
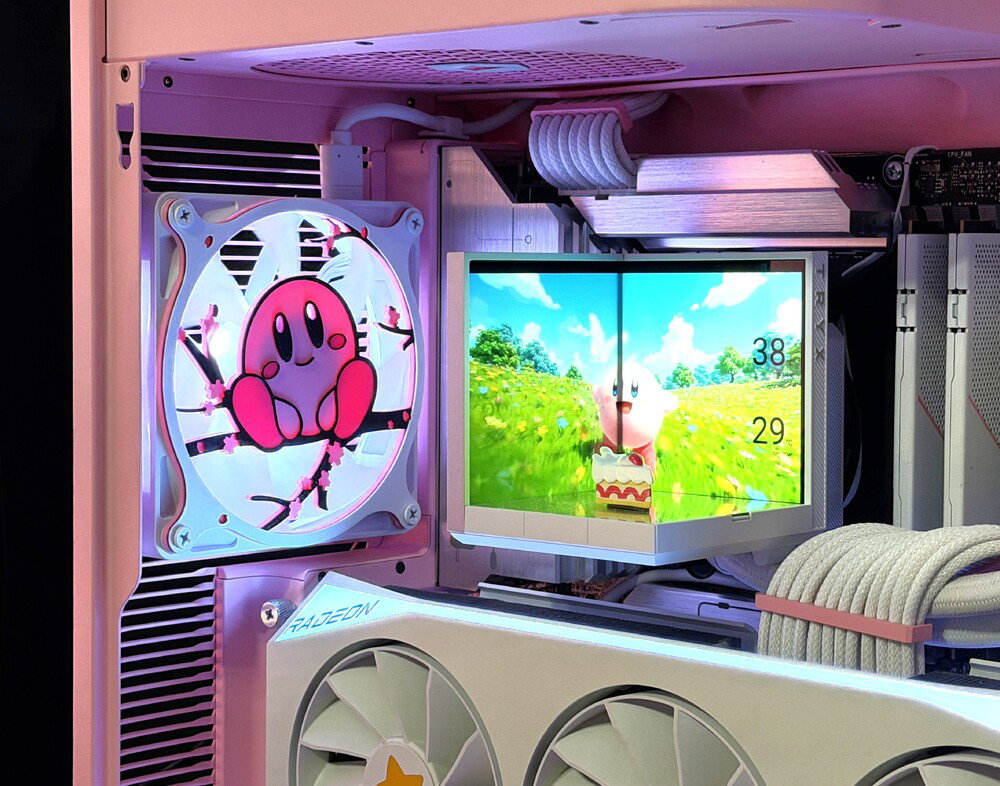
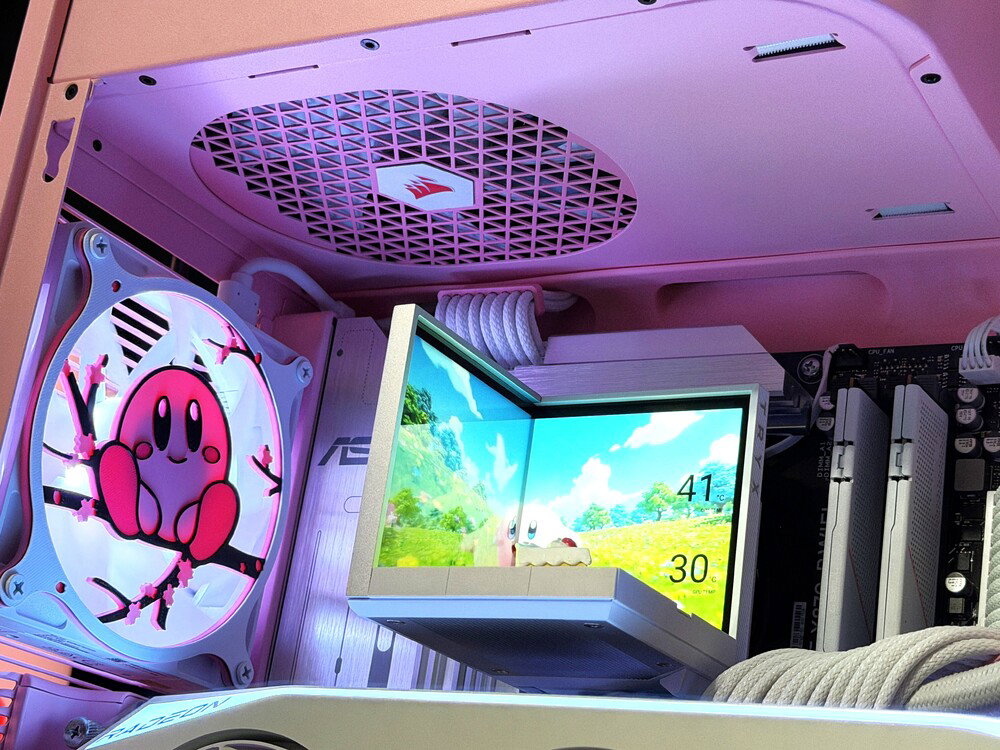
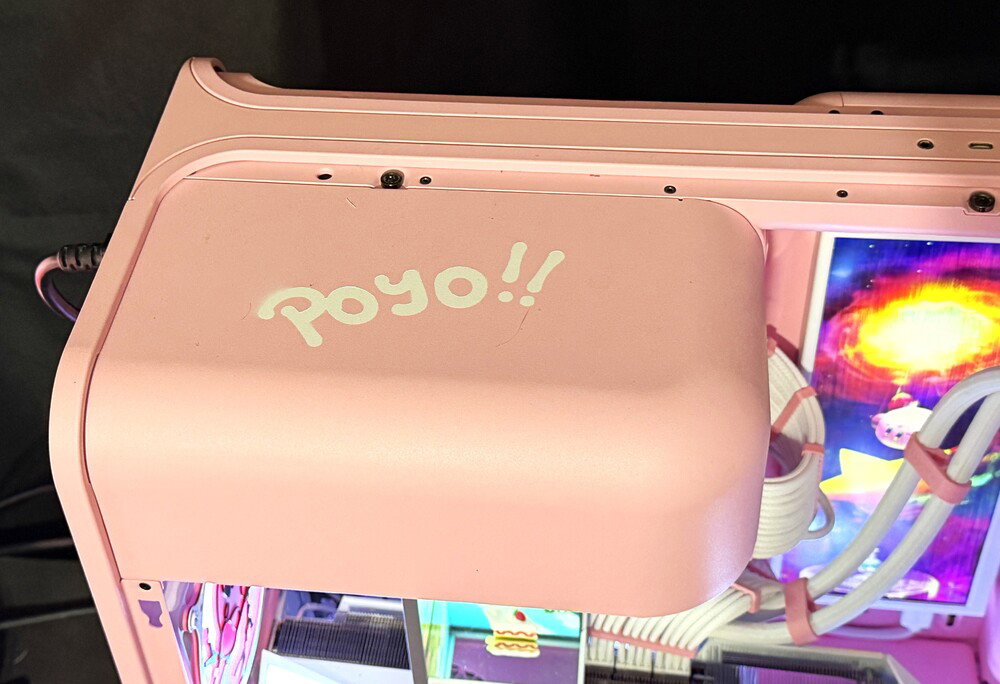
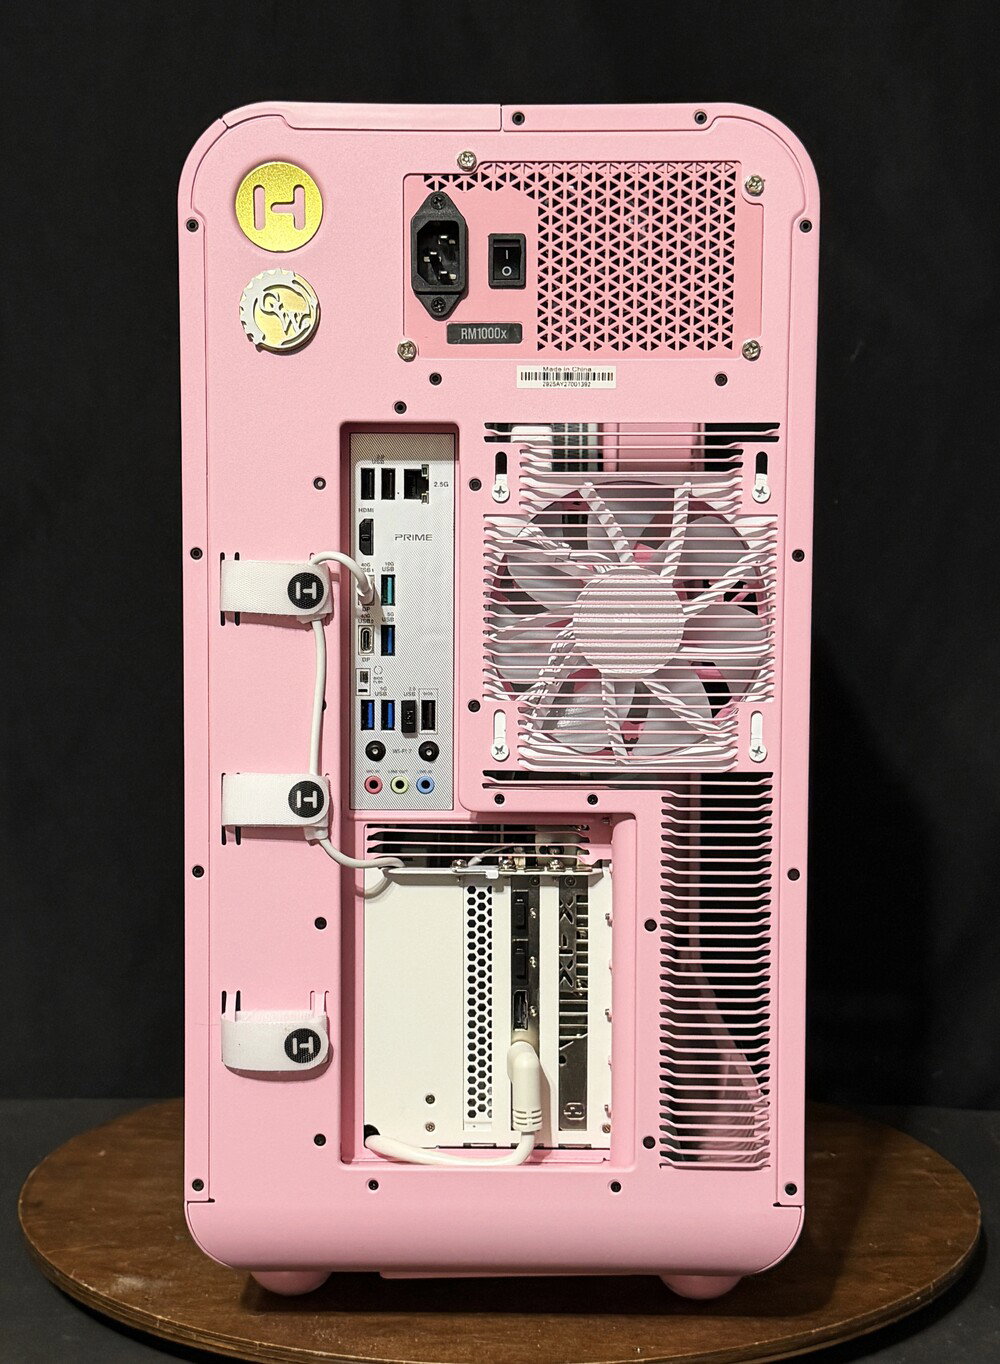
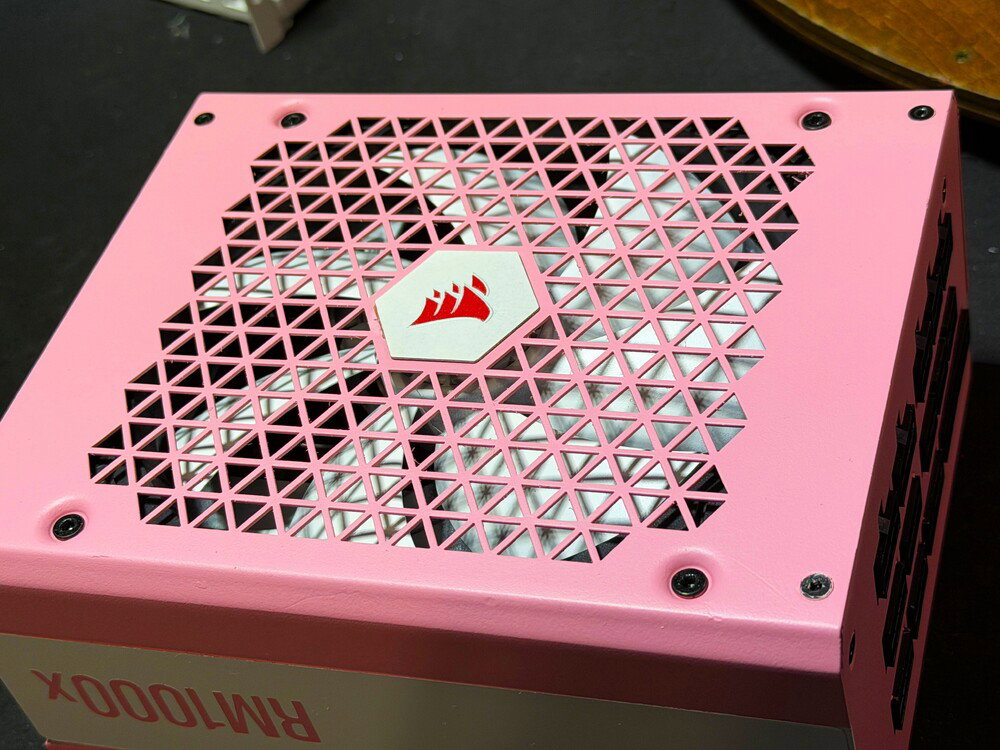
I'm not one to just stick a Funko Pop in a case and call that a mod. I painted Kirb's face on the front panel, and added stars to the center of the GPU fans. I also painted the PSU and Corsair controllers in the rear of the case to match. A custom fan grill from Sakurai Armory on Etsy made a great accent for the rear fan.
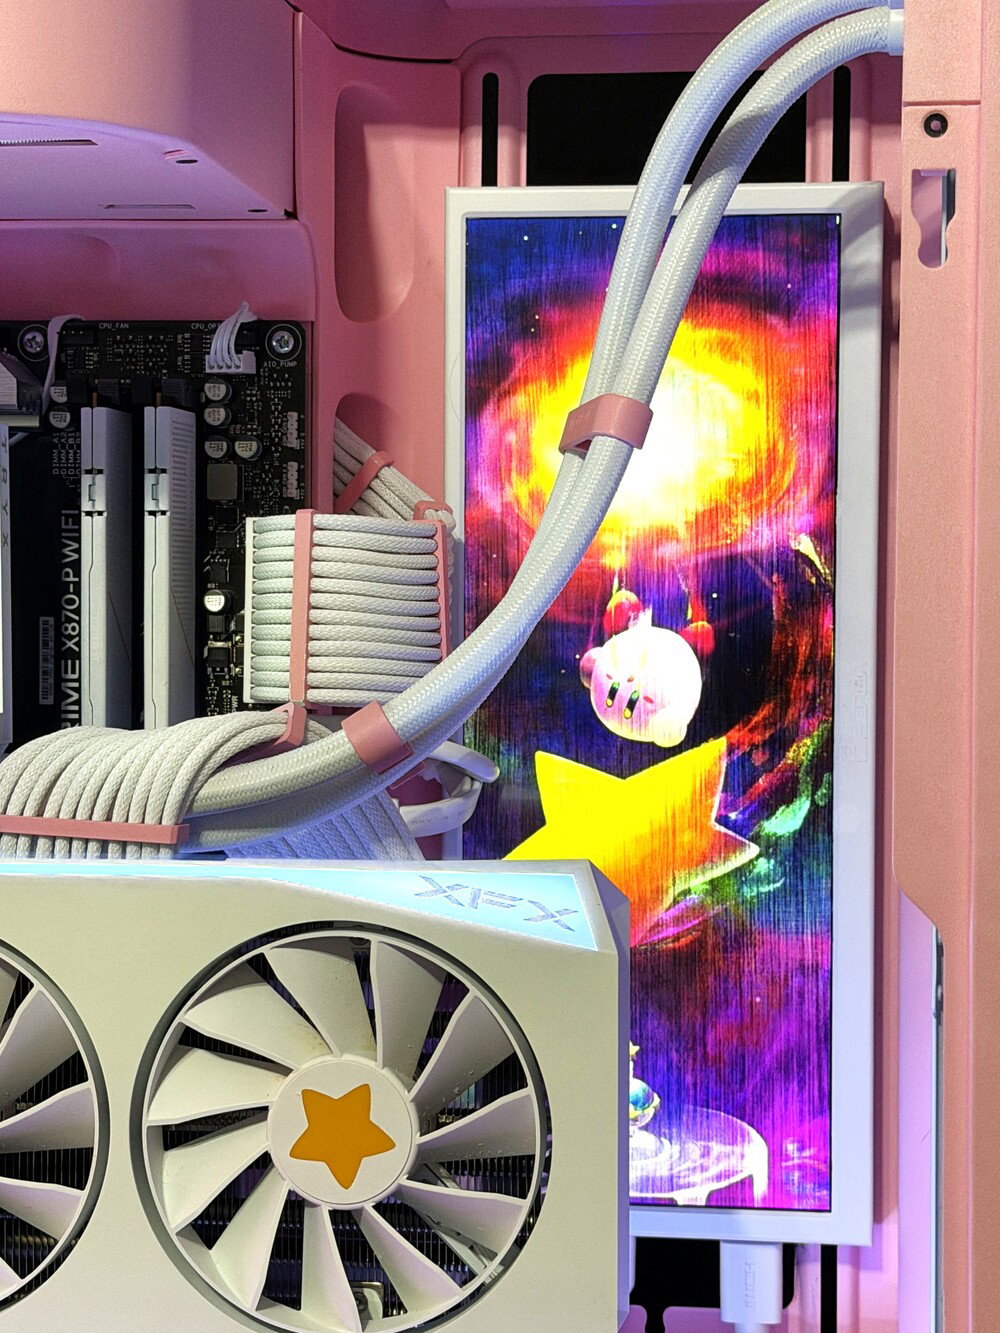
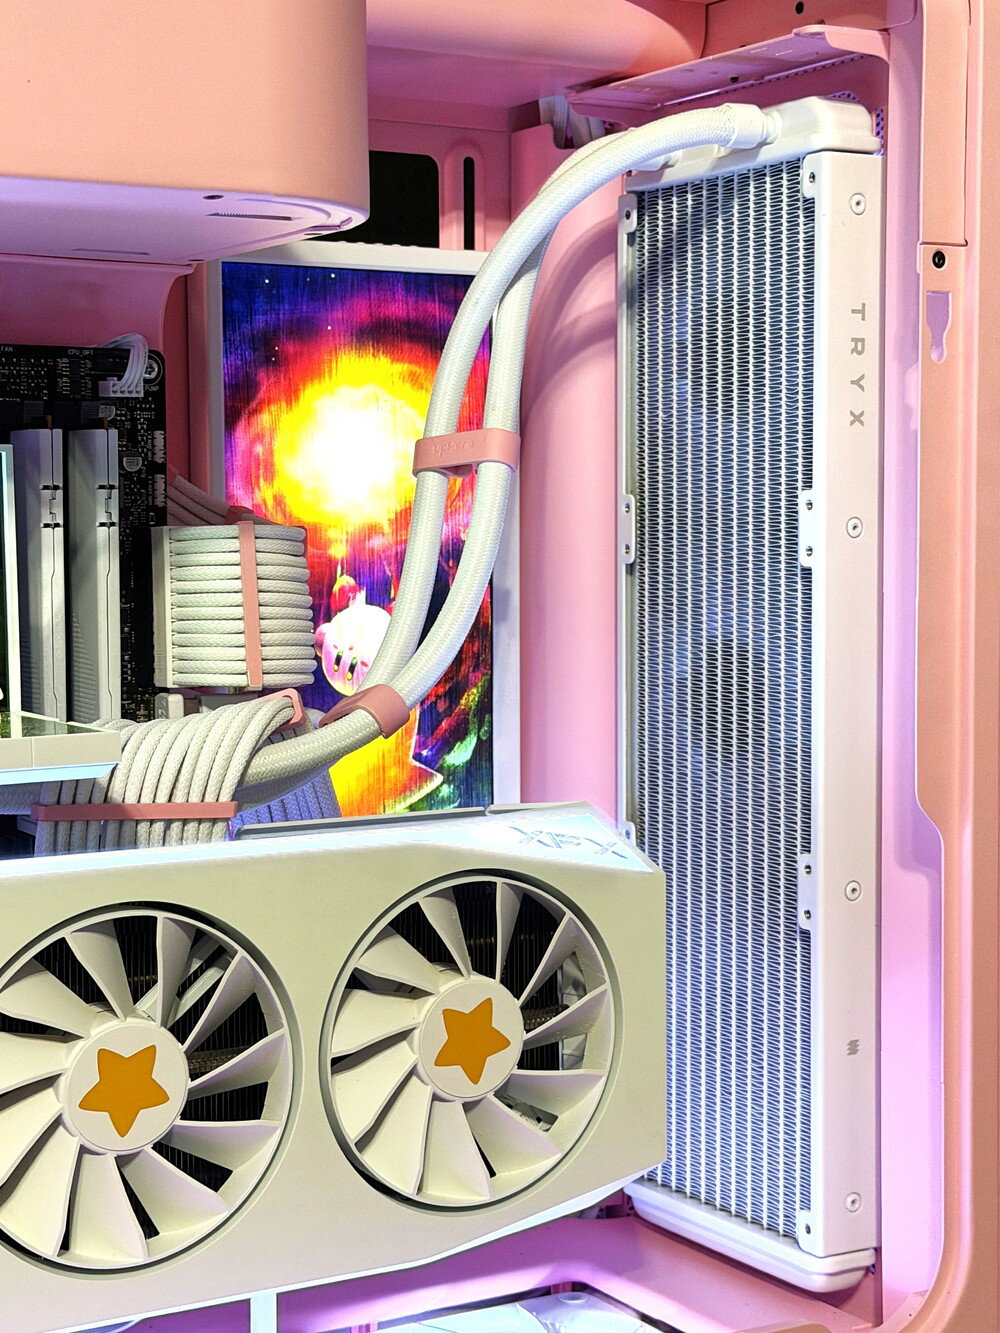
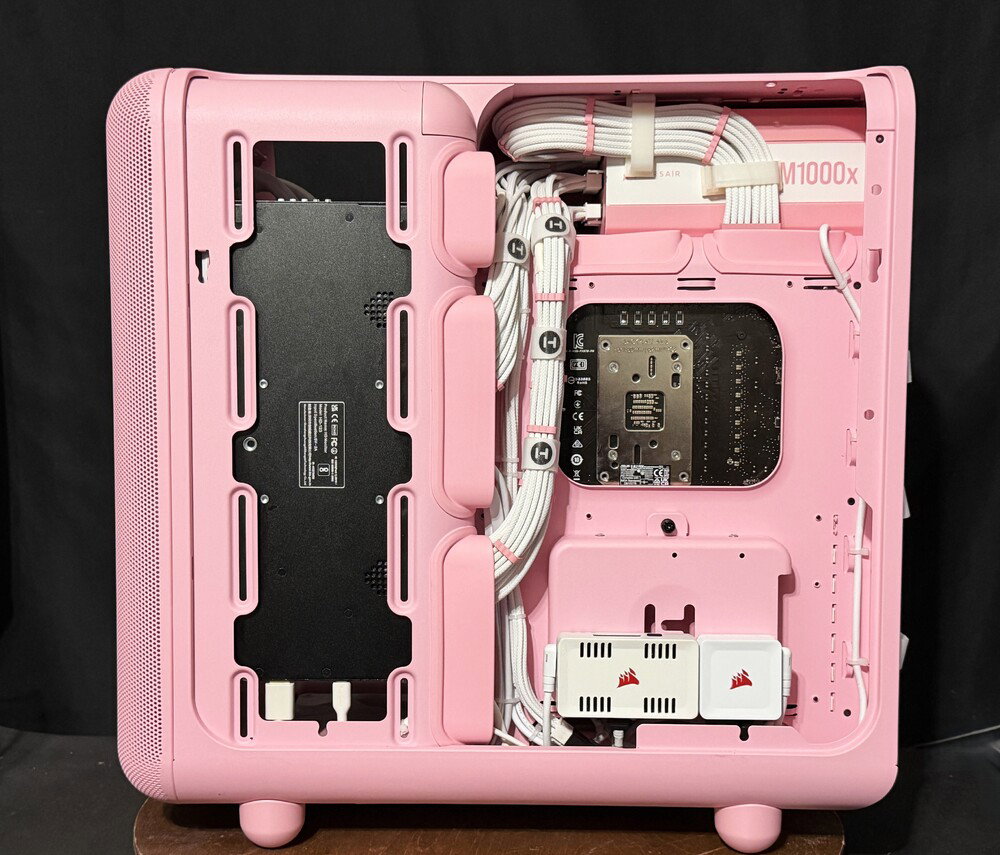
I wanted her to be able to customize the looks, and not just the RGB. Tryx's new Stage AIO was perfect for showcasing some figures with a custom animated background (it currently has Kirby running after a piece of cake). The screen in the rear of the case was painted white, and functions as a second monitor. Using Wallpaper Engine you can change the image displayed independently of the primary monitor's wallpaper.
There are multiple smaller aesthetic and cable management mods throughout the build. I made custom cables sleeved with MDPC-X to keep the rear compartment in order. Corsair's LINK system simplifies the wiring, but does require some planning on how you're going to route their cables. I added a Commander Core Duo module to get extra RGB channels; this way the GPU's lighting is kept under the iCUE ecosystem with everything else.
The hardware is high-end, but pretty straightforward. She'll be using it for gaming and WFH. She's also getting a new monitor (painted pink, lol) - the 9070 XT was a great way to keep costs down while being more than sufficient for her needs. We bought some of the hardware back in Jan-February, as we knew prices would be getting worse. With a Microcenter bundle and some other deals, our actual price was around $700 less than what's reflected on the list today.
The board did require a bios update to support the 9850X3D, but was fine after that. The EZDIY-FAB vertical mount bracket has a "foot" to prevent sag, but it would have rested on the fan blades. Although there wasn't much, if any sag, I added a support that mounts further back.
Final note - with the PSU up top, it will intake from inside the case. Depending on ambient temps and how you set your airflow, this can become an issue. In this build, the AIO intakes from the front. My friend lives in NYC and the build will be in an air-conditioned room, so ambient temp isn't a concern. If you're in a hotter region/climate and have higher ambient temps, setting three fans in the back of the case, or mounting the AIO rad there, will exhaust the CPU heat. This leaves mostly just GPU heat to be exhausted out the rear, and should lower the risk of PSU overheating. Just something to consider.
I'm not one to just stick a Funko Pop in a case and call that a mod. I painted Kirb's face on the front panel, and added stars to the center of the GPU fans. I also painted the PSU and Corsair controllers in the rear of the case to match. A custom fan grill from Sakurai Armory on Etsy made a great accent for the rear fan.
I wanted her to be able to customize the looks, and not just the RGB. Tryx's new Stage AIO was perfect for showcasing some figures with a custom animated background (it currently has Kirby running after a piece of cake). The screen in the rear of the case was painted white, and functions as a second monitor. Using Wallpaper Engine you can change the image displayed independently of the primary monitor's wallpaper.
There are multiple smaller aesthetic and cable management mods throughout the build. I made custom cables sleeved with MDPC-X to keep the rear compartment in order. Corsair's LINK system simplifies the wiring, but does require some planning on how you're going to route their cables. I added a Commander Core Duo module to get extra RGB channels; this way the GPU's lighting is kept under the iCUE ecosystem with everything else.
The hardware is high-end, but pretty straightforward. She'll be using it for gaming and WFH. She's also getting a new monitor (painted pink, lol) - the 9070 XT was a great way to keep costs down while being more than sufficient for her needs. We bought some of the hardware back in Jan-February, as we knew prices would be getting worse. With a Microcenter bundle and some other deals, our actual price was around $700 less than what's reflected on the list today.
The board did require a bios update to support the 9850X3D, but was fine after that. The EZDIY-FAB vertical mount bracket has a "foot" to prevent sag, but it would have rested on the fan blades. Although there wasn't much, if any sag, I added a support that mounts further back.
Final note - with the PSU up top, it will intake from inside the case. Depending on ambient temps and how you set your airflow, this can become an issue. In this build, the AIO intakes from the front. My friend lives in NYC and the build will be in an air-conditioned room, so ambient temp isn't a concern. If you're in a hotter region/climate and have higher ambient temps, setting three fans in the back of the case, or mounting the AIO rad there, will exhaust the CPU heat. This leaves mostly just GPU heat to be exhausted out the rear, and should lower the risk of PSU overheating. Just something to consider.
Color(s): Pink White
RGB Lighting? Yes
Theme: Video Game
Cooling: AIO Cooling
Size: ATX
Type: General Build
Hardware
CPU
Motherboard
Memory
Graphics
XFX - Mercury OC Magnetic Air Edition (White/RGB)
Chip Manufacturer: AMD
Chip: RX 9070 XT
Interface: PCIe x16
Case Fan
Cooling
Approved by: