Firebend Technologies
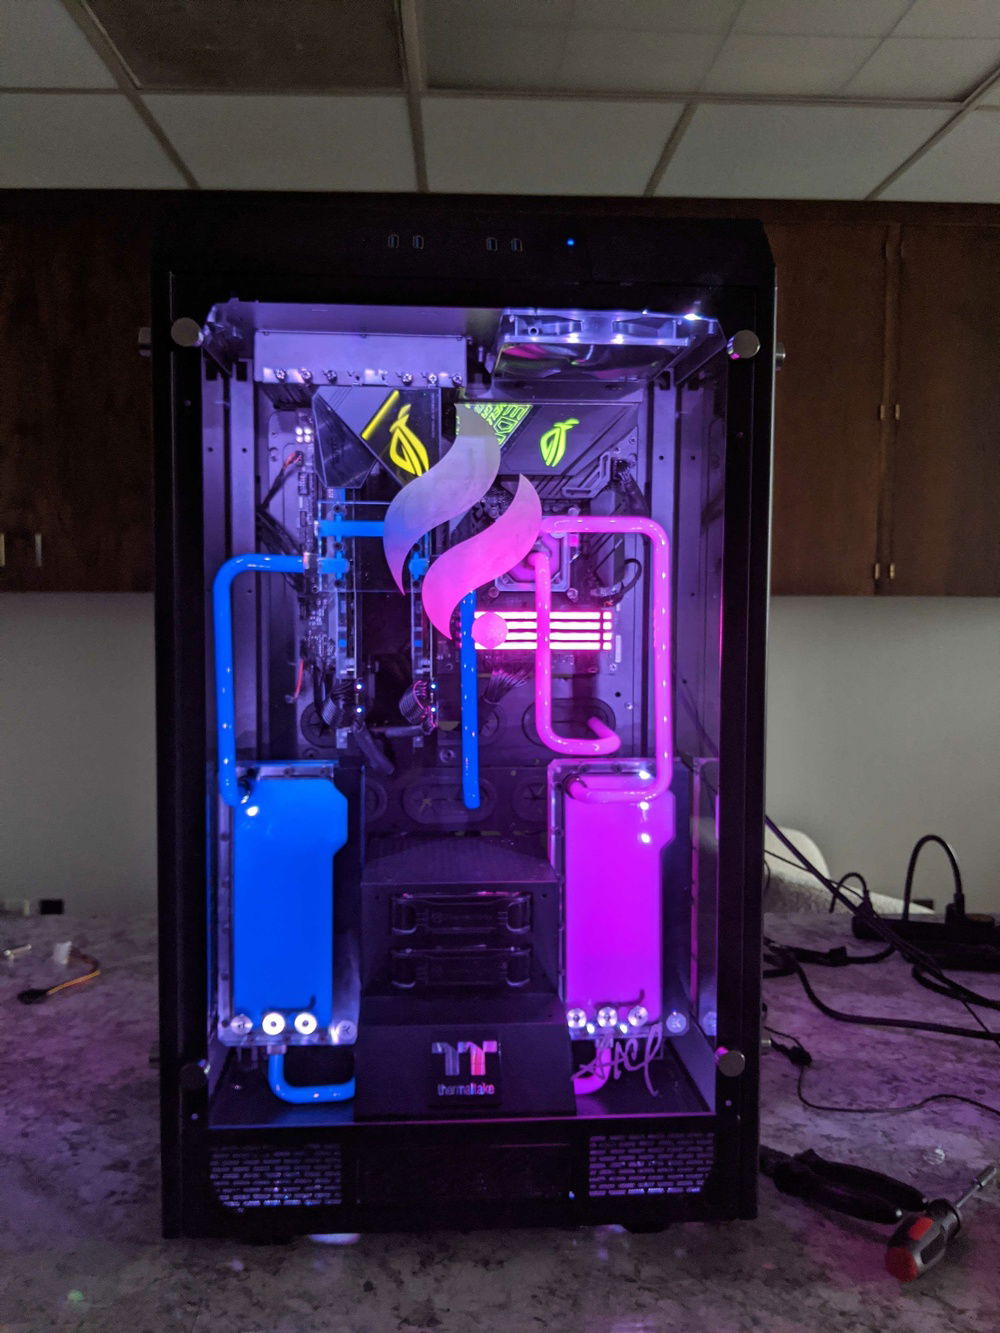
This entry serves as the build log of the Signature Edition Firebend Mk1.
Those were the requirements we had to fill and we were happy to oblige. With the help of some fellow Firebenders, Brandon Stillwell and David Spielmaker, we started the build.
It's not too awful hard to build the "V12 Turbo to rival best on the market", everyone has their own parts and preferences as to what that is. Our vision was a showcase computer with the firepower and style that could stand tall on any desk for years to come. For that reason, we chose The Tower 900 from Thermaltake as our case for its multi-perspective viewing angles and ample build space. It's the bees knees when it comes to computer modding and showcase machines. Props to the people who put their Tower 900 builds here, you all have mad skills.
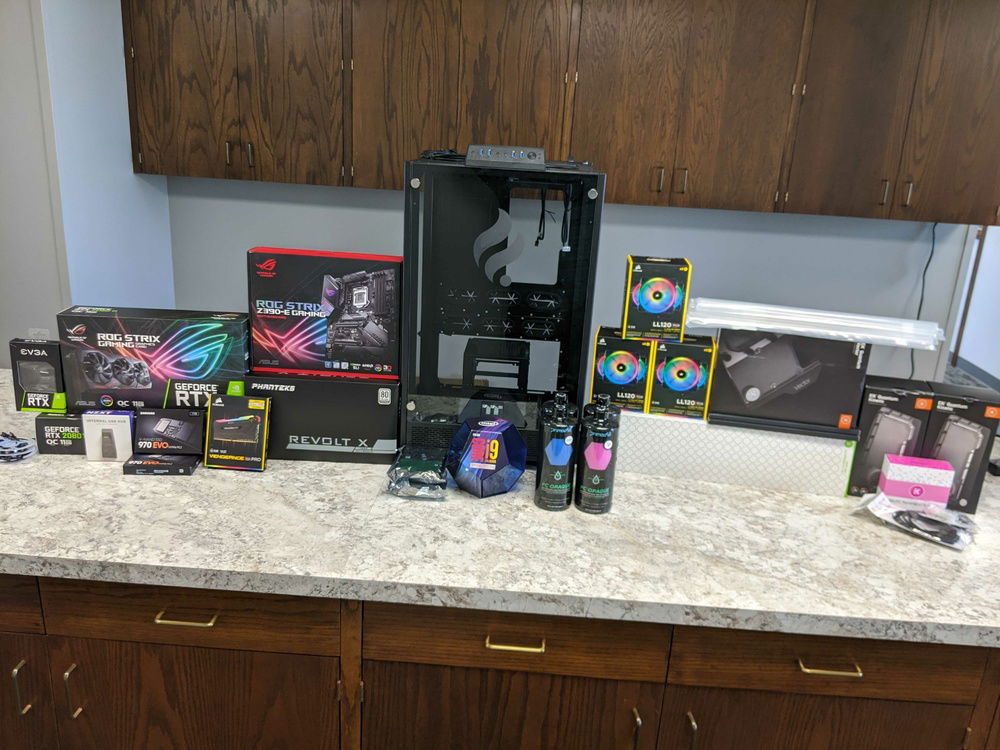
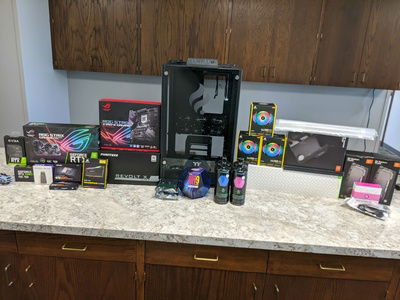
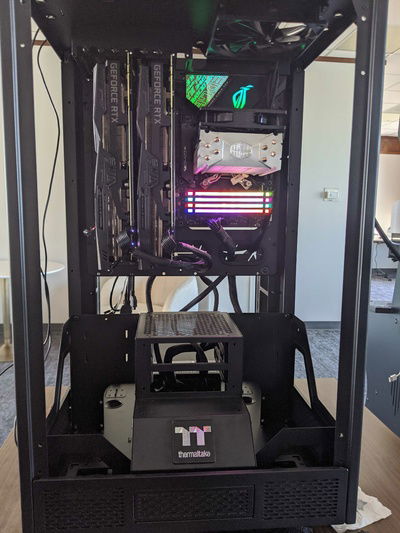
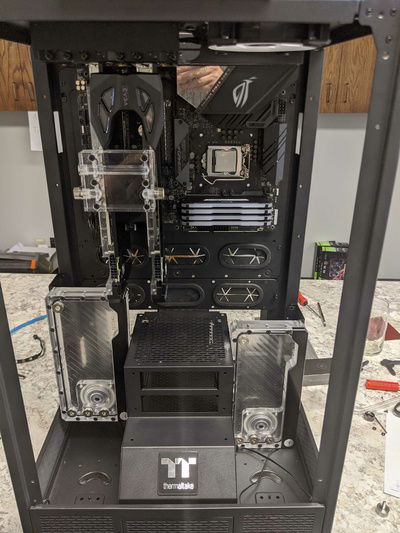
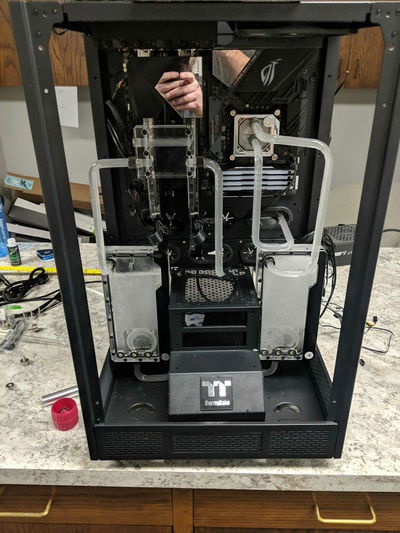
This is our quick and dirty build after getting all of the parts in, pictured here is my personal Hyper 212 EVO standing in as our cooler for the time being while we make sure the computer POSTs and can run benchmarks for stock part testing. My desk became overwhelmed by the amount of hardware that was unboxed and the bags of screws and brackets were thrown everywhere. Once the waterblocks and such showed up we started to remove heatsinks from GPUs and mounted them in the case to get an idea as to how the GPU loop was going to function.
Note: The NVLink Bridge in this picture was simply for testing purposes, the one I really wanted got stuck in the mail during the beginning stages of Covid in Europe in Feburary. The new one is featured in other pictures.
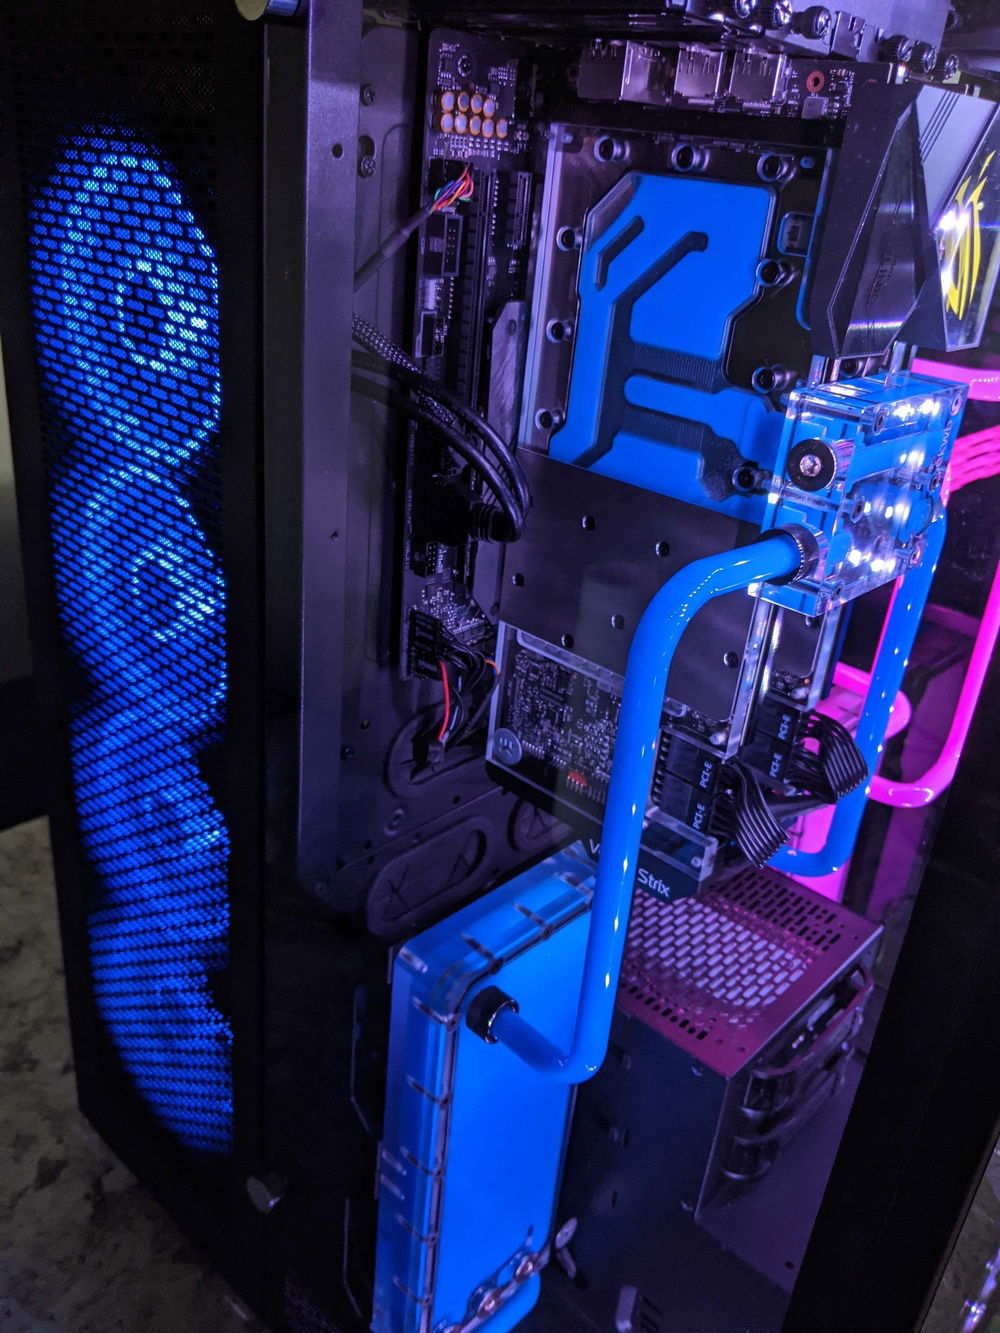
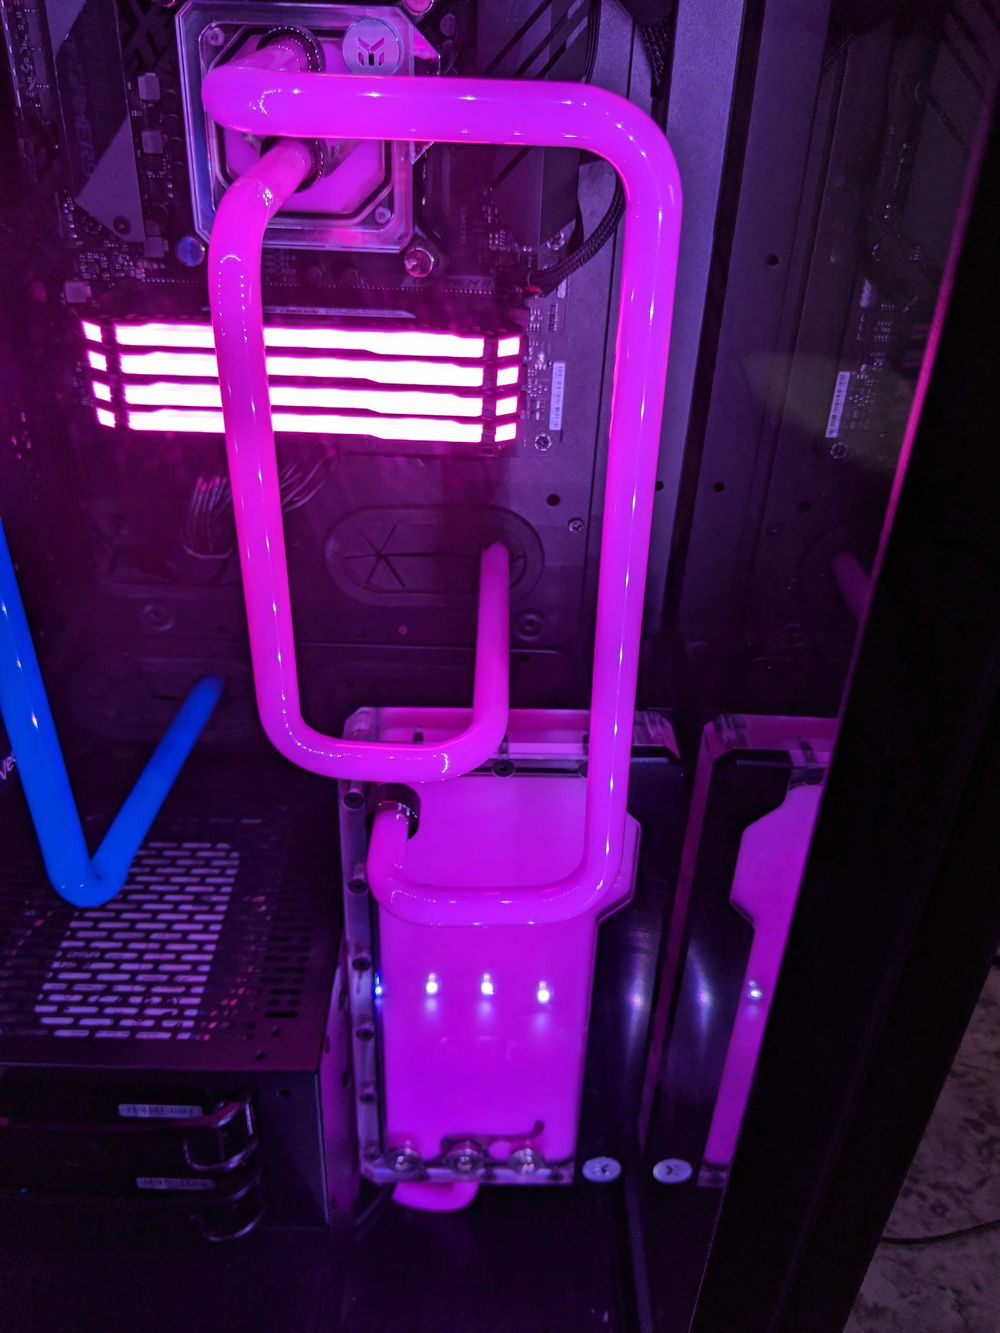
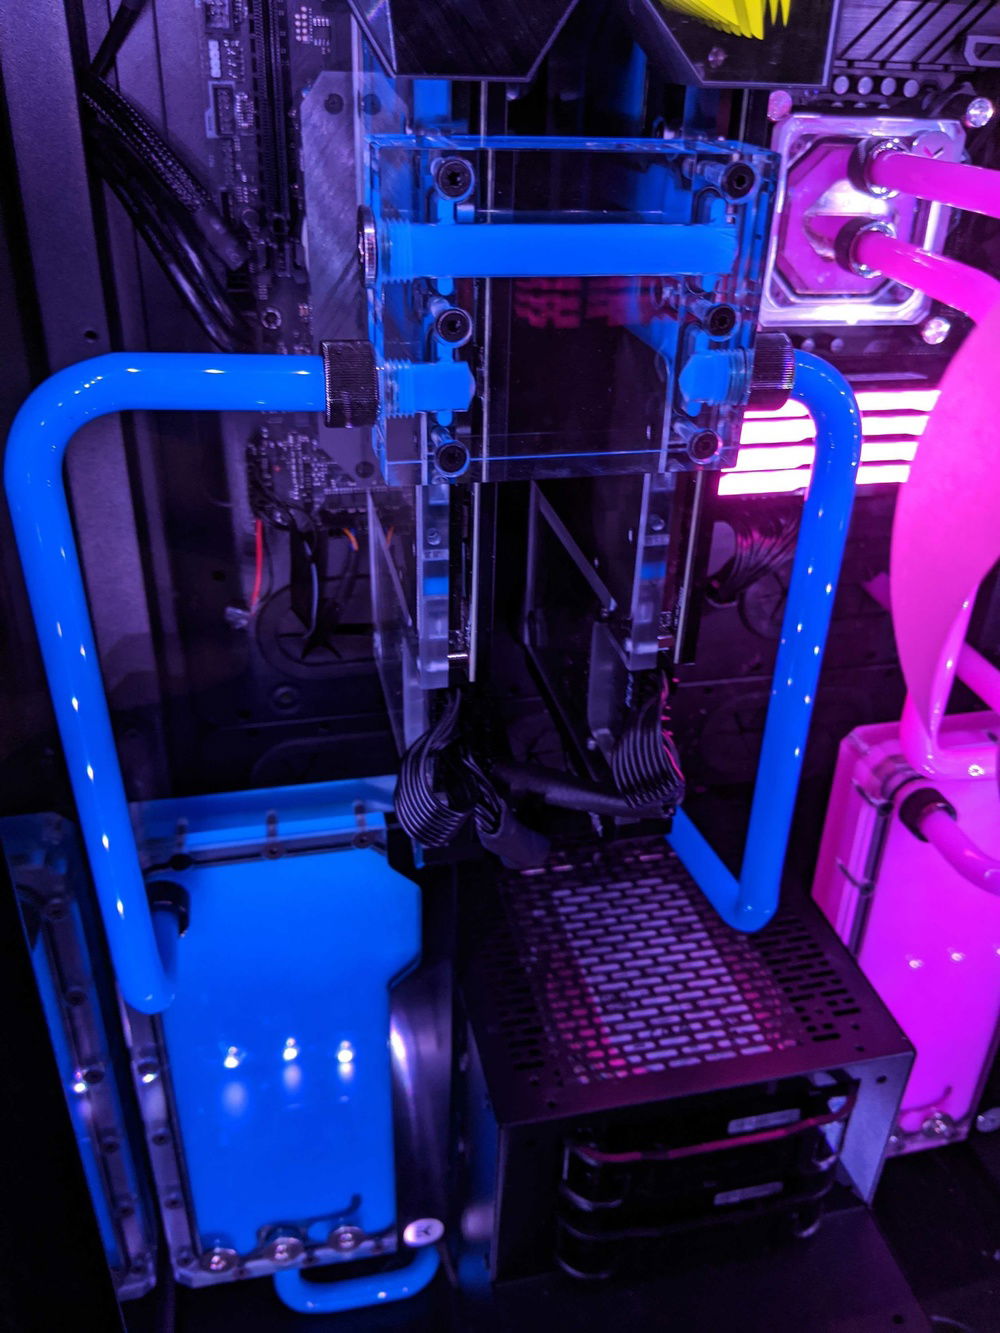
The subject of watercooling had always been something I wanted to attempt, but [insert excuse here], and I never got around to it. Since this was to be my first custom water cooling build, why not throw myself and the build team into the proverbial deep end and attempt two separate loops with hardline tubing? We really wanted this to be inspired by Firebend and in order to do that, we needed two colors of liquid.
Lesson #1: There are more watercooling parts than I ever thought imaginable.
There are so many brands, aesthetics, and accessories it made my head spin. In the end, I chose the tried and true EKWB. Reasoning was because I was more comfortable with them since they have a ton of good reviews (written and video) by people I tend to agree with. Shoutout to my squad in Discord for the help in going through all those parts, sharing their experiences and being there to bounce ideas off of in general.
Lesson #2: Bending pipes by hand is difficult and gets harder the more bends there are.
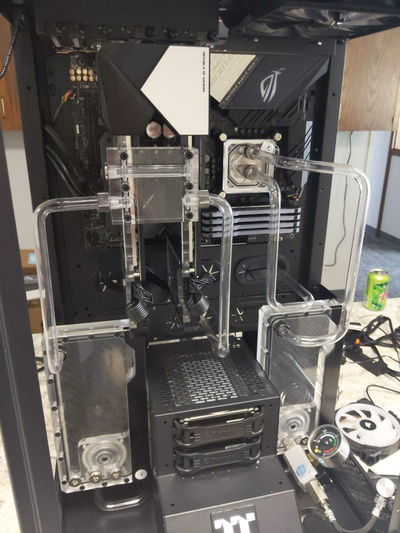
I cannot express the amount of frustration I had the first few times I tried to bend these pipes. The short ones weren't too awful bad, but two of those pipes have like 5 bends in them and its tragic to have the 3rd or 4th bend to not go exactly where you need them to for the final bend to work. Luckily, through sheer brute force and persistence, I was able to fit those two pipes where they needed to go (Don't ask me how many pipes I destroyed by myself due to over heating or rebending).
Lesson #3: Angled fittings are your friend.
Thanks to the build team for putting up with my obsession to having every pipe look perfect and redoing some pipes that would have passed even if it was going into my personal rig, they handled it like champs.
With all the pipe bending finished, we moved into the leak testing stage. This went pretty well, we used a pressure gauge made by EKWB. Handy gadget, definitely keeping this in my tool box, saved us A TON of time. We ended up needing to sand down some of the ends of the pipes to ensure a stronger seal, but nothing game breaking.
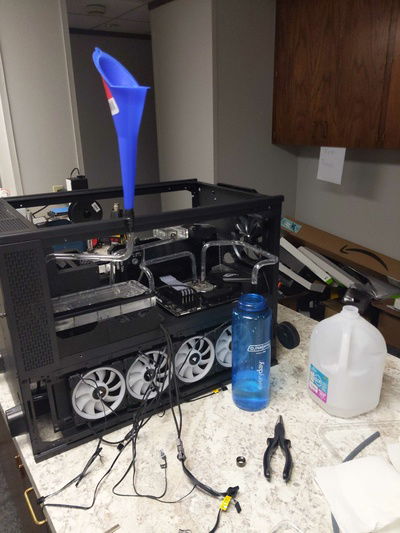
Ok folks, it's time to fill this beast with the testing fluid. Now, the way you are supposed to do this is use the top port in the reservoir to fill it. I got a pipe going there, so thats no good. My only real option is to lay it down on its back and use one of the other ports on the front of the reservoir. Armed with my $2 oil funnel from AutoZone taped to a screwed up bent pipe that happened to be the right orientation, we began to fill it.
The GPU loop filled great, and ran perfectly. I was an instant fan and my heart swelled with pride as our first loop spun up to life.
Lesson #4: Rinse your pipes after bending
The disaster struck after I filled the second loop and powered it on, I had forgotten to make sure all of the pipes had been washed out after bending. We used soap to lube the silicon insert when we were bending the pipe. When I powered it on, soap suds immediately started filling the pipes and reservoir. I powered everything off and buried my face in my hands for a few minutes as I came to the realization that I would have to rinse this whole loop several times to get it all out. I humored very briefly the possibility of just making the intern David do it, but sadly he was off that day and it was well into the night by now.
As I sat in my exhausted and pissed off state, I came up with a way to very easily rinse this system. I present to you the best water park for ants imaginable.
A couple gallons of soapy no-longer-distilled water later, Ive got a clean loop. I fill it back up with the PrimoPrep fluid and let it run off and on for the next three days.
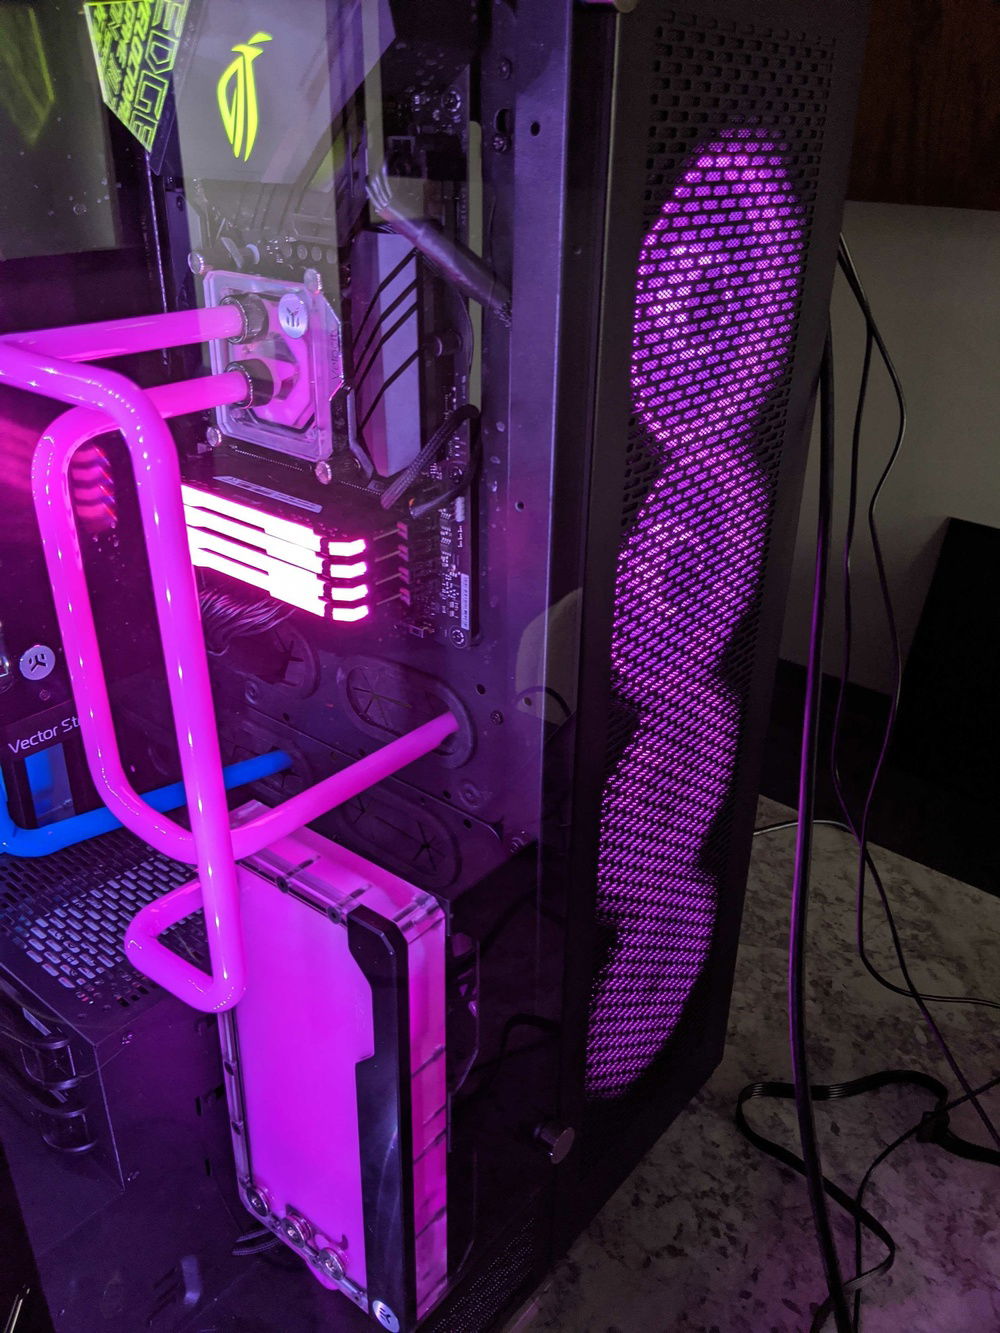
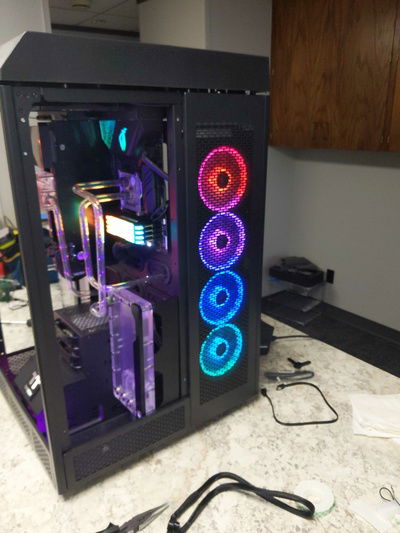
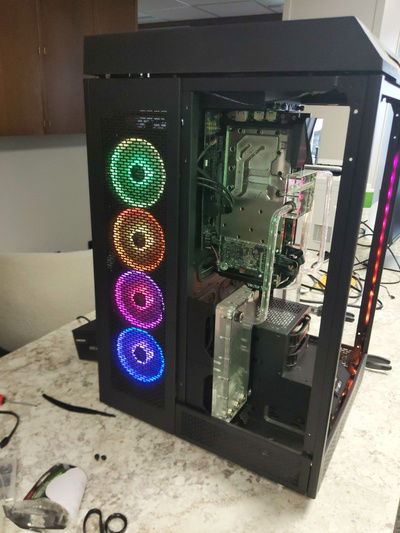
Whew, that was a quick three days. Time to cable manage and add all the RGB components. Nothing too crazy of note here as we used two Light Node Pros that came with our RGB fans so we could individually control each bay of RGB fans on either side of the case. Take it away, David!
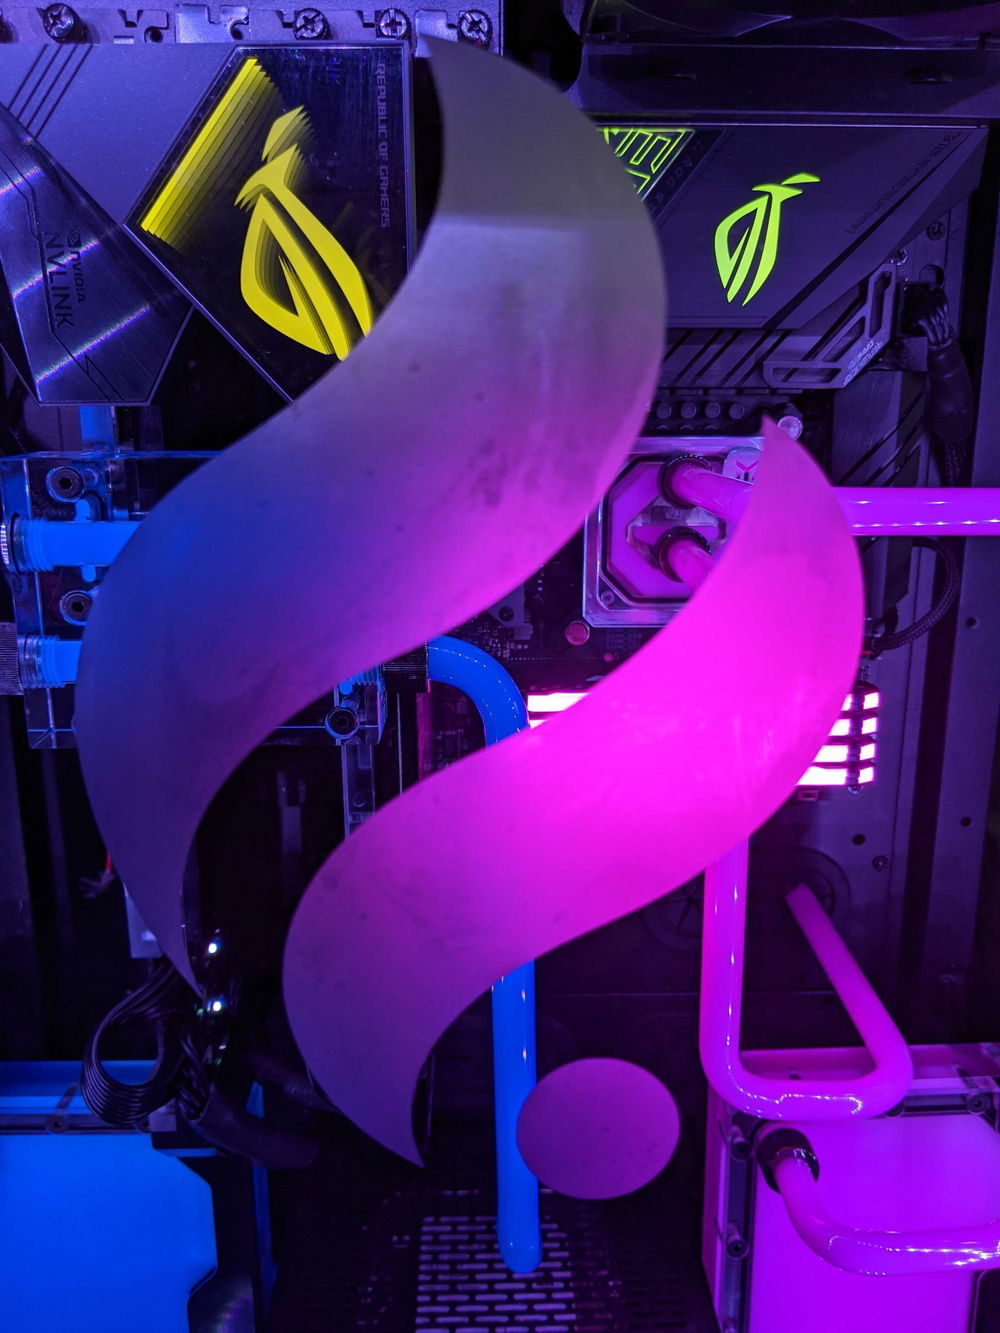
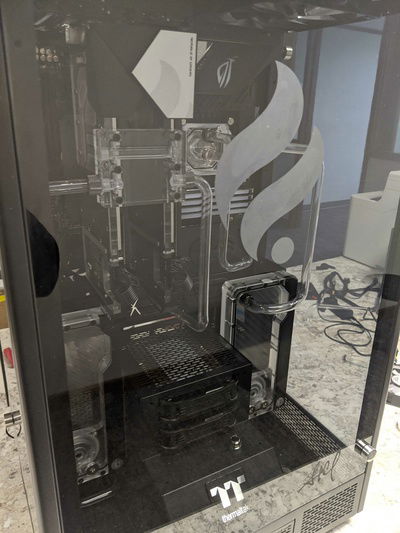
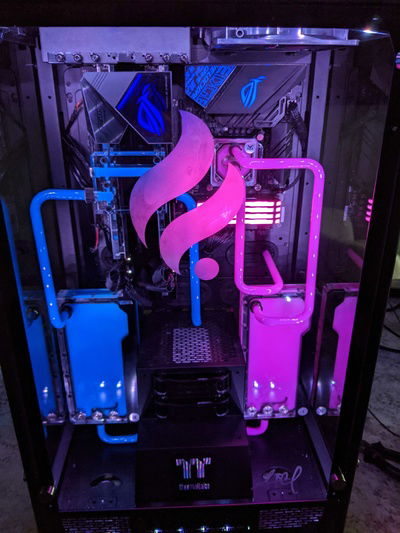
A detail that I left out at the beginning is that we really wanted to incorporate the logo in some way, we decided on etching the glass and putting our Firebend logo as well as a personalized mark for Steve. I called around to some local trophy shops asking if they could etch some tempered glass for us. I have a buddy with a laser engraver but he lives in Ohio and I didn't really know how quickly this project was to be done and the added risk of the glass breaking in transit. In chronological order, this step actually happened first when we got the case in and had the system posting. I was talking to some friends in Slack and they put me onto the idea of trying to use a product called Armour Etch which can easily be bought at any hobby store or Amazon. In the end, we decided that playing with acid was much more fun and it would be a good story later.
I had very little knowledge of how to do this so I took one of my glass panels off my (personal) case and used it as a testing piece of glass. Thankfully, we have someone in the office with a Cricut machine, and we had some vinyl stencils made of the Firebend logo in several different sizes. (I definitely etched a couple other things as well after all of this happened.) We put the stencil on the glass and applied the Armour Etch acid and waited about 8 minutes. The instructions clearly state that you should wear gloves, but it was 4:30 on a Friday and trash bags should work about the same so thats what we used on the testing piece of glass. Real vynil gloves were used after this attempt because we realized how stupid it was to not have them. Armed with our new found knowledge, we proceeded with the production piece of glass.
With the final unveil upon us, there is one last thing to note. I ordered some CableMod cables back in late January, but due to Coronavirus in China prevented them from arriving in time for this build log. I will update this post when I get the cables in (3/26, according to DHL), which will also be when I post the benchmarks and stress tests.
Voilá!
"Watercooled V12 Turbo to rival best on the market, I want people to know what we are capable of."
- Steve Clark, Founder of Firebend Technologies
Those were the requirements we had to fill and we were happy to oblige. With the help of some fellow Firebenders, Brandon Stillwell and David Spielmaker, we started the build.
It's not too awful hard to build the "V12 Turbo to rival best on the market", everyone has their own parts and preferences as to what that is. Our vision was a showcase computer with the firepower and style that could stand tall on any desk for years to come. For that reason, we chose The Tower 900 from Thermaltake as our case for its multi-perspective viewing angles and ample build space. It's the bees knees when it comes to computer modding and showcase machines. Props to the people who put their Tower 900 builds here, you all have mad skills.
This is our quick and dirty build after getting all of the parts in, pictured here is my personal Hyper 212 EVO standing in as our cooler for the time being while we make sure the computer POSTs and can run benchmarks for stock part testing. My desk became overwhelmed by the amount of hardware that was unboxed and the bags of screws and brackets were thrown everywhere. Once the waterblocks and such showed up we started to remove heatsinks from GPUs and mounted them in the case to get an idea as to how the GPU loop was going to function.
Note: The NVLink Bridge in this picture was simply for testing purposes, the one I really wanted got stuck in the mail during the beginning stages of Covid in Europe in Feburary. The new one is featured in other pictures.
The subject of watercooling had always been something I wanted to attempt, but [insert excuse here], and I never got around to it. Since this was to be my first custom water cooling build, why not throw myself and the build team into the proverbial deep end and attempt two separate loops with hardline tubing? We really wanted this to be inspired by Firebend and in order to do that, we needed two colors of liquid.
Lesson #1: There are more watercooling parts than I ever thought imaginable.
There are so many brands, aesthetics, and accessories it made my head spin. In the end, I chose the tried and true EKWB. Reasoning was because I was more comfortable with them since they have a ton of good reviews (written and video) by people I tend to agree with. Shoutout to my squad in Discord for the help in going through all those parts, sharing their experiences and being there to bounce ideas off of in general.
Lesson #2: Bending pipes by hand is difficult and gets harder the more bends there are.
I cannot express the amount of frustration I had the first few times I tried to bend these pipes. The short ones weren't too awful bad, but two of those pipes have like 5 bends in them and its tragic to have the 3rd or 4th bend to not go exactly where you need them to for the final bend to work. Luckily, through sheer brute force and persistence, I was able to fit those two pipes where they needed to go (Don't ask me how many pipes I destroyed by myself due to over heating or rebending).
Lesson #3: Angled fittings are your friend.
Thanks to the build team for putting up with my obsession to having every pipe look perfect and redoing some pipes that would have passed even if it was going into my personal rig, they handled it like champs.
With all the pipe bending finished, we moved into the leak testing stage. This went pretty well, we used a pressure gauge made by EKWB. Handy gadget, definitely keeping this in my tool box, saved us A TON of time. We ended up needing to sand down some of the ends of the pipes to ensure a stronger seal, but nothing game breaking.
Ok folks, it's time to fill this beast with the testing fluid. Now, the way you are supposed to do this is use the top port in the reservoir to fill it. I got a pipe going there, so thats no good. My only real option is to lay it down on its back and use one of the other ports on the front of the reservoir. Armed with my $2 oil funnel from AutoZone taped to a screwed up bent pipe that happened to be the right orientation, we began to fill it.
The GPU loop filled great, and ran perfectly. I was an instant fan and my heart swelled with pride as our first loop spun up to life.
Lesson #4: Rinse your pipes after bending
The disaster struck after I filled the second loop and powered it on, I had forgotten to make sure all of the pipes had been washed out after bending. We used soap to lube the silicon insert when we were bending the pipe. When I powered it on, soap suds immediately started filling the pipes and reservoir. I powered everything off and buried my face in my hands for a few minutes as I came to the realization that I would have to rinse this whole loop several times to get it all out. I humored very briefly the possibility of just making the intern David do it, but sadly he was off that day and it was well into the night by now.
As I sat in my exhausted and pissed off state, I came up with a way to very easily rinse this system. I present to you the best water park for ants imaginable.
A couple gallons of soapy no-longer-distilled water later, Ive got a clean loop. I fill it back up with the PrimoPrep fluid and let it run off and on for the next three days.
Whew, that was a quick three days. Time to cable manage and add all the RGB components. Nothing too crazy of note here as we used two Light Node Pros that came with our RGB fans so we could individually control each bay of RGB fans on either side of the case. Take it away, David!
A detail that I left out at the beginning is that we really wanted to incorporate the logo in some way, we decided on etching the glass and putting our Firebend logo as well as a personalized mark for Steve. I called around to some local trophy shops asking if they could etch some tempered glass for us. I have a buddy with a laser engraver but he lives in Ohio and I didn't really know how quickly this project was to be done and the added risk of the glass breaking in transit. In chronological order, this step actually happened first when we got the case in and had the system posting. I was talking to some friends in Slack and they put me onto the idea of trying to use a product called Armour Etch which can easily be bought at any hobby store or Amazon. In the end, we decided that playing with acid was much more fun and it would be a good story later.
I had very little knowledge of how to do this so I took one of my glass panels off my (personal) case and used it as a testing piece of glass. Thankfully, we have someone in the office with a Cricut machine, and we had some vinyl stencils made of the Firebend logo in several different sizes. (I definitely etched a couple other things as well after all of this happened.) We put the stencil on the glass and applied the Armour Etch acid and waited about 8 minutes. The instructions clearly state that you should wear gloves, but it was 4:30 on a Friday and trash bags should work about the same so thats what we used on the testing piece of glass. Real vynil gloves were used after this attempt because we realized how stupid it was to not have them. Armed with our new found knowledge, we proceeded with the production piece of glass.
With the final unveil upon us, there is one last thing to note. I ordered some CableMod cables back in late January, but due to Coronavirus in China prevented them from arriving in time for this build log. I will update this post when I get the cables in (3/26, according to DHL), which will also be when I post the benchmarks and stress tests.
Voilá!
Color(s): Blue Pink Yellow
RGB Lighting? Yes
Theme: Brand
Cooling: Custom Liquid Cooling
Size: E-ATX
Type: General Build
Hardware
Motherboard
$ 292.02
Memory
$ 371.98
Graphics
$ 1,498.00
ASUS - GeForce ROG Strix OC (Black) (2x)
Chip Manufacturer: NVIDIA
Chip: RTX 2080 Ti
Interface: PCIe x16
Storage
$ 307.98
Case
$ 296.03
Case Fan
$ 316.88
Cooling
$ 350.00
Cooling
$ 199.98
EKWB - EK-Quantum Kinetic FLT 240 D5 PWM D-RGB - Plexi (2x)
Type: Pump/Reservoir Combo
Size (WxHxD): 240 mm
Cooling
$ 99.99
Cooling
$ 329.98
Estimated total value of this build:
$ 5,365.17
Approved by:
