Battle Station City
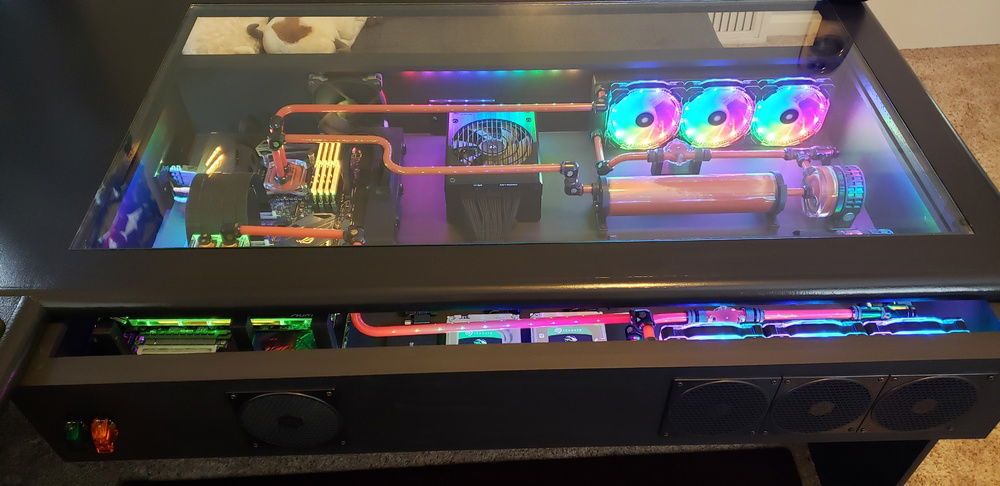
Custom built from the case to the liquid cooling.
*Extra Features*
-The entire case can be slid out and detached from the desk.
-Custom design/3D printed PSU cable Management
-Custom design/3D printed Water cooling indicator supports
-Military Style Momentary switches for Power/Reset
-DXRacing Series Chair
-USB Hub with Charging (Grommet Hole Style at corner of desk)
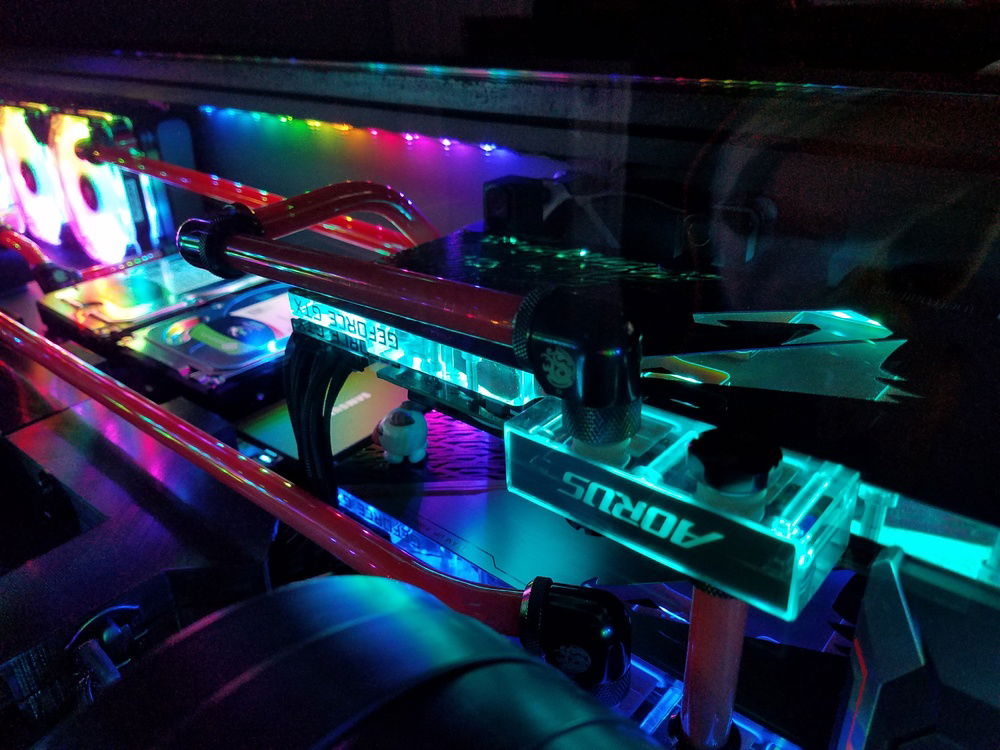
-Custom Graphics card mount
-Amazon Monitor mount
After years of having a regular rig and being behind the times as far as parts, I thought it was time to treat myself to the best for once. However, I didn't want something typical. I wanted a piece of art to look at every day and to be able to say I built that; a conversation starter if you will. Self taught, I custom designed and built the case you see. From the 3D printed parts and liquid cooling to the case itself. The whole process took about 8 months months to complete.
Desk - The desk was purchased from my work place. They were moving buildings and getting rid of furniture. The desk only costed me $200. Which was a steal.. I guess they like the work that I do for them. You can purchase these from numerous retailers.
Glass Top - I chiseled out a lip to hold a 3/8" thick piece of glass. The glass was custom cut by a local retailer. I chose to go with a higher thickness for protection and because I use this desk quite often. It should hold up to years of abuse.
Case - The case itself (the box that holds everything) was built out of MDF wood. I would recommend using plywood though. MDF is pretty heavy. It sits on heavy-load drawer slides. These drawer slides can be detached from their tracks so I can perform maintenance, cleaning or changing the fluid out. Cut outs were provided to accommodate the fans and wiring.
Liquid Cooling - Features two loops. One for the processor and the 2nd for the double stacked graphic cards. Each loop consists of: 1 Pump, 1 Flow Indicator, 1 Reservoir, 3 Fans and 1 Radiator. The Flow indicators are supported by 3D printed supports (with game tag engraved).
Graphics Card Stand - I wanted to think outside the box on this. From what I could find, most builds have the cards mounted in a vertical fashion. I wanted the cards to be flat so you can see them in their entirety, but also to be stacked (which made liquid cooling easier). There are wood supports holding the two graphics cards on one side and the other side is supported by the liquid cooling/SLI Bridge. The cards are also bolted to the wood supports.
PSU Wire Management - I purchased custom length, black, cables from CableMod. They worked out perfectly.Originally I liked the whole "bundle" of cables look running through the box. But, I wanted to put more thought into this and bring some of my passion for fusion/solidworks design to the build. I designed the channels and had them 3D printed out. They're held together by craft store box latches (painted black). All in all, this brings a very clean look to the build.
RGB Lighting - I used Corsair RGB addressable strips. I created about a 1/2 inch lip inside the box to accommodate these strips. The fans are Corsair RGB as well. They are controlled by Corsairs RGB command hub and their software. This was the only "down fall" of my build (you're bound to have something). Make sure all your RGB lighting have the same software. (Motherboard, graphics card, etc.). It's not fun getting 2-3 softwares to work together.
Color(s): Black Orange
RGB Lighting? Yes
Theme: Desk / Table
Cooling: Custom Liquid Cooling
Size: ATX
Type: General Build
Contests
This build participated in 1 contest.
| Rank | Contest | Date |
|---|---|---|
| #118 | The builds.gg 10K Challenge | ended |
Hardware
CPU
$ 183.16
Motherboard
$ 199.99
Memory
$ 264.99
Graphics
$ 415.00
Storage
$ 154.99
Storage
$ 61.99
Case Fan
Cooling
CableMod
Accessories
$ 29.99
Accessories
$ 74.90
Accessories
$ 18.99
Accessories
$ 46.31
Accessories
Monitor
$ 1,058.75
Keyboard
$ 249.66
Mouse
$ 79.99
Approved by:


