
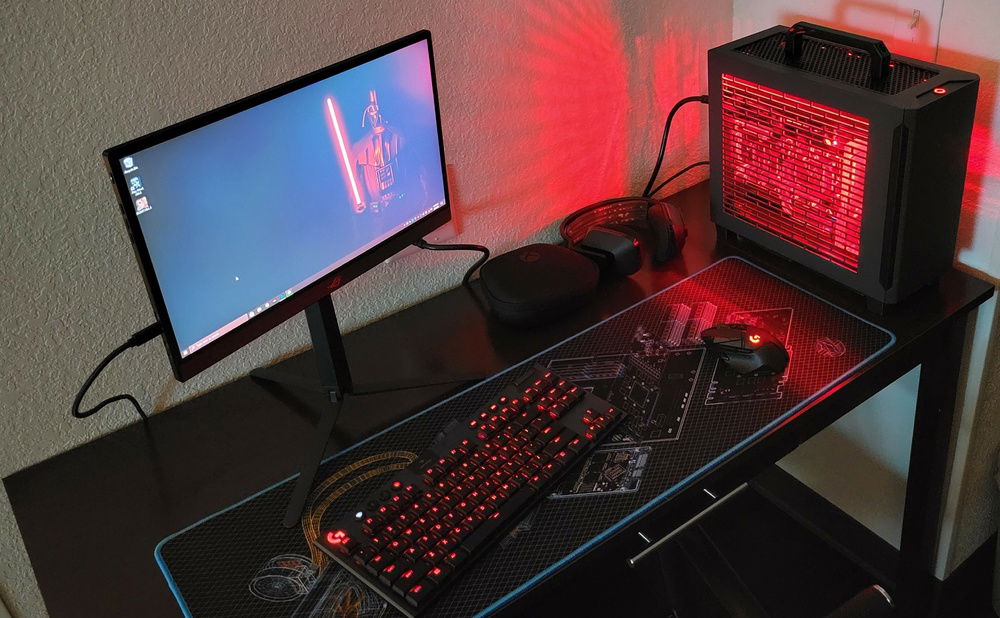
Hotel setup FTW!

CPU side.
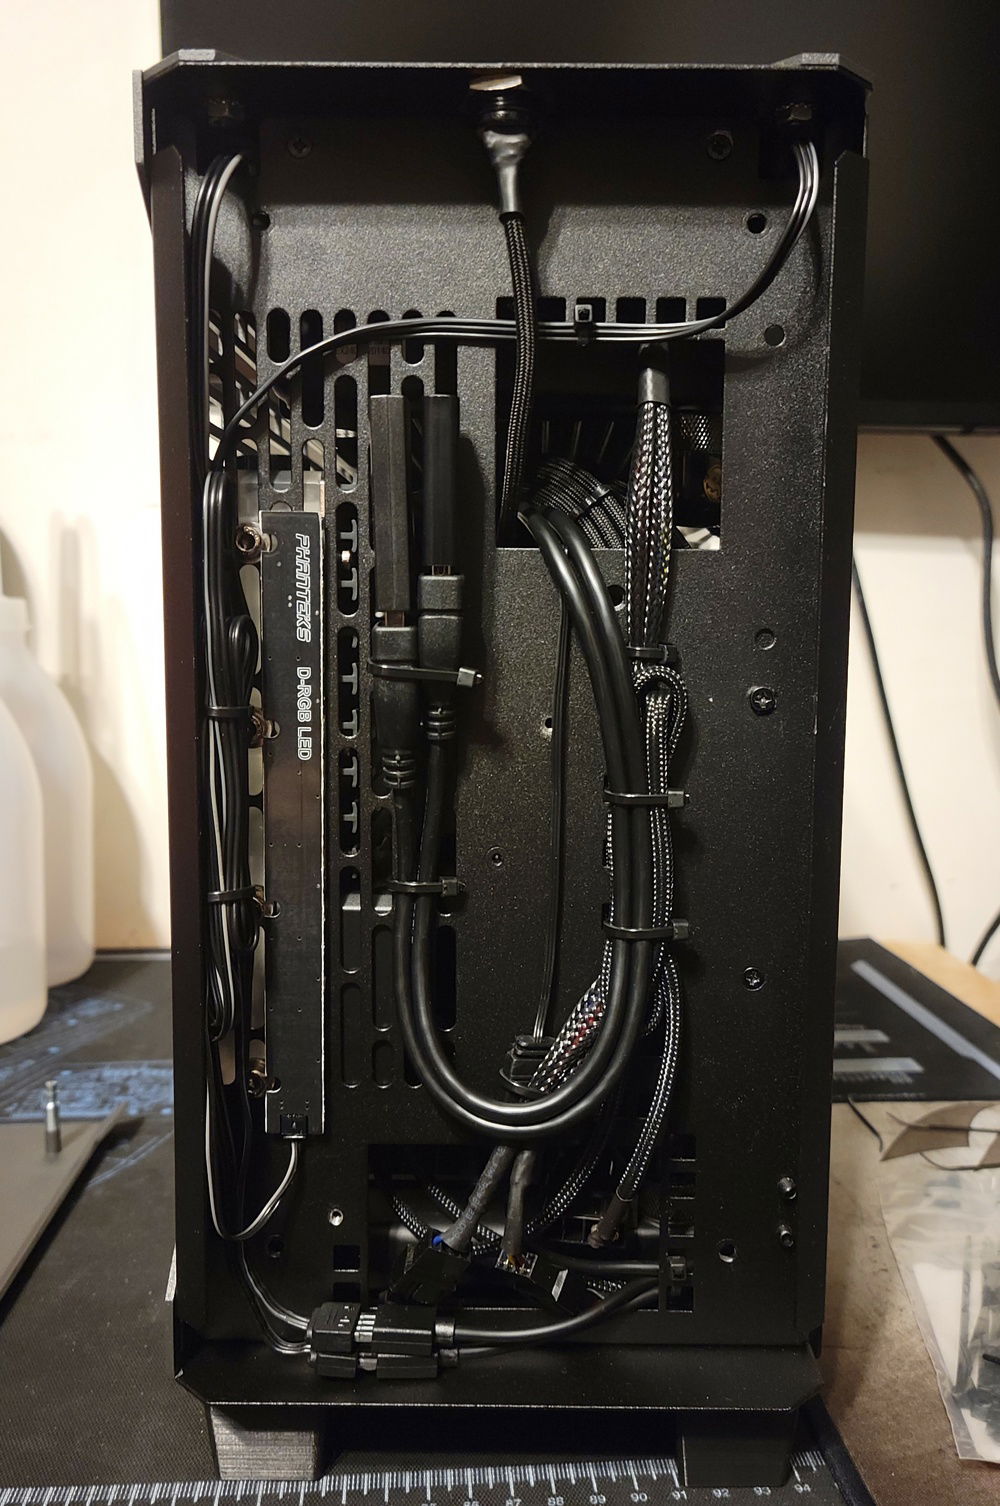
Front of the case behind the panel. This is where I've hidden pretty much all of my wiring, as well as my wireless dongles.
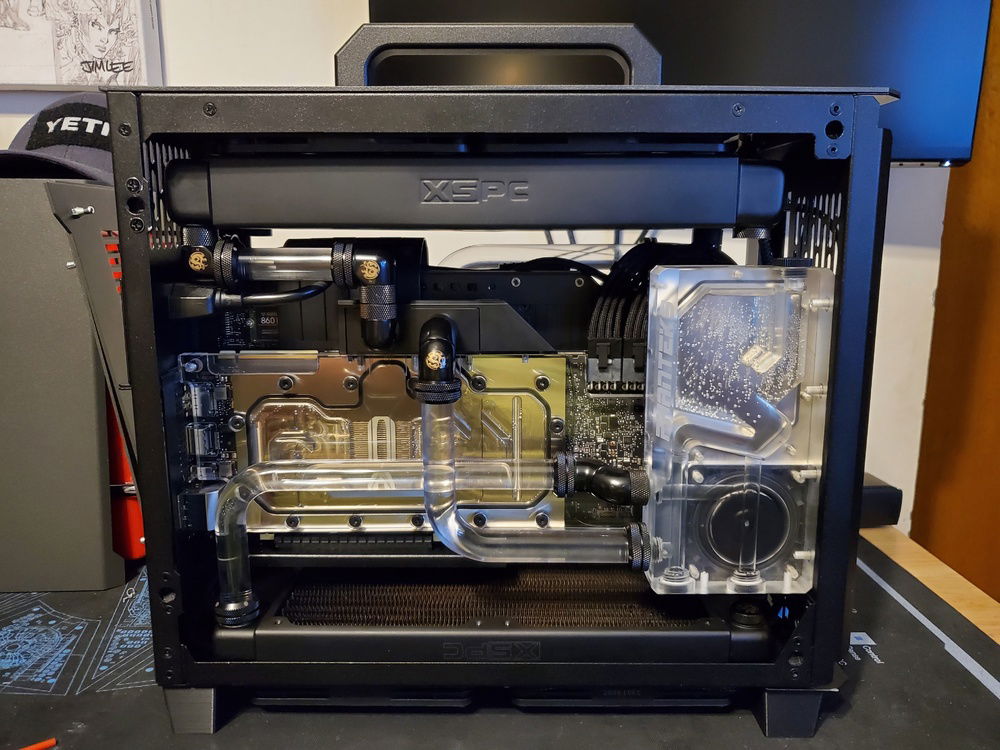
GPU side.
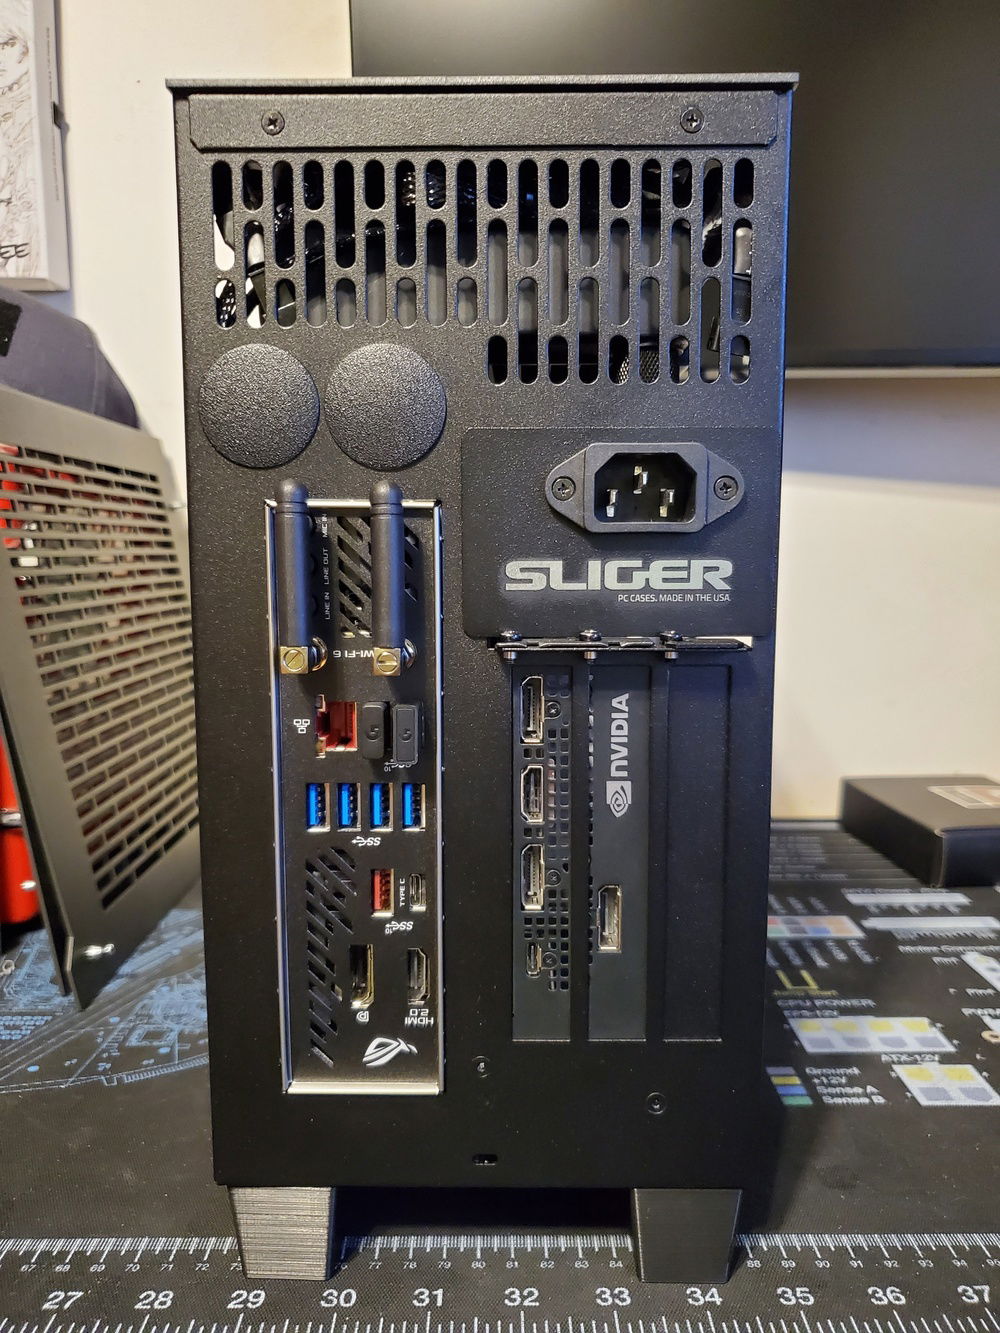
Power and USB-C is all that's needed to get this system functional, everything else stays mounted where it is.
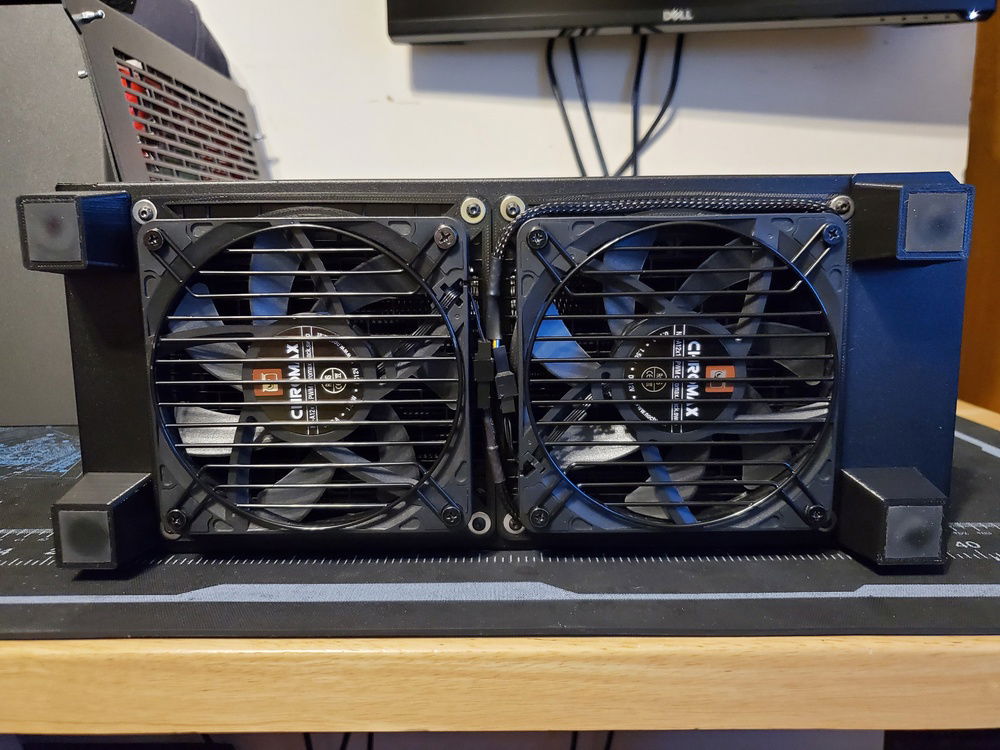
3D printed fan brackets and case feet, along with a little trickery with some PETG and 3M rubber cut to size for some padding and sliding protection.
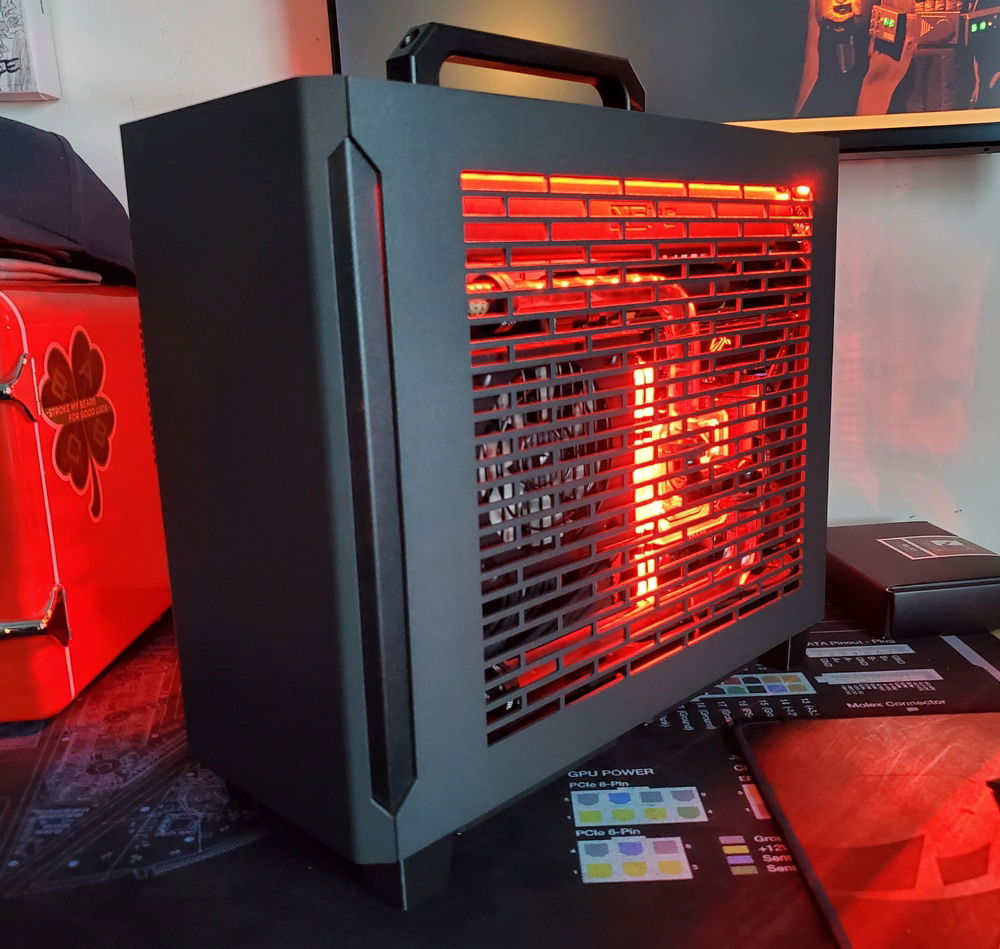
Road Warrior
AD:
Hello again SFF peeps. This is my current build that I take out of town with me every week for entertainment in my hotel room. I work a job that has me staying away from home M-F pretty much every week, and I decided that rather than waste a ton of money on a laptop, I could have a far quieter and more cost effective build.
Onto the build then. So this case is awesome in many many ways, and is so far my favorite SFF case to work with despite the shortcomings I am going to list in a bit here. Coming from a Louqe Ghost S1, and then an NCase M1 afterwards, a few things jumped out to me with the SM580.
Right off the bat, the build quality of the Sliger case is far and away one of the most robust and well built cases out of all that I have built in. Really really impressive in that regard. With the system completed, there is absolutely no flex whatsoever. What is a little less impressive is the real lack of native mounting for fans/radiators in this case. My original plan was to follow the maximum allowed spec according to Sliger's own list, using a 280mm radiator in the top, and a 120mm in the bottom. The top supports up to a 280mm radiator, but only very specific ones of which I found out later. I tried to put an XSPC EX280 in the top and had to drill out the rivets for the panel sockets to get it to fit (despite it meeting the measurements stated on the spec sheet), even then there was absolutely no way to do it properly.
The bottom mounts of the case also leave a lot to be desired. Rather than having a built in set of rails to mount your fans of choice, be it 120mm or 140mm; they opted to have eight pre-drilled holes that fit 140mm fans only. In order to mount 120mm fans, it requires another $20 in brackets. Then there are the brackets themselves. While decently made, they have M3 knurls in each corner of the mount that stick out about 2mm on one side of the bracket. When attempting to use an approved XSPC TX120 radiator at the bottom (any 120mm radiator under 25mm w/ a 15mm thick fan attached), having it flipped one way had these knurls colliding with the radiator, needing a spacer to get them to clear. Putting them the other way wouldn't allow the mounting screws to be flush with the case, so it just kind of rattles around in the holes, so again a spacer. Maybe I'm missing something here.
In the first revision of the case after my failed attempts with the 280mm/120mm, I just opted to use my original TX240s. The fan adapter brackets definitely weren't designed with radiators in mind, so some weird trickery with outdoor grade double sided tape needed to be done. This isn't so much a fault of the case, moreso me for trying to shoehorn in something it wasn't designed for. So take that for what you will.
After this I ran into another issue. This revolves around this specific GPU/waterblock/pump/reservoir combo. I chose the Phanteks R160 because it could be used as a pump/reservoir combo OR as a standalone reservoir. Originally I was going to use the Nouvolo Aquanaut pump/block combo. Problem with that was bleeding the system with the reservoir feeding into the bottom radiator before the pump was completely impossible. No amount of tipping, rolling, jostling, or otherwise would get the air out. So the decision was made to tear it all down and start over with the pump attached to the R160 instead. Issue with this approach was that the pump heatsink sticks out too far and was colliding with the vanity cover at the end of the GPU block. I could have removed it, but then I would have lost my RGB and we just can't have that!
So, enter the Dremel. With some measuring I found that if I shaved off three of the DDC heatsink fins, it would clear the block. So I got to work. Finished shaving them off with a cutting disk, then sanding, then wire brushing to get the burrs off. Shortly thereafter I realized that because the heatsink is keyed for the pump wires, I had done the wrong side like the chimp I am. So back outside I went to do it all again. At least it's symmetrical now.
Finally, the finishing touches. Cable management has always been a top priority with my builds. Pslatecustoms cables were really the only way to go at the time, and unfortunately CableMod doesn't offer sleeving options on their SFF cables as far as I'm aware. Another fun challenge were routing the exterior fan cables. I didn't want to have to drill any holes for them to pass through into the case, because the ultimate goal of mine with every build is to have no hard mods done to the case if I can help it. (I may have slightly failed at that by drilling out the rivets for the panel sockets, but four countersunk screws and four stainless nuts later, and you almost can't tell). Luckily the fan brackets I found on Thingiverse had those handy little channels that hold the cables almost perfectly. Lastly was some taller case feet to accommodate the fans (again, thanks Thingiverse), and that was it.
All in all, my requests for a future revision/offshoot of this case are as follows.
It is worth noting that what you see here is my second revision in this case. After about a month of using the original build with a 3950X, I was able to get my hands on a 5800X instead. Since this is a gaming rig first, I figured the IPC tradeoff was worth the reduction in cores since I wasn't going to be really using 16 cores anyway. With the CPU swap I decided to make some alterations to the build. Namely tubing, and radiators. More on that below.
Historically speaking, I am incredibly unpleasable when it comes to the cleanliness of my builds, both with my tubing runs and my cable management. These were the exact points of contention with my previous build in this case. My fan wiring was relatively hidden, but also all over the place. Using EKWB ZMT, my tubing runs were half decent in a couple of spots, and annoyingly sub-optimal in others. I told myself that if I had to do it all over again, I'd use cross-flow radiators to ease some of my routing issues.
So, this time around that is exactly the route I took. Instead of doing the two standard XSPC TX240s that I had on hand, I went for an XSPC EX240 Cross-flow for the top, and a TX240 Cross-flow for the bottom. I figured I may as well use a slightly thicker radiator up top this time since I had a ton of extra space originally. However, my original plan for the bottom was a second EX240 Cross-flow, but I had misread the specs on it when I purchased and didn't realize my screwup until after PPCs had shipped it. The thing about the SM580 (and probably the SM570 as well) is that it only supports 25mm thick fans in the bottom, with no mention of 240mm radiators in the official spec sheet; only 120mm. The EX240 comes in at a chonky 34mm thick, so that was dukes on my part.
I bring this up because basically anything thicker than the XSPC TX series of radiators is probably a no go if you're trying to cram a dual fan rad in the bottom. Under normal circumstances in the specified max configuration, 140mm fans in particular have to be put in one at a time. This is done by placing the first one in towards the front, and then sliding it back before adding the second fan. Even with a TX240 coming in at 20.5mm thick, it is a trick getting it in there with the adapter brackets attached without destroying the fins in the process.
Once everything is in place, the cross-flow setup of these rads makes it's presence known. Tube routing is infinitely easier when you're not trying to shove everything into one end of the case or the other, this was also made (arguably) easier with hard tubing versus soft tubing. When I originally built this system, I was feeling super lazy and didn't want to break out the heat gun to bend the tubes, so I figured ZMT would be good enough, and functionally it was. Aesthetically for me anyway, it wasn't. The PETG does make navigating around the cables a bit easier, and it cut way back on the sheer number of fittings I needed since I could make the bends with the tubing instead.
As far as the fan cables are concerned, I used an extra long extension for both of my runs, and then routed them between the top radiator and the panel to keep them well hidden. The female PWM plug is a bit too thick to fit under the panel, so I had to call on my old friend Mr. Dremel to persuade it to get a little thinner.
Under the front panel, I also made an attempt to clean up the wiring and overall I'm happy with how it turned out. With that, I added another addressable RGB strip to the motherboard side to even out the lighting a bit. I also added an extra screw to mount the PSU bracket to the front of the case. The bracket already had a threaded knurl built into it, but the case didn't have a hole lining up to actually secure it. This left the PSU bracket with quite a bit of flex that surprised me a bit. Looking at their webpage, apparently this is a recent change that they made. So I must have gotten a newer PSU bracket, but an older chassis. Nothing that couldn't be fixed with a drill, and now the PSU bracket is rock solid.
The final touch came down to my antennae/dongles for WiFi, my headset, and Xbox controller. I didn't want to have to worry about plugging them in every single time I set up the system, not to mention possibly losing them if I were in a hurry. I found an internal USB 2.0 splitter that allowed me to mount the dongles under the front panel with everything else. You'd think that this would cause connectivity issues, but it is surprisingly rock solid. I wanted the same hands off approach to the WiFi as well, but being that you can't really mount the WiFi antennas internally without mods it made it slightly difficult. As luck would have it, the folks over at SFF Noire released their low profile 90 degree WiFi/Bluetooth antennas. Just as the name suggests, they are specifically designed for SFFPCs. The dark nickel finish on the metal portions look much better than the brass connectors that you usually see, and once you get them snug they stay in place really well.
With these slight tweaks, I have to say that this is now probably one of my favorite systems I've ever built. Whenever I set it up, it is just a power cable to the PC and a USB-C cable to my monitor, and I'm gaming. I am still blown away by how well this case is built overall. Big hats off to the folks over at Sliger. This is about as close to CaseLabs quality that I've seen out of a case manufacturer since they closed their doors a few years ago.
As always, if you have any questions don't hesitate to reach out!
Onto the build then. So this case is awesome in many many ways, and is so far my favorite SFF case to work with despite the shortcomings I am going to list in a bit here. Coming from a Louqe Ghost S1, and then an NCase M1 afterwards, a few things jumped out to me with the SM580.
Right off the bat, the build quality of the Sliger case is far and away one of the most robust and well built cases out of all that I have built in. Really really impressive in that regard. With the system completed, there is absolutely no flex whatsoever. What is a little less impressive is the real lack of native mounting for fans/radiators in this case. My original plan was to follow the maximum allowed spec according to Sliger's own list, using a 280mm radiator in the top, and a 120mm in the bottom. The top supports up to a 280mm radiator, but only very specific ones of which I found out later. I tried to put an XSPC EX280 in the top and had to drill out the rivets for the panel sockets to get it to fit (despite it meeting the measurements stated on the spec sheet), even then there was absolutely no way to do it properly.
The bottom mounts of the case also leave a lot to be desired. Rather than having a built in set of rails to mount your fans of choice, be it 120mm or 140mm; they opted to have eight pre-drilled holes that fit 140mm fans only. In order to mount 120mm fans, it requires another $20 in brackets. Then there are the brackets themselves. While decently made, they have M3 knurls in each corner of the mount that stick out about 2mm on one side of the bracket. When attempting to use an approved XSPC TX120 radiator at the bottom (any 120mm radiator under 25mm w/ a 15mm thick fan attached), having it flipped one way had these knurls colliding with the radiator, needing a spacer to get them to clear. Putting them the other way wouldn't allow the mounting screws to be flush with the case, so it just kind of rattles around in the holes, so again a spacer. Maybe I'm missing something here.
In the first revision of the case after my failed attempts with the 280mm/120mm, I just opted to use my original TX240s. The fan adapter brackets definitely weren't designed with radiators in mind, so some weird trickery with outdoor grade double sided tape needed to be done. This isn't so much a fault of the case, moreso me for trying to shoehorn in something it wasn't designed for. So take that for what you will.
After this I ran into another issue. This revolves around this specific GPU/waterblock/pump/reservoir combo. I chose the Phanteks R160 because it could be used as a pump/reservoir combo OR as a standalone reservoir. Originally I was going to use the Nouvolo Aquanaut pump/block combo. Problem with that was bleeding the system with the reservoir feeding into the bottom radiator before the pump was completely impossible. No amount of tipping, rolling, jostling, or otherwise would get the air out. So the decision was made to tear it all down and start over with the pump attached to the R160 instead. Issue with this approach was that the pump heatsink sticks out too far and was colliding with the vanity cover at the end of the GPU block. I could have removed it, but then I would have lost my RGB and we just can't have that!
So, enter the Dremel. With some measuring I found that if I shaved off three of the DDC heatsink fins, it would clear the block. So I got to work. Finished shaving them off with a cutting disk, then sanding, then wire brushing to get the burrs off. Shortly thereafter I realized that because the heatsink is keyed for the pump wires, I had done the wrong side like the chimp I am. So back outside I went to do it all again. At least it's symmetrical now.
Finally, the finishing touches. Cable management has always been a top priority with my builds. Pslatecustoms cables were really the only way to go at the time, and unfortunately CableMod doesn't offer sleeving options on their SFF cables as far as I'm aware. Another fun challenge were routing the exterior fan cables. I didn't want to have to drill any holes for them to pass through into the case, because the ultimate goal of mine with every build is to have no hard mods done to the case if I can help it. (I may have slightly failed at that by drilling out the rivets for the panel sockets, but four countersunk screws and four stainless nuts later, and you almost can't tell). Luckily the fan brackets I found on Thingiverse had those handy little channels that hold the cables almost perfectly. Lastly was some taller case feet to accommodate the fans (again, thanks Thingiverse), and that was it.
All in all, my requests for a future revision/offshoot of this case are as follows.
- Make a version of this case that natively supports a 240mm rad+fans in the bottom.
Design the bottom to support either 120mm or 140mm fans without an add on bracket.
Redesign the panel retention clips, or move them as to not interfere with 280mm radiator placement.
It is worth noting that what you see here is my second revision in this case. After about a month of using the original build with a 3950X, I was able to get my hands on a 5800X instead. Since this is a gaming rig first, I figured the IPC tradeoff was worth the reduction in cores since I wasn't going to be really using 16 cores anyway. With the CPU swap I decided to make some alterations to the build. Namely tubing, and radiators. More on that below.
Historically speaking, I am incredibly unpleasable when it comes to the cleanliness of my builds, both with my tubing runs and my cable management. These were the exact points of contention with my previous build in this case. My fan wiring was relatively hidden, but also all over the place. Using EKWB ZMT, my tubing runs were half decent in a couple of spots, and annoyingly sub-optimal in others. I told myself that if I had to do it all over again, I'd use cross-flow radiators to ease some of my routing issues.
So, this time around that is exactly the route I took. Instead of doing the two standard XSPC TX240s that I had on hand, I went for an XSPC EX240 Cross-flow for the top, and a TX240 Cross-flow for the bottom. I figured I may as well use a slightly thicker radiator up top this time since I had a ton of extra space originally. However, my original plan for the bottom was a second EX240 Cross-flow, but I had misread the specs on it when I purchased and didn't realize my screwup until after PPCs had shipped it. The thing about the SM580 (and probably the SM570 as well) is that it only supports 25mm thick fans in the bottom, with no mention of 240mm radiators in the official spec sheet; only 120mm. The EX240 comes in at a chonky 34mm thick, so that was dukes on my part.
I bring this up because basically anything thicker than the XSPC TX series of radiators is probably a no go if you're trying to cram a dual fan rad in the bottom. Under normal circumstances in the specified max configuration, 140mm fans in particular have to be put in one at a time. This is done by placing the first one in towards the front, and then sliding it back before adding the second fan. Even with a TX240 coming in at 20.5mm thick, it is a trick getting it in there with the adapter brackets attached without destroying the fins in the process.
Once everything is in place, the cross-flow setup of these rads makes it's presence known. Tube routing is infinitely easier when you're not trying to shove everything into one end of the case or the other, this was also made (arguably) easier with hard tubing versus soft tubing. When I originally built this system, I was feeling super lazy and didn't want to break out the heat gun to bend the tubes, so I figured ZMT would be good enough, and functionally it was. Aesthetically for me anyway, it wasn't. The PETG does make navigating around the cables a bit easier, and it cut way back on the sheer number of fittings I needed since I could make the bends with the tubing instead.
As far as the fan cables are concerned, I used an extra long extension for both of my runs, and then routed them between the top radiator and the panel to keep them well hidden. The female PWM plug is a bit too thick to fit under the panel, so I had to call on my old friend Mr. Dremel to persuade it to get a little thinner.
Under the front panel, I also made an attempt to clean up the wiring and overall I'm happy with how it turned out. With that, I added another addressable RGB strip to the motherboard side to even out the lighting a bit. I also added an extra screw to mount the PSU bracket to the front of the case. The bracket already had a threaded knurl built into it, but the case didn't have a hole lining up to actually secure it. This left the PSU bracket with quite a bit of flex that surprised me a bit. Looking at their webpage, apparently this is a recent change that they made. So I must have gotten a newer PSU bracket, but an older chassis. Nothing that couldn't be fixed with a drill, and now the PSU bracket is rock solid.
The final touch came down to my antennae/dongles for WiFi, my headset, and Xbox controller. I didn't want to have to worry about plugging them in every single time I set up the system, not to mention possibly losing them if I were in a hurry. I found an internal USB 2.0 splitter that allowed me to mount the dongles under the front panel with everything else. You'd think that this would cause connectivity issues, but it is surprisingly rock solid. I wanted the same hands off approach to the WiFi as well, but being that you can't really mount the WiFi antennas internally without mods it made it slightly difficult. As luck would have it, the folks over at SFF Noire released their low profile 90 degree WiFi/Bluetooth antennas. Just as the name suggests, they are specifically designed for SFFPCs. The dark nickel finish on the metal portions look much better than the brass connectors that you usually see, and once you get them snug they stay in place really well.
With these slight tweaks, I have to say that this is now probably one of my favorite systems I've ever built. Whenever I set it up, it is just a power cable to the PC and a USB-C cable to my monitor, and I'm gaming. I am still blown away by how well this case is built overall. Big hats off to the folks over at Sliger. This is about as close to CaseLabs quality that I've seen out of a case manufacturer since they closed their doors a few years ago.
As always, if you have any questions don't hesitate to reach out!
Color(s): Black
RGB Lighting? Yes
Theme: none
Cooling: Custom Liquid Cooling
Size: SFF
Type: General Build
Contests
This build participated in 1 contest.
| Rank | Contest | Date |
|---|---|---|
| #124 | SFFPC meets builds.gg Contest | ended |
Hardware
CPU
$ 248.00
Motherboard
$ 415.29
Memory
$ 231.09
Graphics
$ 859.99
Storage
$ 148.99
Monitor
$ 547.97
Mouse
$ 99.89
Approved by: