Yet another Rhino S Mini-ITX build
AD:
So I finally finished this build a few days ago, and I wanted to share it because it didn't start as "let's build a cool open-frame PC." It started with a GPU I just couldn't let go of.
Why this GPU
The RTX 3080 Ti in this build came out of a Gigabyte AORUS Gaming Box — basically an eGPU enclosure. It's not my newest card, not even close to the fastest thing I could've bought, but it's the one I've had the longest, and it's been through a lot with me. I just wasn't ready to retire it to a drawer.
The problem: a card built for an eGPU box has a fairly unusual connector setup — it was never meant to live on a normal motherboard. So before any of this build happened, I had to track down custom cables just to get it talking to a standard system, and on top of that, source a custom waterblock since nothing off the shelf was designed for this card's layout.
Once that part was sorted, the rest of the idea clicked into place: build something small, open-frame, and clean around this GPU that means something to me.
The build
CPU: AMD Ryzen 9 9950X3D
GPU: RTX 3080 Ti (the sentimental one)
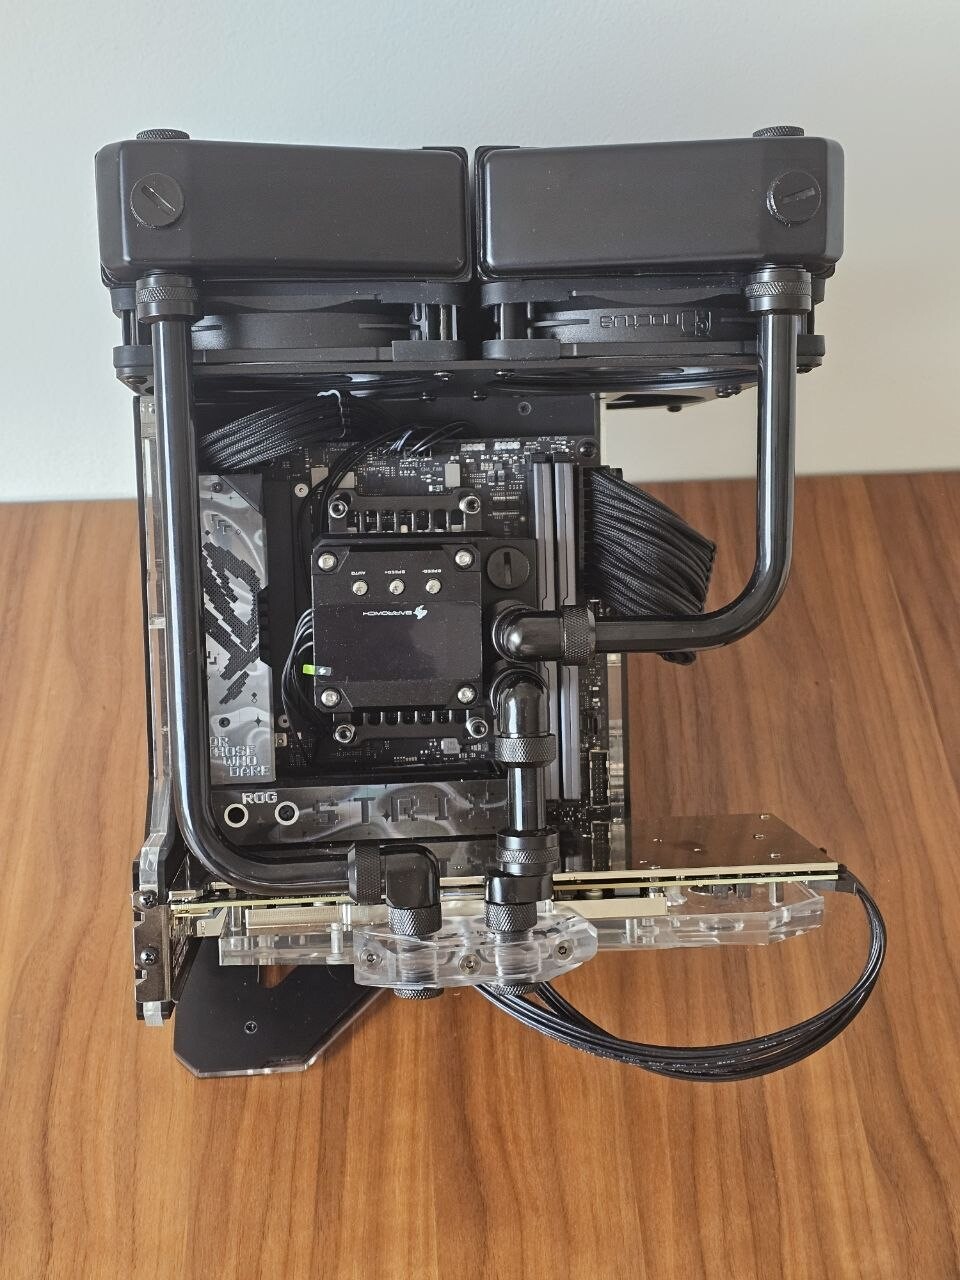
Motherboard: ASUS ROG Strix X870-I Gaming WiFi
RAM: Corsair Vengeance DDR5 64GB (2x32GB) @ 6000MHz EXPO
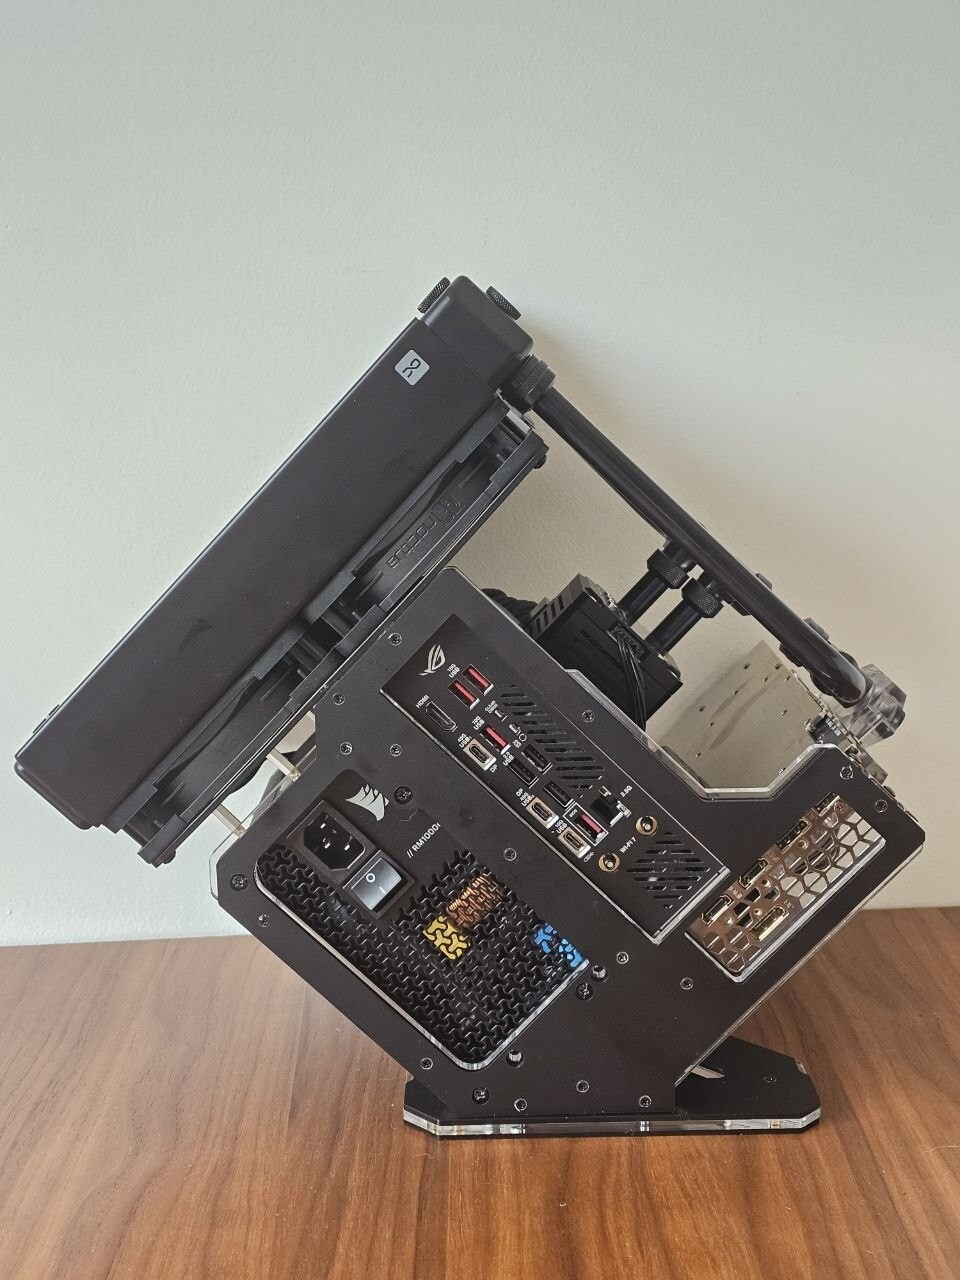
PSU: Corsair RM1000e
Case: Rhino S Mini-ITX
The loop
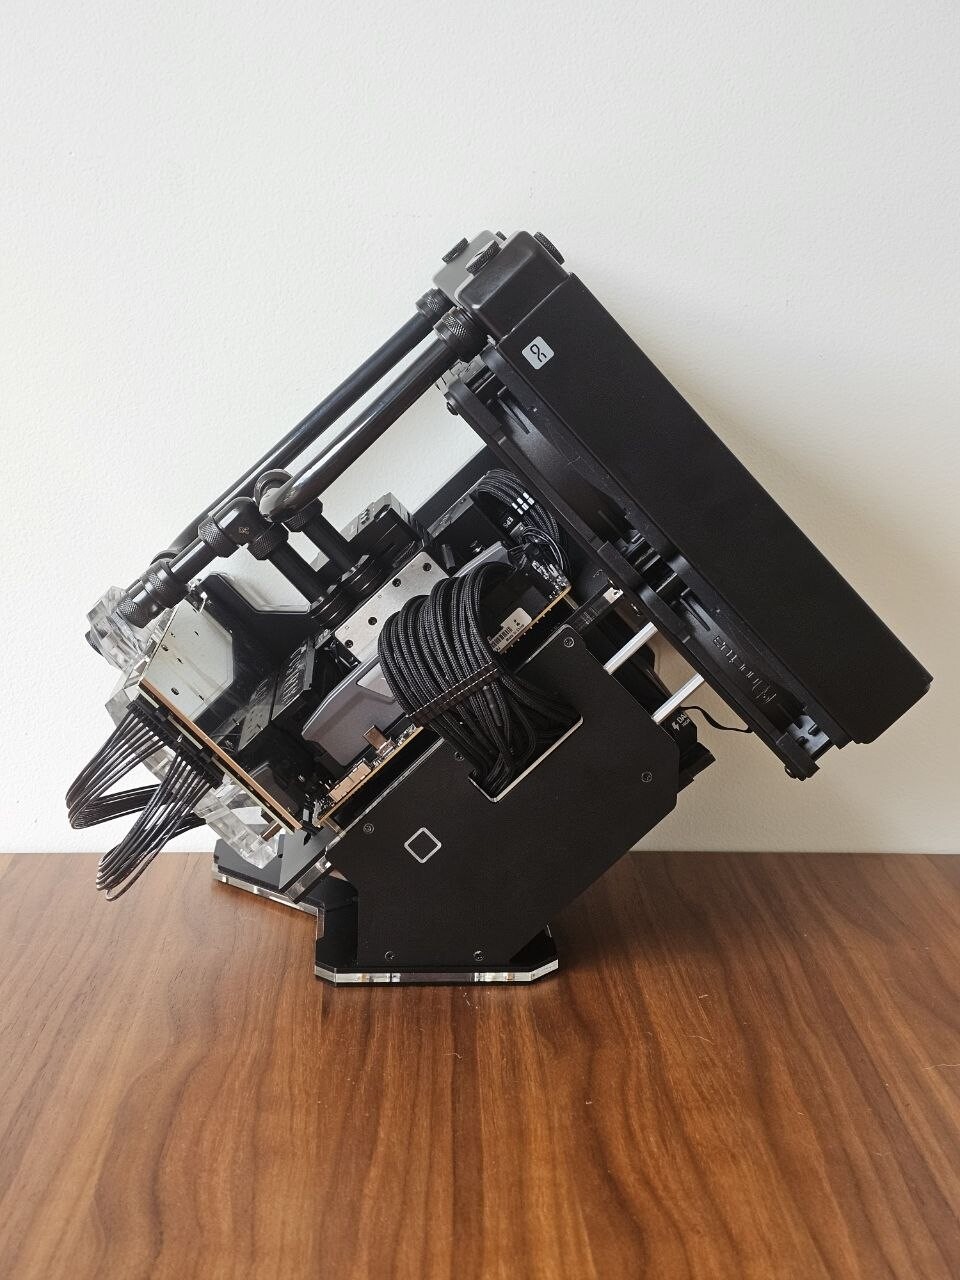
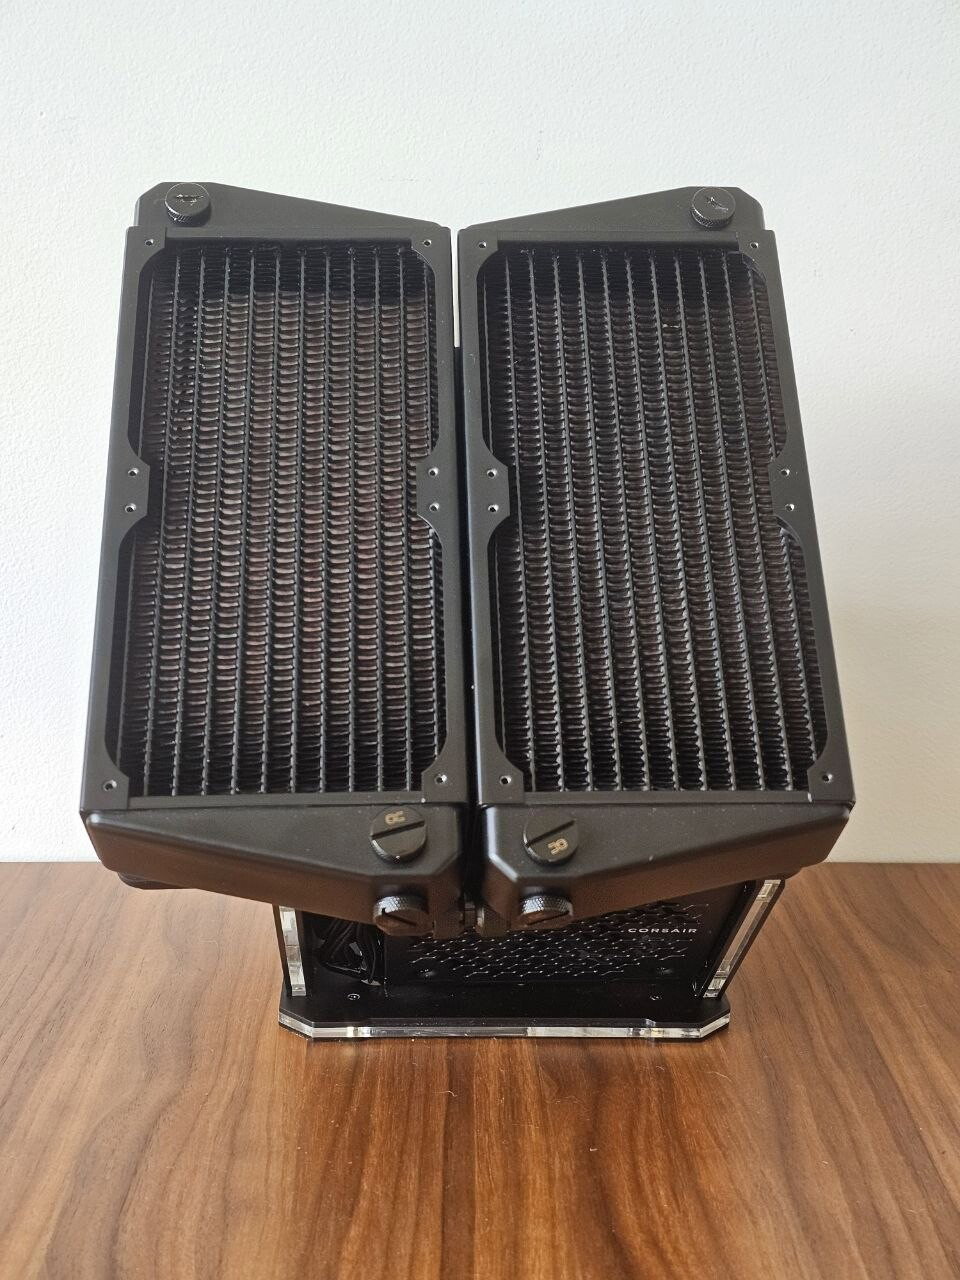
2x Alphacool Nexxxos XT45 X-Flow 240mm radiators, side by side
4x Noctua NF-A12x25
Barrowch 17W PWM pump with the little OLED screen
Where it got interesting — the bracket
The Rhino S doesn't come with any mounting solution for two 240mm rads side by side, so that part was on me. I ended up designing and laser-cutting my own 3mm aluminum bracket from scratch.
This took a few rounds of trial and error that I actually enjoyed more than I expected — printing 1:1 templates, cutting them out of cardboard, holding the cardboard up against the actual case, marking where things didn't line up, and going back to adjust. At one point I found that two of the case's mounting studs landed right inside one of the fan cutouts with nothing to screw into, so I had to leave a deliberate bridge of material there instead of just cutting a clean circle.
One fan in the corner only ended up with 2 working mounting bolts instead of 4, since the other two holes would've overlapped with the case's structure. I made sure those two bolts sit on opposite corners so the fan still holds flush and secure — just asymmetric on that one.
How it's running
Stress tested with Prime95 + FurMark running together: CPU stays under 85°C, GPU under 75°C. The pump's running close to full speed since the loop is on the longer side with two rads, but it's quiet and the flow looks healthy.
Room to grow
There's still some thermal headroom left in the loop, so a 5090 isn't off the table somewhere down the line. The real limiter would be the PSU — the RM1000e won't have enough for that, so I'd need to step up to something like a Lian Li 1200W first.
Happy to share the bracket files (DXF) if anyone's wrestling with a similar dual-240 setup in this case.
Why this GPU
The RTX 3080 Ti in this build came out of a Gigabyte AORUS Gaming Box — basically an eGPU enclosure. It's not my newest card, not even close to the fastest thing I could've bought, but it's the one I've had the longest, and it's been through a lot with me. I just wasn't ready to retire it to a drawer.
The problem: a card built for an eGPU box has a fairly unusual connector setup — it was never meant to live on a normal motherboard. So before any of this build happened, I had to track down custom cables just to get it talking to a standard system, and on top of that, source a custom waterblock since nothing off the shelf was designed for this card's layout.
Once that part was sorted, the rest of the idea clicked into place: build something small, open-frame, and clean around this GPU that means something to me.
The build
CPU: AMD Ryzen 9 9950X3D
GPU: RTX 3080 Ti (the sentimental one)
Motherboard: ASUS ROG Strix X870-I Gaming WiFi
RAM: Corsair Vengeance DDR5 64GB (2x32GB) @ 6000MHz EXPO
PSU: Corsair RM1000e
Case: Rhino S Mini-ITX
The loop
2x Alphacool Nexxxos XT45 X-Flow 240mm radiators, side by side
4x Noctua NF-A12x25
Barrowch 17W PWM pump with the little OLED screen
Where it got interesting — the bracket
The Rhino S doesn't come with any mounting solution for two 240mm rads side by side, so that part was on me. I ended up designing and laser-cutting my own 3mm aluminum bracket from scratch.
This took a few rounds of trial and error that I actually enjoyed more than I expected — printing 1:1 templates, cutting them out of cardboard, holding the cardboard up against the actual case, marking where things didn't line up, and going back to adjust. At one point I found that two of the case's mounting studs landed right inside one of the fan cutouts with nothing to screw into, so I had to leave a deliberate bridge of material there instead of just cutting a clean circle.
One fan in the corner only ended up with 2 working mounting bolts instead of 4, since the other two holes would've overlapped with the case's structure. I made sure those two bolts sit on opposite corners so the fan still holds flush and secure — just asymmetric on that one.
How it's running
Stress tested with Prime95 + FurMark running together: CPU stays under 85°C, GPU under 75°C. The pump's running close to full speed since the loop is on the longer side with two rads, but it's quiet and the flow looks healthy.
Room to grow
There's still some thermal headroom left in the loop, so a 5090 isn't off the table somewhere down the line. The real limiter would be the PSU — the RM1000e won't have enough for that, so I'd need to step up to something like a Lian Li 1200W first.
Happy to share the bracket files (DXF) if anyone's wrestling with a similar dual-240 setup in this case.
Color(s): Black Gray
RGB Lighting? No
Theme: none
Cooling: Custom Liquid Cooling
Size: Mini-ITX
Type: General Build
Hardware
CPU
$ 663.99
Motherboard
$ 389.99
Memory
$ 241.99
Graphics
Case Fan
$ 139.80
Cooling
$ 159.98
Cooling
Approved by: