
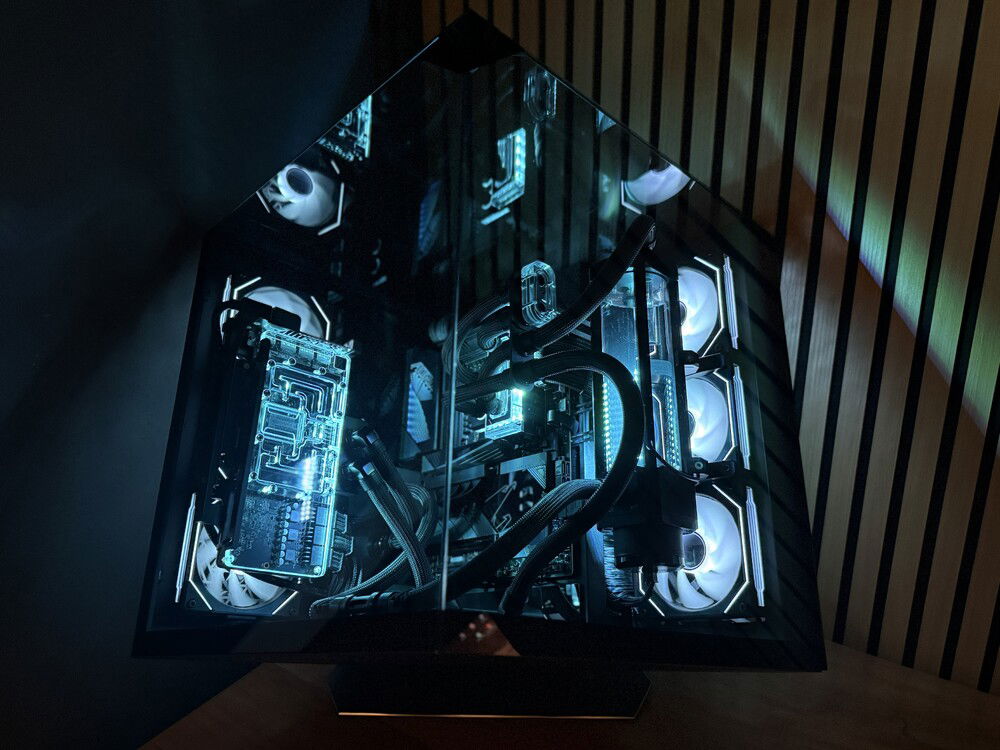
c u b e

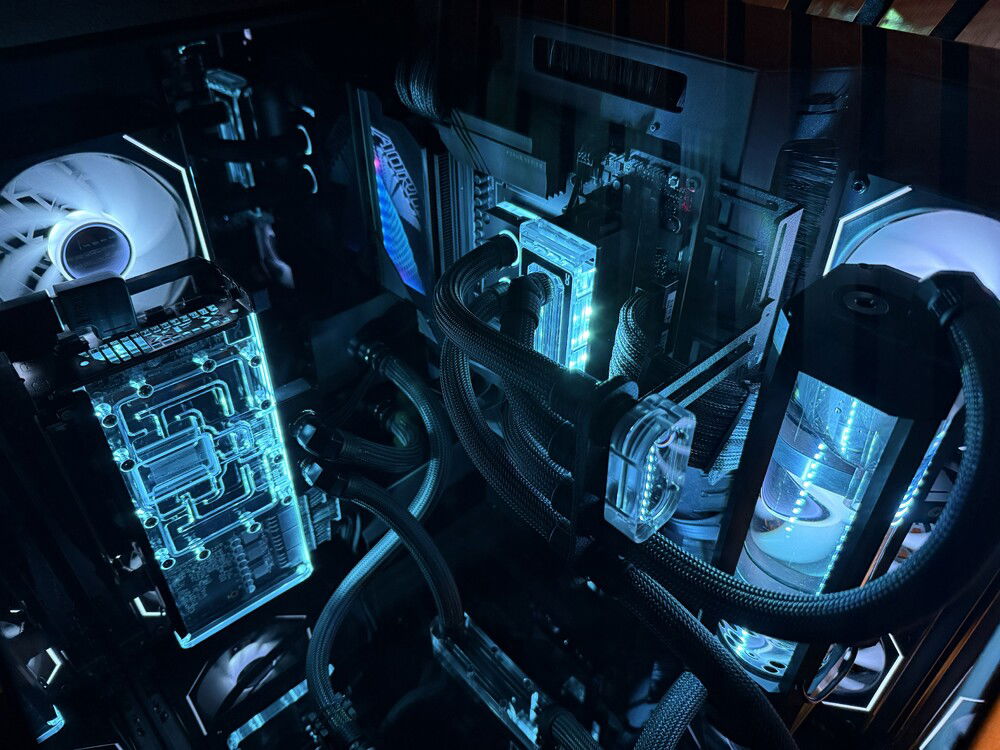
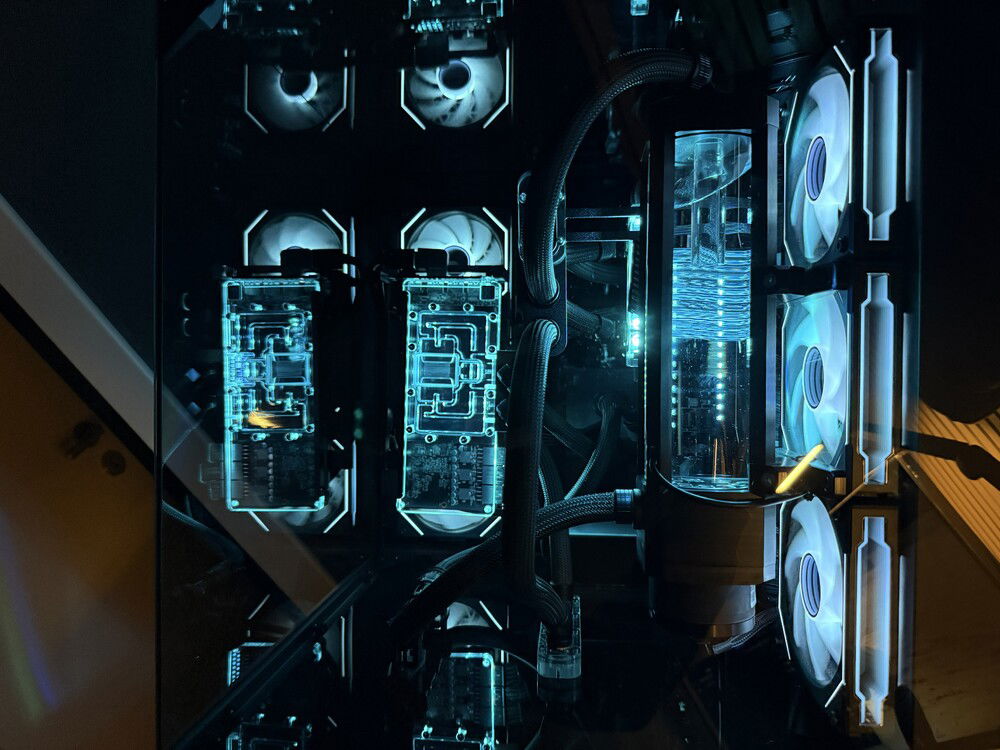

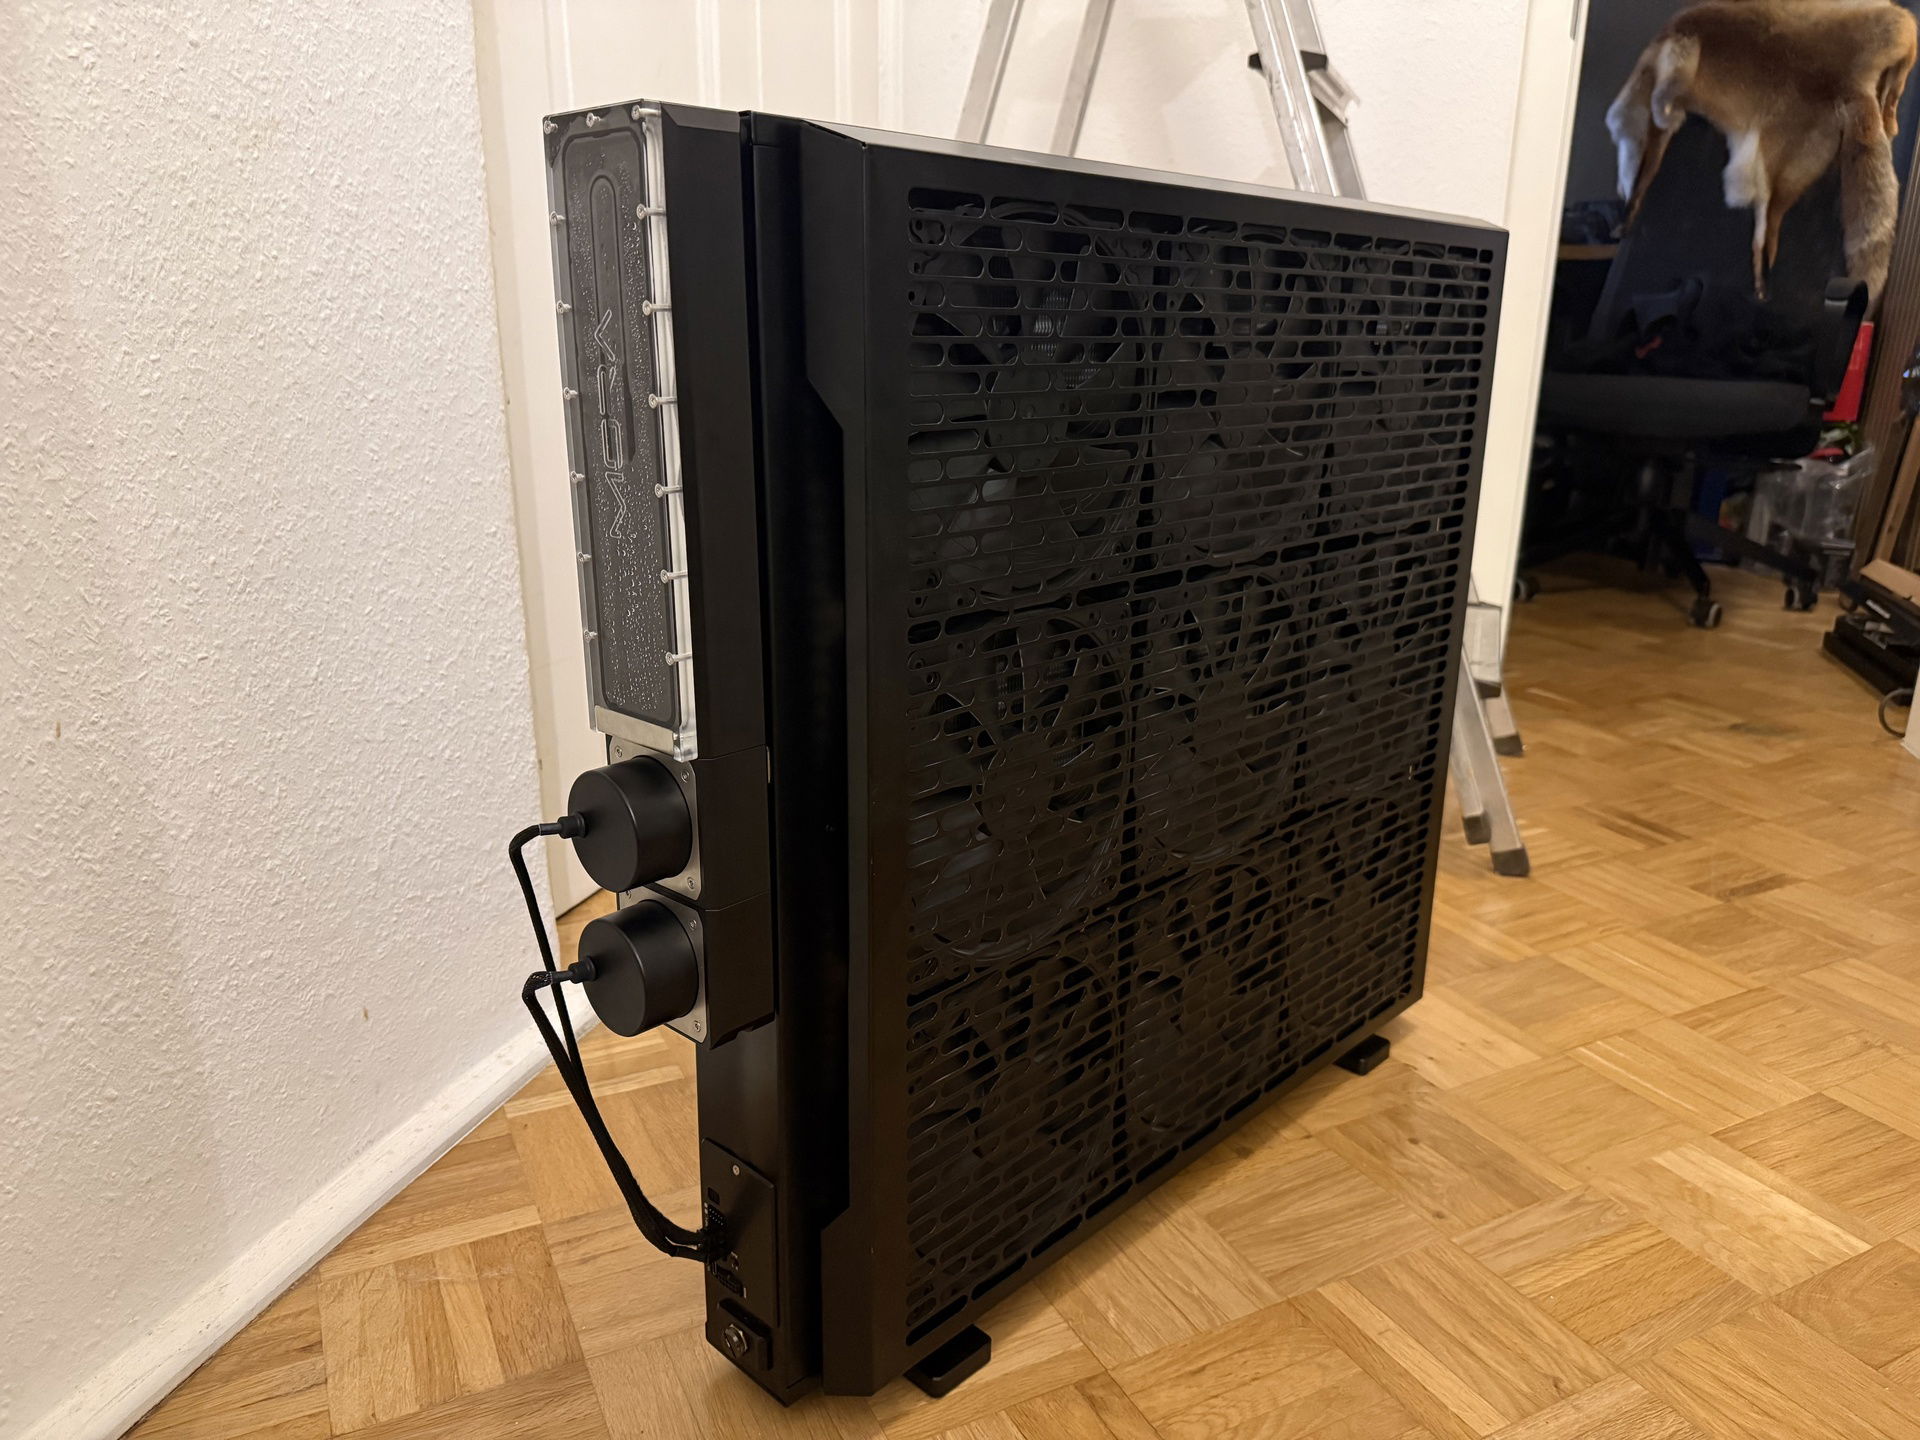
probably my favourite perspective in the case, good sleeving *chef's kiss*

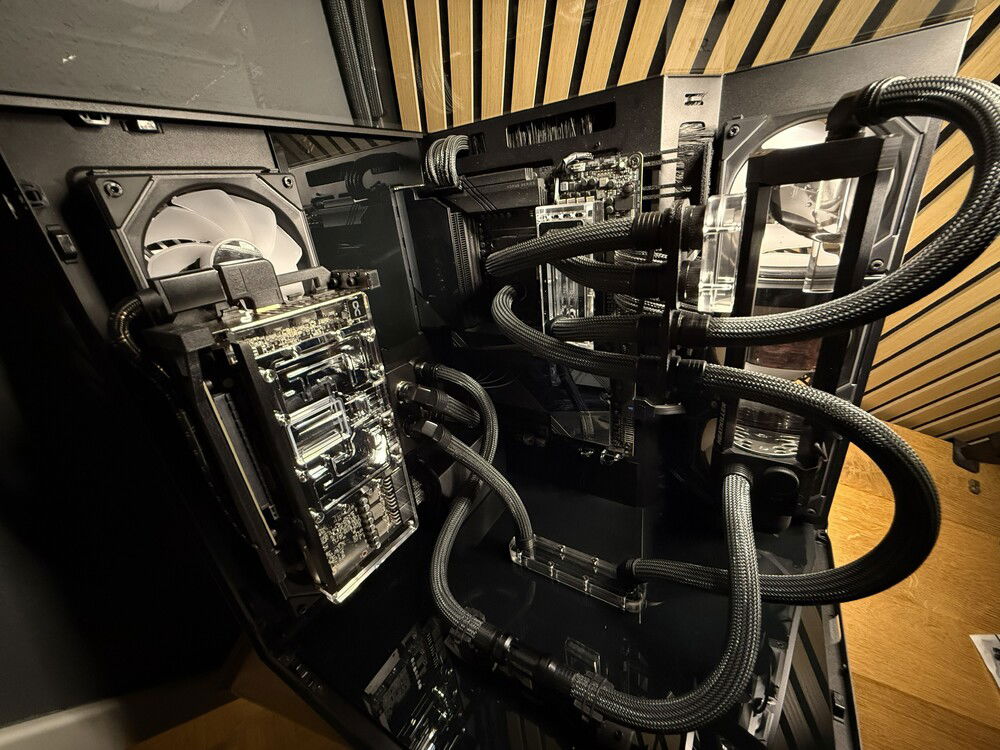
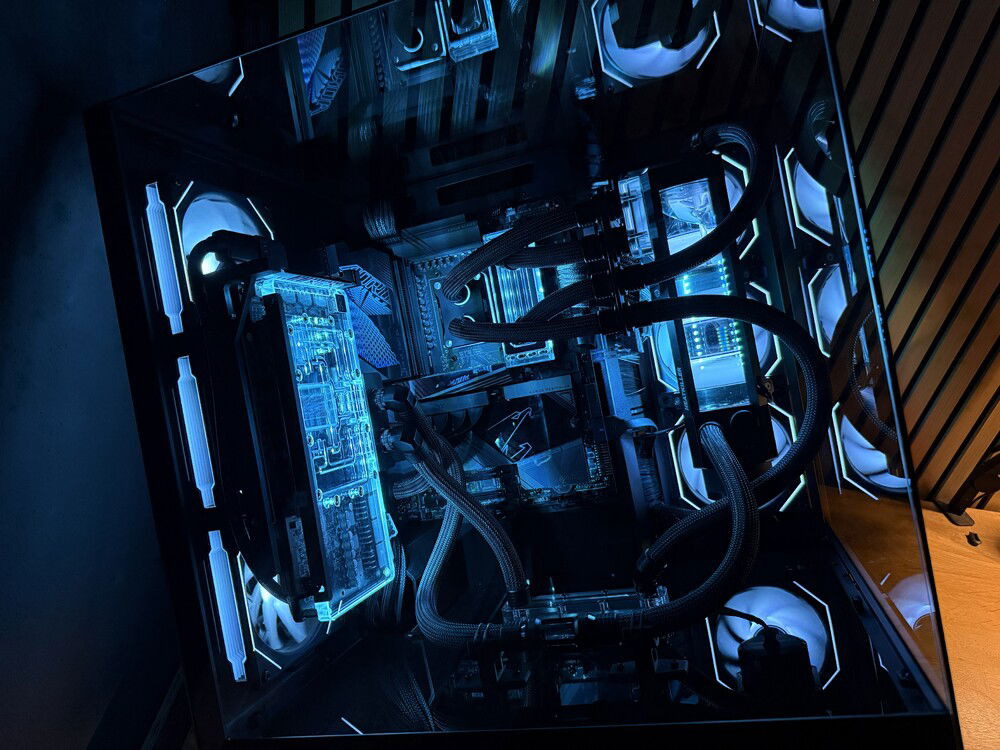
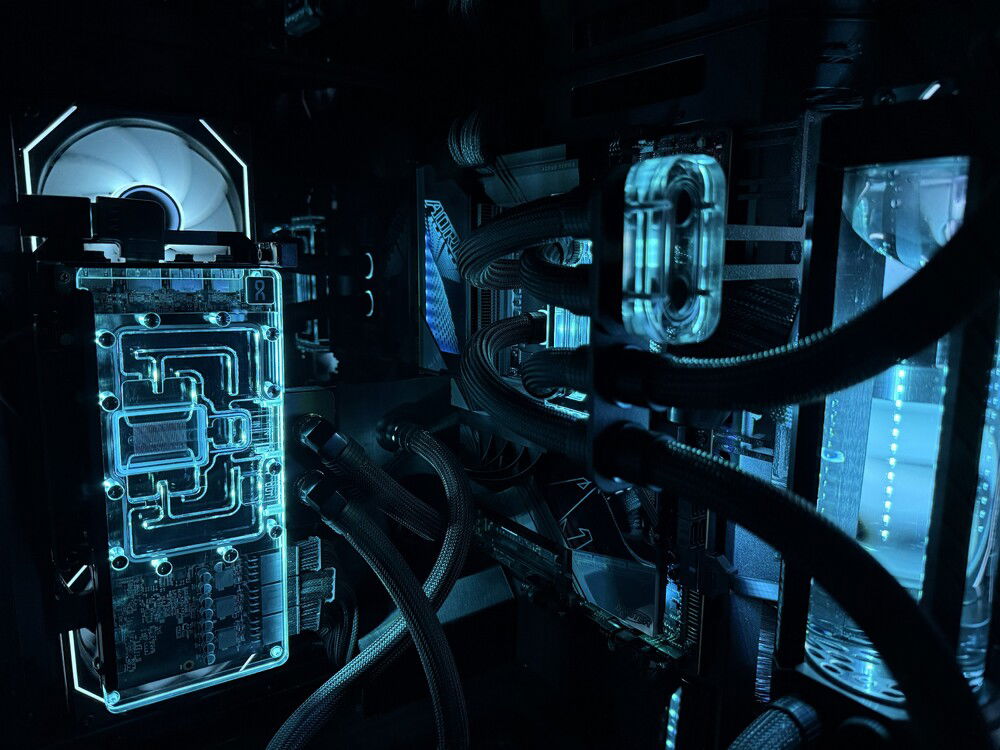
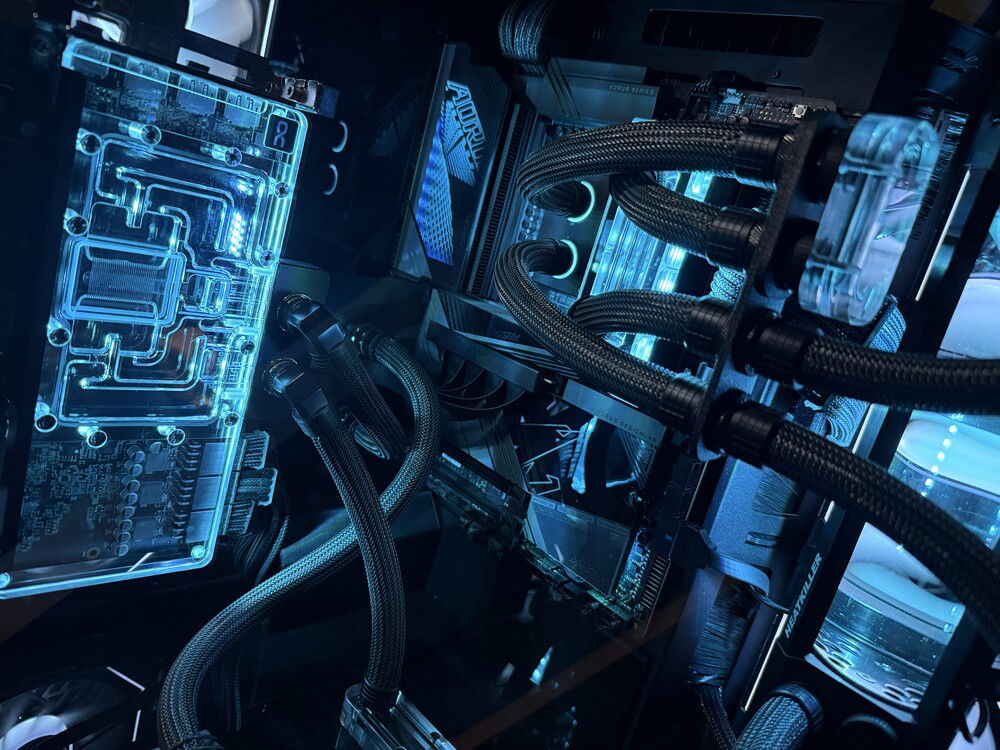
sorry for the quality, this is just to supply an overall view of the case from all angles.
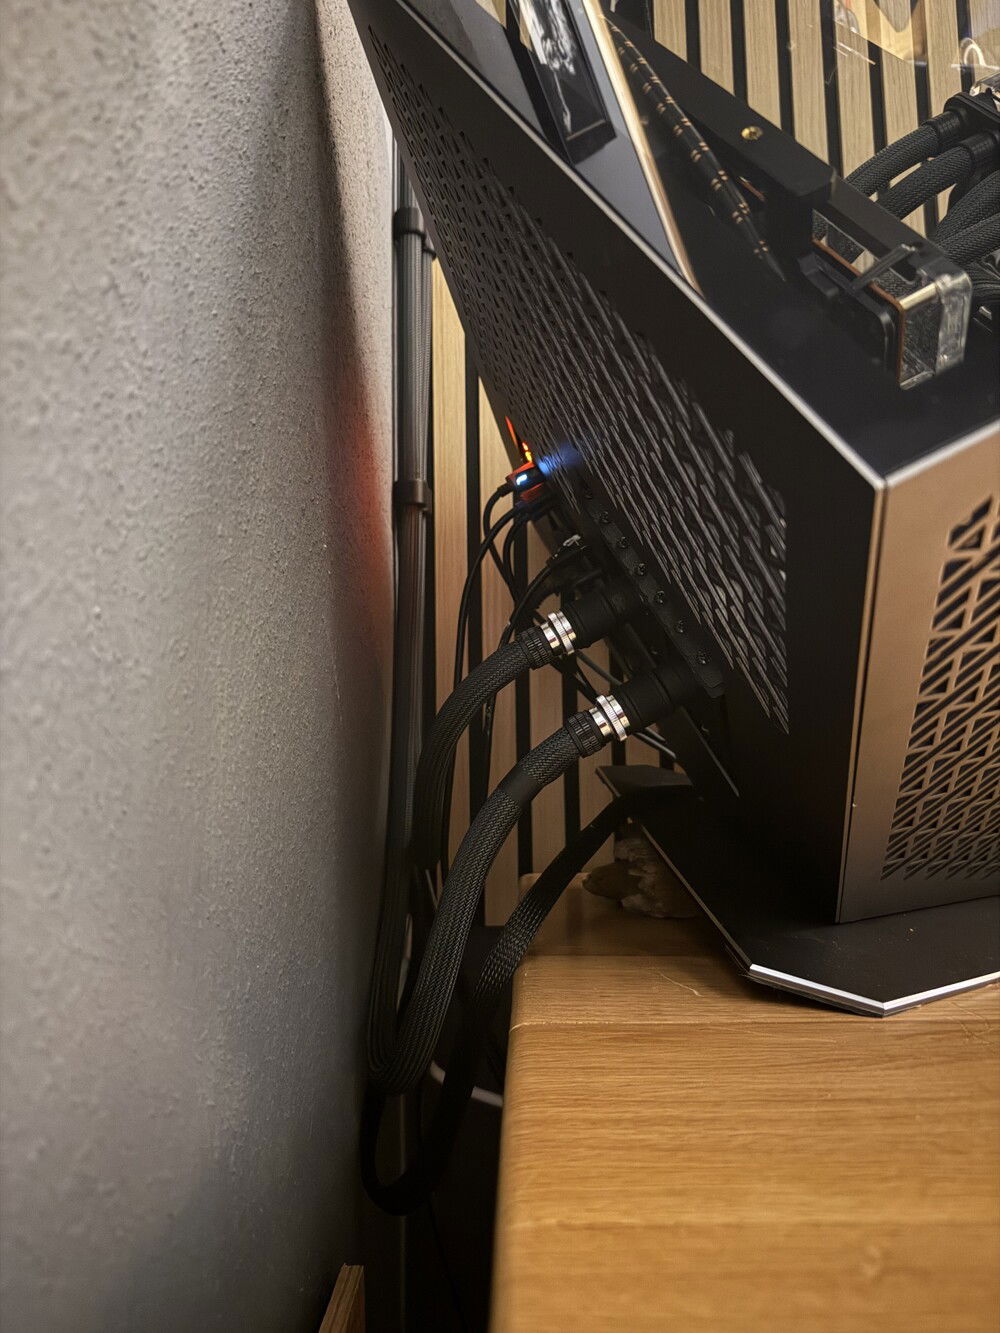

all hail mora
The Carbon Cube
AD:
Hello everyone and welcome to this little writeup about my new build. My online alias is Lazare, I am from Germany and I highly doubt that anyone will fully read what I have to say about this build. You're welcome to at least look at the pictures, I tried to document every part of this journey.
Prologue
Three years ago, I built my first custom watercooled PC. I drew lots of inspiration from creators like LiquidHaus so it became a sleeved EPDM build. Nothing out of the ordinary, I used a O11D Evo in reverse mode to house two 360mm rads, a 3080 and a 5800X3D. This build took me some nerves since it was my first time sleeving, the first time custom watercooling even but I learned a lot along the way.
![User Image]()
![User Image]()
A new, cubic beginning
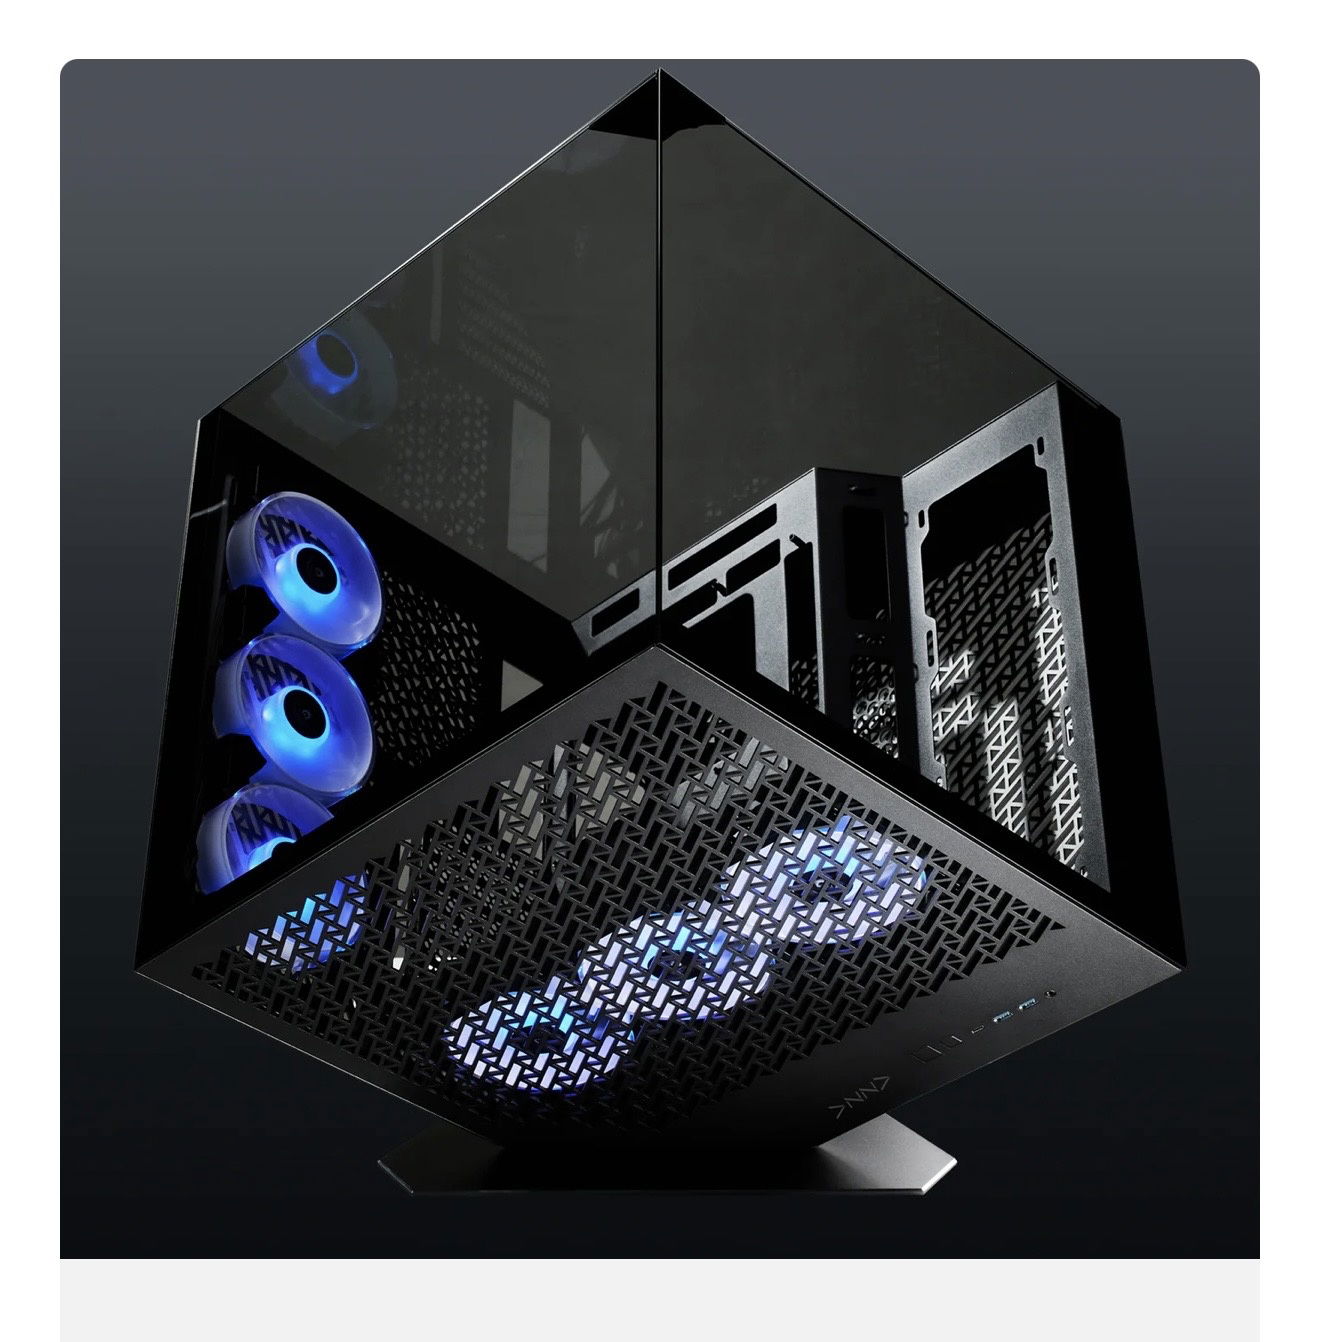
This PC has served me well but I always side-eyed one of those cube cases by Azza. Back in the day, the Cube Mini and Cube 805 were rather small form factors that didn‘t allow for much play with the cubic shape. When I first researched for my next build in the summer of 2025, I came across Azza‘s newest Cube Plus. Three sides of the cube could be outfitted with fans, maybe an acrylic panel (foreshadowing) and it was BIG. Sadly, its release date had passed and it was nowhere to be found. So I messaged the German Azza representative asking for the case and didn‘t get a reply. Messaged Azza‘s instagram, they reached out to their German branch who then answered me and 2 weeks later, the case arrived.
![User Image]()
![User Image]()
Now if you look at the case‘s introduction page on Azza‘s official website, you might think that there’s a seriously high end product coming your way. Unfortunately, with the Cube Plus, that was not the case. For 500€ you get a really heavy case and solid craftsmanship but that‘s about it. I don‘t know if I‘m asking for too much at this point but cable passthrough grommets would‘ve been nice at least. Or some basic support for cable management.
Nevertheless, its size was impressive and I was really looking forward to this build.
So, what‘s next?
August 2025 marked the official start for my project. I unpacked the case (didn‘t snap any pictures of that unfortunately) and started to envision some concepts I would like to implement in this build. There were no mockups made, things just started growing in my head. For about three months, nothing much happened, mainly due to family, work and financial reasons. Mainboard, GPU and GPU cooler arrived in november.
There are four main objectives for this build:
1: Utilize LiquidHaus BLK
2: Sleeved EPDM tubes
3: External MoRa IV
4: Unique graphics card placement
First three are easy, order it online and rely on experience from my previous build.
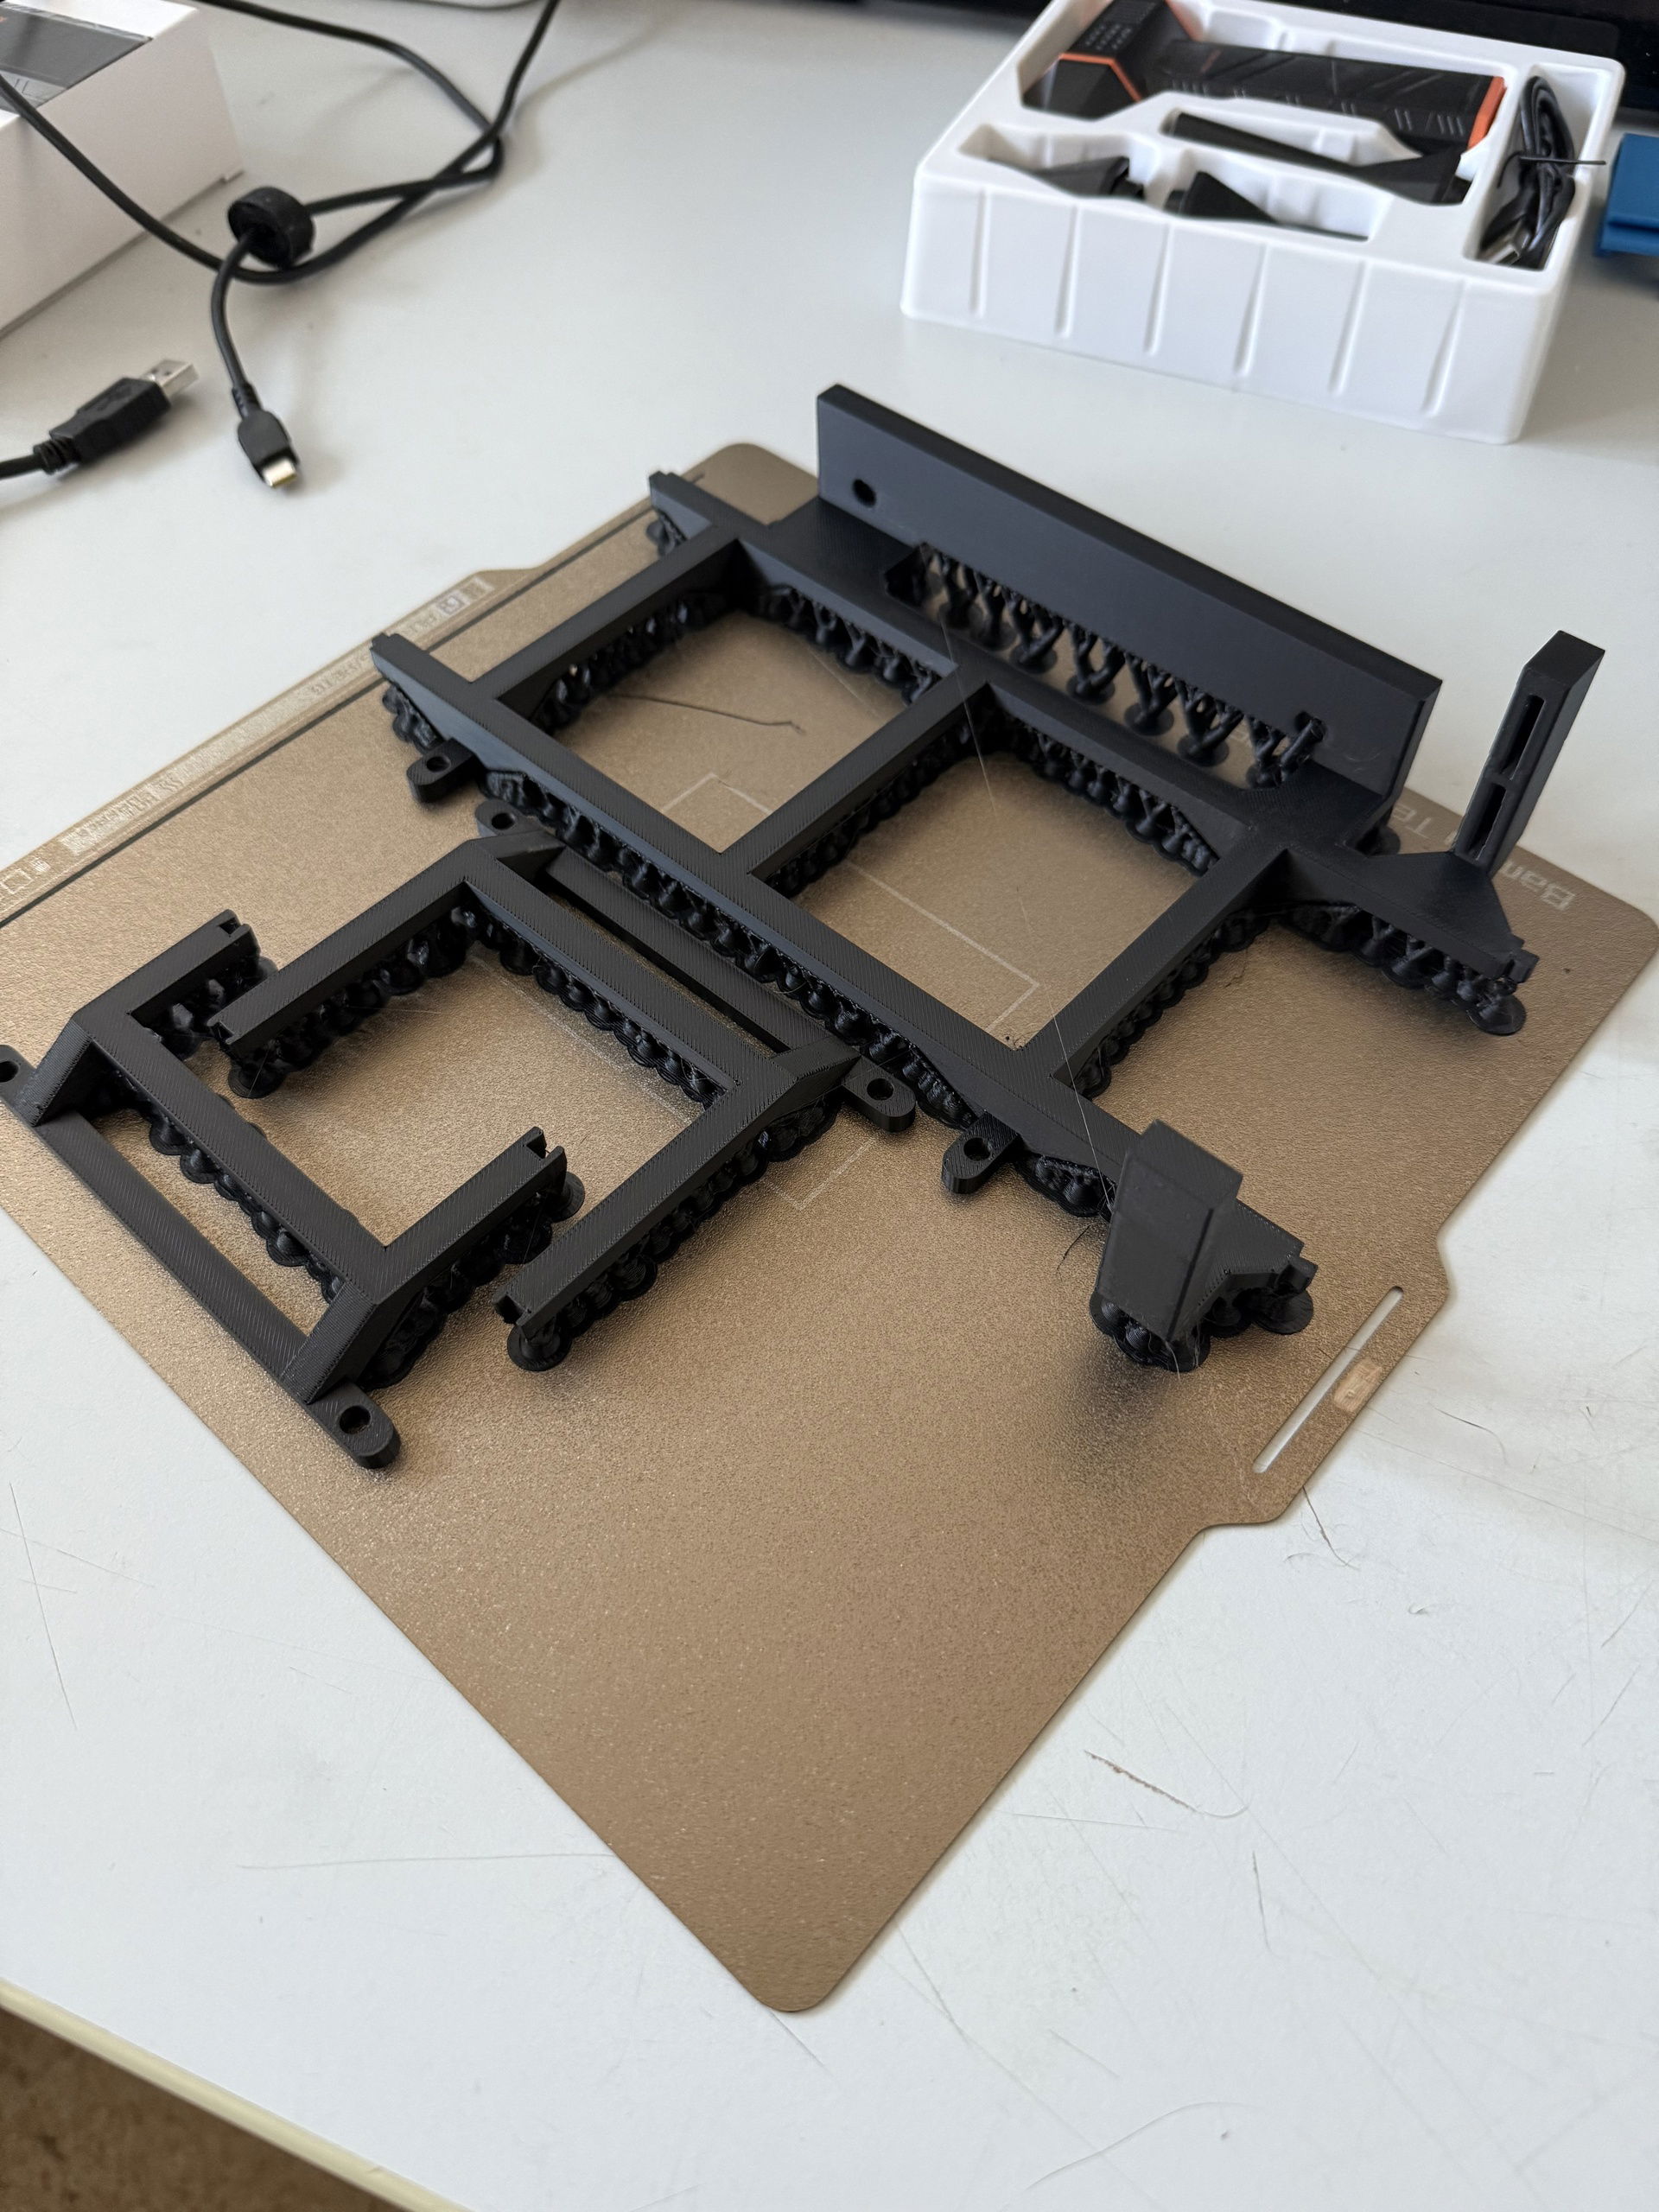
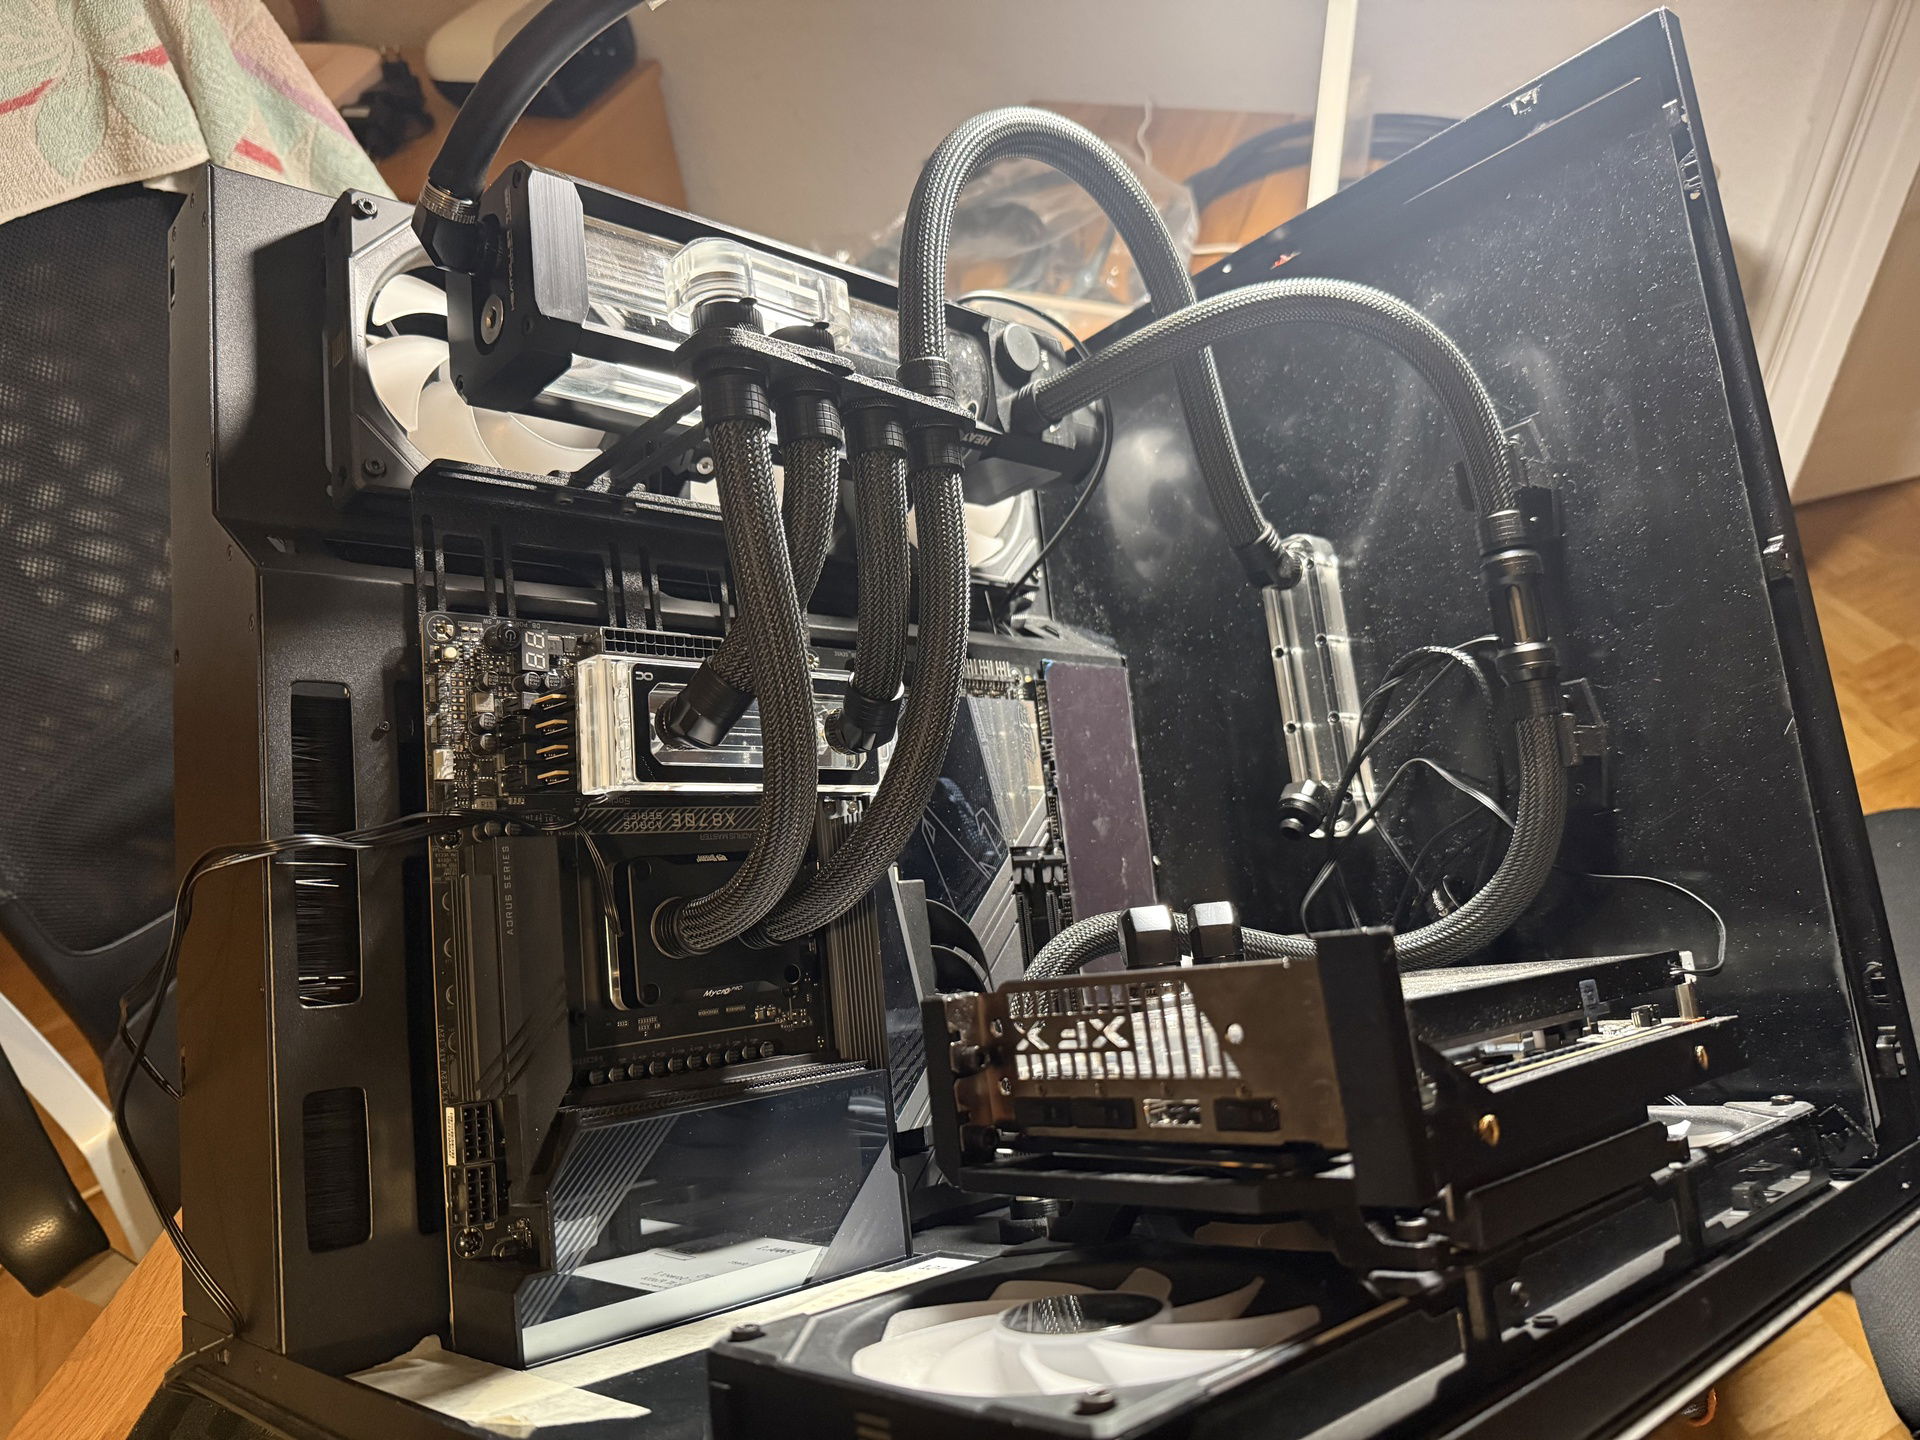
However, since there are no pre-fabricated GPU brackets to put on fan slots, I had to design my own version and print it (and learn how to use Fusion before all that).
I tried to go for a three-part solution that mounted to all three fans of a 360mm array but scrapped this idea for a minimalist solution that now mounts to the fist and last of the three fans. If you‘re curious, this was printed using a BambuLabs P1S and Bambu PETG filament. I didn‘t buy a printer for this, I‘m part of a workshop conglomerate that has wood, metal, laser and 3D printing workshops and was able to use the facilities and other member‘s knowledge there.
![User Image]()
![User Image]()
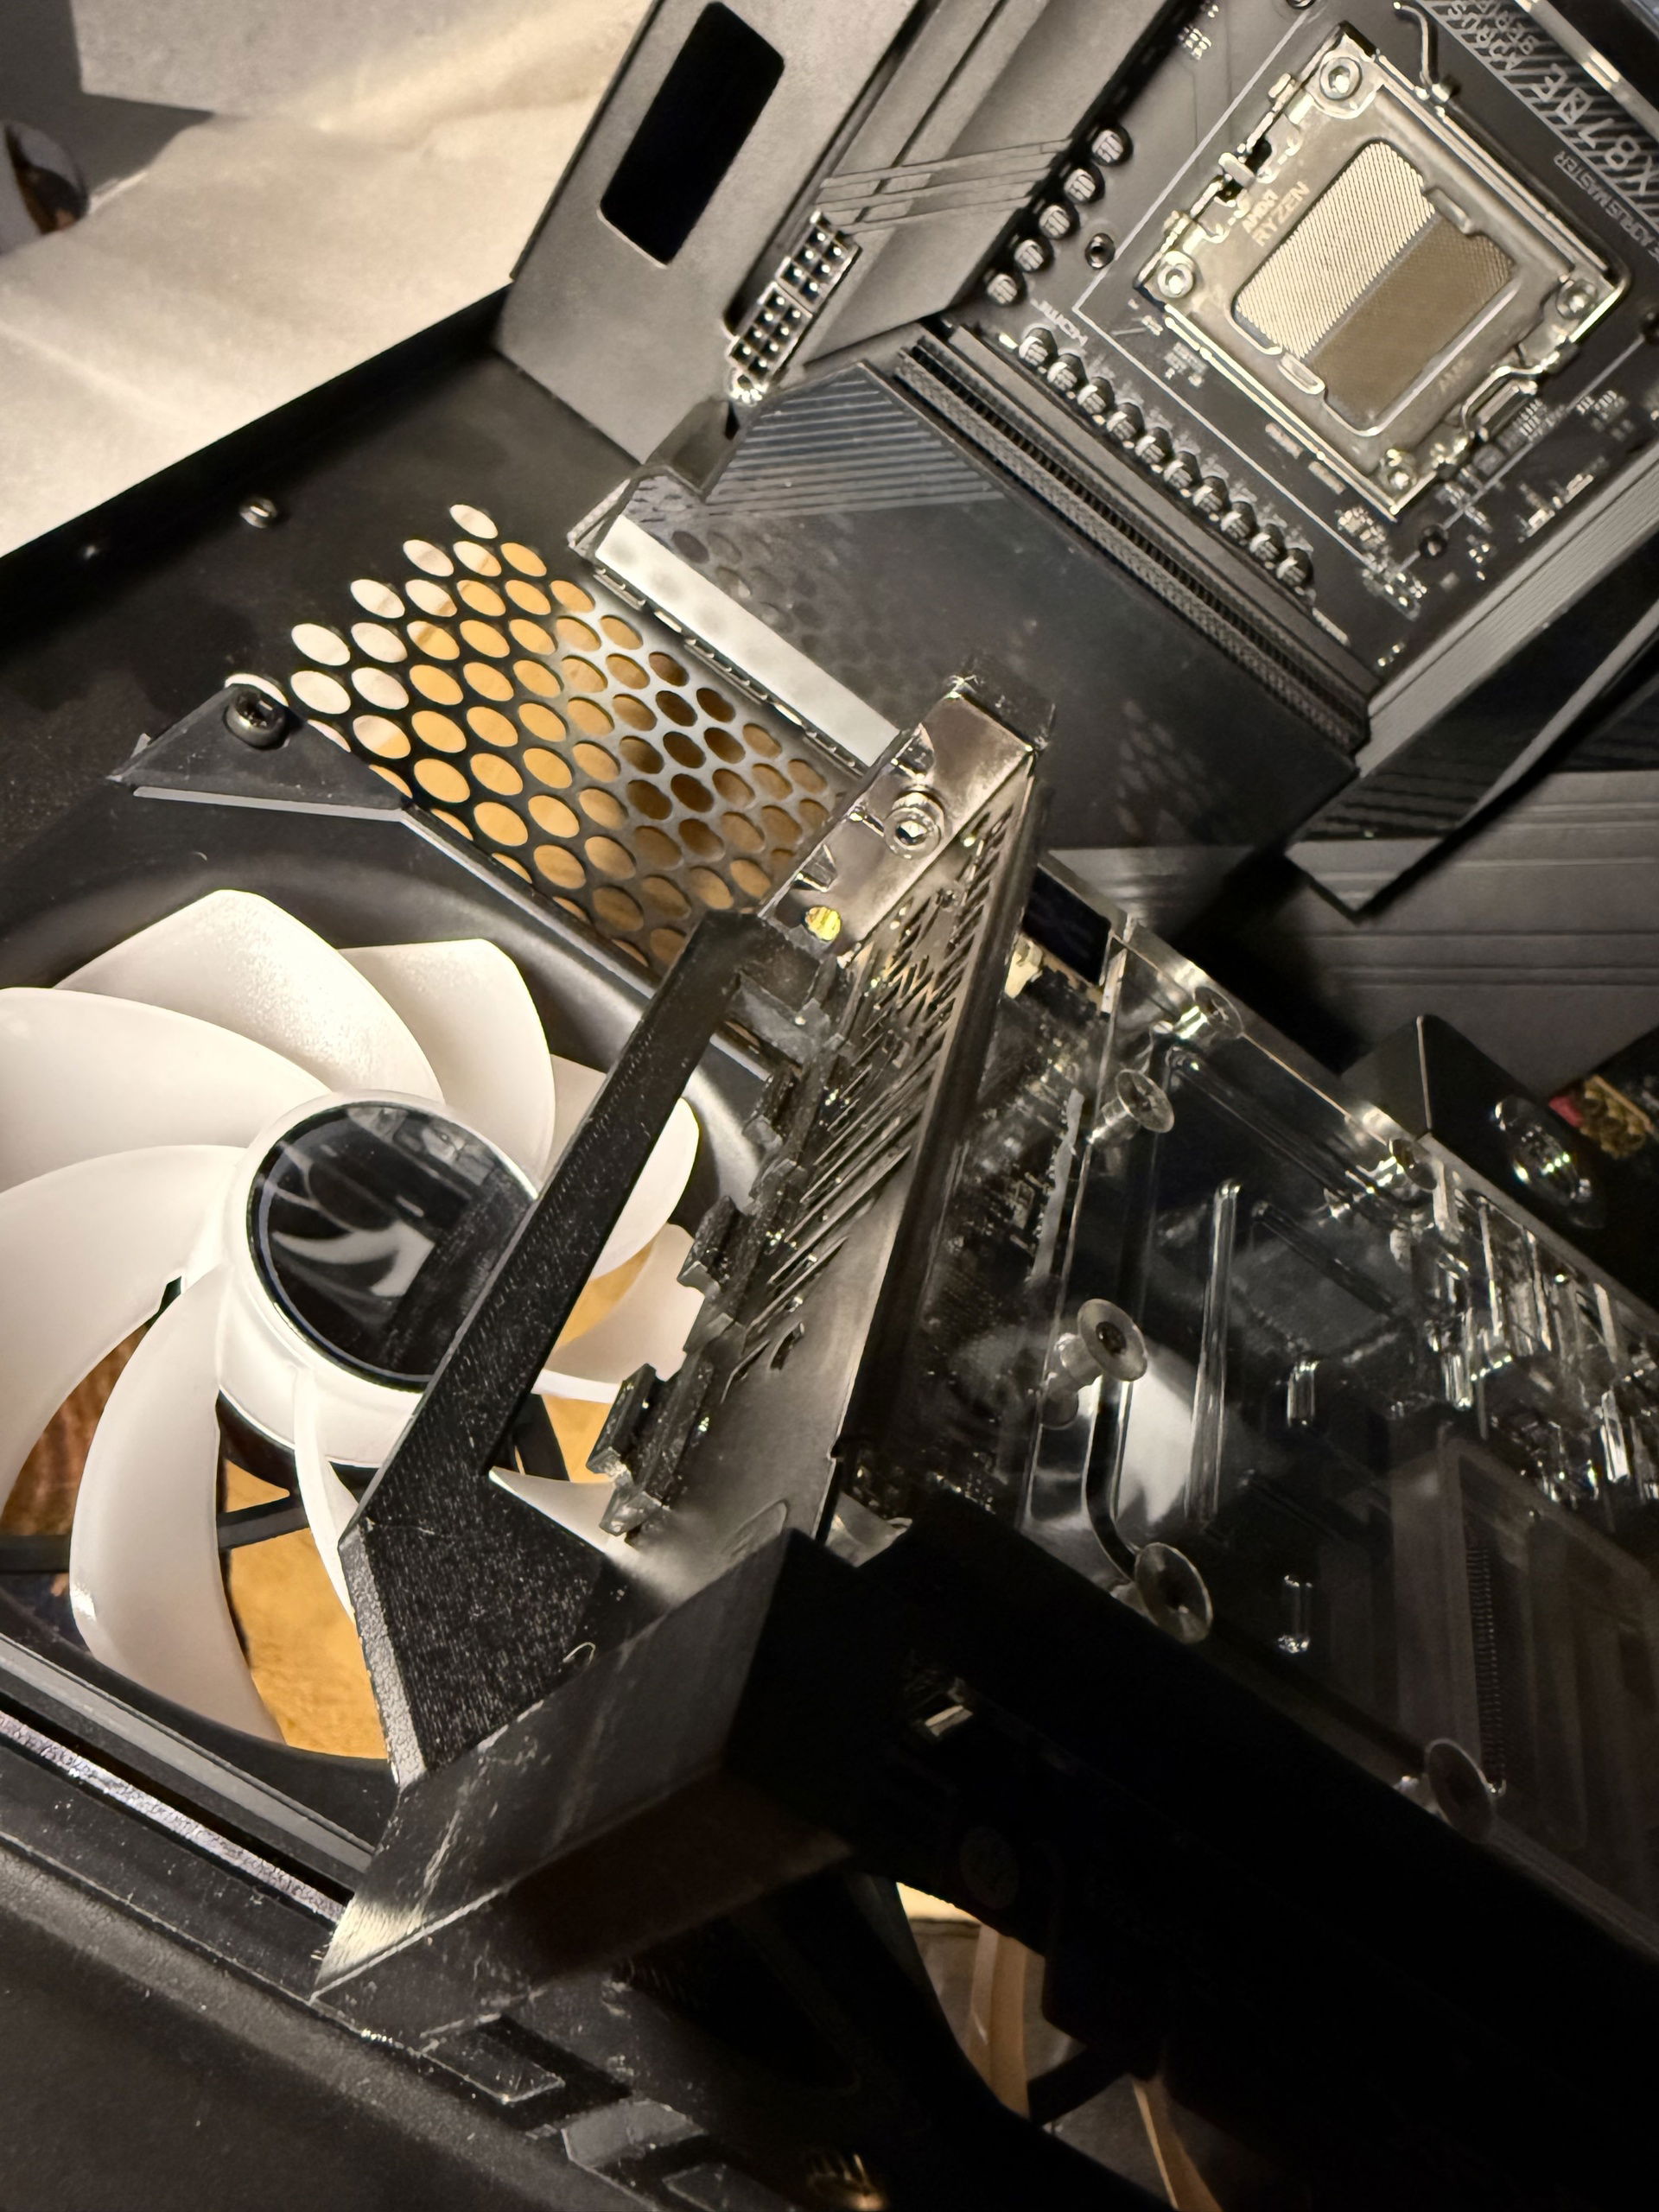
After about 6 revisions, everything fit perfectly and I was able to mount my GPU with its riser cable to the left of the mainboard. All cables except for the riser cable will go through a printed cable duct in the bottom corner of the case.
![User Image]()
![User Image]()
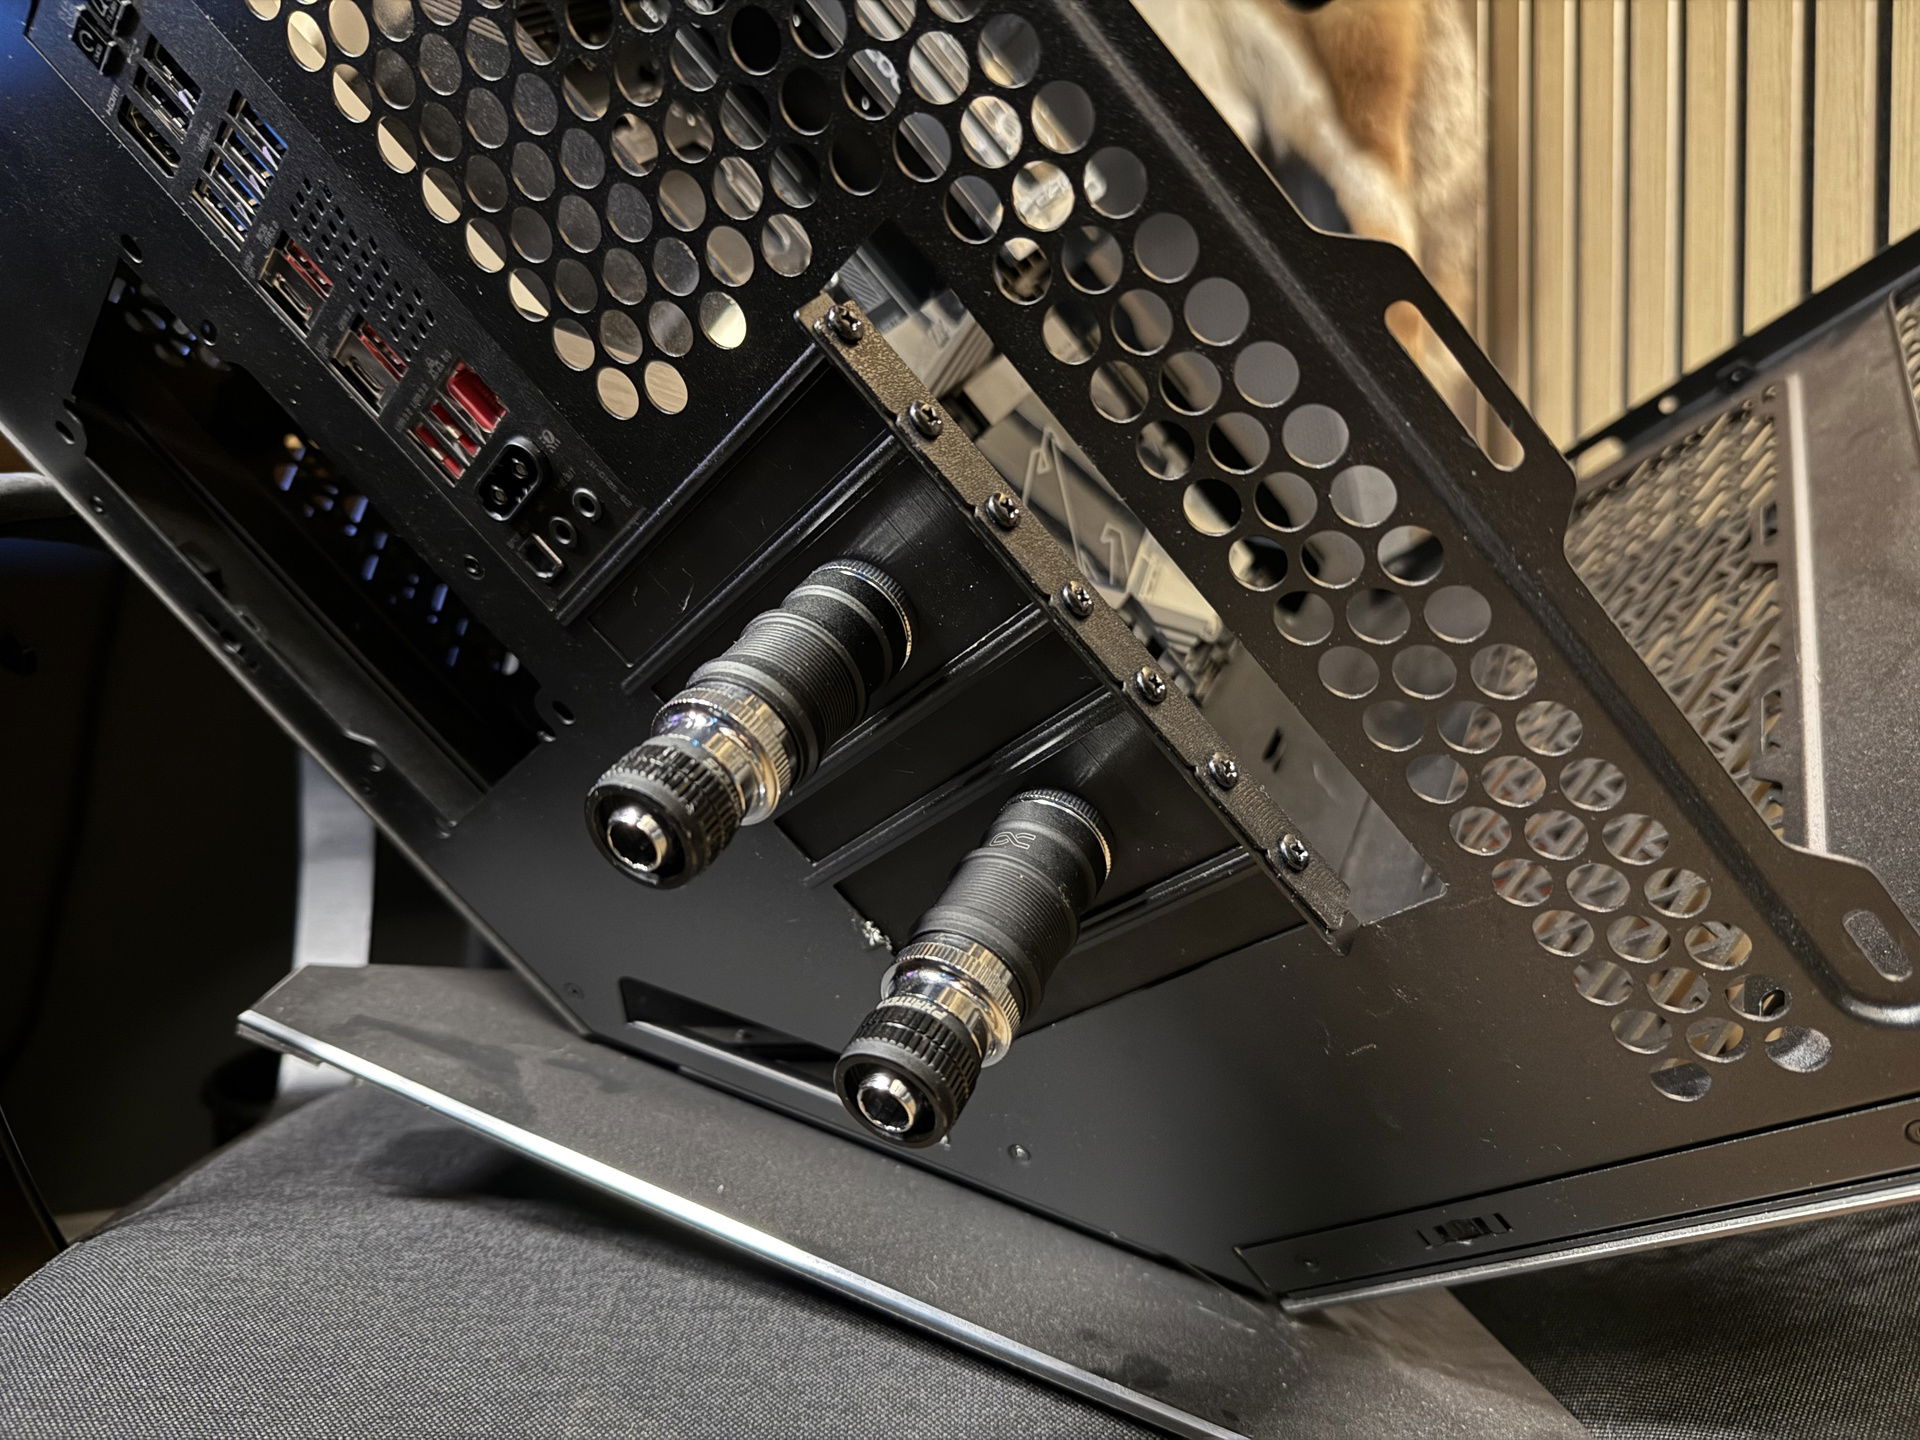
With this whole ordeal figured out, I was able to focus on all the other rather small problems surrounding this build. A QDC passthrough, some tube clamps, just smaller tasks but lots of them. I won‘t go into too much detail, it has been a great learning experience.
![User Image]()
![User Image]()
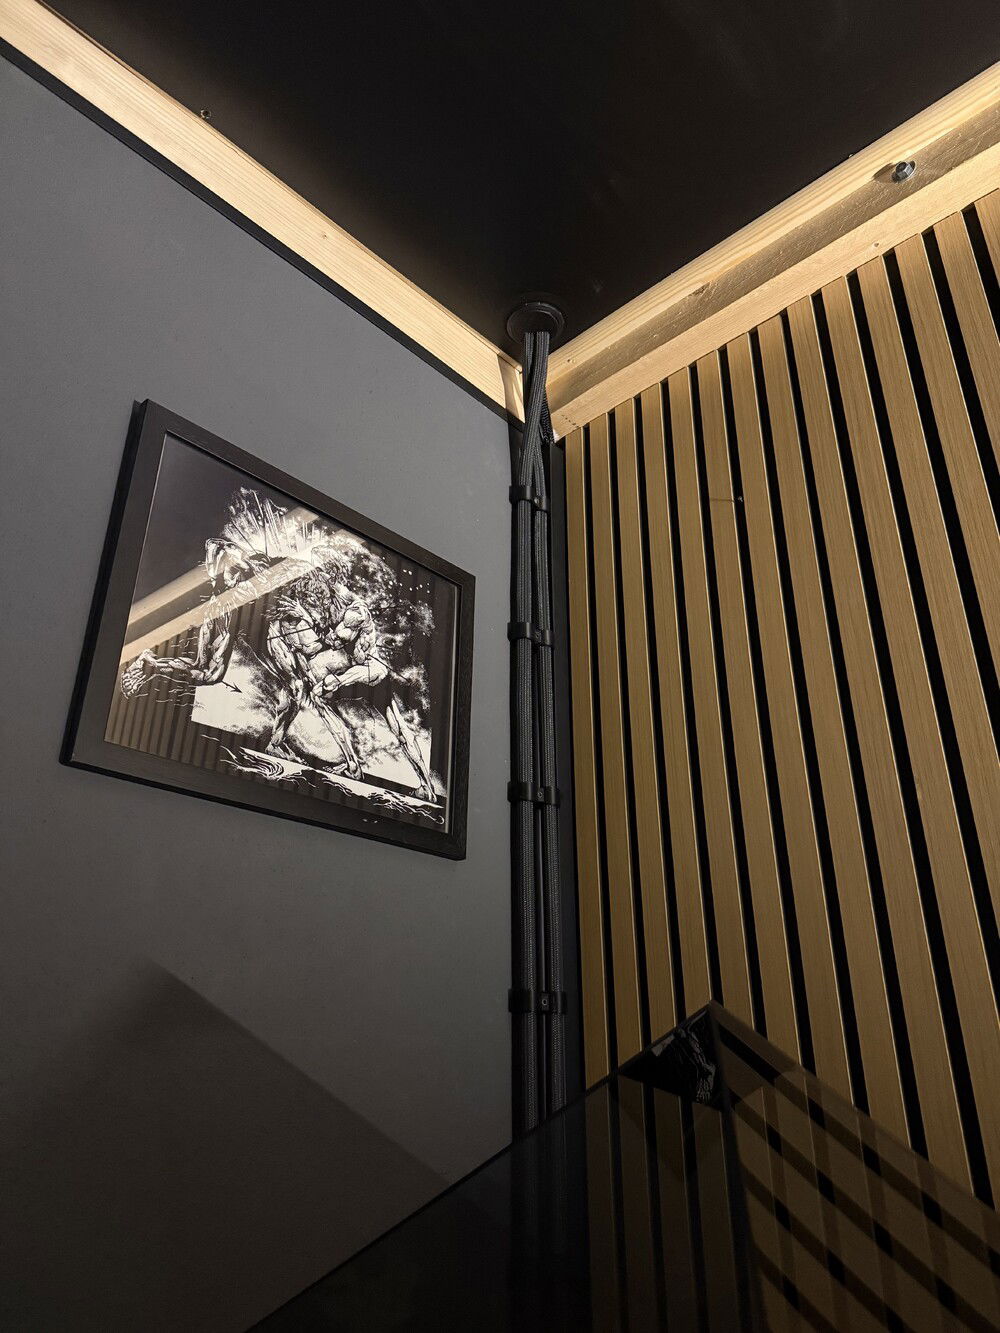
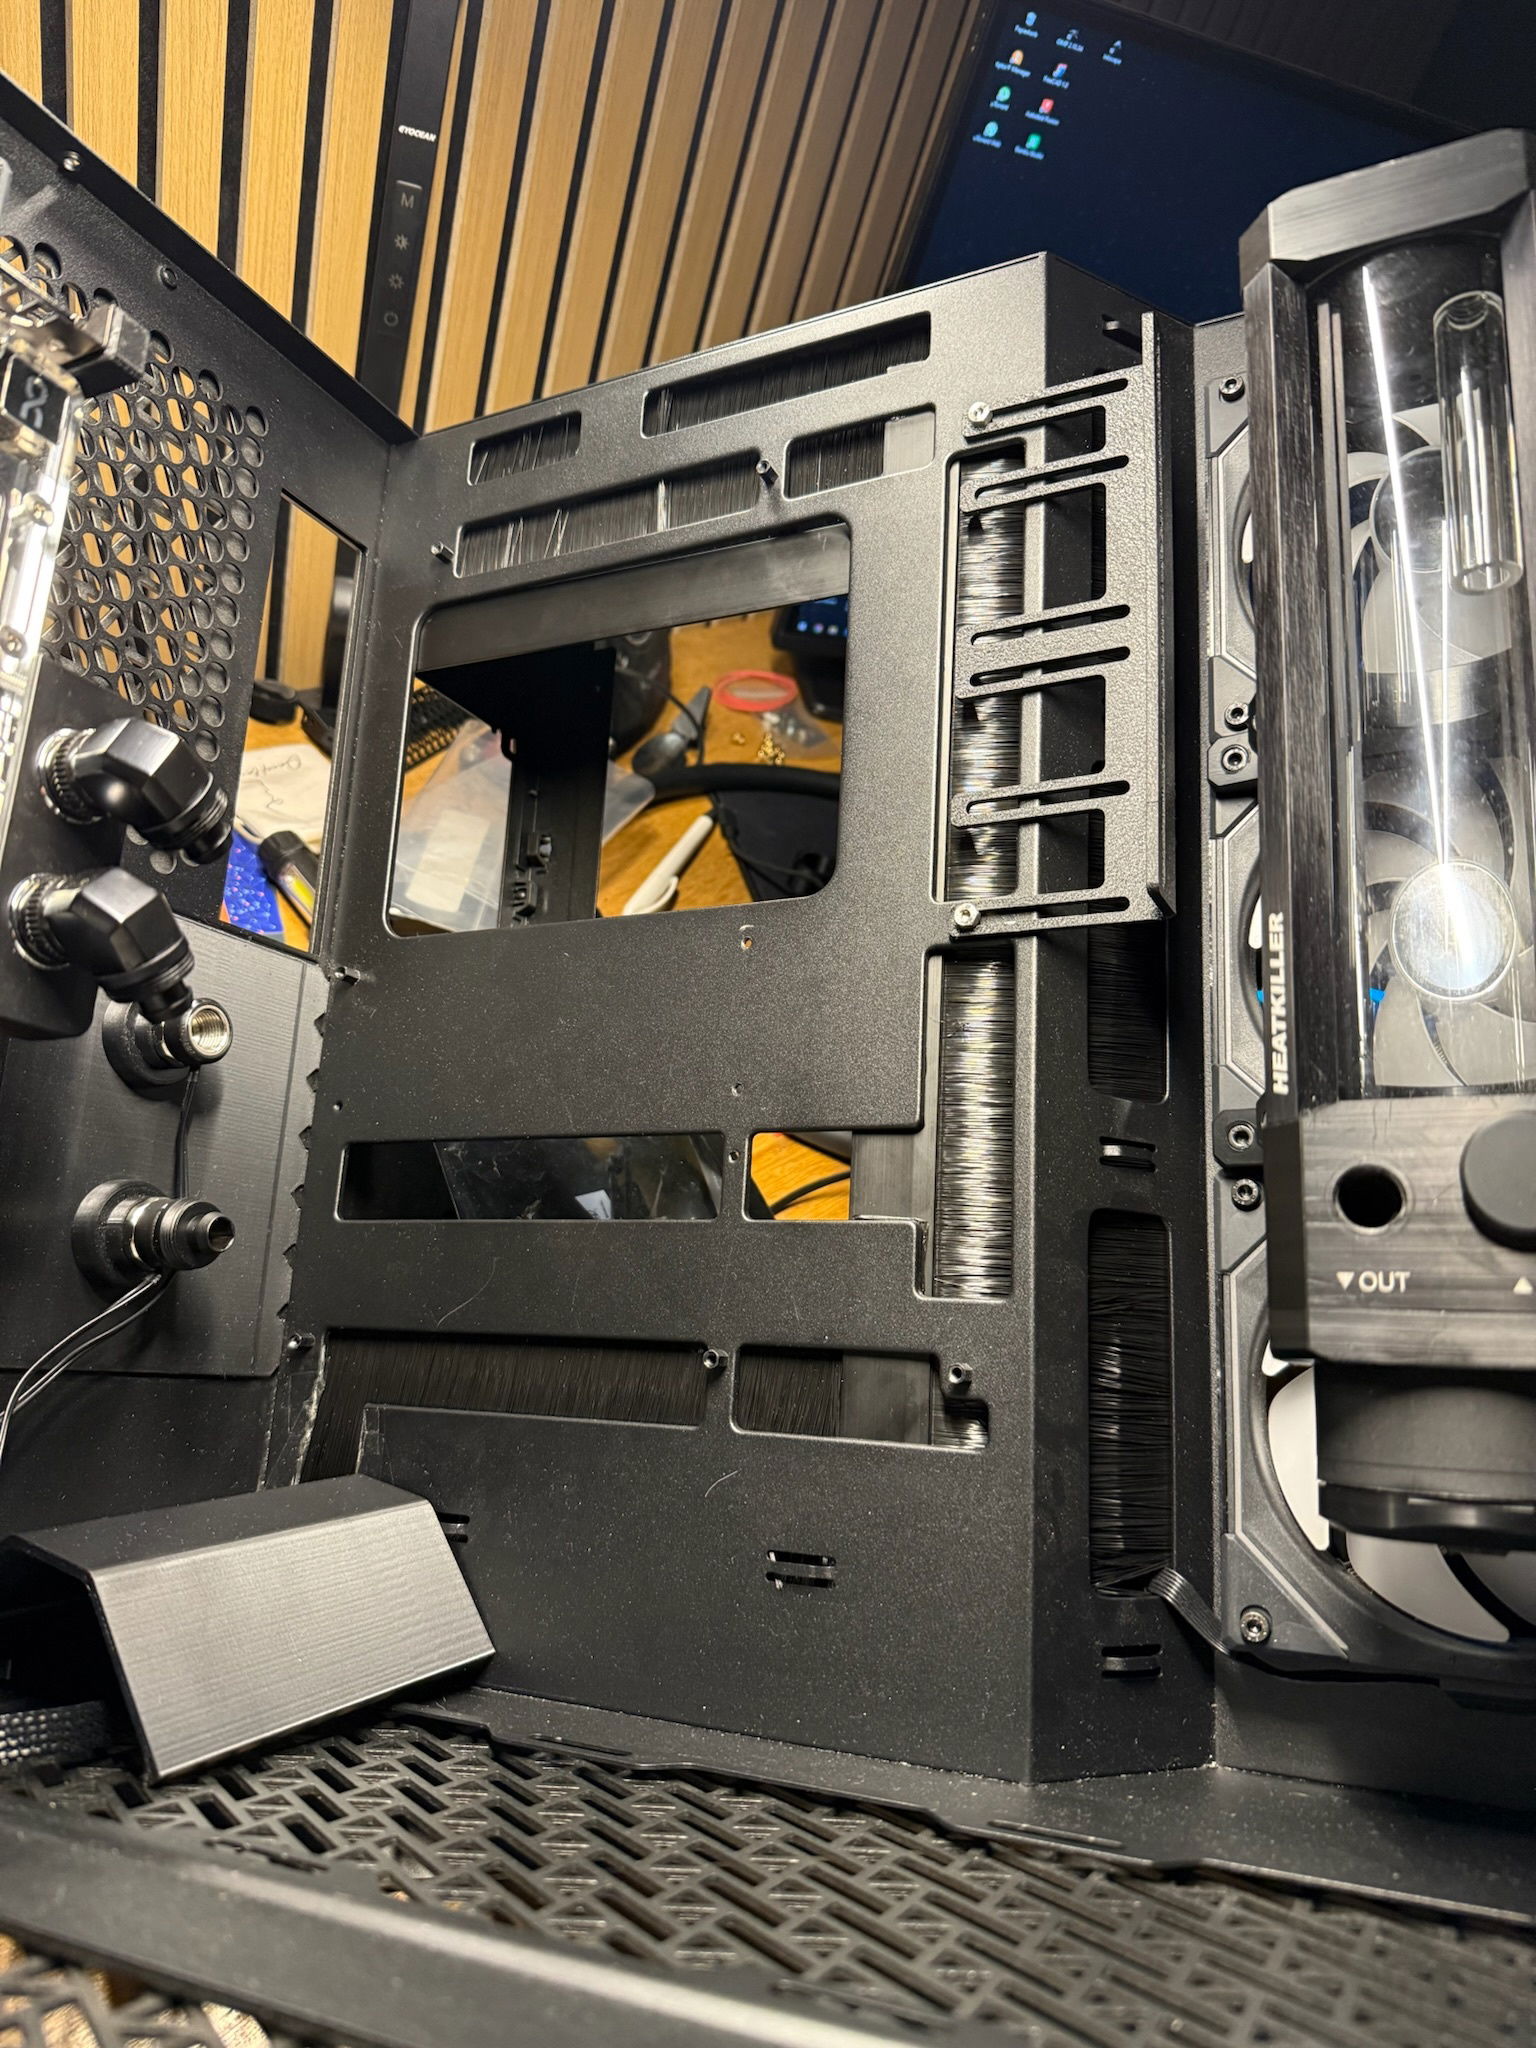
Two things also bugged me about the case: There were no covers for the cable slots and a few spots looked a little boring. so I decided to order some brush profiles and black acrylic and cover these spots with it. In the future, I will definitely work more with acrylic, it looks really clean and I've seen tons of creators make use of it.
![User Image]()
![User Image]()
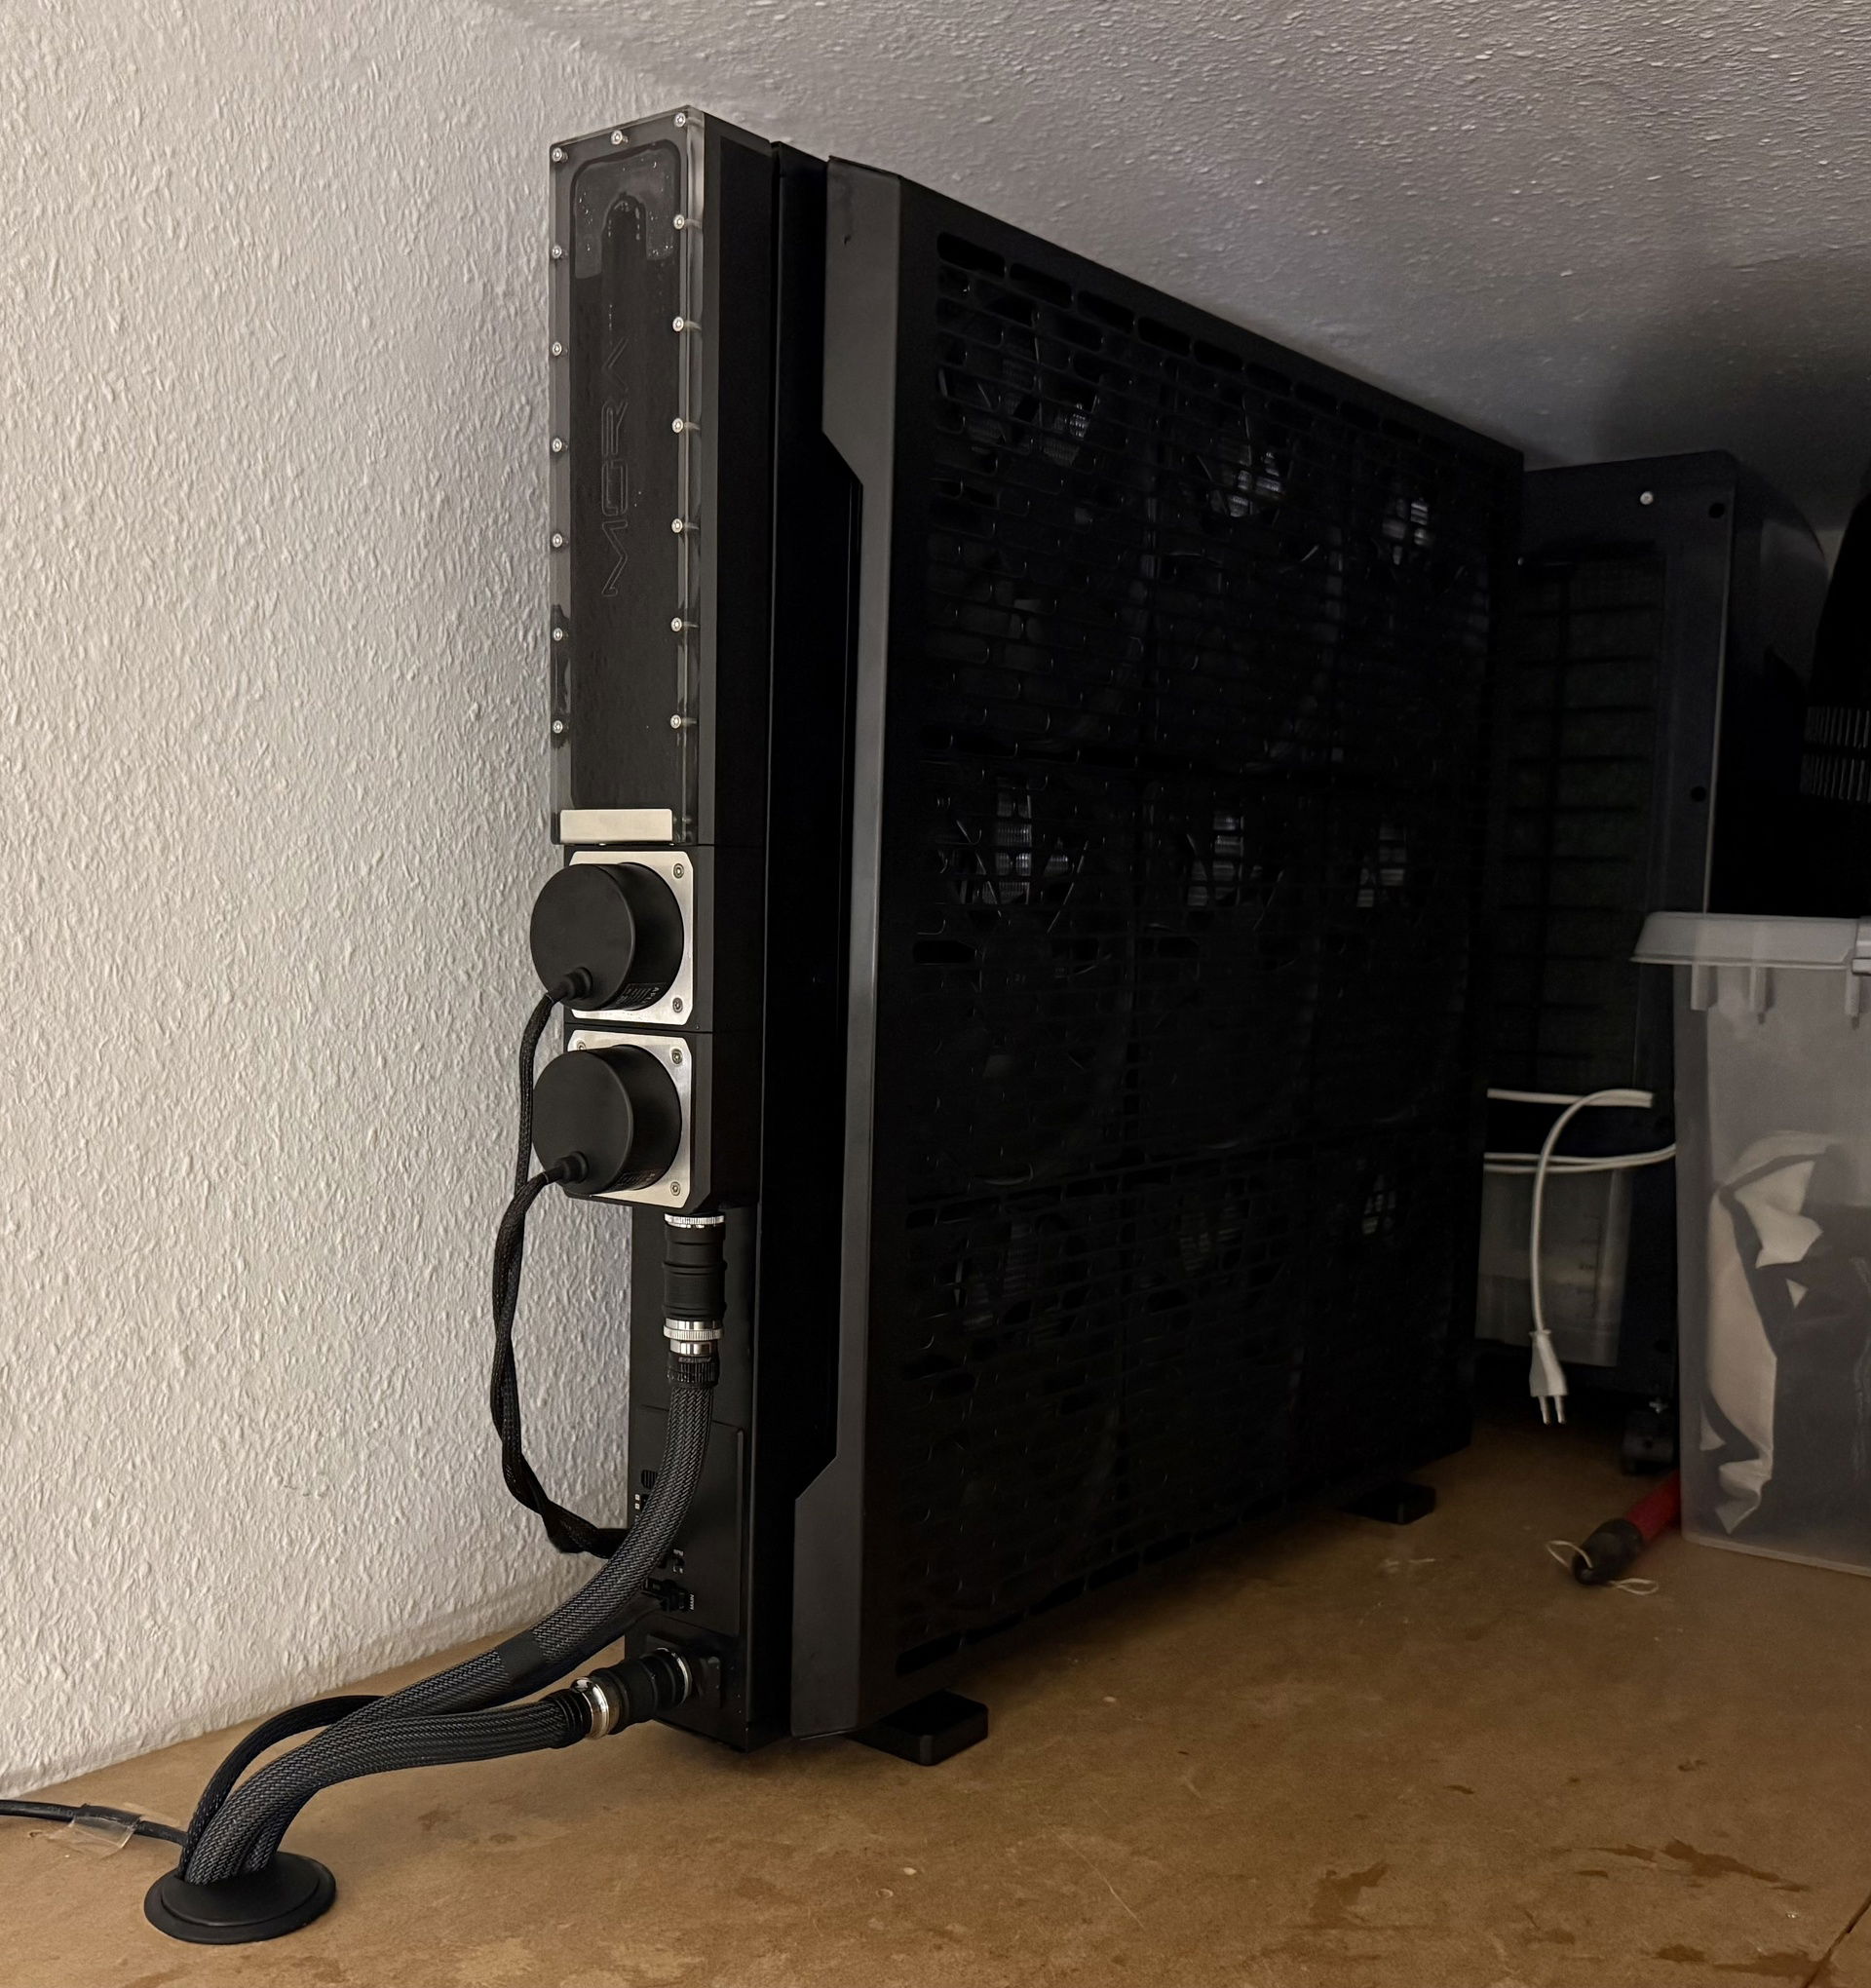
All hail Mo-Ra
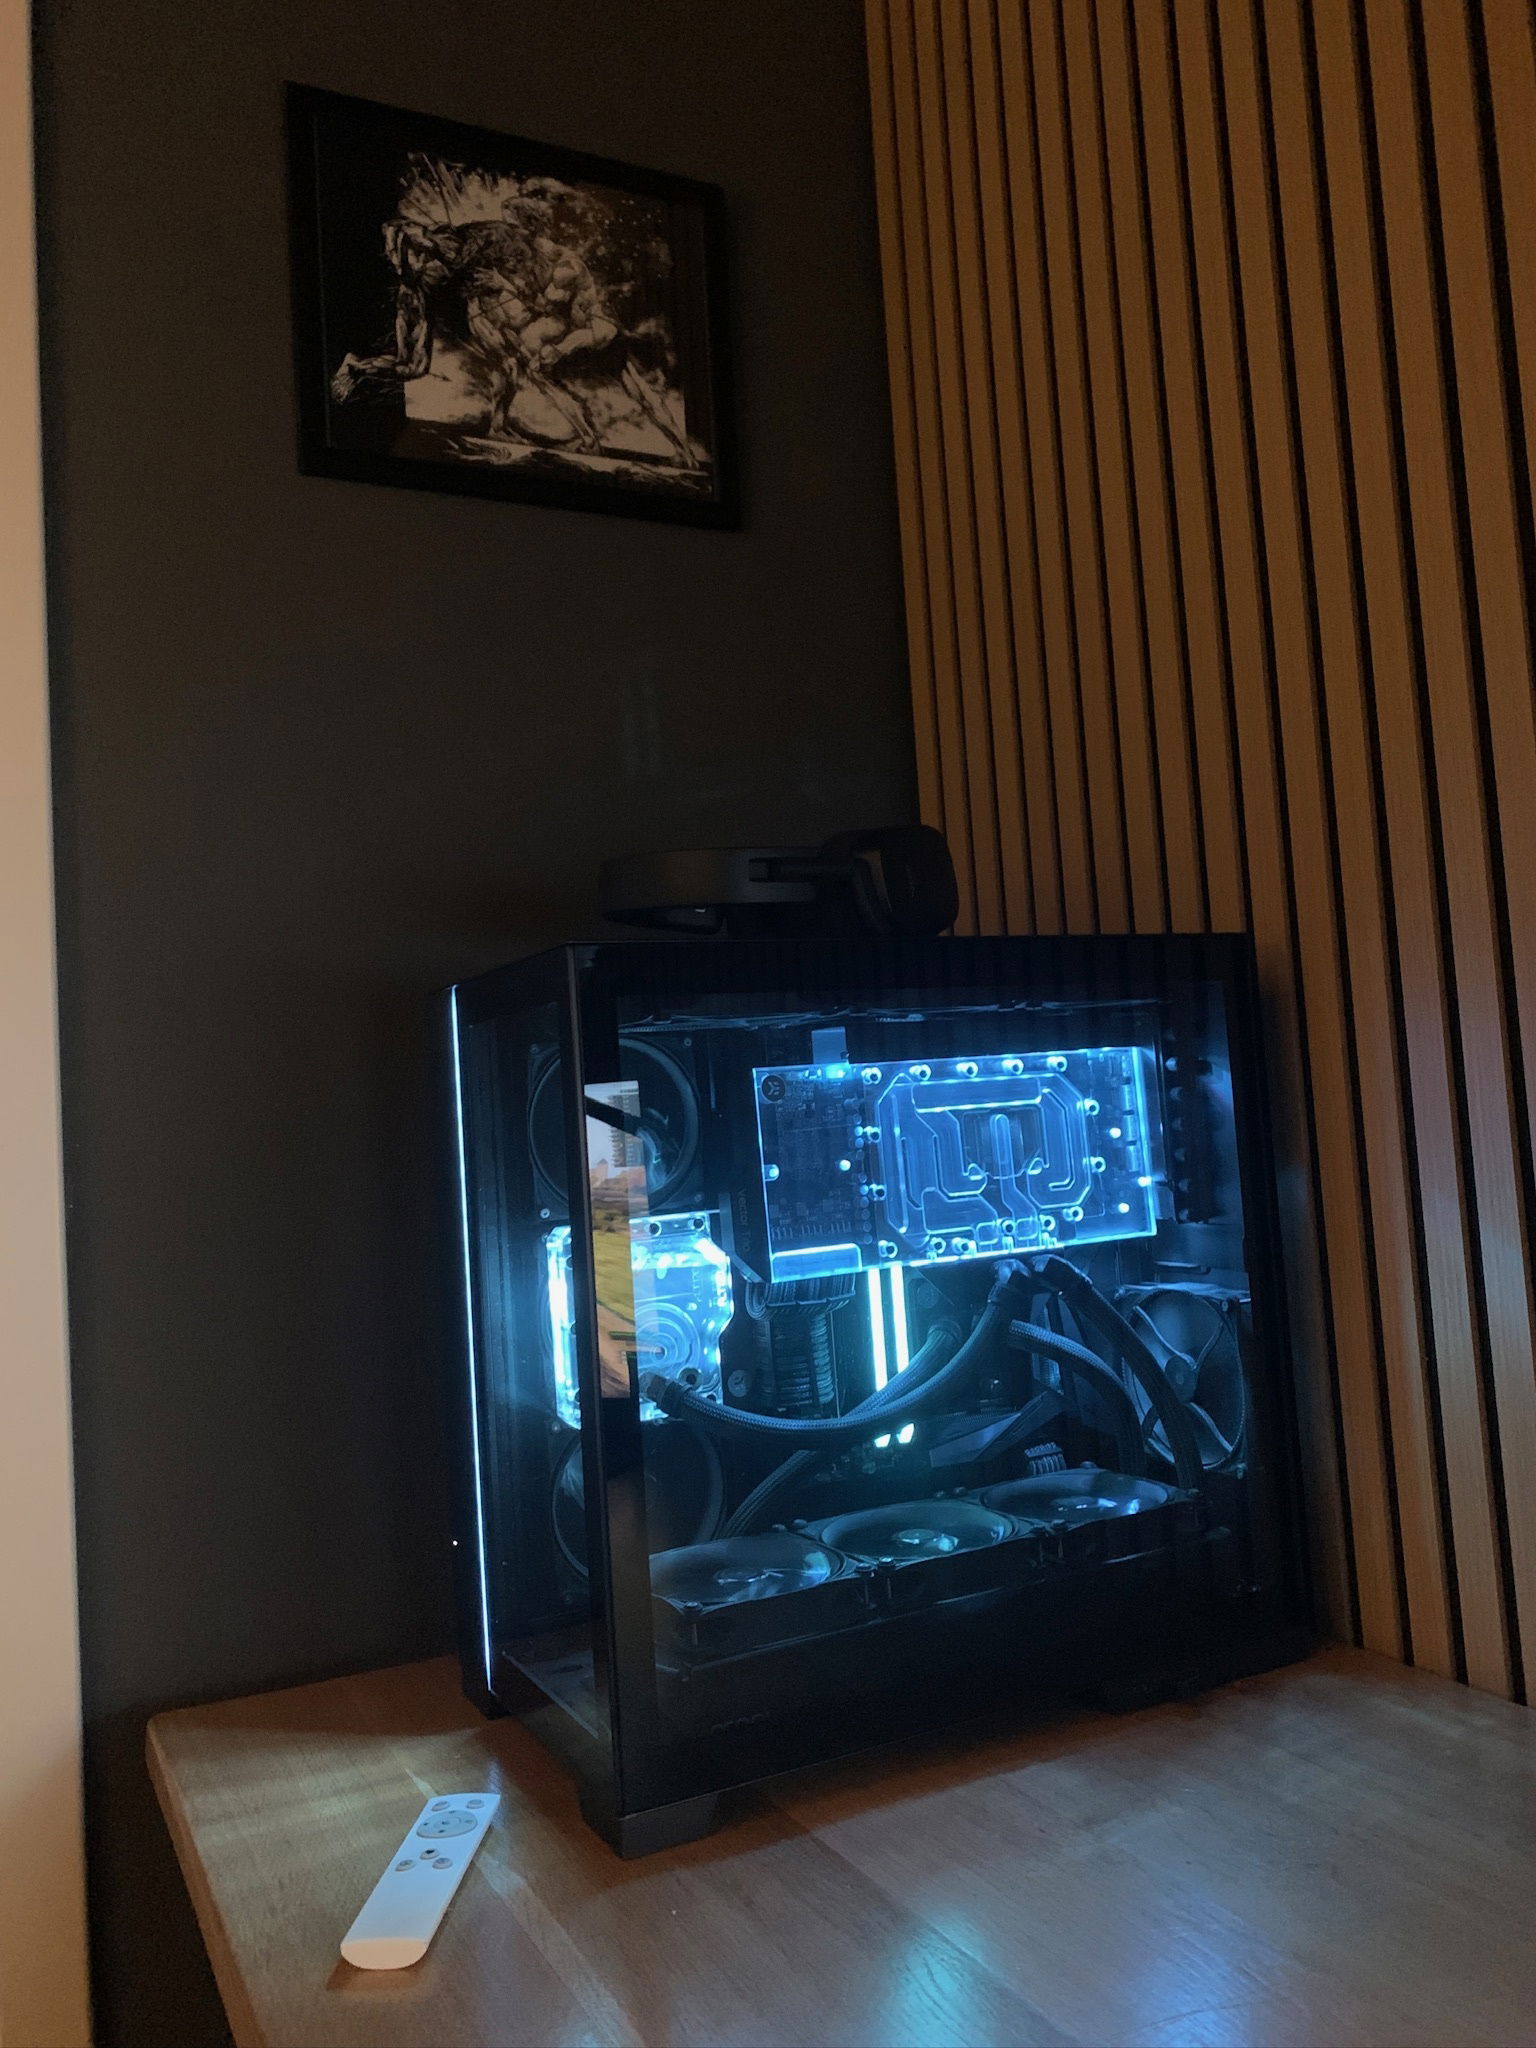
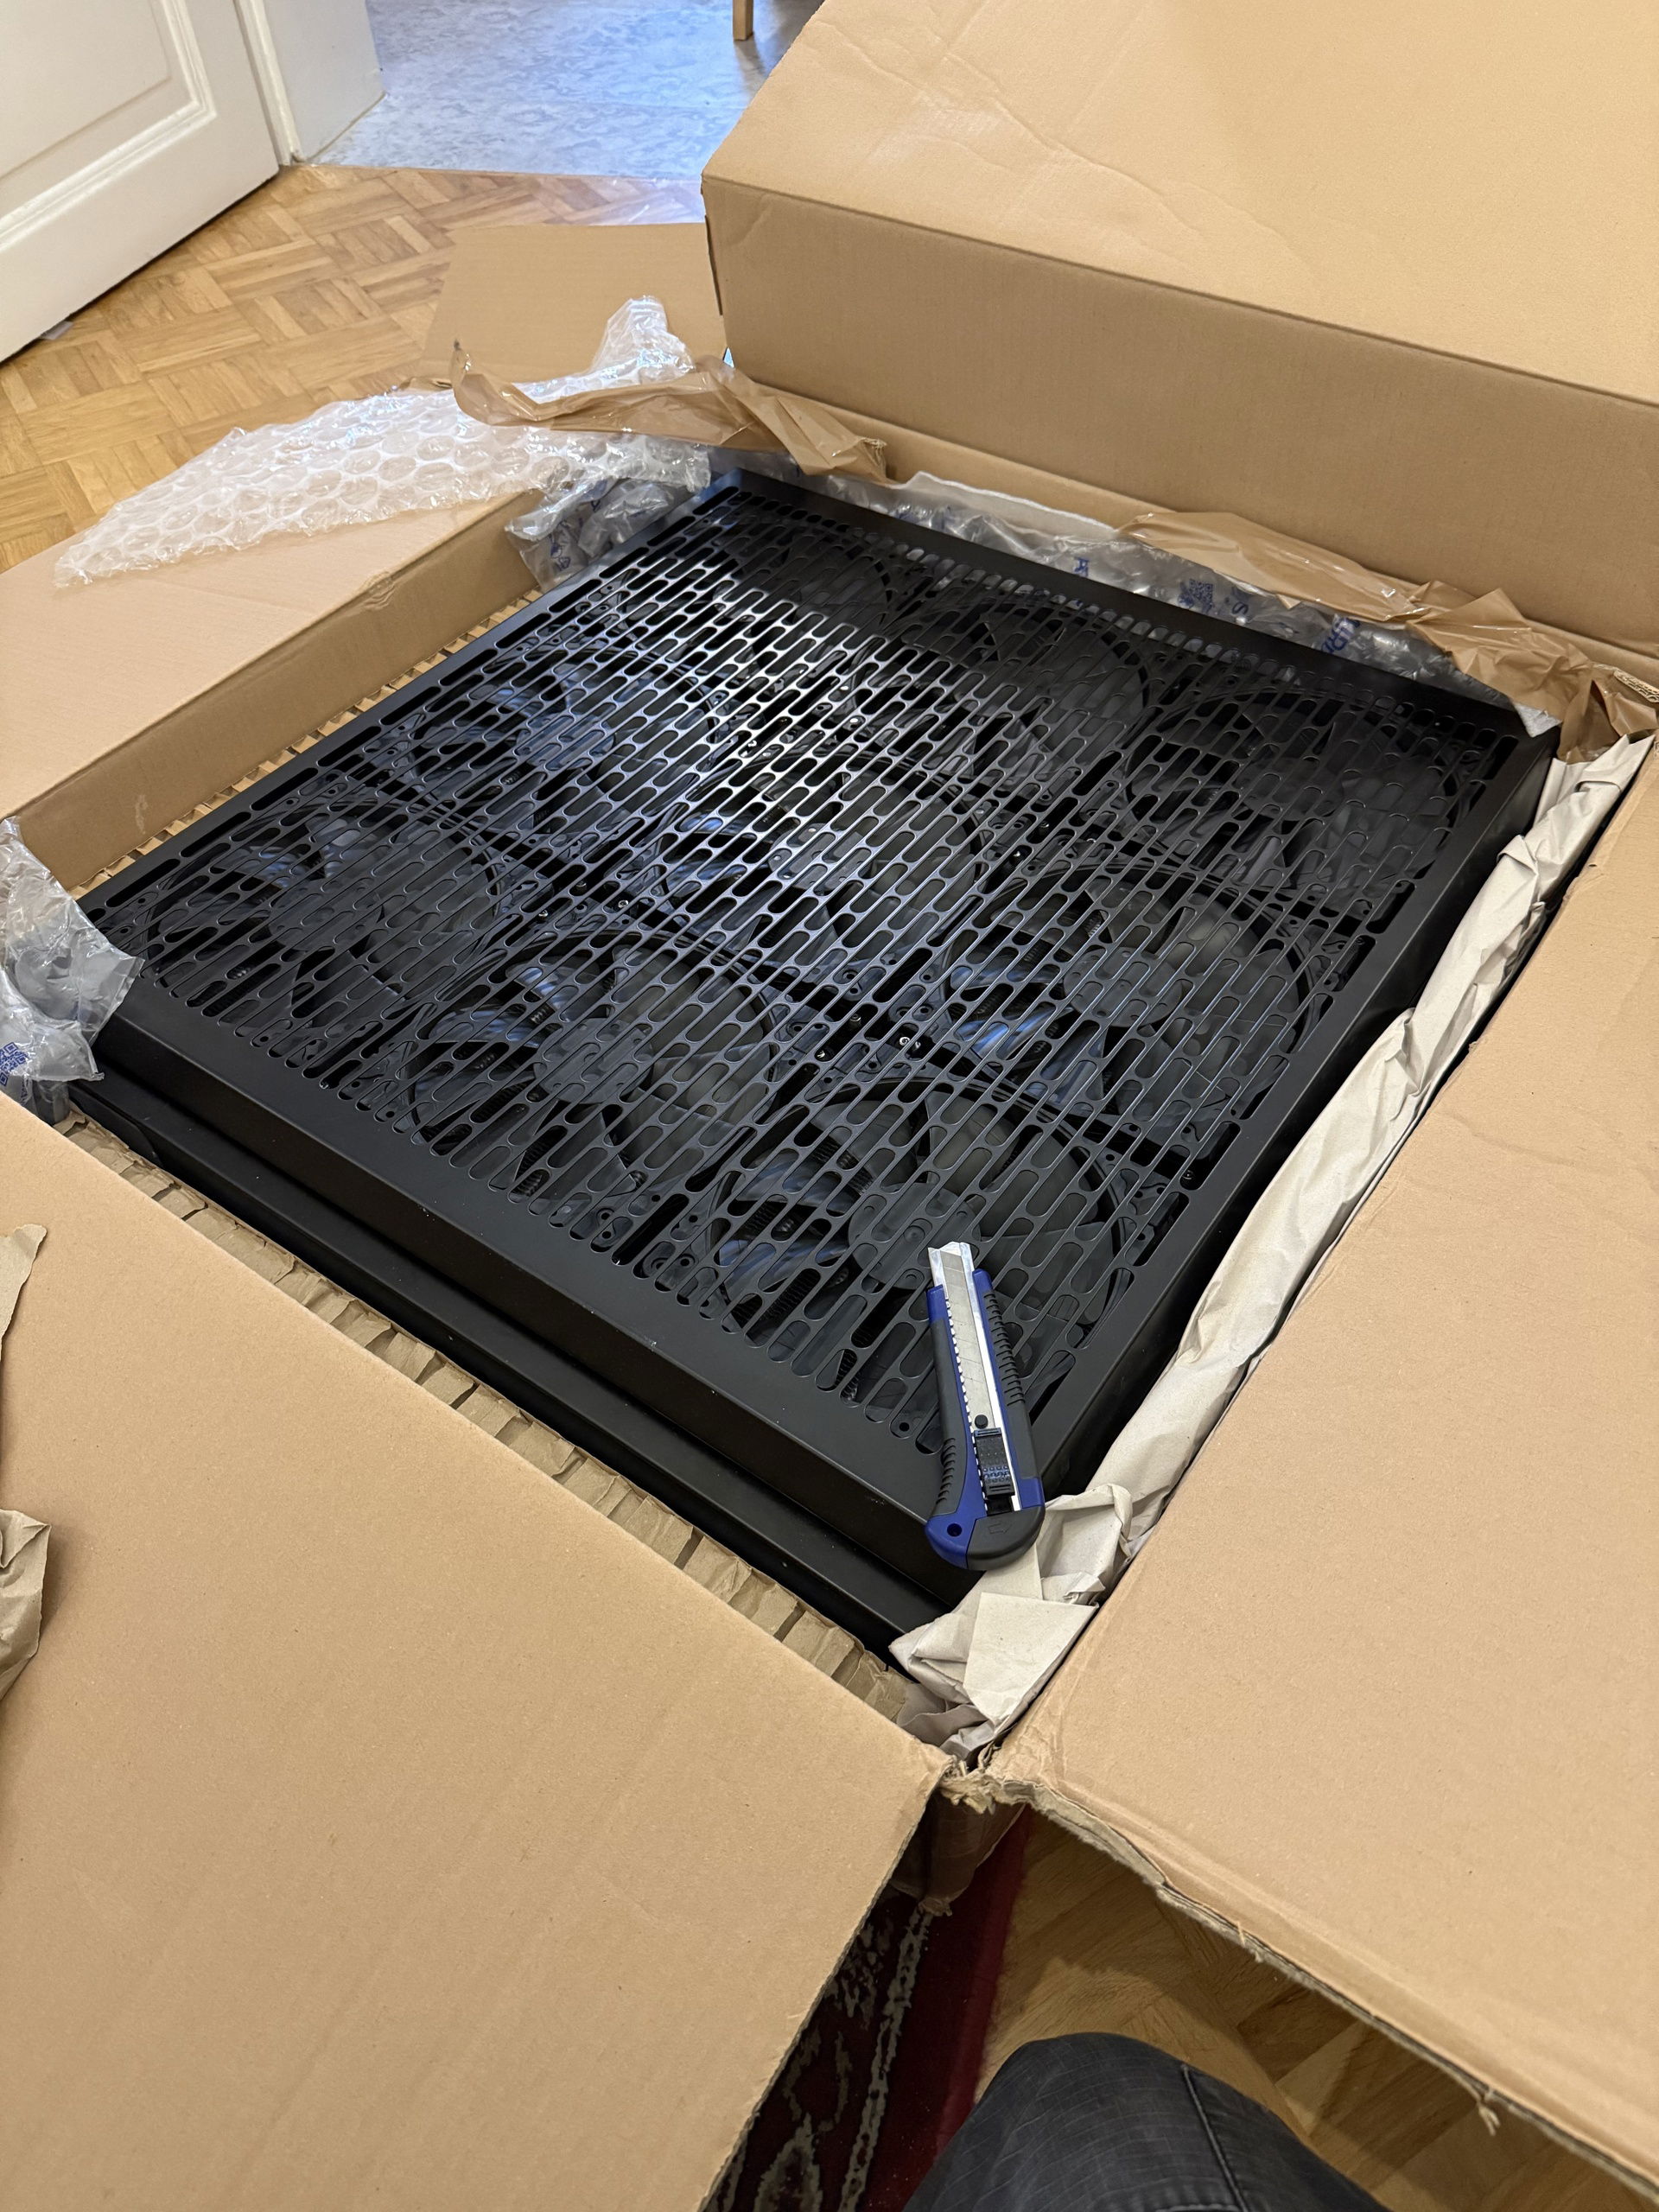
External cooling was always interesting to me, I just never thought that there would ever be a use case where I really needed that and it would make sense. Then, I built myself a small room for gaming in the back of our flat‘s corridor. I never planned on really venting this since shutting the door behind me isn‘t really a thing that I do or need. But putting a Mo-Ra on top of my little room and into our little storage space was something that really intrigued me, mainly for the silence and for the heck of it.
There‘s a platform for selling used goods in Germany, something like Craigslist but a lot more serious, people sell all kinds of stuff there. Originally, I only wanted a Mo-Ra IV 400 but then…. someone offered a 600 WITH Fans for 750€ so I just had to go for it. Had to persuade the guy to ship it to me and bought most of to attached parts used also. This way, I saved over 600€ in parts. It was even cheaper than buying a 400 new (noone offered a used one in 4 months).
I put a hole through my ceiling, sleeved the tubes and pushed on.
![User Image]()
![User Image]()
![User Image]()
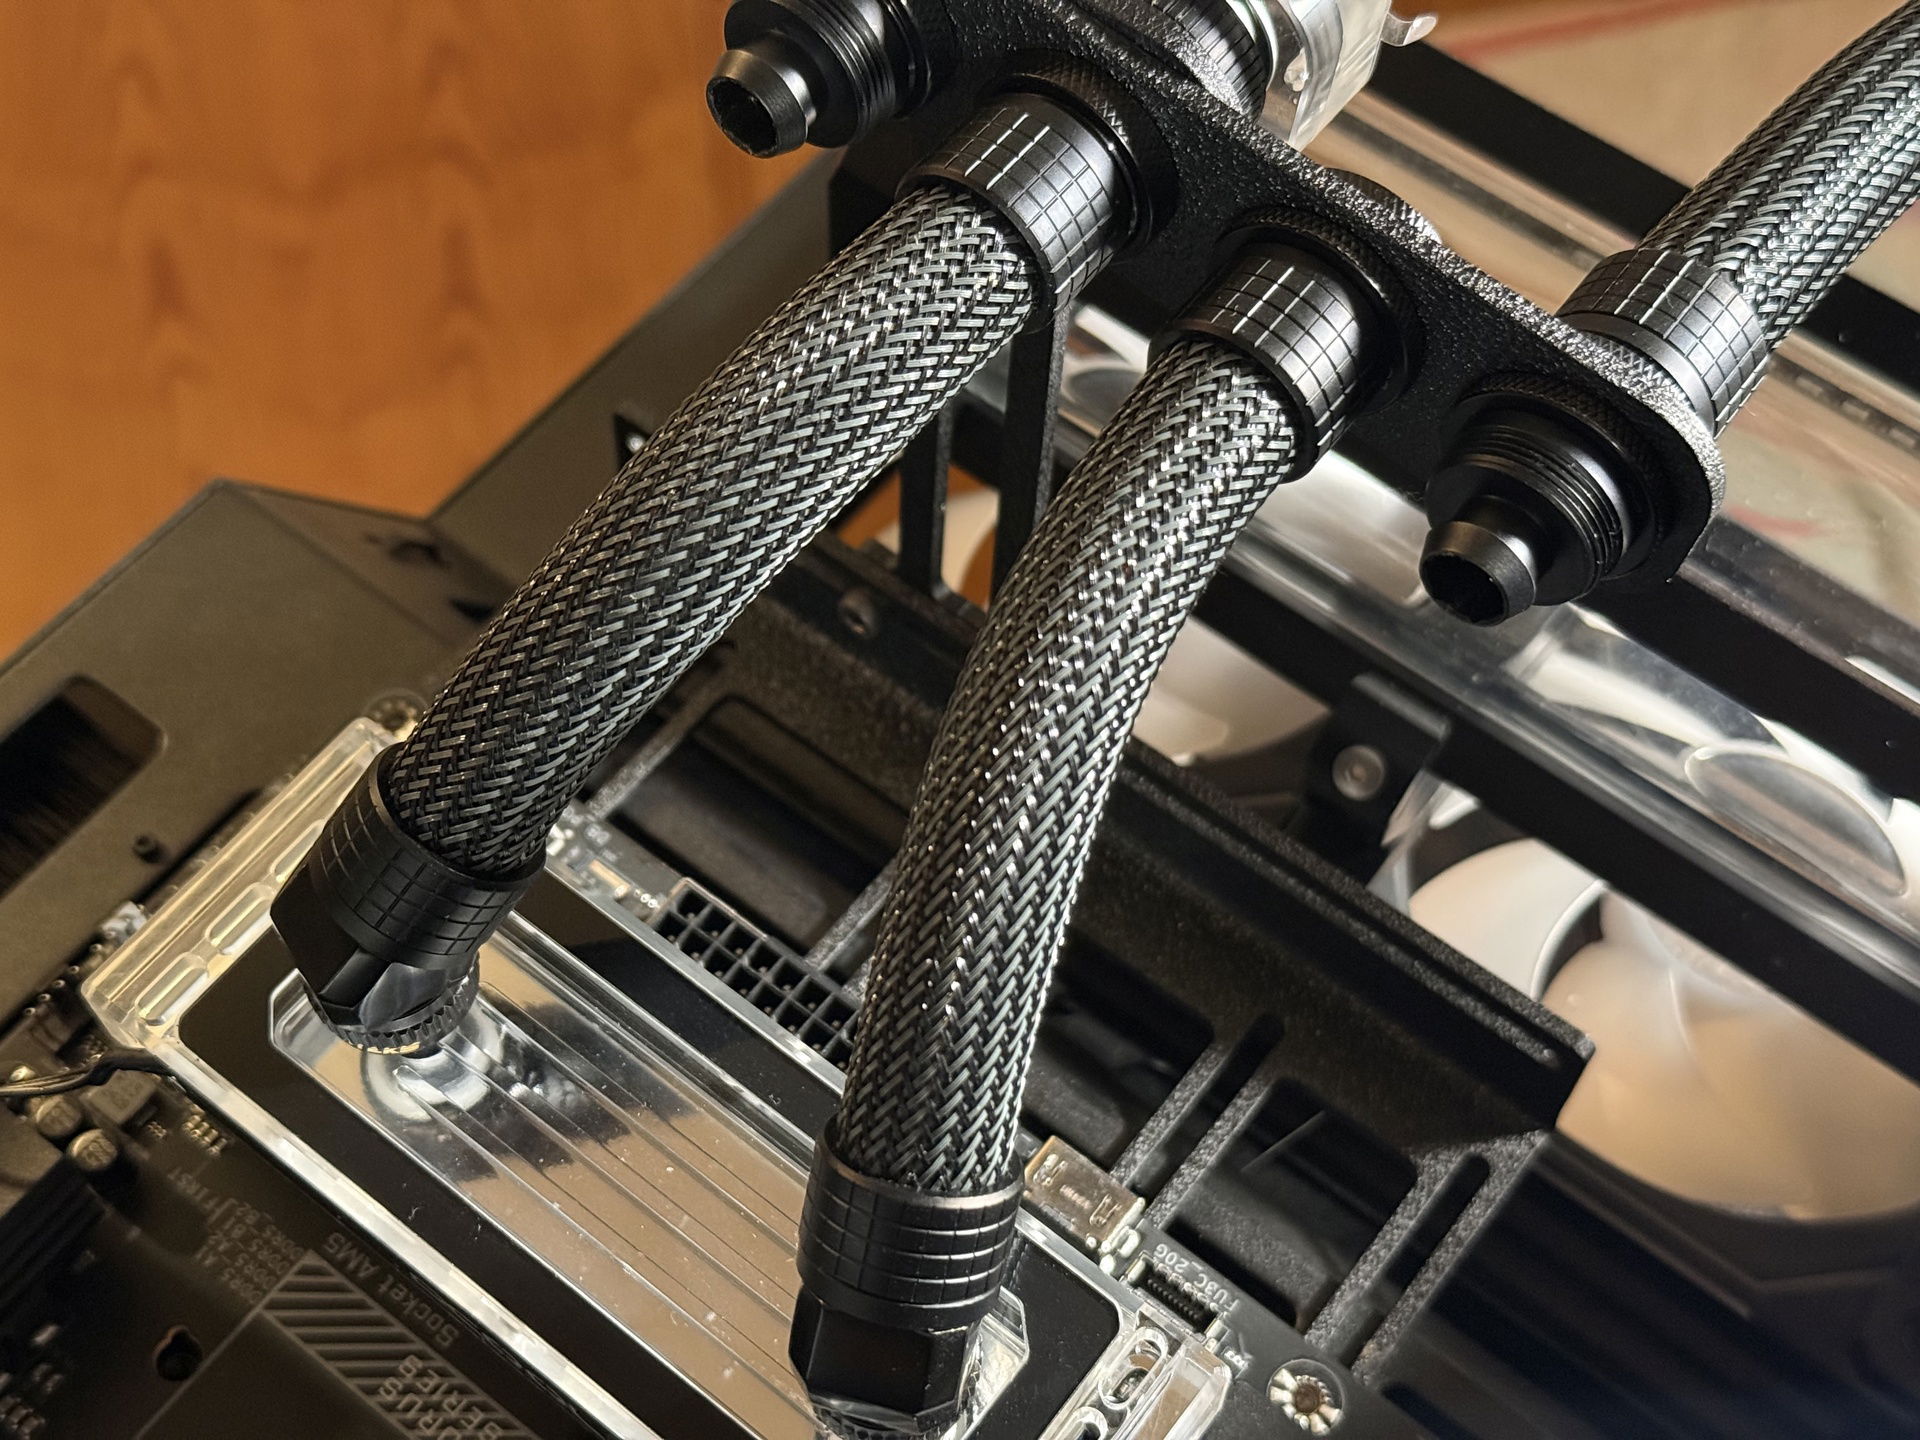
Finding the right path… at least for tubes
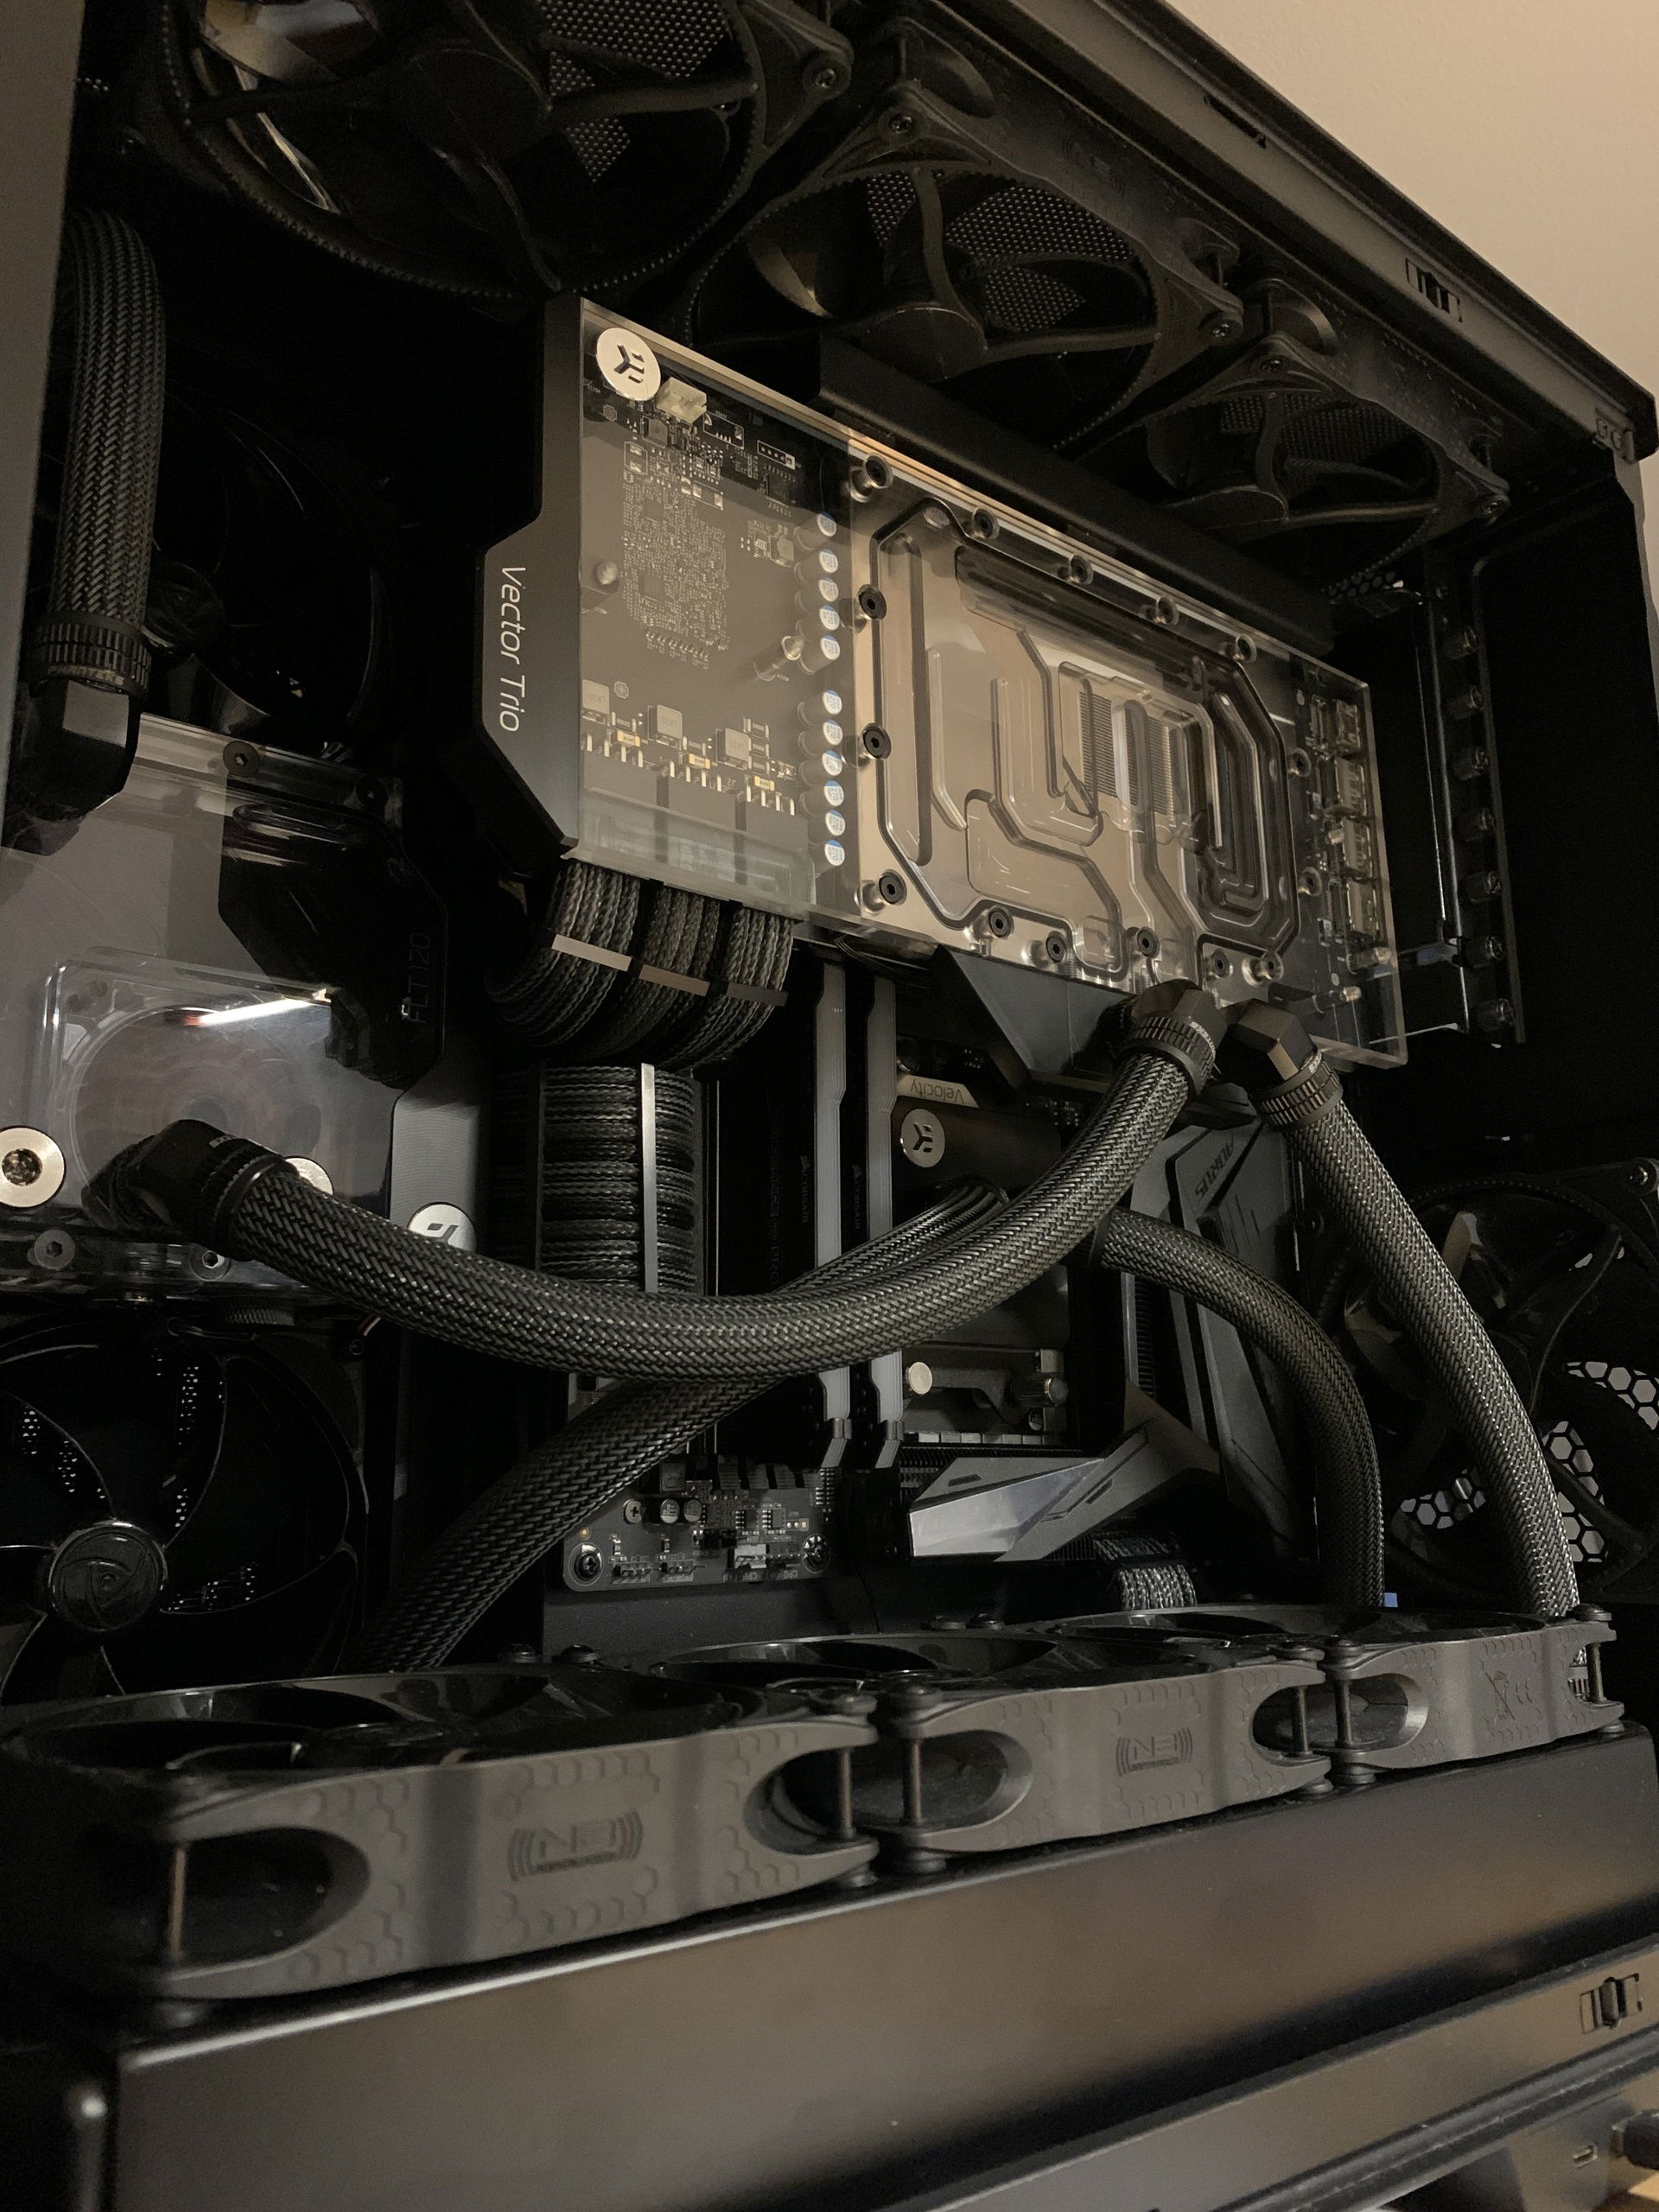
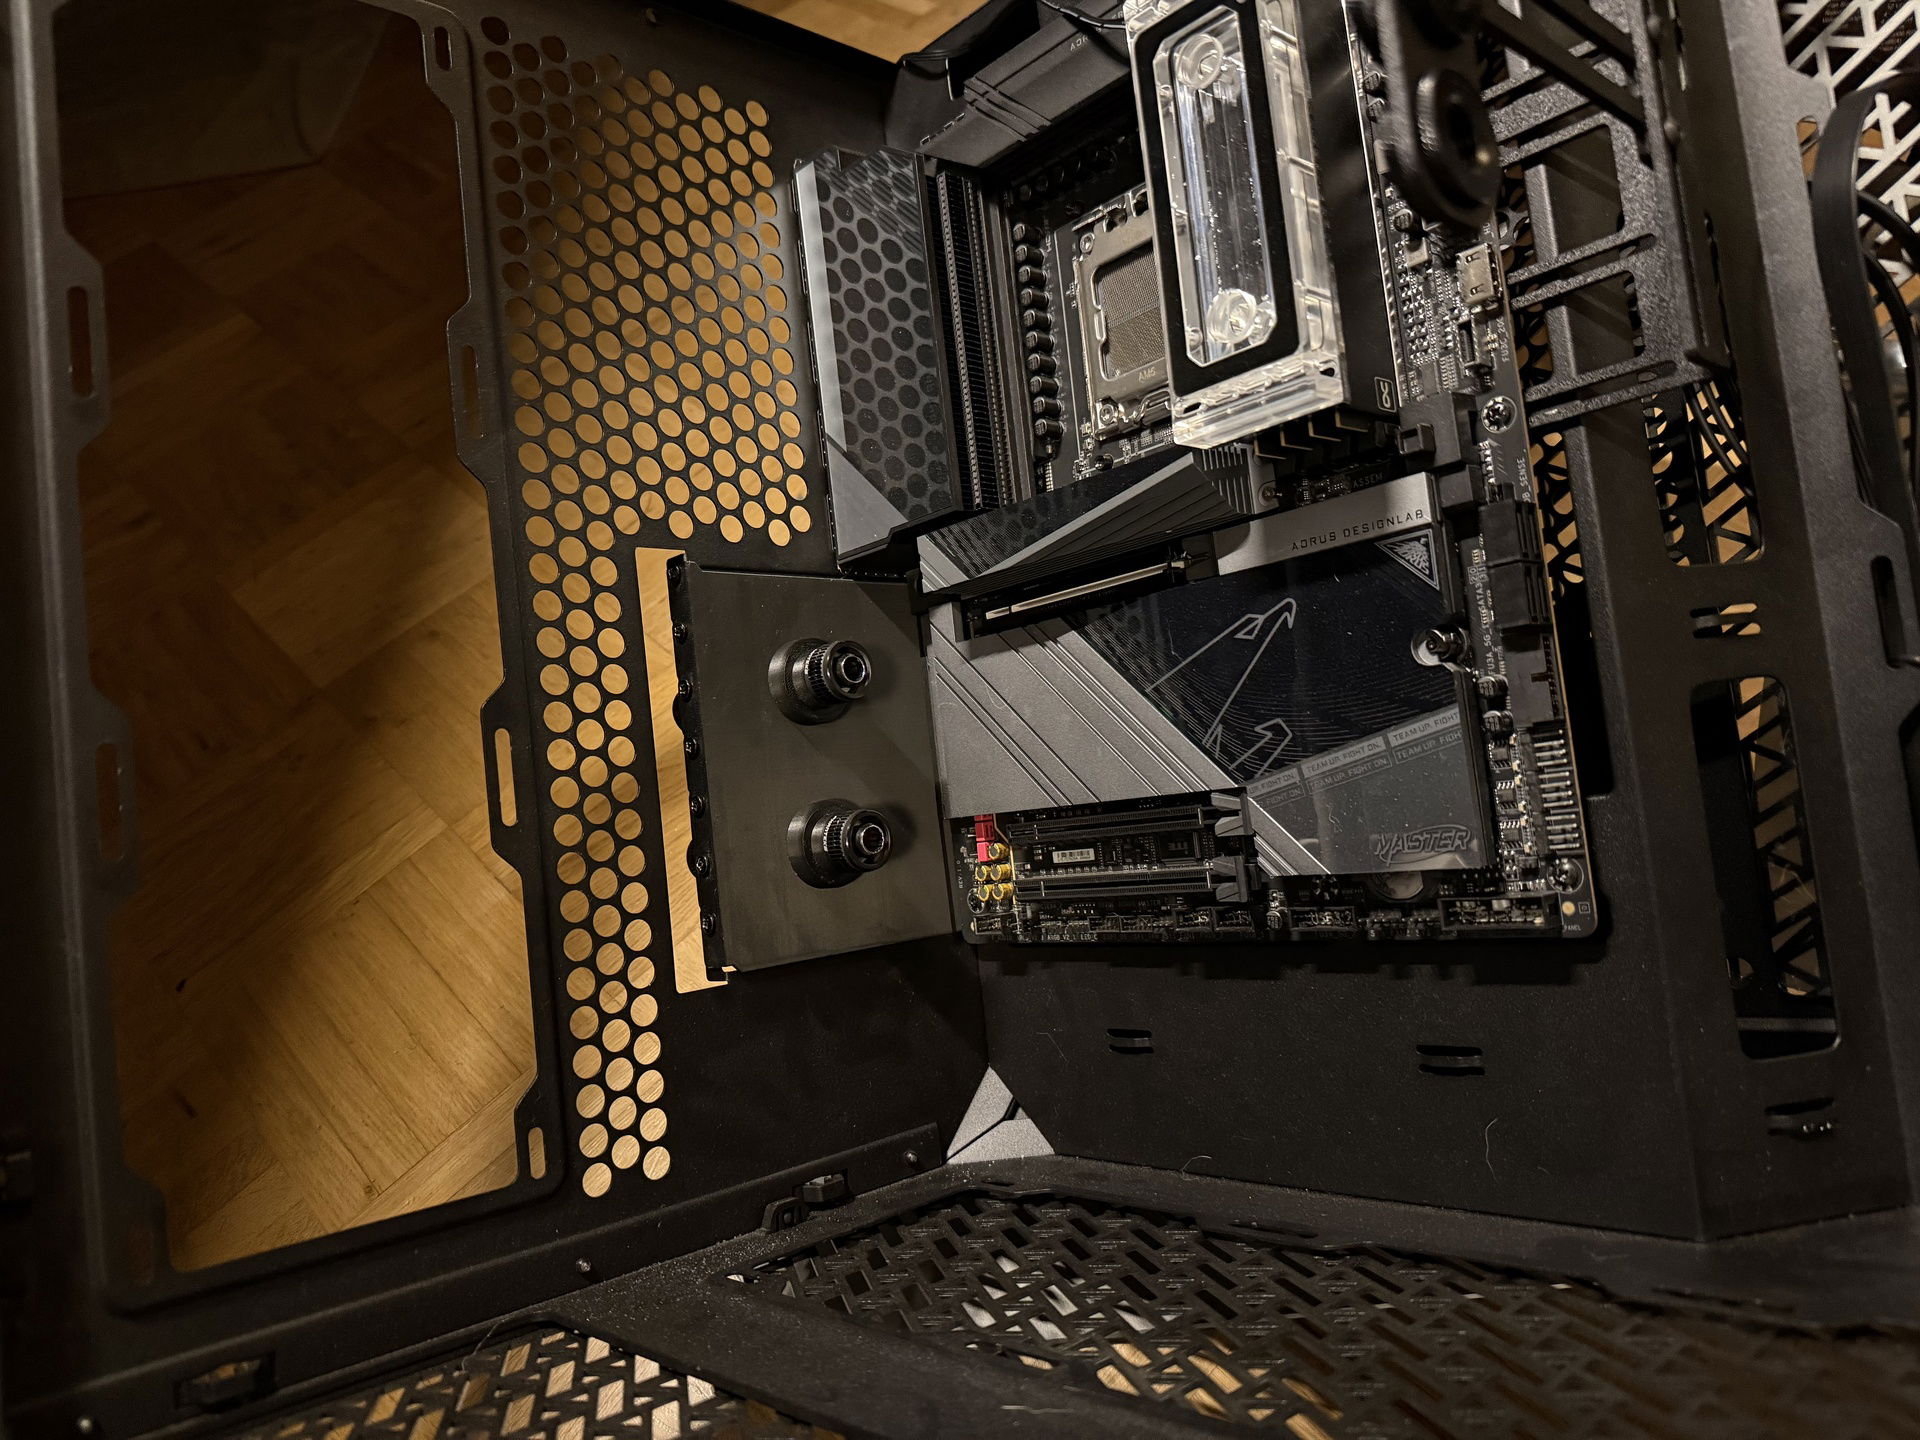
As I mentioned before, one of the objectives was utilizing LiquidHaus‘ BLK distribution manifold. Originally, I planned on using metal tubes to supply water to a Stealkeys Customs CubeTube distroplate, go to the BLK from there and then to RAM and CPU cooler. Due to a lack of space (I decided to go for a Heatkiller Tube 200), things came out a little differently. See for yourselves.
![User Image]()
![User Image]()
![User Image]()
Tube routing finally took shape, I can‘t say that this is the best that I could do but it‘s the best I can do right now. Maybe my next build will carry this whole CubeTube distroplate thing.
Unfortunately, Phanteks doesn‘t make their glacier soft tube fittings anymore. Luckily, Thermal Grizzly has since stepped foot into the fittings arena and come out with their DeltaMate fitting series. These have the exact same dimensions as the Phanteks fittings, same price but so much more quality. Thanks, Roman!
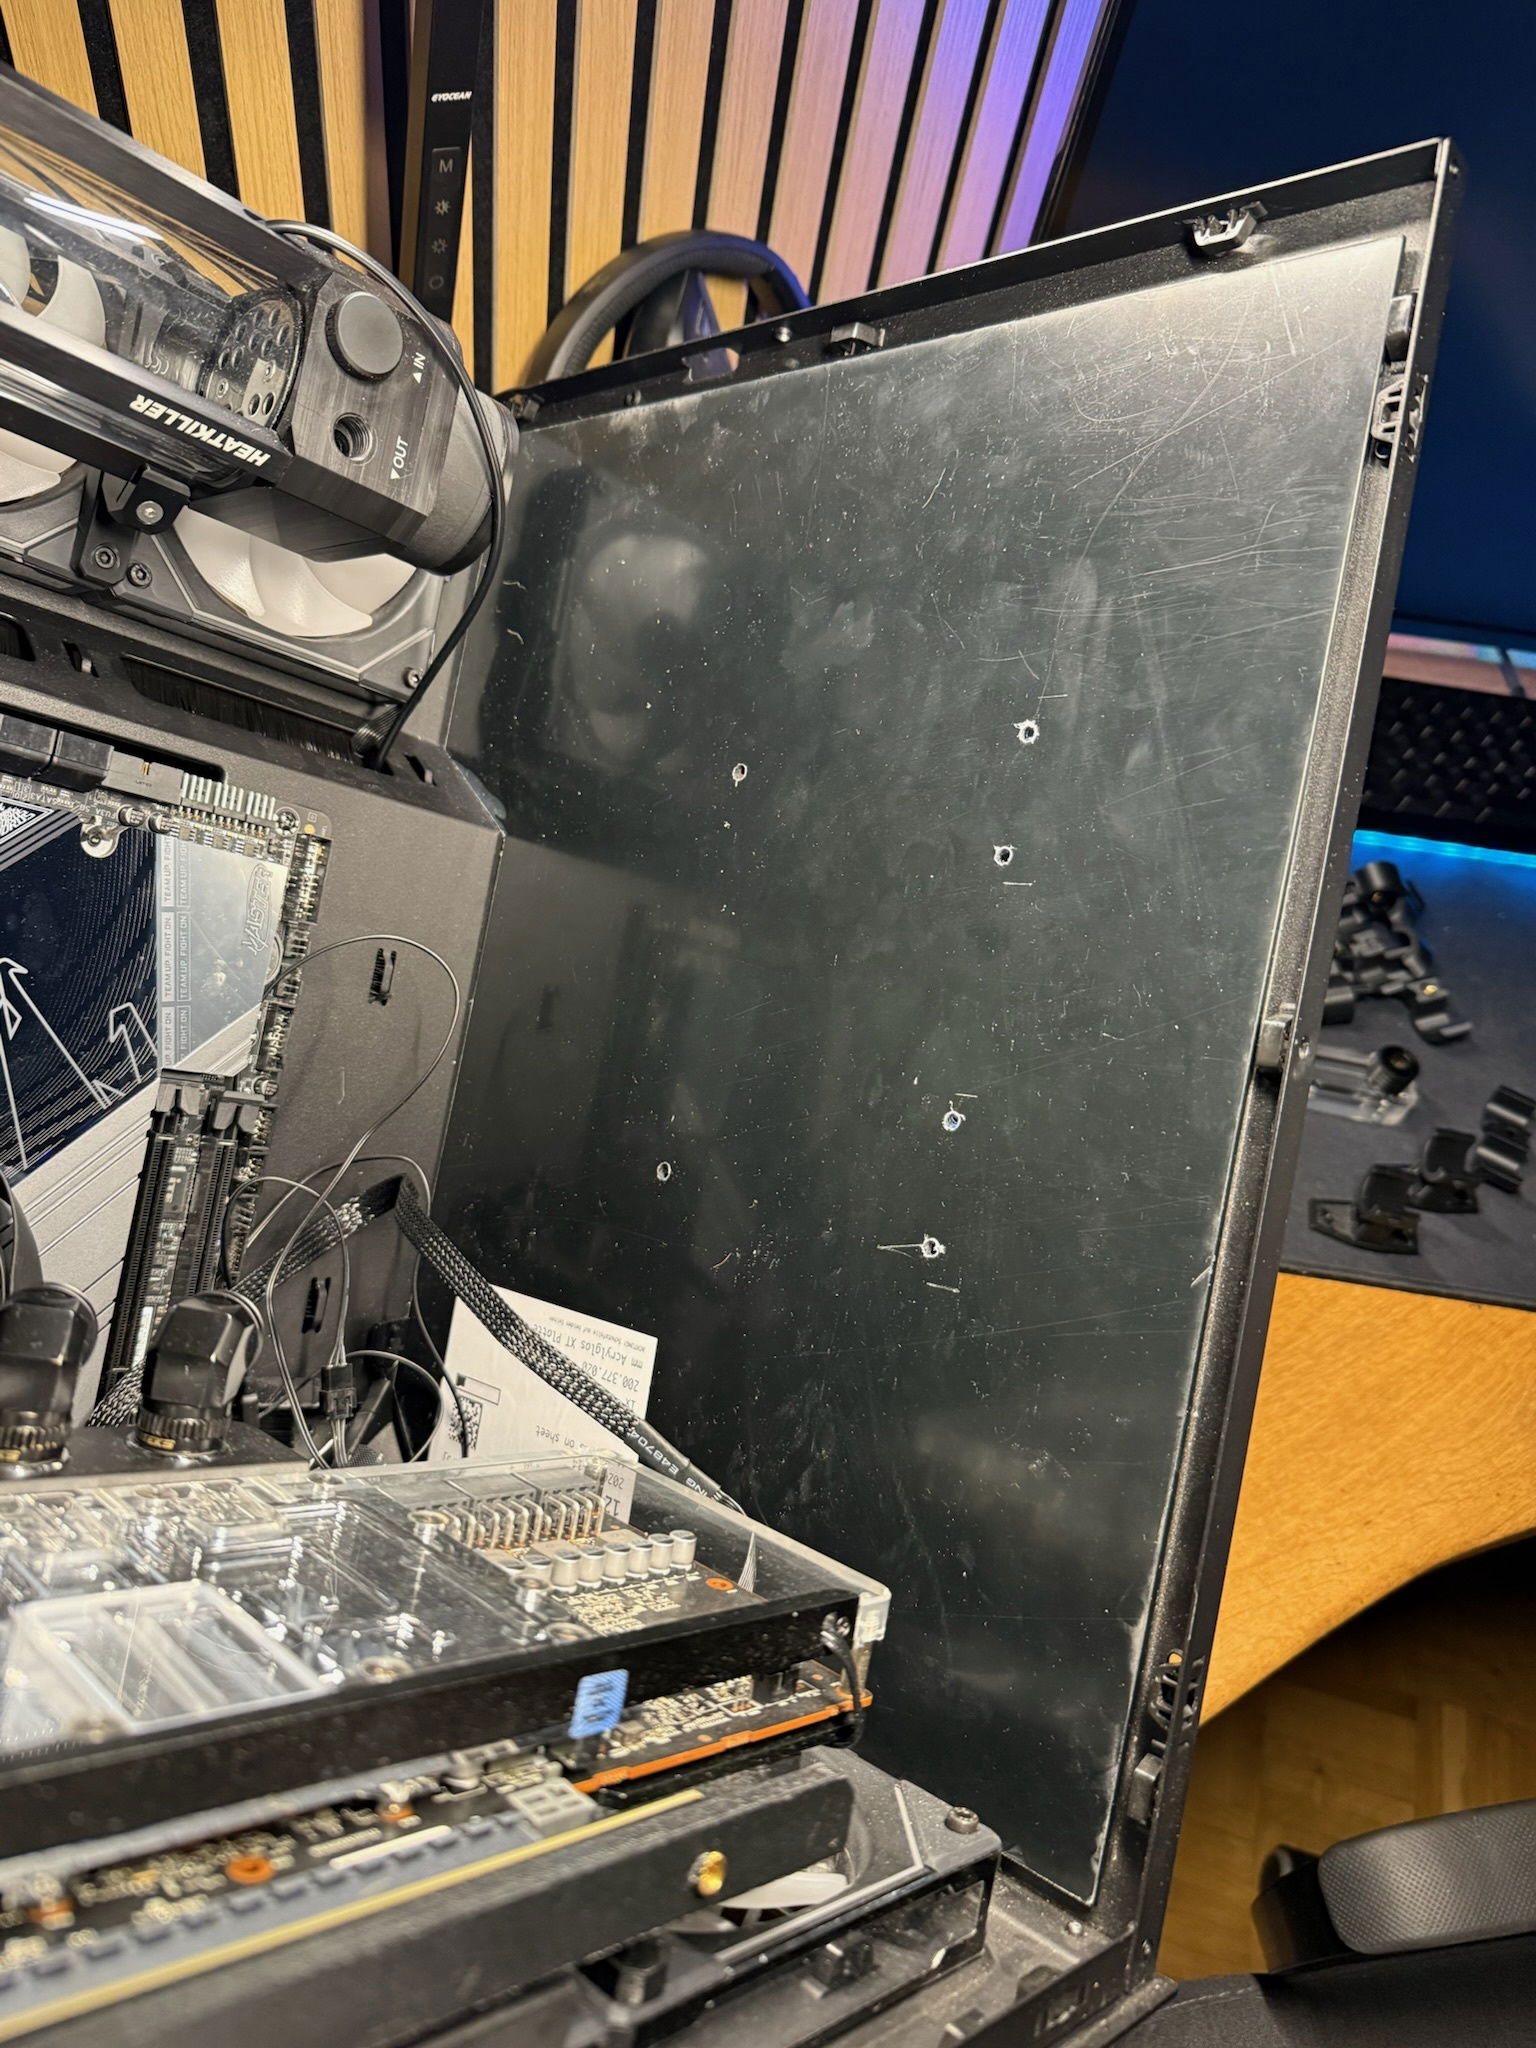
Regarding the „boring parts“ of the case, I put an acrylic sheet in the bottom, drilled some holes into it and mounted a Stealkeys Customs Cubetube 140 and a self-printed contraption to hold a filter there, purely for aesthetic reasons.
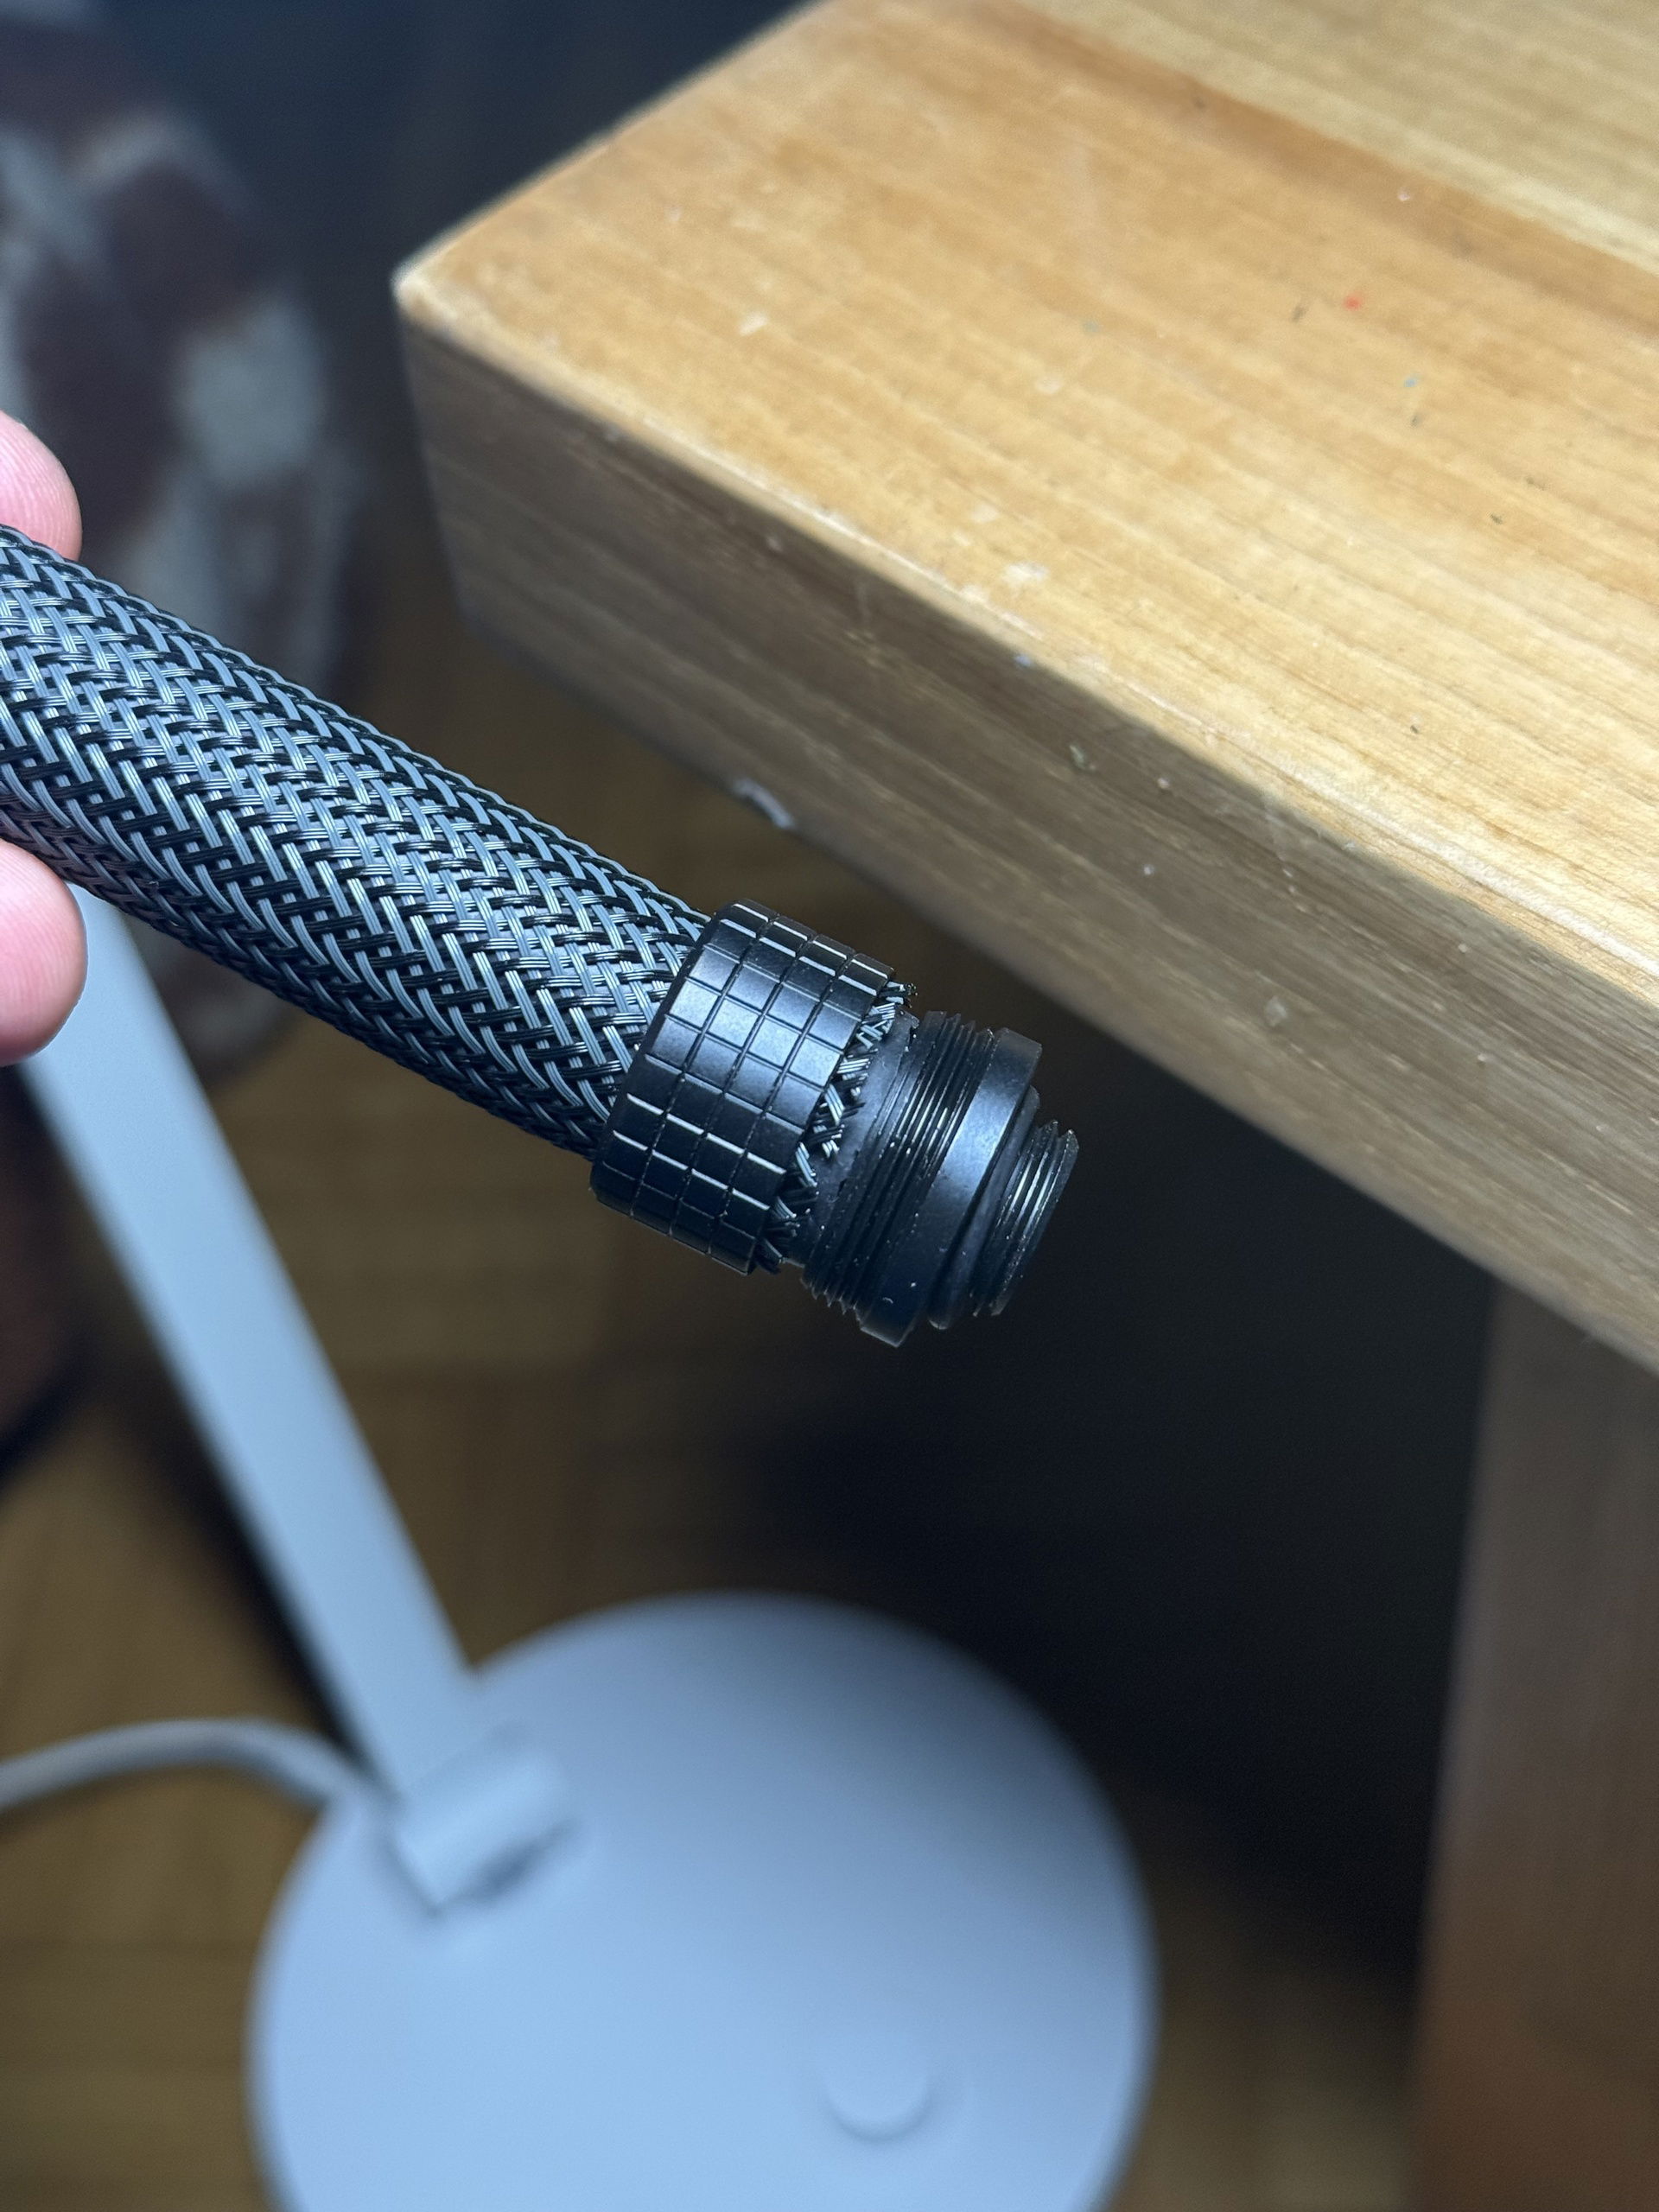
I love sleeving! At least looking at it.
Turns out that quality fittings also means very, very tight tolerances. This meant that putting sleeving between Heatkiller EPDM and the fitting collar isn‘t really a use case for these fittings. It was tight / extremely tight. So tight that I had to sand down some of the fitting collars because they had the slighted bit of a sharp edge on the collar chamfer and that damaged my sleeving on one tube, forcing me to sleeve it again and changing the collar for a smoother one.
I'll have to give an absolute shoutout to Paul at Thermal Grizzly, with whom I talked about my little problem. I noticed 5 more of my 14 fittings had this problem while the others were perfectly smooth. I decided to notify TG about this small inconsistency and they went ahead and sent me 6 new fittings. Way to gu, guys! I never expected this kind of action, my use case is pretty special and I wouldn‘t expect for fittings to be extremely smooth when I‘m taking extra steps just for tubing to look cool.
And cool it looks. Here's a picture how I cut my sleeving to get a perfect sleeve. Thank you to LiquidHaus who made a tutorial a few years ago.
![User Image]()
In the end, everything will be worth it
Oh yeah, it was worth it. I learned so much along the way, things that I will be able to apply in different areas of my life, especially the whole 3D printing ordeal and following the flow.
Due to work, being a dad and partner and thus having to manage my personal resources, this project sat under my desk for almost 5 months, sometimes untouched for weeks at a time. I didn‘t let anything or anyone rush me and just took my time and that was perfect. Also, I wouldn’t have been able to buy all the components at once, We‘re looking at 5.539,94 € - I wrote it all down in true German fashion. No idea how long it took, just enjoy these pictures and please do not hesitate to ask questions. Maybe I‘ll add more paragraphs to this writeup once I realize I forgot some important challenge that I overcame but simply forgot becaue everything took a fair amount of time.
Thank you to everyone who stayed until the end and thak you to my wonderful girlfriend, she always supports my ideas and had to listen to a lot of me talking about some technical small problem that I had and how I solved it. I‘m pretty sure she didn‘t want to hear any of it.
Take care
Lazare
The Carbon Cube
Prologue
Three years ago, I built my first custom watercooled PC. I drew lots of inspiration from creators like LiquidHaus so it became a sleeved EPDM build. Nothing out of the ordinary, I used a O11D Evo in reverse mode to house two 360mm rads, a 3080 and a 5800X3D. This build took me some nerves since it was my first time sleeving, the first time custom watercooling even but I learned a lot along the way.
A new, cubic beginning
This PC has served me well but I always side-eyed one of those cube cases by Azza. Back in the day, the Cube Mini and Cube 805 were rather small form factors that didn‘t allow for much play with the cubic shape. When I first researched for my next build in the summer of 2025, I came across Azza‘s newest Cube Plus. Three sides of the cube could be outfitted with fans, maybe an acrylic panel (foreshadowing) and it was BIG. Sadly, its release date had passed and it was nowhere to be found. So I messaged the German Azza representative asking for the case and didn‘t get a reply. Messaged Azza‘s instagram, they reached out to their German branch who then answered me and 2 weeks later, the case arrived.
Now if you look at the case‘s introduction page on Azza‘s official website, you might think that there’s a seriously high end product coming your way. Unfortunately, with the Cube Plus, that was not the case. For 500€ you get a really heavy case and solid craftsmanship but that‘s about it. I don‘t know if I‘m asking for too much at this point but cable passthrough grommets would‘ve been nice at least. Or some basic support for cable management.
Nevertheless, its size was impressive and I was really looking forward to this build.
So, what‘s next?
August 2025 marked the official start for my project. I unpacked the case (didn‘t snap any pictures of that unfortunately) and started to envision some concepts I would like to implement in this build. There were no mockups made, things just started growing in my head. For about three months, nothing much happened, mainly due to family, work and financial reasons. Mainboard, GPU and GPU cooler arrived in november.
There are four main objectives for this build:
1: Utilize LiquidHaus BLK
2: Sleeved EPDM tubes
3: External MoRa IV
4: Unique graphics card placement
First three are easy, order it online and rely on experience from my previous build.
However, since there are no pre-fabricated GPU brackets to put on fan slots, I had to design my own version and print it (and learn how to use Fusion before all that).
I tried to go for a three-part solution that mounted to all three fans of a 360mm array but scrapped this idea for a minimalist solution that now mounts to the fist and last of the three fans. If you‘re curious, this was printed using a BambuLabs P1S and Bambu PETG filament. I didn‘t buy a printer for this, I‘m part of a workshop conglomerate that has wood, metal, laser and 3D printing workshops and was able to use the facilities and other member‘s knowledge there.

After about 6 revisions, everything fit perfectly and I was able to mount my GPU with its riser cable to the left of the mainboard. All cables except for the riser cable will go through a printed cable duct in the bottom corner of the case.

With this whole ordeal figured out, I was able to focus on all the other rather small problems surrounding this build. A QDC passthrough, some tube clamps, just smaller tasks but lots of them. I won‘t go into too much detail, it has been a great learning experience.
Two things also bugged me about the case: There were no covers for the cable slots and a few spots looked a little boring. so I decided to order some brush profiles and black acrylic and cover these spots with it. In the future, I will definitely work more with acrylic, it looks really clean and I've seen tons of creators make use of it.
All hail Mo-Ra
External cooling was always interesting to me, I just never thought that there would ever be a use case where I really needed that and it would make sense. Then, I built myself a small room for gaming in the back of our flat‘s corridor. I never planned on really venting this since shutting the door behind me isn‘t really a thing that I do or need. But putting a Mo-Ra on top of my little room and into our little storage space was something that really intrigued me, mainly for the silence and for the heck of it.
There‘s a platform for selling used goods in Germany, something like Craigslist but a lot more serious, people sell all kinds of stuff there. Originally, I only wanted a Mo-Ra IV 400 but then…. someone offered a 600 WITH Fans for 750€ so I just had to go for it. Had to persuade the guy to ship it to me and bought most of to attached parts used also. This way, I saved over 600€ in parts. It was even cheaper than buying a 400 new (noone offered a used one in 4 months).
I put a hole through my ceiling, sleeved the tubes and pushed on.
Finding the right path… at least for tubes
As I mentioned before, one of the objectives was utilizing LiquidHaus‘ BLK distribution manifold. Originally, I planned on using metal tubes to supply water to a Stealkeys Customs CubeTube distroplate, go to the BLK from there and then to RAM and CPU cooler. Due to a lack of space (I decided to go for a Heatkiller Tube 200), things came out a little differently. See for yourselves.

Tube routing finally took shape, I can‘t say that this is the best that I could do but it‘s the best I can do right now. Maybe my next build will carry this whole CubeTube distroplate thing.
Unfortunately, Phanteks doesn‘t make their glacier soft tube fittings anymore. Luckily, Thermal Grizzly has since stepped foot into the fittings arena and come out with their DeltaMate fitting series. These have the exact same dimensions as the Phanteks fittings, same price but so much more quality. Thanks, Roman!
Regarding the „boring parts“ of the case, I put an acrylic sheet in the bottom, drilled some holes into it and mounted a Stealkeys Customs Cubetube 140 and a self-printed contraption to hold a filter there, purely for aesthetic reasons.
I love sleeving! At least looking at it.
Turns out that quality fittings also means very, very tight tolerances. This meant that putting sleeving between Heatkiller EPDM and the fitting collar isn‘t really a use case for these fittings. It was tight / extremely tight. So tight that I had to sand down some of the fitting collars because they had the slighted bit of a sharp edge on the collar chamfer and that damaged my sleeving on one tube, forcing me to sleeve it again and changing the collar for a smoother one.
I'll have to give an absolute shoutout to Paul at Thermal Grizzly, with whom I talked about my little problem. I noticed 5 more of my 14 fittings had this problem while the others were perfectly smooth. I decided to notify TG about this small inconsistency and they went ahead and sent me 6 new fittings. Way to gu, guys! I never expected this kind of action, my use case is pretty special and I wouldn‘t expect for fittings to be extremely smooth when I‘m taking extra steps just for tubing to look cool.
And cool it looks. Here's a picture how I cut my sleeving to get a perfect sleeve. Thank you to LiquidHaus who made a tutorial a few years ago.
In the end, everything will be worth it
Oh yeah, it was worth it. I learned so much along the way, things that I will be able to apply in different areas of my life, especially the whole 3D printing ordeal and following the flow.
Due to work, being a dad and partner and thus having to manage my personal resources, this project sat under my desk for almost 5 months, sometimes untouched for weeks at a time. I didn‘t let anything or anyone rush me and just took my time and that was perfect. Also, I wouldn’t have been able to buy all the components at once, We‘re looking at 5.539,94 € - I wrote it all down in true German fashion. No idea how long it took, just enjoy these pictures and please do not hesitate to ask questions. Maybe I‘ll add more paragraphs to this writeup once I realize I forgot some important challenge that I overcame but simply forgot becaue everything took a fair amount of time.
Thank you to everyone who stayed until the end and thak you to my wonderful girlfriend, she always supports my ideas and had to listen to a lot of me talking about some technical small problem that I had and how I solved it. I‘m pretty sure she didn‘t want to hear any of it.
Take care
Lazare
Color(s): Black Carbon Chrome
RGB Lighting? Yes
Theme: Industrial
Cooling: Custom Liquid Cooling
Size: ATX
Type: General Build
Hardware
CPU
$ 450.00
Motherboard
$ 369.99
Memory
$ 241.99
Graphics
$ 820.99
XFX - Mercury Radeon RX 9070 XT Gaming Edition
Chip Manufacturer: AMD
Chip: RX 9070 XT
Interface: PCIe x16
PSU
$ 259.90
Case Fan
$ 202.20
Cooling
$ 120.00
Cooling
$ 280.00
Cooling
$ 144.99
Cooling
$ 119.00
Cooling
$ 145.29
Cooling
$ 1,600.00
Estimated total value of this build:
$ 5,788.31
Approved by: