


Most Recent Build
Best Build
AD:

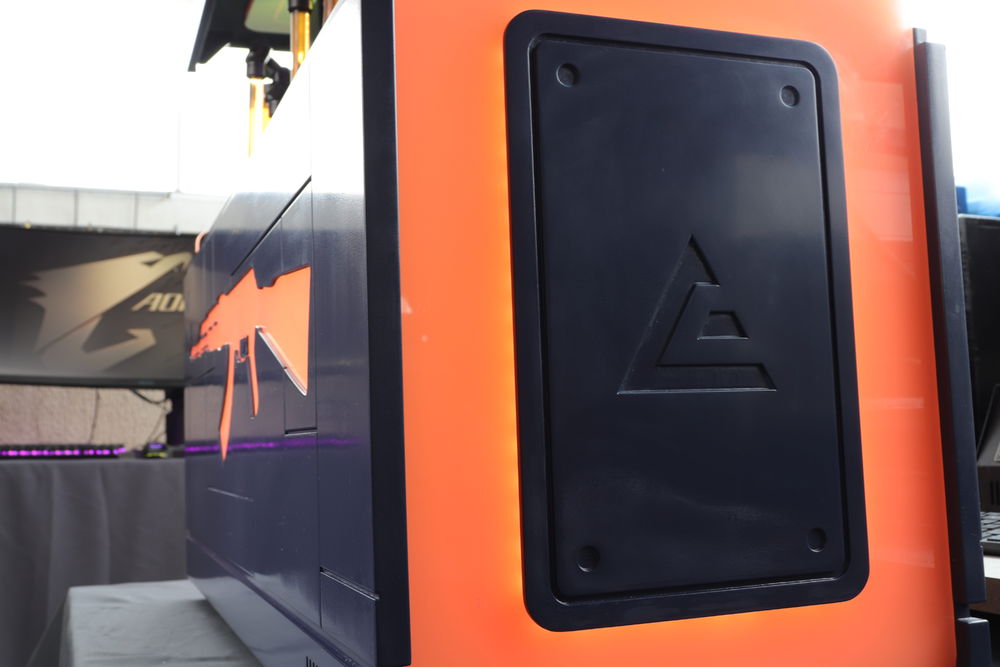

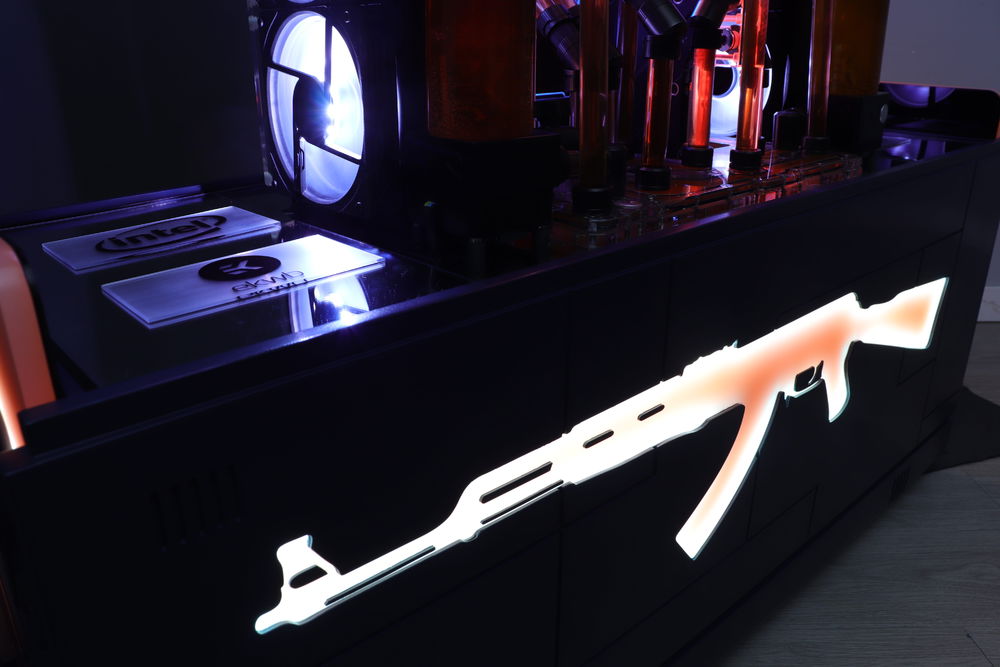
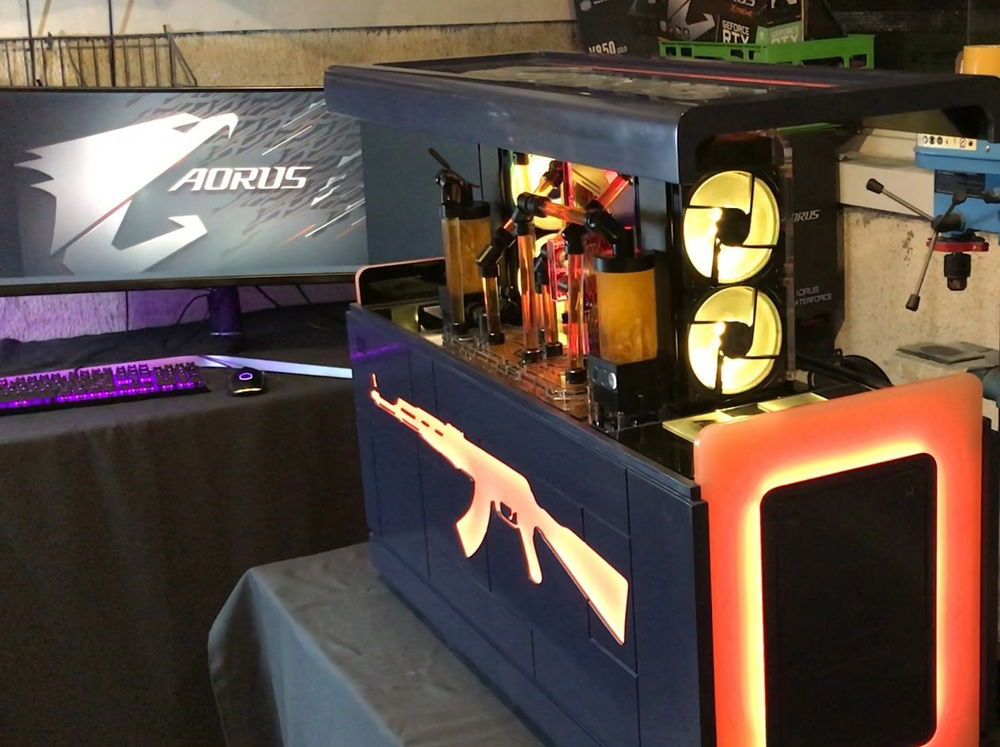
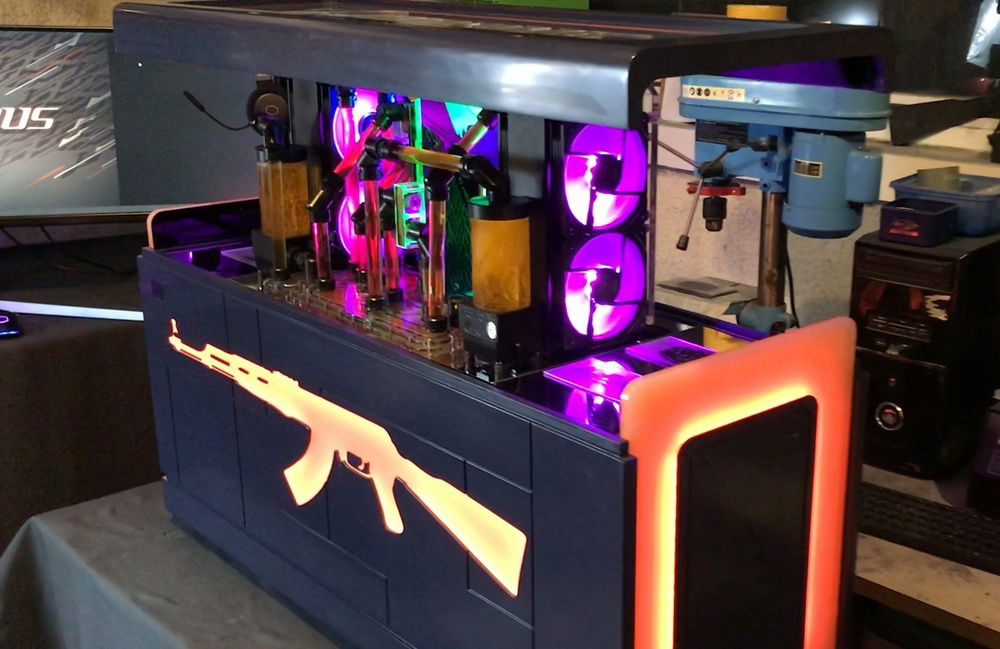
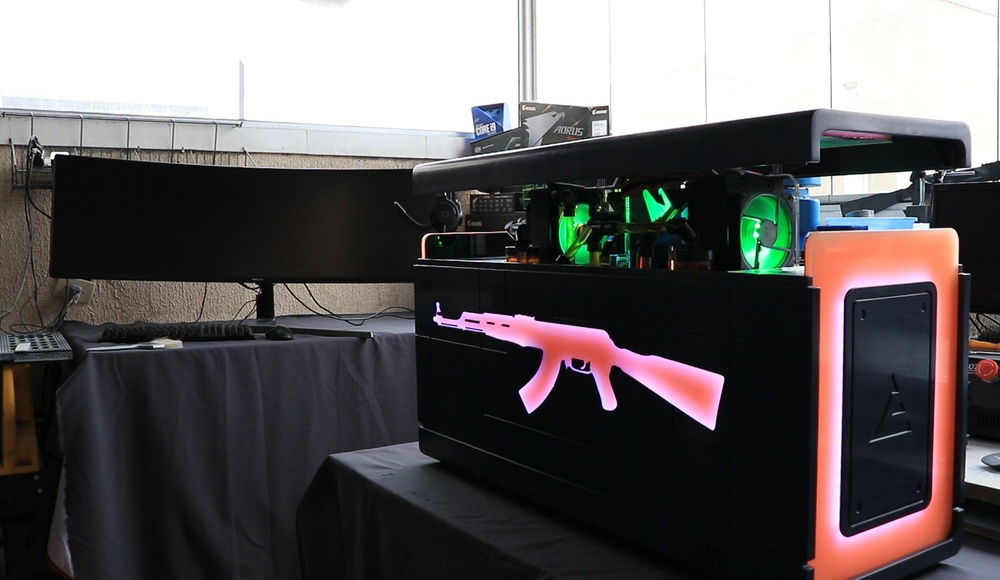

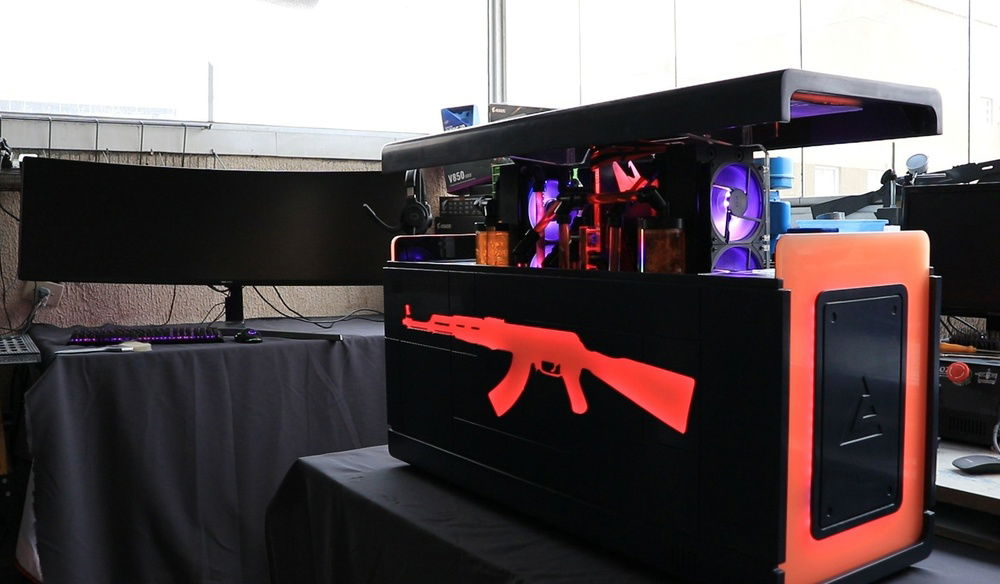
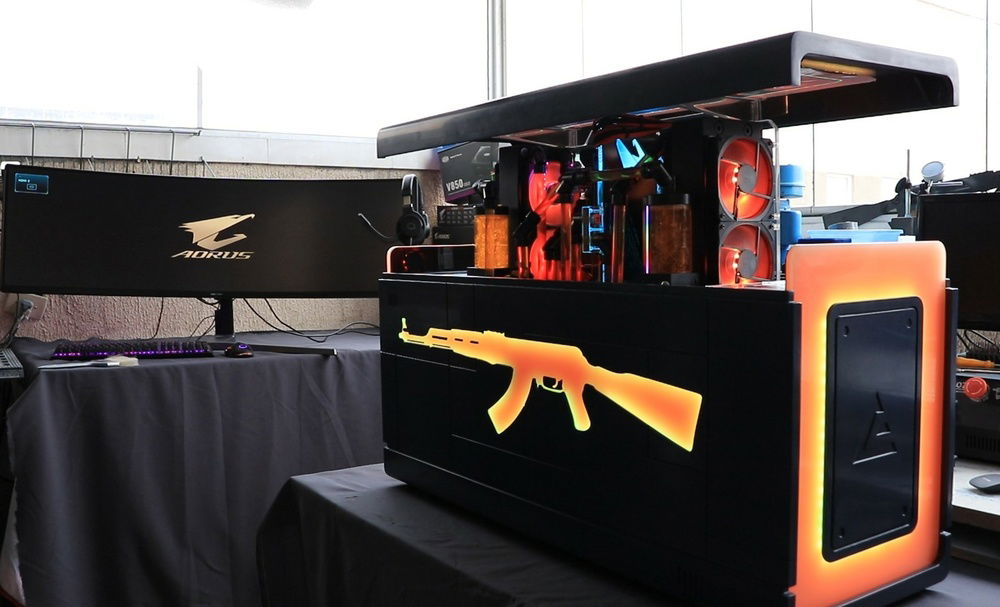
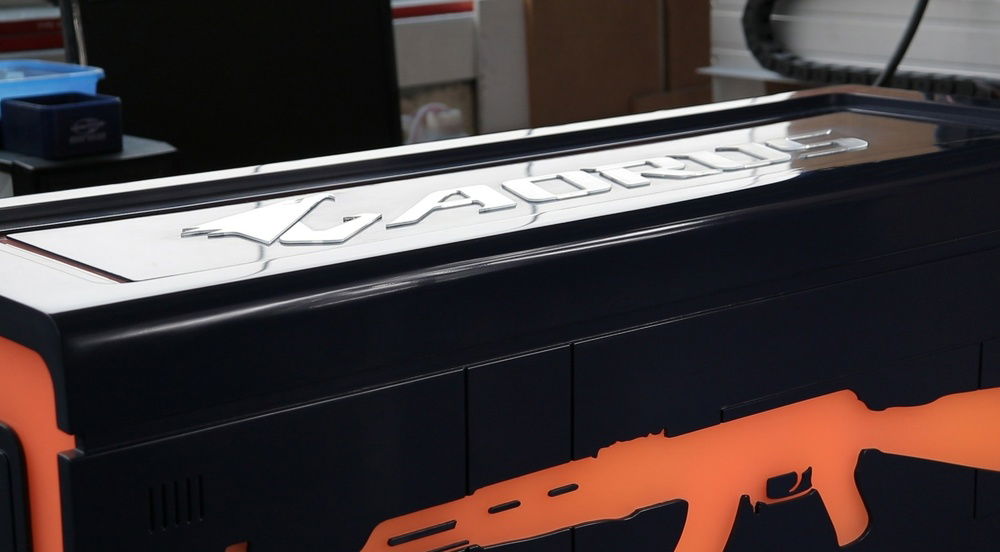
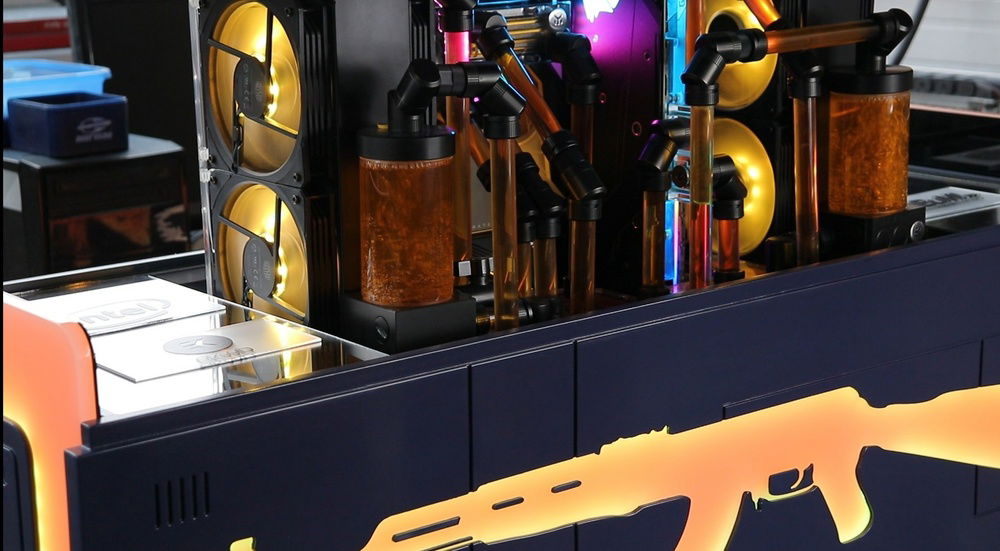
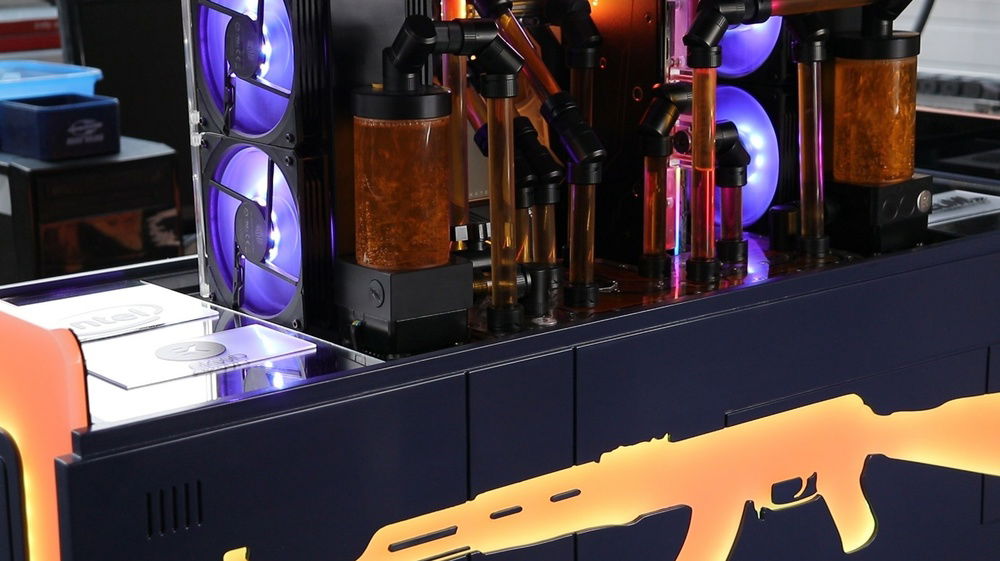
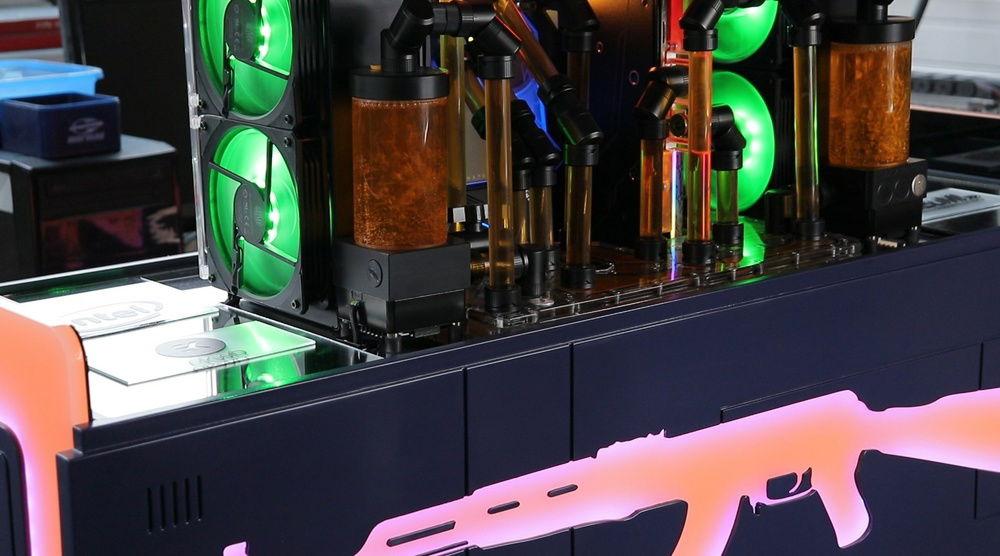
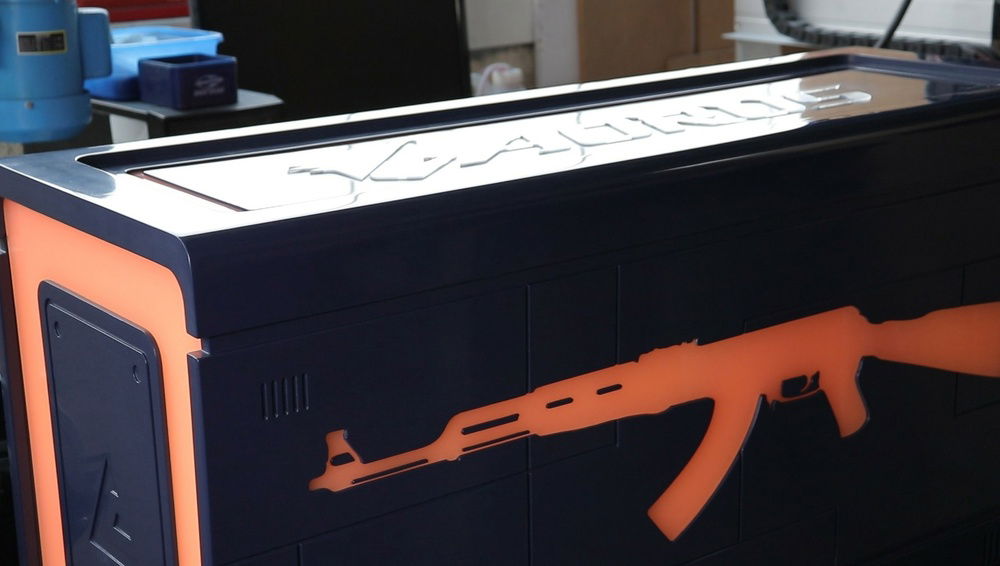

Projeto Box CS GO
AD:
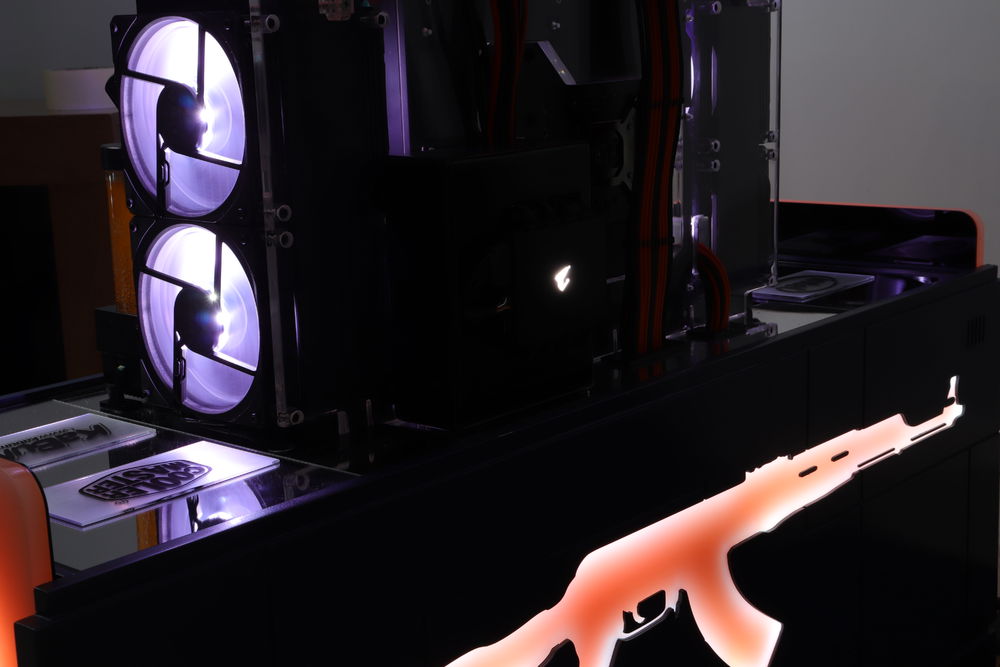
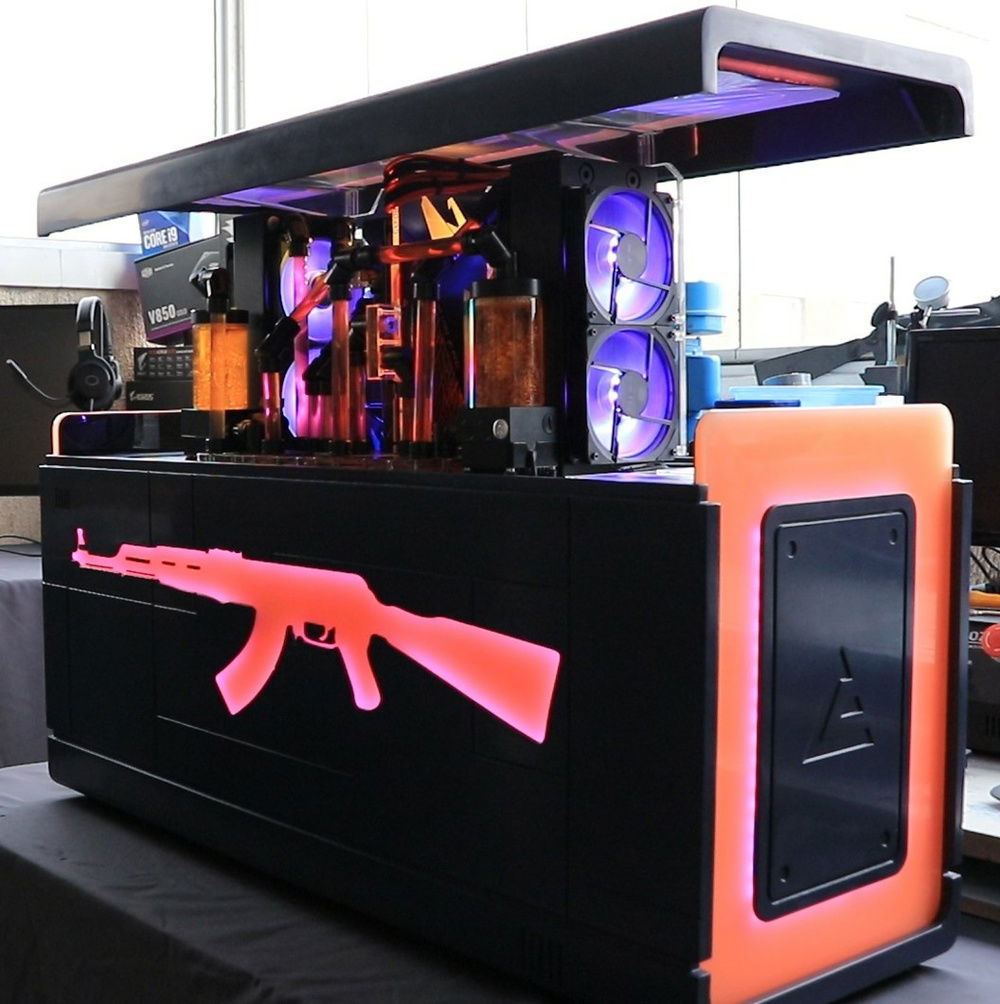
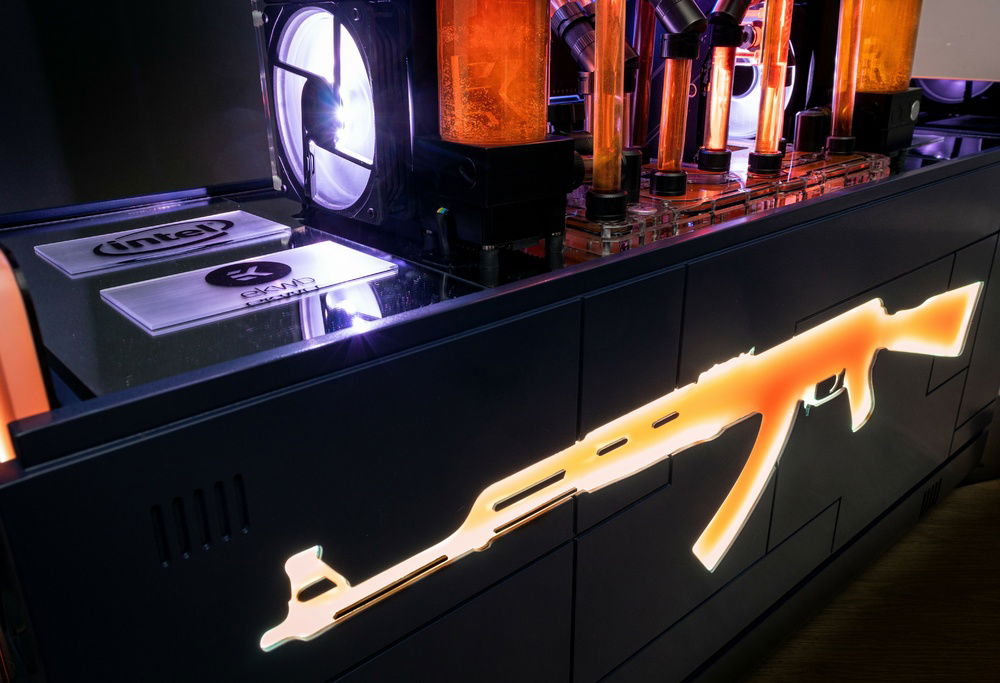
This project arose in partnership between PCROOMBRASIL and Aorus. When discussing ideas, it was exposed by the company Aorus that it would like to use a game box as a project theme. After many boxes, see which one fits my ideas best, so when I saw the CS GO box I saw that it certainly improved with my ideas.They liked the idea, but asked that the part of the AK47 be lit up too. Then the challenge started, how would I create this project and what material would I use. I started thinking about how he would be delighted and surprised, I wanted a project that everyone would talk about and comment on, so I thought of creating something that could be used as a meme, like "look what I have in the cs go box", or things like that . A box with a folding lid would be easy to assemble, but in my head I found it embarrassing to have to go in and open the lid. It was then that I remembered a video I saw in police groups (for those who don't know, I'm a police officer in Brazil), there was an American showing him the voice command for Alex, and then a secret department leaves a bank that makes it available many times. weapons:
(198) Alexa We Need Guns - Home Automation Setup - YouTube
I thought to myself, wow, if I could build something like that, it would be surreal, I would give the command “alexa, I need a pc player” and a top project would come out of the box. I set up a 3D project appearance and sent it to an AORUS, they agreed on the spot. Well I had already committed myself to the company to do the project and now I had to bear the consequences, even without knowing where to start kkkkk. First, I studied the space needed to put everything inside, I didn't conclude that with a 1000mmx450mmx350mm box I would be able to do what I wanted.
The material was difficult to decide, after all the mdf would be facial and cheap but the finish would not be so good, I went to talk to a friend who works with acrylic and he told me that for 500 dollars he would be able to deliver me the necessary material for the project, I didn't believe it and I even argued with him insisting that it wouldn't be enough hehe, he insisted that it would work. So we made a deal, I paid him 550 dollars and if I used more material it would come out of his pocket kkkk and he agreed. Poor kkk passed a little, but agreement is agreement, thankfully he's a very good friend of mine.
Well then it was decided, the whole structure will be in acrylic. In my head I consider myself a guy who has cool ideas, but I'm a cool guy compared to the geniuses I see around. It's not Alex.
It took me a week to do the 3D drawing, and I wanted to follow more or less what was there. I used this as a way to show the project itself to other companies. I was very lucky
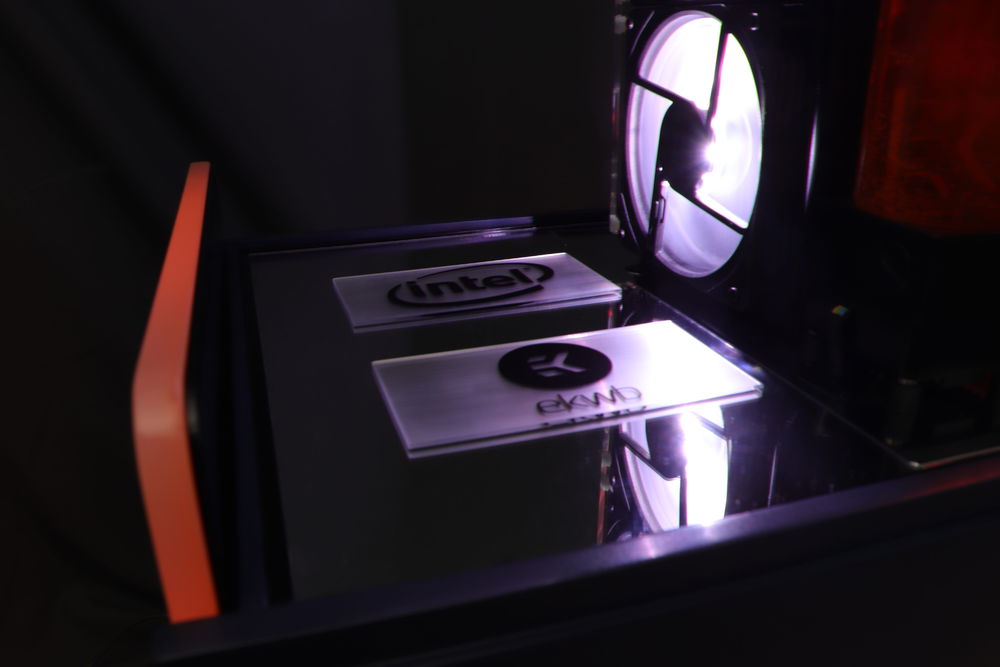
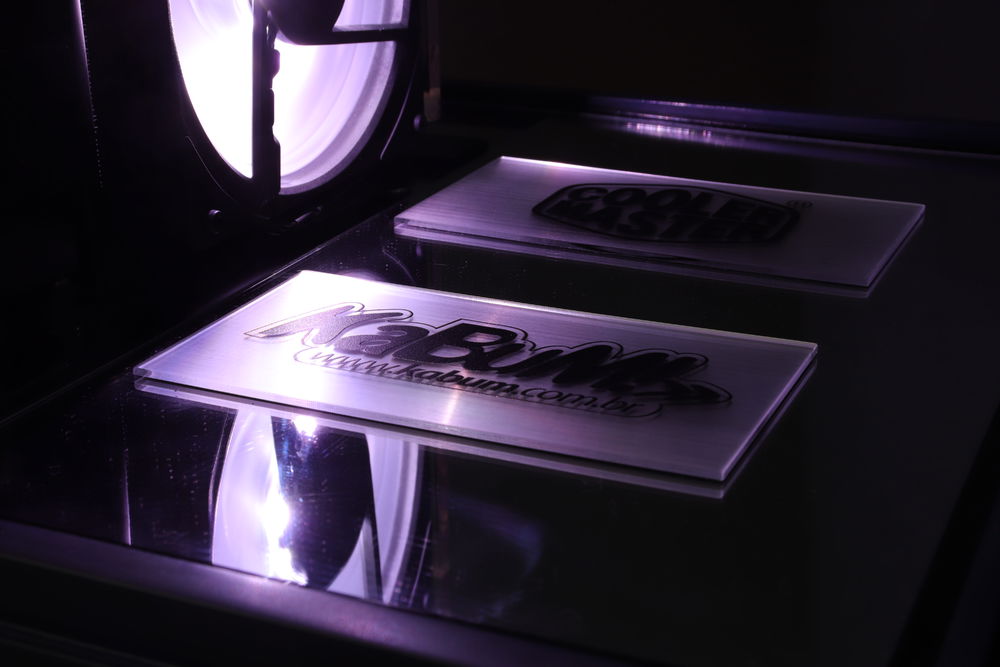
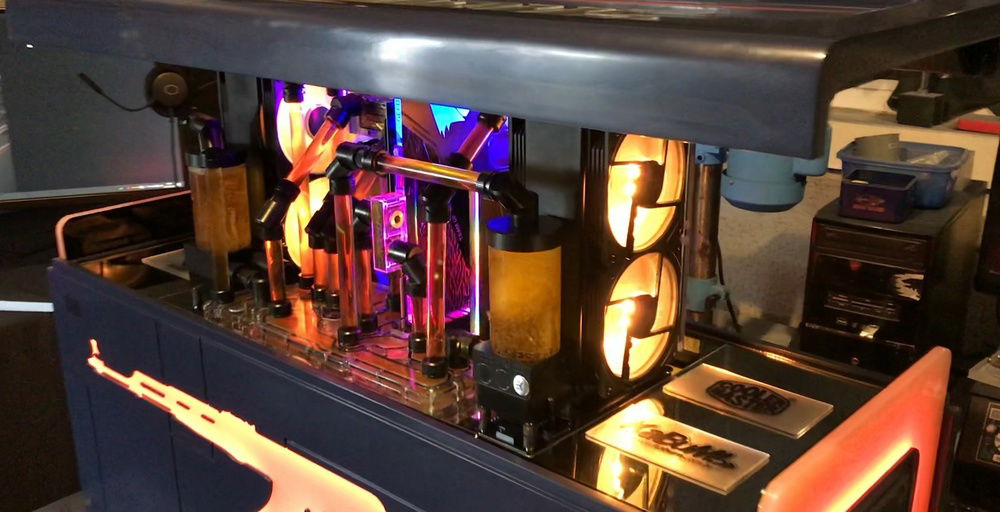
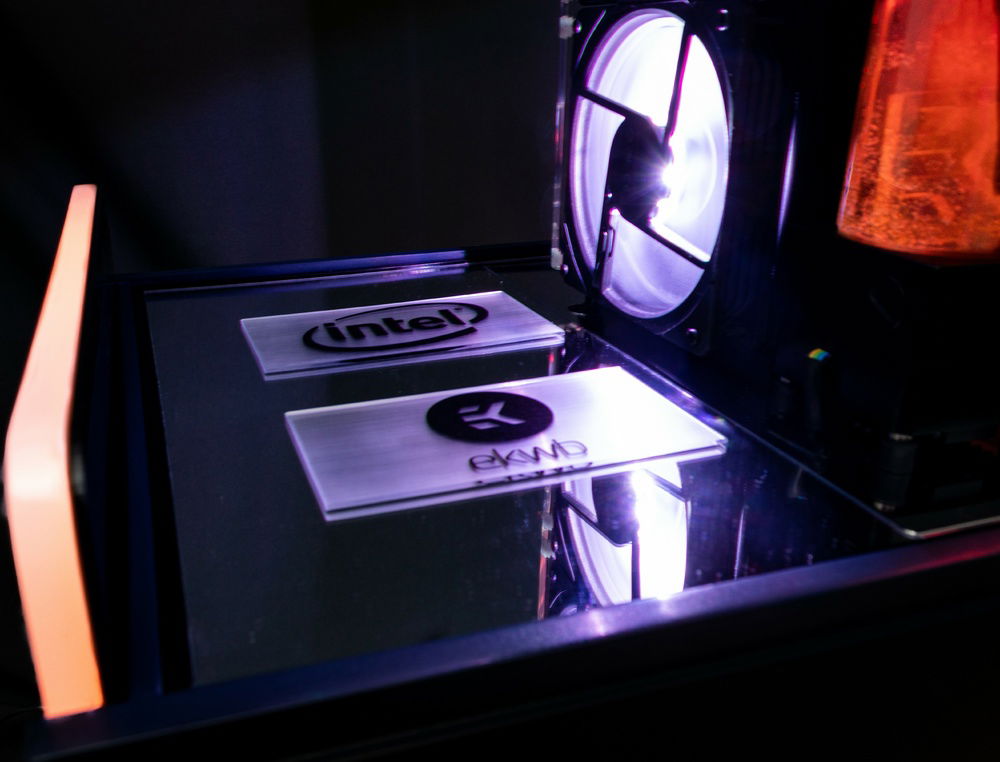
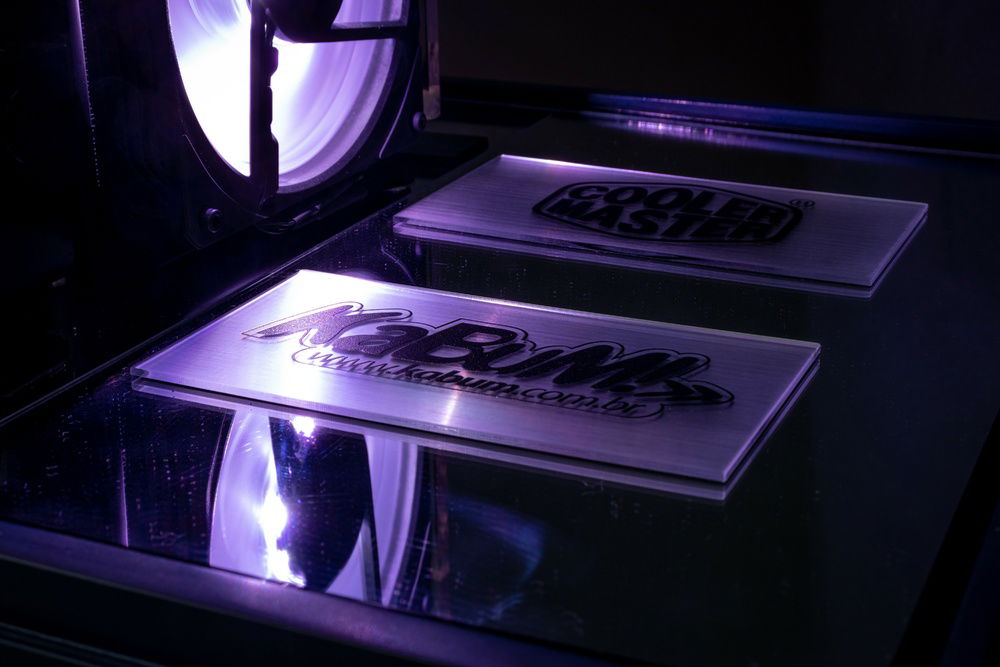
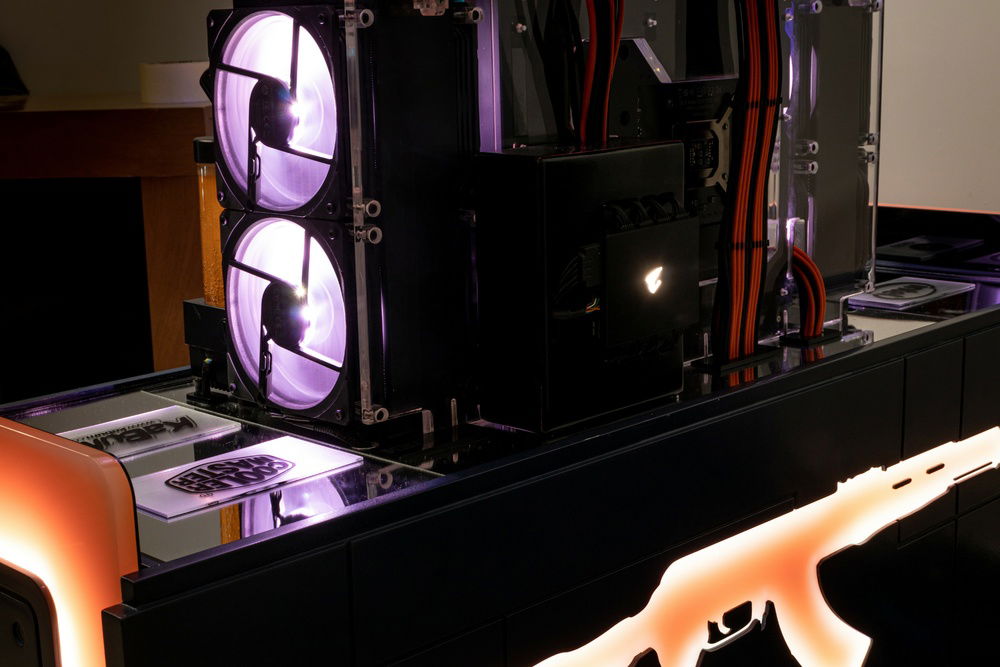
So, with the support of Cooler Master, Aorus, Intel, Kabum and AKWB, I managed to set up this project. Many thanks to the sponsors.When AORUS gave me the pieces I couldn't believe it, I almost cried kkkkk:
So they are:
Processor: Intel i9 10900k
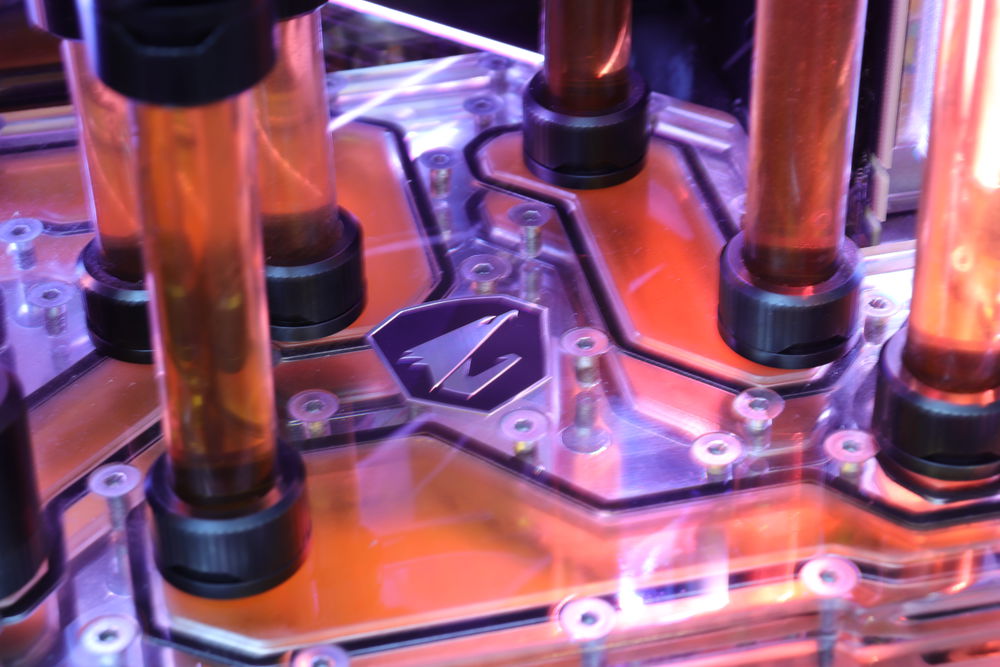
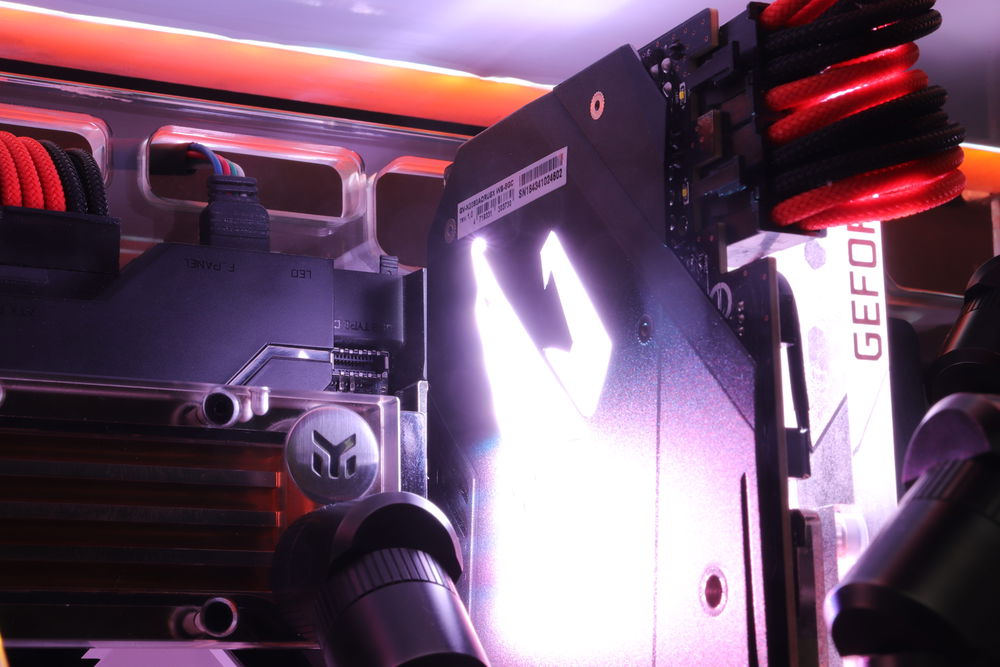
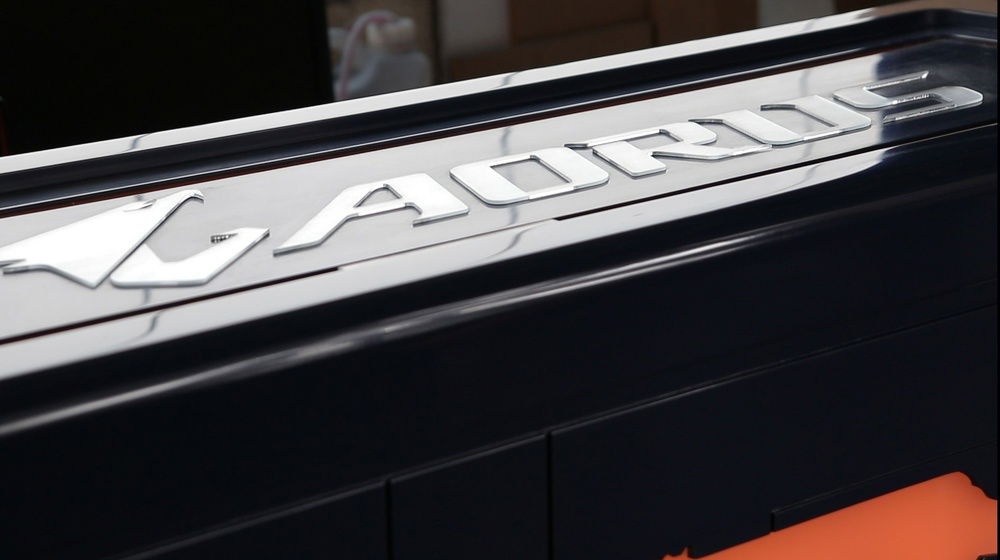
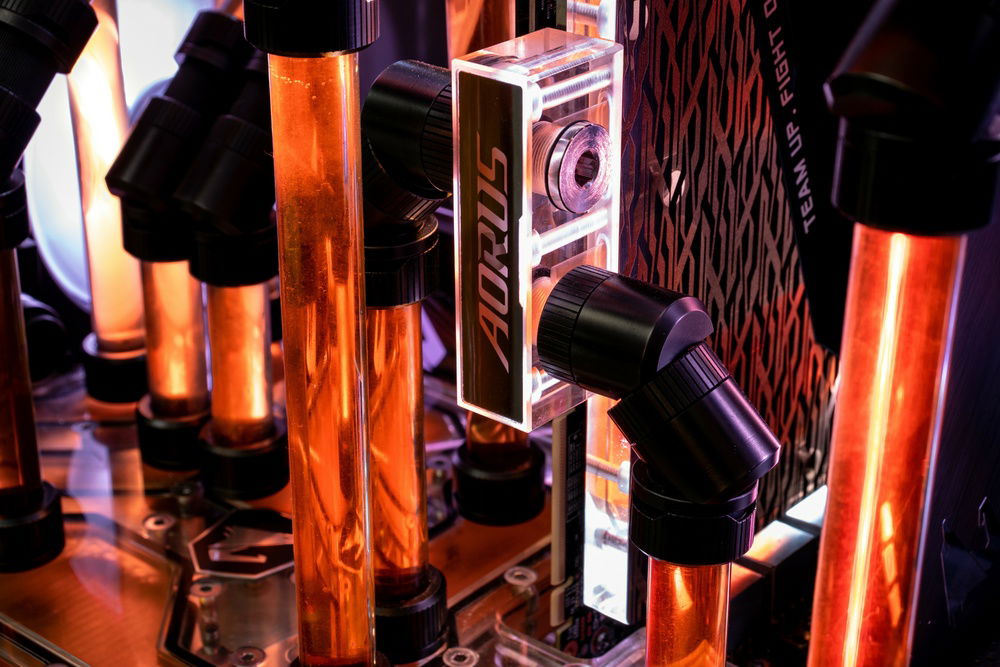
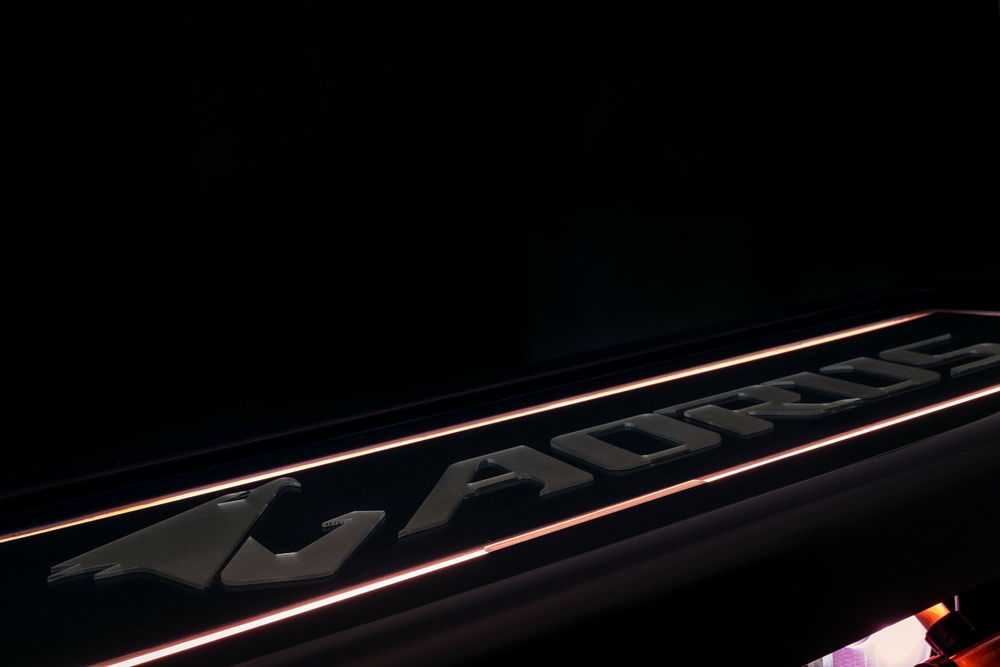
Motherboard: Aorus Z490 Xtreme Waterforce
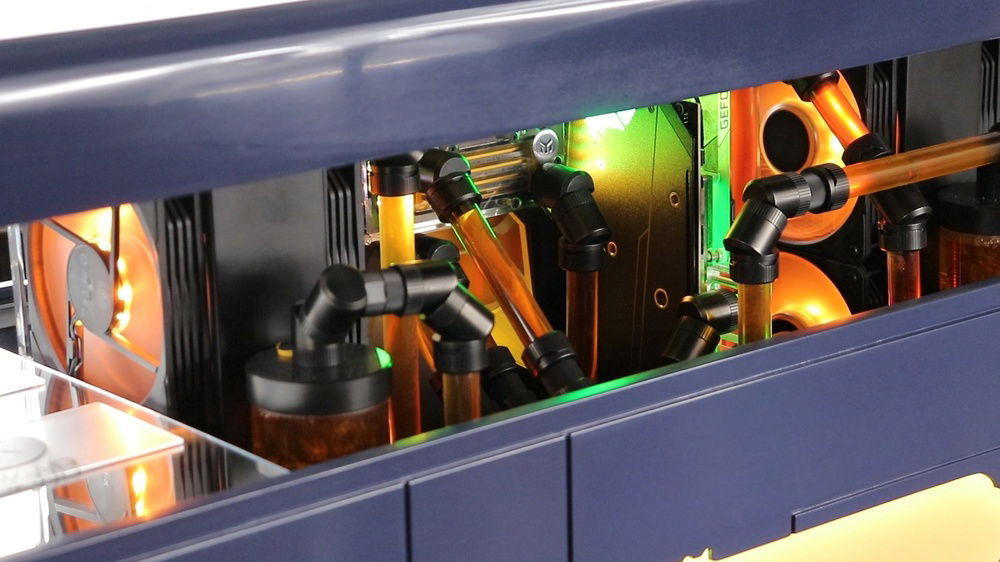
GPU: Aorus RTX 2080 Waterforce
SSD: Aorus RGB AIC 1 Tb.
Power Suply: Cooler Master V1300 1300w 80plus Platinum Full Modular
Memory: Corsair Vengeance DD4 4000mhz (4x8gb)
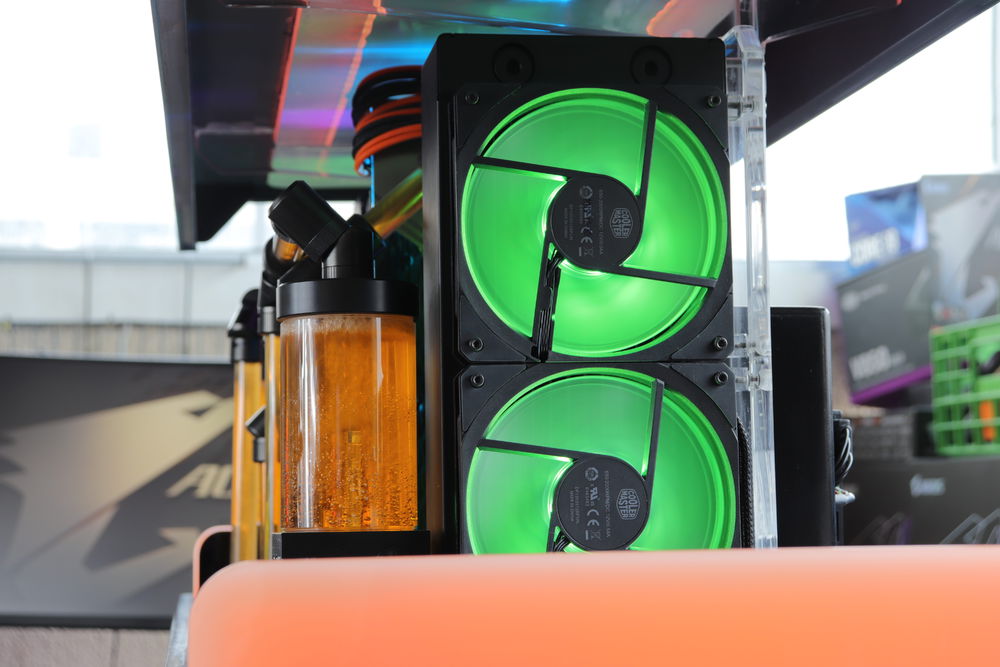
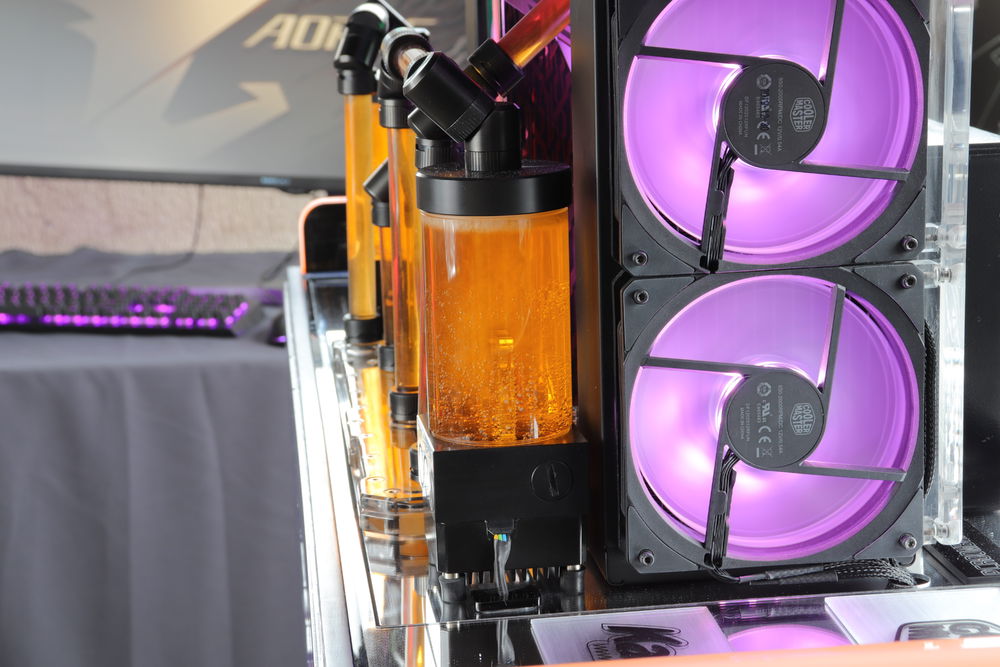
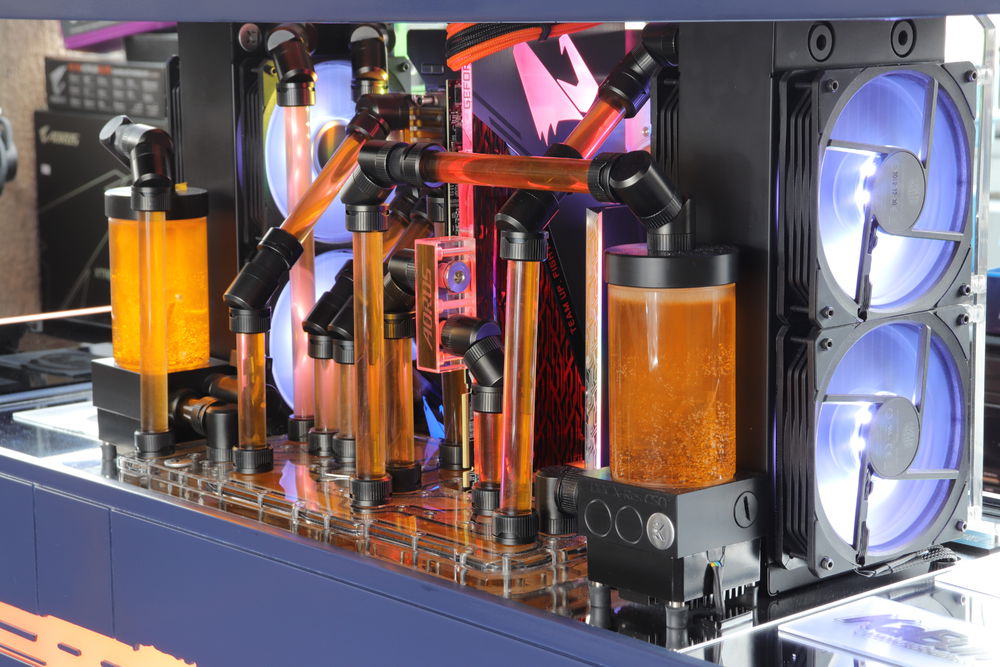
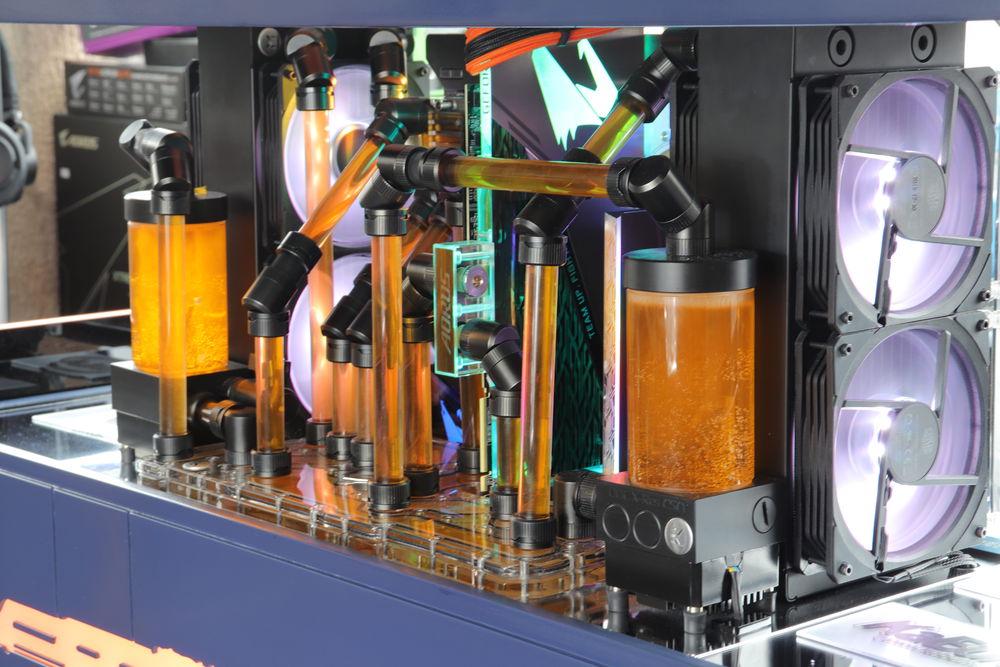
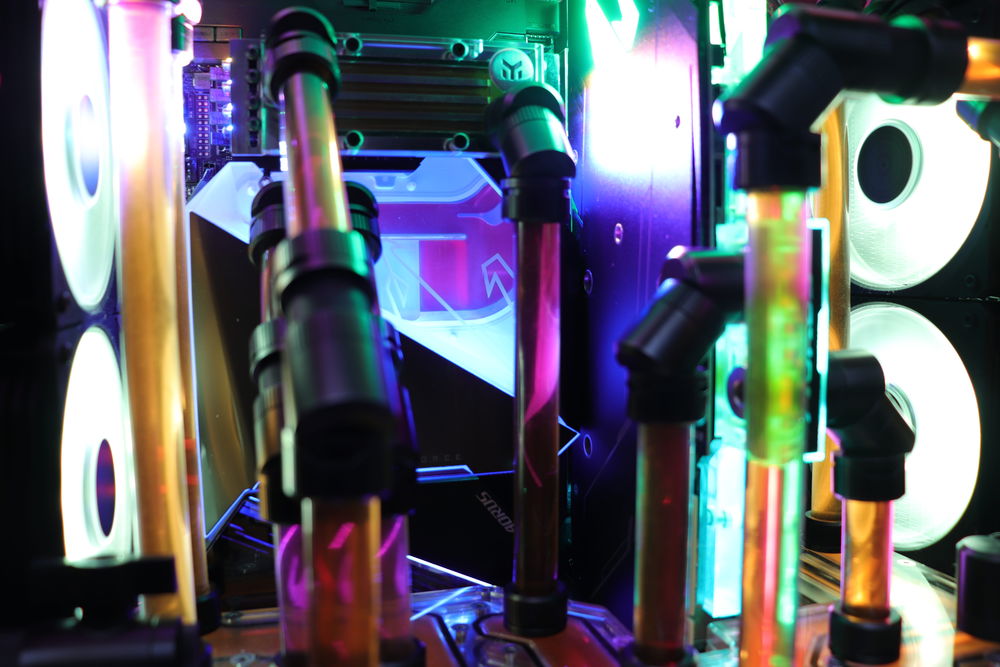
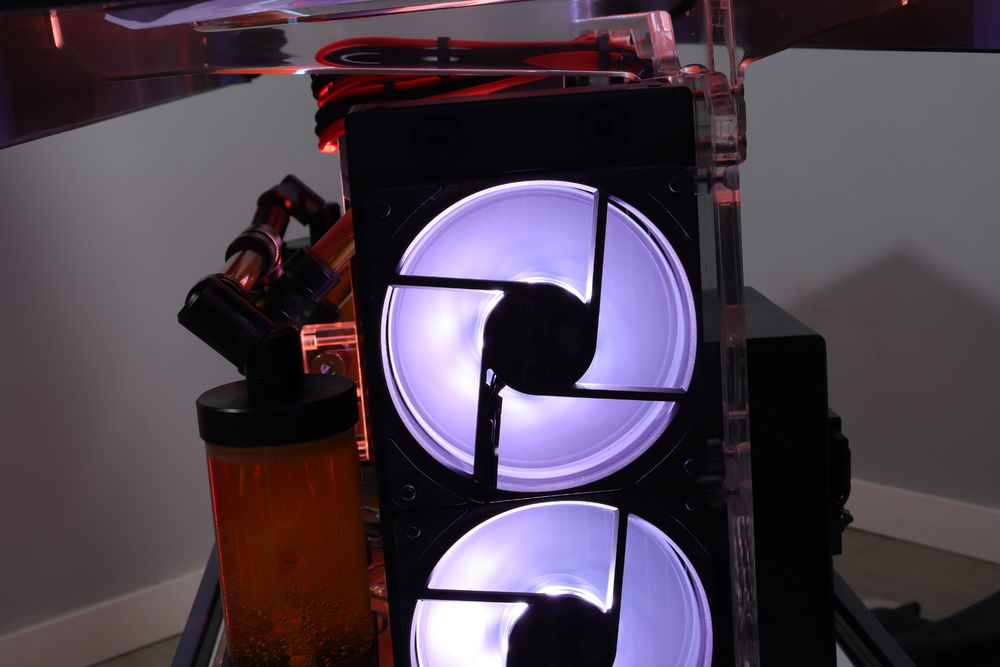
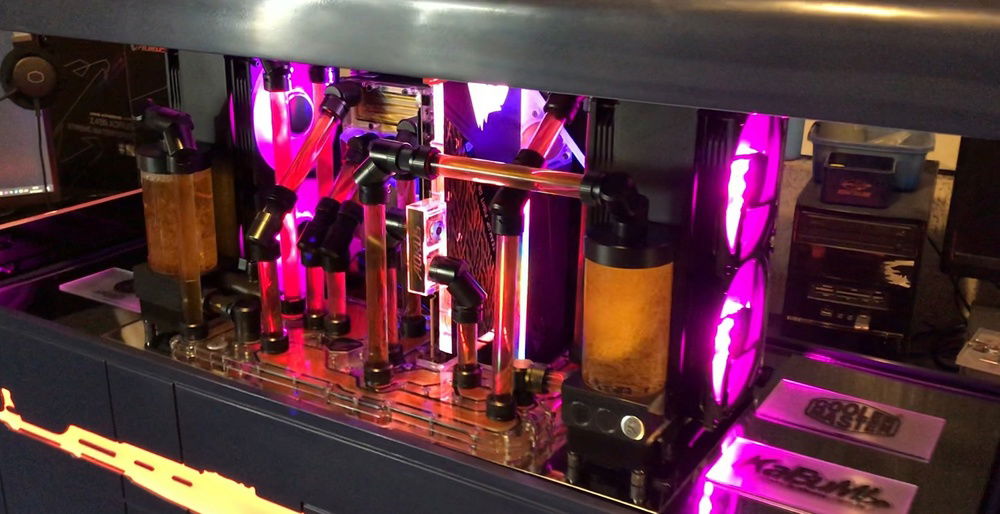
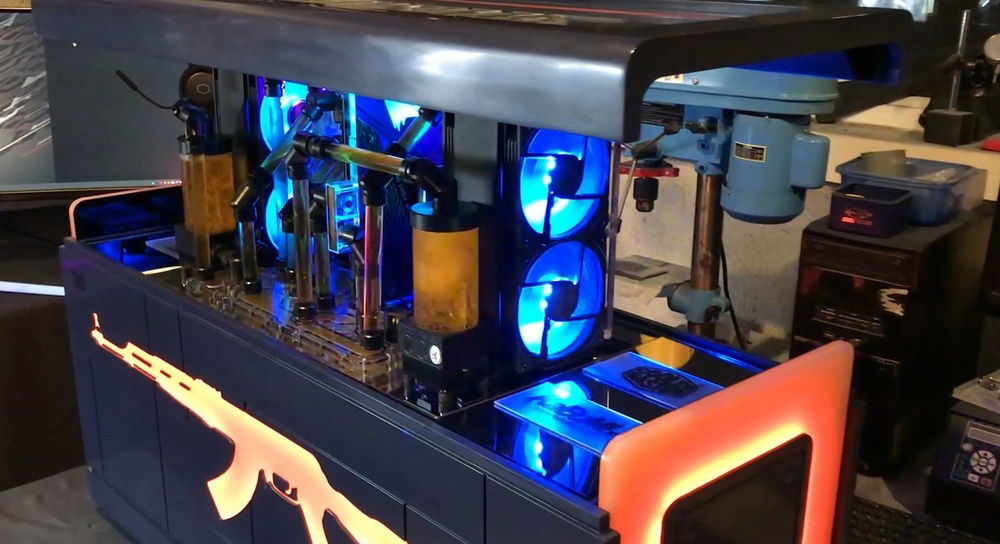
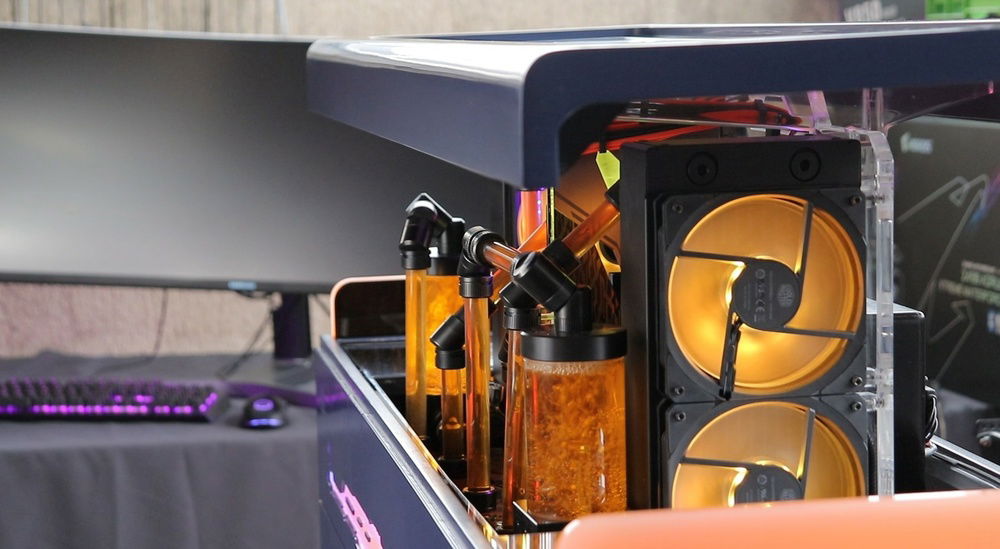
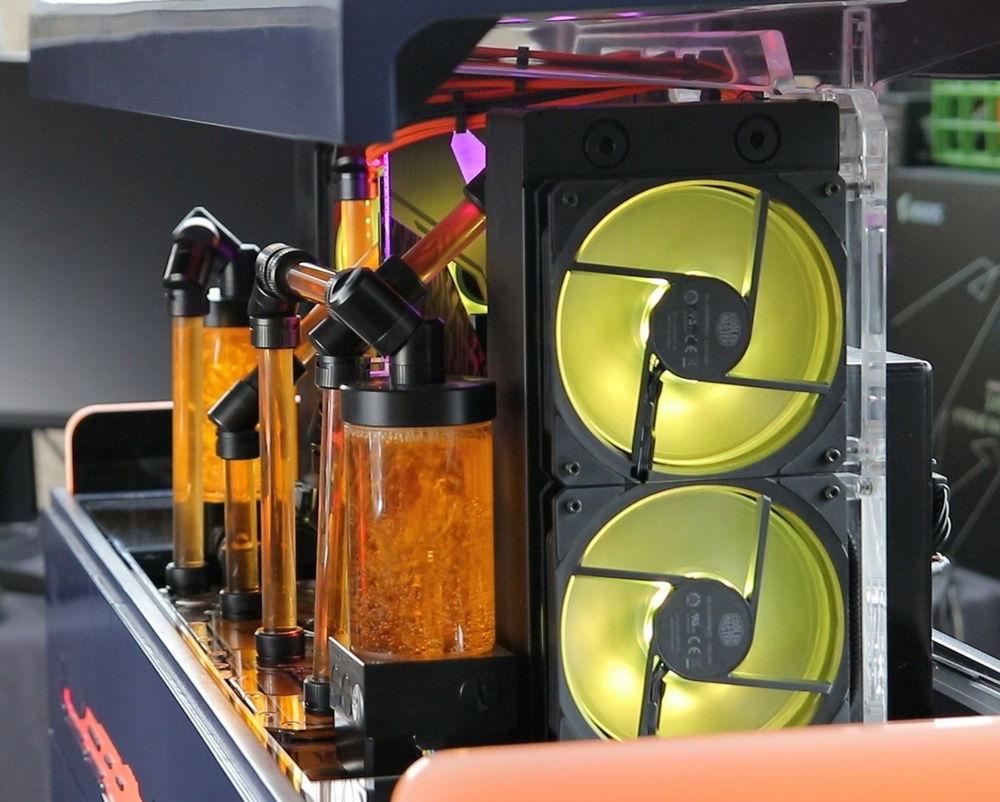
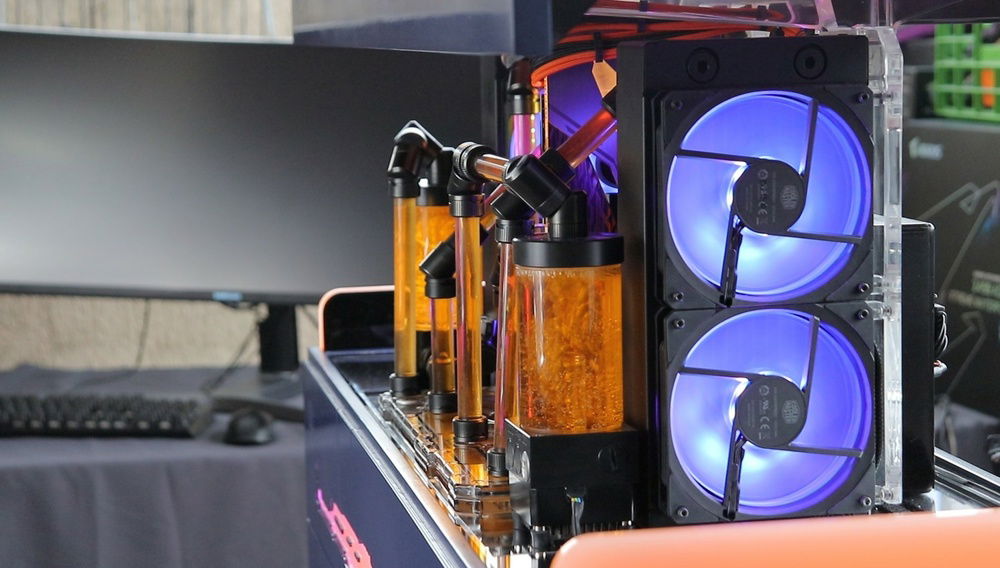
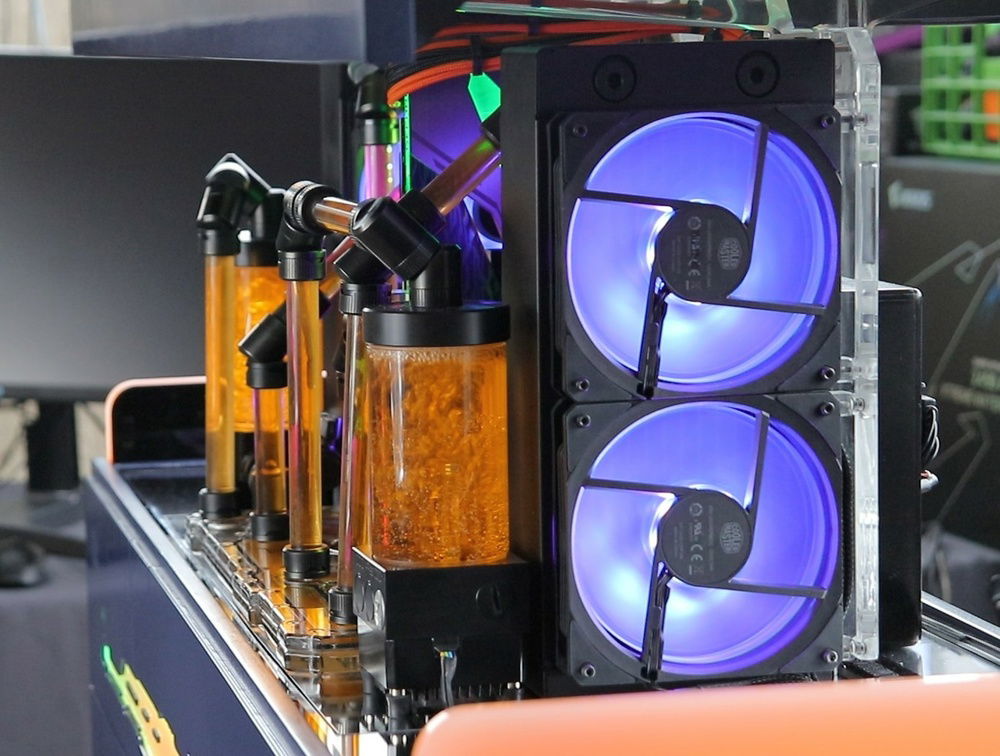
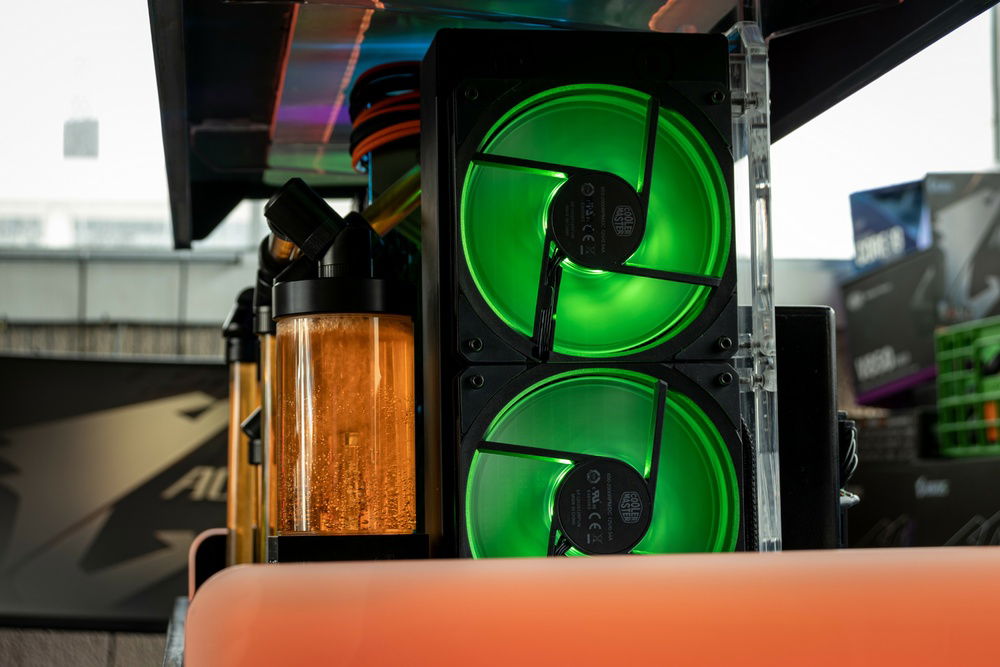
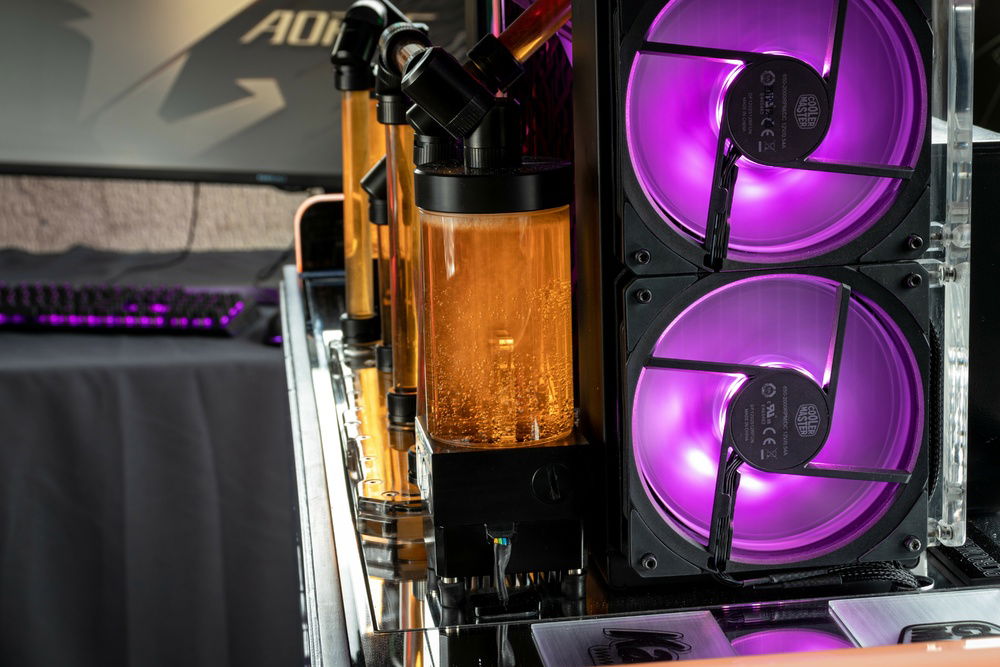
Fans: Cooler Master Master fan SF120r ARGB
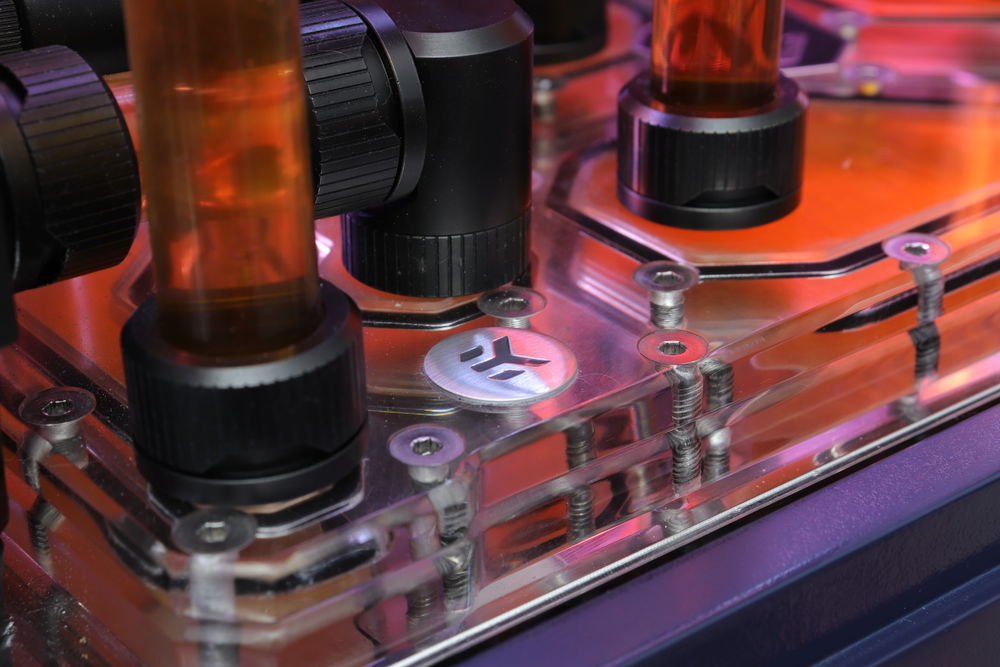
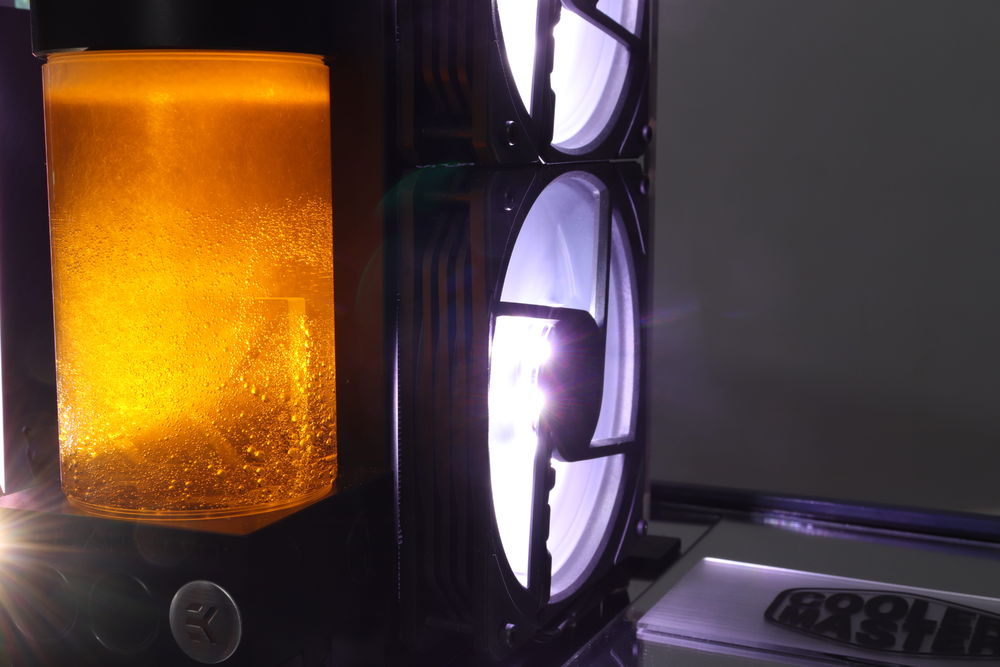
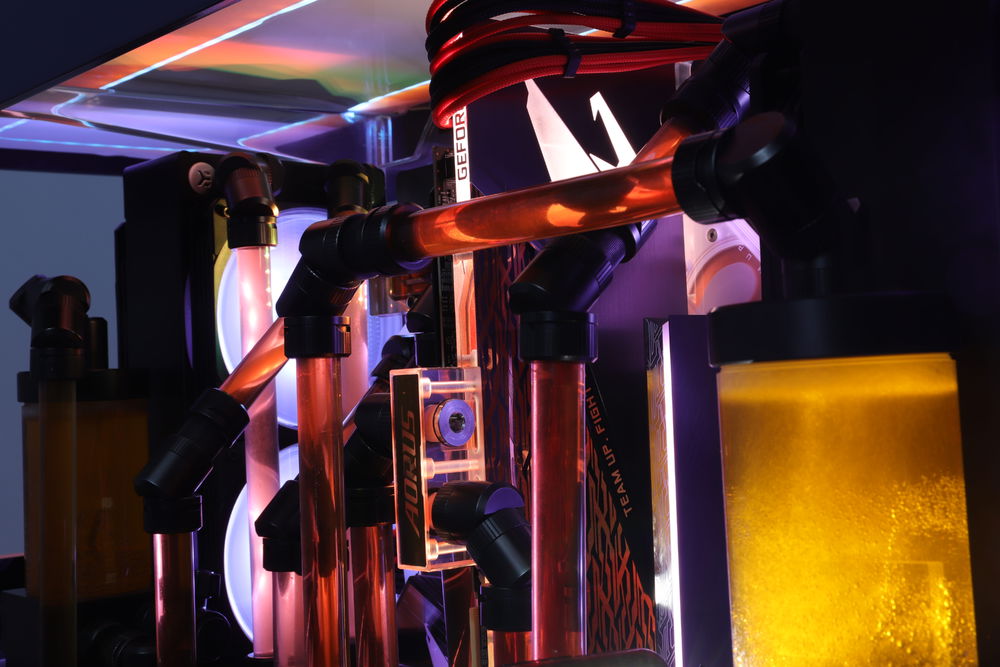
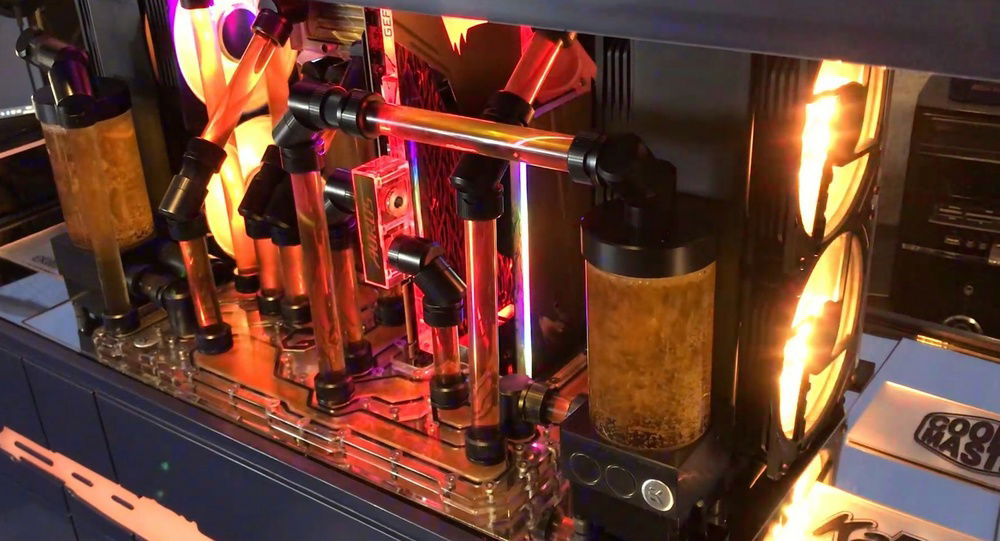
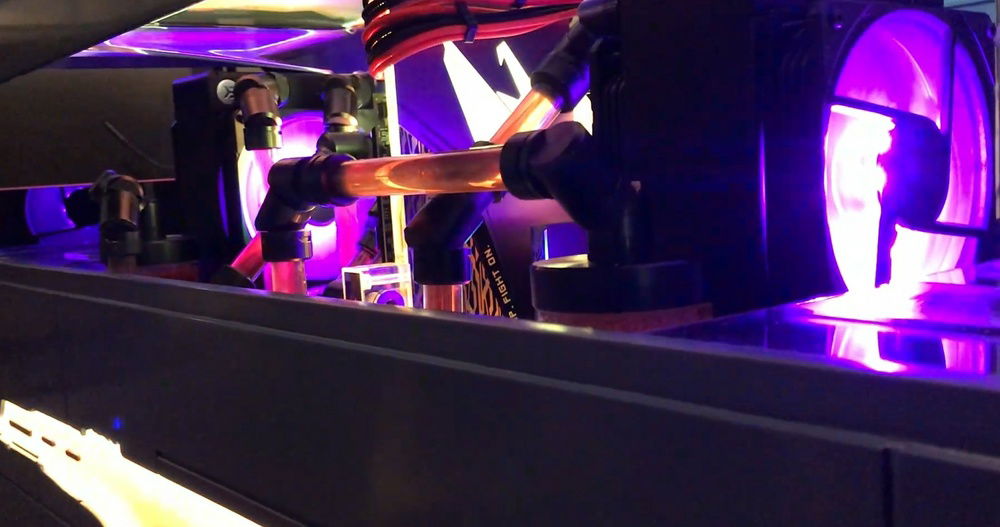
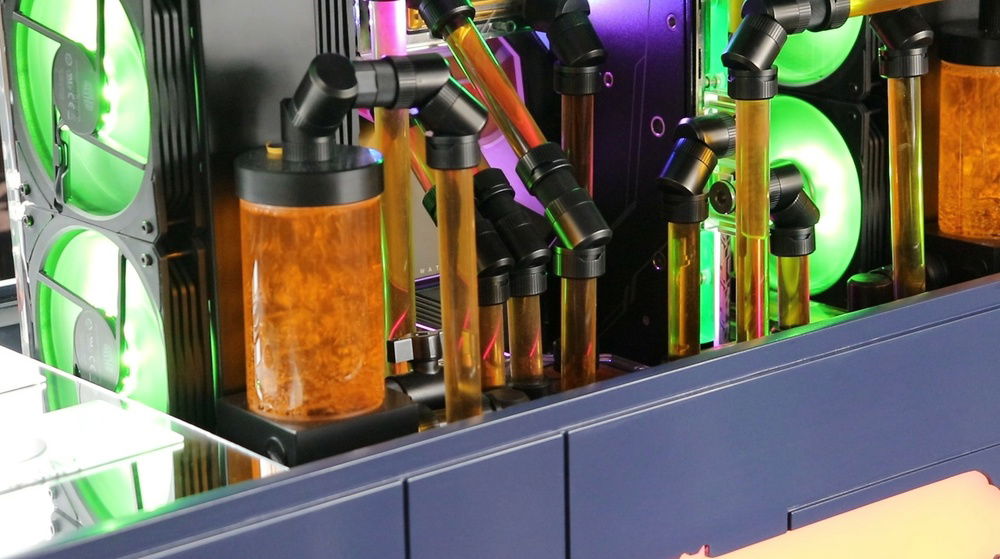
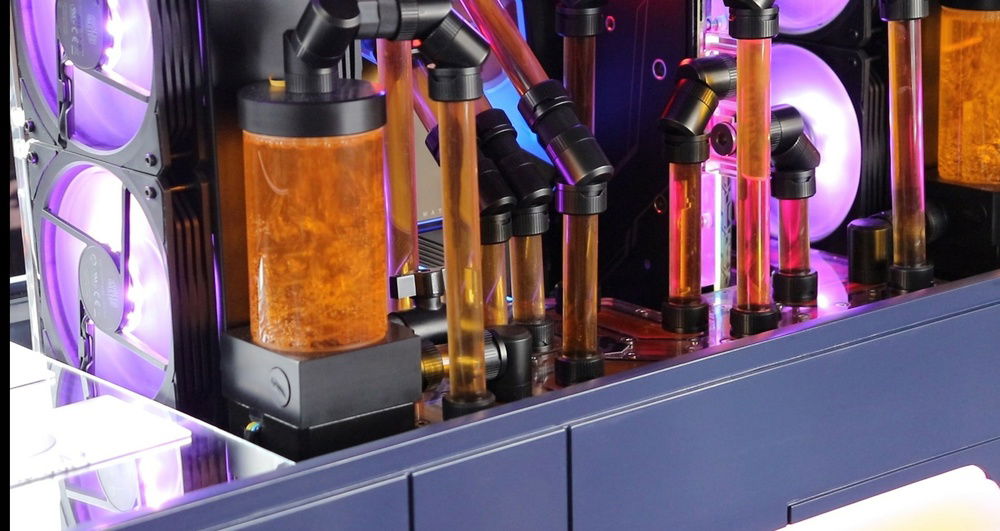
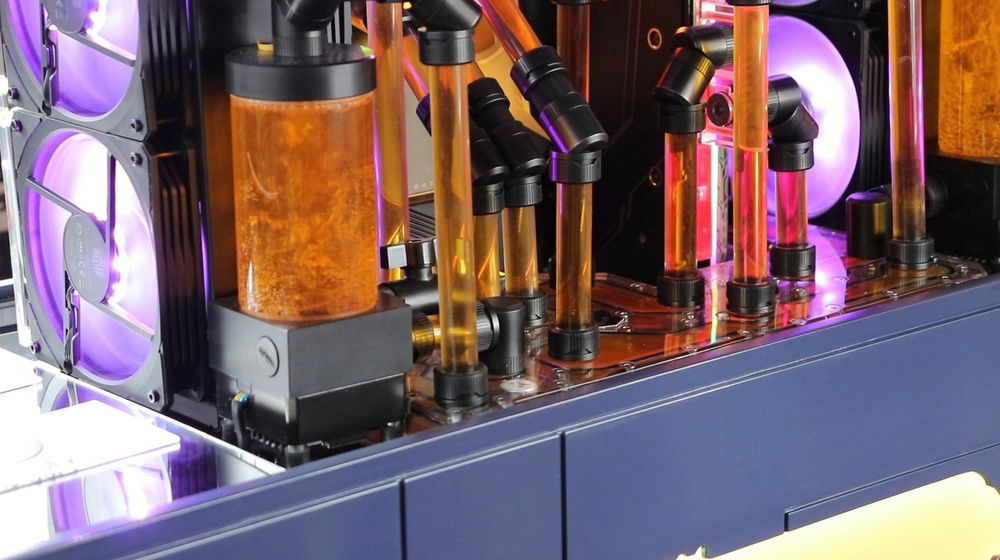
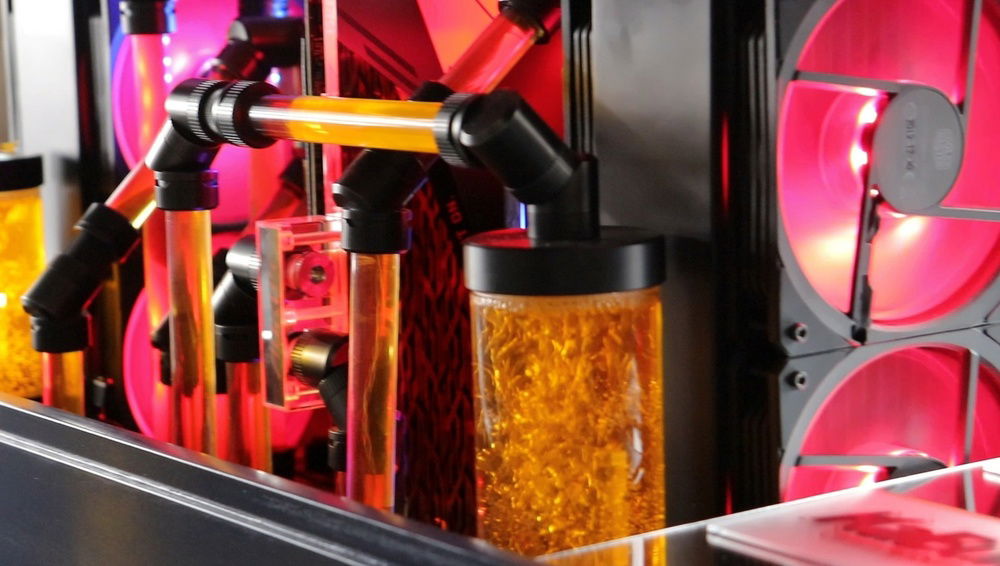
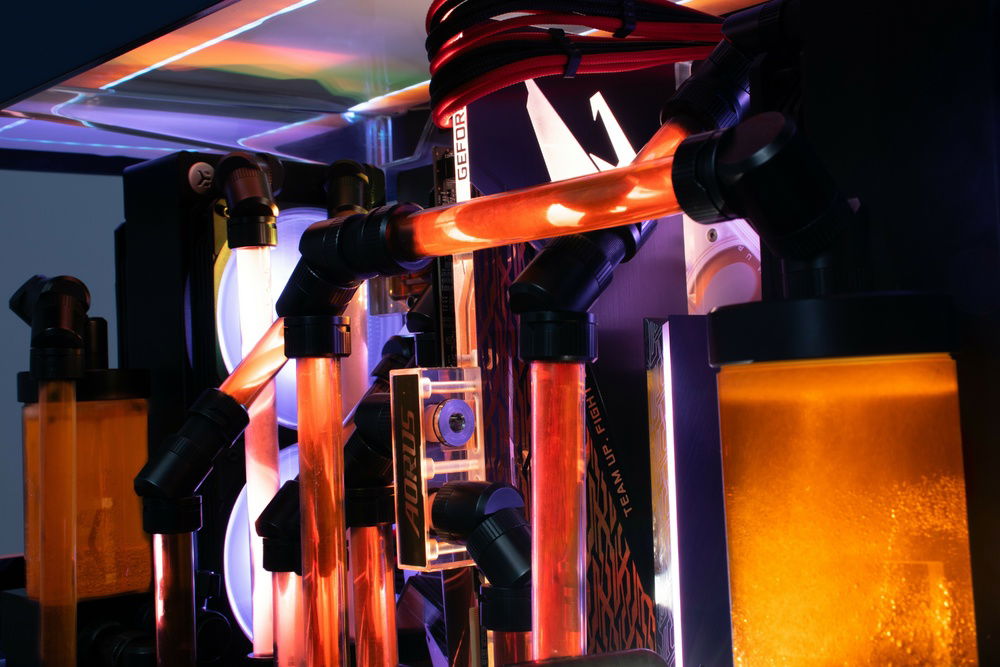
Radiator: 2x EK - Coolstream XE 240
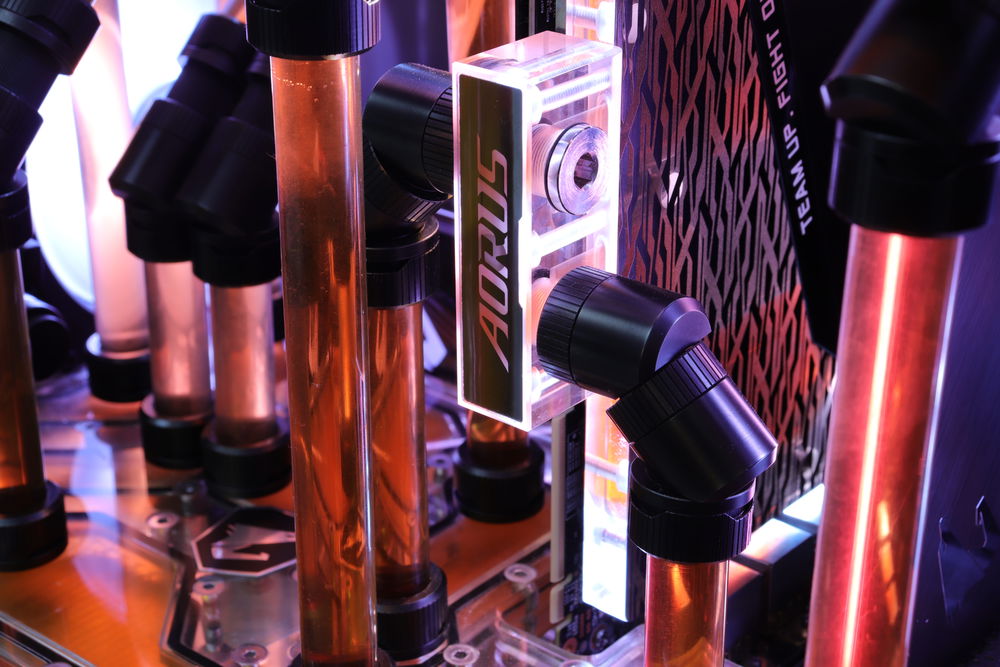
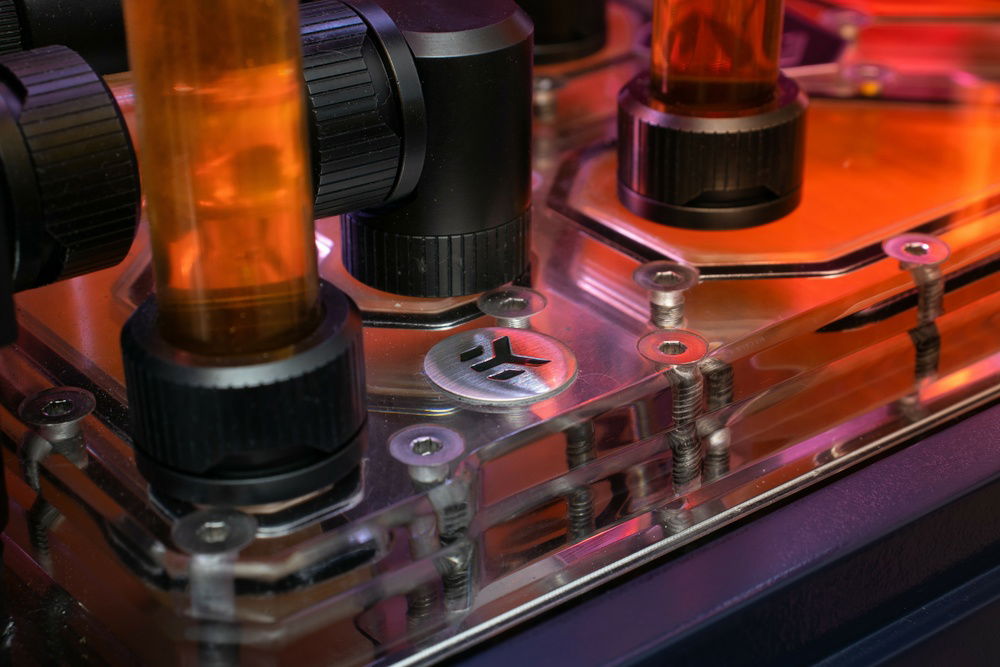
Fittings: EK-Quantum Torque HDC 16 - Black and acessories
Tube: EK-HD PETG Tube 12 / 16mm 500mm
Pump + Resevoir: EK-Classic Pump Reservoir 160
Well, while the pieces arrived, I was already assembling the main structure.
To assemble the structure of the main box we use 10mm acrylic and simply assemble it like this.
side view:It was glued with acrylic glue. The finishing was done with acrylic cutouts for example.
The finishing would then be with polyester plastic putty and sandpaper, it would be a challenge because I had never worked with anything at that level.
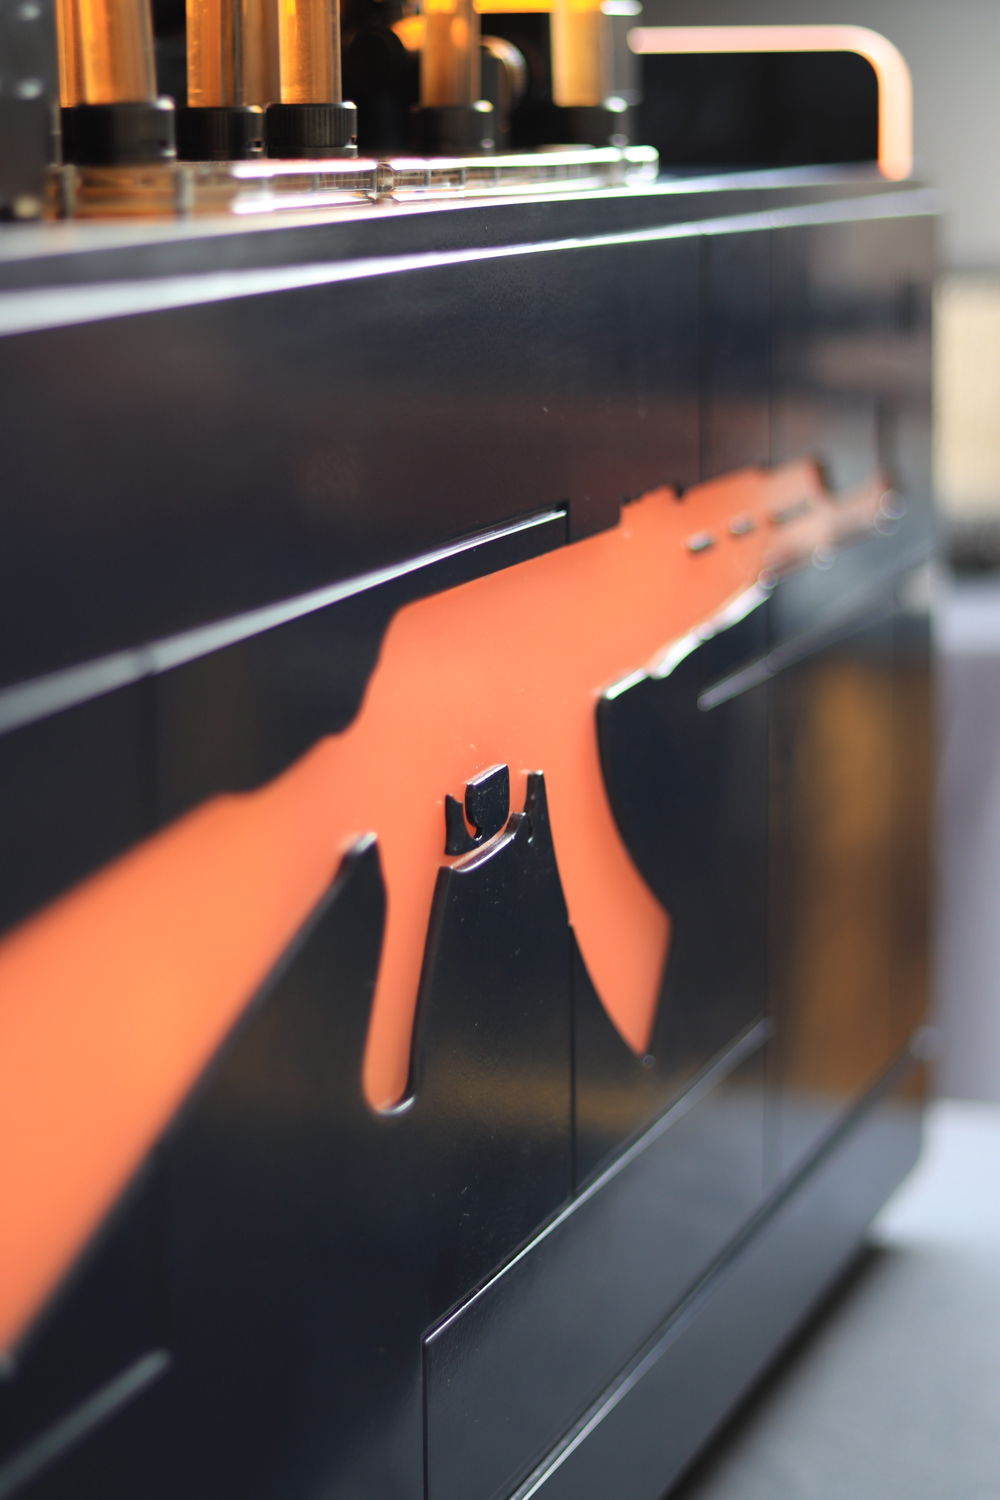
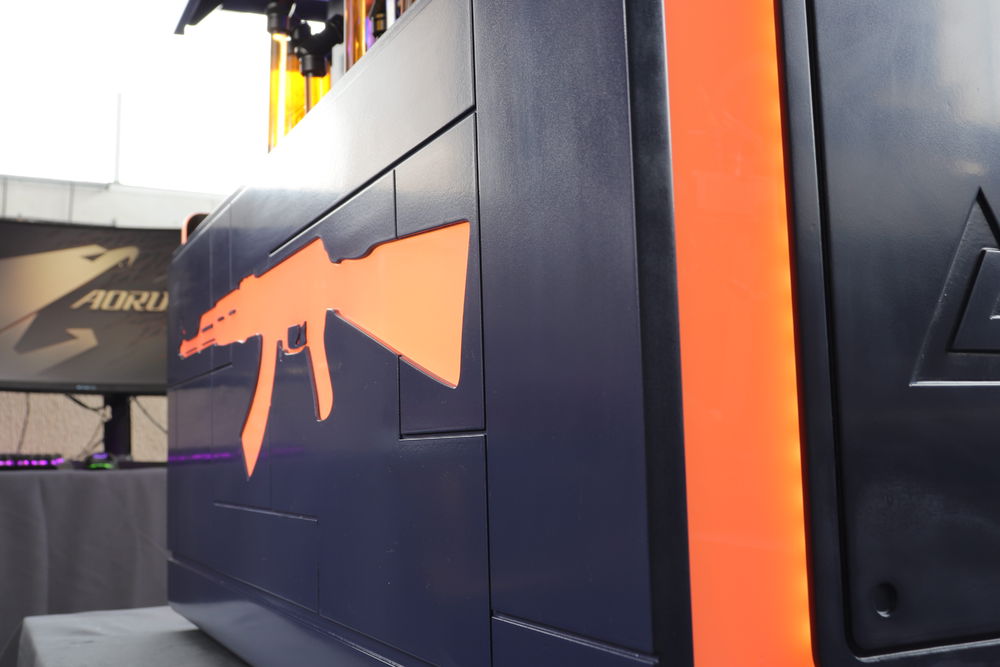
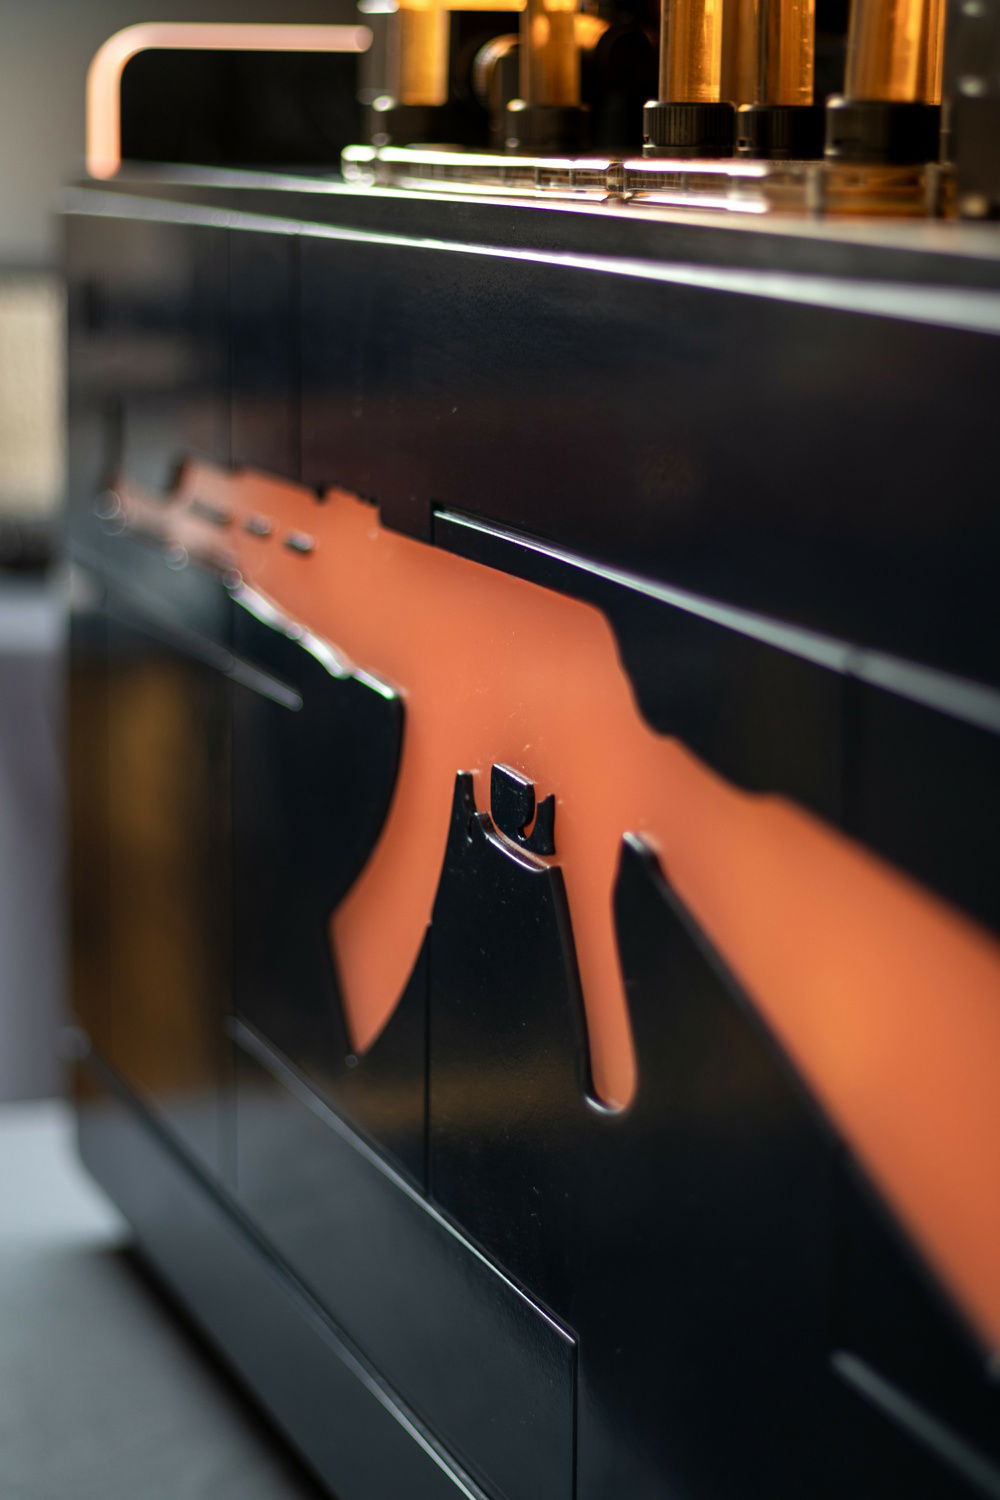
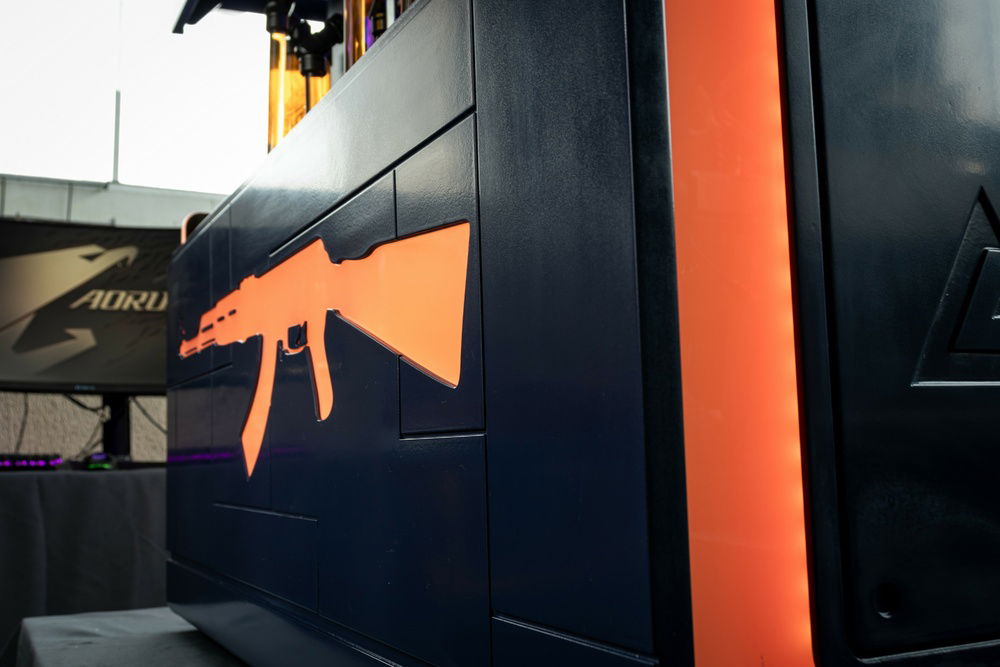
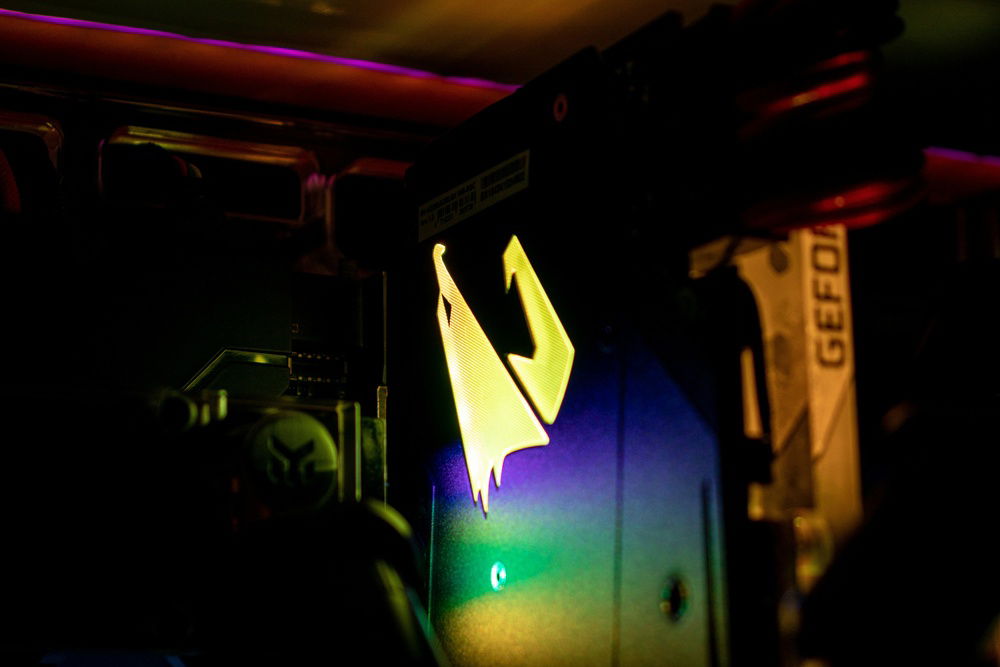
As can be seen in the previous images, 10mm acrylic was used and the weapon location is rounded. Explaining to you, this part will be placed the led, more layers of acrylic will be placed both on the inner and outer part, on the inner side a 3mm layer would be placed in its entire length to make the 10mm sandblasted acrylic square and fit that is the shape of the weapon, it would be placed 2mm out of the black 10mm acrylic, this would be the measure for fitting another 2mm acrylic placed on the outside that obeys the outline of the weapon, I followed this way because I wanted to maximize the brightness in the surroundings, I accept suggestions. Finally, another 2mm layer was placed, these are the ones that would form the grooves around the weapon.
As you may have already noticed, the shape in which it was made left the tips of the box at a 90 degree angle and the project should be curved. For this we use a curved router, I believe with a radius of 25mm.Then more sanding and plastic mass kkkk.
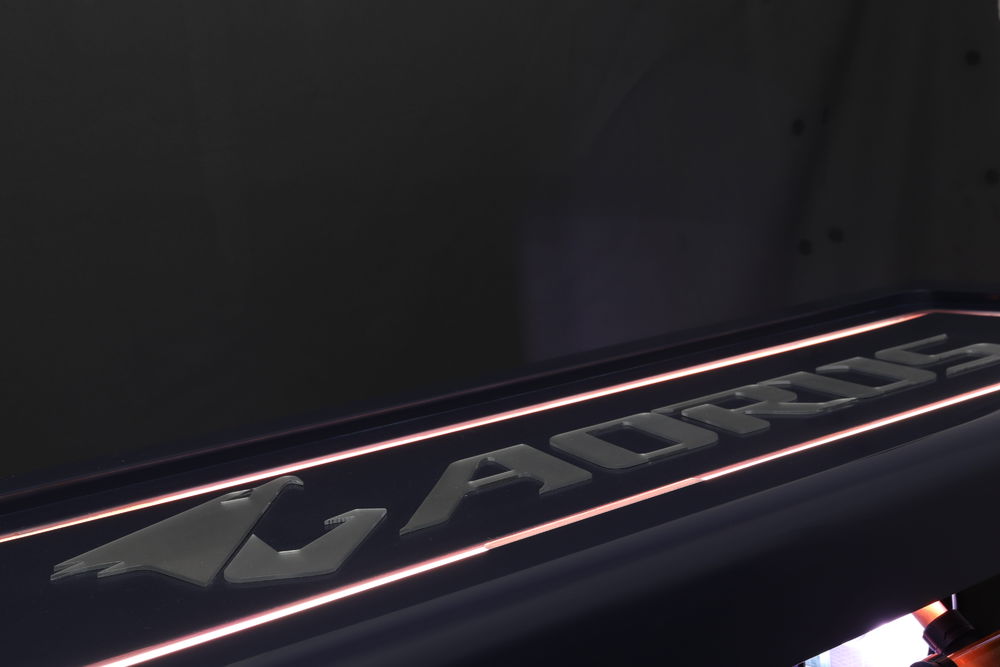
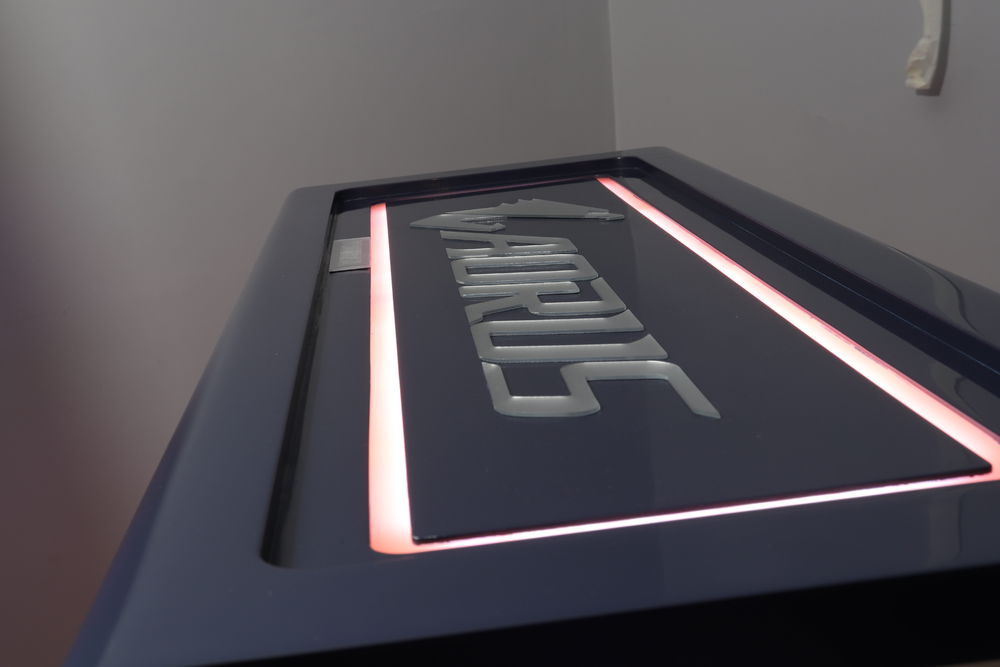
For the central area, led edge from the top and sides were used 10mm sandblasted acrylic. On the side we did as follows, we made a perfect lateral fit leaving the corners rounded for a better fit when the cover went down. In the middle for placing the LEDs, we leave a 4mm cut-out for the LED strip to pass outside. The acrylic with design in the middle was exceeded by about 10 mm so that the led dots do not appear. In the internal part, an acrylic with the same size as the blasted acrylic was placed and it is the one that hits the square and also holds the structure. And finally the elaboration of the cover that was done at the same time but that has not yet been shown.
Looking at a main structure gave me joy, but at the same time fear, because dale sand kkkk. Well, now it's time to do the interior. To be honest, have a little idea of how to make it go up, but so far I hadn't created anything specific or personalized in the box. Crazy right ?! To be honest, I paid dearly for it. My friend is an amazing guy, and I trust his opinion a lot, but to be honest the last one was not the best, I was trying to save money and he suggested making acrylic gears on the bottom where they would rotate 4 axes that would rotate the PC up, I asked to him about stability and noise and he said that it would not be a problem, anyway, here is the place to be honest and show the mistakes and successes. I accepted the idea and regretted it, it was very noisy and without stability, here are the photos and videos.
Okay I did my part, I trusted, but my friend project of elevation was not cool. So change plans, let's go back to the original plan.
We will spend more, but it will certainly get better.
I bought a spindle system.
4x set of linear guides of 8mm in diameter
4X spindles 8mm in diameter and pitch 2mm.
1x 23kg stepper motor
The lifting mechanics part looked like this:
The PC structure would be in the middle of the box, for each end there would be a guide and a spindle.
It would rise as follows:
On the engine, I put a bicycle disk as gear (yes you heard, kkk, as I wanted to save money, I replaced gear systems and pulleys with bicycle chain and rear gearshift pedestrians, I don't know if I got the translation right), following , the motor moved the first spindle that, through pedestrians and chains, was transferring one by one to
The other spindles, as they were all the same size, faithfully obeyed the number of turns. Show right kkkk.
It is worth mentioning that I tried to put a spindle on each side at the beginning but it didn't work, the excessive effort brought instability. So I put two more there.
In the electrical part it was as follows:
1x Arduino uno
1x 24v source
1x digital driver
1x smart socket
1x conversion relay from 120v to 5v
From that moment on I designed the elevation structure.
The electrical system for going up and down was quite simple:
Let's see the following:
I enabled the smart plug in the ewelink app that communicates with the Amazon Alexa app, I have an echo dot to accept the voice command.
Then when giving the command the voice command the smart socket connects to the relay 120v where it converts to 5v giving a signal to the Arduino uno, which was programmed that when it receives the signal it will communicate the digital driver that will make the reading and transfer to the stepper motor how much it should turn. For safety I installed buttons that must be tightened at the ends in order that they are in the correct position to perform the movement, that is, if none of these buttons are pressed they will not start the movement. I also put limit switches to not exceed the limits and damage the parts. Simple right. When the plug turns on and the button underneath is pressed, it commands to go up. When the outlet turns off and the top button is pressed, the system goes down.
Here is the command:
const int stepPin = 5; // Output to the engine
const int dirPin = 6; // Output to the engine
int smart_plug = 7;
int botao_topo = 8;
int botao_solo = 9;
void setup () {
pinMode (stepPin, OUTPUT);
pinMode (dirPin, OUTPUT);
Serial.begin (9600);
pinMode (7, INPUT_PULLUP);
pinMode (8, INPUT_PULLUP);
pinMode (9, INPUT_PULLUP);
}
void loop () {
smart_plug = digitalRead (7);
button_topo = digitalRead (8);
botao_solo = digitalRead (9);
if (smart_plug == LOW) {
Serial.println ("Triggered Smart Plug");
Serial.println (smart_plug);
}
if (smart_plug == HIGH) {
Serial.println ("Smart Socket off");
Serial.println (smart_plug);
}
if (botao_solo == LOW) {
Serial.println ("Botao solo");
Serial.println (botao_solo);
}
if (button_topo == LOW) {
Serial.println ("top button");
Serial.println (botao_topo);
}
// UP
if (smart_plug == LOW && botao_solo == LOW) {
digitalWrite (dirPin, HIGH);
for (int x = 0; x
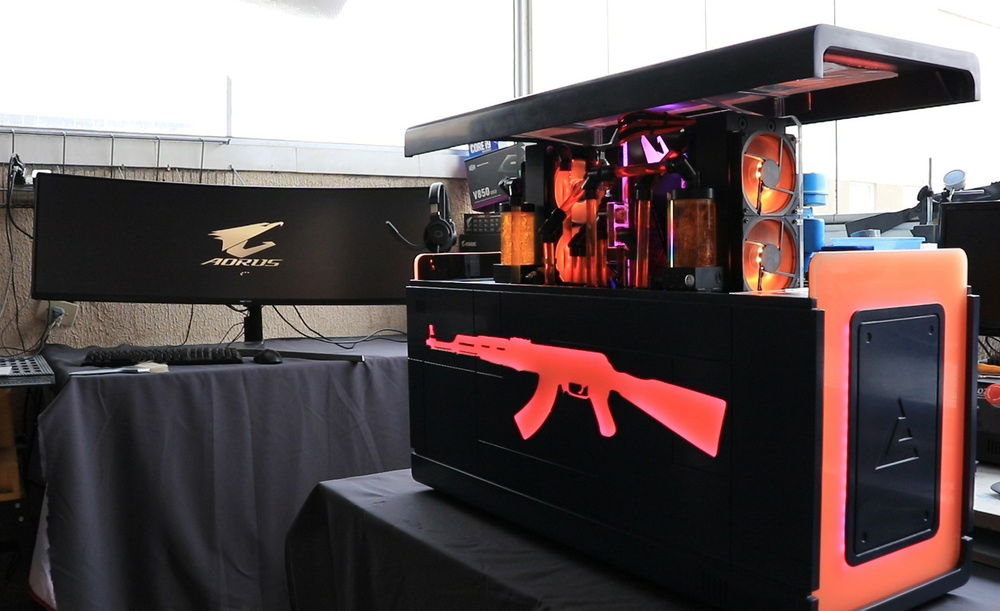
Color(s): Blue Orange
RGB Lighting? Yes
Theme: Video Game
Cooling: Custom Liquid Cooling
Size: ATX
Type: General Build
Hardware
CPU
$ 465.00
Motherboard
Memory
$ 411.92
Graphics
Storage
$ 149.99
PSU
$ 391.90
Case
Case Fan
$ 239.92
Cooling
$ 203.80
Cooling
$ 629.98
Approved by: