E257-5000
This is my second PC build, completed in January 2024 - a few months shy of seven years after the first was built. It is used for 1440p ultrawide gaming, digital drawing and general work.
While for my first build I followed a PC Gamer part suggestion, this time I did my own research on everything and took conscious decisions on part manufacturers. That led me to building it as an AMD system, as AMD is known to support Free and Open Source Software projects and platforms, and has good compatibility with Linux. That also meant I would avoid monopolistic giants like Intel and Nvidia.
Modding
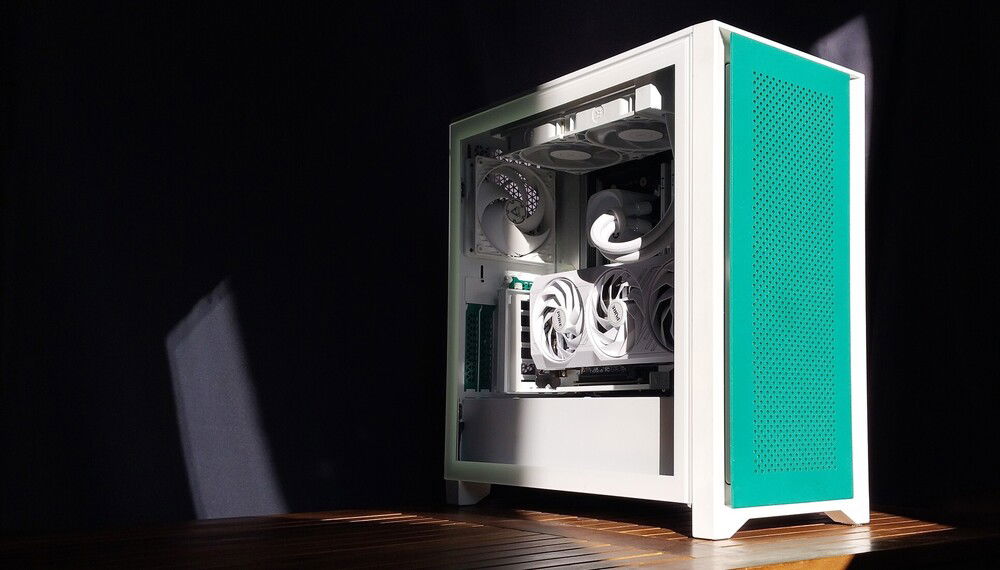
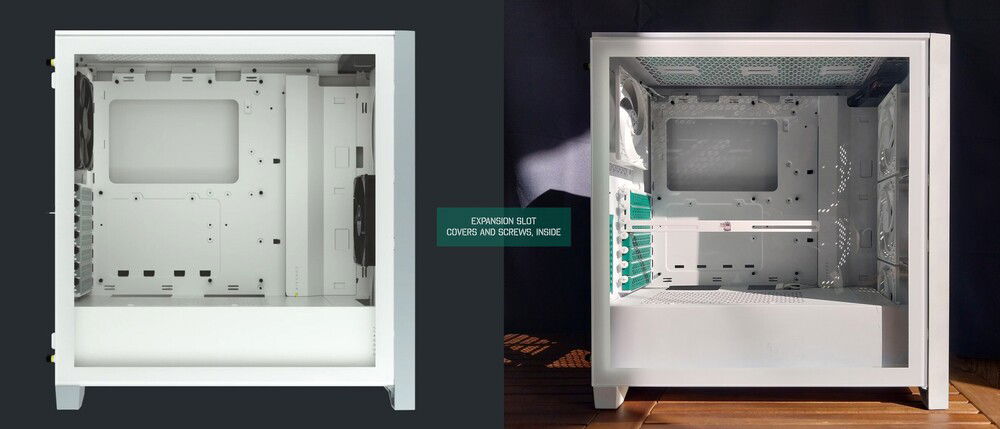
The other major difference from the first build was that this time, as an enthusiast of modding, customising and repairing things, I decided to add my own touch to it. That meant that I was picking the case for this build with moddability in mind. I considered Fractal Design North and Lian Li Lancool 216 along with this case, but I could see there were more parts with the 4000D Airflow that I could individually remove and repaint - front bezel, front panel, rear legs, etc. - plus this case was selling at a better price and had some custom replacement parts available from third-party makers, so in the end I settled on it.
Once the case was with me, I:
I later noticed the front panel was bending inwards by a couple of millimetres in the central part whenever attached to the case (visible in the stock v modded case comparison photo). So I measured the length between the dust filter and the panel, cut out two rectangular, 1.8cm-long pieces from a packaging foam and glued them to those areas to make sure the middle part of the panel would be held straight.
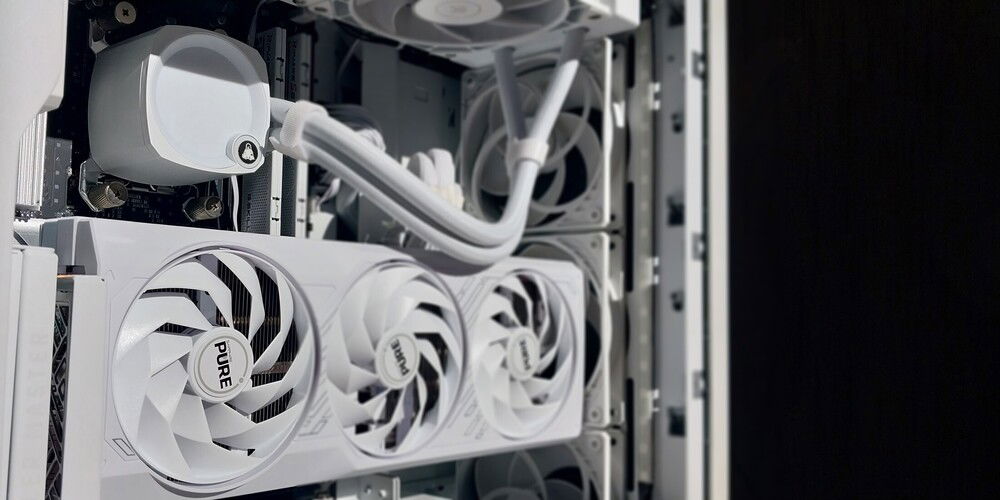
As a final little cherry on top, I placed a Linux logo sticker on top of the EK logo on the AiO pump.
Assembly
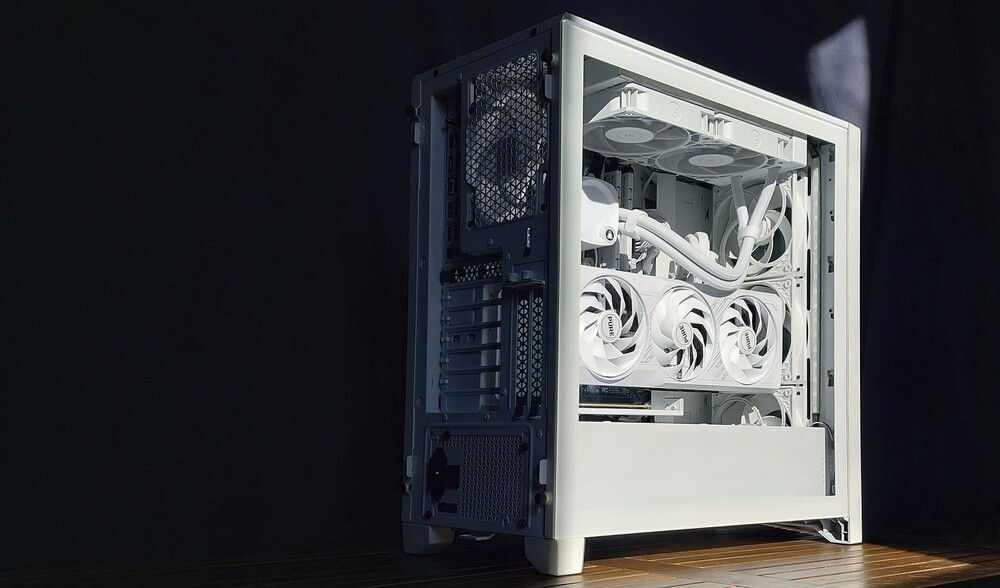
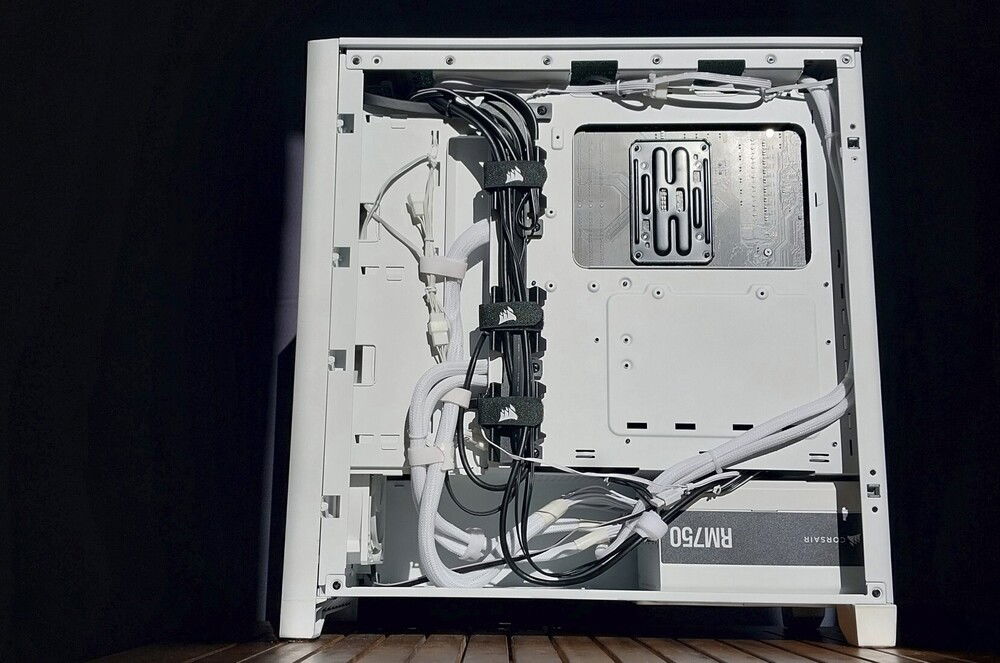
For assembly, the only issue I had was with the incredibly stiff PSU cables. It was very difficult to get the ends in the shape required to connect into CPU, motherboard and GPU headers. For the latter, the same problem also made it difficult to tuck the pigtail ends of the two 8-pin PCIe connectors neatly behind the main cables so that they would not be visible. In the end, I somehow made it work using fastening cable ties. Cable management for the back was easier despite the stiffness of the cables - the good number of tie-down points this case comes with really helped with routing both the thick PSU cables and thinner ones for other parts.
GPU installation
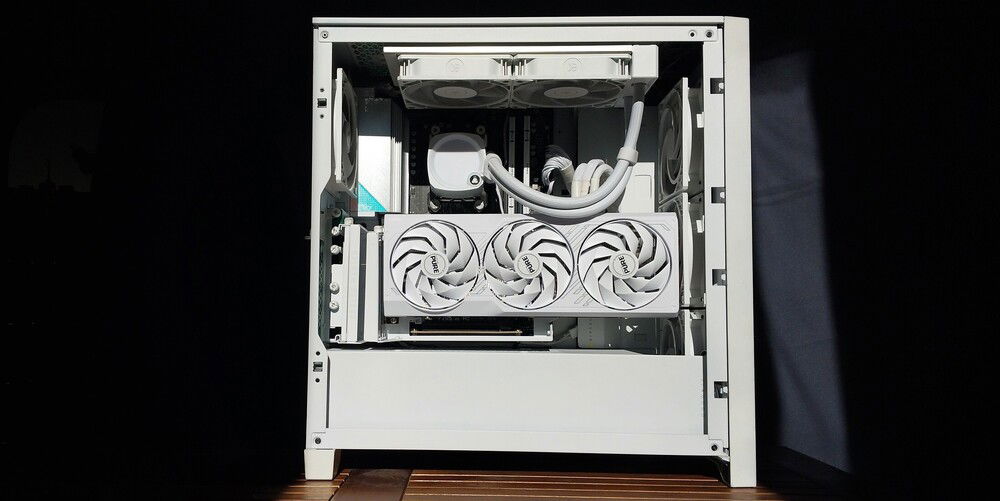
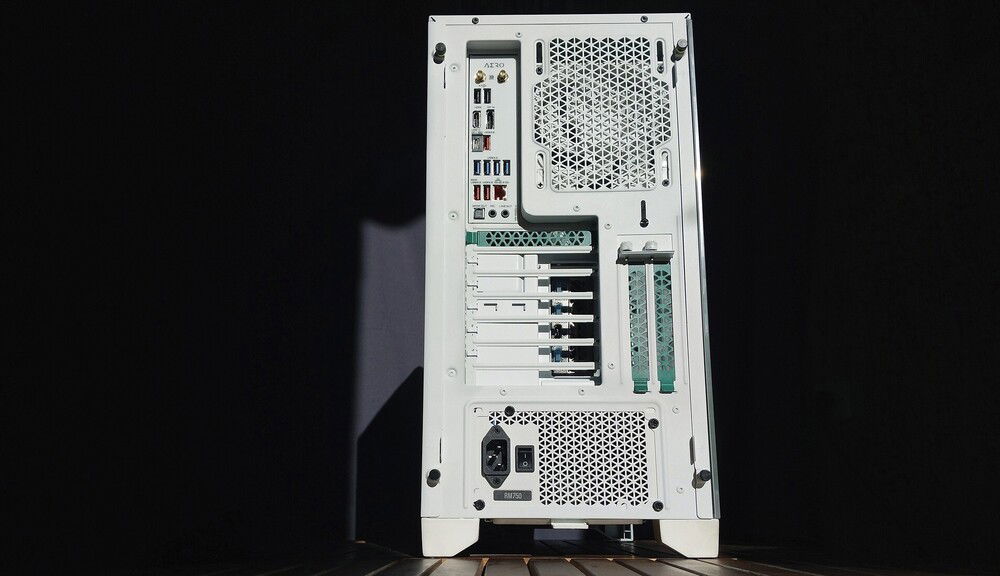
My initial plan was to install the GPU horizontally and with an anti-sag brace, but I am not a fan of the look of the "front" side of this GPU - the heatsink and its cutout look very basic, especially compared to the awesome design of the reference/black Sapphire version. I thought about getting the latter instead and repainting it white, but ultimately decided against taking the risk of damaging something in disassembly, and simply mounted the white version vertically. The fact that this case has non-removable frames between rear expansion slot covers meant that I needed to slide the GPU a few centimetres toward the front of the case, so that the monitor connector would be threaded into an expansion slot opening. The end of the connector head is still squeezed a bit by the nearest frame, so I plan to use a rotary tool to cut a circular portion out of that edge of the frame to allow comfortable threading of the cable.
I ended up still having to partly disassemble the GPU to remove the red LED panel in the front, so that it would not clash with the green of the theme I was going with. The disassembly and removal was simple, and the details of how to remove the panel are here.
RAM
For the RAM, I initially planned to get the black version of the S5 and repaint it white, as I could not find a white set with EXPO support. But I was advised against disassembling the set for modding due to complications, and was told that XMP overclocking would work fine with an AMD system, so swapped it for a white version with XMP support.
Undervolting, overclocking and optimisation
For the CPU, I enabled Precision Boost Overdrive for undervolting and tested stability for curve settings as low as -35. I also set Loadline Scaling to Extreme, and Platform Thermal Throttle Limit at 85C.
For the RAM, I enabled the preset 6000-speed overclocking, Low Latency Support and High Bandwidth Support, but decided not to tinker with manual subtimings.
Fan curves were set to run at 20 percent up to 40C degrees, and then progressively spin up to 100 percent at 70C for all fans.
These optimisations have led to CPU temperatures of 78C under load in Cinebench tests, 60C while gaming and 31C idle, and GPU temperatures of 63C under load in Cinebench and while gaming, and 28C idle. The CPU draws between 0.68-1.1 Volts and runs up to a clock rate of 5.04GHz.
Misc
The one part I moved over from my previous build to this system was the PCIe 3.0 NVMe.
For lighting, not being a fan of RGB, I decided to go for non-RGB case fans and RAM, and illuminate the case using static, low white lighting from the AiO and two LED strips instead.
I named this build after a Japanese passenger train series that features a livery with a similar colour combination of ~70% white, 20% green and 10% black.
Note
The listing of the GPU is for a wrong card, due to the Sapphire Pure RX 7800 XT not having been available in selection when I was submitting this build. The RAM modules and PSU are also white models, not black.
While for my first build I followed a PC Gamer part suggestion, this time I did my own research on everything and took conscious decisions on part manufacturers. That led me to building it as an AMD system, as AMD is known to support Free and Open Source Software projects and platforms, and has good compatibility with Linux. That also meant I would avoid monopolistic giants like Intel and Nvidia.
Modding
The other major difference from the first build was that this time, as an enthusiast of modding, customising and repairing things, I decided to add my own touch to it. That meant that I was picking the case for this build with moddability in mind. I considered Fractal Design North and Lian Li Lancool 216 along with this case, but I could see there were more parts with the 4000D Airflow that I could individually remove and repaint - front bezel, front panel, rear legs, etc. - plus this case was selling at a better price and had some custom replacement parts available from third-party makers, so in the end I settled on it.
Once the case was with me, I:
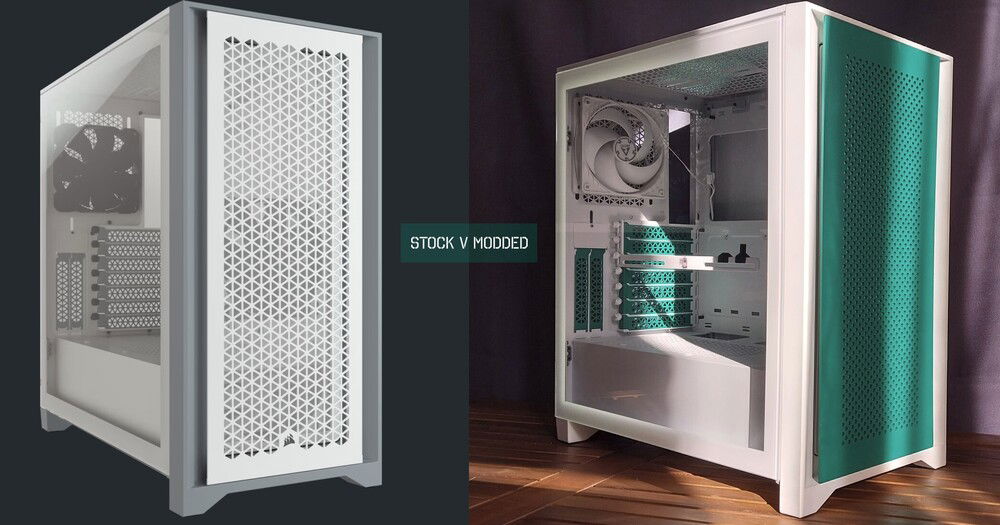
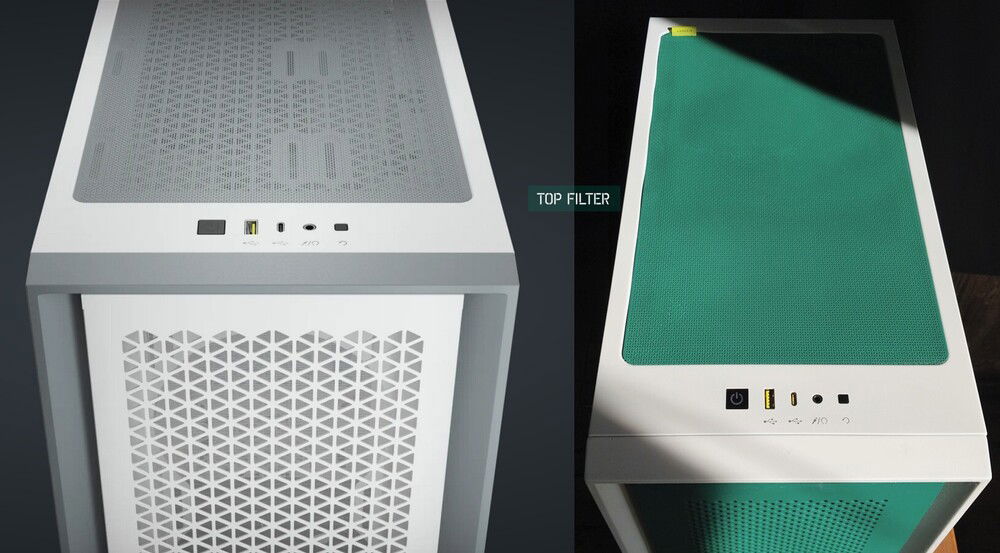
- Replaced the front panel with a different pattern plexiglass piece from ColdZero and repainted it from black to green
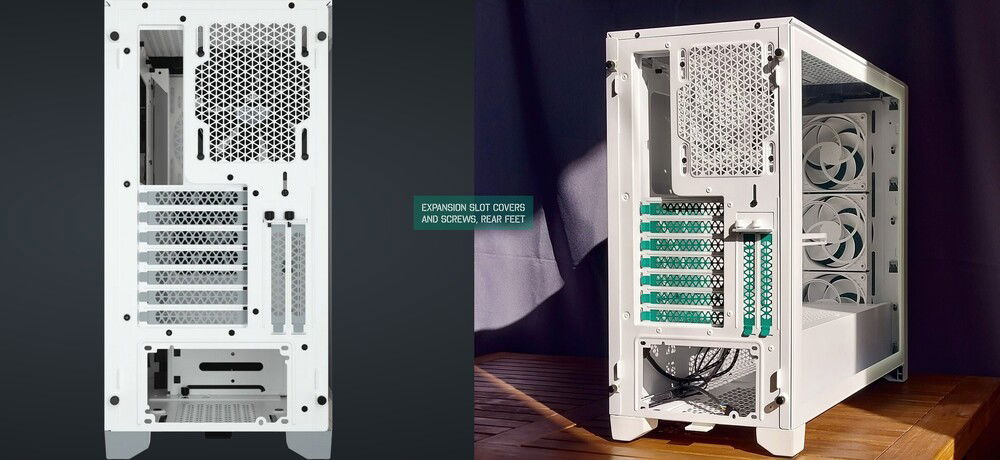
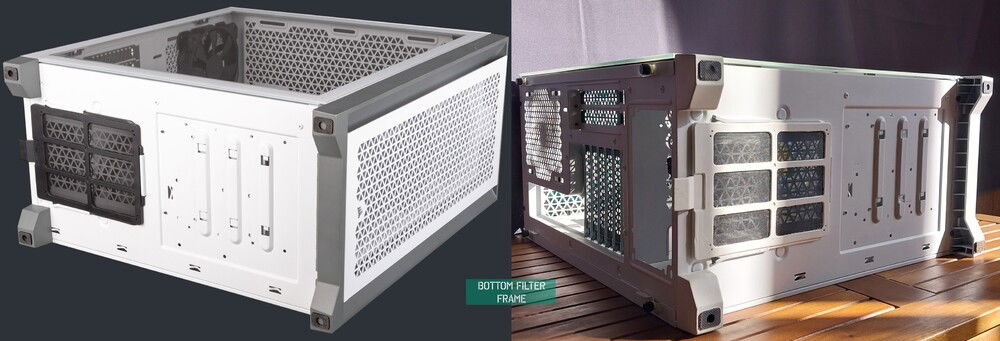
- Repainted the front bezel and rear legs from grey to white
- Repainted the top filter from grey to green
- Repainted the frame of the bottom filter from black to white
- Repainted rear expansion slot covers from grey to green, and their bolts from black to white
I later noticed the front panel was bending inwards by a couple of millimetres in the central part whenever attached to the case (visible in the stock v modded case comparison photo). So I measured the length between the dust filter and the panel, cut out two rectangular, 1.8cm-long pieces from a packaging foam and glued them to those areas to make sure the middle part of the panel would be held straight.
As a final little cherry on top, I placed a Linux logo sticker on top of the EK logo on the AiO pump.
Assembly
For assembly, the only issue I had was with the incredibly stiff PSU cables. It was very difficult to get the ends in the shape required to connect into CPU, motherboard and GPU headers. For the latter, the same problem also made it difficult to tuck the pigtail ends of the two 8-pin PCIe connectors neatly behind the main cables so that they would not be visible. In the end, I somehow made it work using fastening cable ties. Cable management for the back was easier despite the stiffness of the cables - the good number of tie-down points this case comes with really helped with routing both the thick PSU cables and thinner ones for other parts.
GPU installation
My initial plan was to install the GPU horizontally and with an anti-sag brace, but I am not a fan of the look of the "front" side of this GPU - the heatsink and its cutout look very basic, especially compared to the awesome design of the reference/black Sapphire version. I thought about getting the latter instead and repainting it white, but ultimately decided against taking the risk of damaging something in disassembly, and simply mounted the white version vertically. The fact that this case has non-removable frames between rear expansion slot covers meant that I needed to slide the GPU a few centimetres toward the front of the case, so that the monitor connector would be threaded into an expansion slot opening. The end of the connector head is still squeezed a bit by the nearest frame, so I plan to use a rotary tool to cut a circular portion out of that edge of the frame to allow comfortable threading of the cable.
I ended up still having to partly disassemble the GPU to remove the red LED panel in the front, so that it would not clash with the green of the theme I was going with. The disassembly and removal was simple, and the details of how to remove the panel are here.
RAM
For the RAM, I initially planned to get the black version of the S5 and repaint it white, as I could not find a white set with EXPO support. But I was advised against disassembling the set for modding due to complications, and was told that XMP overclocking would work fine with an AMD system, so swapped it for a white version with XMP support.
Undervolting, overclocking and optimisation
For the CPU, I enabled Precision Boost Overdrive for undervolting and tested stability for curve settings as low as -35. I also set Loadline Scaling to Extreme, and Platform Thermal Throttle Limit at 85C.
For the RAM, I enabled the preset 6000-speed overclocking, Low Latency Support and High Bandwidth Support, but decided not to tinker with manual subtimings.
Fan curves were set to run at 20 percent up to 40C degrees, and then progressively spin up to 100 percent at 70C for all fans.
These optimisations have led to CPU temperatures of 78C under load in Cinebench tests, 60C while gaming and 31C idle, and GPU temperatures of 63C under load in Cinebench and while gaming, and 28C idle. The CPU draws between 0.68-1.1 Volts and runs up to a clock rate of 5.04GHz.
Misc
The one part I moved over from my previous build to this system was the PCIe 3.0 NVMe.
For lighting, not being a fan of RGB, I decided to go for non-RGB case fans and RAM, and illuminate the case using static, low white lighting from the AiO and two LED strips instead.
I named this build after a Japanese passenger train series that features a livery with a similar colour combination of ~70% white, 20% green and 10% black.
Note
The listing of the GPU is for a wrong card, due to the Sapphire Pure RX 7800 XT not having been available in selection when I was submitting this build. The RAM modules and PSU are also white models, not black.
Color(s): Green White
RGB Lighting? No
Theme: Vehicle
Cooling: AIO Cooling
Size: ATX
Type: General Build
Hardware
CPU
$ 399.00
Motherboard
$ 229.99
Memory
$ 469.99
Graphics
$ 594.99
Storage
Case
$ 124.43
Case Fan
$ 41.96
Cooling
$ 109.95
Accessories
$ 76.55
Accessories
$ 67.74
Approved by:
