Build Views
2,334
Build Approvals
26
Fistbumps
76
Followers
3
Posts
49
Most Recent Build
Best Build
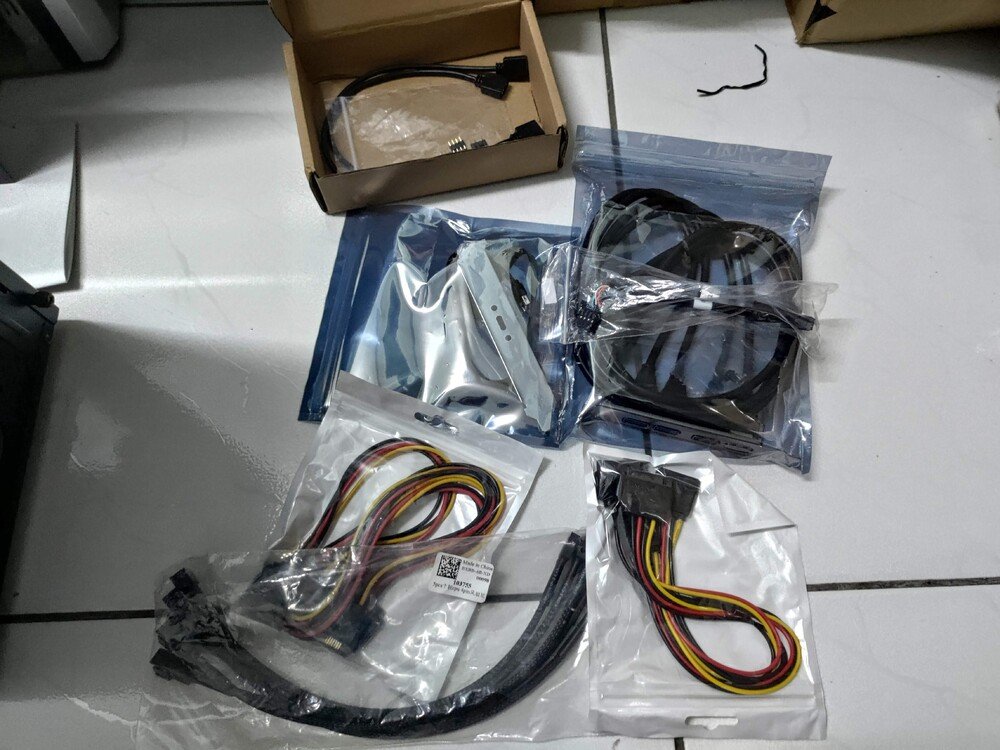
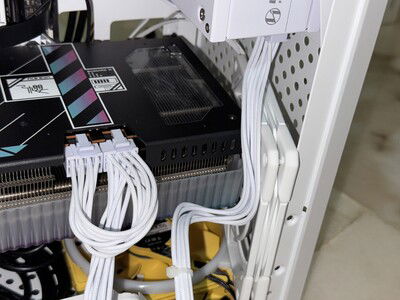
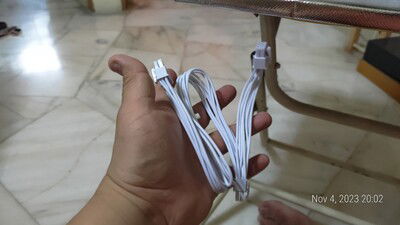
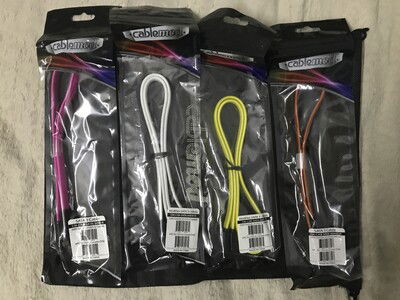
Several cables meant for the built
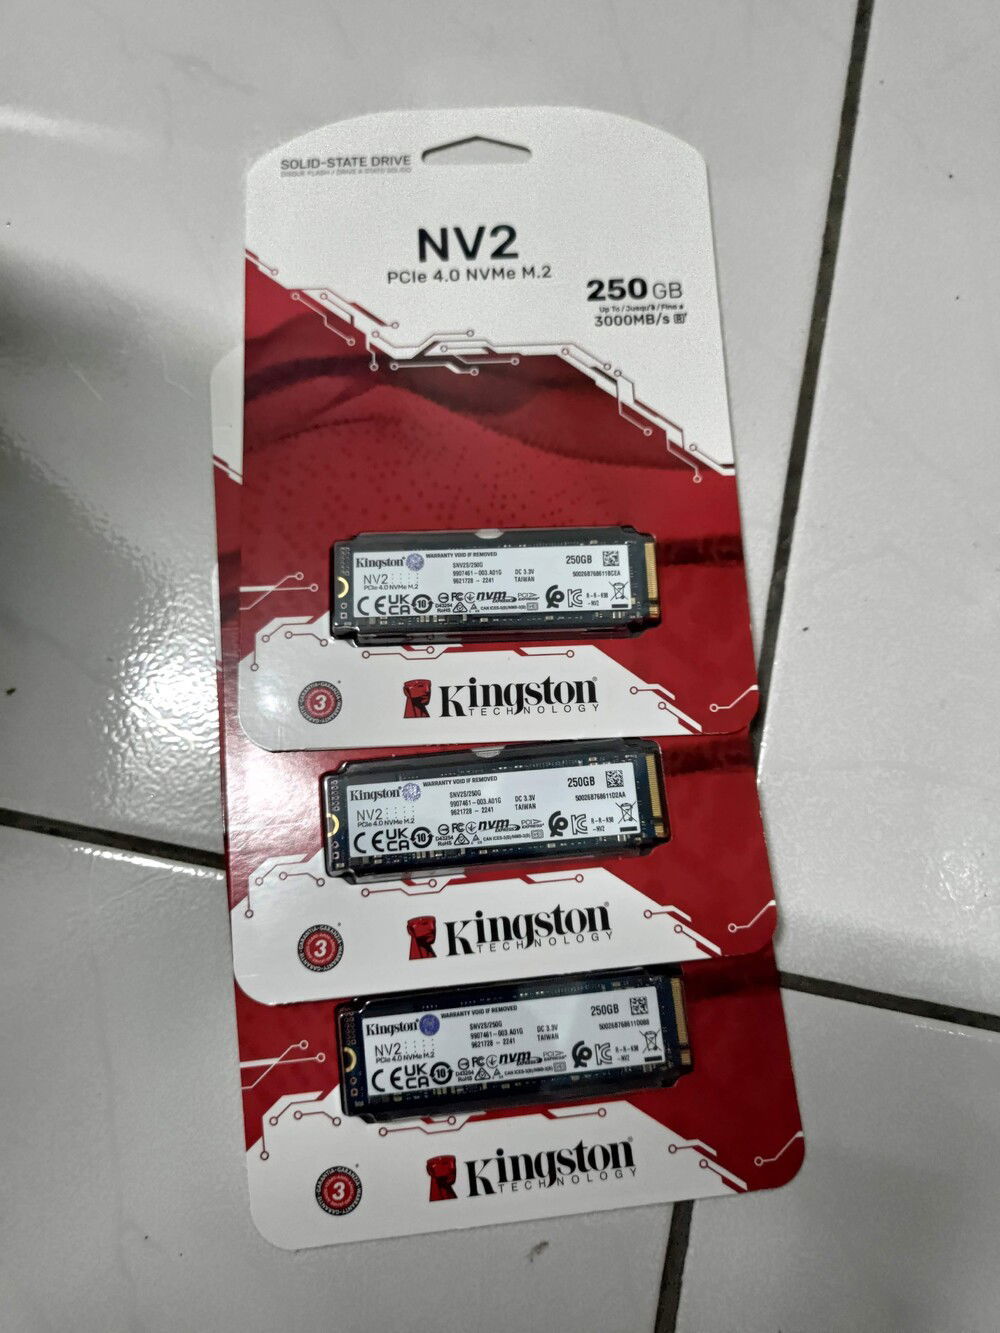
Gen 4 NVMEs meant for use as cache.
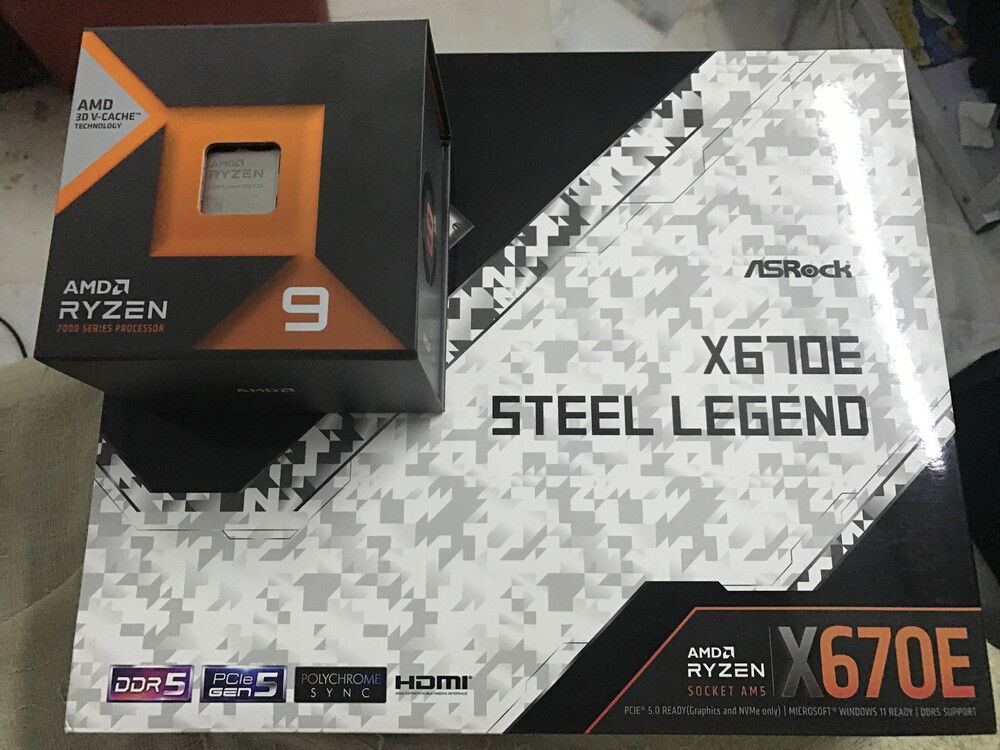
One step closer
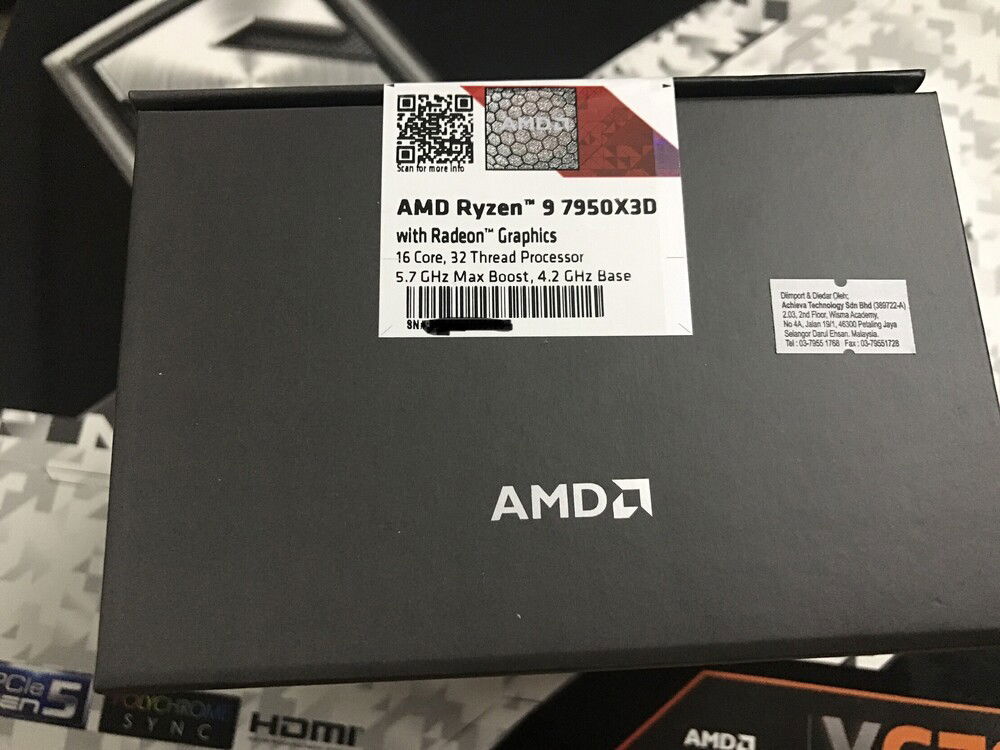
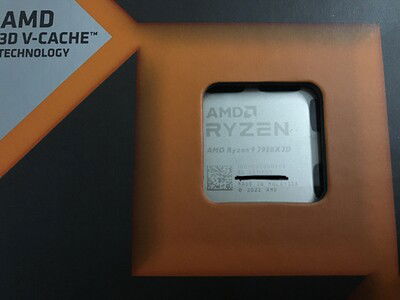
The CPUID to prove that yes, this is a 7950X3D
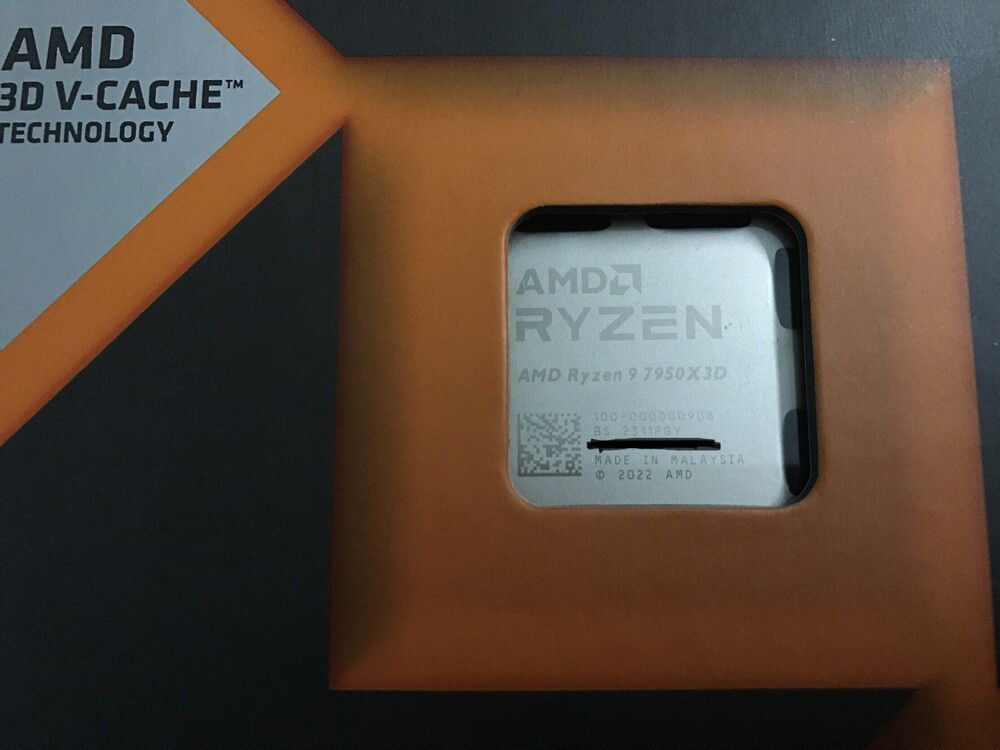
Made in Malaysia. And yet Malaysia is the last country to get the CPU. What gives?
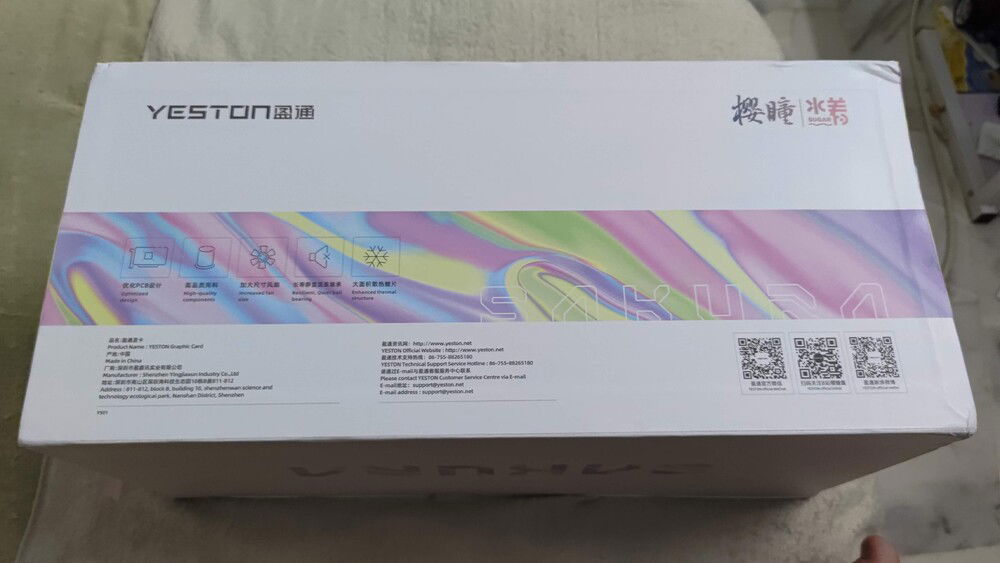
Got over the barrier.
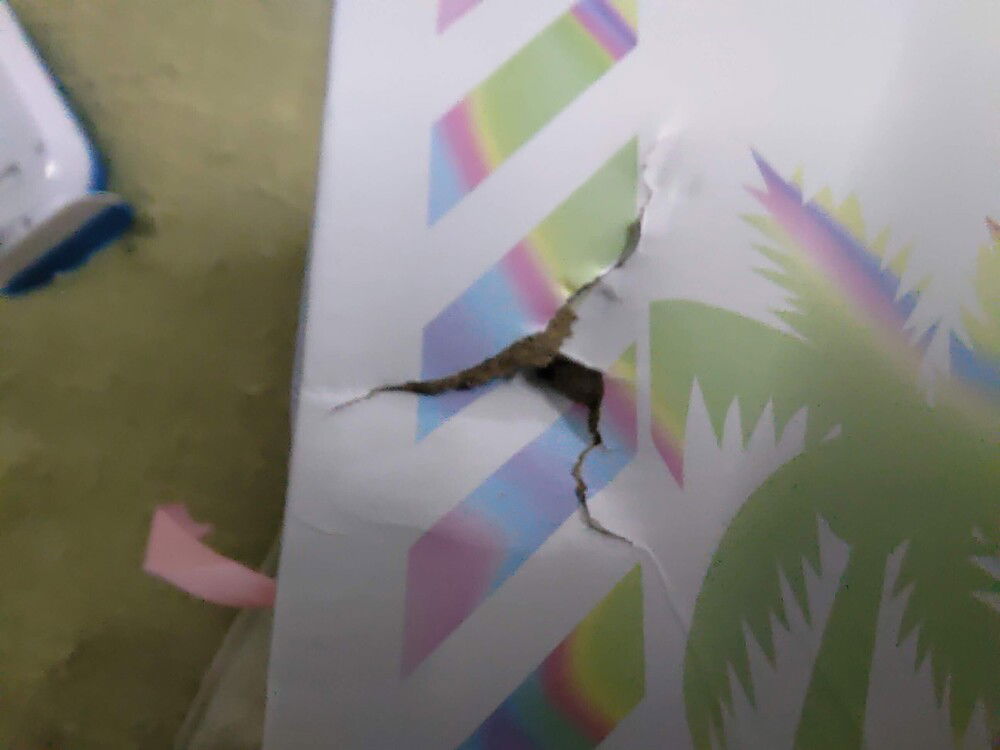
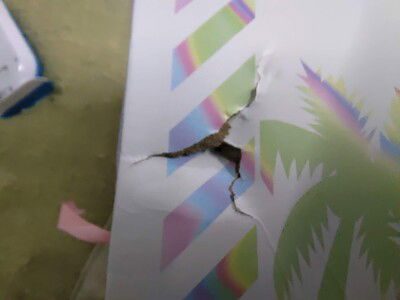
Small hole in the box. Hope this is not a bad sign.
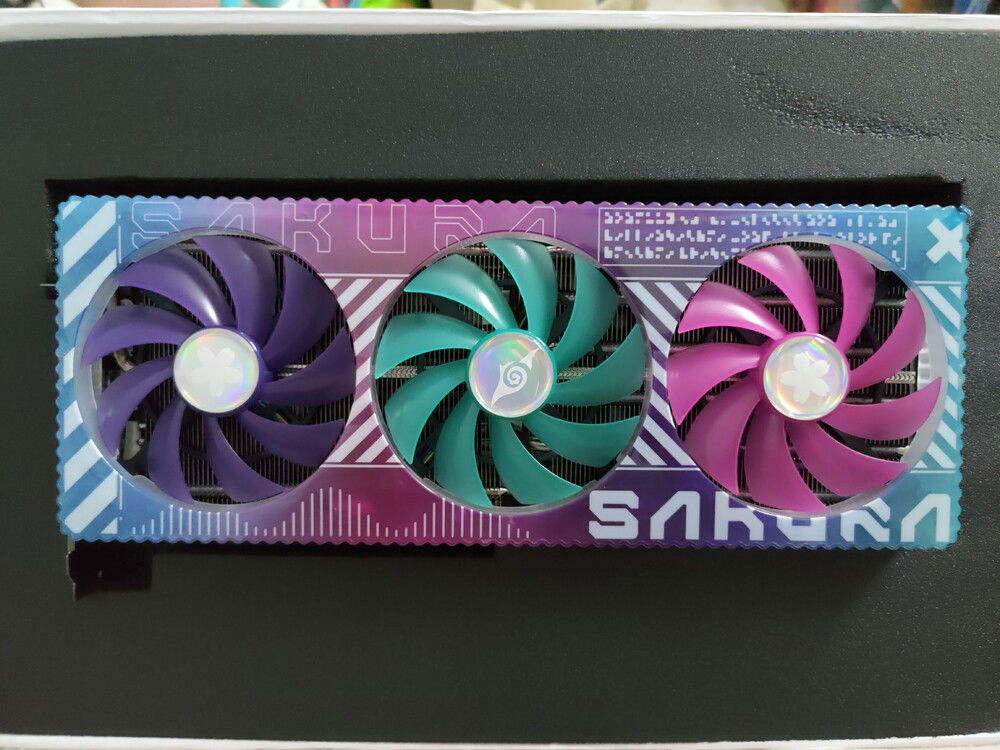
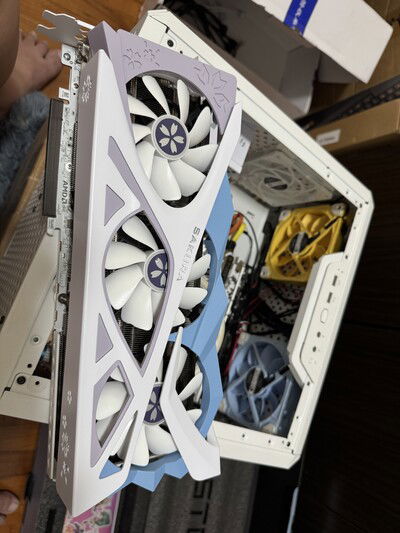
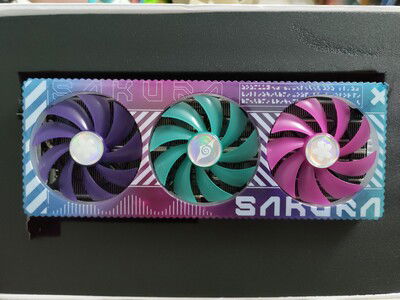
It's beautiful...
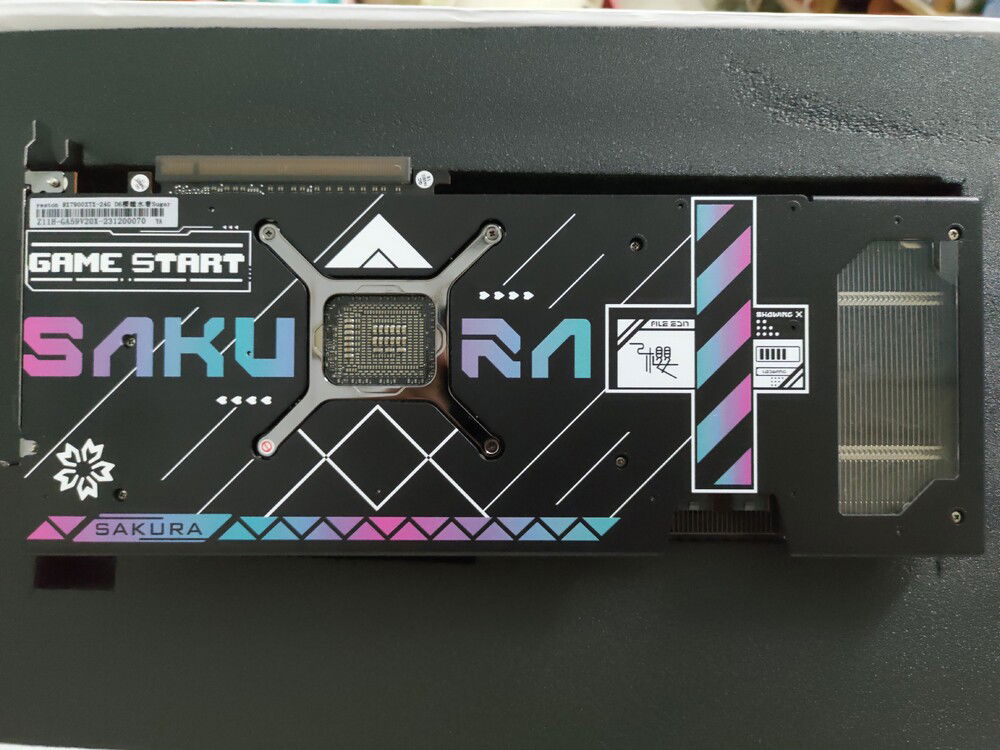
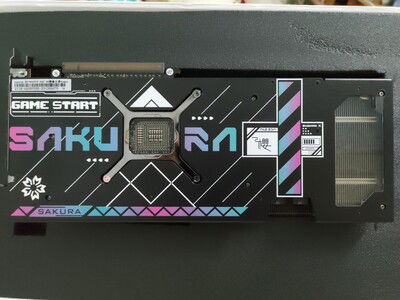
Back of the card.
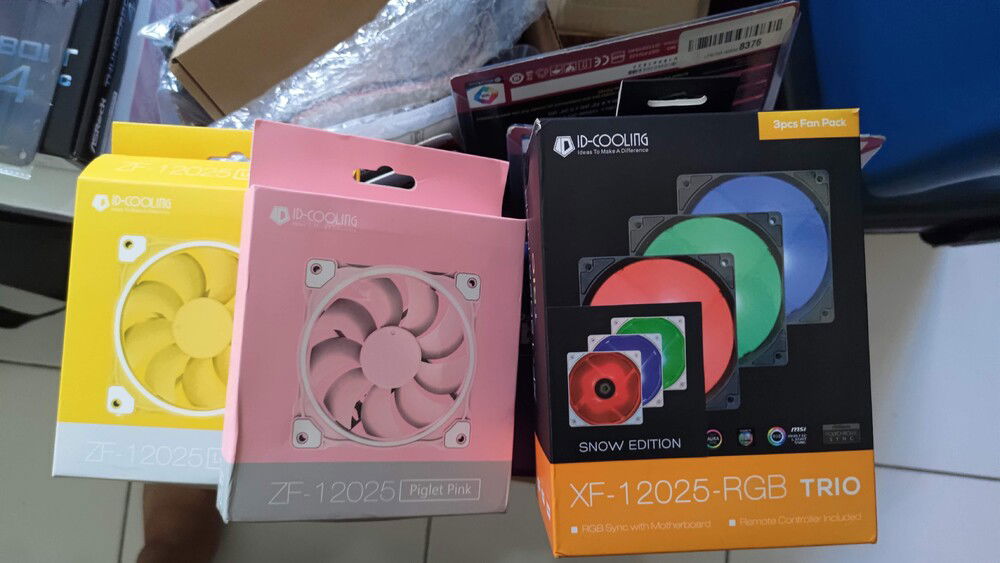
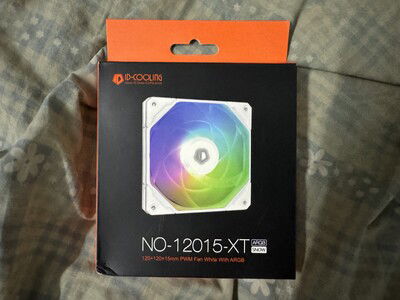
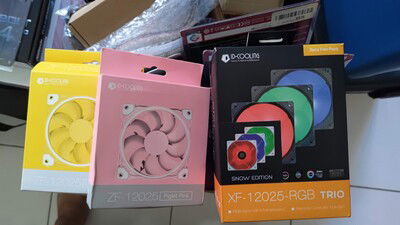
Colorful fans and fans of color
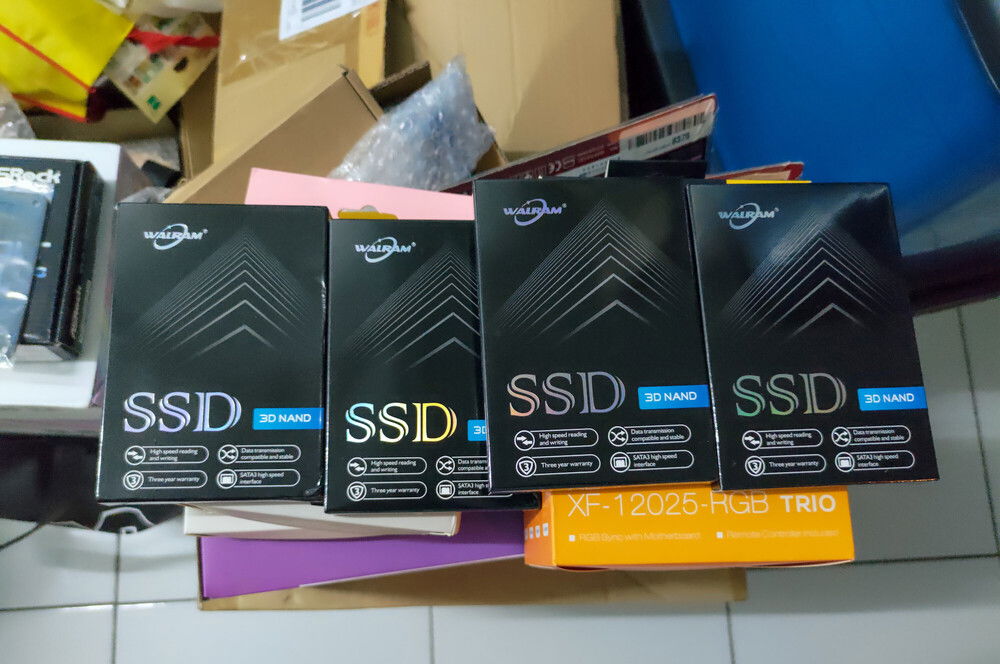
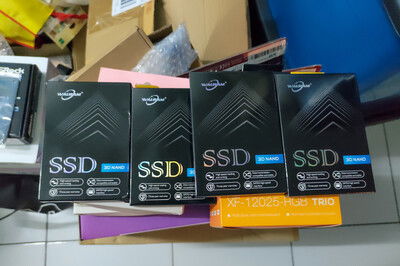
SSDs. Nice packaging considering the budget price.
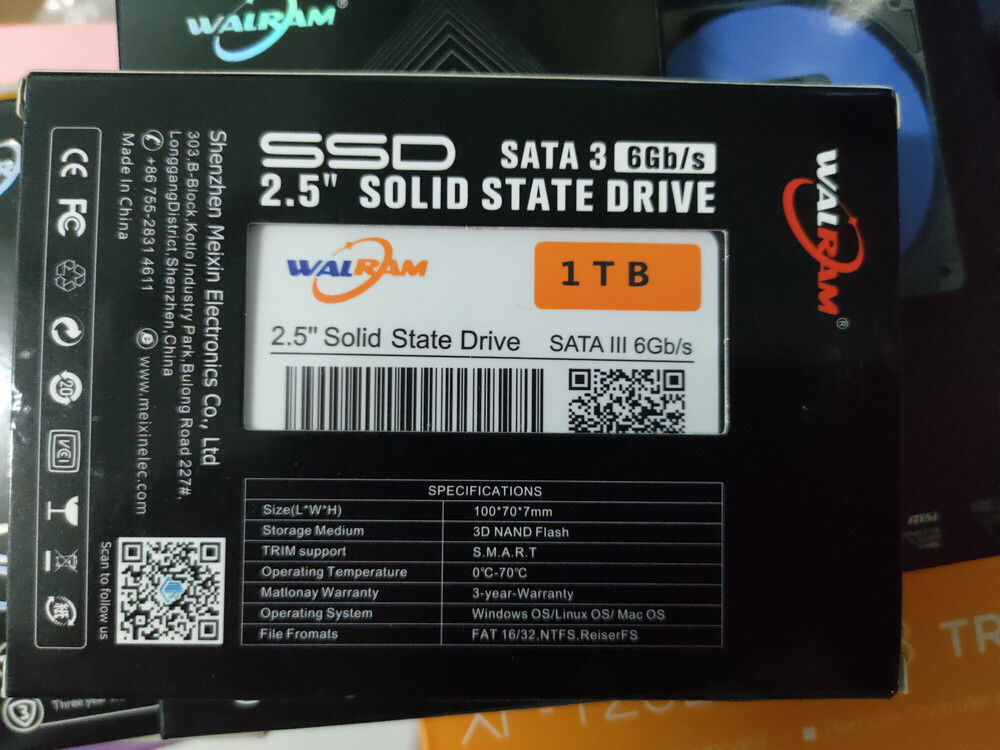
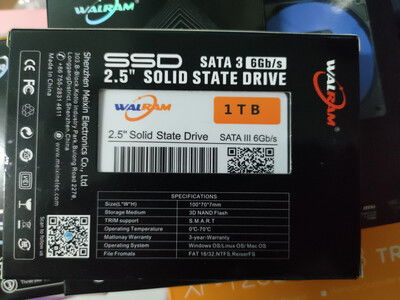
One of the SSDs.
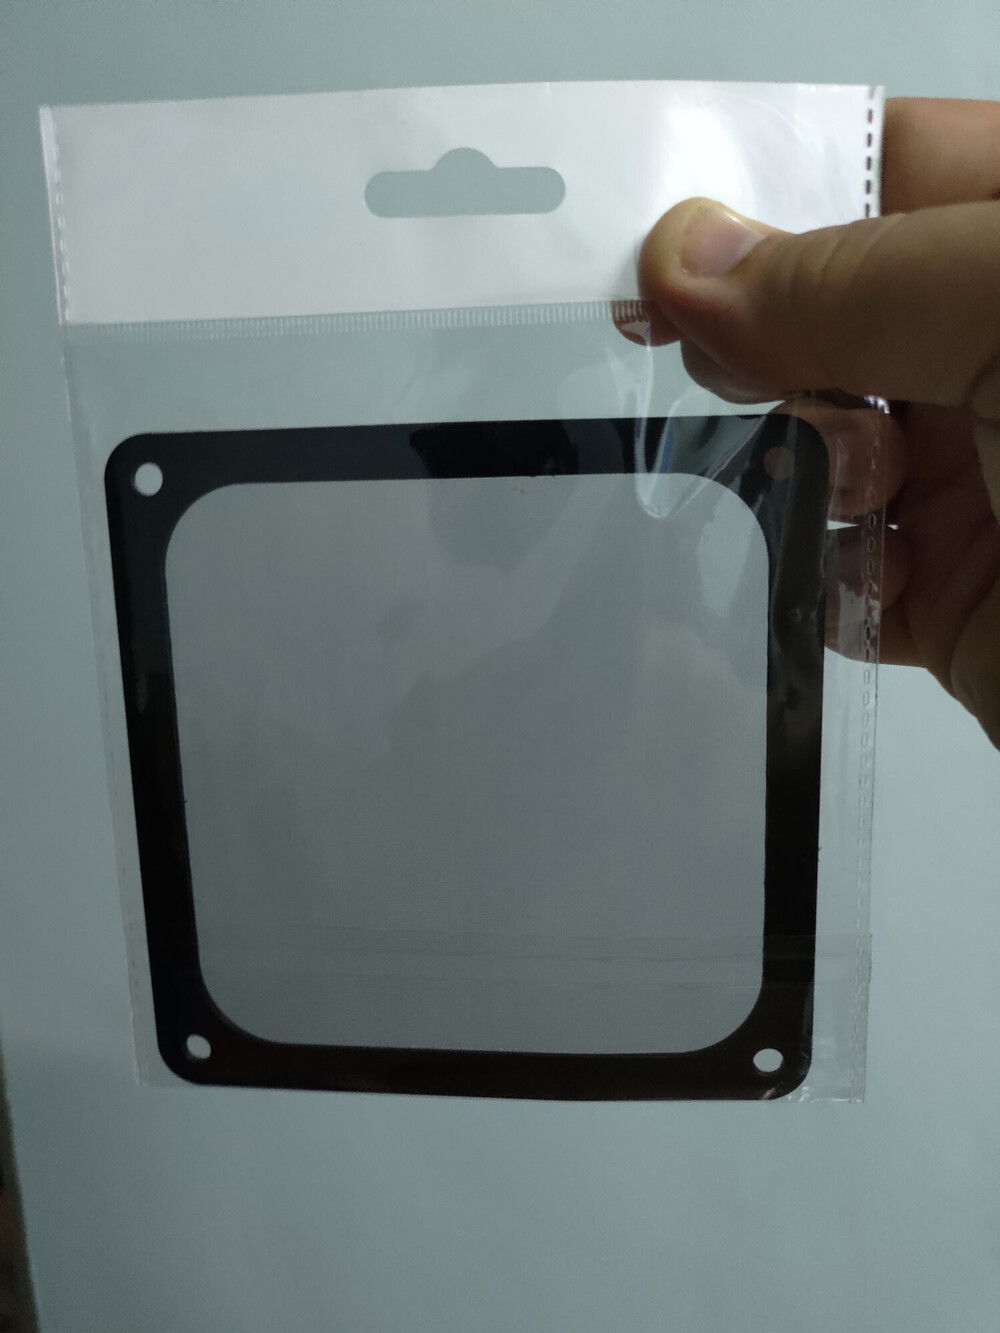
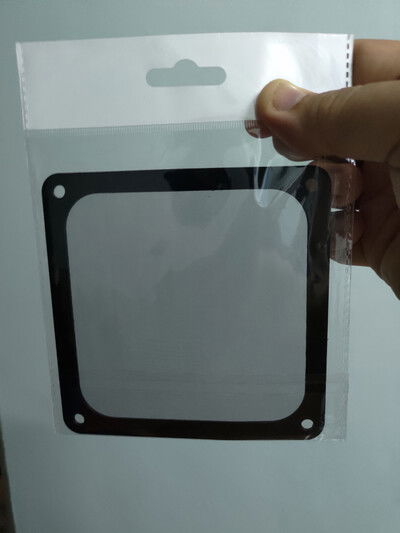
Air filter. Apparently these only comes in black. I will wedge it between the case wall and the fan to minimize visibility.
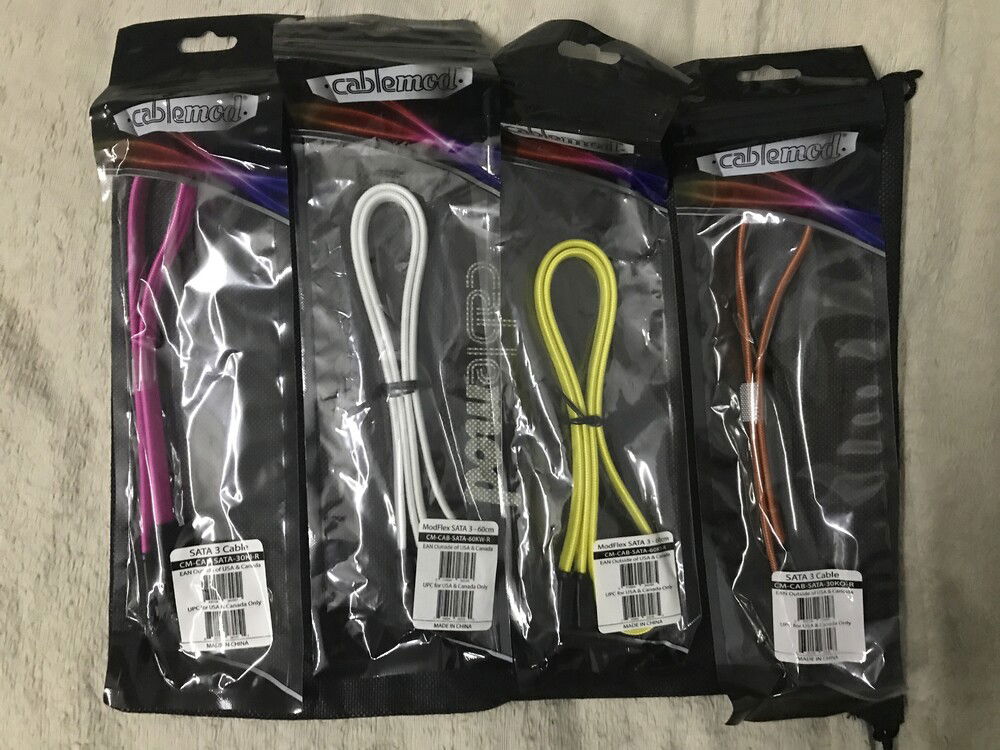
Cablemod SATA. we’re almost there!
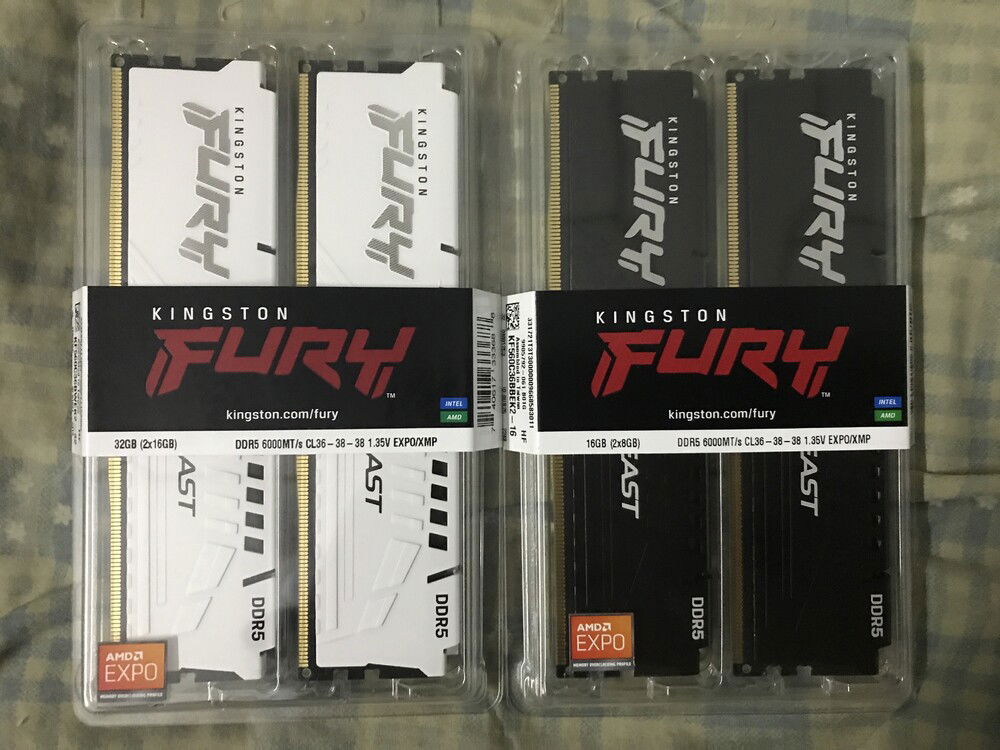
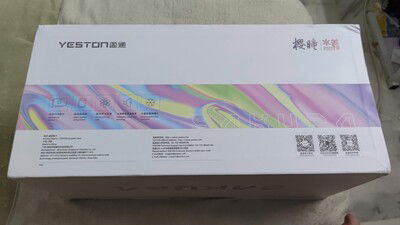
Black and White.
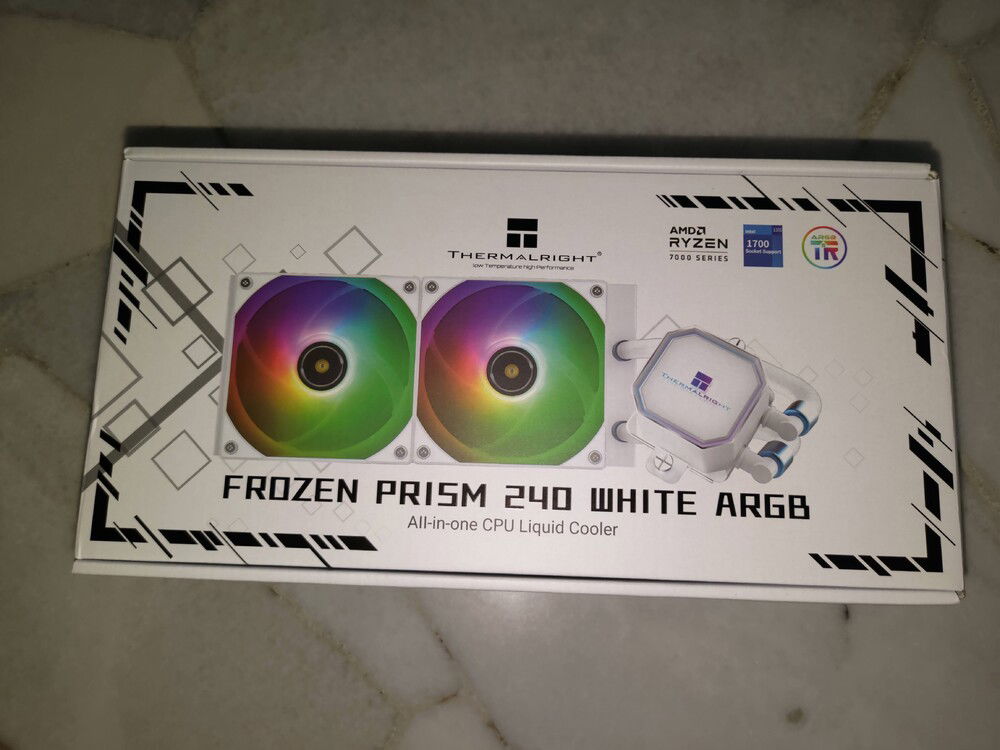
First impression: it's lightweight.
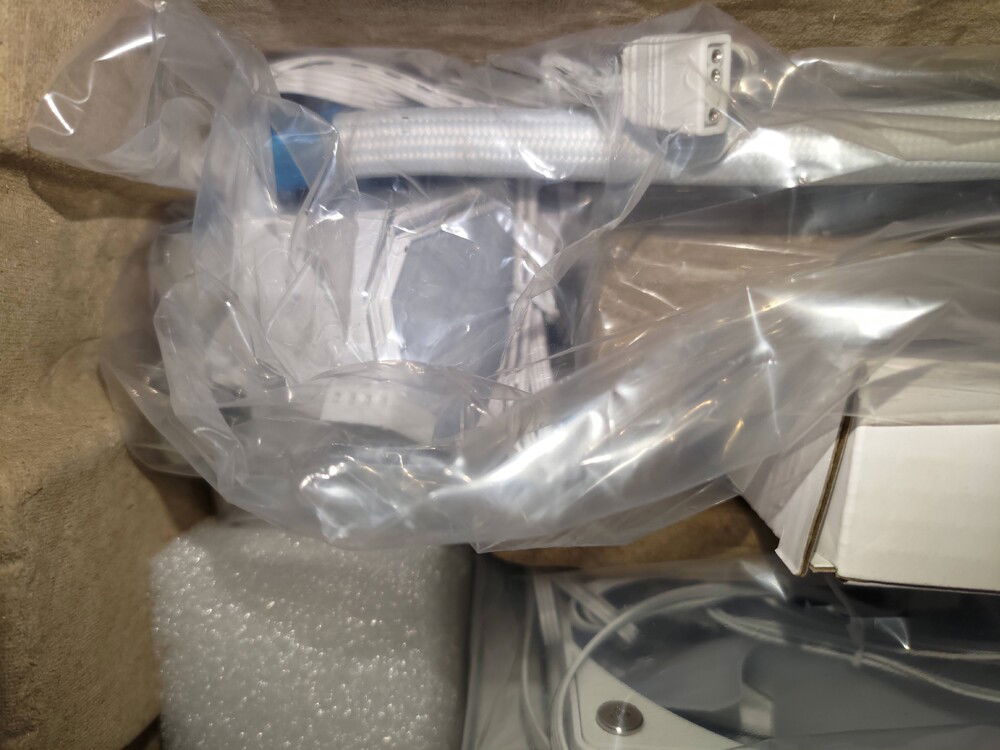
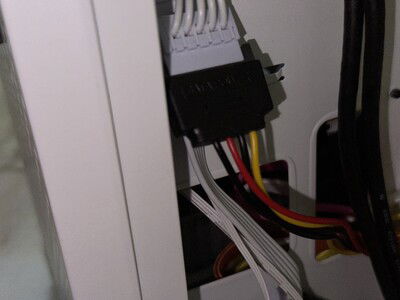
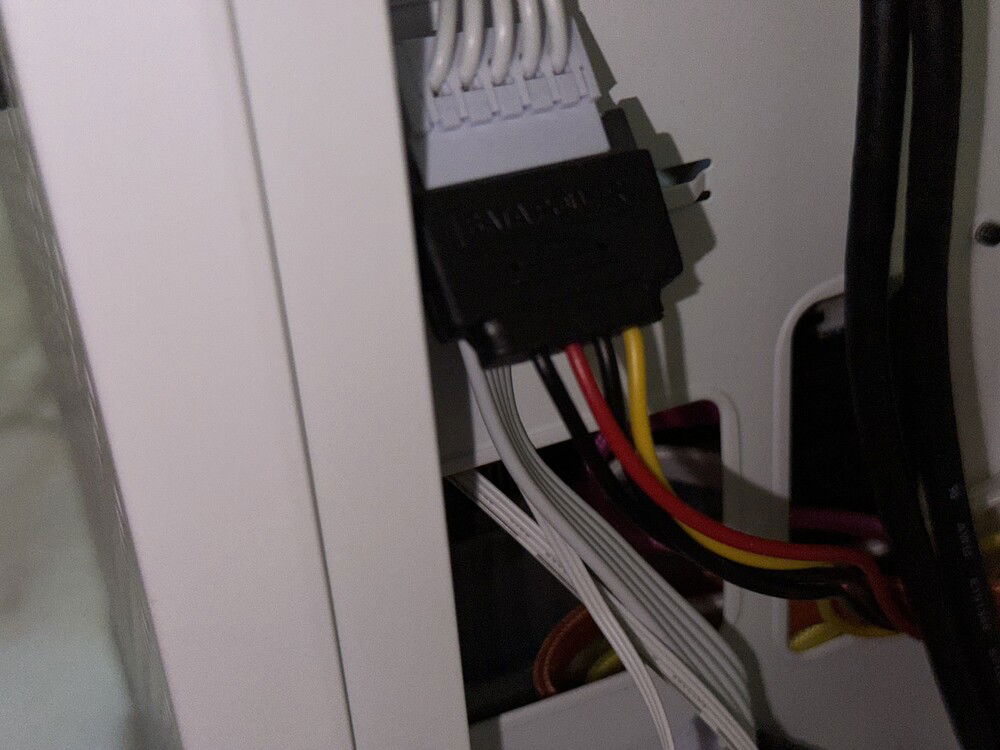
ARGB connector... And PWM fan connector. Name a more dynamic pair.
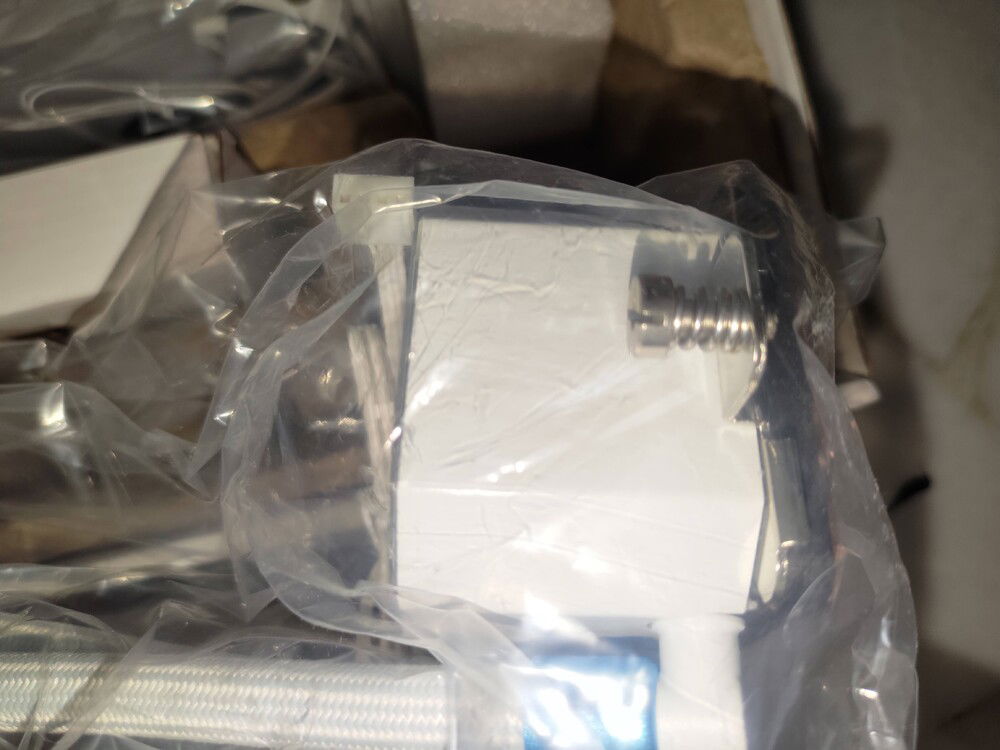
Four wires. Definitely PWM.
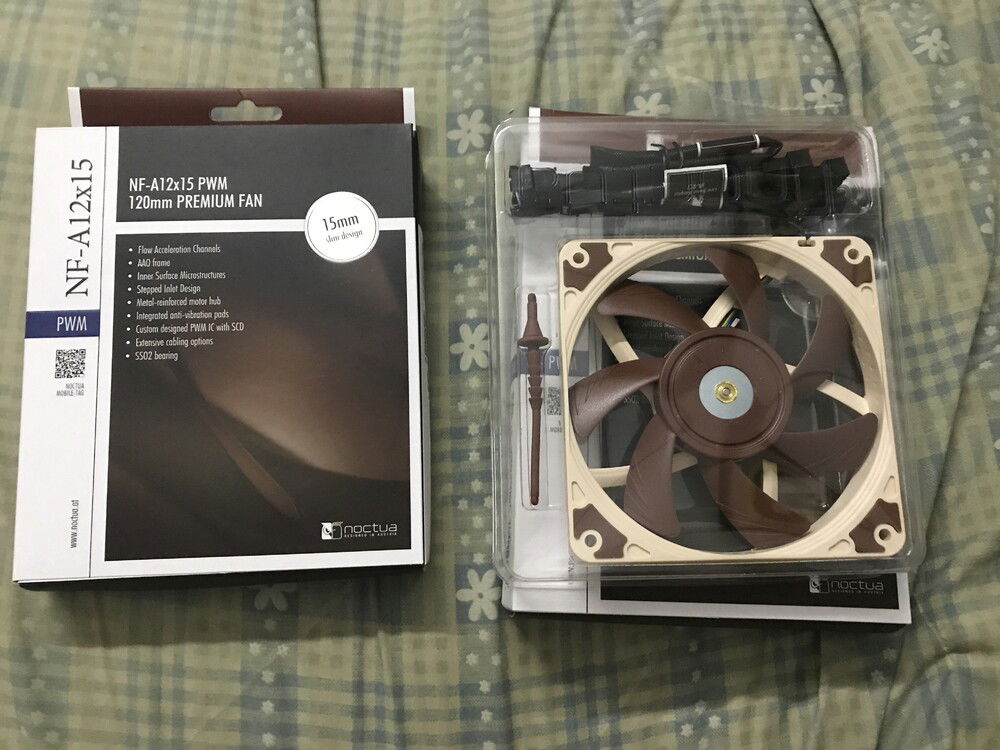
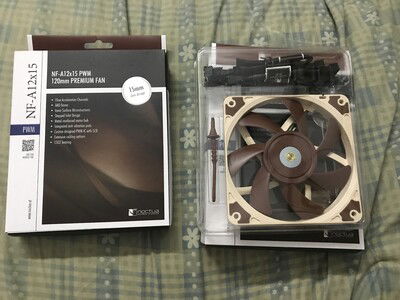
Noctua fans have arrived
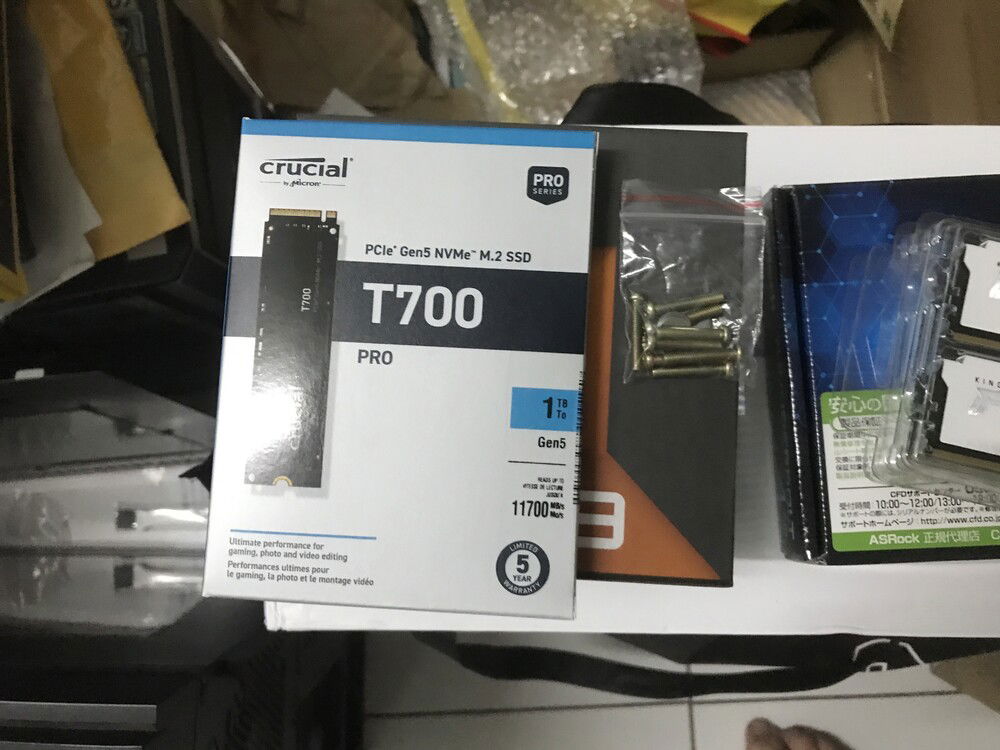
Second gen Gen5 NVMe.
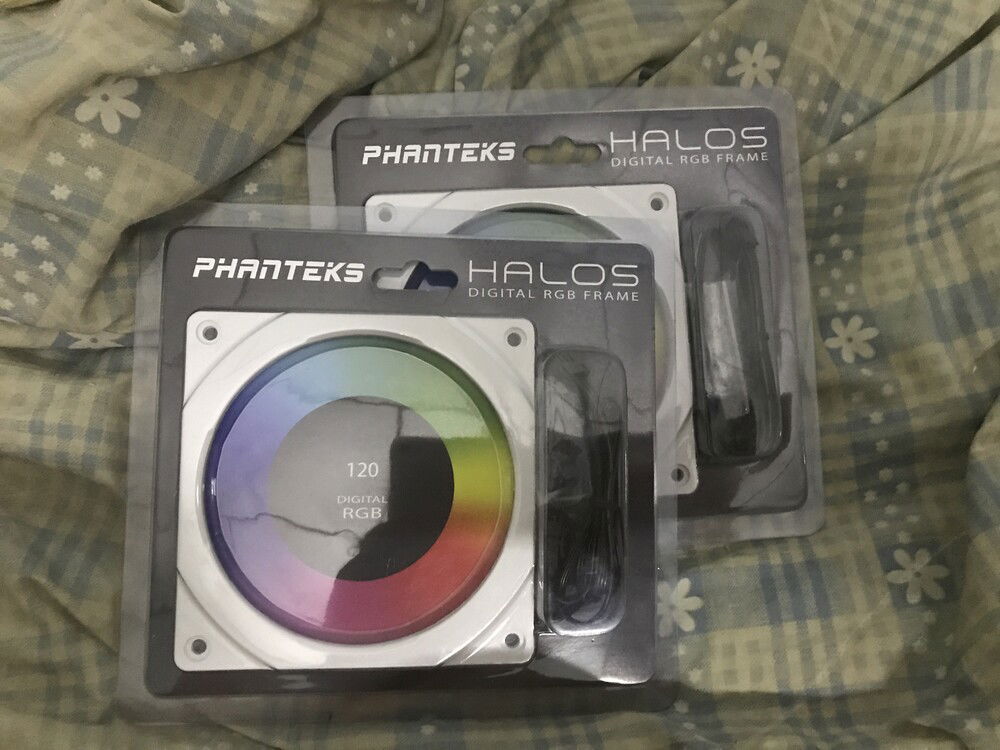
Pearly shells
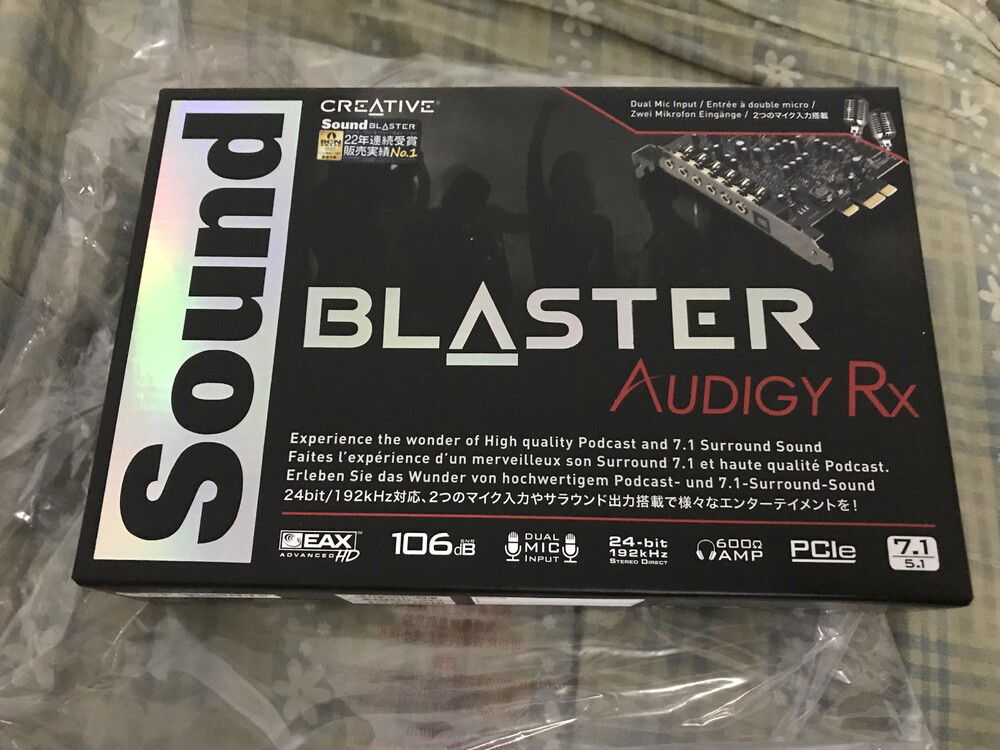
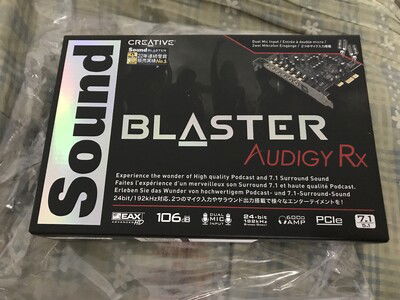
The pinnacle of sound?
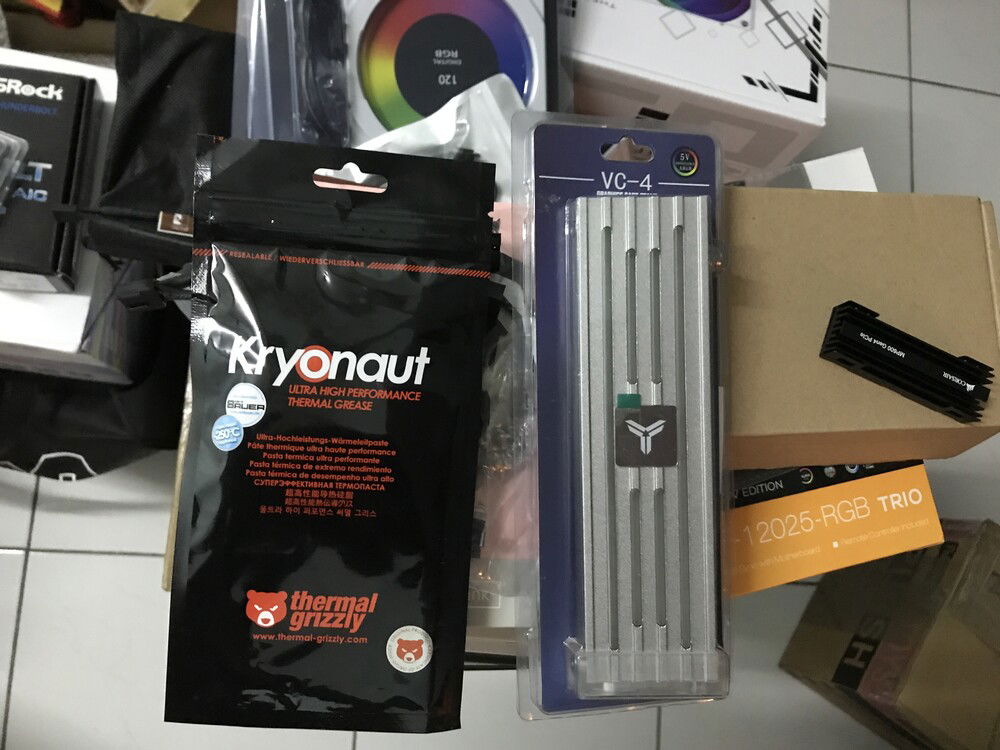
The last compulsory part has arrived, along with one more optional part for me to explore alternative plans.
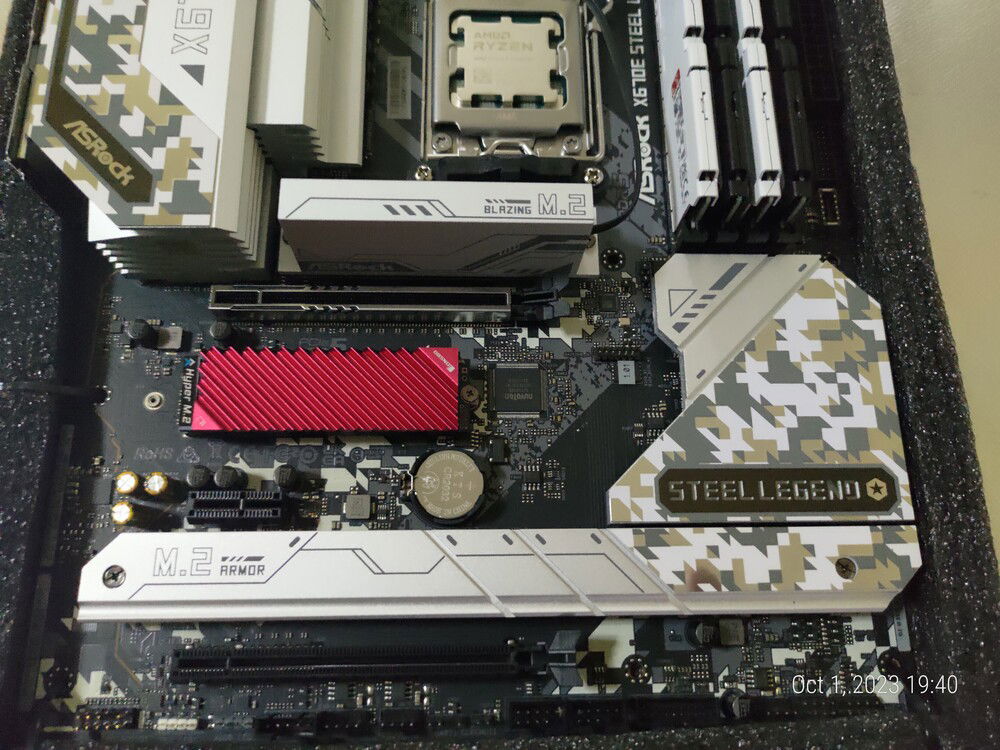
Every journey begins with a single step. This is part 1.
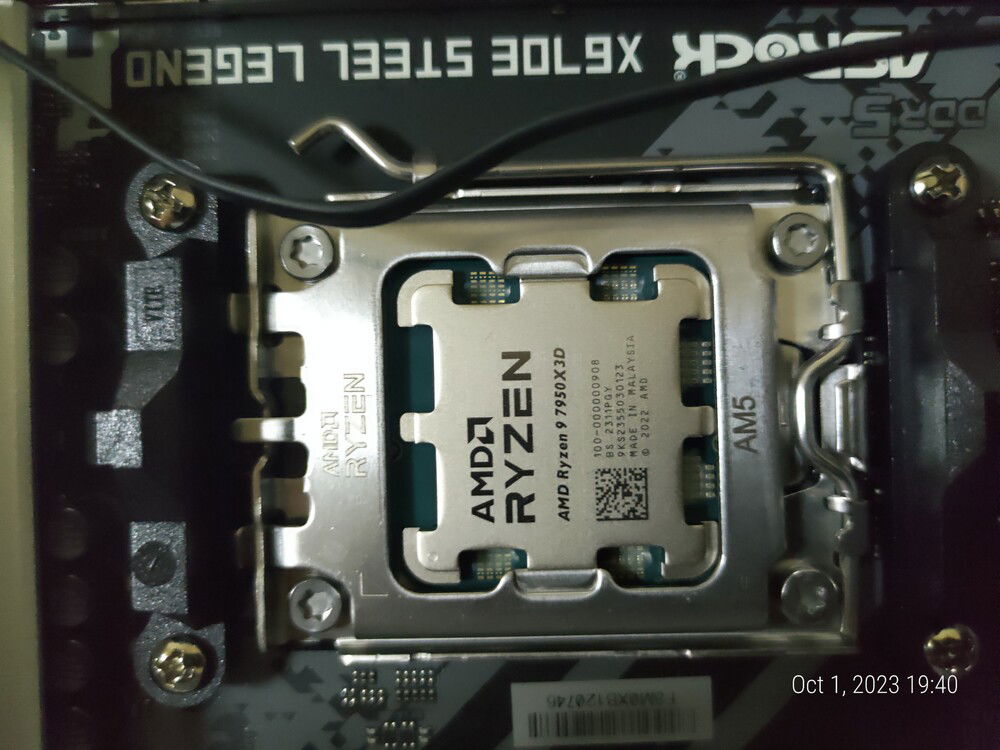
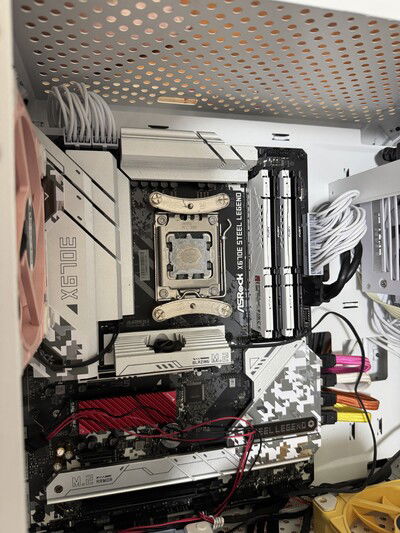
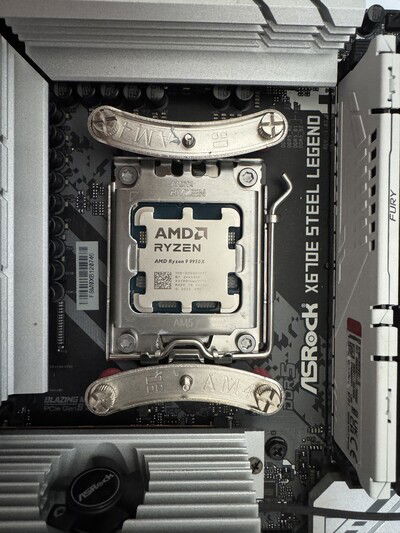
Hope I got the CPU installed right. My fear of LGA and the fact that this is my first time dealing with AM5 made this a nightmare to install.
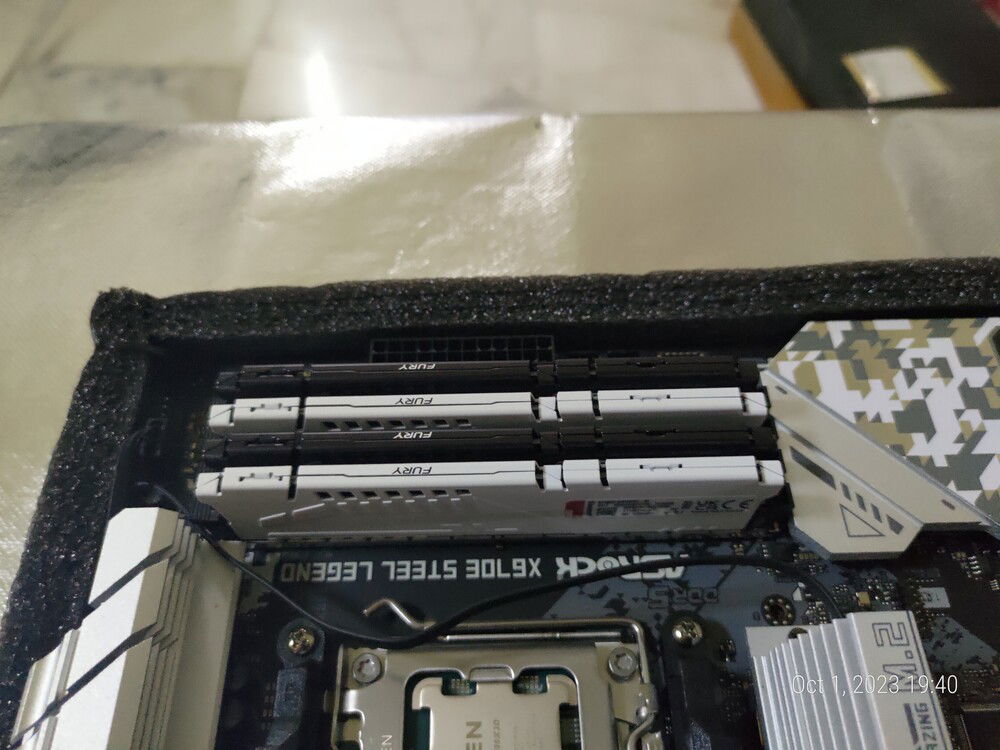
Black or White? How about both?
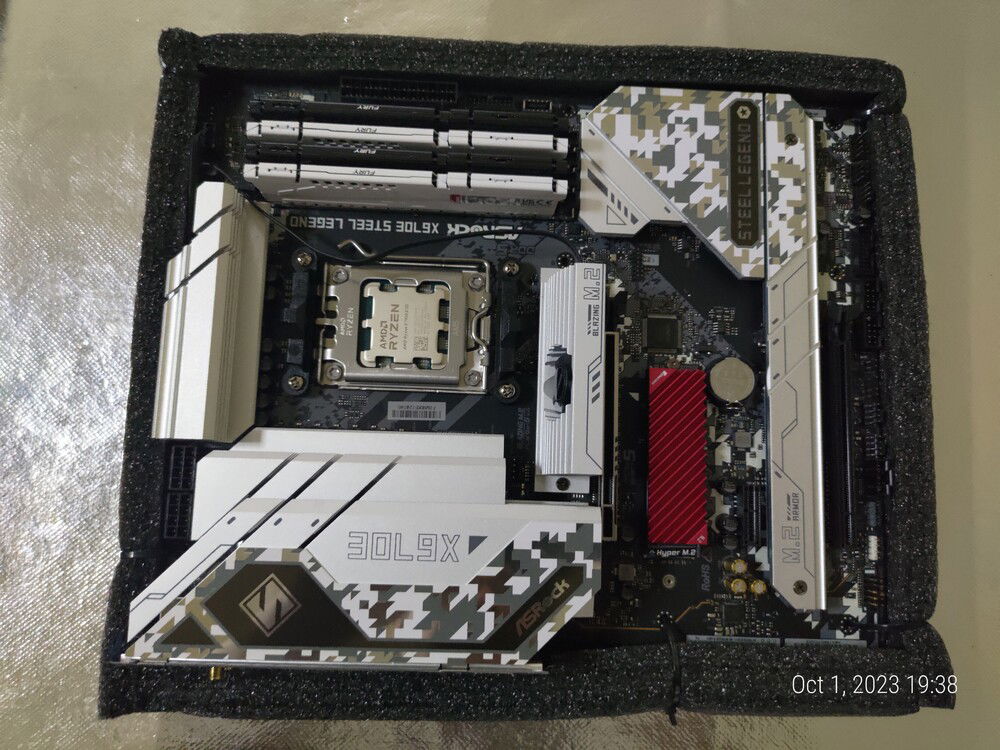
Looking like a good start.
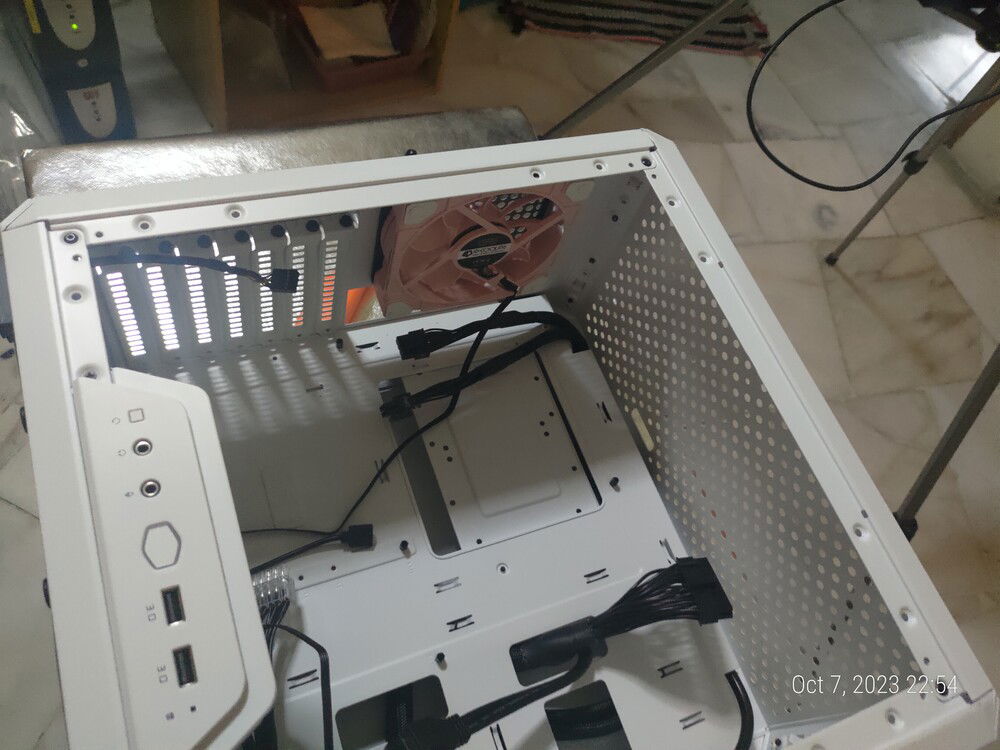
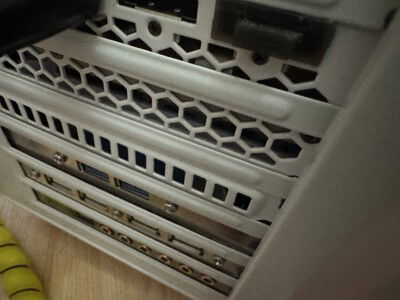
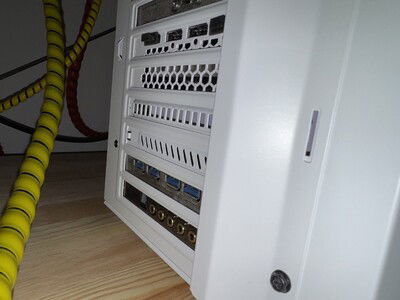
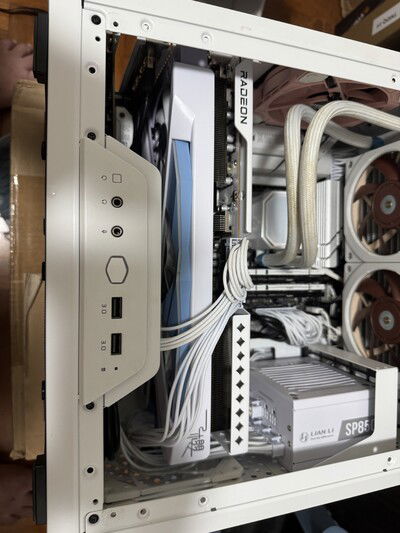
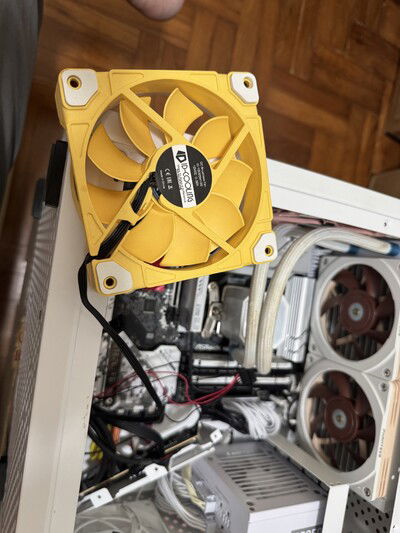
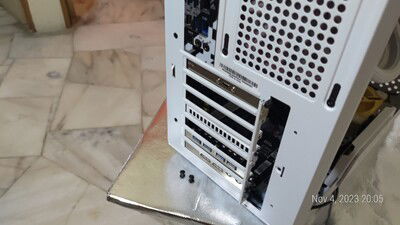
Back of the case. The case came with a single DC 3-pin, ARGB configured for exhaust. I replaced the fan and configured it for intake, adding a filter so air comes in clean.
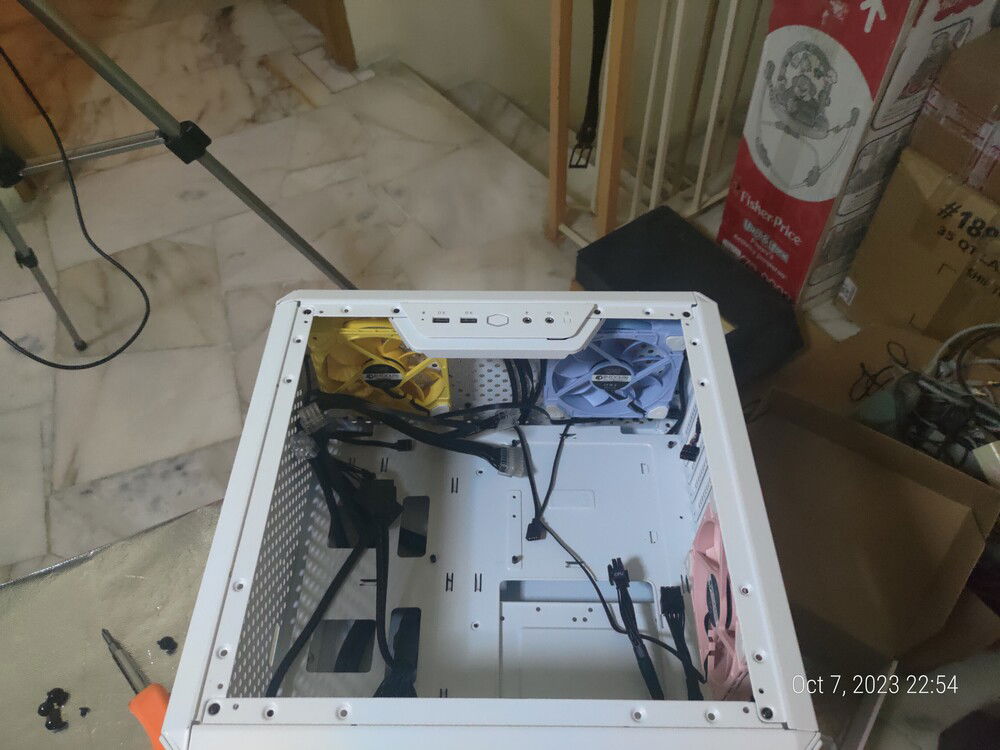
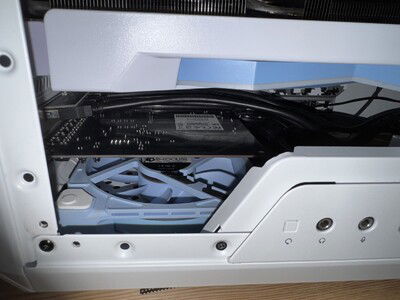
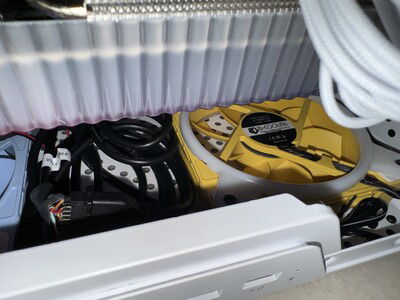
The bottom intake fans. Yellow to the front and blue to the back
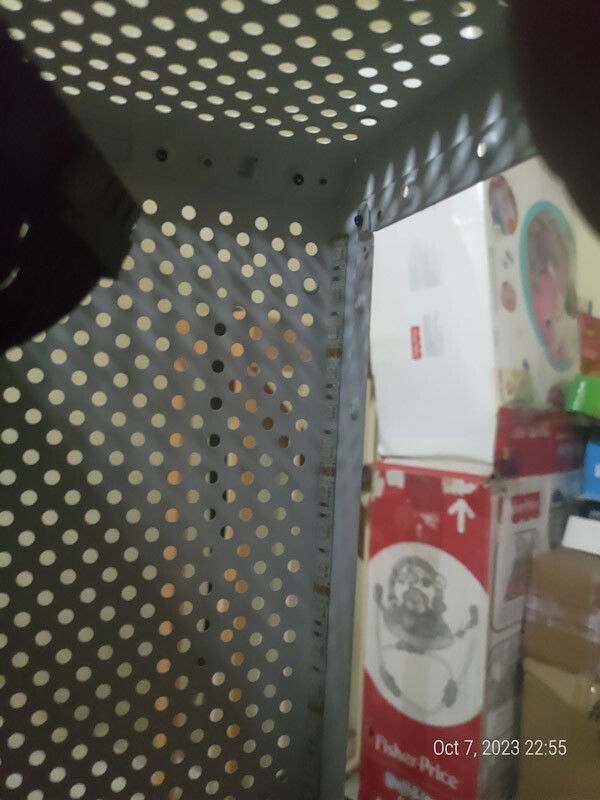
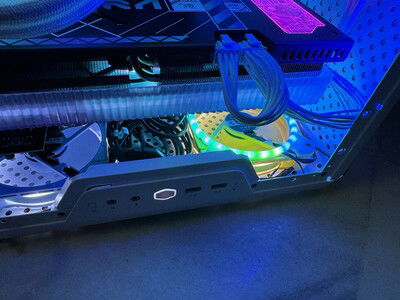
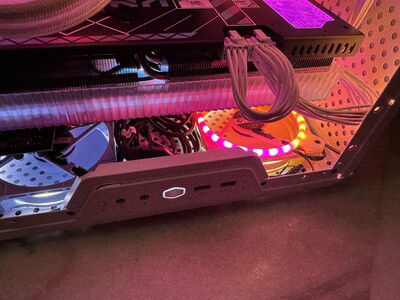
A DRGB strip hidden in the front of the case. Doesn't rally serve any real purposes I suppose.
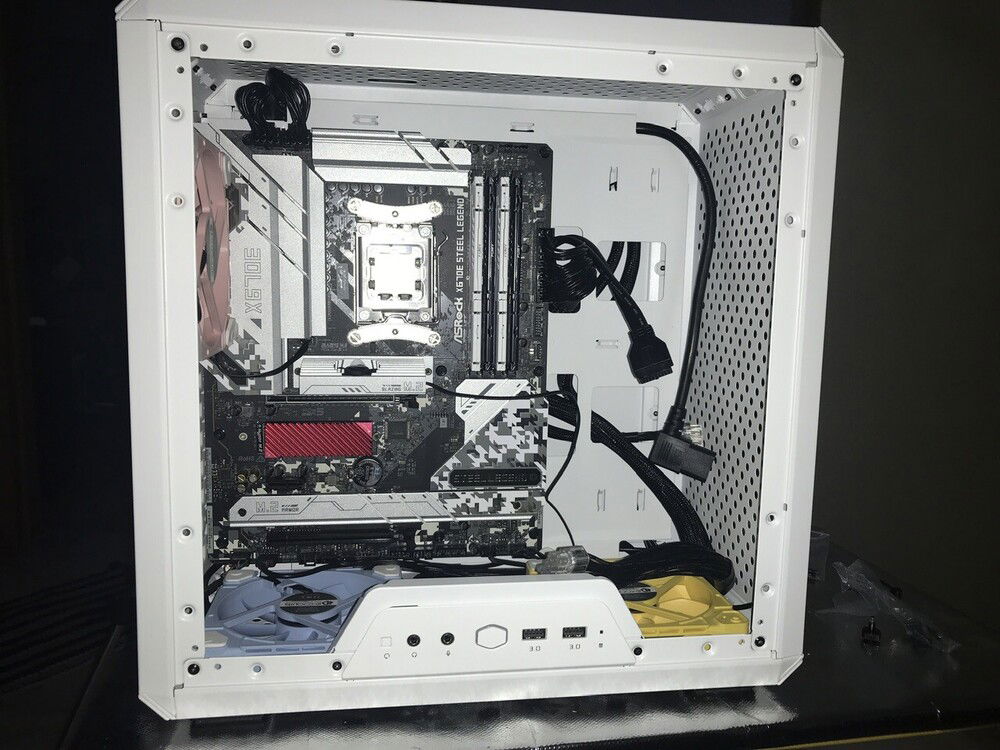
Can't install the rad...
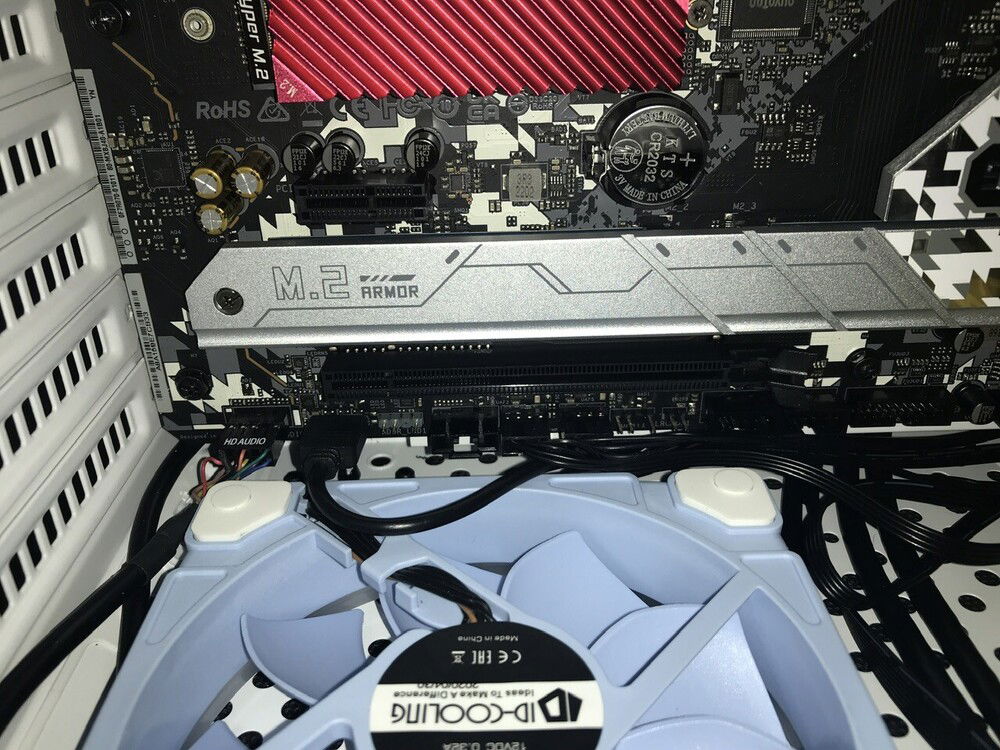
The RGB cable was a complete PITA to install.
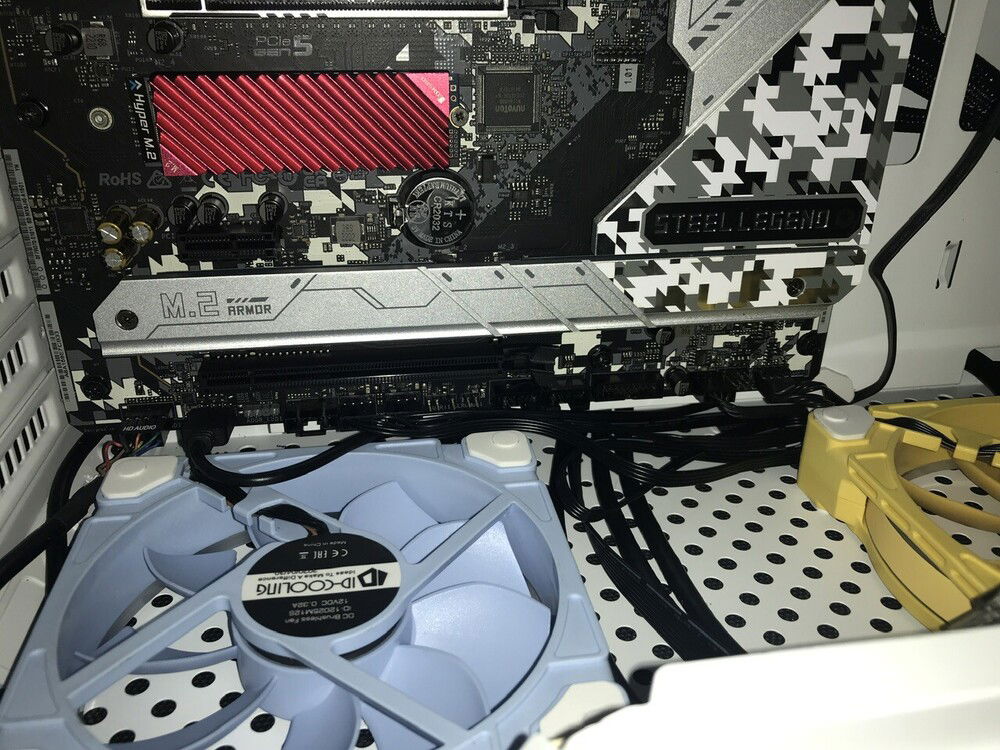
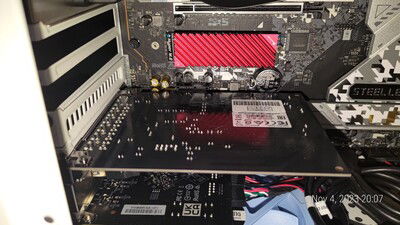
Mobo bottom. Looks like the Thunderbolt4/USB4 card will be wedged in pretty tight.
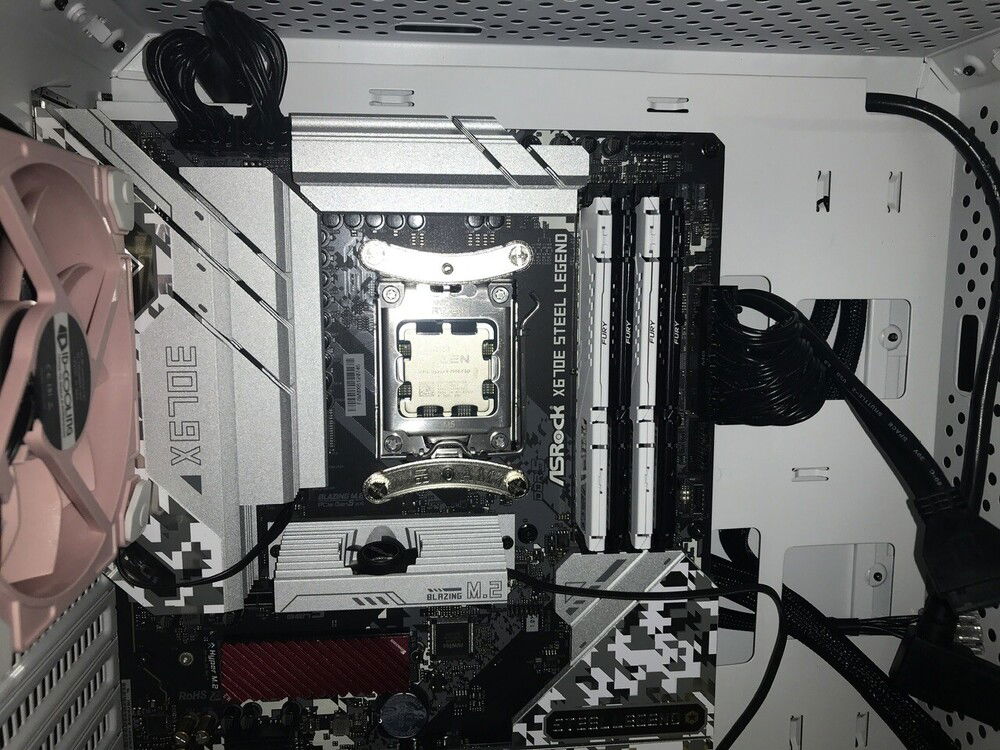
Did a bit of tweaking to the mobo, installed the pump mounting and moved the cable for the Blazing M.2 cooler to the bottom right fan header.
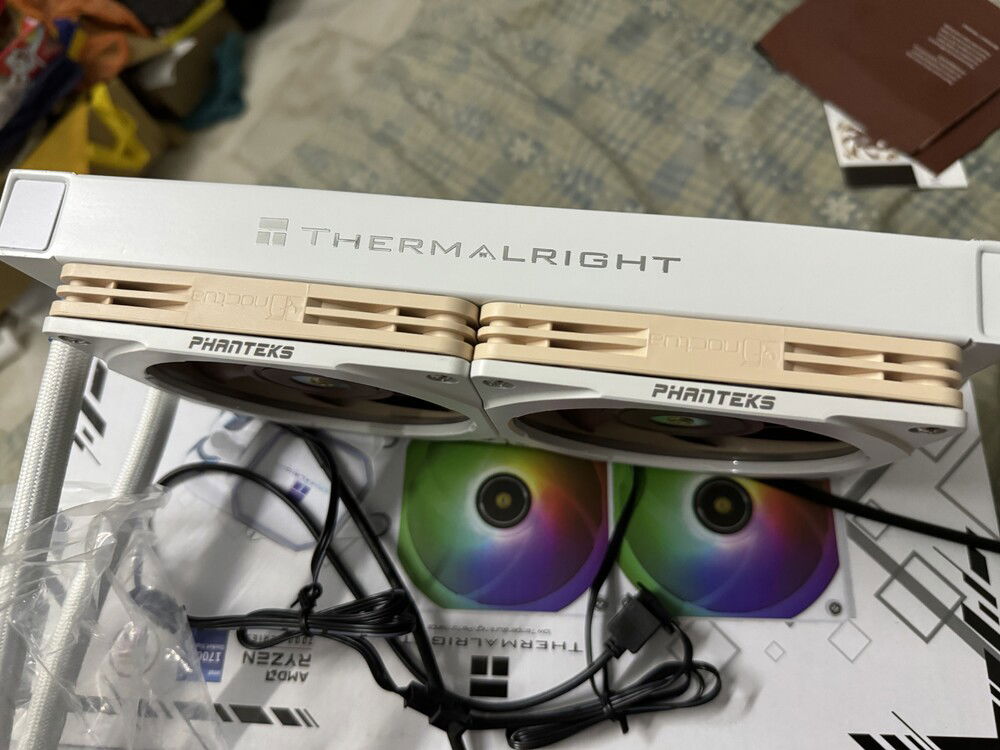
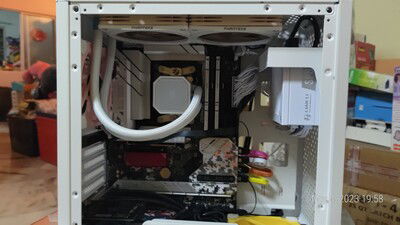
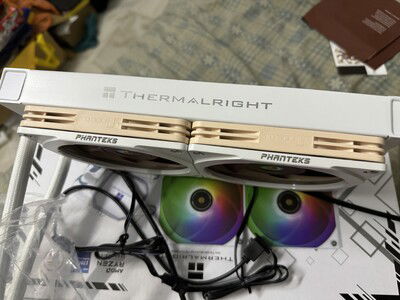
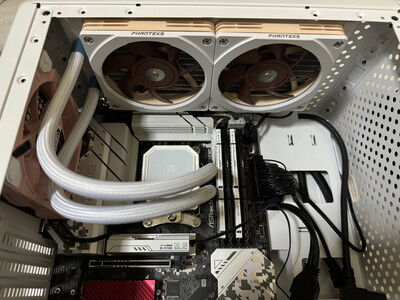
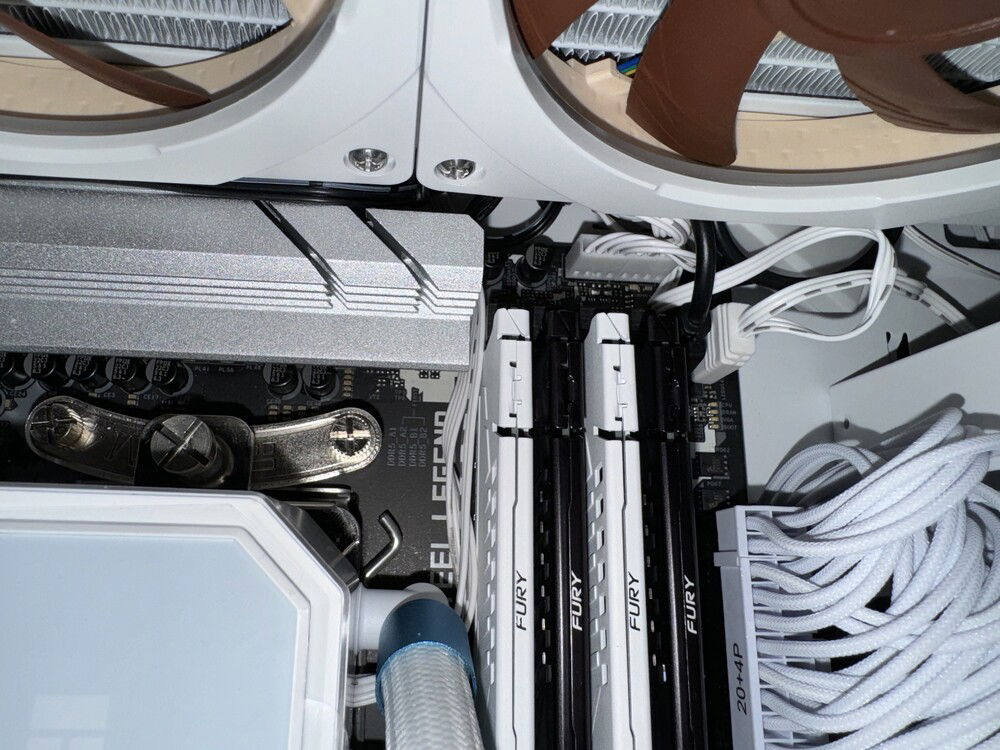
Modded radiator with slim fans and Phanteks Halos to compensate
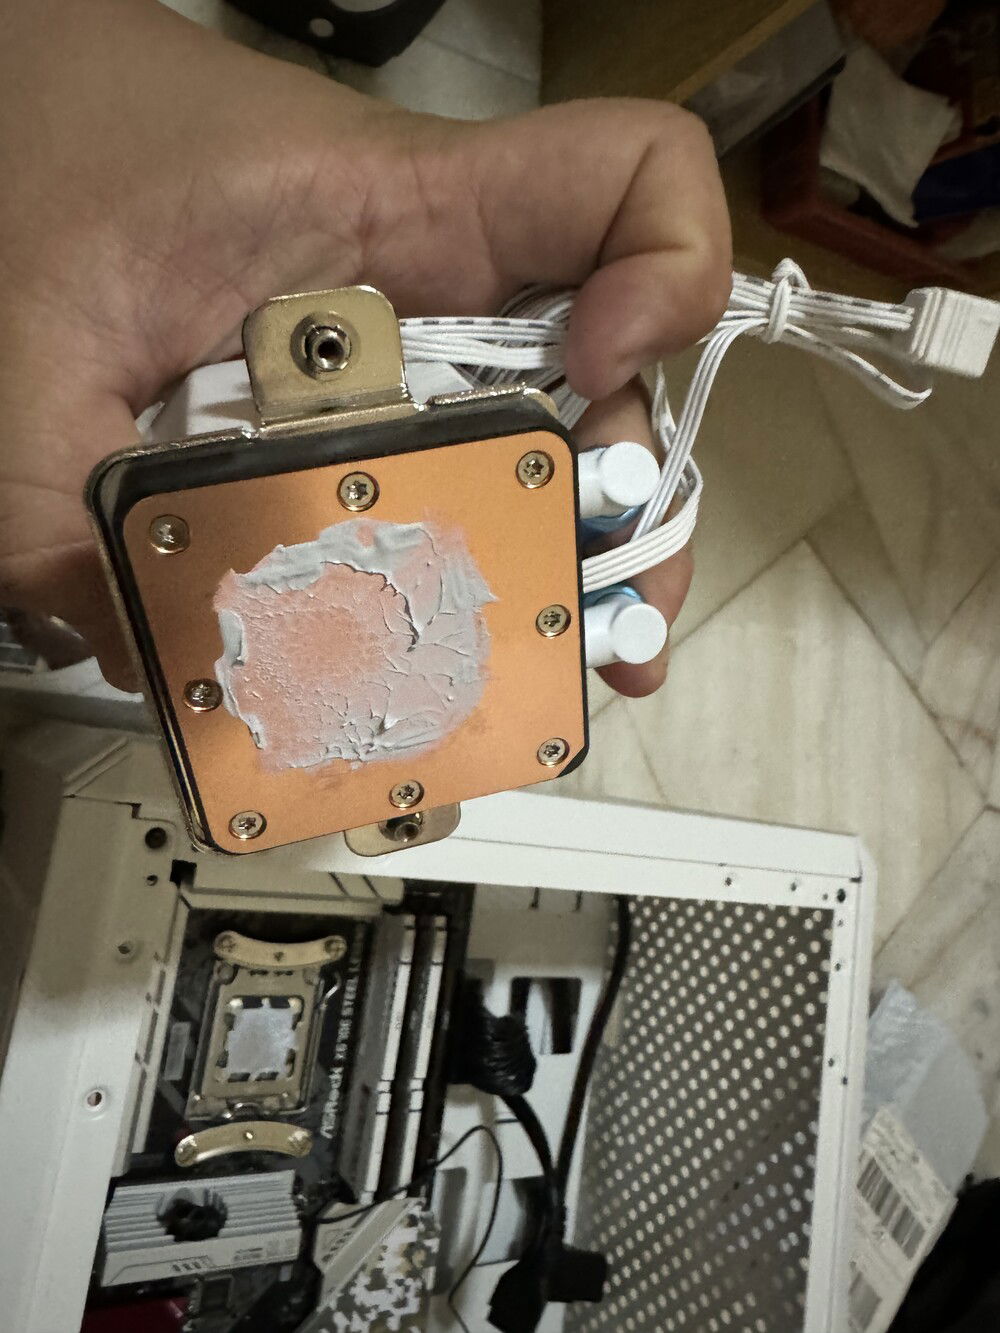
Thermal paste
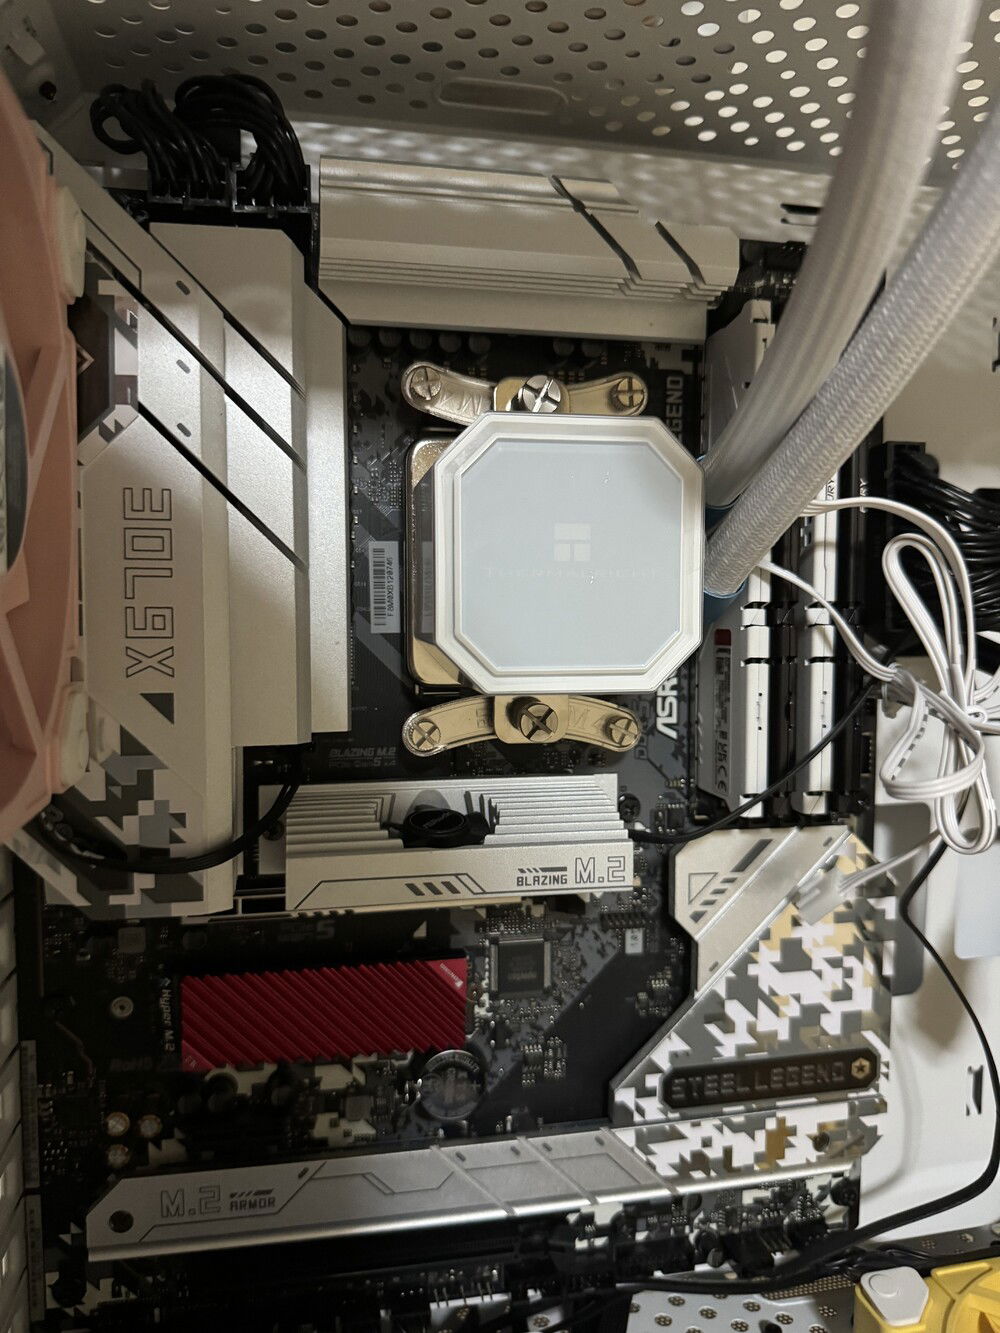
Pump in.
More wire hidin'
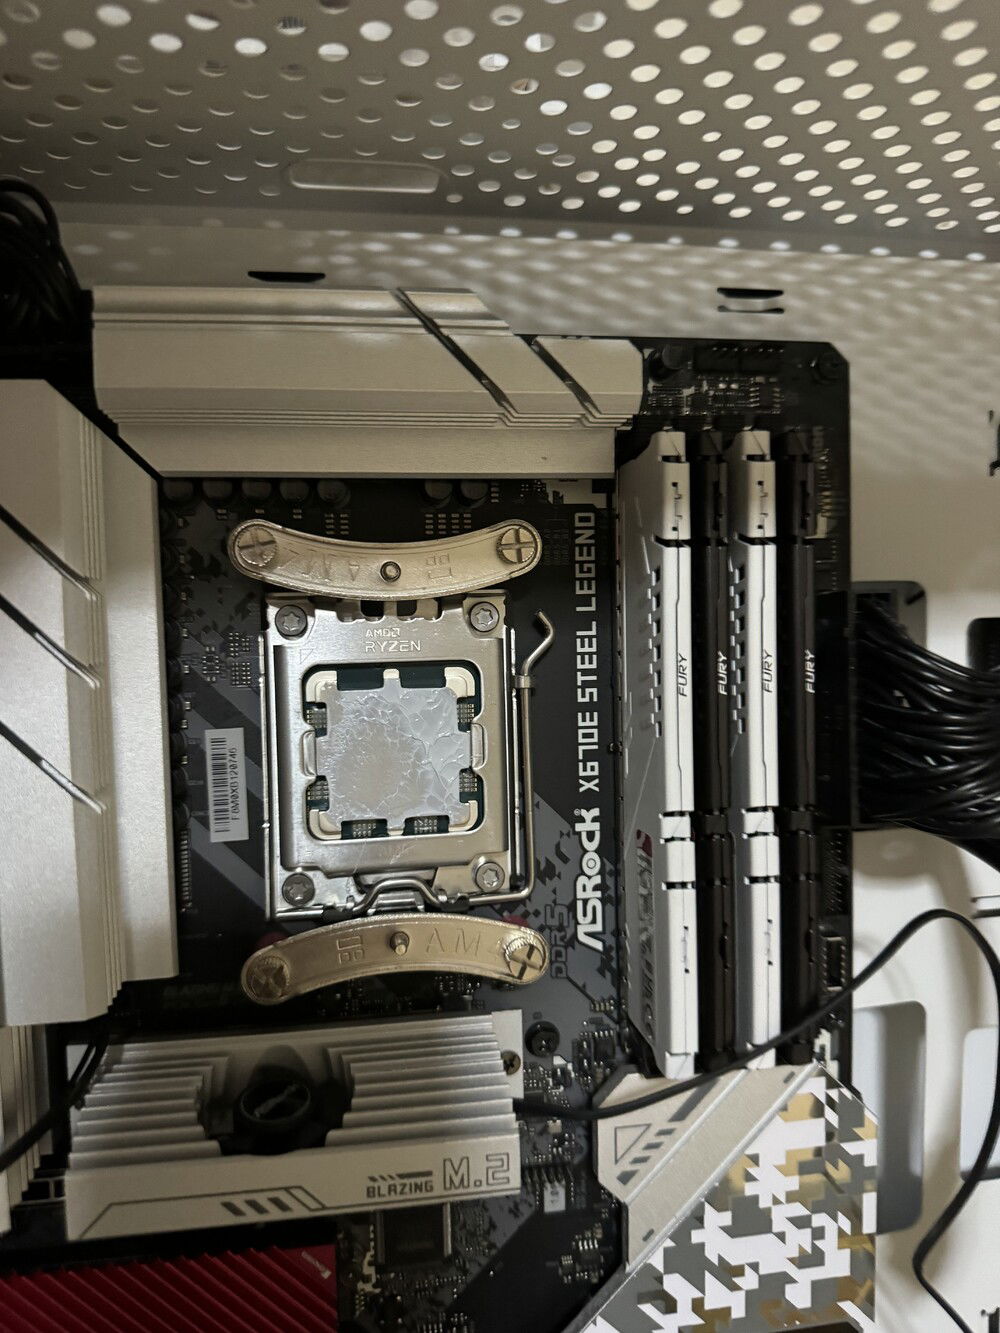
More thermal paste. Of the Thermal Grizzly variety.
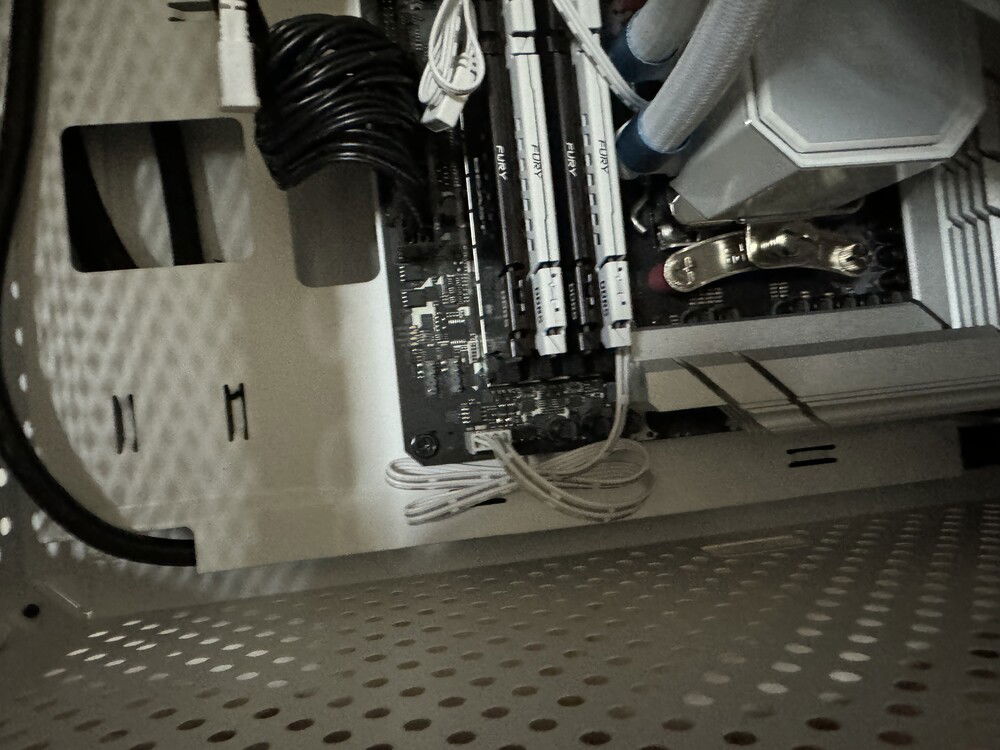
Installing the pump before the rad
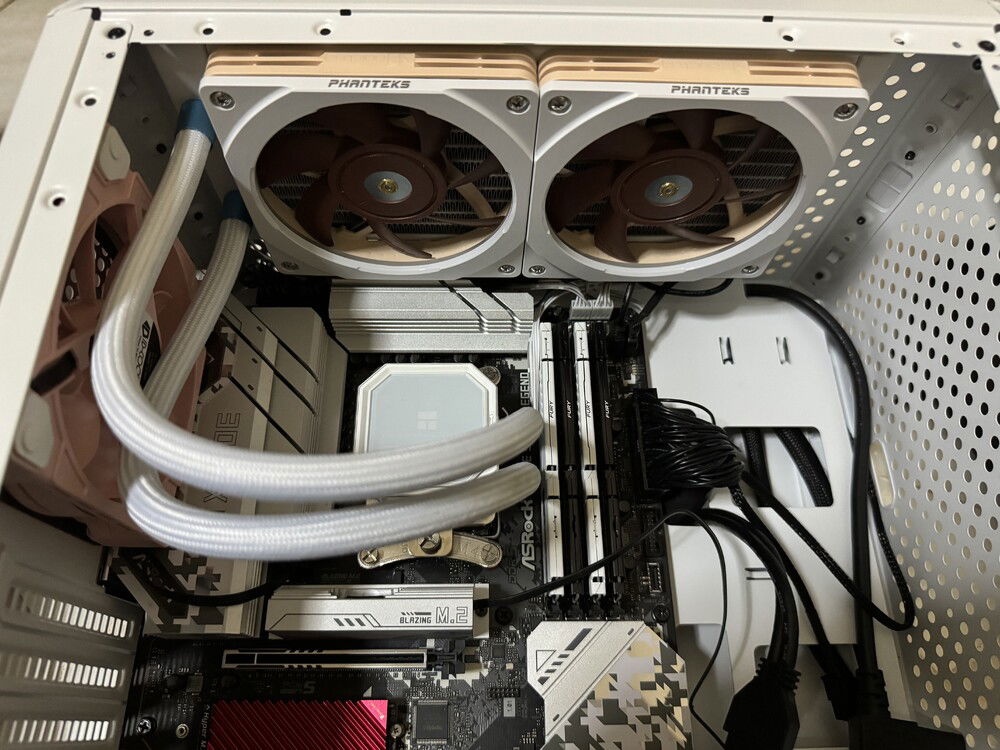
I'm probably the first madlad who succeeded in installing a radiator on the top in this godforsaken case.
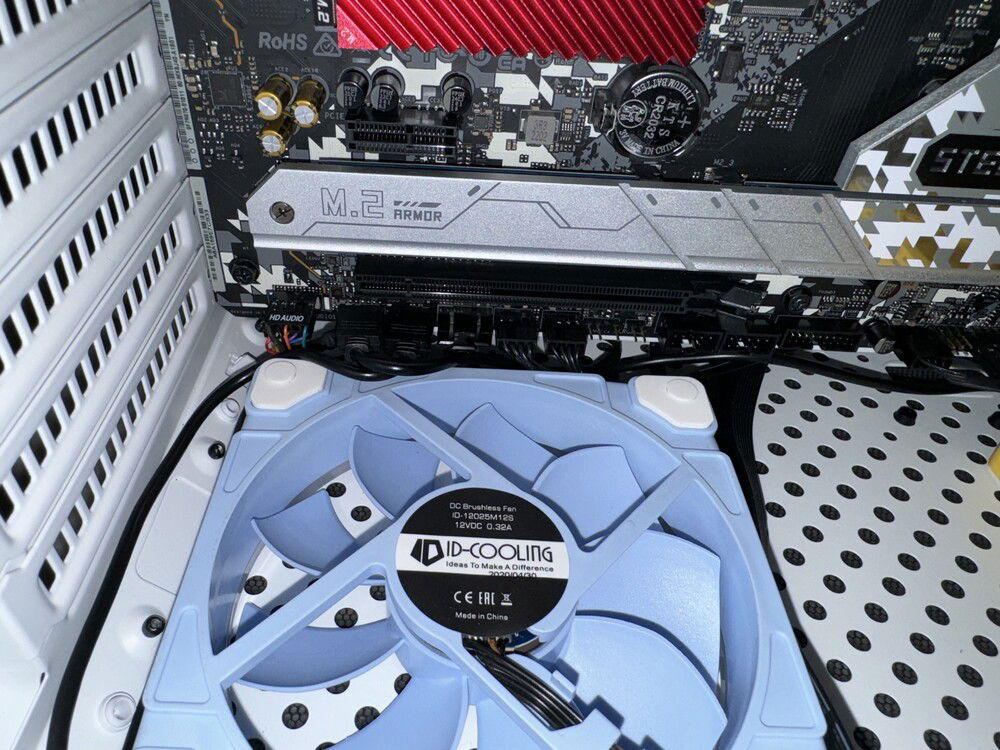
ARGB extension cable connected to the mobo. I'm not going to want to deal with that connector once all the cards are in place.
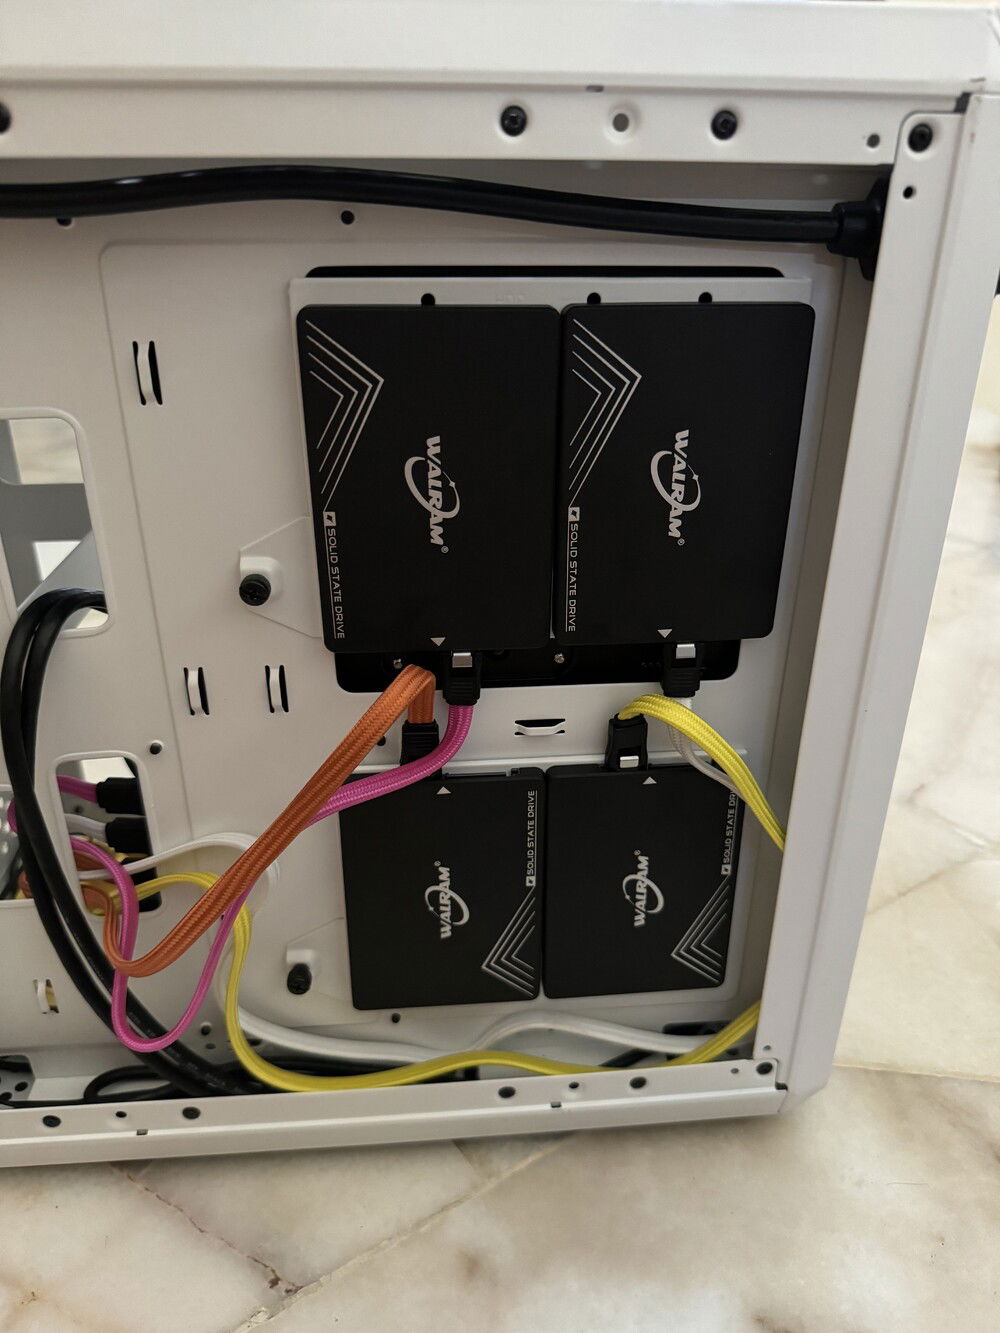
Four WalRAM 1TB SSDs along the back. These probably won't have any onboard cache, but that's okay. They're the "slow" tier. The three NV2s are these drives' RAM cache.
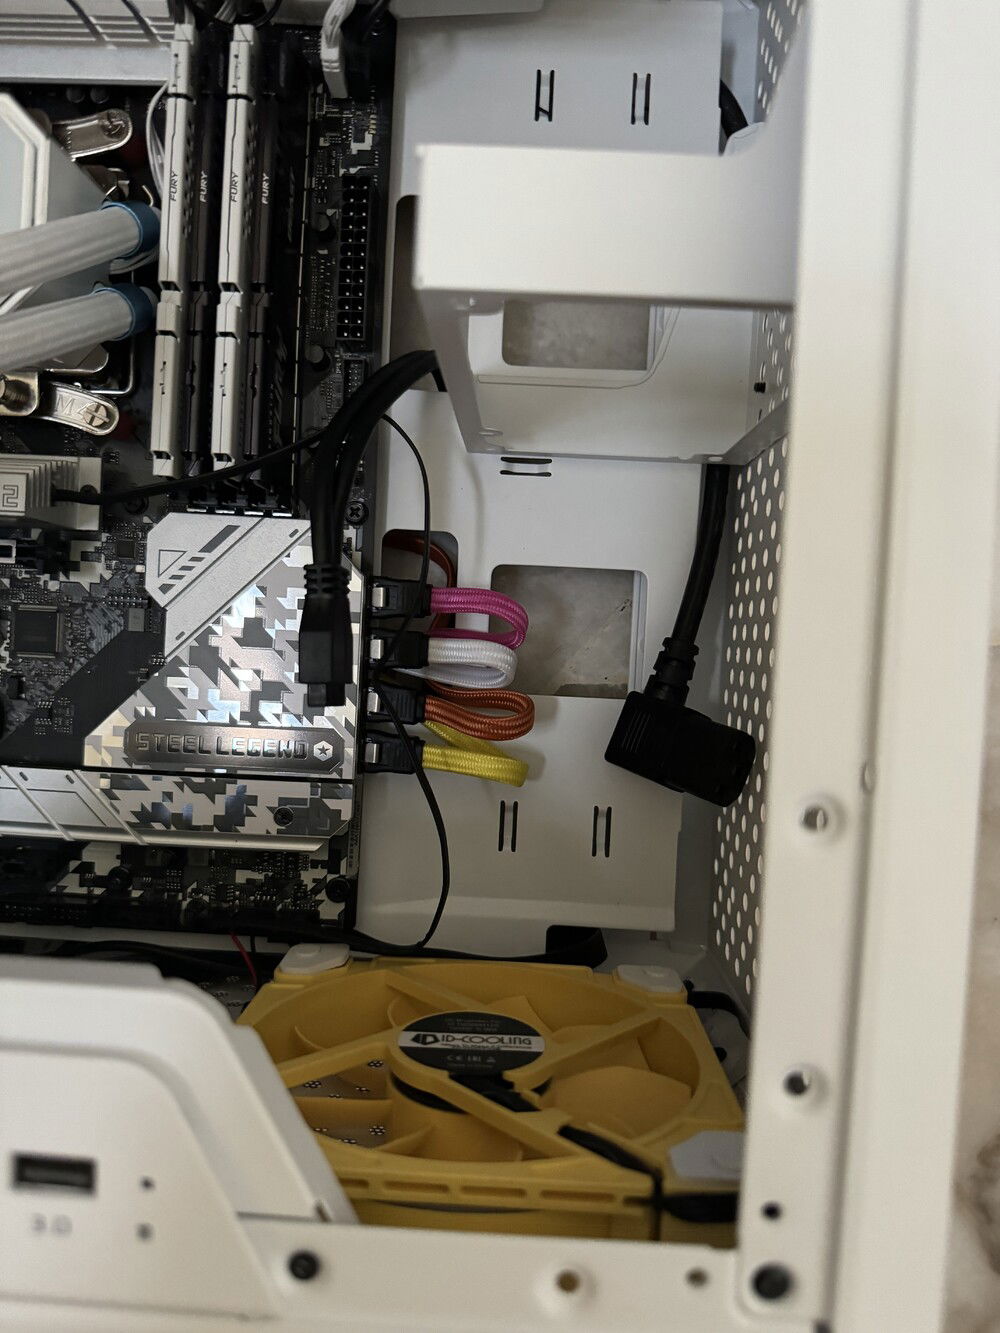
Too bad view of these cables would be obstructed by the GPU...
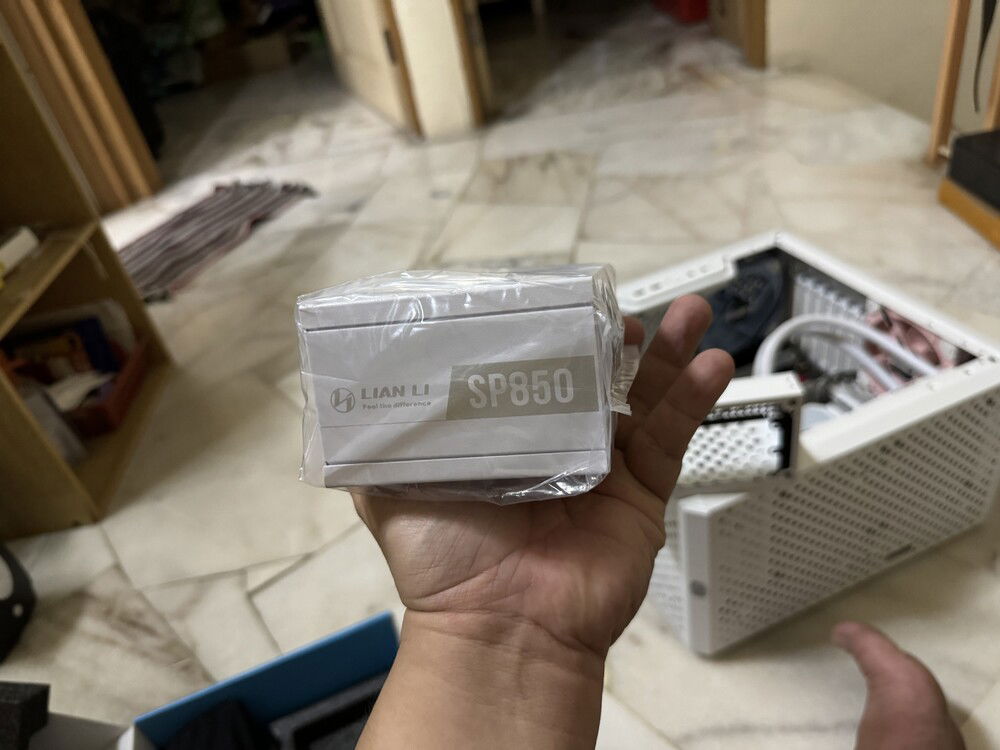
In the end it comes down to this.
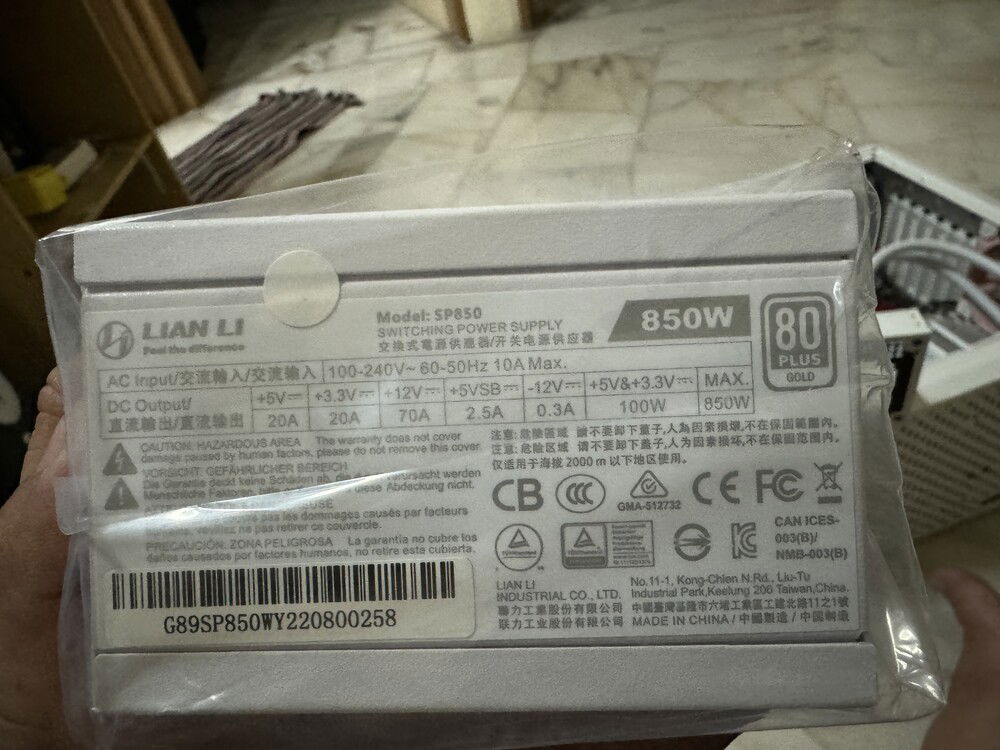
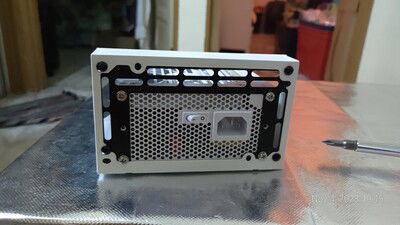
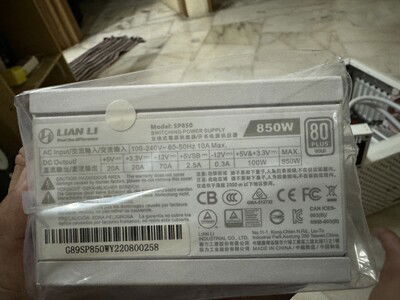
100-240v, but is it really? Because someone at Reddit says it's not.
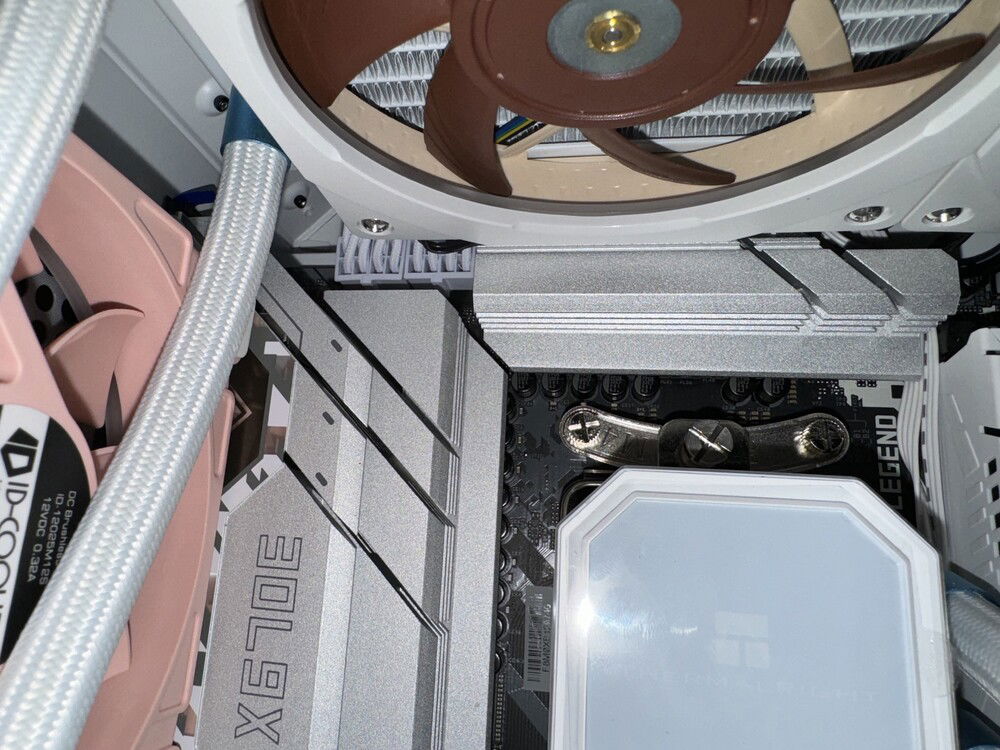
EPS Wired in
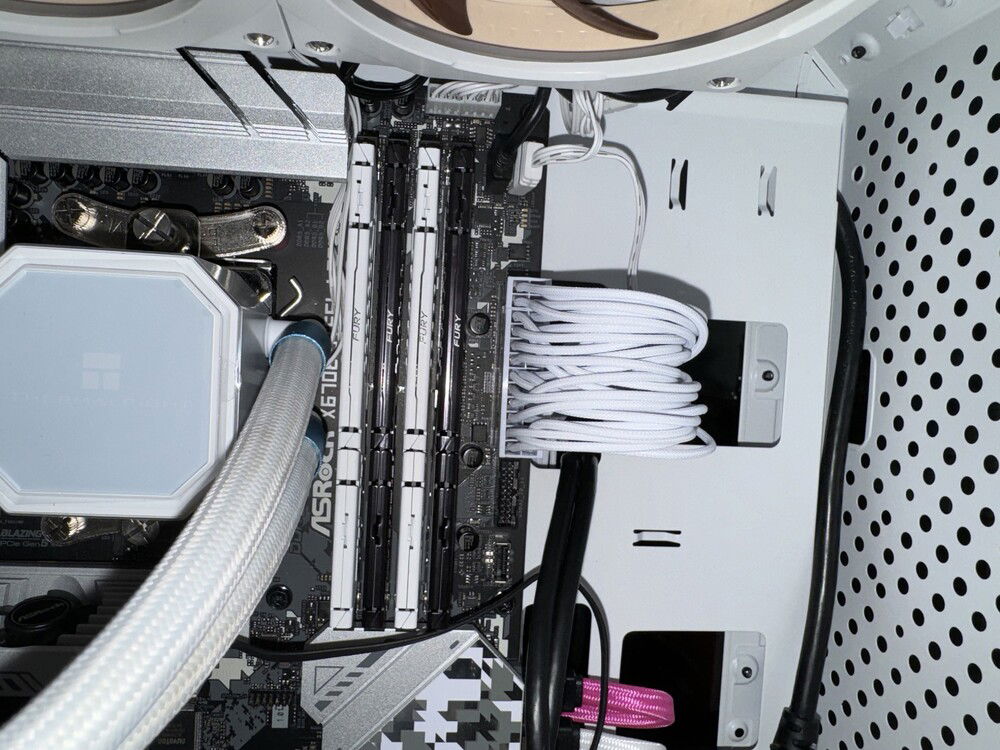
ATX Wired in
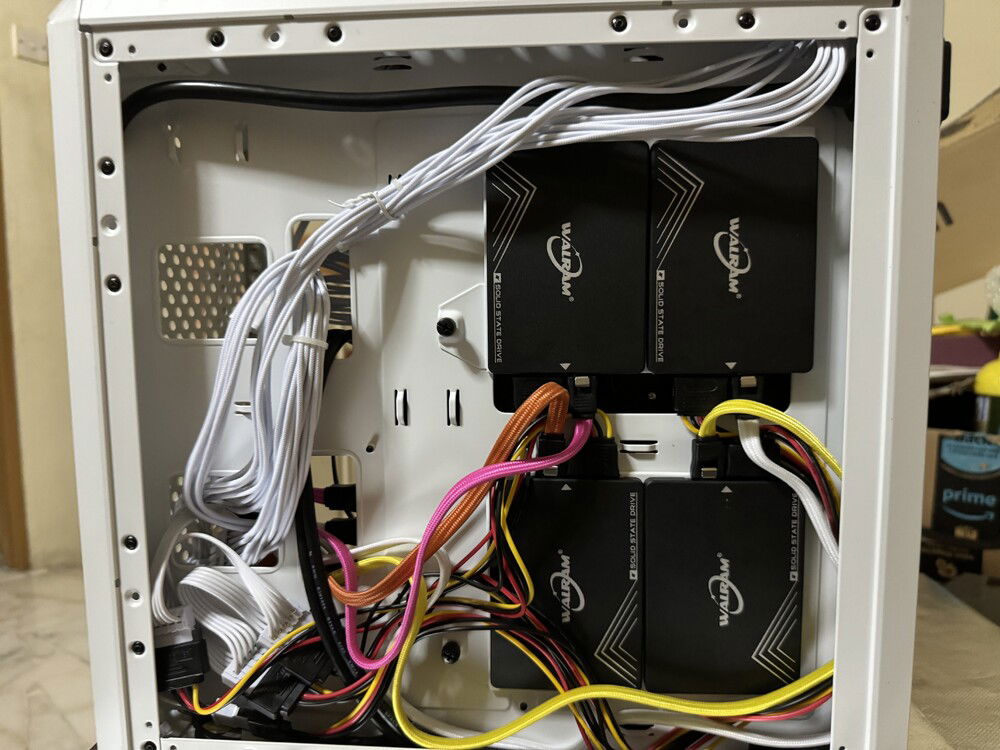
Wiry mess.
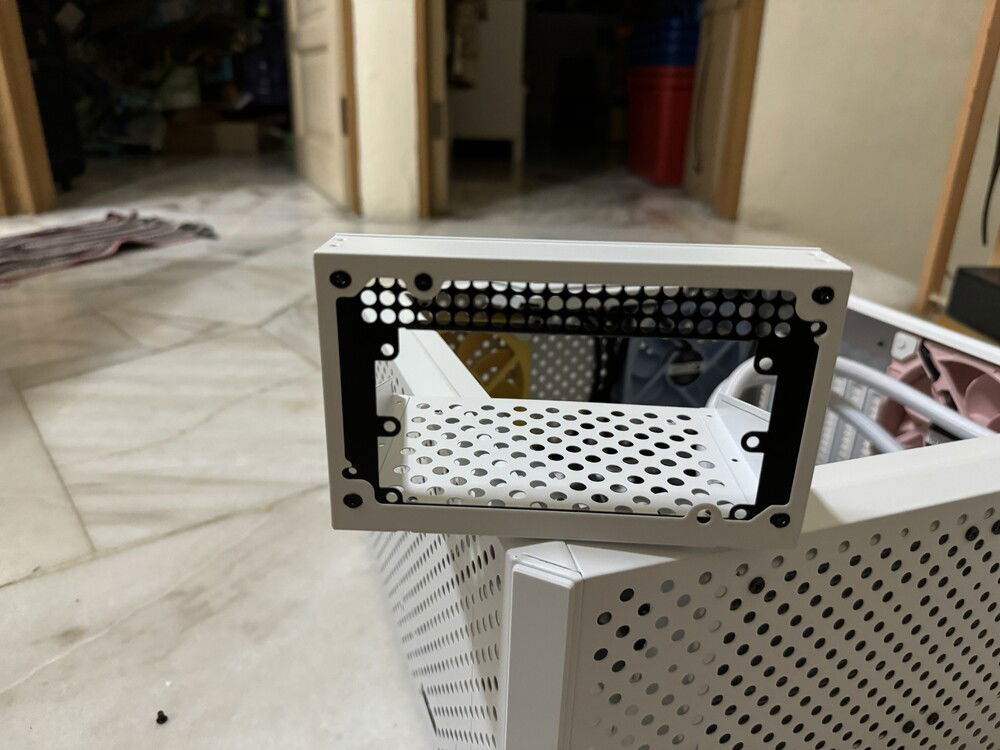
Silverstone's PP-08. Fits fine here, but the PSU doesn't fit.
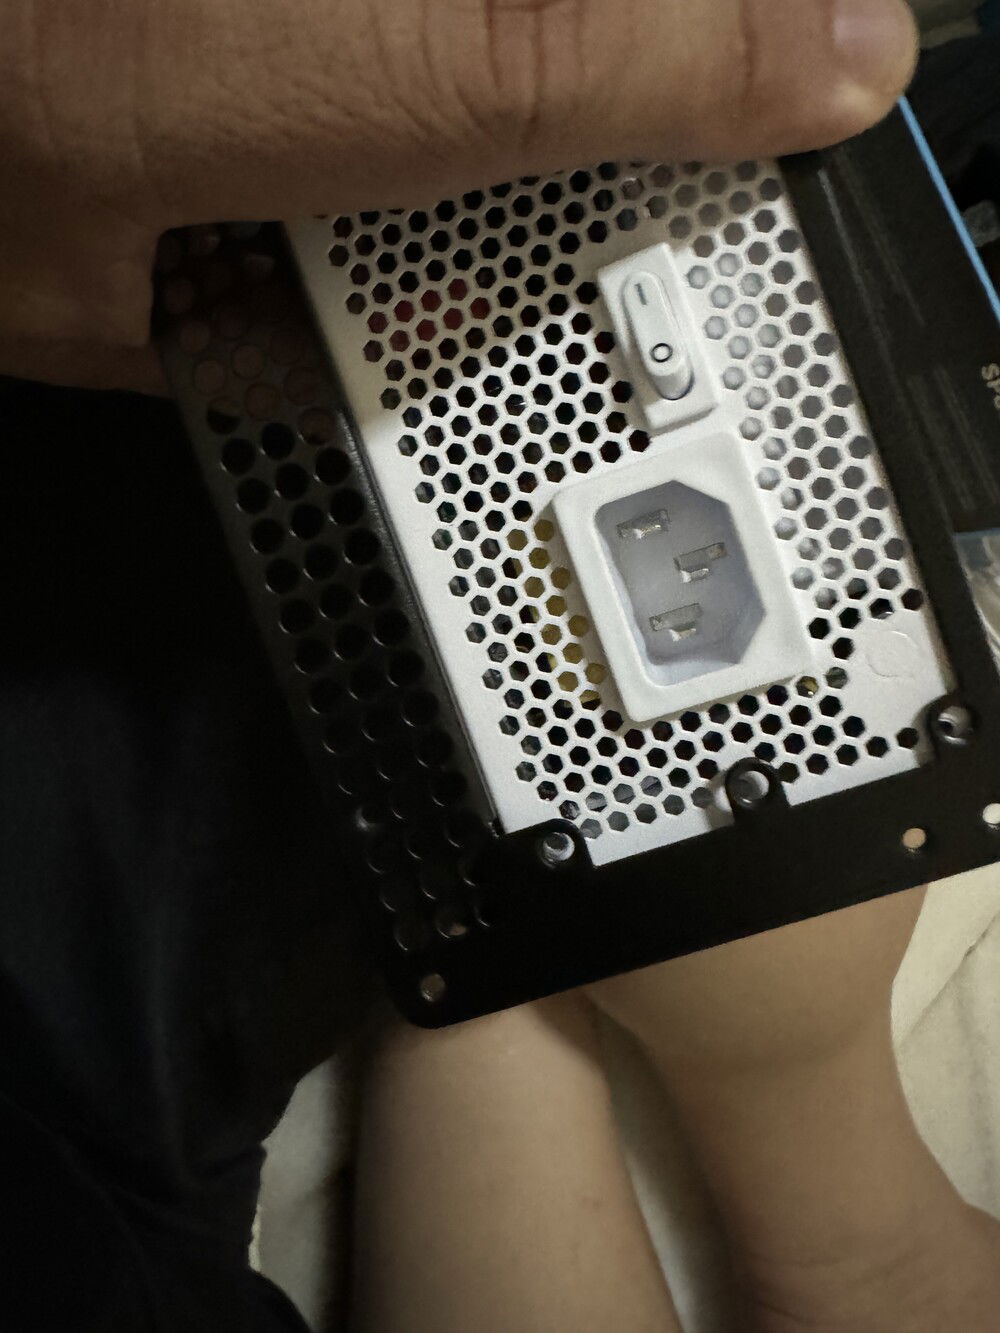
Does not fit
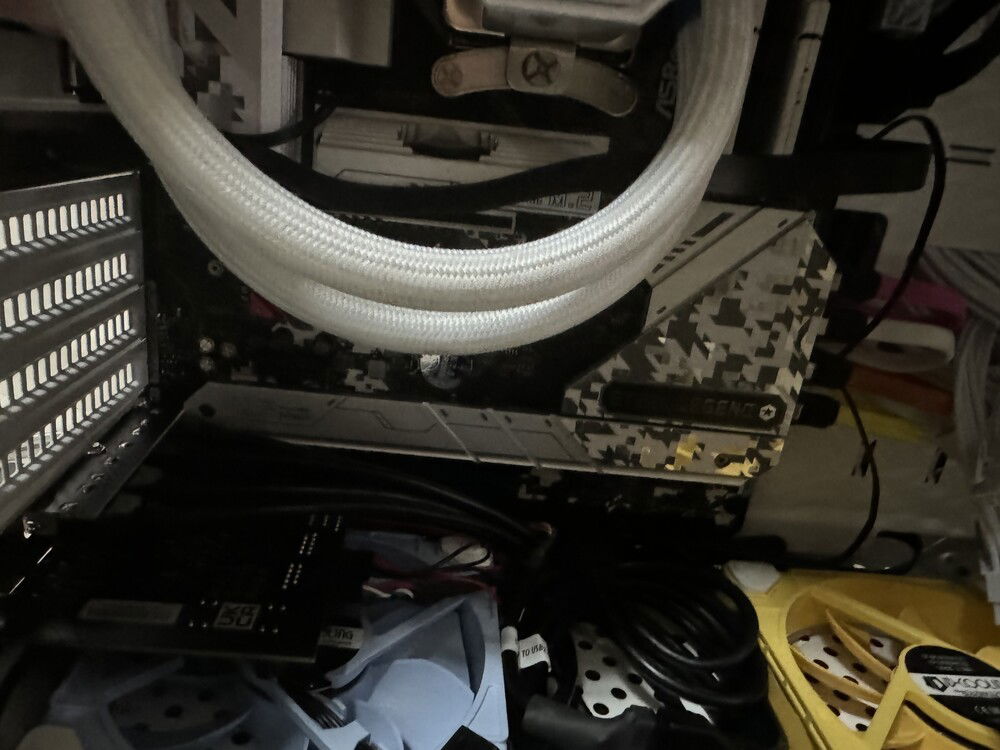
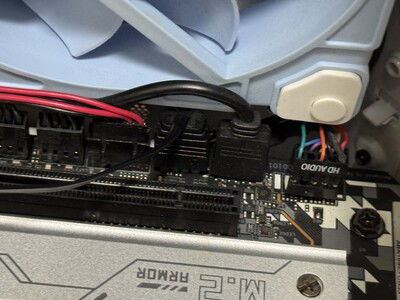
Remaining headers populated. TB4 card installed.
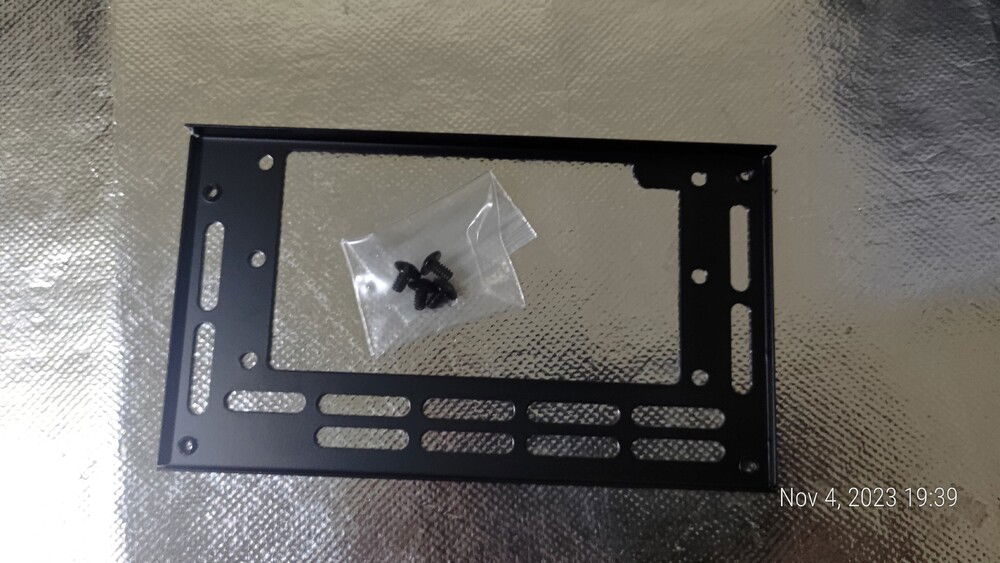
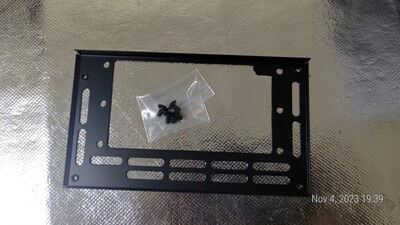
SFX to ATX bracket round 2
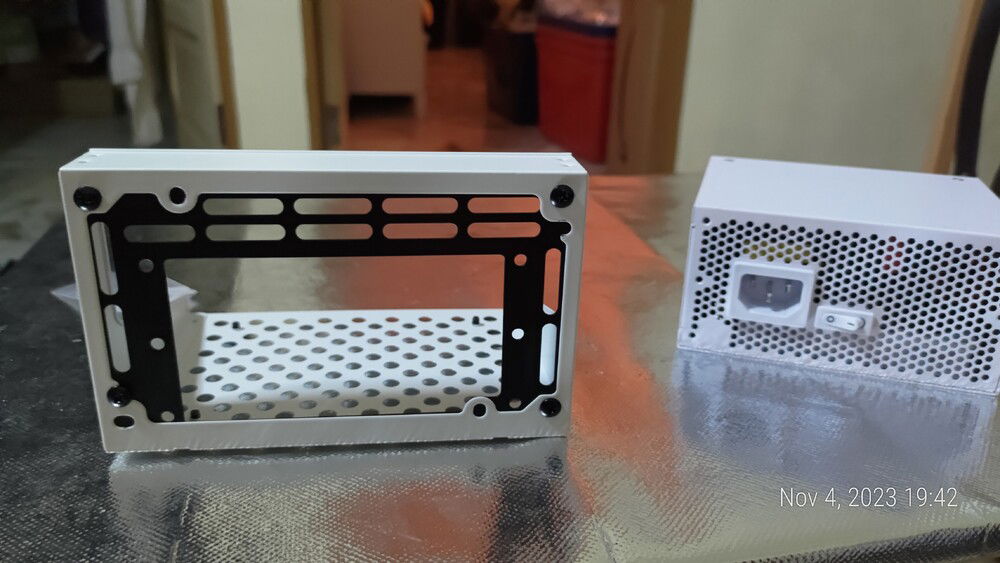
Replacement bracket to ATX PSU mount.
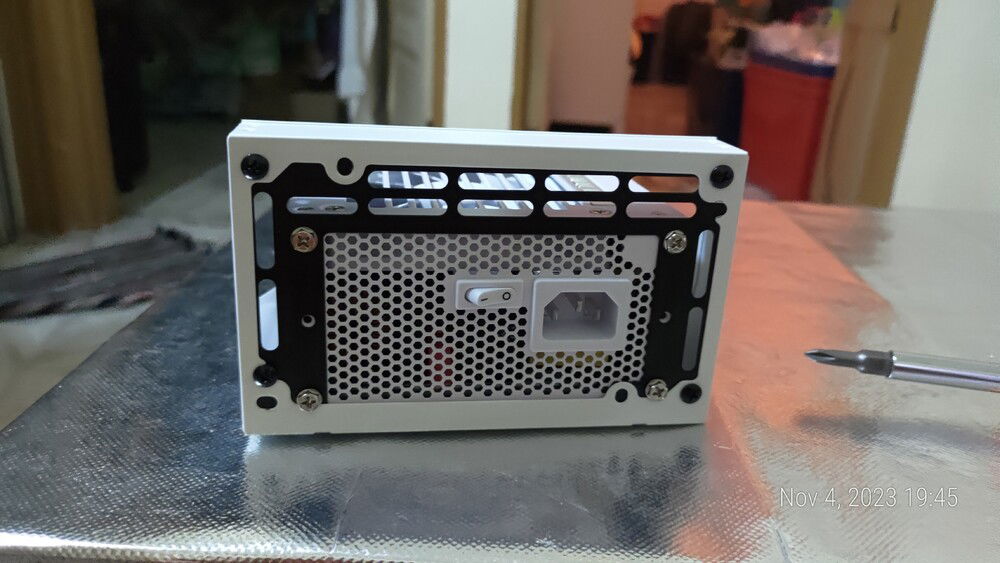
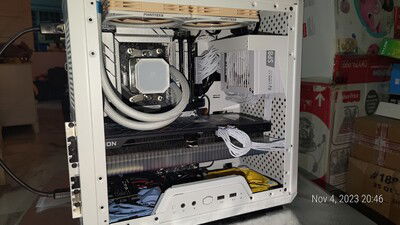
PSU installed, finally.
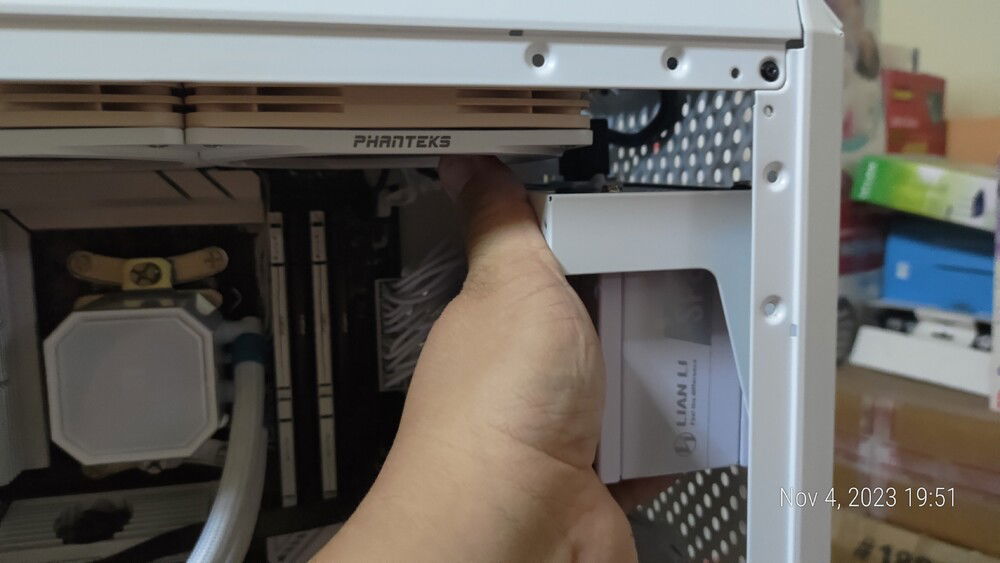
Preparing to finalize mounting the PSU.
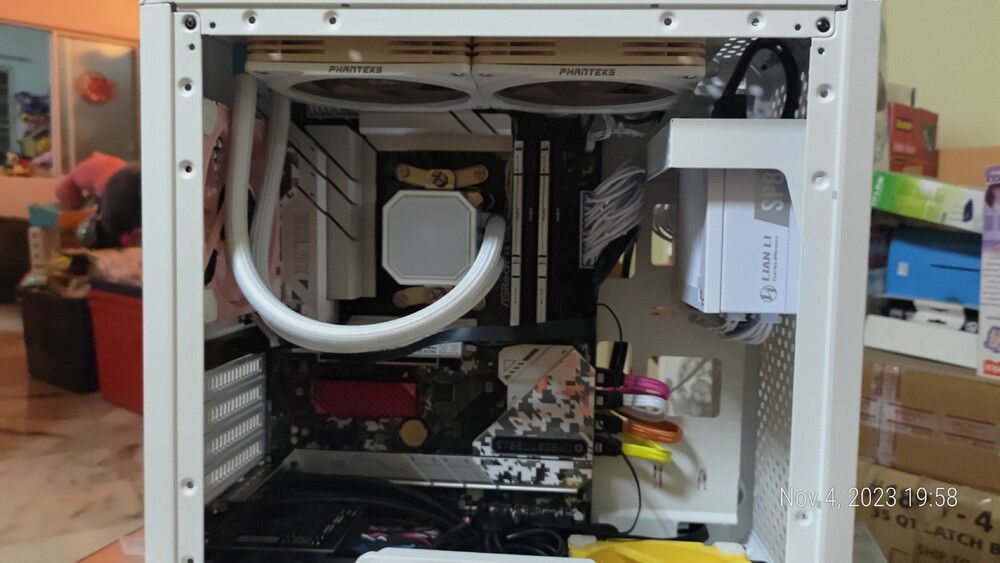
Compromises were made.
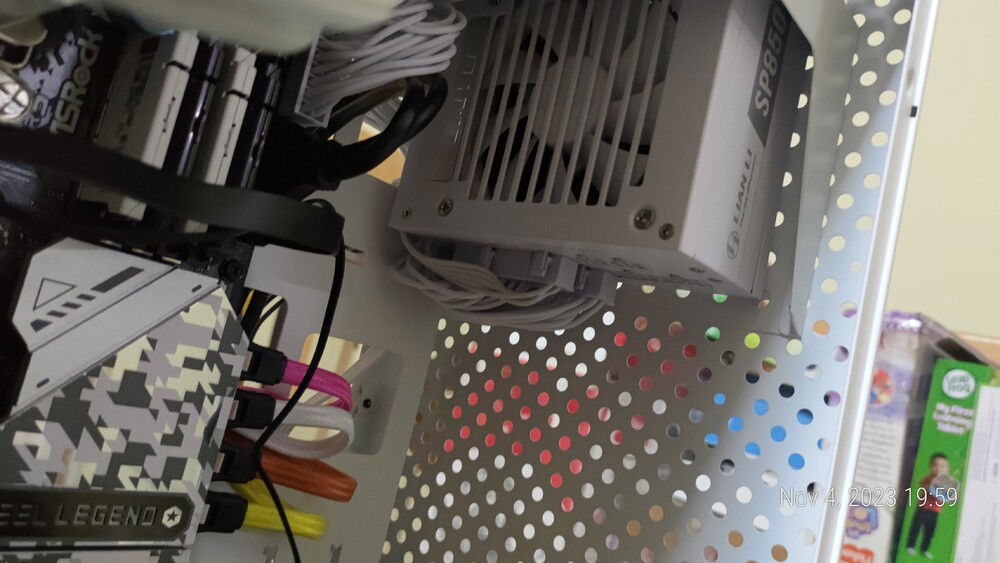
The cables were made to be as flat as possible to ensure enough space for the GPU
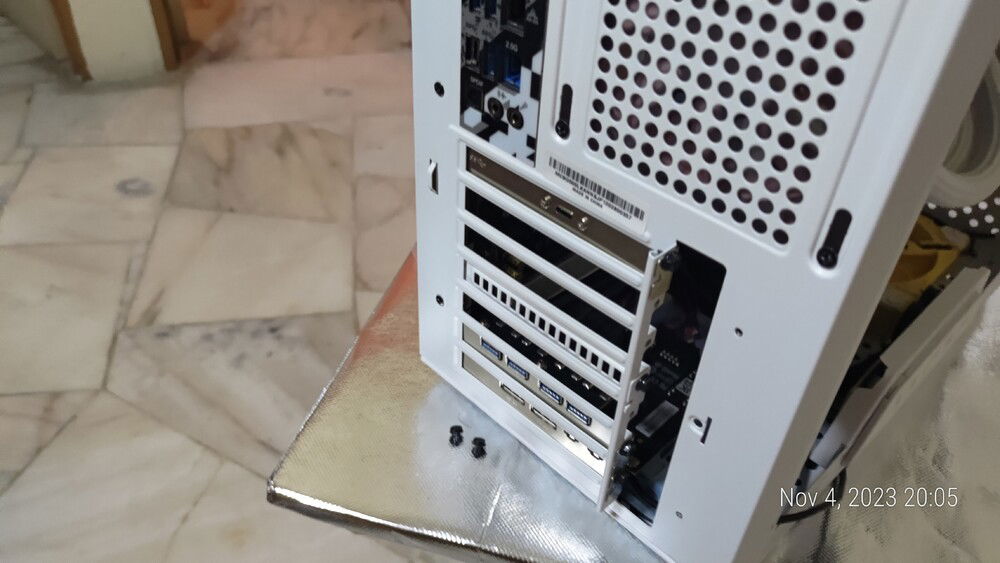
Back brackets removed in anticipation for the GPU
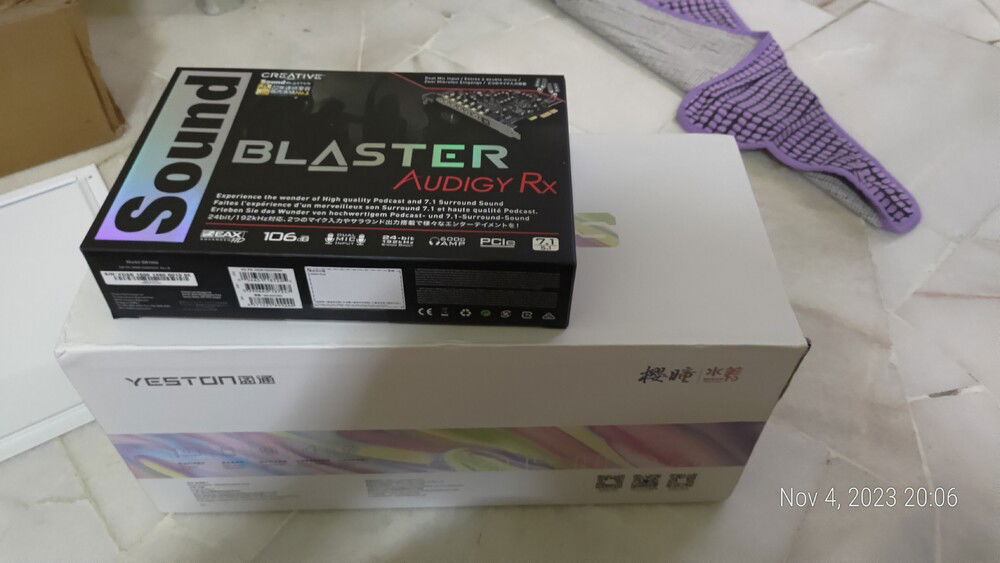
*”March of The Toreadors” from “Carmen” intensifies*
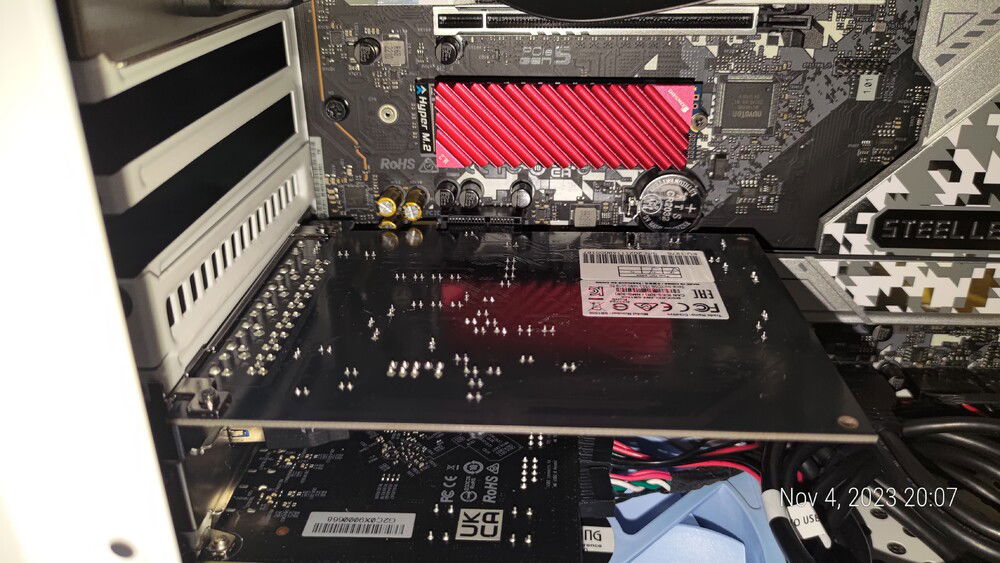
Sound card went in easy enough.
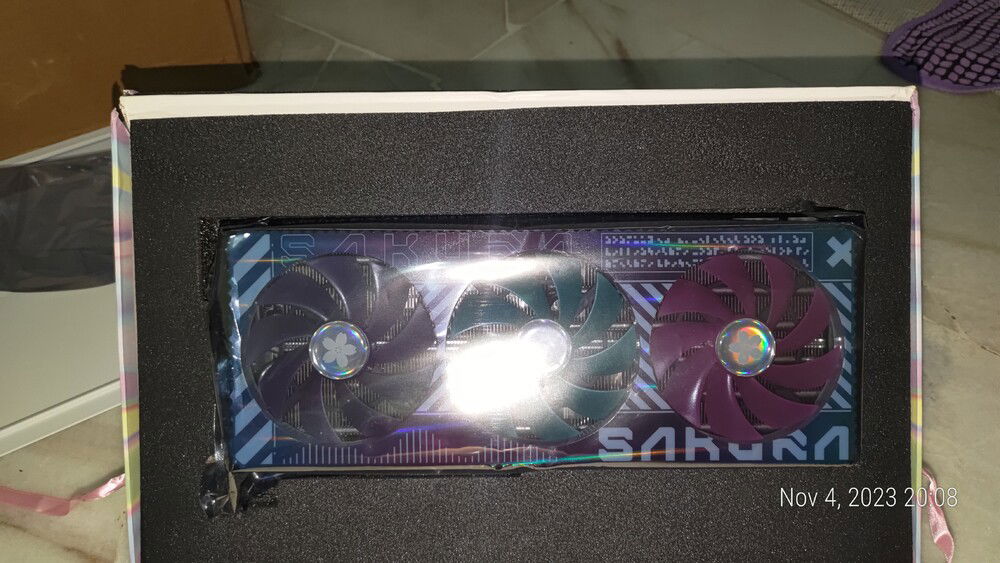
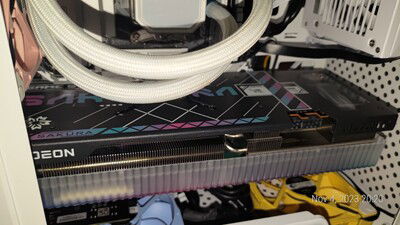
And now the princess.
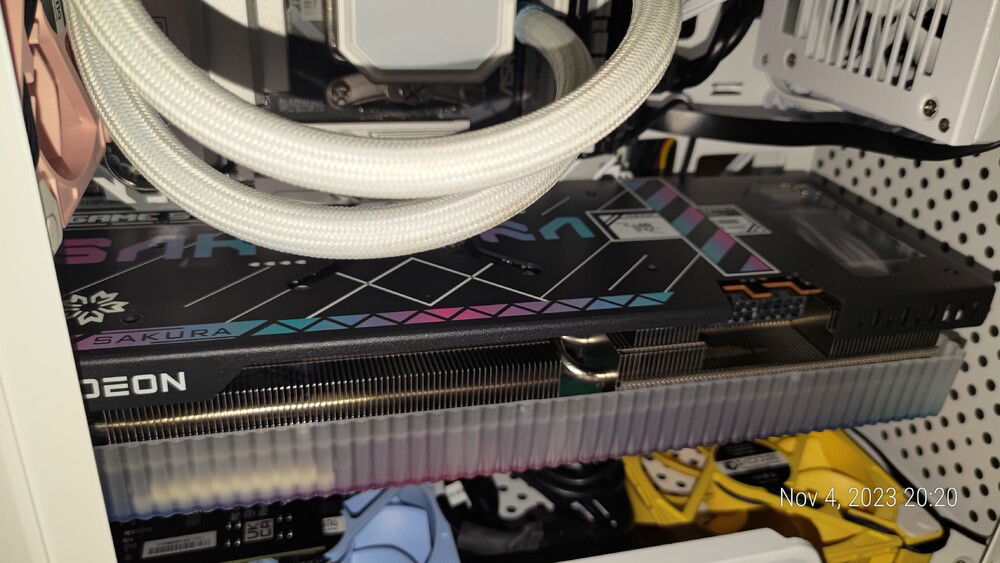
Damn card was a pain to install…
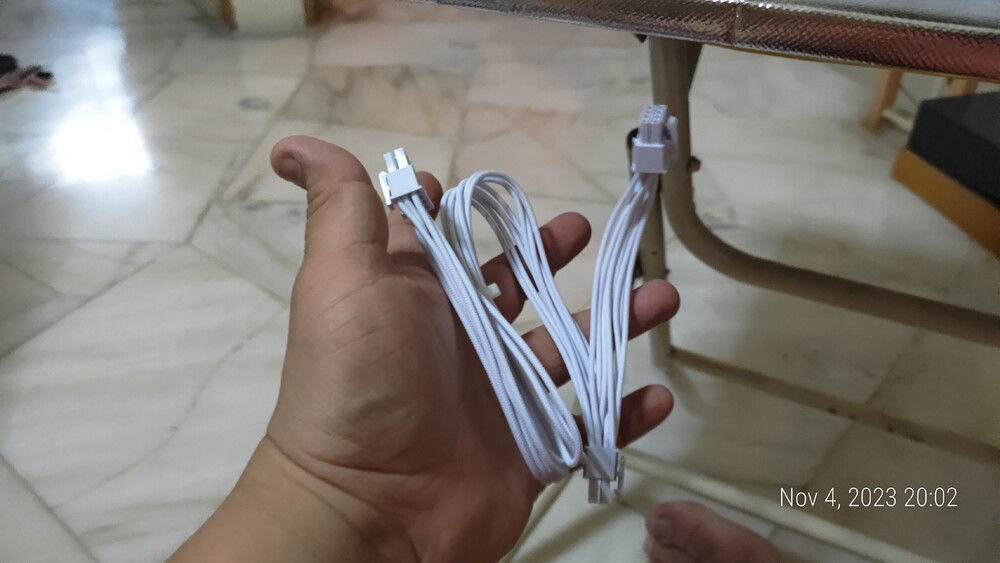
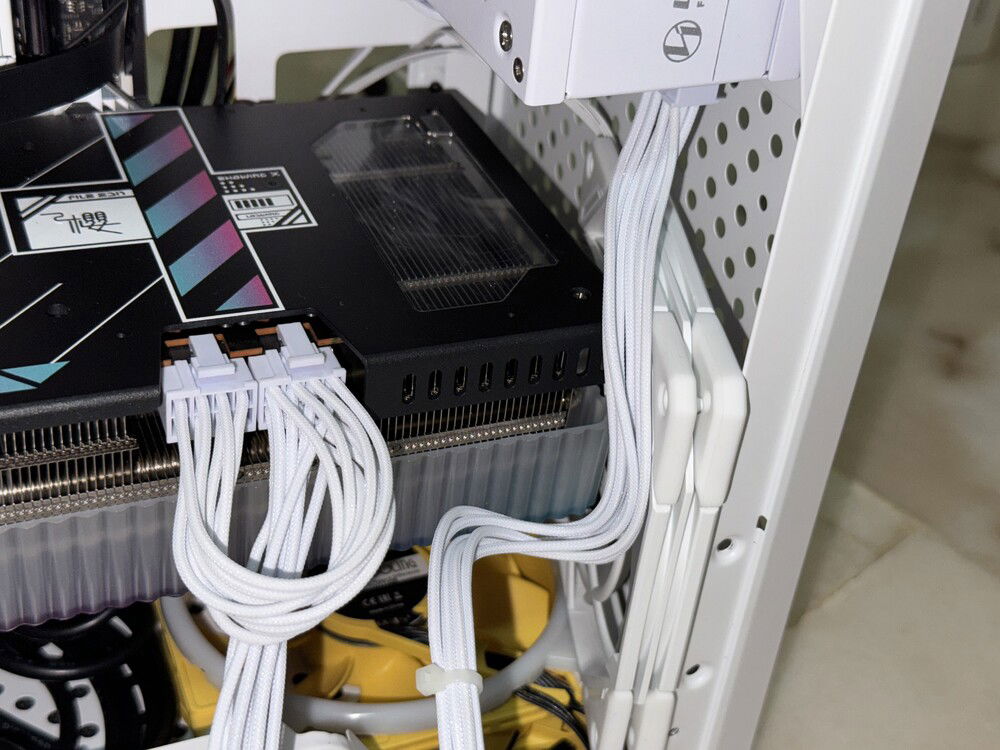
At this point, it’s time to install the power for the card. You know what? Fukuwachita. YOLO. And all that. We’re using the daisy chain cord.
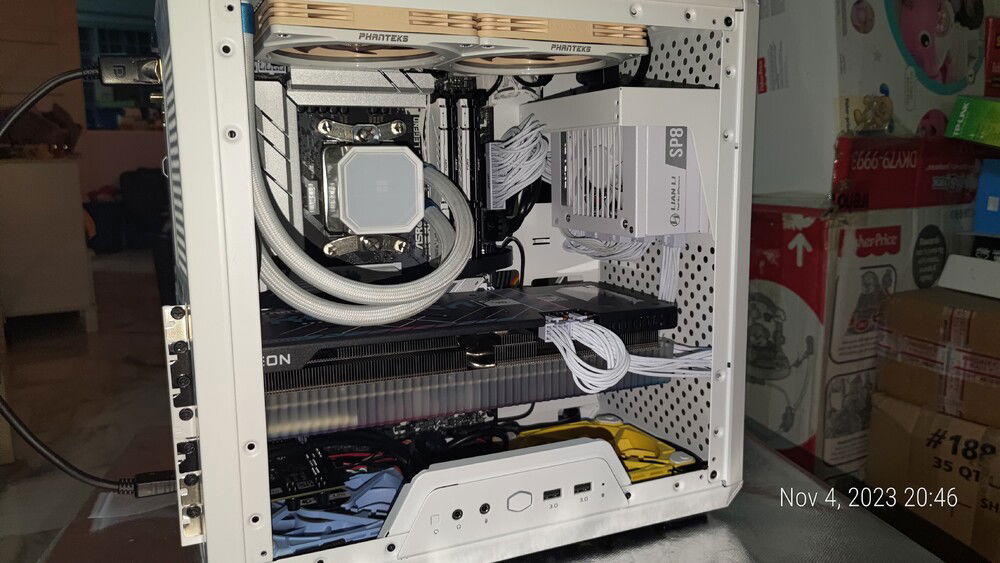
More compromises were made.
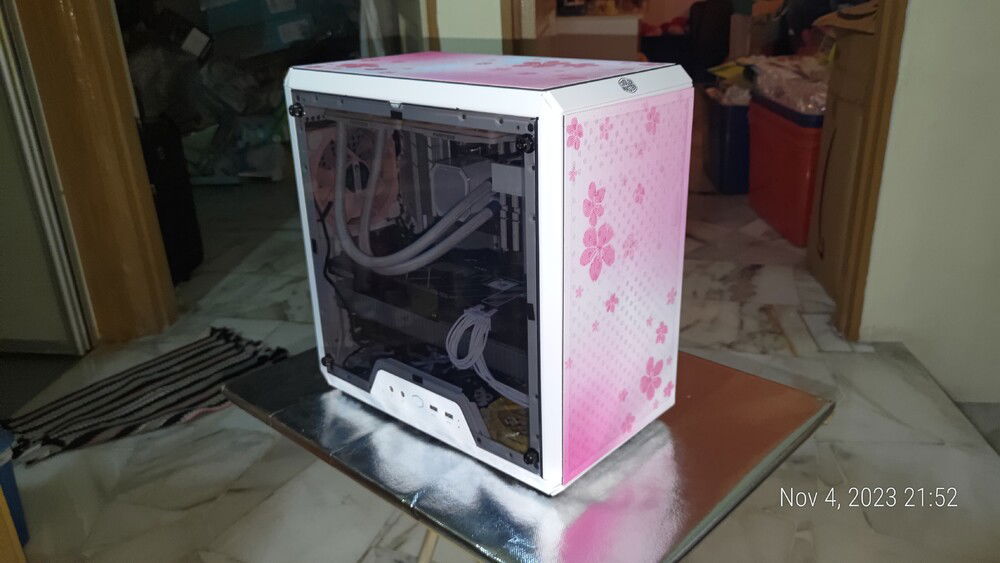
It’s over.
Or is it?
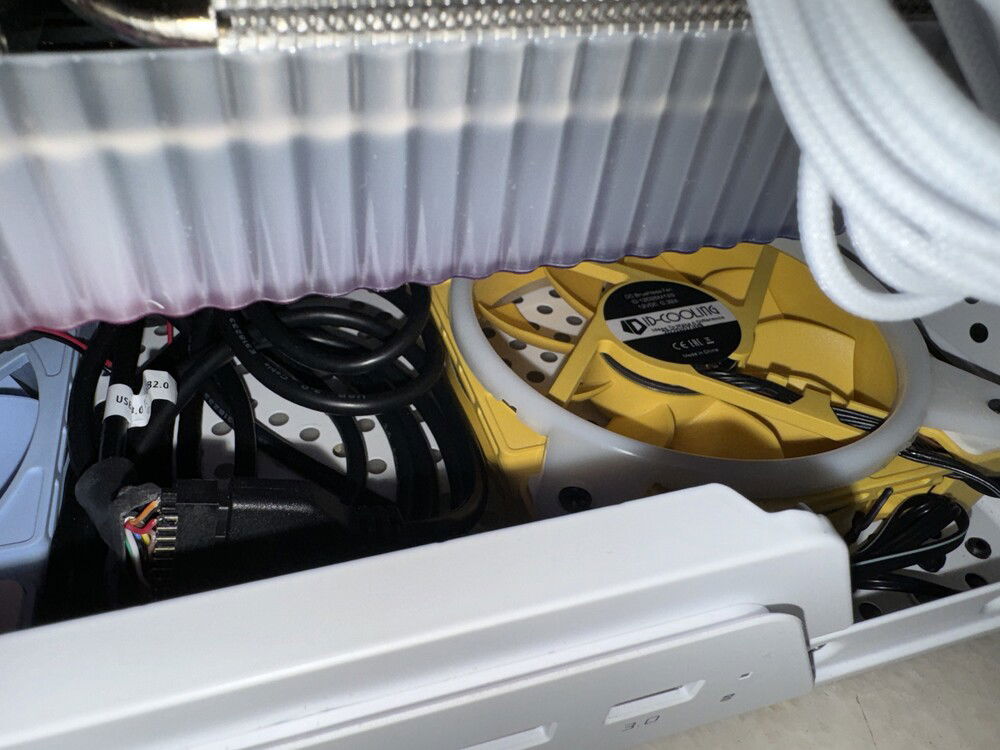
Now with FG-122!
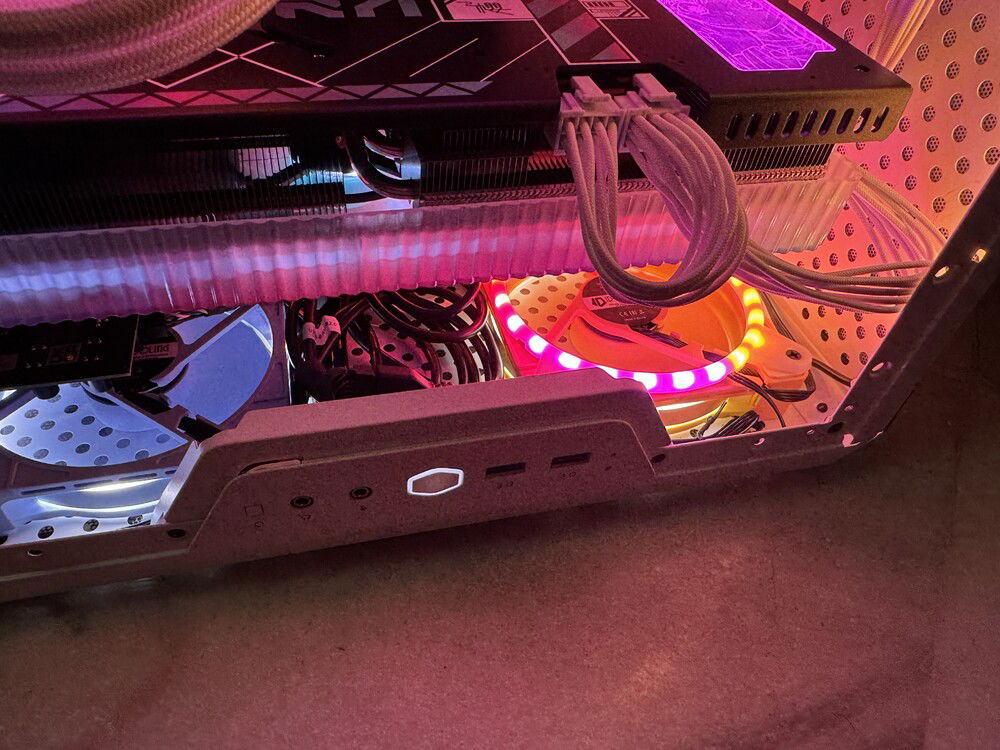
Red, red...
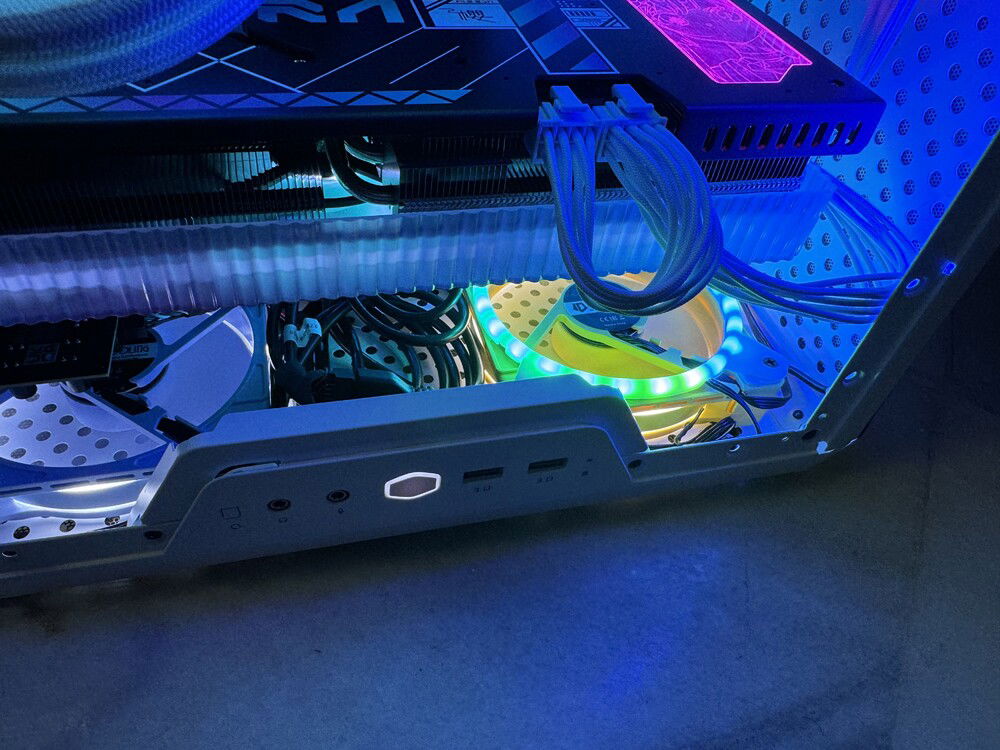
Blue, blue...
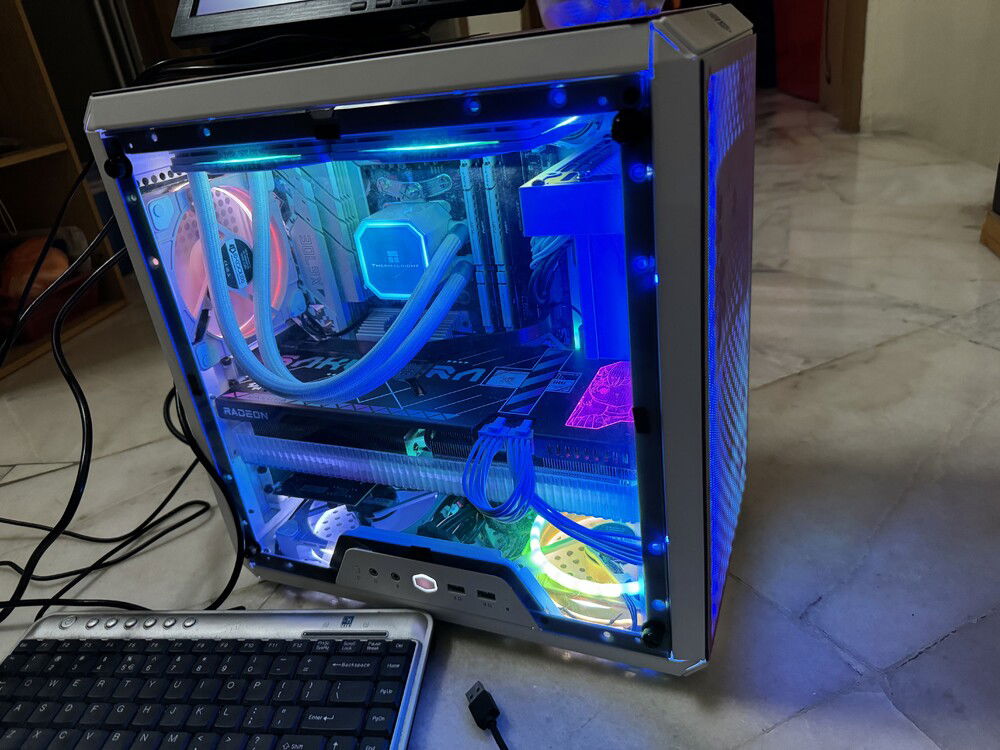
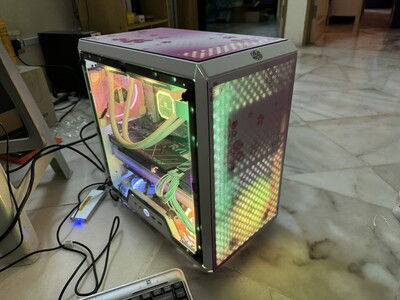
Final build- focus.
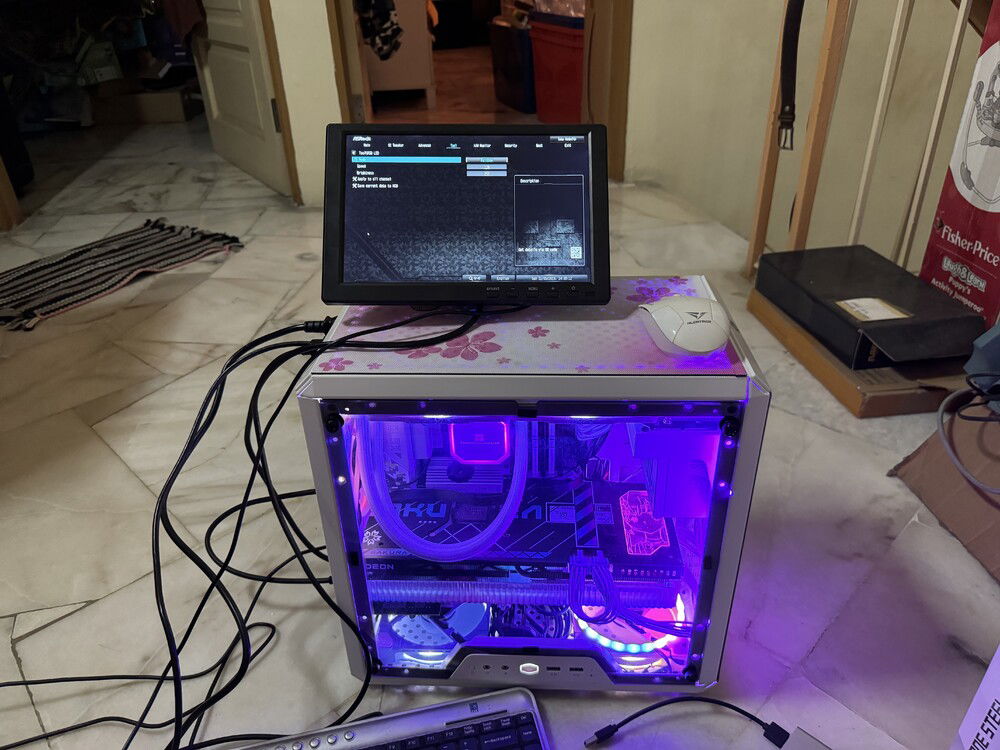
Test rig.
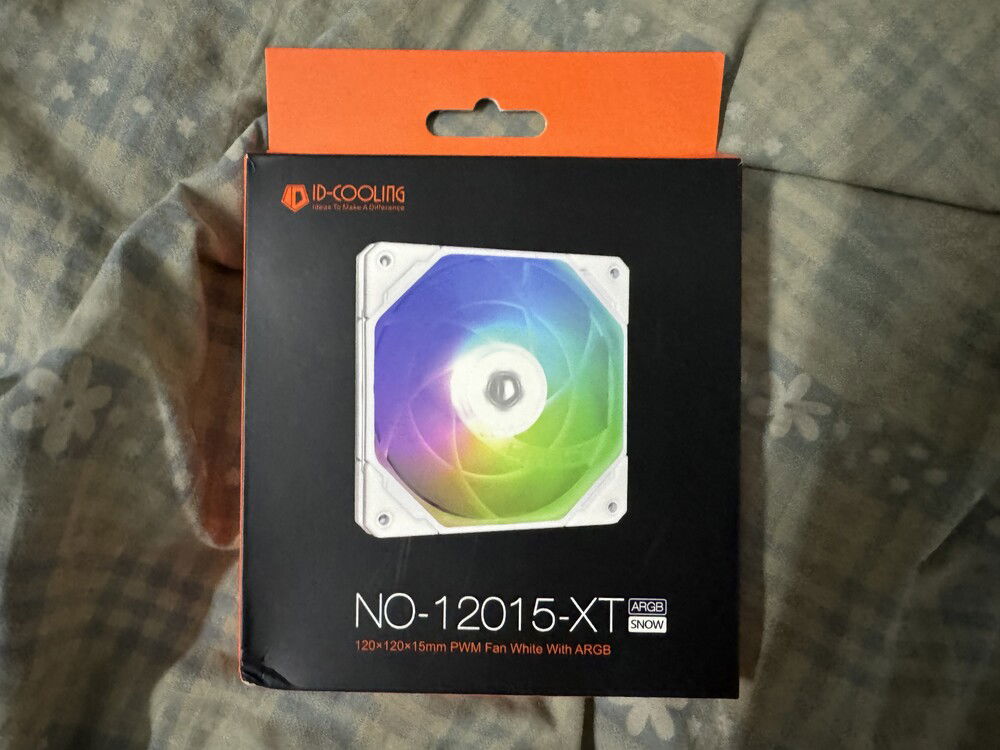
Another shiny
So thin, it slips between tight spaces!
Cable Management attempt
You couldn't even tell there's something over there
Unicorn barf. In CGA.
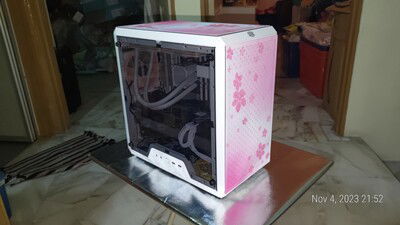
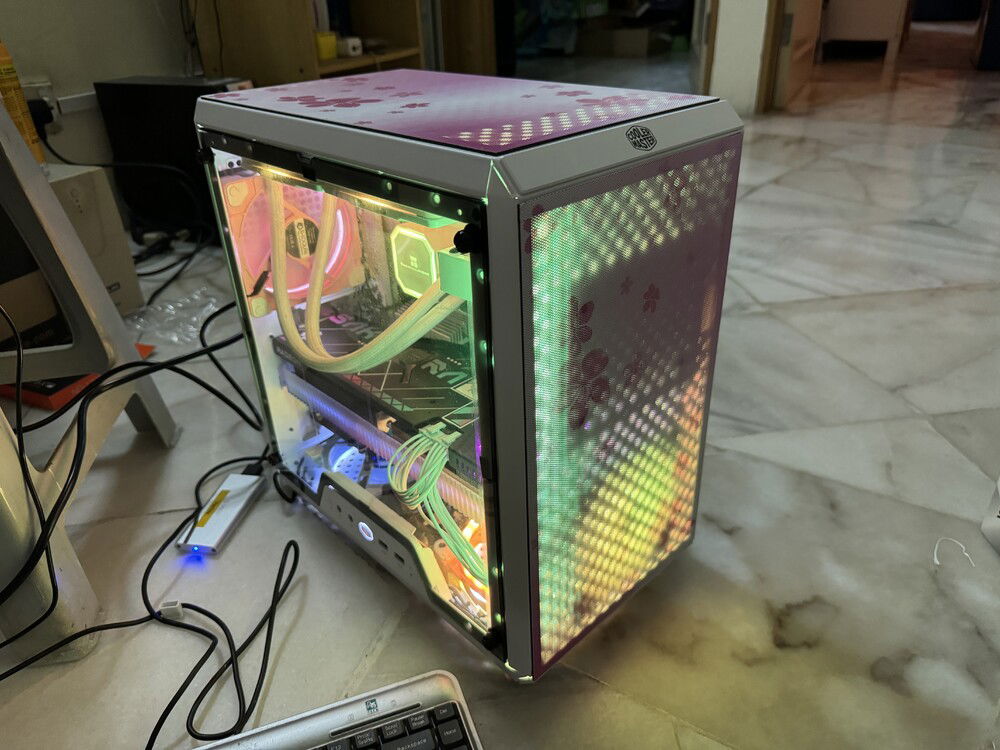
Final resting spot.
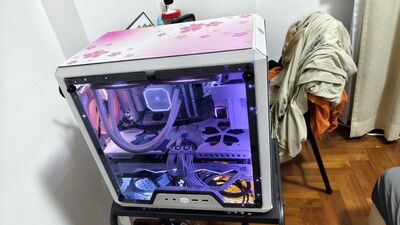
Sakurako 2.0: You (must) upgrade.
Don’t need the FG122 anymore. The port is going to be used for something else.
Removing the rad. Painful.
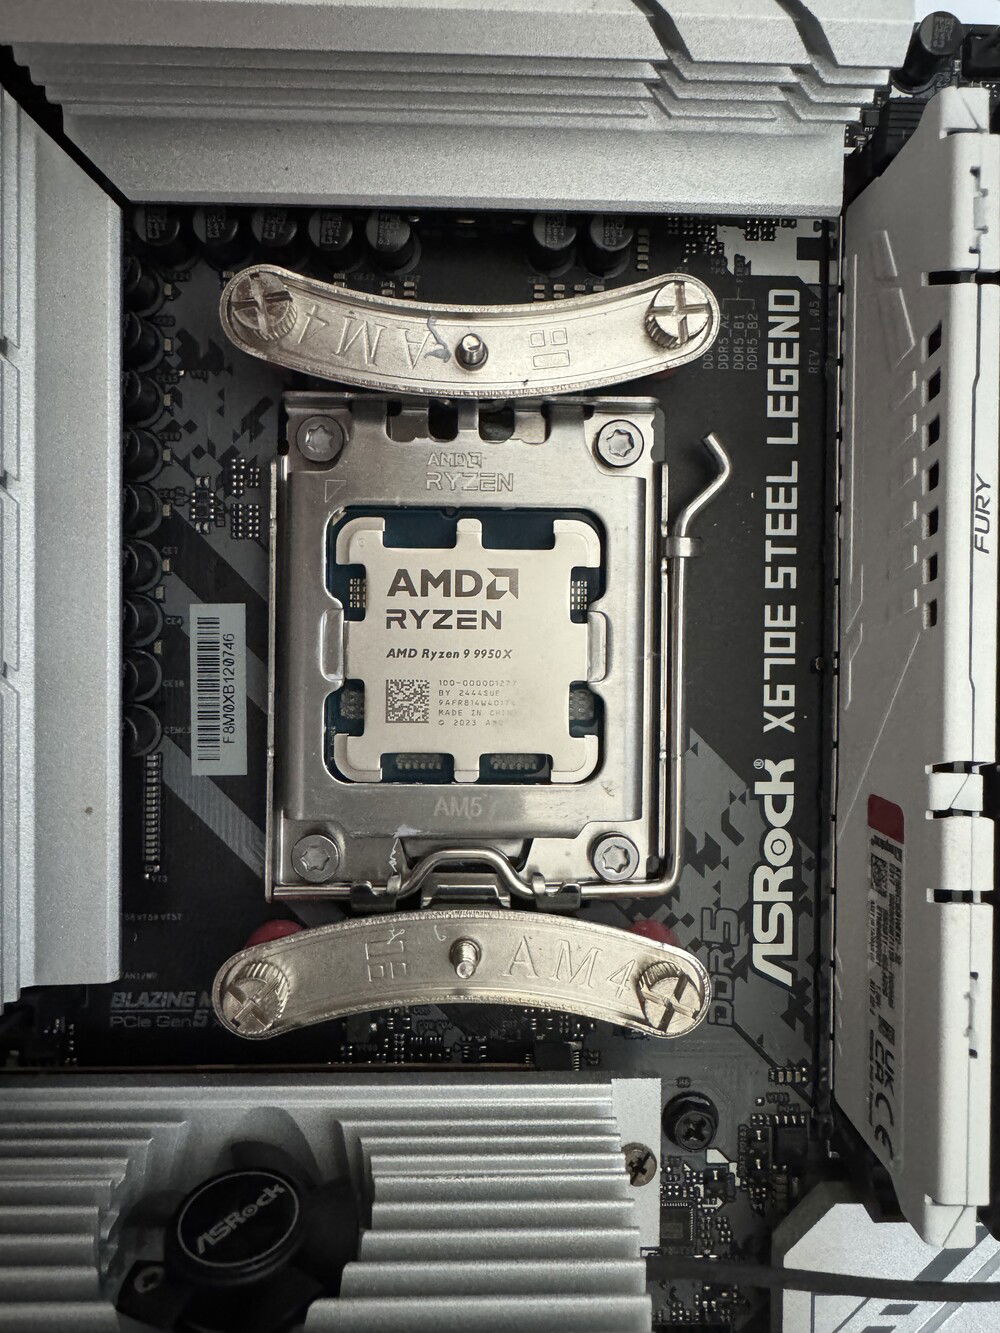
Replacement CPU.
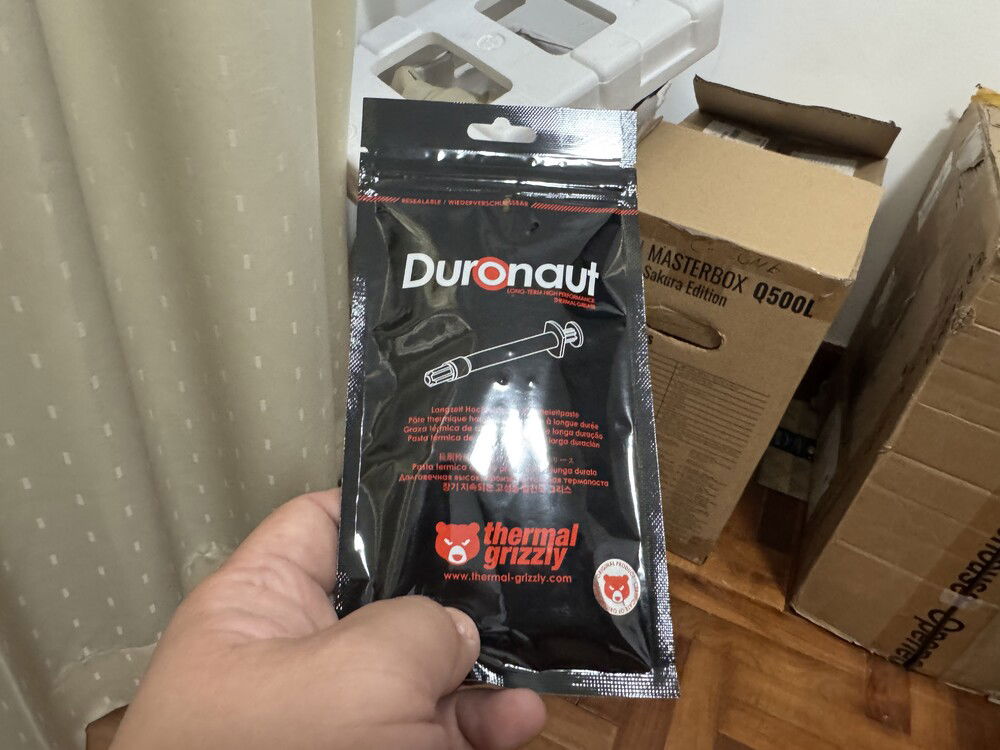
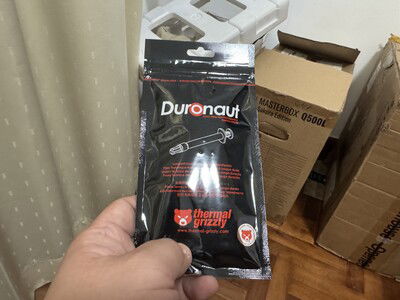
We’re using the new Duronaut from Thermal Grizzly
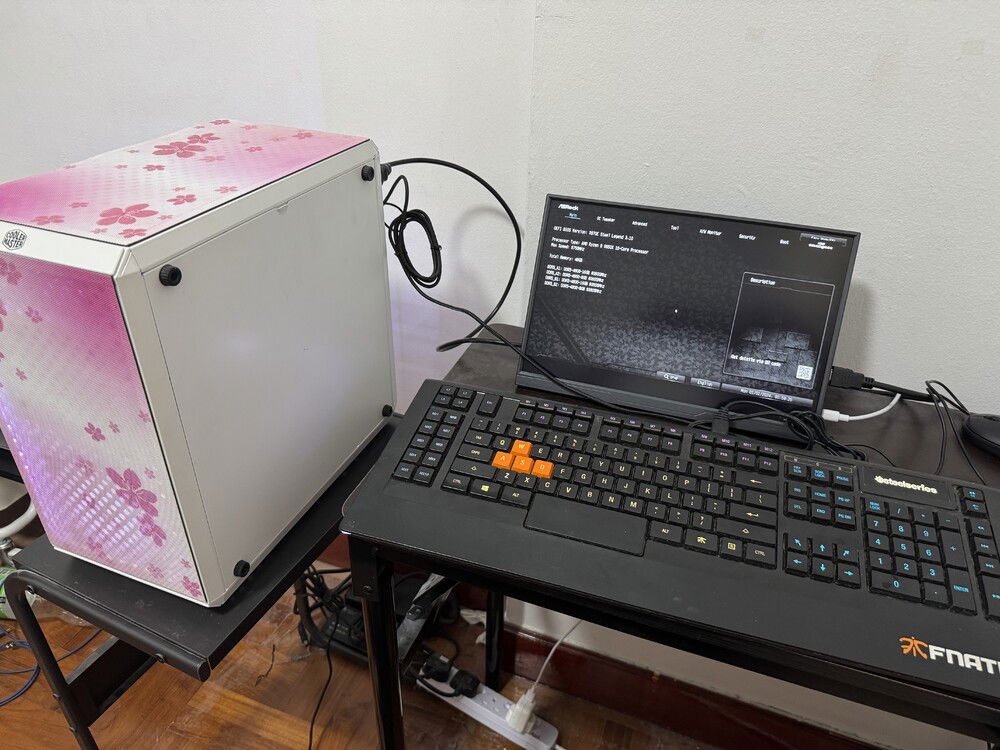
Phase 1 test.
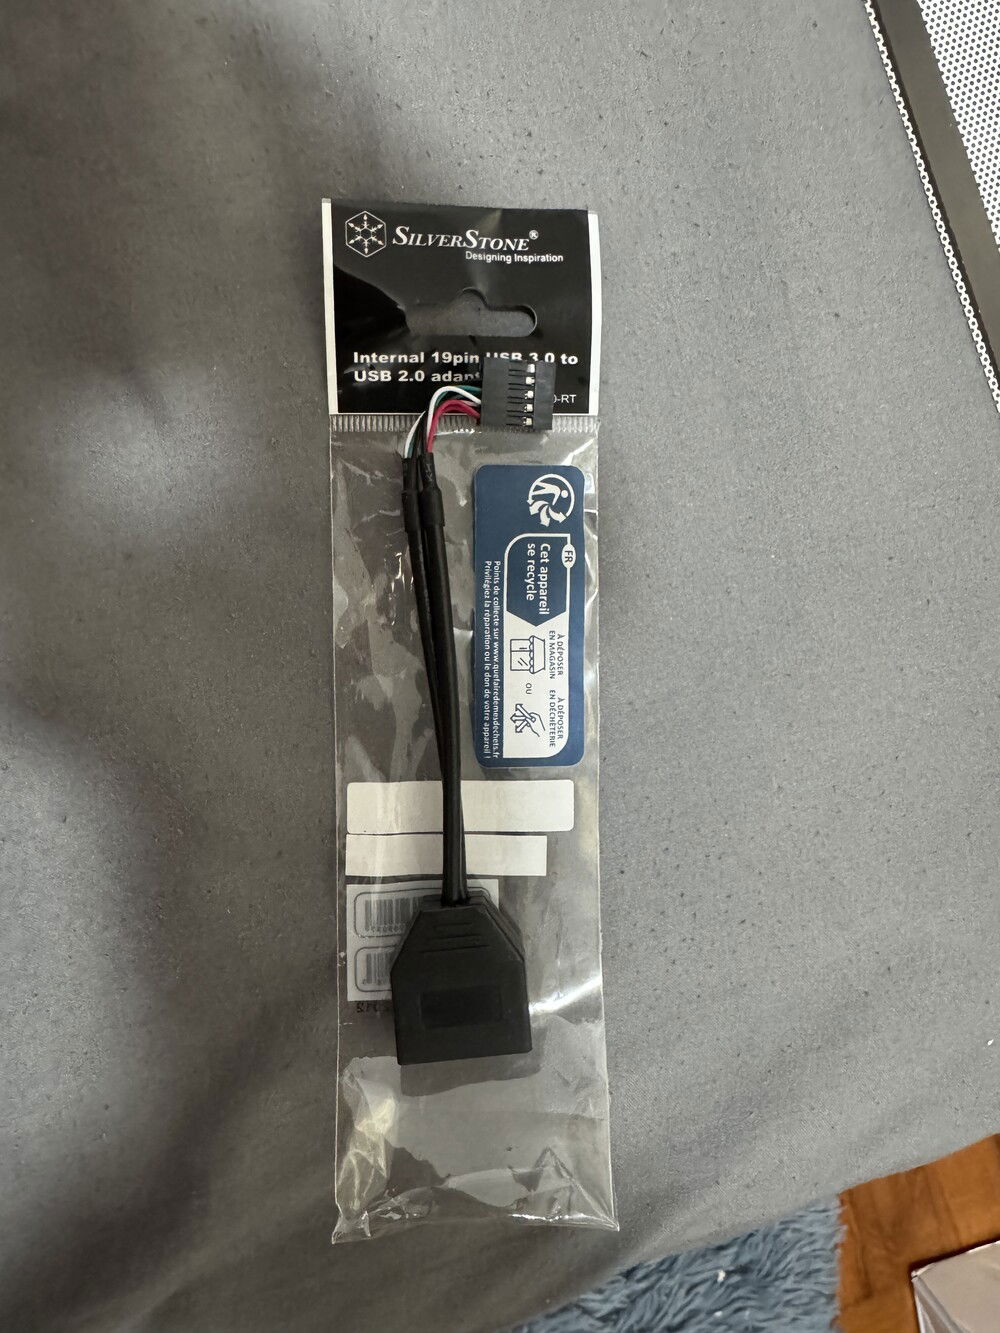
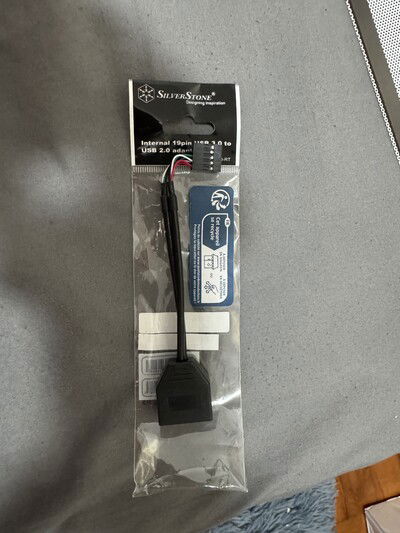
Replaces the funky nobrand USB2 to USB3 adapter with a reliable one from Silverstone.
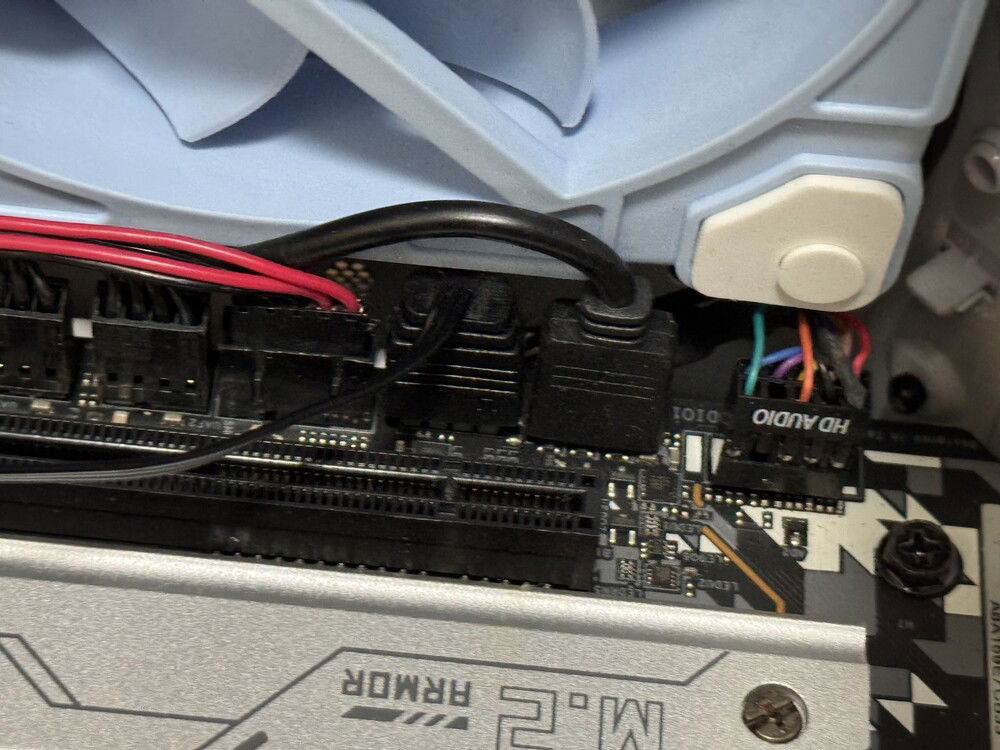
The FG-122’s ARGB connector is replaced with an extension
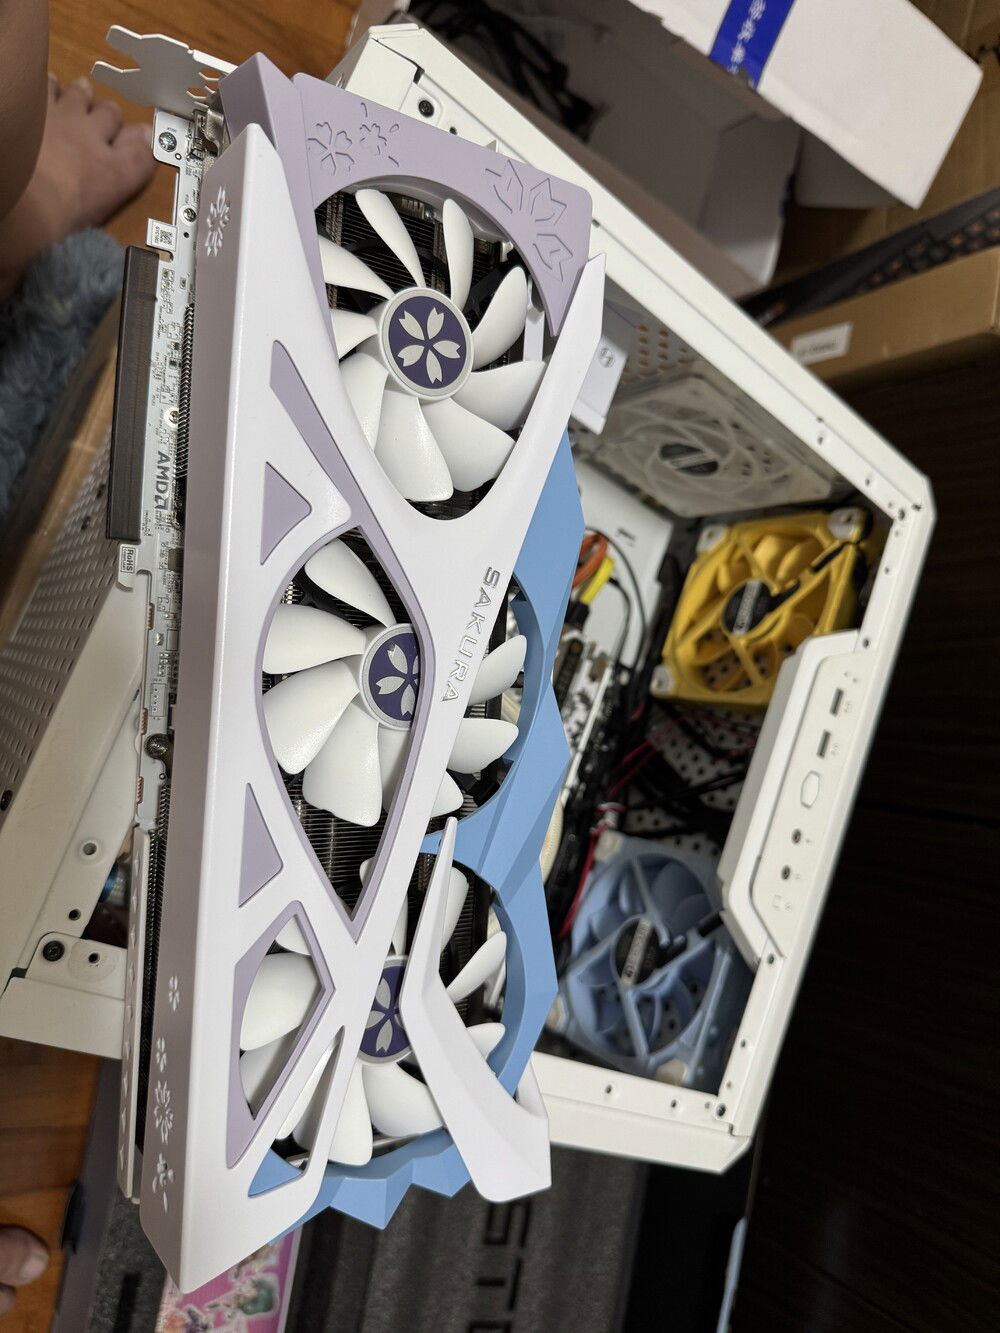
I underestimated 322mm…
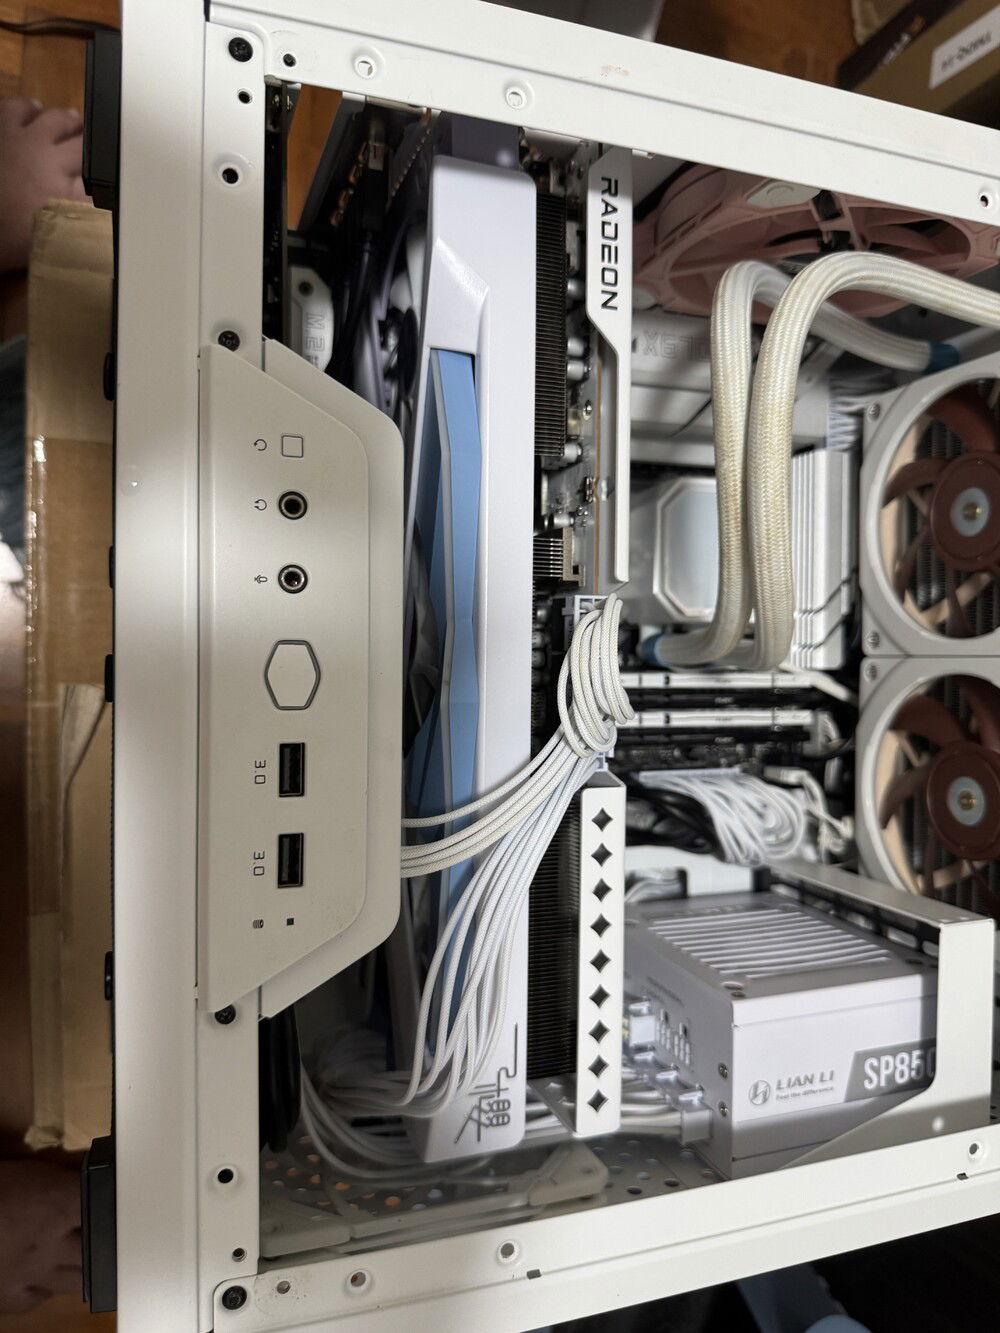
Another tight fit.
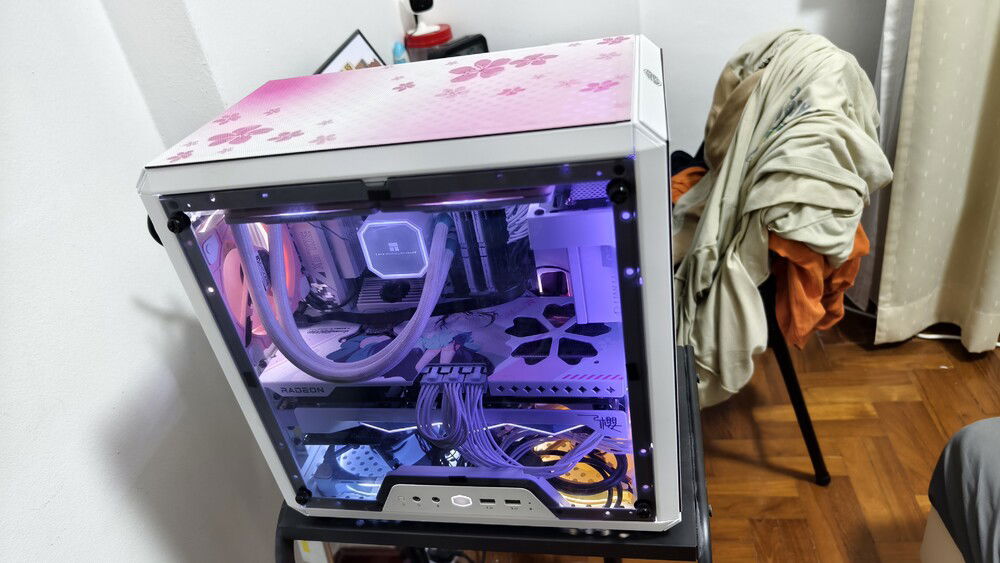
Final for now.
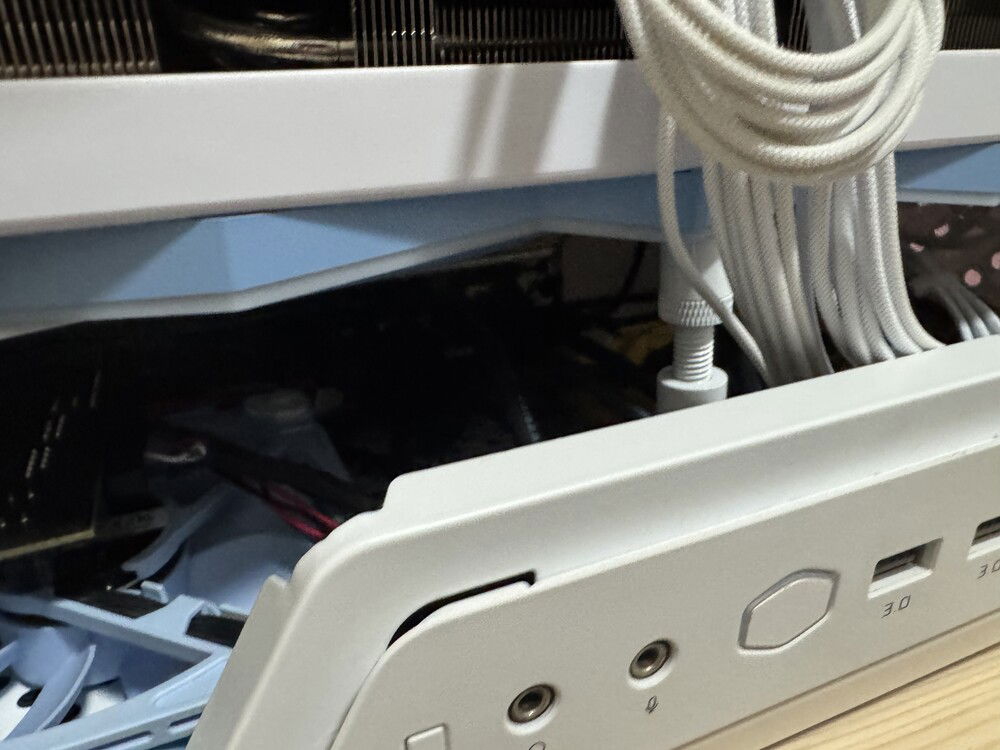
Better late than never. Finally have an anti-sag bracket installed for the GPU.
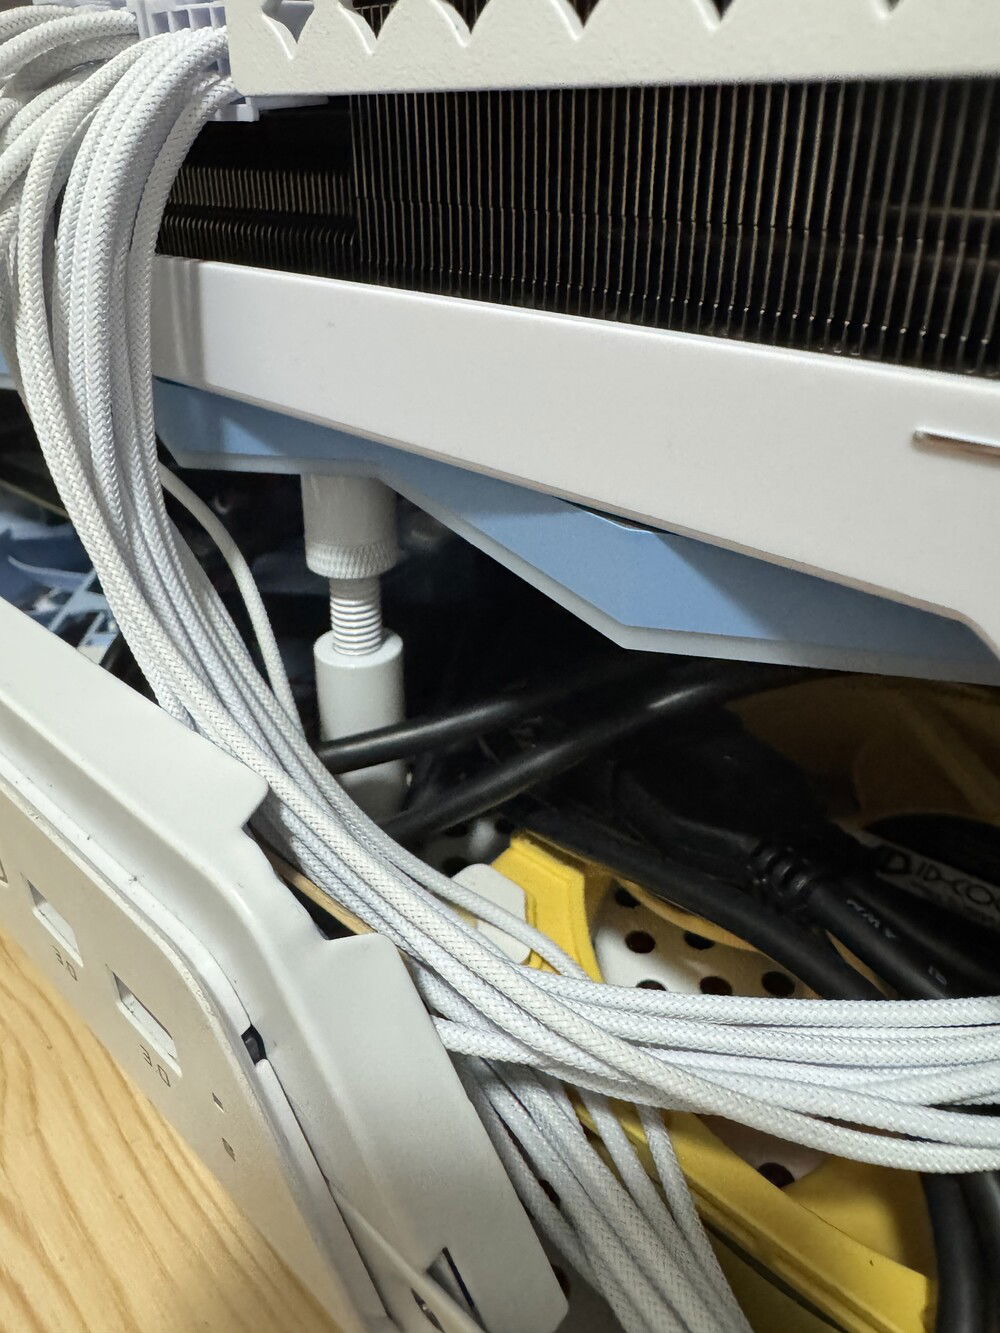
Another shot of the anti-sag bracket.
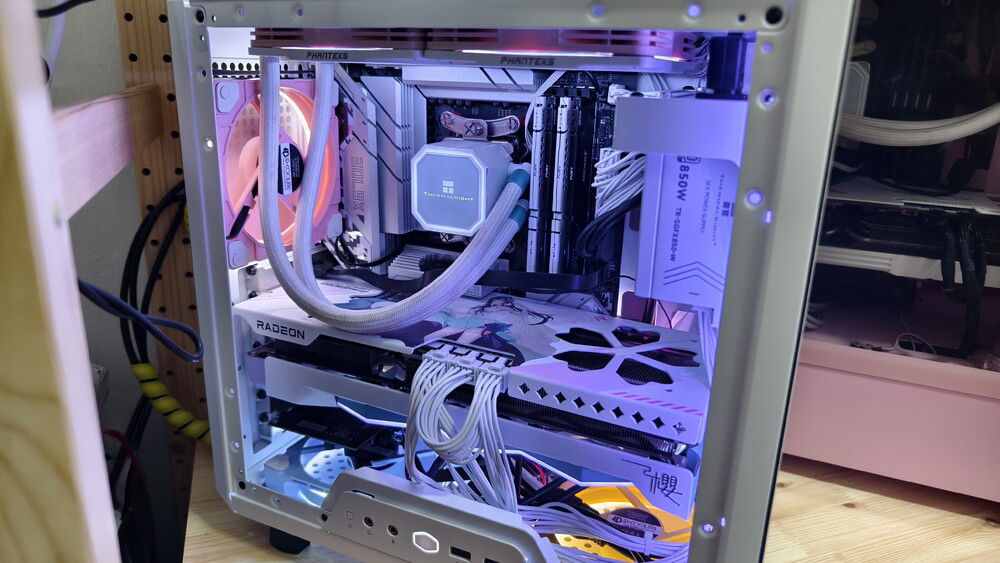
New PSU in place. Again, I don't ever want to do that ever again.
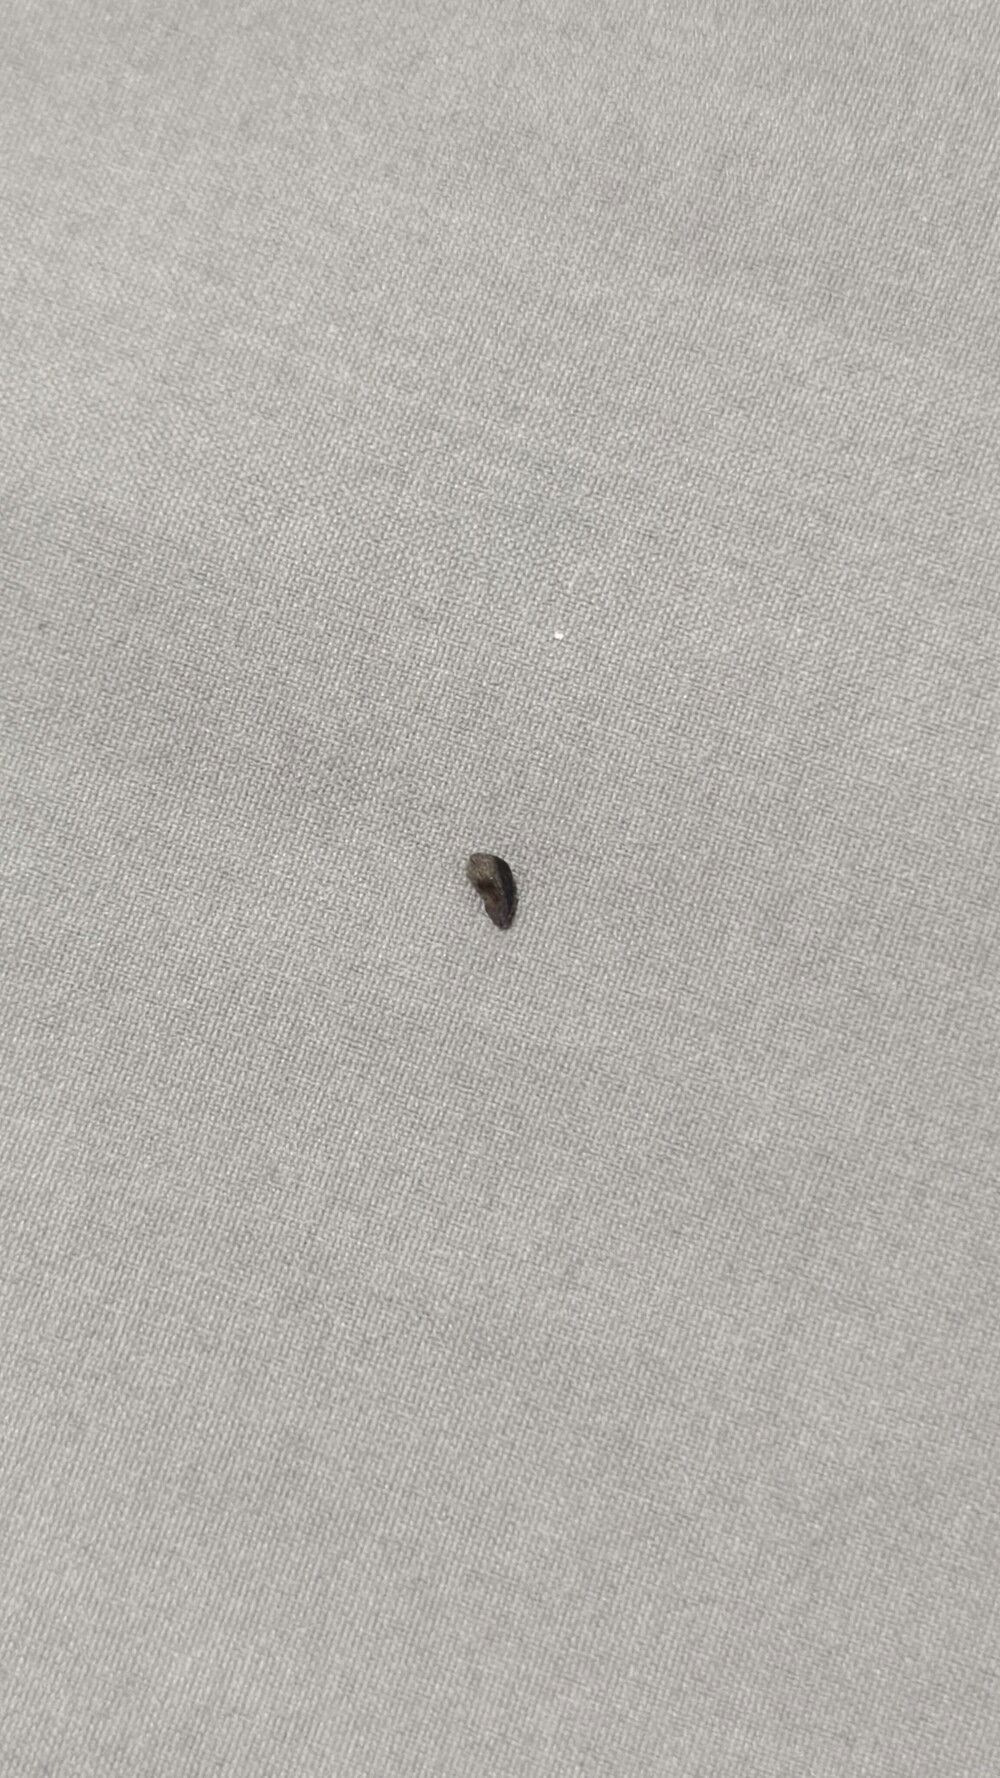
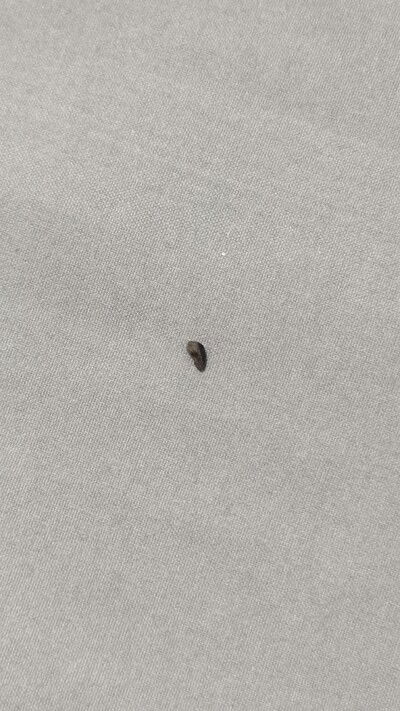
This fell out of the Lian Li PSU. Looks like a piece from a Transistor...
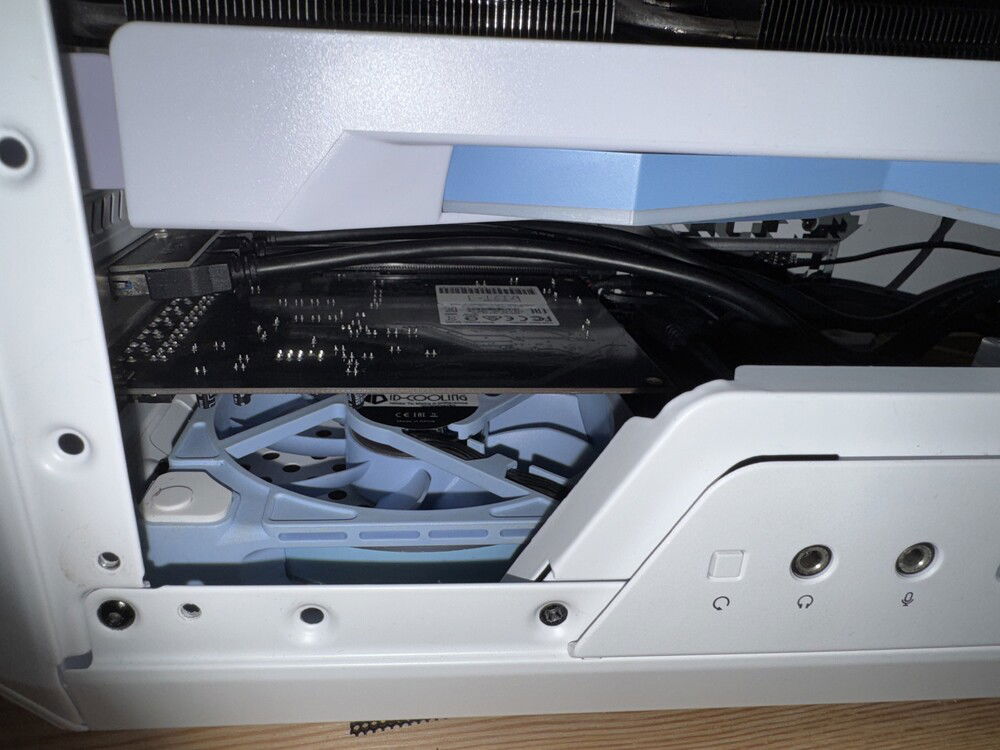
Soundblaster Audigy RX.
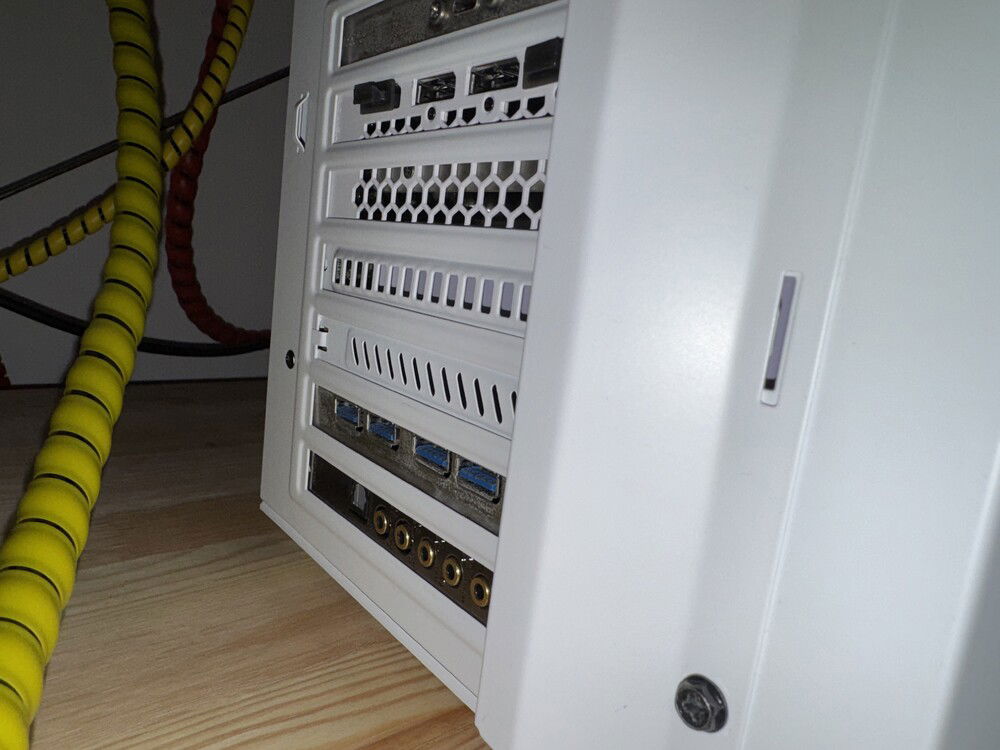
Soundblaster Audigy RX image 2
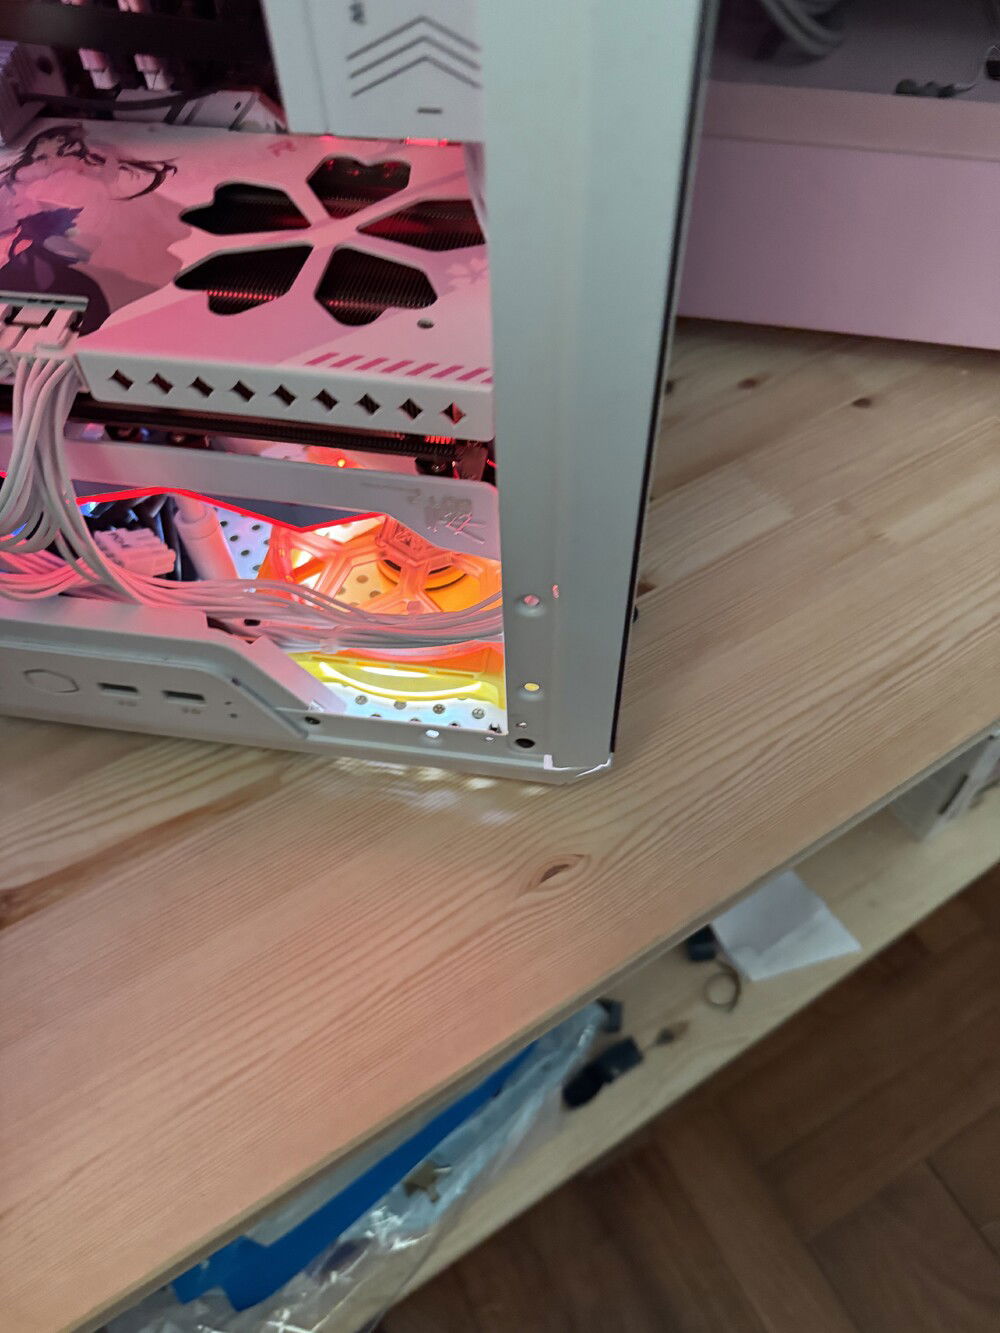
Red, Red...
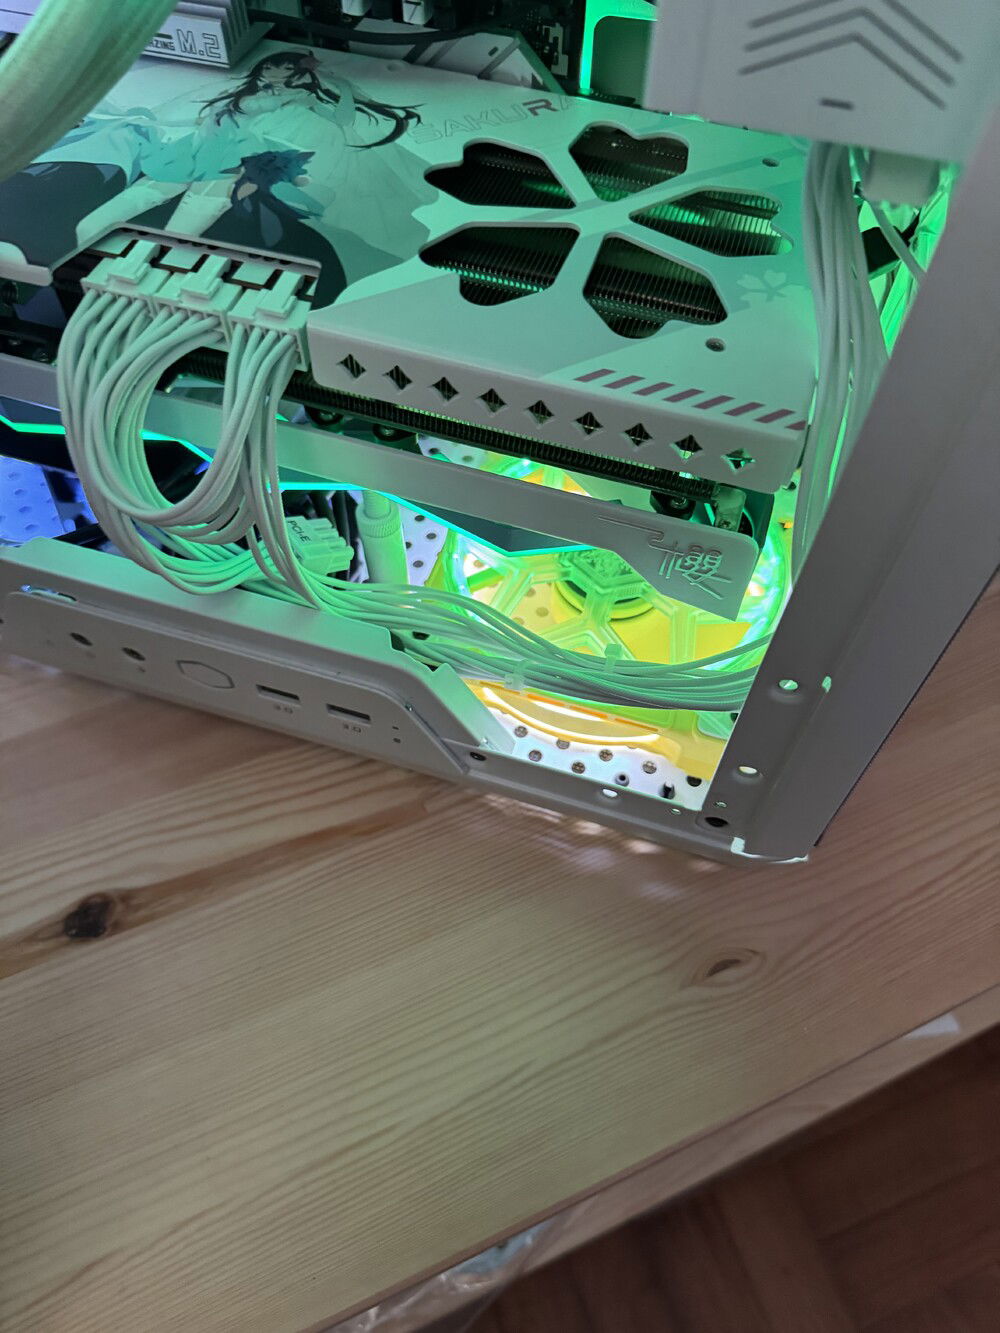
Green, green...
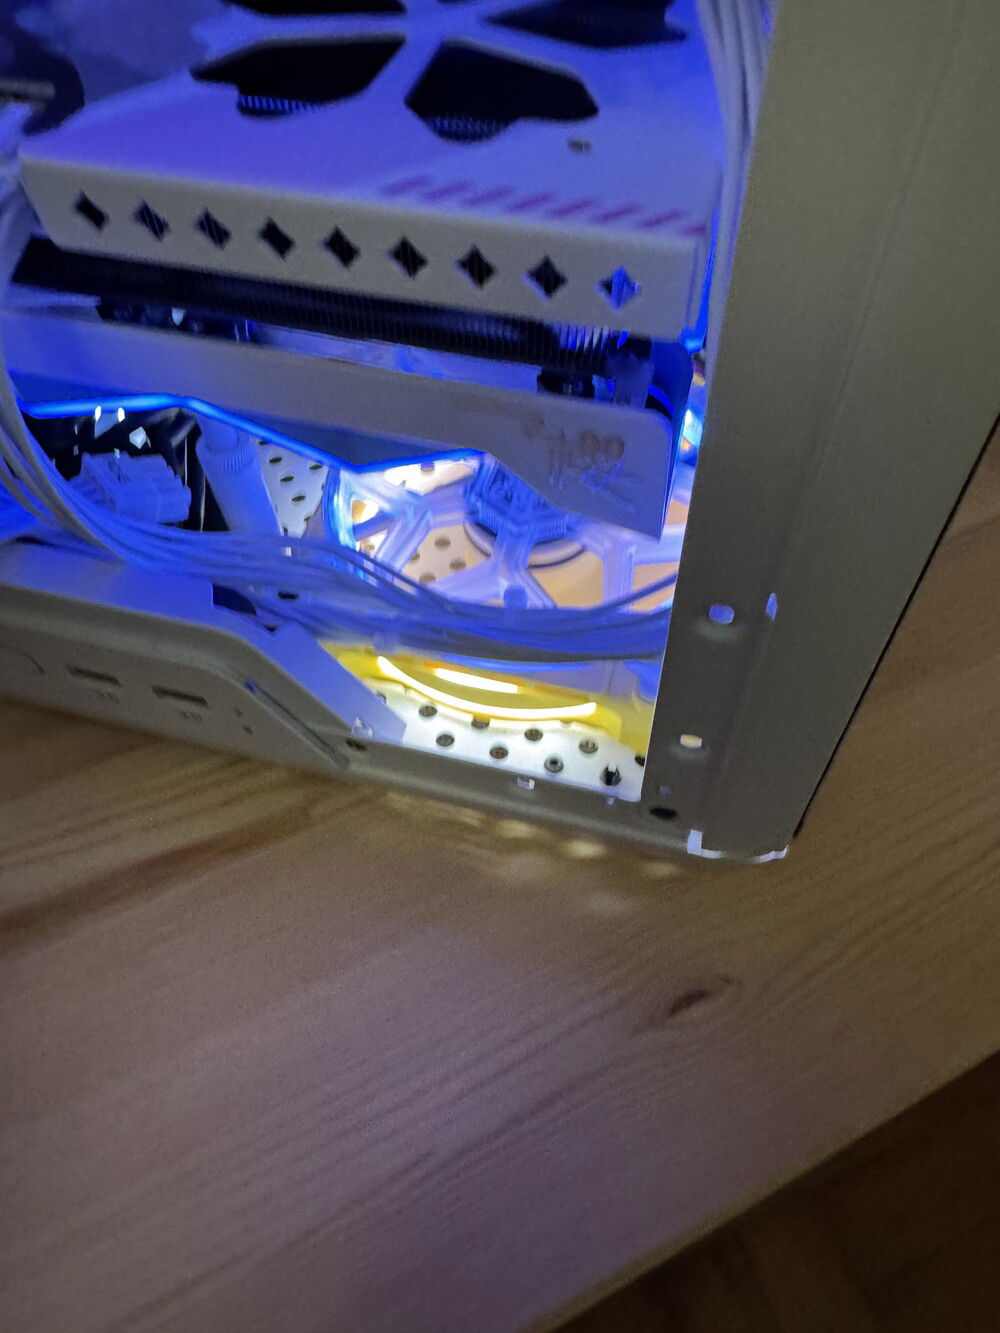
Blue, blue...
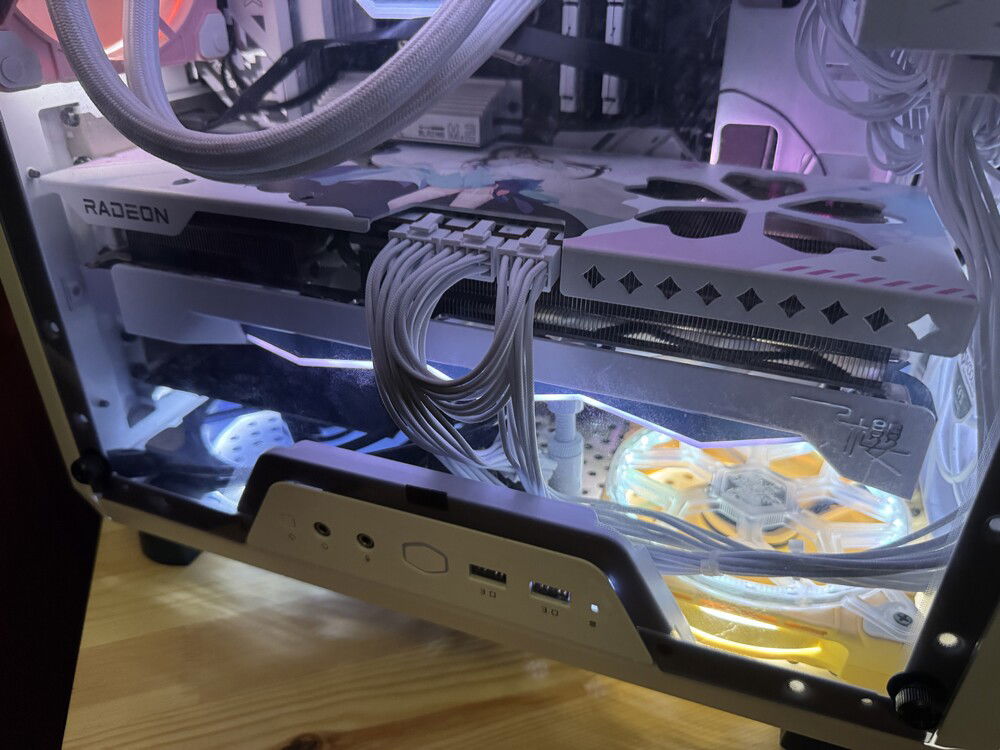
Where was once an FG-122, now sits an FG-121
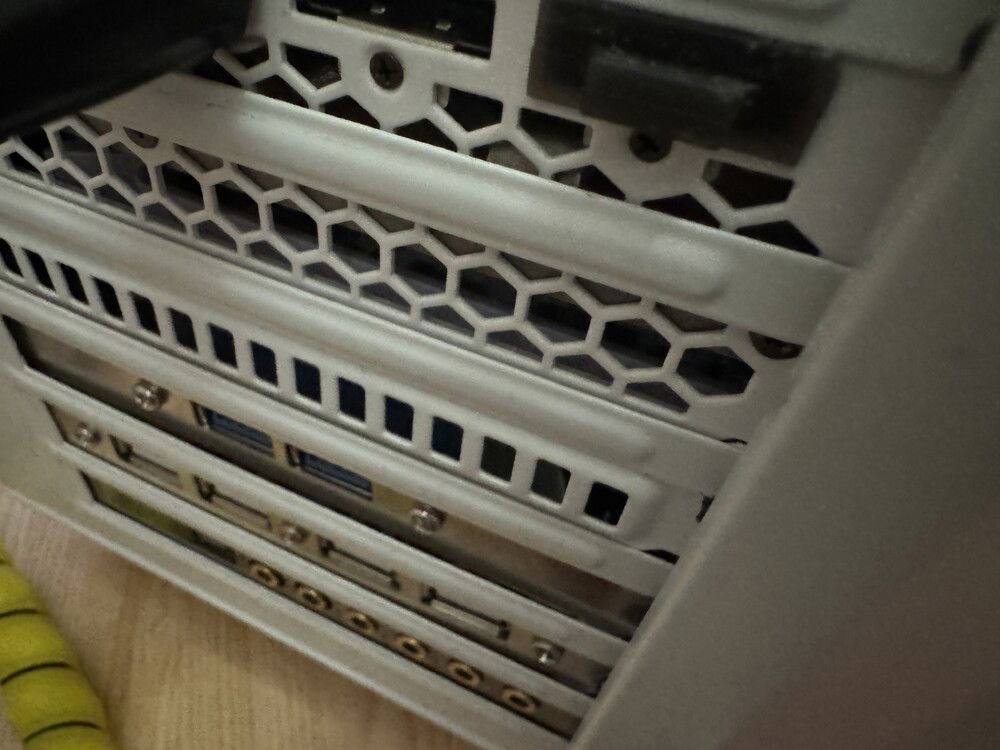
This is fine
Operation: M.U.S.S.E aka The Senbonzakura Project
Operation: M.U.S.S.E
AKA
The Senbonzakura Project
AKA
The Senbonzakura Project
The Momotaro-Sakura hybrid
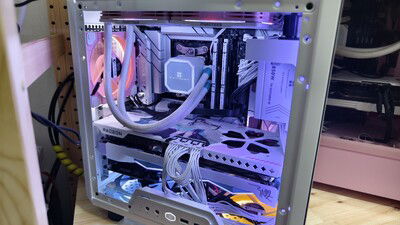
The pinnacle of AMD computing, dedicated to my anime waifu.
Color(s): Brown Orange Pink Purple White Yellow
RGB Lighting? Yes
Theme: Anime
Cooling: AIO Cooling
Size: ATX
Type: General Build
Build Updates
Stopping here for now
Moving forward. What is important?
Long story short: Moving forward, Sakurako will no longer have a thunderbolt card. I replaced the apparently malfunctioning card with a brand new card that costs almost SGD200 and it didn't work. However plugging in the Soundblaster into that slot does work. So the decision has been made to let the Soundblaster be plugged in directly to the slot..
Secondly while working on the sound card, somehow the RGB strip burnt out. Decision has been made to replace it with an FG121. Now begins the wait for the FG121 to arrive from Japan…
Sakurako continues to evolve.


Secondly while working on the sound card, somehow the RGB strip burnt out. Decision has been made to replace it with an FG121. Now begins the wait for the FG121 to arrive from Japan…
Sakurako continues to evolve.

Soundblaster Audigy RX.

Soundblaster Audigy RX image 2

Red, Red...

Green, green...

Blue, blue...

Where was once an FG-122, now sits an FG-121
Catatrosphic PSU Failure
So it started about a month ago. I plugged the mains in and heard a loud pop coming from the PSU. Scared the hell out of me. The machine would still power up, but something was definitely up. Found several posts on Reddit and the gist of it is that the PSU is not reliable and to trash it for something else.
So I initially tried to get my hands on a FSP Dagger Pro 850w ATX3.1 White, except as expected they were sold out everywhere.
So it came down to this.
Thermalright's new TR-SGFX850-W. Apparently they're just starting to branch out beyond liquid coolers and one of the items they decide to try to hock are PSUs, apparenly rebadged PSUs from a unknown company called Dongguan SANR Electronics.
I was initially skeptical of getting it due to Dongguan SANR being also relatively unknown and there being zero reviews of the PSU, but push comes to shove. Figured that Singapore's extremely strict testing board wouldn't allow it in if it sucked anyway.
It just arrived three hours ago and I just got done installing it.
I'll save you the gore. However the EPS cable was too short, trying to route it using the path of the Lian Li wouldn't reach. Does Thermalright think we still live in the 2000s where the PSU lives right above the motherboard? Routing it behind the top rad works, barely. The cable just about reaches.
It still powers on after all that ordeal. Which is great.
I'm tired now tho.
Side note: While removing the Lian Li PSU, there was rattling noises coming from inside it. I shook it about a bit and a small chunk of plastic fell out. Something did explode inside.

New PSU in place. Again, I don't ever want to do that ever again.

This fell out of the Lian Li PSU. Looks like a piece from a Transistor...
Changes Pt. 2
Lunch over. Now comes the big step. Upgrading (or rather, sidegrading) to a 9070 XT.
The reason for this is two fold. Firstly, the entire system is already PCIe 5. However the 7900 XTX is only PCIe 4. This doesn’t sit well with me. The 9070 XT is a PCIe 5 part.
Secondly, the 7900 XTX was kinda behaving funky. It was frequently glitching and then crashing the entire system. Opinions I received were mixed, with many saying that the card is defective from factory, while Yeston pointed out the need for a 1000w PSU for this card (either the BIOS is heavily modified to boost constantly, or Chinese components are just less efficient and needs more power to power the GPU). Yeston says that their 9070 XT part only needs an 850w PSU which is what I have. Either way, swapping was the only option. I left the 7900 XTX back in Malaysia anyway.
First thing first, replacing the no-brand USB2 to USB3 adapter with a good quality one from Silverstone.
Next I attempt to install the GPU.
First I plug an extension cable into the ARGB port previously used by the FG-122.
See, the 9070 XT Sakura series of cards from Yeston are the first Yeston cards to have ARGB. However instead of including a controller on the GPU itself (and thus potentially requiring proprietary software to control), they wisely chose to allow the user to wire the GPU’s ARGB into the motherboard. Which is what we’re doing here.
Next I connected the other end of the ARGB extension cable into the card, and start to try to install it.
Ugh, I underestimated the size again. However I managed to eventually get it in.
And there lies the second issue. This card is much wider than the 7900 XTX. I have to leave out the Soundblaster Audigy RX.
Everything else fitted fine, including the Thunderbolt 4 card.
So yeah, the option is there. I need to buy a Thunderbolt PCIe enclosure to continue using my Audigy RX. Except that it’s going to cost me. For reasons unknown to man Thunderbolt enclosures are far from cheap.
I also need a plate to cover the exposed hole left behind by the Audigy RX…
This is going to cost me.
For now tho:

Replaces the funky nobrand USB2 to USB3 adapter with a reliable one from Silverstone.

The FG-122’s ARGB connector is replaced with an extension

I underestimated 322mm…

Another tight fit.

Final for now.
Changes Pt. 1
It’s April 2025. In the past 10 months I have moved countries to Singapore, and last Monday, M.U.S.S.E and H.E.L.L.R.a.I.S.E.R, my two mains, finally joined me. And while I intend to leave the latter unchanged, I do still have some plans for the former. As teased before, the CPU is to be sidegraded to a 9950X, and the GPU to a 9070XT.
The first order of business would be to get rid of the FG122. I have something else in mind for the port.
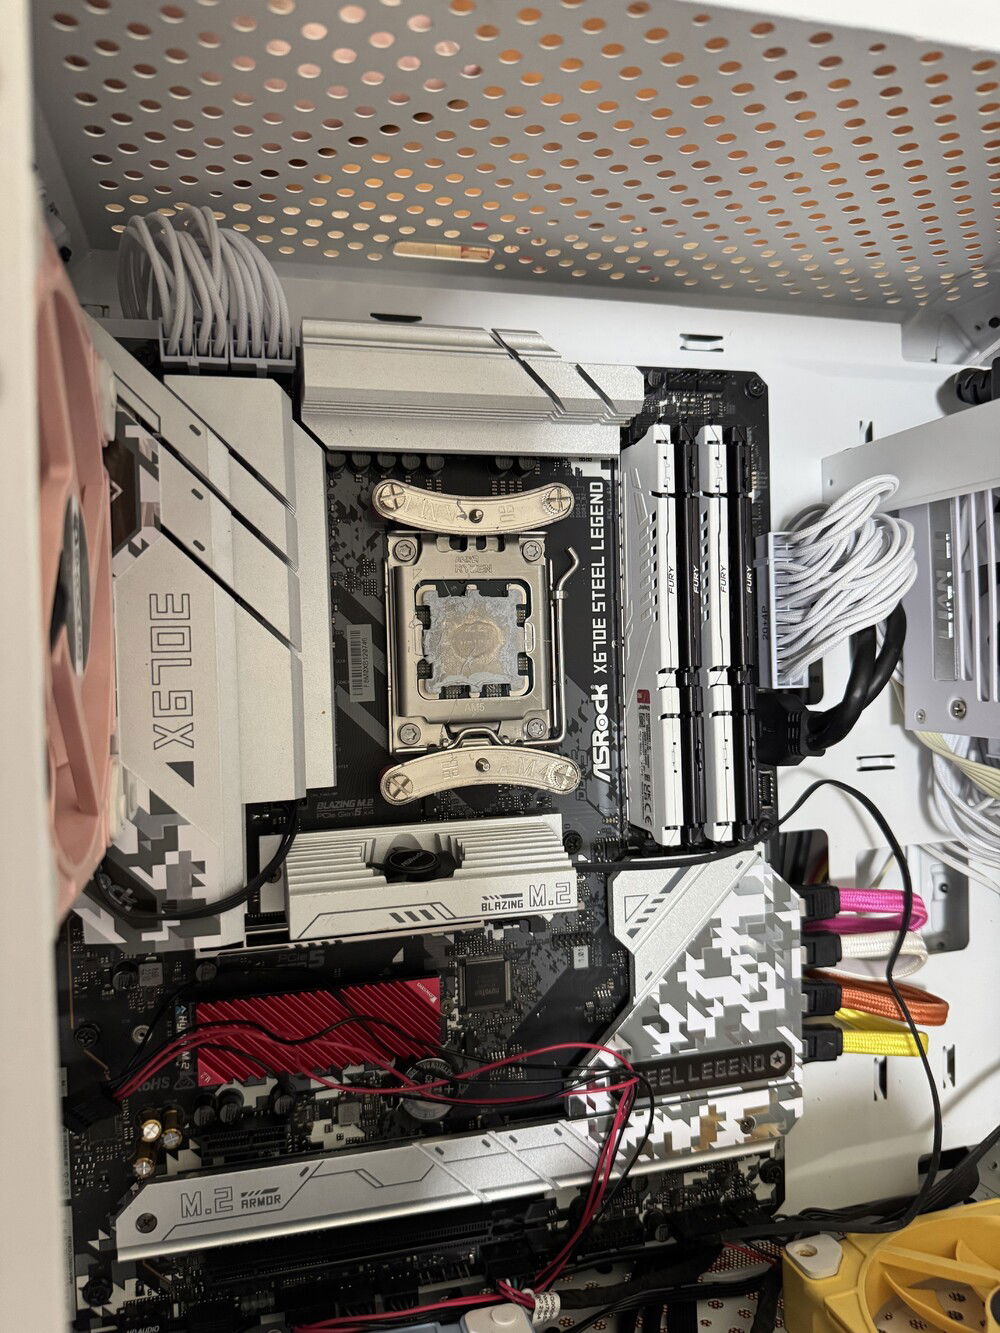
Next I started the upgrade process for the CPU. First order of business is to tear out the rad temporarily (well, this case…).
Next I carefully removed the 7950X3D and switched it for the 9950X. This part was nerve wrecking because LGA. I had bad experiences with LGA in the past and thus am a bit worried when working with them.
For our thermal paste, we’re using the new Duronaut paste from Thermal Grizzly. Really nothing to write home about tho.
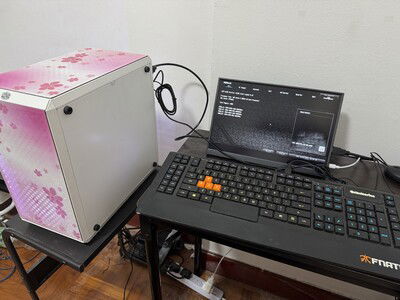
Finally we get everything reassembled and did primary test. We got to the BIOS successfully, so that’s a good sign.
After that, I decided to break for lunch.
To be continued.

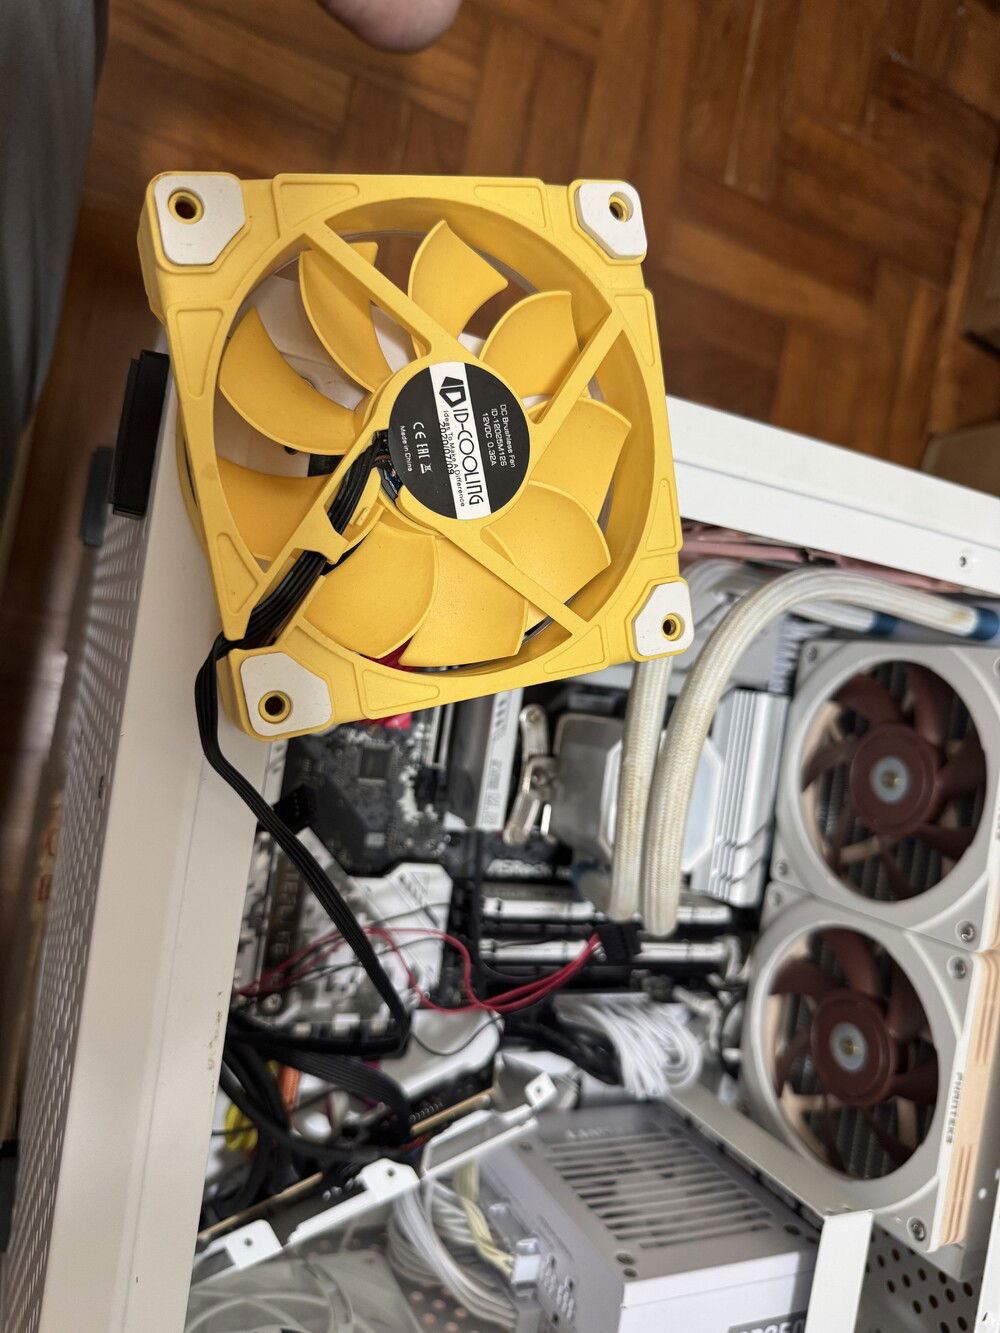
Don’t need the FG122 anymore. The port is going to be used for something else.

Removing the rad. Painful.

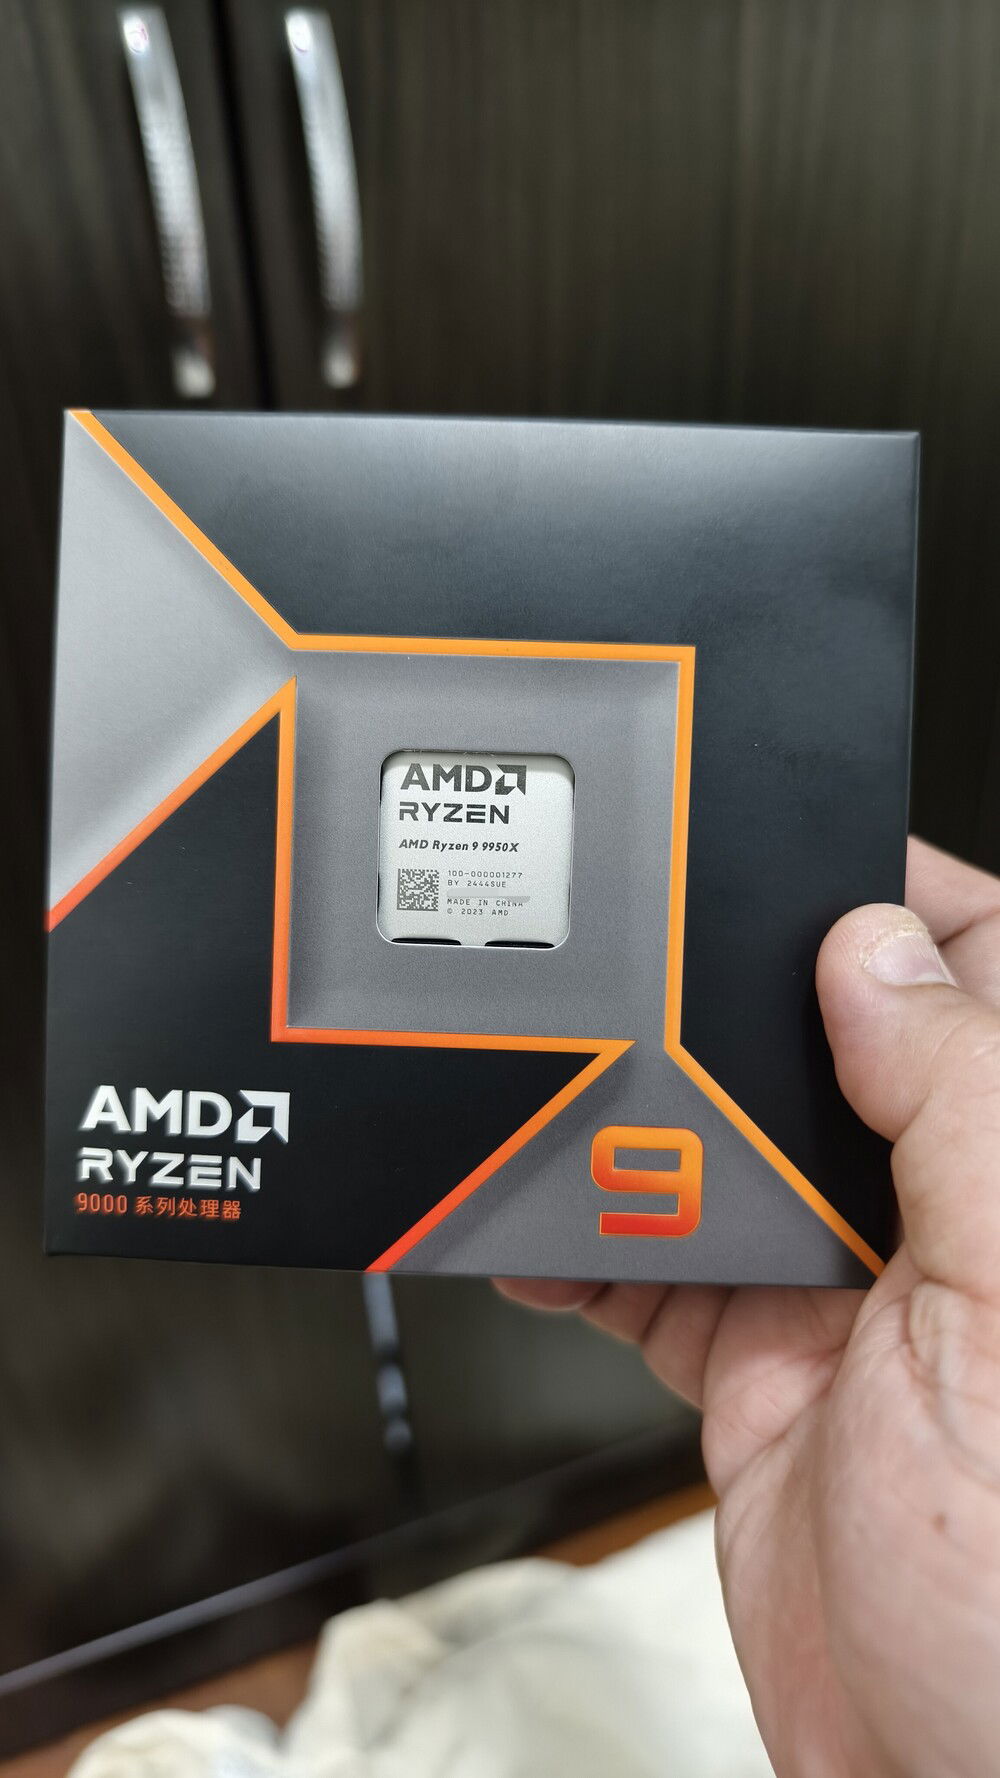
Replacement CPU.

We’re using the new Duronaut from Thermal Grizzly

Phase 1 test.
If something is working right, don't fix it!
So I thought I wanted to install the GPU anti-sag that came with the Powercolor Hellhound card into this machine (after all, H.E.L.L.R.a.I.S.E.R already took the bracket meant for M.U.S.S.E). It didn't fit, but in the process of installing it, I accidentally messed up the wiring into the FG122.
I discovered it this morning with the FG122 acting erratically when I just powered Sakurako up due to a sudden craving for a game of SimCity 2013.
Repairs took 2 hours and involved trying to get the GPU out (a total PITA), getting the PSU out, and getting all the aux cards out.
And in the process of fixing that, I messed up the USB2 to USB3 adapter. Had to take up a soldering gun, and yeah, reinstalling that cable was a pain.
Never want to do that ever again.
Vlog Finale: Ignition!
VLOG Update: The Smoke Test
VLOG Update: Things went pear-shaped
VLOG Update: "The Mendoza Path"
VLOG Update: Things start to go wrong
VLOG Update: Case open
VLOG Upload: Starting the build
Addendum A: Meet Me Halfway
Reopening the book to add some stuff.
The RAID10 and RAID0 arrays have been purged in a favor of two RAID5 arrays. The SATA side now has increased to somewhere around the neighborhood of 2.4TB of capacity while the NVMe side dropped a bit to a little over 490GB.
So did I finally get Storage Tiers in spaces working?
No.
But I figured out I'd try an experiment using storage spaces anyway, using spaces to create two RAID-5 Arrays and PrimoCache to bridge the gap.
And it worked. I had to go into disk management and trick windows into unformatting the NVMe volume (I need an blank partition) and then convince PrimoCache to use the unformatted volume as L2 Cache. Then all that's left is tricking PrimoCache into caching the SATA array (which it gladly did).
Also, I found out that AMD was serious that Enduro is no more and I can't use the 7900 as the performance GPU while using the on board as the power saving one. Plugging the monitor into the on board then telling it to run games on the 7900 causes a hard crash. So to not waste processing power, the 10" monitor I bought for testing stuff now serves as a second display at least until the Jonsbo DS8 comes in, which will be a while.
Closing this chapter
It's over. Operation: M.U.S.S.E is deemed complete and have been moved into my lair.
Which I stripped apart to remove legacy components before the move.
So Sakurako is hooked up to a 1.2KwH UPS originally used for the Red Dead Re:Birth build (currently mothballed - failure determined to be the PSU, 1.2KW is not enough for four glorified RX480s and a Threadripper 2990WX after all. )
The storage configuration has been finalized as the sole PCIe5 stick for OS and high rank software (ie Visual Studio), A RAID-10 array of 1TB SATA SSDs (2TB effective storage space) for games and short term storage, and the three PCIe4 SSDs being combined into a RAID-0 volume used by PrimoCache for cache-boosting the RAID-10 array (RAID-0 is normally foolish, but in this case it's used on a bunch of cheapo Gen4 SSDs to work as non-volatile cache memory for the RAID-10 backing store). In all honesty I'd like to go RAID-5 on the slow SSDs but AMD's Ryzen SoftRAID only supports RAID-5 on select high end CPUs like Threadripper Pros.
On that note, my Primocache license is now one reset less because of the transfer.
I still could not get tiered storage working. Windows was crippled because Microsoft doesn't think normal users need tiered storage and should rely on cloud for data reliability and backups. Blah! Trying to get tiered storage working was so much of a nightmare I had half the mind to just go full Linux.
In any case, the book is closing on this build. It has been a painful and bumpy ride.
But yeah, as this book closes, another book is opening soon. Stay tuned.

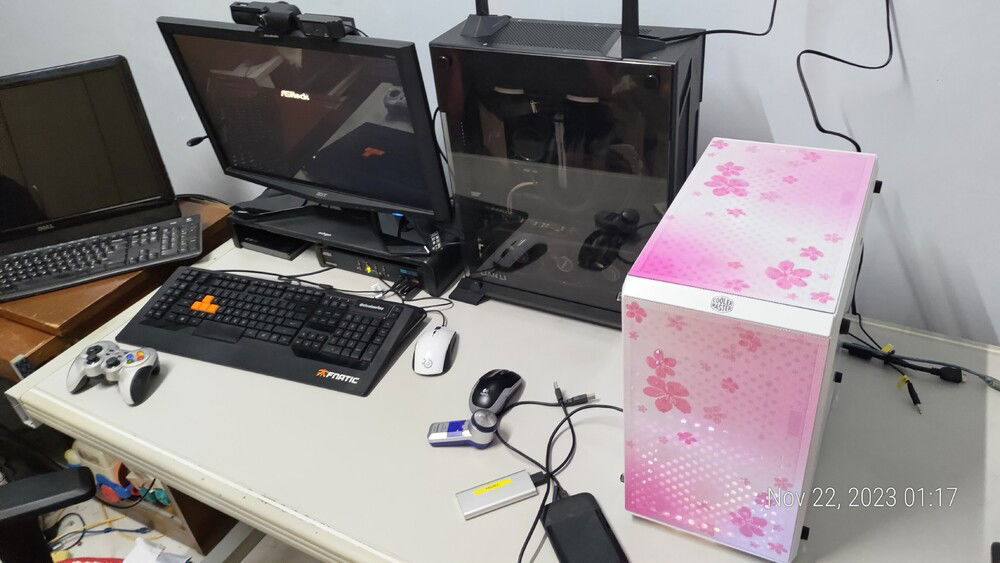
Final resting spot.
Post completion updates 1
Walked in this morning and found that the ARGB strip had bad adhesive and had detached itself.
So I decided that it won't work. I'm just going to sacrifice my last Silverstone FG-122 in my stock to it. Initially I am worried that the light from the fan would drown out the FG-122, but in practice the light from the fan was so focused that the back remained dark.
10 minutes to take out the yellow Fan, attach the FG-122 to it's back, and reinstall.
Another smoke test was performed. And it was glorious.
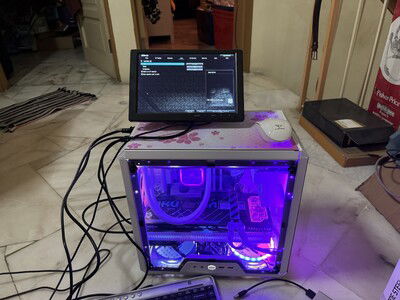
And here's the machine in BIOS:

Now with FG-122!

Red, red...

Blue, blue...

Final build- focus.

Test rig.
Also I did not get Starfield
Fscking promotion ended on October 31. Having so many issues with the build that the first smoke test was in November.
I could take the current game, but I don't like Avatard. Even worse is it's from potato soft ("ubi" means "potato" in Malay). I hate ubisoft connect, it wants admin rights each time it's run. Even worse is that my account was apparently stolen sometime last year (I'm currently locked out of my ubisoft connect account, keeps saying my password is invalid despite me using the same password I use on all online platforms, and oh, having 2FA) and support did fsck-all to help me get it back. And apparently I'm not alone. I hate them with a passion. I hate this.
I could take the current game, but I don't like Avatard. Even worse is it's from potato soft ("ubi" means "potato" in Malay). I hate ubisoft connect, it wants admin rights each time it's run. Even worse is that my account was apparently stolen sometime last year (I'm currently locked out of my ubisoft connect account, keeps saying my password is invalid despite me using the same password I use on all online platforms, and oh, having 2FA) and support did fsck-all to help me get it back. And apparently I'm not alone. I hate them with a passion. I hate this.
Defending my use of the daisy chain cable (ie you worry too much)
I'm going to defend my use case of the daisy chain PCIe cable.
First of all, it looks neater.
With that out of the way, here comes what I've gathered online (ie the technical matter).
According to Hardware Busters, the wires Lian-Li used are 18AWG (source). Same site also states that the cable length is 52.5cm, that's a little over a foot long. Credible guides (source) states that you can carry 10 Amps at 12 volts on an AWG18 cable at less than 10 feet. At 1.3 feet, resistance is less than 0.01 ohms (source). Ohm's law states that watts is volta multiplied by ampere. That gets you 120w per cable (source). Distribute that across 4 cables and you can effectively carry 480 watts- even enough for an Nvidia Ada card if you don't overclock. So you really have nothing to worry about unless you're one of those who overclocks your GPUs for shits and giggles. You do what you do, I don't overclock and even oppose the practice of overclocking.
Post completion updates 2: our work is never over
So I did some measuring and determined that I could stuff a 12cm fan into the front of the case.
So that's what I did.
Installing it was a breeze. I initially thought I needed to remove the PSU to install it, but nope, it slipped right in between the GPU and the case easily.
Attempt to cable manage it went smoothly too. The cable was generously long that I could slip it to the back of the case and then up and over towards the top.
Now, you may wonder how the heck I'm going to hook it up given that all the headers on the motherboard has been exhausted. Simple. Remember how the AIO came with a three way fan splitter box? And how the pump's ARGB cable has a breakout for splitting the signal that I intended to connect to the Super Flower until I realized it was too big? Yeah.
After that, another smoke test confirms that everything is working as it should.
Personally, I think it was a good call. Despite the fan mostly focused on the GPU, temperature in the case apparently fell about 5 degrees Celsius. For the records, the case is mostly positive air pressure, there are (as of now) four fans pumping in air while the two fans behind the radiator exhausts them while cooling the CPU radiator. Hot air naturally rises so the radiator fans just help move hot air out from the case faster.
One minor issue is that the FG-122's lights tend to overpower the NO-12015-XT's. It's not noticeable all the time, only when viewed at a certain angle. However, given that I will mostly be working with the RGB turned off or to all white, it is also a non-issue.

Another shiny

So thin, it slips between tight spaces!

Cable Management attempt

You couldn't even tell there's something over there

Unicorn barf. In CGA.
The final furlong
This is it. The replacement SFX to ATX bracket is here.
It’s Time to finally finish the build.
The bracket went into the ATX PSU mount effortlessly and unlike the last time, the PSU fitted into the bracket fine.
Well, I say fine, but in actuality compromises were made.
For example, my wish to have the PSU fan face outward had to be scrapped because the screw points on the SFX PSU doesn’t line up if I try to install it the other way. Also, after much consideration, I decided to have the power input side face upwards. This is because the part of the PSU is a grill meant for hot air exhaust. If I face the grill down hot air could be trapped inside the PSU due to the law of thermodynamics demanding that hot air always rises to the top, and the modular cable side of the PSU is solid metal and does not have a grill.
With the PSU in place, are down to the home stretch. I removed the remaining brackets in anticipation to installing the final cards.
The sound card, the Audigy RX, went in without problems.
The same couldn’t be said for the GPU. Despite the case being supposedly bigger than the GPU, it initially refused to go in. I stopped to cool down, and then, after clearing my mind, began trying to solve the puzzle again. After contorting and inserting the card at esoteric angles, it finally went in.
Then it came time to install the power lead for the GPU. At this point I’ve decided to just YOLO it and use the daisy chain lead. It’s AWG18 cable. According to Google AWG18 can take up to800 480 watts of power(*1). The 7900XTX consumes 355w at full load- not a big issue. Besides, I’ve run Vega cards off daisy chains and they were fine.
Also, it was so packed in there that there is no space for the GPU anti sag holder. So I ended up using the ARGB strip after all. It was a real pain to install but in the end, it was worth it.
So how did it all turn out?
Yes, I did not cable manage the GPU power cable. It wasn’t long enough that I decided it wasn’t worth the pain.
Smoke test 2 was also successful. Both the onboard and the Sakura GPUs were detected as was the SoundBlaster Audigy RX. Initially the Thunderbolt card wasn’t showing up but I managed to find the entry in the BIOS and enabled it. I will document this an upcoming video as the location of the BIOS option to enable support is neither mentioned in the manual that came with the Thunderbolt card nor was it mentioned in the motherboard manual.
But, this is not the end…


It’s Time to finally finish the build.
The bracket went into the ATX PSU mount effortlessly and unlike the last time, the PSU fitted into the bracket fine.
Well, I say fine, but in actuality compromises were made.
For example, my wish to have the PSU fan face outward had to be scrapped because the screw points on the SFX PSU doesn’t line up if I try to install it the other way. Also, after much consideration, I decided to have the power input side face upwards. This is because the part of the PSU is a grill meant for hot air exhaust. If I face the grill down hot air could be trapped inside the PSU due to the law of thermodynamics demanding that hot air always rises to the top, and the modular cable side of the PSU is solid metal and does not have a grill.
With the PSU in place, are down to the home stretch. I removed the remaining brackets in anticipation to installing the final cards.
The sound card, the Audigy RX, went in without problems.
The same couldn’t be said for the GPU. Despite the case being supposedly bigger than the GPU, it initially refused to go in. I stopped to cool down, and then, after clearing my mind, began trying to solve the puzzle again. After contorting and inserting the card at esoteric angles, it finally went in.
Then it came time to install the power lead for the GPU. At this point I’ve decided to just YOLO it and use the daisy chain lead. It’s AWG18 cable. According to Google AWG18 can take up to
Also, it was so packed in there that there is no space for the GPU anti sag holder. So I ended up using the ARGB strip after all. It was a real pain to install but in the end, it was worth it.
So how did it all turn out?
Yes, I did not cable manage the GPU power cable. It wasn’t long enough that I decided it wasn’t worth the pain.
Smoke test 2 was also successful. Both the onboard and the Sakura GPUs were detected as was the SoundBlaster Audigy RX. Initially the Thunderbolt card wasn’t showing up but I managed to find the entry in the BIOS and enabled it. I will document this an upcoming video as the location of the BIOS option to enable support is neither mentioned in the manual that came with the Thunderbolt card nor was it mentioned in the motherboard manual.
But, this is not the end…

It’s over.
Or is it?

More compromises were made.

At this point, it’s time to install the power for the card. You know what? Fukuwachita. YOLO. And all that. We’re using the daisy chain cord.

Damn card was a pain to install…

And now the princess.

Sound card went in easy enough.

*”March of The Toreadors” from “Carmen” intensifies*

Back brackets removed in anticipation for the GPU

The cables were made to be as flat as possible to ensure enough space for the GPU

Compromises were made.

Preparing to finalize mounting the PSU.

PSU installed, finally.

Replacement bracket to ATX PSU mount.

SFX to ATX bracket round 2
Smoke Test: Huge Success
OK. So smoke test attempted. I had the PSU set up outside the case with all the cables going into it. All remaining brackets (type-C, quad Type A) were installed as was the Thunderbolt 4 card. A cheap but serviceable 10" HDMI monitor is used as output and a cheap compact keyboard and wireless mouse was used as input.
BIOS was updated using BIOS Flashback (took forever) but in the end we have ignition.
After what seemed like forever, Sakurako limped to life at subsonic speed. Didn't help that the RAM configuration is extremely exotic (48GB across two 16GB and two 8GB sticks).
Welcome to the world, Sakurako. Now I just need to finish the build by 1. Installing the PSU inside, and 2. Installing the GPU and SoundBlaster.

Remaining headers populated. TB4 card installed.
So it has come down to this
Cooler Master's white PSU availability was a lie. They apparently actually didn't bring in any. Should've figured this out from the start since they also won't bring in the PL240 White Edition because "White parts don't sell in Malaysia" (their words). Well, their funeral.
I wish Cooler Master HQ would just fire that idiot who biases to black parts.
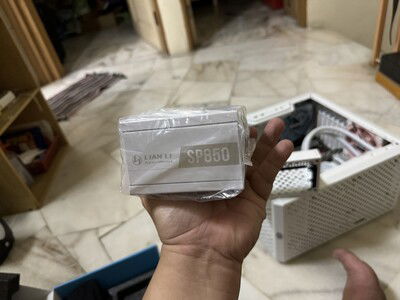
So now my only choice is a Lian Li SP850. Tier rating B by the PSU list. Said to be a potential fireball-cum-smokebomb that could cause catastrophic damage to the components according to Reddit. But since no other white SFX PSUs are available in the country, not even FSP's Dagger Pro white, it's what I'm stuck with.
Also, since I'm already working with "the worst case in the world", (Gamers Nexus calls it an "oven"), why the fsck not.
Also, it doesn't fit Silverstone's PP08 SFX-to-ATX adapter. Because of a fricking lip on the adapter, no doubt to ensure only Silverstone's PSUs would fit. And there's no mention of this on the box. RM30 wasted.
Ordered a generic adapter (for half the price) from Shopee. But it's going to be a long wait since it's coming from China (AGAIN!). In the meantime, I've wired in the two 8-pin EPS and 24-pin ATX power cables. I've also gone ahead and repasted the radiator pump's plate with more Kryonaut that I bought late last week.
I'm just going to smoke test the thing and power it on with the PSU outside the case tonight. I don't know when the Starfield promo ends but I sure as hell want my free copy of Starfield (especially if it costs RM350 in my money).

Wiry mess.

ATX Wired in

EPS Wired in

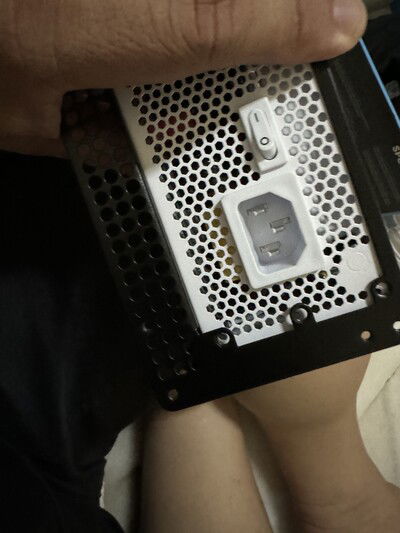
100-240v, but is it really? Because someone at Reddit says it's not.

In the end it comes down to this.

Silverstone's PP-08. Fits fine here, but the PSU doesn't fit.

Does not fit
Very angry
What arrived today after a whole week of bullshittery was a black PSU and not a white one.
Angry.
At this point I don’t think I’d be able to finish the build because of the PSU…
Angry.
At this point I don’t think I’d be able to finish the build because of the PSU…
Rethinking the PSU
Admittingly, I actually saw this problem coming at the very start of the project. However I went forward with the Super Flower because I thought modifying the radiator with slim fans would solve it.
I was naïve.
No, I will still need a SFX (NOT SFX-L!) PSU to work around the space consumed by the rad or there won't be space for the RX7900XTX.
I have a Cooler Master V850 SFX Gold White Edition on order as of Sunday evening. It's going to psuh me another RM650 over budget and I'm probably going to need some extension cables for the EPS links. That or custom cables...
In the meantime I got the SATA drives installed.

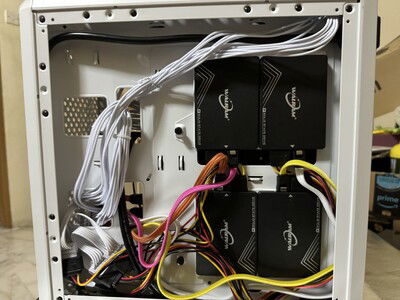
Four WalRAM 1TB SSDs along the back. These probably won't have any onboard cache, but that's okay. They're the "slow" tier. The three NV2s are these drives' RAM cache.

Too bad view of these cables would be obstructed by the GPU...
Radiator Stories
Excellent news: I managed to find one inch long 6-32 screws locally. And they work awesome.
So I managed to get the radiator in now. It looks good, all the cabling are well hidden enough, that I suppose I will become the first madlad to get a radiator into this case in the top position.
Feeling accomplished, I turned my attention to the PSU, aiming to at least get a bootable system by tonight.
Then disaster struck: Apparently an ATX PSU is just too much for the case, at least with the radiator installed. Even slim fans on the rad won't save this.
So I have only one option left. This option is extreme but I already come this far. I can't turn back now.
I need a SFX PSU.

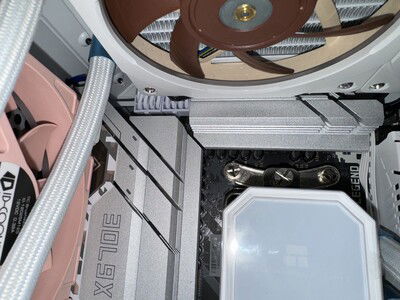
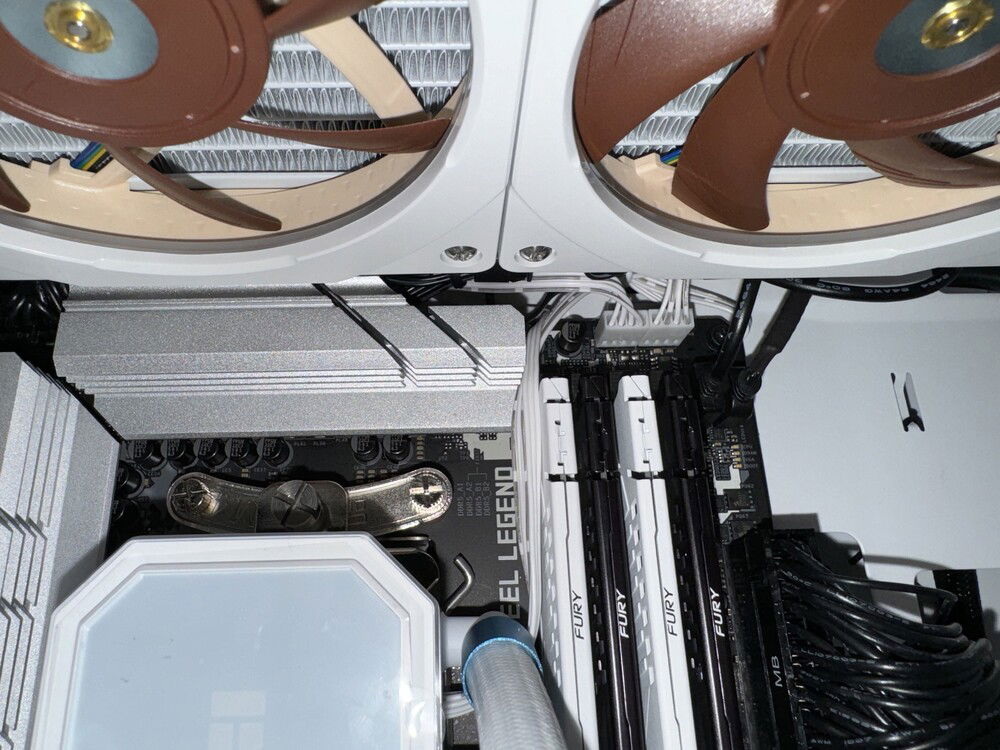
Modded radiator with slim fans and Phanteks Halos to compensate

Thermal paste

More thermal paste. Of the Thermal Grizzly variety.

Installing the pump before the rad

Pump in.

More wire hidin'

I'm probably the first madlad who succeeded in installing a radiator on the top in this godforsaken case.

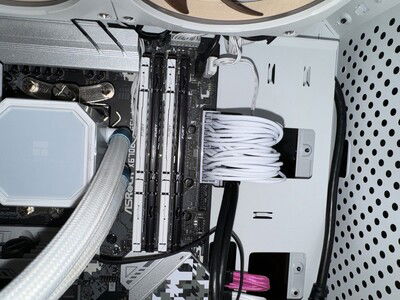
ARGB extension cable connected to the mobo. I'm not going to want to deal with that connector once all the cards are in place.
No thank you
Pretty much have to undo everything and reassemble after an attempt to install the included GPU anti-sag bracket went haywire. After putting everything back together I decided that the anti-sag bracket wasn't worth the trouble. I'll just use the Jonsbo anti-sag support as my sole anti-sag solution, thanks.
Another barrier to get over
Went to Cameron Highlands to film my next installment of Kiddie Ride Hunter.
Got back tired, but decided to finally put the motherboard into the case.
And yeah, it was a pain. Maybe if I installed the fans and the control panel later. Still, I managed it. Manhandled the motherboard a bit, hopefully noting got damaged.
I also had to remove the rear fan to facilitate the case installation. Installed it back after the board was successfully in. They were not kidding when they said this case is a real PITA to work with. I reinstalled the fan after.
Anyways, after all that's done I turned my attention to the radiator.
Those replacement screws I bought? They don't work. Too short even after installing the Halos Lux Digital lighting, and the groove doesn't match up. Chalk it up to Malaysia using metric screws (ie M3, M4, Etc) instead of imperial (ie UNC 6-32, 4-40, etc).
So I swapped the Slim fans out for a pair of NF-F12s from the Pinkeye Revenger's NH-U12S and used the replacement screws that came with the Halos Lux Digital lighting. It works, but now the radiator is too thick to fit into the case and is obstructing the rear fan and PSU mounting point.
Looks like the project is on ice until I can find a good source of #6-32 1" screws locally. And as mentioned before, importing is not an option because of the former Mahathir government's archaic laws prohibiting the import of certain raw parts still being in effect.
*sigh* looks like another barrier to cross![Emoji]()


Got back tired, but decided to finally put the motherboard into the case.
And yeah, it was a pain. Maybe if I installed the fans and the control panel later. Still, I managed it. Manhandled the motherboard a bit, hopefully noting got damaged.
I also had to remove the rear fan to facilitate the case installation. Installed it back after the board was successfully in. They were not kidding when they said this case is a real PITA to work with. I reinstalled the fan after.
Anyways, after all that's done I turned my attention to the radiator.
Those replacement screws I bought? They don't work. Too short even after installing the Halos Lux Digital lighting, and the groove doesn't match up. Chalk it up to Malaysia using metric screws (ie M3, M4, Etc) instead of imperial (ie UNC 6-32, 4-40, etc).
So I swapped the Slim fans out for a pair of NF-F12s from the Pinkeye Revenger's NH-U12S and used the replacement screws that came with the Halos Lux Digital lighting. It works, but now the radiator is too thick to fit into the case and is obstructing the rear fan and PSU mounting point.
Looks like the project is on ice until I can find a good source of #6-32 1" screws locally. And as mentioned before, importing is not an option because of the former Mahathir government's archaic laws prohibiting the import of certain raw parts still being in effect.
*sigh* looks like another barrier to cross

Can't install the rad...

Mobo bottom. Looks like the Thunderbolt4/USB4 card will be wedged in pretty tight.

The RGB cable was a complete PITA to install.

Did a bit of tweaking to the mobo, installed the pump mounting and moved the cable for the Blazing M.2 cooler to the bottom right fan header.
One more step closer to completion
Worked on the case today.
Pretty much not much to be done, but boy this case a real pain to work with.
Also, recording didn't go smoothly. At one point I stopped the recording and forgot to restart. Then the camera just ran out of battery halfway through. Good thing I was able to keep powering it with a USB power bank. But yeah, expect parts of the recording to be missing.
Put on two of the fans before realizing that I forgot the silencing rubber pads and thus had to remove them, attach the rubber, and put them back.
Also, after much testing, it turns out that I cannot mount the FG-121 to where I want it due to lack of space either. But that's okay, since I had a contingency plan in the form of a no-brand RGB LED strip (actually, the brand is DSpace, not to be confused for DBrand, but you try adding that).
So all the stuff are now in place. The control panel has been moved, fans installed and LED strip installed. Time will tell if it works since I removed and restuck the strip at one point.

Back of the case. The case came with a single DC 3-pin, ARGB configured for exhaust. I replaced the fan and configured it for intake, adding a filter so air comes in clean.

The bottom intake fans. Yellow to the front and blue to the back

A DRGB strip hidden in the front of the case. Doesn't rally serve any real purposes I suppose.
Late but...
So I didn't build yesterday. Laziness got to me.
I ended up building it just moments ago, on Sunday evening.
Ah well. At least part 1 is out of the way. Hope I didn't break anything installing the CPU.
Here are some pictures in the meantime. Video coming once I find the time to edit them.


I ended up building it just moments ago, on Sunday evening.
Ah well. At least part 1 is out of the way. Hope I didn't break anything installing the CPU.
Here are some pictures in the meantime. Video coming once I find the time to edit them.

Every journey begins with a single step. This is part 1.

Hope I got the CPU installed right. My fear of LGA and the fact that this is my first time dealing with AM5 made this a nightmare to install.

Black or White? How about both?

Looking like a good start.
Saturday it is
Gathered a few more unnecessary parts and realised that I won't have a holiday in a long time.
Welp, Saturday it is. Time to we get this baby off the list so I can focus on the next one.
Welp, Saturday it is. Time to we get this baby off the list so I can focus on the next one.
Radio silence
So yeah. I went quiet that people are probably wondering if I died or something.
No, it’s just that my new job is taking a lot of my time. One and a half hour travel both ways as well as long working hours.
However…
I am planning to build my rig the moment I have a long holiday.
I am also planning to revive the Pinkeye Revenger build, finally. I am still working on the specifics, but the moment I have everything down I will create a page for the build. The only plan I have for it so far is that it will be a replacement for my modest build (which unlike my secret build, is still working fine thanks to Linux not needing shit like TPM compared to Windows, but yeah, I want to bring it at least a little forward, with PCIe 4 storage and a newer GPU than the aging Vega 56, and a 16 core Ryzen 9 5950X CPU to make building stuff in Yay on Arch faster. Since I maintain a few stuff on AUR this will help a lot in testing. It will also have a case transplant to a smaller case and other changes, some significant, others not so.
So yeah, stay tuned.
I can build anytime now
I just need time...
Also, after watching Der8auer's latest video, I'm kinda concerned for the T700 and am trying to source a Blazing M.2 gen5 fan heatsink, type 1. I can go ahead without it, but I am concerned of the consequences of doing so- the default heatsink was apparently designed without afterthought that PCIe5 devices generate more heat than PCIe4 devices, moreso second generation PCIe5 devices.


Also, after watching Der8auer's latest video, I'm kinda concerned for the T700 and am trying to source a Blazing M.2 gen5 fan heatsink, type 1. I can go ahead without it, but I am concerned of the consequences of doing so- the default heatsink was apparently designed without afterthought that PCIe5 devices generate more heat than PCIe4 devices, moreso second generation PCIe5 devices.

The last compulsory part has arrived, along with one more optional part for me to explore alternative plans.
Right, Audigy has arrived
And not the one I bought from Shopee. The one I bought from Creative direct as a second try, out of frustration after the Shopee one appears to be a scam.
The Audigy RX is a weird beast. It’s built on a two decade old but somehow still in production E-MU 10K2.5 SPU that was used in the Audigy 2 Value and Audigy 4, linked to a PCI to PCIe adapter chip made by PLX. The tech somehow outlived it’s more able E-Mu 20K siblings. But because of the fact that it’s still based on two decade old SPU, hardware accelerated Wavetable MIDI is still fully supported on it in Linux. Which will be useful when the day comes for me to dump Windows.
So now I’m ready to build… if it wasn’t for the fact that the Phanteks Halos were short of one Phanteks proprietary to ARGB adapter (seriously, why do these companies deviate from the industry standard?!?). I could daisy chain it to the first grill, but then I’ll have one free ARGB header on the mobo and I don’t want that. In my head the pump ARGB daisy chains to the PSU’s ARGB and the Phanteks are independently controlled over two separate ARGB channels. I’m not gonna change that. Unless I can get my hands on a ARGB GPU holder? Hmmmm….
Also, Unfortunately for me, my last chance to do the build passed on the day before, and my next free day is in another 3 weeks. Still it will give me time to make some last minute small changes. I’m still arguing with myself over the GPU stand (current plan is to Jerry rig one using merch with images of my waifu on it, but that might not come to pass if the end result is too short to reach the GPU, or is too tall that it pushes on the GPU), whether to get different thermal paste (been using Noctua NT-H1 for a long while now, but part of me wants to try Thermal Grizzly Kryonaut for this build).
I even considered Thermal Grizzly Carbonaut at one point, but then snapped out of it when reviews show that it performs worse than traditional thermal paste.
Also, amazing how the scene changes. I remember when Arctic Silver was THE thermal paste to use. Then the crown was snatched away by the Noctua NT-H1. Now it seems that Thermal Grizzly Kryonaut is the new go-to thermal paste. Time changes. I’m growing older…

The pinnacle of sound?
The disappointment never ends
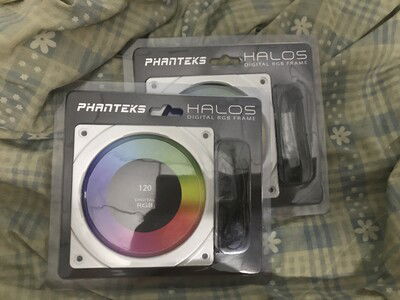
Welp, the Phanteks Halos frames are here.
Problem: my Audigy RX still hasn't shipped. I'm starting to think that I may have been scammed (a common issue with Shopee. Don't know why it didn't occur to me to buy from Amazon. I did try buying from Creative themselves before turning to Shopee but their system was erratic at the time and rejected all my cards. However I tried Creative again yesterday out of frustration and my main card went through this time).
Also, my Phanteks Halos frames shipped with only one Phanteks proprietary to DRGB adapter. Ugh, I needed 2 and was expecting 2, one in each frame pack.
Back to shopping I go then.

Pearly shells
Remember what I said about the cooler being ready to mod?
I take that back.
I have the T700 now. Alongside the slim fan screws.
I am still waiting for the white Phanteks Halos to arrive.
Also. I so totally forgot that I wanted to install an Audigy RX in here. So I scrambled to buy one in the last minute. It’s coming from Hong Kong. So that definitely will take a while.


I have the T700 now. Alongside the slim fan screws.
I am still waiting for the white Phanteks Halos to arrive.
Also. I so totally forgot that I wanted to install an Audigy RX in here. So I scrambled to buy one in the last minute. It’s coming from Hong Kong. So that definitely will take a while.

Second gen Gen5 NVMe.
I’m just reminded on why I hate Malaysia.
So yeah. Screws (ordered from Shopee) were to come from China and got blocked by customs. Excuse given was something about there being no proper declaration form. Someone told me that customs were instructed to not allow raw metal parts like screws, bolts, bearings, washers and nuts in because Malaysia produces its own, protectionism created by the old Mahathir government if you will. F**k that old man.
So I ordered replacements locally. Except that those are now too short. Exactly 20mm, which doesn’t cut it because the Silverstone FG121s add another 5mm to the height of the fans, so the screws are exactly as tall as the fans plus the Silverstone RGB. They don’t make 7/8-inch screws in Malaysia because the country runs on metric. 25mm 6-32s apparently doesn’t exist here either because no commercial products known uses them.
Ok, I do have a backup plan: https://youtu.be/aEIEUMnoLNs
And they do come in white.
Except I don’t have any ready on hand. And as it turns out, Phanteks doesn’t even have a distributor in Malaysia (EDIT: I was just made aware that Phanteks does have a distributor in Malaysia. But they don’t carry the Halos grills for some obtuse reason), I ordered those from Shopee and it’s *sigh* coming from China. Again. And it’s pushing me RM150 over budget. Although the customs will most likely let them in because they’re finished products despite being made of brushed Aluminium, but it’s also delayed me further.
ARGH!
On a better note tho, the T700 is secured. Paid for today, arriving in a day or two.
Preparing to mod the rad
The Noctua fans are here, so I'm now able to start calculating for the length of the screw needed to hold the fan and ring lights into place.
The total height of the fan and ring light comes up to 21mm. Still slightly shorter than a 25mm fan but not by much.
I've settled for 6-32 * 7/8 (22.225mm) screws. I only hope it's long enough, as I'm not able to locate 15/16 screws.

Noctua fans have arrived
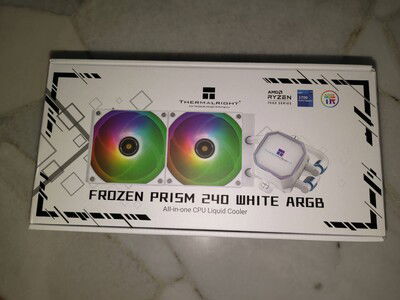
The Thermalright stays
The Thermalright AIO arrived today, and on inspection, I'm happy to announce that the AIO pump is indeed PWM.
So I guess this one is locked down.
The Noctua fans are still in the mail. And I still haven't started on the screws.
And suddenly the hardest part is done.
Now all I need is the Gen5 SSD.

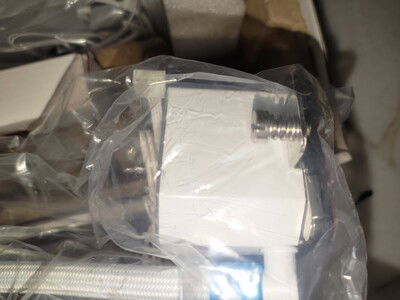
First impression: it's lightweight.

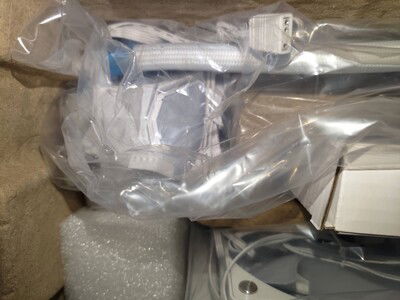
ARGB connector... And PWM fan connector. Name a more dynamic pair.

Four wires. Definitely PWM.
We're almost ready to build!
RAM collected. Special thanks to Convergent Technologies for helping me get the White sticks- looks like not many shops here in Malaysia will be carrying them.
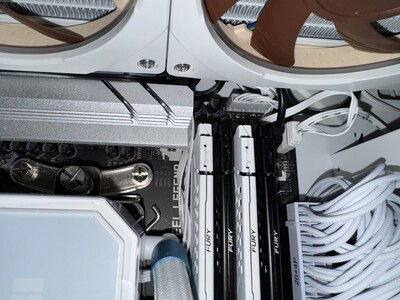
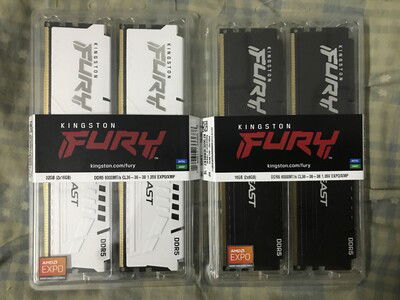
The black sticks are 6000MHz 36-38-38 8GB modules with a total effective capacity of 16GB, while the white sticks are the same specification but 16GB modules with a total effective capacity of 32GB. This gives us a total of 48GB to play with.
I've also changed option on the cooler again, apparently Thermalright Frozen Prism 240 AIOs are also PWM and comes in white, and are readily available in Malaysia. I'm getting mixed messages about them (some review sites say they're not PWM) but after examining a picture of the installed cooler, I've decided to bite because I'm seeing 3+4 wires in 2 groups and am confident that the 3 wire group is the ARGB cable while the 4 wire group is the PWM pump cable. So I have it locked down. However I will return the pump if it turns out I am wrong. Therefore I won't update the build component list until I confirm the pump is correct.
I think AIO manufacturers should include images of the cables in pictures of their AIOs. Because sometimes their spec sheet lies and it's a pain to find out which really are PWM and which aren't.
I've also decided to go ahead and execute the Slim Fan mod on the cooler and have locked down two Noctua NF-A12x15 fans. As with the original plan the fans will be accompanied by a pair of Silverstone SST-FG122 ARGB fan rings. All that's left is to secure the eight 6-32 20mm screws needed to carry out the mod.
Also all that's left now is the fast gen 5 NVMe SSD. I've locked down on the Crucial T700 but if that turns out to be unavailable I will fall back to the Corsair MP700 which are finally now readily available.

Black and White.
The state of the build so far
So SATA cables for the build arrived quicker than I anticipated.
You know what? Most of the parts are already here. The RAM has also been finalized and ordered, all that’s left is the Gen5 SSD and the cooler.
I’m taking it out of the Concept Build category and putting it into the General Build category. It’s no longer a dream, it’s happening.
So yeah, RAM has been locked in. We’re going with 2x Kingston Fury Beast 16GB white 6000MHz and 2x Kingston Fury Beast 8GB black 6000MHz for a total of 48GB of RAM. Bold but it should work in theory.
One of the things left to finalize is the SSD. On one hand the MP700 is ready stock just like the Aorus 10000, but like the Aorus 10000 it’s impeded by having first generation Gen5 flash, with a maximum read of 9.5GB/s, while the T700 has second generation Gen5 flash which is 2GB/s faster. People claim that the difference is not visible in real world applications except certain use cases, heck some even claim that for most use cases Gen4 will suffice. But damn it, I paid for Gen5 and I will use it to the fullest.
Also, the T700 is rumored to be RM100(US$20) cheaper than the MP700.
The other thing left to finalize is the cooling. Right now I’m planning to go back to my initial plan of using an EK, albeit a Nucleus CR240 Lux White. Also on the table is the decision to mod the cooler by replacing the stock fans with Noctua A12x15 PWMs, and whether to go with Silverstone FG121s or Phanteks Halo Luxes, mod less by using a Noctua 12x25 PWM fan with aforementioned ARGB grills, or mod even less by just going with a ID-Cooling ZF-12025 Pink ARGB. The cooling is perhaps the most complicated part of the build, not going to lie.
Either way, it’s too late to turn back. There is only one way and it’s forward.

Cablemod SATA. we’re almost there!
Slow SSDs are here
Slow SSDs finally arrived. Actually, they arrived last Wednesday, I was just too lazy to document them until now.
I should convince Yeston to officially start selling on Lazada. These SSDs came straight from China via Lazada and unlike my GPU, the import duties were totally paid for by Lazada.
Also, I forgot to include an image of the filter I ordered with the fans. This goes between the wall of the case and the fan to minimize visibility.

SSDs. Nice packaging considering the budget price.

One of the SSDs.

Air filter. Apparently these only comes in black. I will wedge it between the case wall and the fan to minimize visibility.
Cost-cutting
First, an image of the fans:
Ok. That’s out of the way.
So, I’ve decided to make the move and reduce the storage to 4TB albeit with SSDs. Found this brand called Walram during the Lazada 5.5 sales (wonder if they’re related to Walmart?). At US$34.50 for 1TB, my mind is blown. So I took 4 pieces. This machine is going to be silent like a sleepy puppy. In practice only 3TB will be available once I set up the soft raid stuff, but that should last me a while.
The big issue is clustering everything. I am thinking of using OpenZFS for Windows to tie everything together but apparently it’s not going to work with Windows 11 because the drivers are unsigned. This is still under consideration. My other option is AMDRAID+Primocache. We’ll see.
Still on the topic of storage, my options for Gen5 NVMes have expanded considerably. Corsair has finally released the MP700. Meanwhile Crucial has announced the T700 which is expected to be available at the end of May 2023. So I’m no longer stuck with Gigabyte (which I’m reluctant to get when I found out I need to have the Gigabyte control center, a huge buggy mess, installed). I’m looking into the T700 specifically since it appears cheaper.

Colorful fans and fans of color
Change of fans
Decided that I don’t want to go all Noctua after all. Because they’re bloody expensive here.
Instead, the plan now is that the bottom intake fans will be ID-Cooling ZF-12025 Pastel fans - one will be pink and another will be yellow.
Also, the back fan will now be a single XF-12025 RGB Snow. It will be configured for intake. Now because the rear of the case does not have any filters, I’ve purchased an aftermarket 12cm air filter to be installed between the case and the fan. The decision to make it intake is to provide more fresh air for the exhaust fans on the radiator, since most of the air from the bottom intake will no doubt go into the GPU. So the rear will be configured for intake to compensate.
The exhaust fans on the radiator will be Noctua fans as planned. However I’m still a little uncertain if I want full 25cm thickness or go for slim since slim will require custom screws. Slim will make changing the RAM easier as part of the socket will be obstructed if I use full size fans according to CoolerMaster’s material, but custom screws are kinda hard to get because Amazon won’t ship them to Malaysia.
As of now only the ZF-12025 Pastel fans have arrived. I’ll upload the photographic update once the XF-12025 arrives. Sad that I have to buy them in packs of 3 because the single packs are all apparently sold out…
I can't believe I'm holding this...
Got over the barrier...
Small hole in the box. Hope this is not a bad sign.
I have no words. Except: it's beautiful.
The back of the card. Not very interesting... Until the machine is powered up.

Got over the barrier.

Small hole in the box. Hope this is not a bad sign.

It's beautiful...

Back of the card.
One step closer to the build…
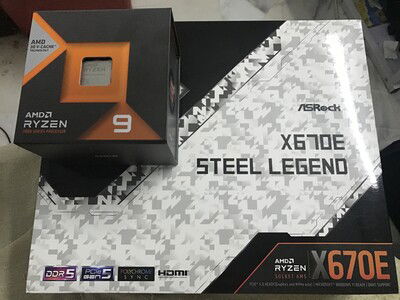
Motherboard and CPU secured.
So yeah, we’re one step closer to getting the build done.
Made in Malaysia and yet Malaysia is one of the last countries to get the CPU. SMH.
In any case tho, further musings about the RAM.
Good news: Kingston has just announced white Fury Beast DDR5 sticks.
Also good news: They’re AMD EXPO Certified and available up to 6000MHz.
Bad news: Minimum size is 16GB.
So now I guess I’ll have a mixture of black and white sticks on the mobo. Which is fine, I can work with that.
And oh yeah, I’ve decided to go for max and upgrade the RAM speed to the maximum 6000MHz.
Also bad news: the CoolerMaster PL240 Flux White appeared to be a limited edition thing and is now out of stock. Shit.
But that makes it clear why they won’t sell it here in Malaysia. Malaysia rarely if ever receives limited edition stuff (we didn’t get the Lian-Li Lancool 205 Mesh C Pink Limited Edition either. But for some reason we were lucky enough to score the MasterCase Q500L Sakura edition. On the other hand the Q500L was considered to be so terrible that it sold poorly in other countries that they could’ve chose to dump the unsold stock here. Still, I’m gonna work with it.
Now I need to seek out another white AIO with PWM pump. Only the best for my anime waifu.

One step closer

The CPUID to prove that yes, this is a 7950X3D

Made in Malaysia. And yet Malaysia is the last country to get the CPU. What gives?
Kinda backtracking about RAM and other musings
I’m kinda thinking of slightly going back on my RAM.
One pair will be reverted to 16GB.
That means I’ll be running on a pair of 16GB and one pair of 8GB for a total of 48GB.
Figure that would be enough. It’s a weird amount, but I think 32GB isn’t enough anymore, and well, it’s still balanced. 24GB split between channel 1 and 2.
A1: 16GB
A2: 8GB
B1: 16GB
B2: 8GB
Aside from that, I’m also thinking of replacing the spinning rust buckets with SATA SSDs. Would probably cost more and slow the build down, or I may need to half its capacity to 1TB drives, but we’ll see.
I’m also thinking of going with a 2TB version of the Gigabyte Aorus 10000 NVMe SSD instead. Apparently the 2TB ones are easier to get because the 1TB ones are in short supply.
Gen5 NVMe: Another Idea
Just realized that Gigabyte has quietly launched Gen5 NVMe SSDs, called the Aorus Gen5 10000 NVMe series. The drives come in 1, 2 and 4 TB capacities and uses the same Phison controllers as Corsair's (vaporware) and CFD Gaming's (No Export For You) offerings. And the biggest thing is, they are readily available in Malaysia, right now. So the remaining problem is now the Yeston card. They're on AliExpress but I'm not sure I want to pay RM7200 for a card. Also, I've been told that the CoolerMaster PL240 will only be available in Black in Malaysia which is really upsetting, I need a white one. That means having to import from Singapore which according to Amazon are getting the white version of the AIO. Which in turn means dealing with the customs again, especially now there is a tax reform that makes it so anything bought from overseas is now subjected to import taxes, before the reform anything below RM500 is exempt. Distressing just thinking of it.
In the meantime, more parts arrived in the interim, pictures uploaded separately.
In the meantime, more parts arrived in the interim, pictures uploaded separately.
You're not the boss of me
I can and will use a 240mm AIO to cool the 7950X3D. To those assholes who banned me from the Ryzen Official Enthusiast fangroup because they insist that the 7950X must be cooled by no less than a 420mm AIO and cannot be air-cooled, up yours.
In fact, now I'm considering dropping water cooling and going for a classic Noctua NH-U12S (which I just so happen to have one hanging around from the cancelled Pinkeye Revenger build), just to rebel and make a statement. Because screw your dreams, screw your nightmares. I'm gonna beat the motherloving bleem out of your obviously false statements.
FTR: remember that I am successfully using a U14S with a second fan in push-pull on my Threadripper rig. And a threadripper 2990WX has a 250w TDP. Comparatively the 7950X only has a 170w TDP. Also remember that I've successfully used a U12S on a Threadripper 1950X which is 10w TDP higher than the 7950X.
Rethinking the RAM Part 2
I’m halving the RAM to just 32GB (2x kits of 2x8GB sticks). Figure it should be enough. I figured that 64 is still somewhat overkill. My only concern is that two games that are just released now have a 32GB minimum requirement. Just hoping that I don’t curse myself doing this.
Or should I try to gun for 48GB (2x16 + 2x8)? Will that impede performance?
Or should I try to gun for 48GB (2x16 + 2x8)? Will that impede performance?
Further costcutting
Seller decides to cancel my order for the Samsung NVMe sticks because they were “out of stock”, in reality I suspect they were being sold for under cost (RM290 as opposed to RM470 other stores were selling them for) and the seller just found out and now wants to jack up the price.
I think Samsung’s asking price of RM470 for a 250GB NVMe is just ridiculous. Why so expensive? Is it because they think they’re the only ones offering a 250GB PCIe 4 NVMe drive?
News for you Samsung: Kingston has 250GB PCIe 4 NVMe drives too.
So I’m switching to Kingston NV2s. Same size, just a quarter of the price. I don’t know if it would last long in my use case (as disk cache for 4TB of spinning rust storage) but they’re cheap enough to replace I suppose.
Next I turned to the water cooler. Found out about the new CoolerMaster PL240 Flex White AIO which ticks all my boxes (PWM pump and white color), although I do still want to try to give it slim Noctua fans. It’s only a bit cheaper (less than RM100 difference) than the EK AIO, but it is full white as opposed to only having a white pump. The only gotcha is that they appear to be a Newegg exclusive and Newegg doesn’t ship to Malaysia anymore. This is going to be a major issue.
Lastly, I’ve decided I don’t need ARGB RAM. It’s still Kingston Beast 5600MHz AMD Expo enabled, but now it’s the non RGB variant. It will only save me RM100 each stick, but in case I can’t stuff low profile fans onto the PL240, it will still guarantee that the AIO will fit (Though just barely- CoolerMaster says that due to overlap, with a normal AIO there’s only clearance for RAM sticks up to 35mm tall In the Q500L. The non RGB RAM barely makes the cut at 34.9mm. The RGB sticks don’t fit, but I was hoping to work around it using slim fans). Just sad that these don’t come in white. Kingston used to provide their RAM with heatsinks that came in a selection of colors- sad that the practice stopped, I would have gotten a pair in white and another in red for this.
Hardware
Category / Value
Brand / Part
CPU
$ 683.00
Motherboard
$ 340.23
Memory
$ 429.99
Memory
$ 59.95
Graphics
$ 0.01
Storage
$ 138.00
PSU
Case
$ 36.99
Case Fan
$ 14.99
Case Fan
$ 38.97
Cooling
$ 49.99
Cooling
$ 4.99
Cooling
$ 47.90
Accessories
$ 139.00
Accessories
$ 8.99
Accessories
$ 48.10
Accessories
$ 23.03
567
3
Approved by:
